A crochet haunted house wall hanging can be much more than a rectangular black-and-orange tapestry. The house can appear as pixel-style C2C art, an open filet silhouette, a layered appliqué scene, a framed wreath composition, a moonlit banner, or even a dimensional wall display with bats extending beyond the main panel.
Not every tutorial below creates a literal haunted house from start to finish. Several teach a wall-hanging construction, Halloween motif, or colorwork method that can be adapted into a haunted-house composition. Those adaptations are identified clearly so you can choose the construction first and then decide how much architectural detail, dimensional decoration, or Halloween imagery you want to add.
For Halloween 2026, the most useful choice is not simply the spookiest image. Think about where the piece will hang, how clearly small windows and rooflines will show from across the room, whether you want a flat project for easy storage, and how much finishing or assembly you are comfortable doing.
Quick List
- Crochet Moonlit Haunted House Tapestry Wall Hanging
- Crochet Scalloped Haunted House Tapestry Banner
- Crochet C2c Pixel Haunted House Wall Panel
- Crochet Granny Square Haunted House Facade Hanging
- Crochet Puff Stitch Haunted House Tile Wall Hanging
- Crochet Filet Haunted Mansion Silhouette Hanging
- Crochet Skull Gate Haunted House Pennant
- Crochet 3d Bat Roost Haunted House Wall Hanging
- Crochet Skull And Spider Haunted House Garland Scene
- Crochet Bat Applique Haunted House Wall Banner
- Crochet Pumpkin Gate Haunted House Ring Hanging
- Crochet Halloween Haunted House Word Banner
- Crochet Wreath Framed Haunted House Wall Hanging
- Crochet Gothic Ring Haunted House Wall Art
- Crochet Fringe Base Haunted House Tapestry
- Crochet Moon Phase Haunted House Wall Hanging
- Crochet Haunted House Pocket Wall Organizer
Choose the Construction Before Designing the Haunted House
A haunted house contains details that can become difficult to read in crochet: narrow windows, pointed roofs, chimneys, towers, railings, bats, moons, and crooked trees. The construction method determines how much of that detail you can use successfully.
Tapestry crochet gives you relatively compact color blocks and works well for graphic architecture. C2C creates a more pixelated image and benefits from larger shapes. Filet relies on open and filled spaces rather than several colors, so the haunted mansion needs a recognizable silhouette. Appliqué construction separates the house into layers, which can be useful when you want depth without managing many active yarn colors.
Granny-square, ring-mounted, and dimensional approaches are less literal. Instead of reproducing a complete picture, they let you suggest a haunted property through roof shapes, windows, bats, pumpkins, ghosts, and moon motifs arranged as fiber art.
Plan the Display Before Adding Tiny Halloween Details
Viewing distance matters. A tiny yellow window may look effective while the piece is in your hands but disappear once the wall hanging is across the room. Bold rooflines, moons, windows, and bat silhouettes usually carry the theme more effectively than many miniature elements.
The hanging method also changes the finished shape. A dowel supports a flat rectangular panel, while a hoop or metal ring can keep an open design under tension. Fringe adds visual length. Stuffed characters add weight. A garland spreads the composition sideways instead of concentrating it in one rectangle.
Temporarily hang the main structure before finishing every decorative element. This gives you a better idea of where the eye naturally lands and whether the house needs another accent or actually needs fewer details.
Think About Storage as Part of a Seasonal Project
Flat tapestries and banners are comparatively simple to store once Halloween is over. Dimensional bats, raised appliqués, stuffed pumpkins, metal rings, and long fringe need more room and can be more vulnerable to crushing or snagging.
If you decorate for only a few weeks each year, consider whether the final piece can be laid flat, loosely rolled, or hung in storage. Follow the care guidance for the actual yarn and any mixed materials you use rather than assuming every completed wall hanging can be washed or steamed in the same way.
1. Crochet Moonlit Haunted House Tapestry Wall Hanging
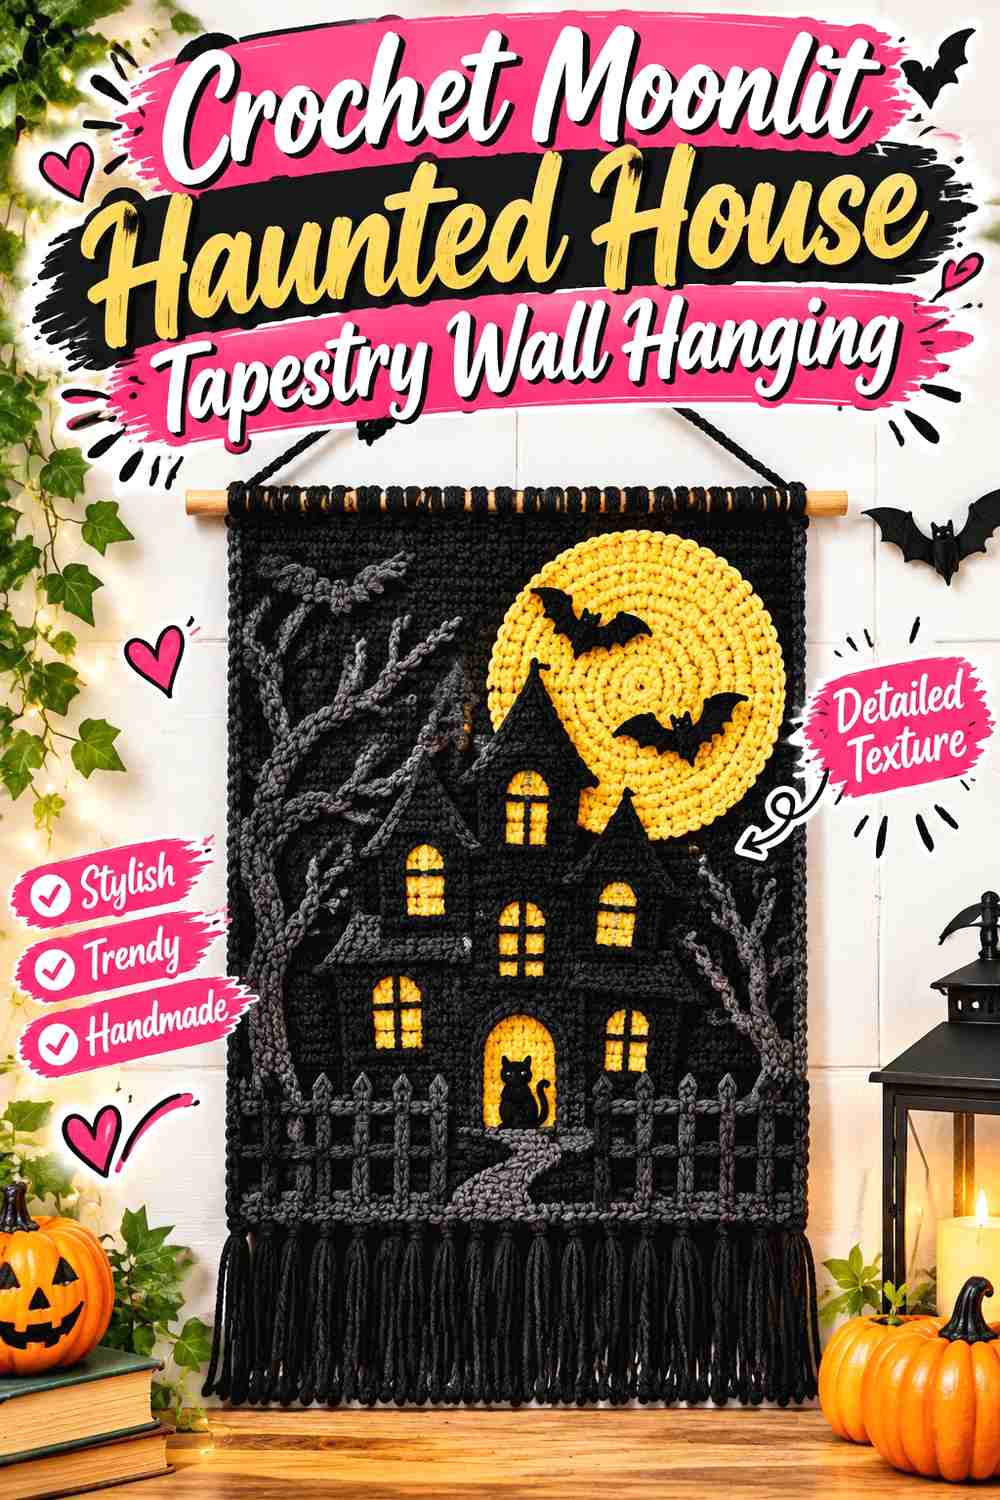
A compact tapestry is one of the clearest ways to make a haunted house immediately recognizable. Raffamusa Designs has an existing haunted-house wall-hanging design and a public tapestry-crochet tutorial demonstrating the colorwork approach used for this type of dense graphic fabric. The format suits a dark house silhouette, contrasting windows, and a moon or twilight background without requiring separate pieces to be sewn over the entire surface.
This is the option to consider when you want the architecture itself to be the focal point rather than a collection of Halloween characters.
Strong Color Boundaries Matter Around the Roofline
Crooked towers and pointed roofs look atmospheric only if their edges remain readable. Uneven tension at color changes can make a deliberate jagged silhouette look unintentionally blurry.
Look at the developing image from several feet away instead of judging each stitch close up. If the house stops reading clearly, stronger contrast may help more than adding another window, bat, or decorative line.
Keep the Hanging Support Proportional to the Panel
A small scene can be overwhelmed by an excessively long or heavy dowel. Finish the crochet portion first, then evaluate how far the support should extend beyond each side.
A branch can make the piece feel rustic and gothic, while a straight dowel gives the architecture a more graphic frame. Either way, center the panel before fixing the final hanging cord.
Creator Credit: RaffamusaDesigns – Crochet Patterns and Tutorials
2. Crochet Scalloped Haunted House Tapestry Banner
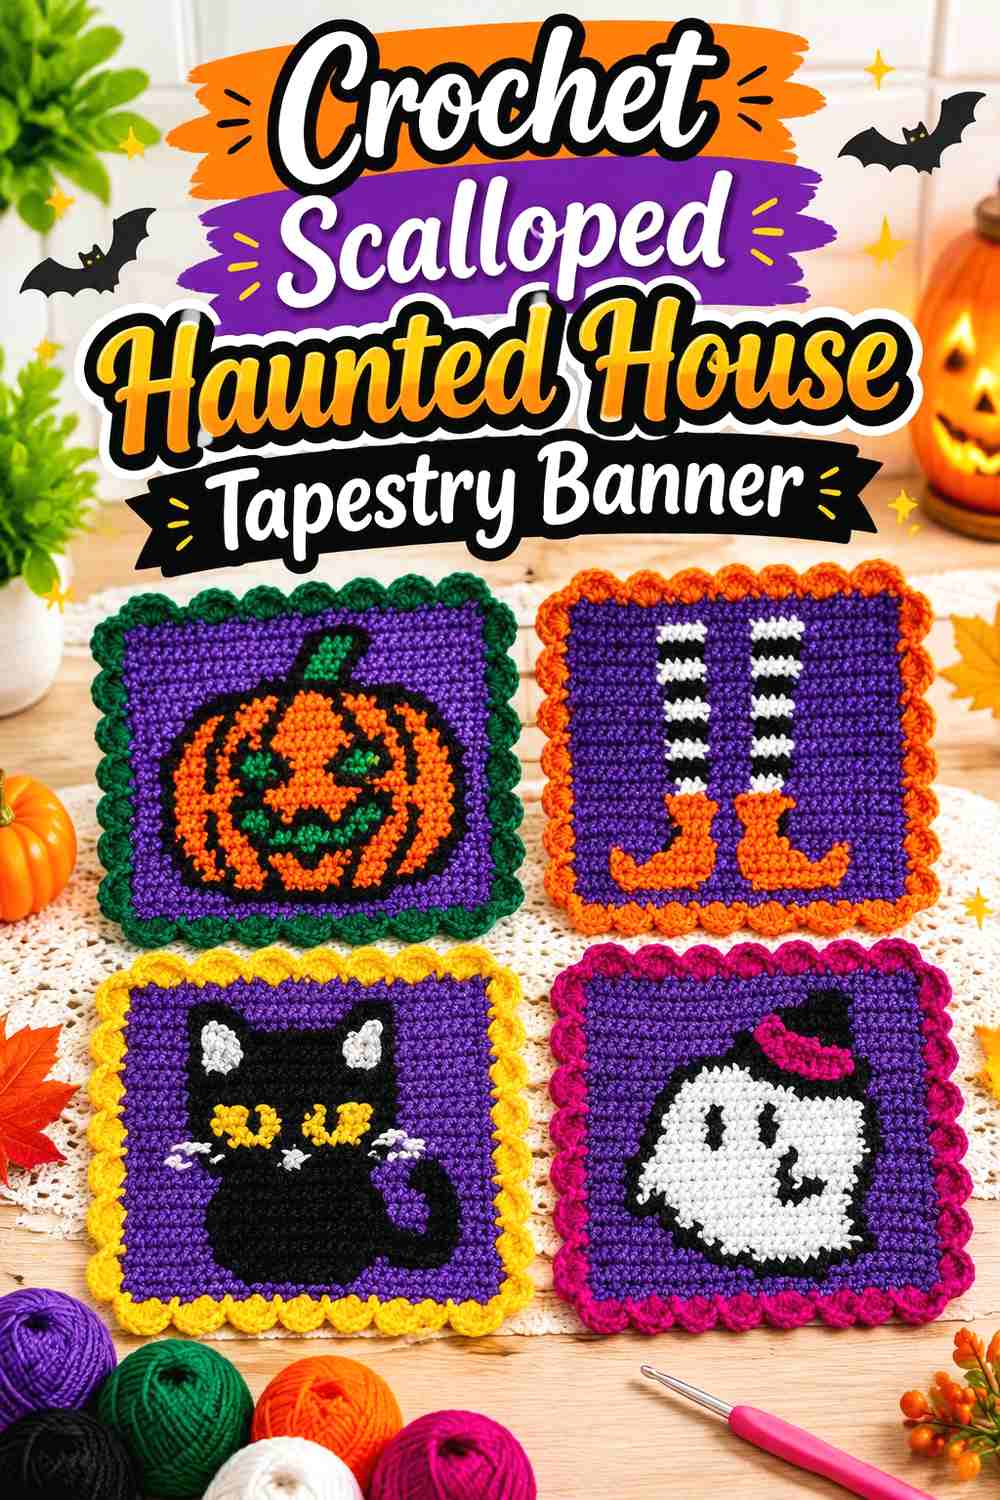
A decorative tapestry border changes the mood of a haunted-house panel. Instead of ending with four plain edges, this version can use a shaped or scalloped lower finish to make the wall hanging feel more like a Halloween banner.
Jazzy0451’s Halloween tapestry tutorial demonstrates a complete seasonal tapestry format that includes graph work, color changes, borders, surface crochet, and a decorative edge, making it a useful foundation for a haunted-house interpretation.
Let the Edge Support the Scene Rather Than Compete With It
A complicated house already contains strong angles. If the border is equally busy on every side, the finished piece can lose a clear focal point.
Consider keeping the side and upper edges relatively controlled while allowing the bottom to carry more decorative movement. A shaped lower border can suggest fog, dripping detail, or an old theatrical banner without changing the house itself.
Surface Details Work Better After the Main Image Is Readable
Surface crochet can highlight windows, roof trim, paths, or architectural outlines, but it should solve a visual problem rather than cover weak colorwork.
Complete the main panel and hold it upright first. Add surface detail only where it improves separation between neighboring shapes or strengthens a feature that disappears at display distance.
Creator Credit: Jazzy0451
3. Crochet C2C Pixel Haunted House Wall Panel
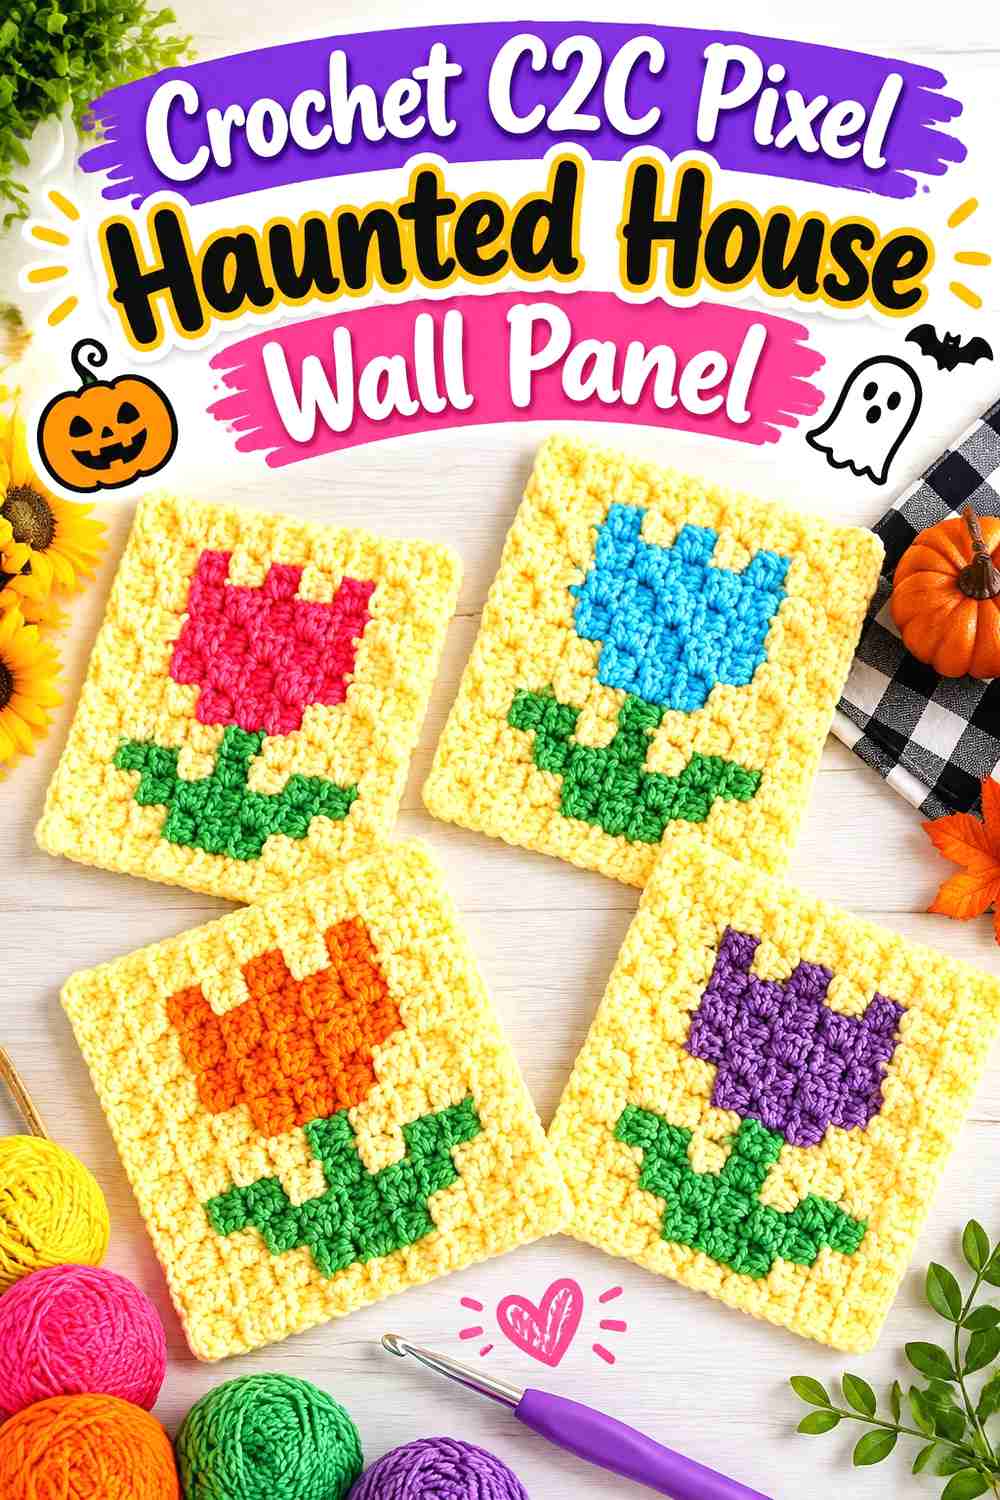
C2C gives the haunted house a blocky, pixel-art quality. RepeatCrafterMe teaches the method through a complete colorwork C2C project and also has a separate haunted-house C2C design in her project library, so the technique translates naturally to Halloween architecture.
This construction is useful when you prefer working from a pixel graph and want the house, moon, windows, and sky to be built from clearly defined blocks rather than compact tapestry stitches.
Simplify Small Architectural Features
A narrow chimney or tiny window that works in a fine tapestry chart may become bulky when every graph square represents a C2C block.
Prioritize the shapes that identify the house from a distance: roof, towers, doors, windows, and moon. Decorative details can be added later if the scale supports them.
Estimate the Finished Footprint Before Crocheting the Whole Graph
C2C blocks can make a graph considerably larger than a dense single-crochet tapestry. Make a realistic sample with the yarn, hook, and C2C variation you plan to use.
That sample helps you decide whether the finished panel belongs above a mantel, beside a doorway, or in a smaller gallery-wall space before you commit to the entire image.
Creator Credit: RepeatCrafterMe
4. Crochet Granny Square Haunted House Facade Hanging
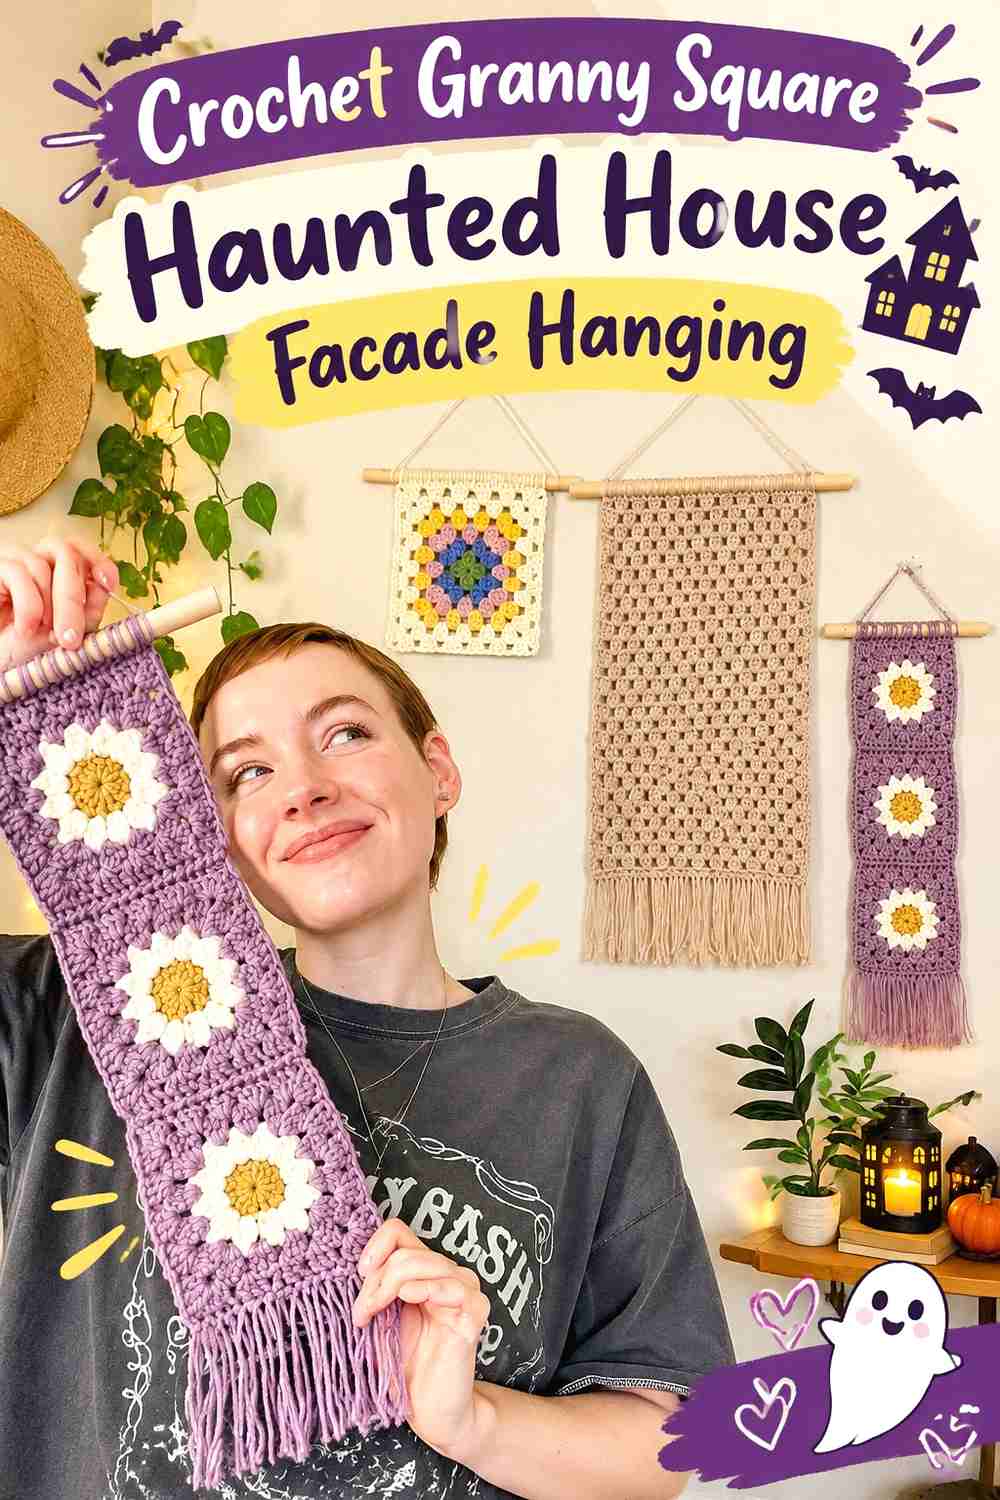
Instead of drawing the whole haunted house inside one graph, a granny-square wall hanging can build the scene from separate modules. HayHay Crochet demonstrates several ways to turn granny squares into finished hanging wall decor, including mounting and fringe.
For a haunted-house adaptation, individual squares can represent windows, roof sections, night-sky panels, or decorative tiles. The result feels more patchwork-like than a traditional tapestry.
Treat the Squares as Architecture
Random motif placement can make the finished piece look like general Halloween patchwork rather than a house. Arrange the squares on a flat surface before joining and identify the basic building outline.
A darker central group can suggest the facade, while contrasting squares can become illuminated windows or sky. The house does not need to be realistic, but the overall silhouette should remain intentional.
Match Blocked Dimensions Before Joining
A window square and a roof square may use different textures, but they still need compatible finished dimensions if they will sit in the same grid.
Compare the motifs after appropriate finishing rather than relying only on the number of rounds. Correct size differences before permanent joining so the wall hanging does not pull diagonally.
Creator Credit: HayHay Crochet
5. Crochet Puff-Stitch Haunted House Tile Wall Hanging
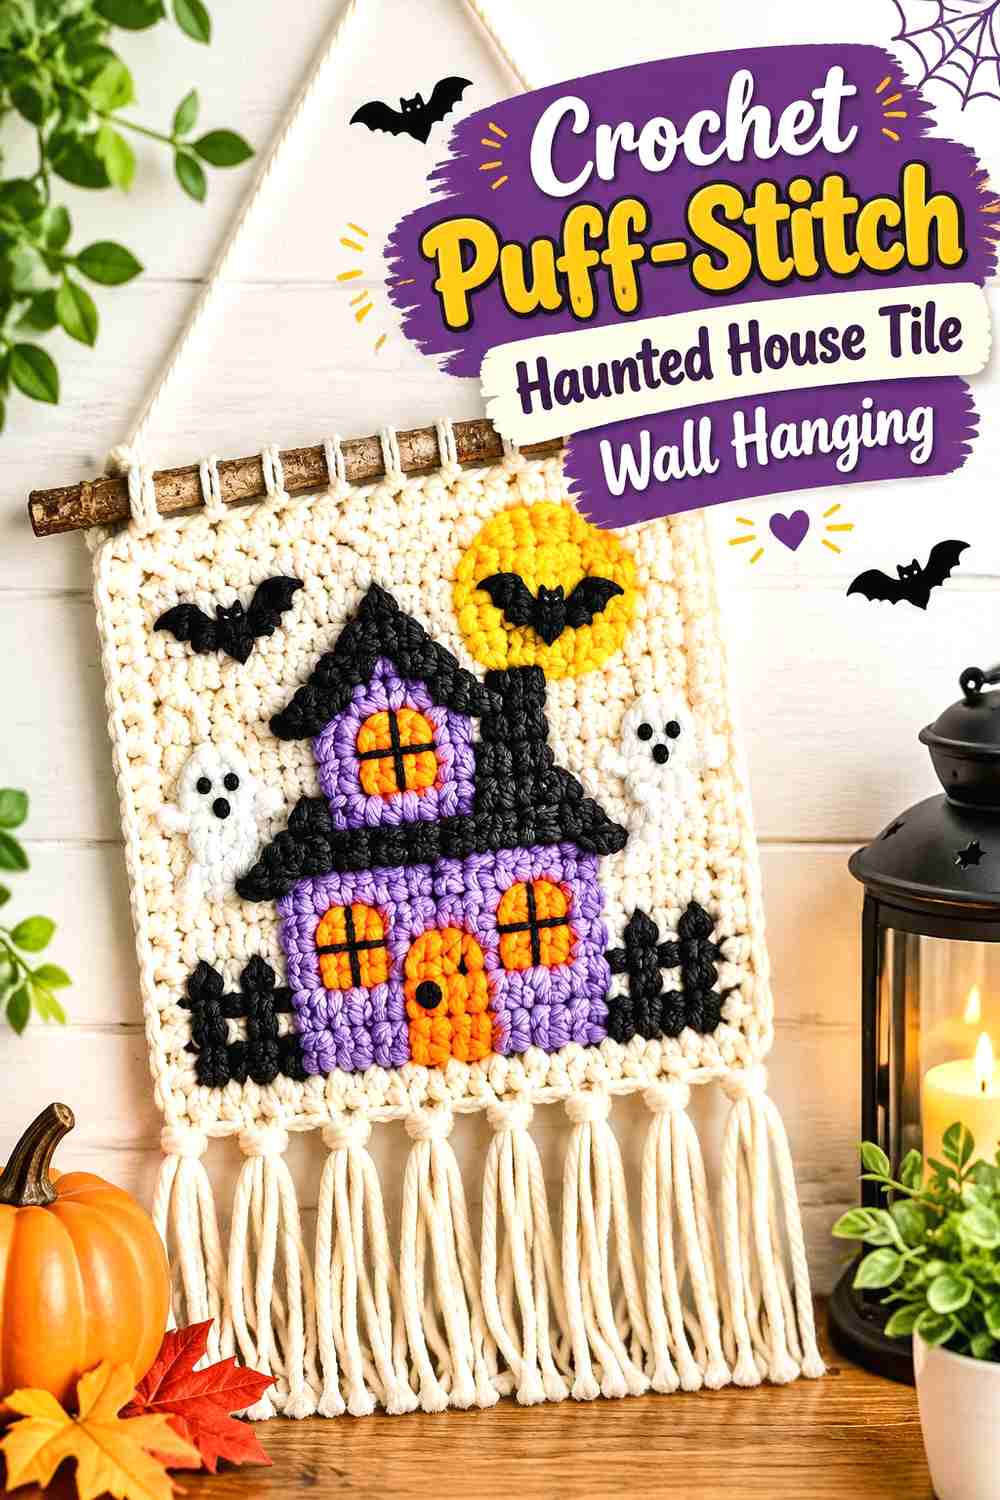
This version uses one textured crochet tile as the main decorative field instead of assembling many squares. Spotted Horse Design Co. demonstrates a compact granny-square wall hanging that incorporates raised stitch texture, fringe, and a branch or dowel-style display.
A haunted-house adaptation can use the textured square as a moon, window, decorative facade panel, or framed background with a flatter house motif layered over it.
Keep Raised Texture Away From Critical House Details
Puffs and other dimensional stitches cast small shadows, which is useful for atmosphere but can interfere with thin roof or window outlines.
Use the strongest texture where it contributes to the background or frame. Keep the main haunted-house silhouette visually separate enough that the viewer does not have to search for it inside the raised stitches.
One Statement Tile Can Be Enough
A small wall hanging does not need an entire haunted village. One square with a recognizable house, moon, or window motif can work as a compact Halloween accent near a desk, shelf, or narrow wall.
This is particularly useful if you want seasonal decor without the storage demands of a large tapestry.
Creator Credit: Spotted Horse Design Co.
6. Crochet Filet Haunted Mansion Silhouette Hanging
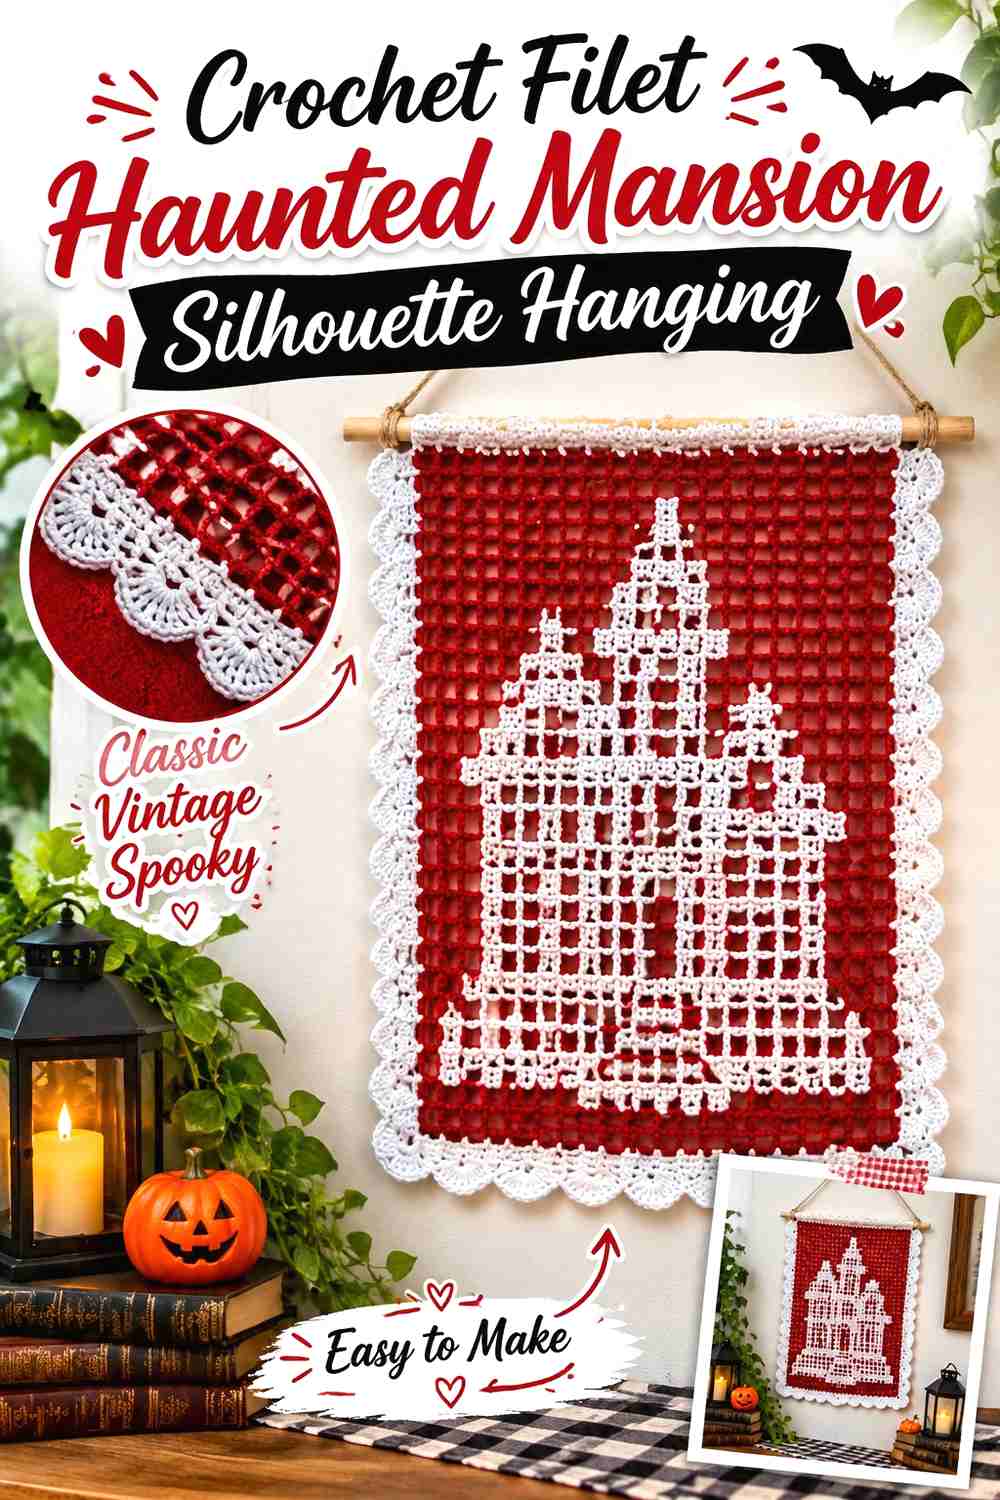
Filet crochet creates images through the relationship between open and filled areas rather than several yarn colors. The tutorial from творческие наклонности demonstrates filet design planning and turns the technique into a finished wall hanging.
For Halloween, this offers a different interpretation of a haunted mansion: more like a lace silhouette or shadow than a colored picture.
The Outline Has to Carry the Entire House
Because filet designs depend heavily on positive and negative space, tiny color accents cannot rescue an unclear building shape.
Emphasize the roof, tower, chimney, windows, and perhaps one moon or tree. If those shapes read clearly, the house can feel detailed even with a restricted visual language.
Wall Color Becomes Part of the Design
Open filet allows the background surface to show through. A pale wall behind dark crochet produces a different effect from a charcoal wall behind cream yarn.
Test the finished fabric against the actual display surface before deciding whether additional backing is needed. Sometimes the wall provides exactly the contrast the design requires.
Creator Credit: творческие наклонности
7. Crochet Skull-Gate Haunted House Pennant
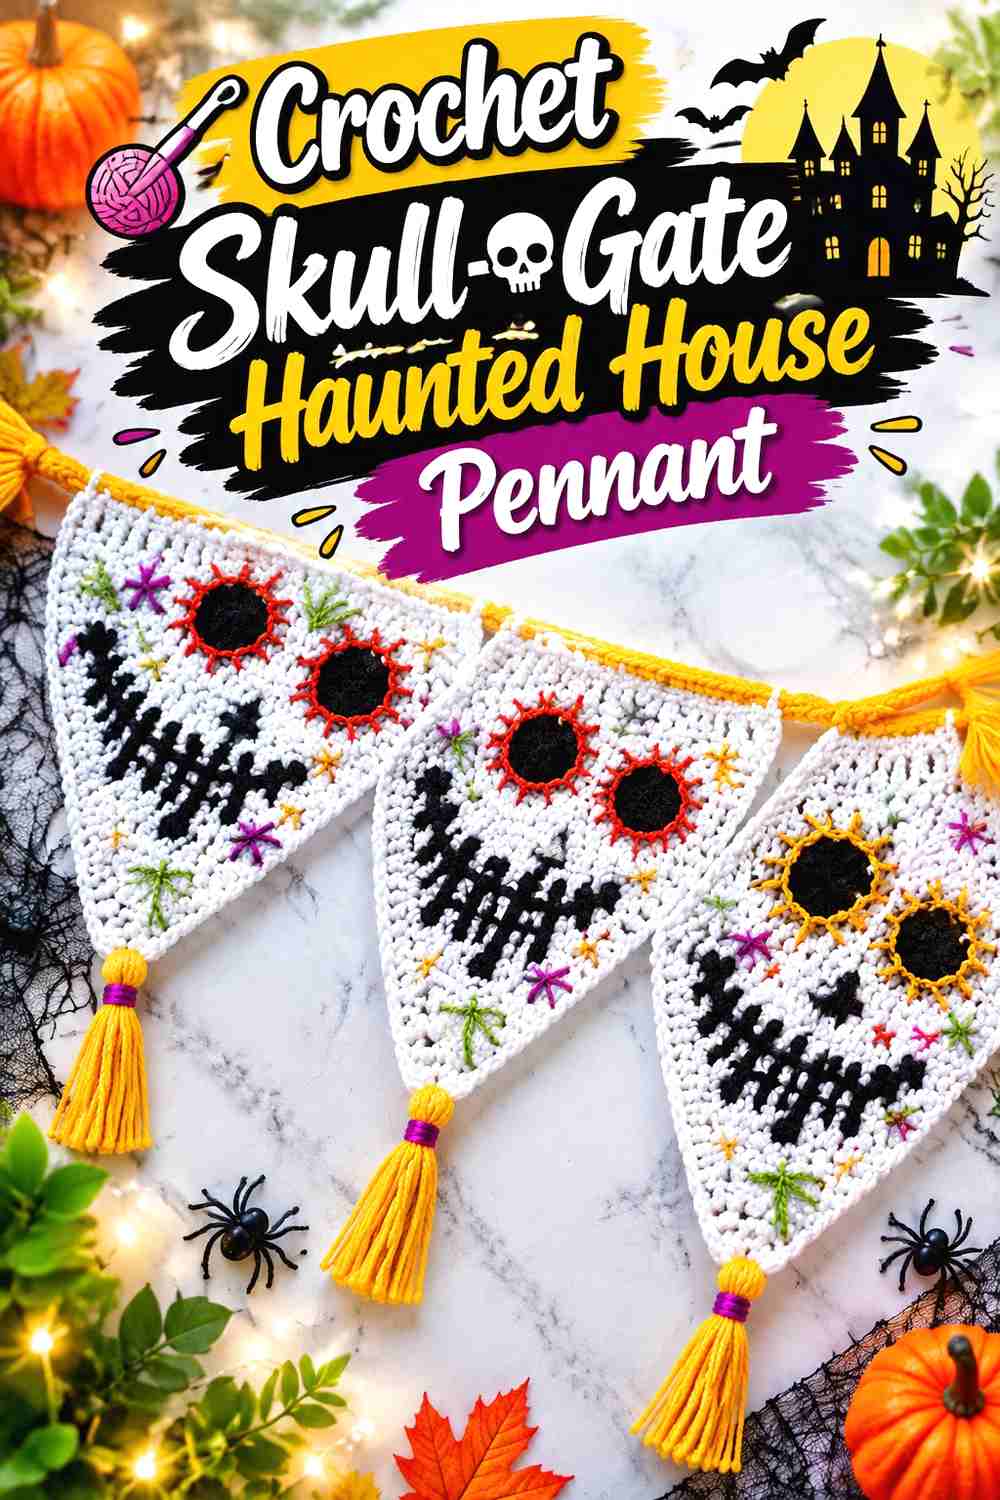
A skull can become the central architectural detail rather than a separate decoration. Molly’s Halloween wall-hanging tutorial uses a skull-focused pennant format, giving this idea a strong foundation for a haunted-house entrance or gothic gate concept.
Instead of building a full rectangular mansion, imagine the wall hanging as the entrance to one: a skull above the door, dark surrounding shapes, and a pointed lower edge.
Use the Skull as a Focal Point
If the skull is already visually complex, the surrounding house should become simpler. A few strong roof, doorway, or window lines can suggest the building without competing with the face.
This approach suits darker gothic Halloween decor better than a playful haunted cottage filled with colorful characters.
A Pennant Shape Creates a Narrow Display
Tall, pointed wall hangings work well between shelves, beside a door, or in narrow wall gaps where a broad tapestry would feel cramped.
Measure the entire vertical footprint, including any dowel, hanging cord, lower point, or fringe, before deciding where it will go.
Creator Credit: Molly
8. Crochet 3D Bat-Roost Haunted House Wall Hanging
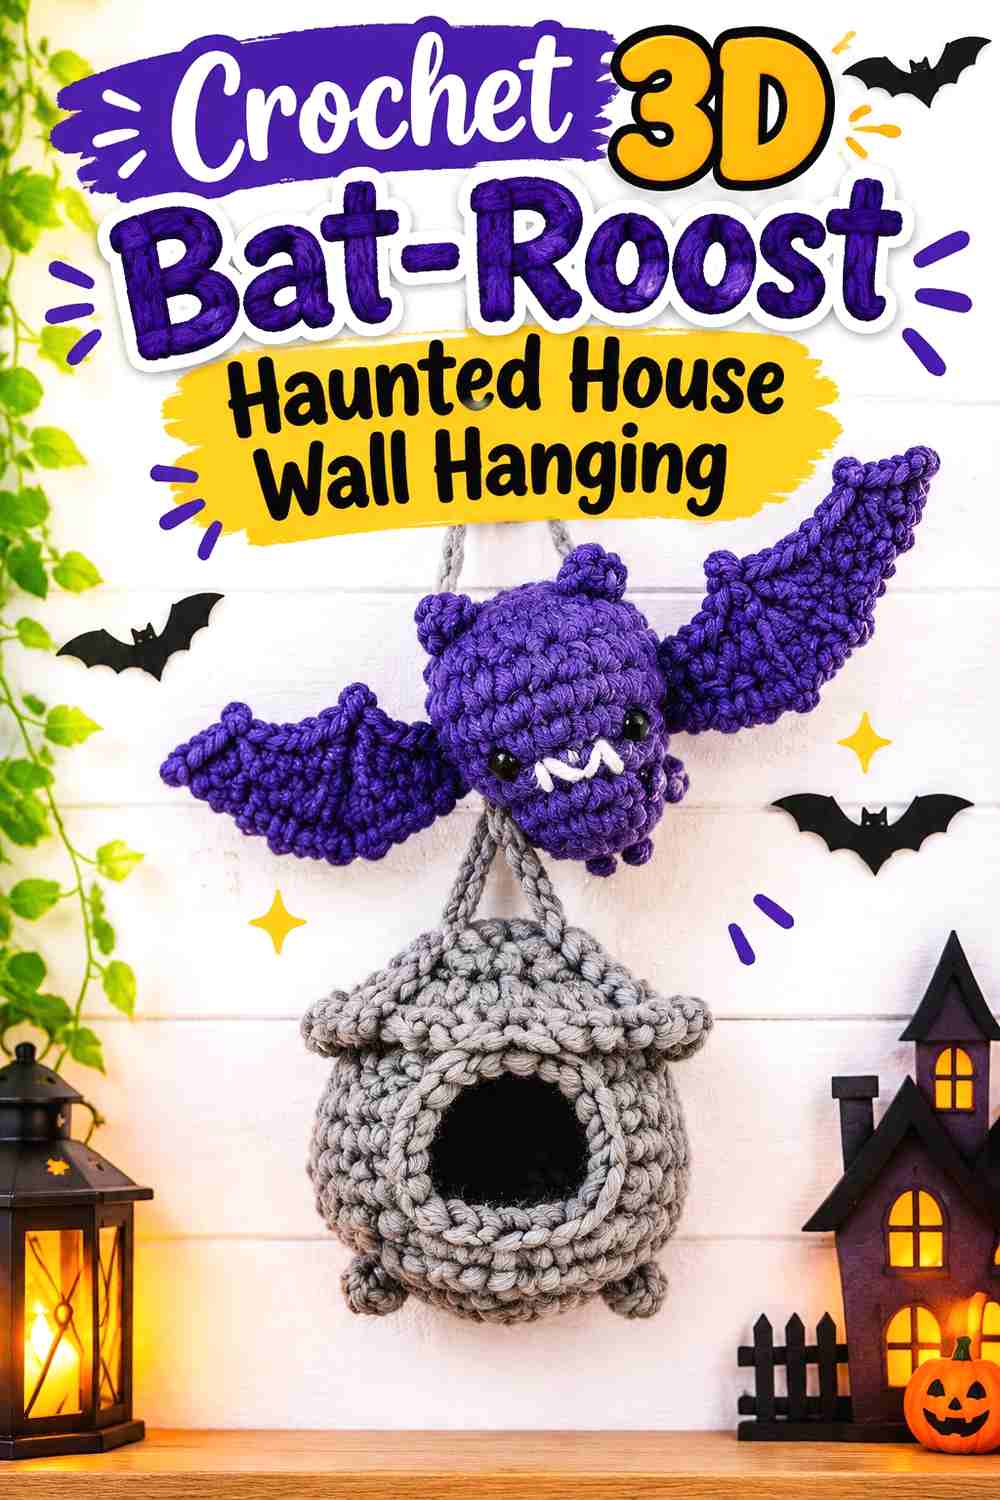
A wall hanging can move beyond a flat panel. Club Crochet’s hanging bat tutorial creates a dimensional bat with poseable elements and a specialized hanging concept, making it a useful source for a haunted-house display where bats project away from the wall instead of being worked into the background.
Pair a simple house silhouette or roofline with one or more dimensional bats and the result becomes closer to fiber sculpture than ordinary tapestry crochet.
Give the Bat Enough Clearance
Three-dimensional wings need physical room. A bat positioned too close to a frame, shelf, or neighboring wall hanging can lose its silhouette.
Plan the bat’s final pose while the house is already hanging. The space around the wings is part of the composition.
Treat Structural Components as Hardware
The source uses non-yarn components to help create its poseable and hanging behavior. Those elements affect both display and safety.
If small magnets, wire, or similar components are inappropriate for the intended location, use a different decorative bat concept rather than assuming every structural element can simply be omitted.
Creator Credit: Club Crochet
9. Crochet Skull-and-Spider Haunted House Garland Scene
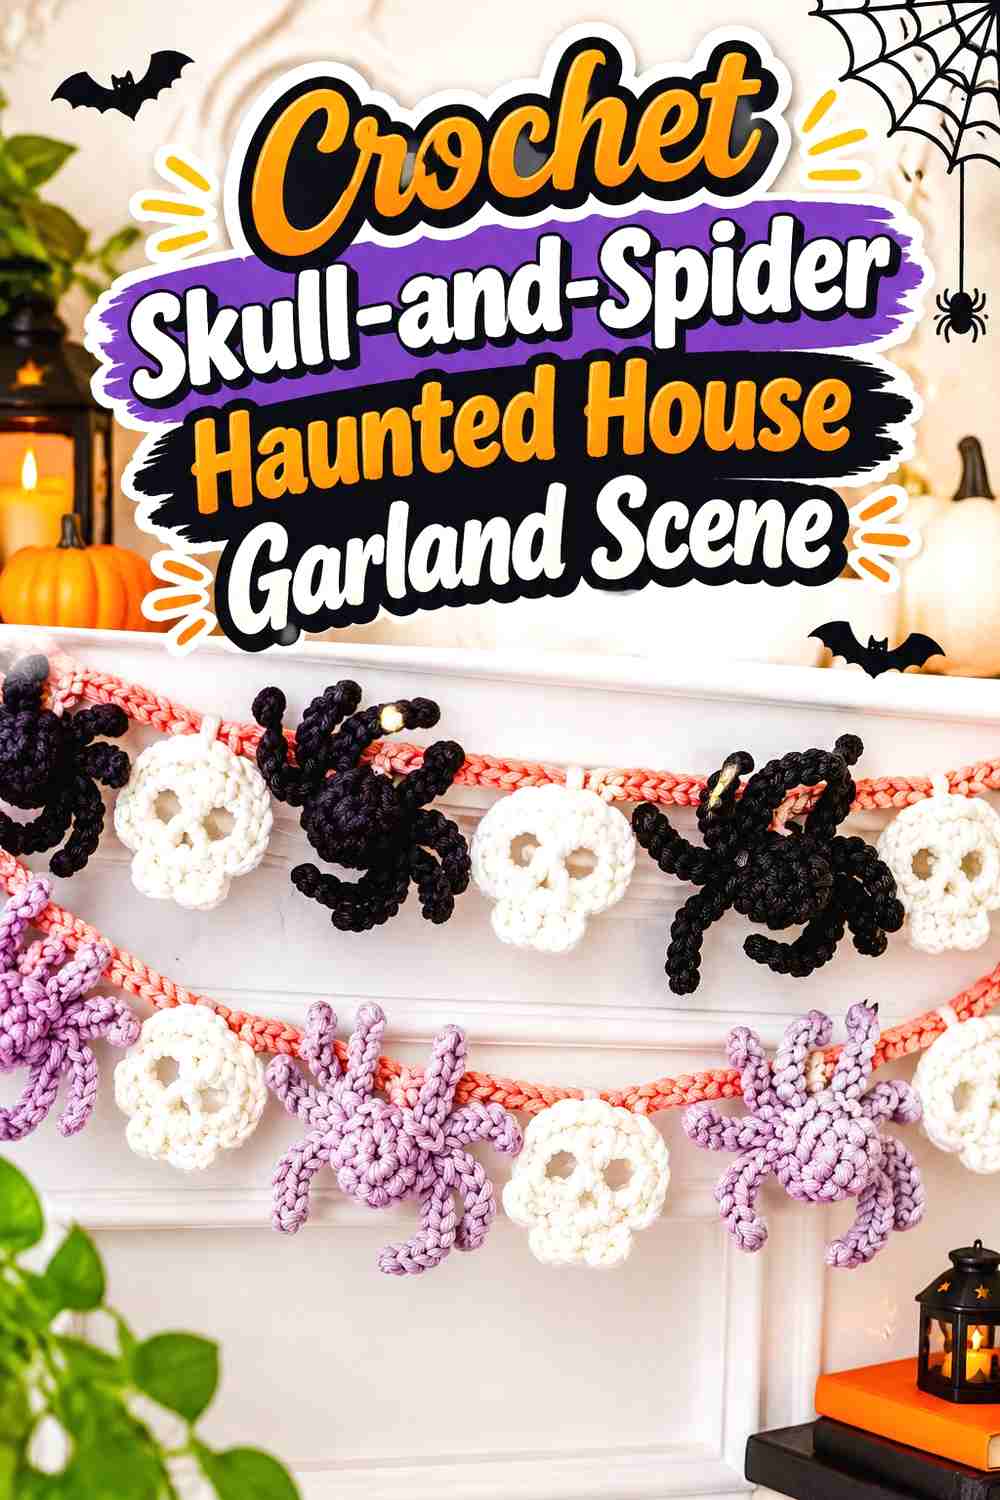
A haunted house does not have to occupy the entire wall hanging. Pocket Yarnlings demonstrates a Halloween garland built around connected skull and spider motifs, which can be positioned above or below a separate house panel to create a wider wall scene.
This format is useful when your display area is broad rather than tall. The house can act as the center, while the motif strand visually expands the Halloween scene sideways.
Check Motif Rotation Before Final Assembly
Small skulls and spiders may twist once the garland is lifted. Test a partial strand in its real hanging position before making the final arrangement permanent.
A motif that faces forward on the table can rotate once gravity changes the direction of the connecting strand.
Leave Negative Space Around the House
The garland should frame the main wall piece rather than hide its roofline and windows. A small amount of separation between the central house and surrounding motifs helps each part remain readable.
This is particularly important if the house itself contains multiple colors or surface details.
Creator Credit: Pocket Yarnlings
10. Crochet Bat-Appliqué Haunted House Wall Banner
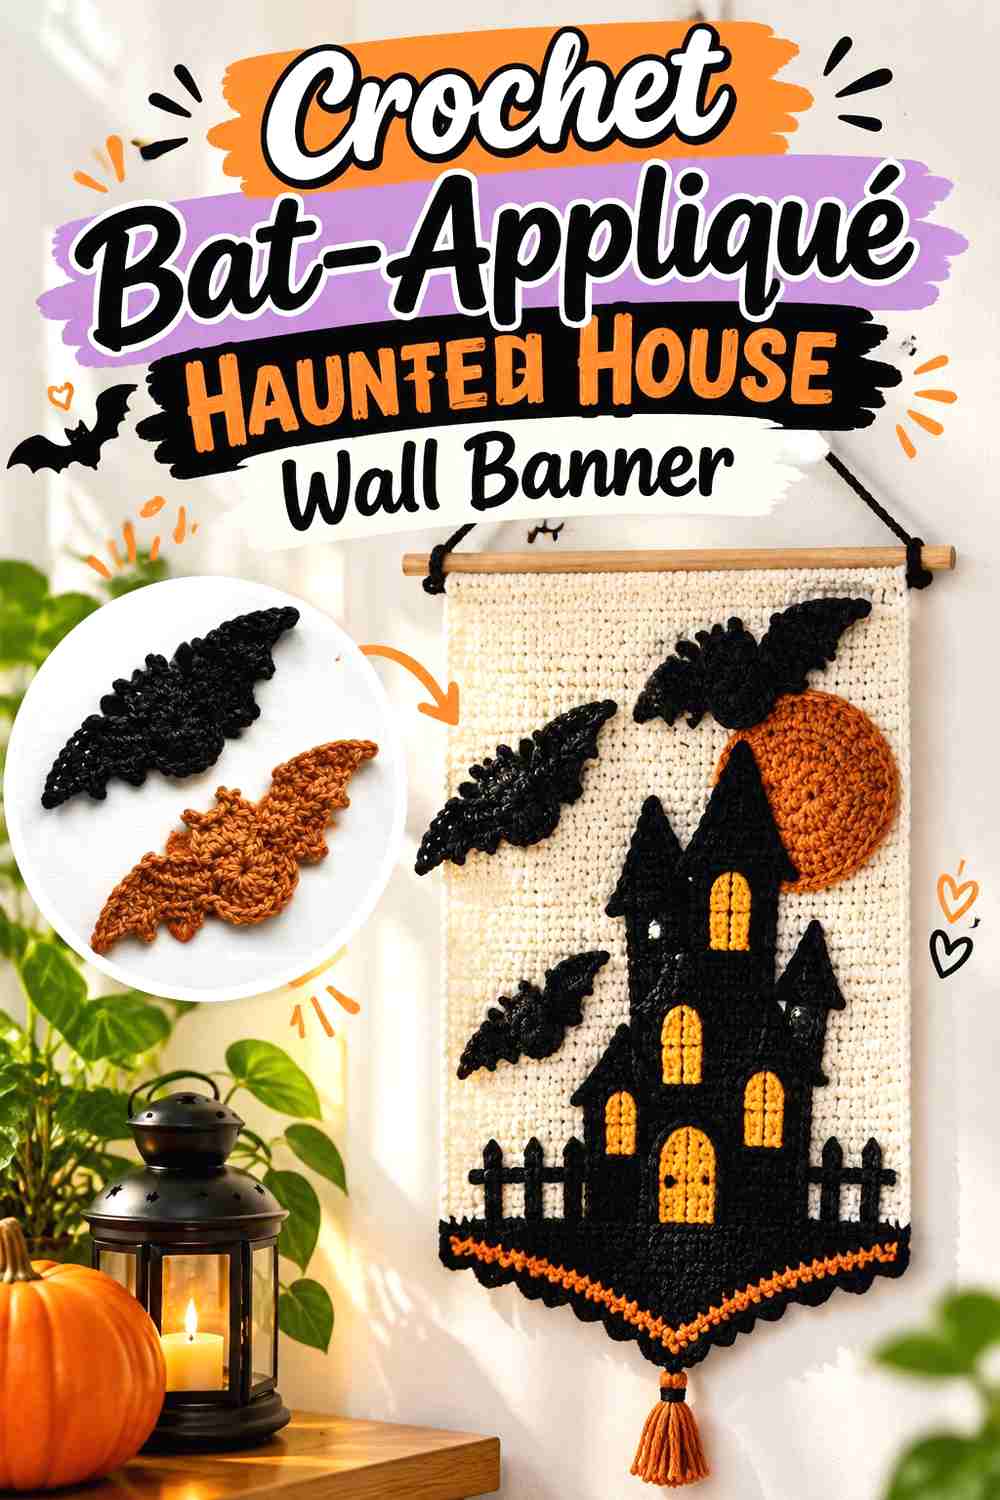
Appliqué construction lets you keep the main house relatively simple and add strong Halloween symbols afterward. OhMeOhMyCrochet’s bat tutorial produces a flat crochet bat motif that can be applied to another project, making it well suited to a layered haunted-house banner.
A dark house against a moon or muted background can be surrounded by several separate bats rather than requiring every flying shape to be incorporated into the original colorwork.
Arrange the Bats While the Panel Is Hanging
Bats that look evenly spaced on a table may appear too symmetrical once the piece is vertical. Temporarily pin or place the motifs first.
A small cluster near the roof and a separate bat farther into the sky can create more movement than an evenly distributed row.
Keep Raised Pieces Away From the Mounting Edge
The top of a wall hanging already contains a rod, loops, stitches, or other support. Crowding appliqués into that area can make mounting more awkward.
Leave enough plain fabric around the support so the finished wall hanging sits straight and the bat silhouettes remain fully visible.
Creator Credit: OhMeOhMyCrochet
11. Crochet Pumpkin-Gate Haunted House Ring Hanging
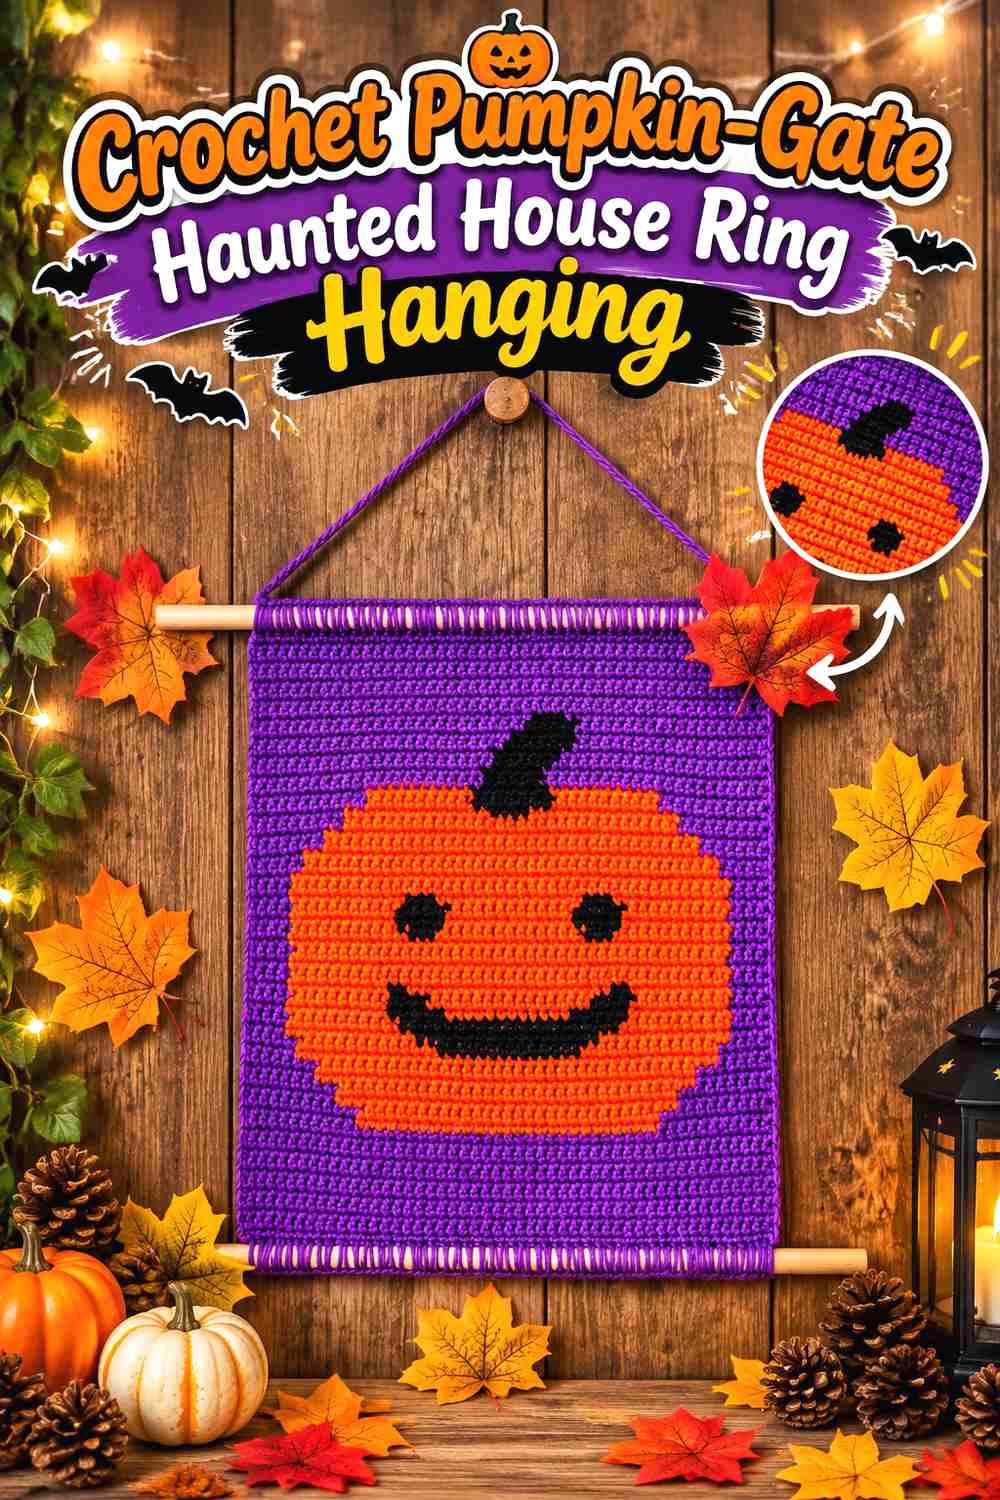
A circular support can turn haunted-house decor into something closer to a Halloween wreath. Odinka Wisanindhi’s pumpkin wall-hanging tutorial demonstrates a substantial seasonal wall piece with a rounded form, making it a useful starting point for a haunted-house entrance framed by pumpkins.
Instead of putting the house inside a rectangular sky, place a simplified facade, doorway, or roof silhouette inside or alongside a round pumpkin-focused composition.
Use the Circle as a Frame
The strongest advantage of a ring-style design is its boundary. Let the circle contain the main scene rather than allowing every decorative element to extend beyond it.
A centered house or doorway with small pumpkins near the lower edge can make the piece feel architectural without needing a full building.
Check Balance Before Fixing the Top
A heavy pumpkin, stem, or layered house component can pull the hanging point slightly off center.
Suspend the nearly finished project before finalizing the loop and see whether the composition naturally faces forward.
Creator Credit: Odinka Wisanindhi
12. Crochet Halloween Haunted House Word Banner
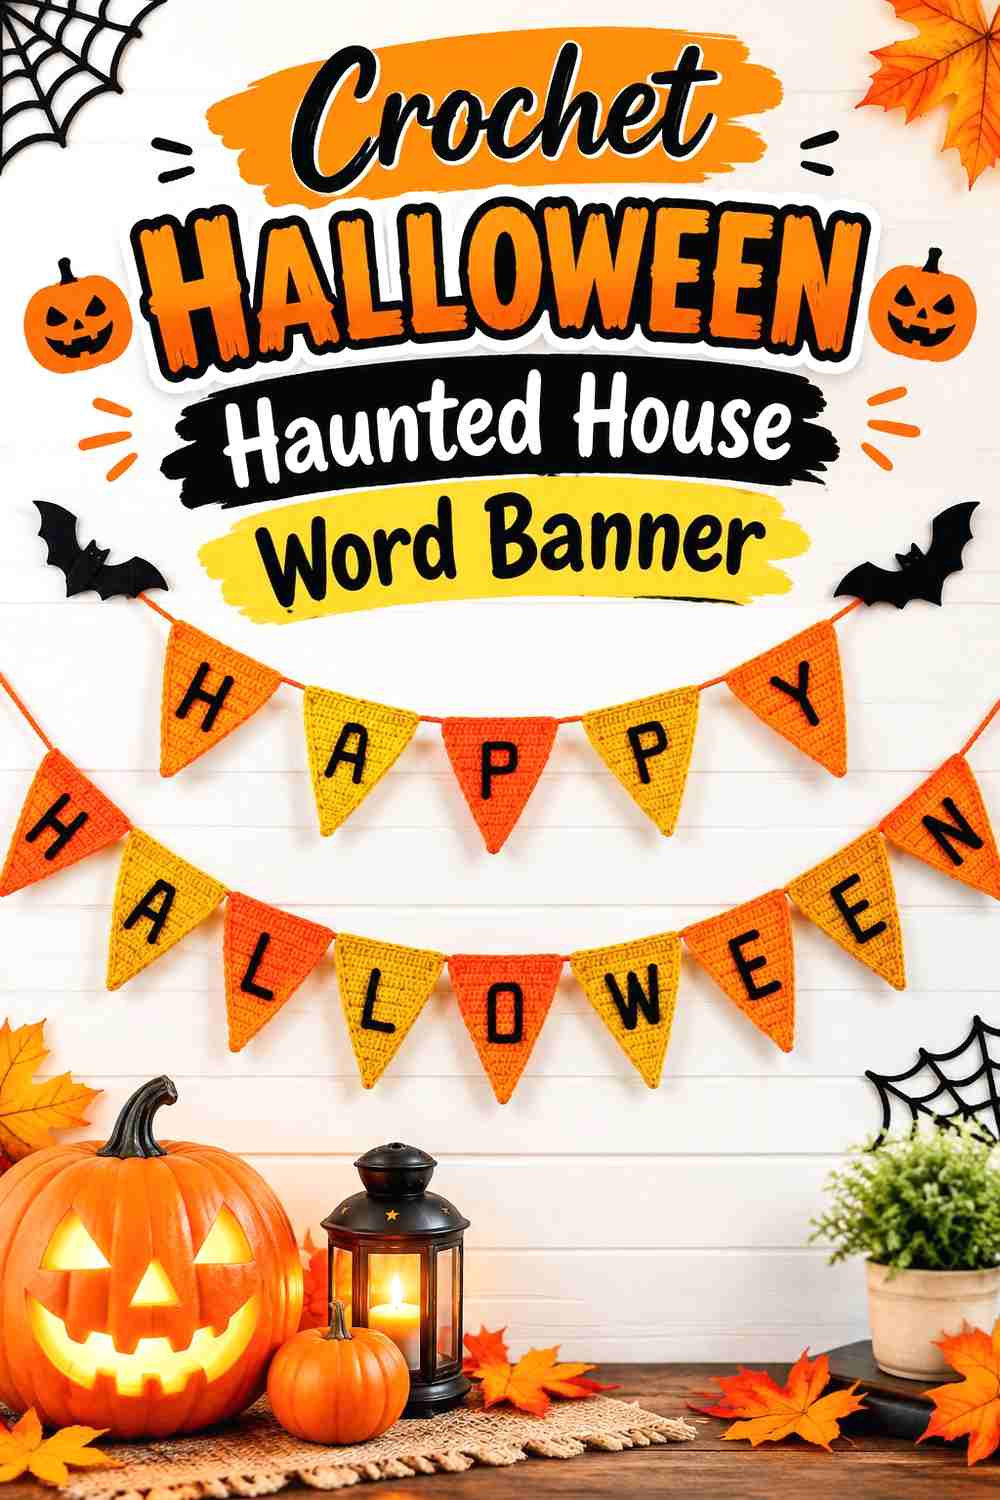
Sometimes lettering can carry part of the Halloween message. Crochet daniela’s seasonal banner tutorial demonstrates a finished hanging format centered on Halloween text, which can be adapted by placing a haunted-house silhouette beneath, behind, or between the words.
This approach works well for a party wall, doorway, or seasonal photo area where the decoration needs to read clearly from farther away.
Decide Whether the Words or House Are Primary
Two focal points of equal size can compete. If the lettering is large, keep the house compact and graphic. If the house is the main feature, use shorter or smaller text.
Look at the piece from normal room distance before deciding whether both elements remain readable.
Avoid Overloading the Background
Words, architecture, bats, pumpkins, ghosts, and borders can quickly turn one banner into too many separate ideas.
Choose a hierarchy. One major element, one supporting element, and restrained small details often create a stronger result than filling every open space.
Creator Credit: crochet daniela
13. Crochet Wreath-Framed Haunted House Wall Hanging
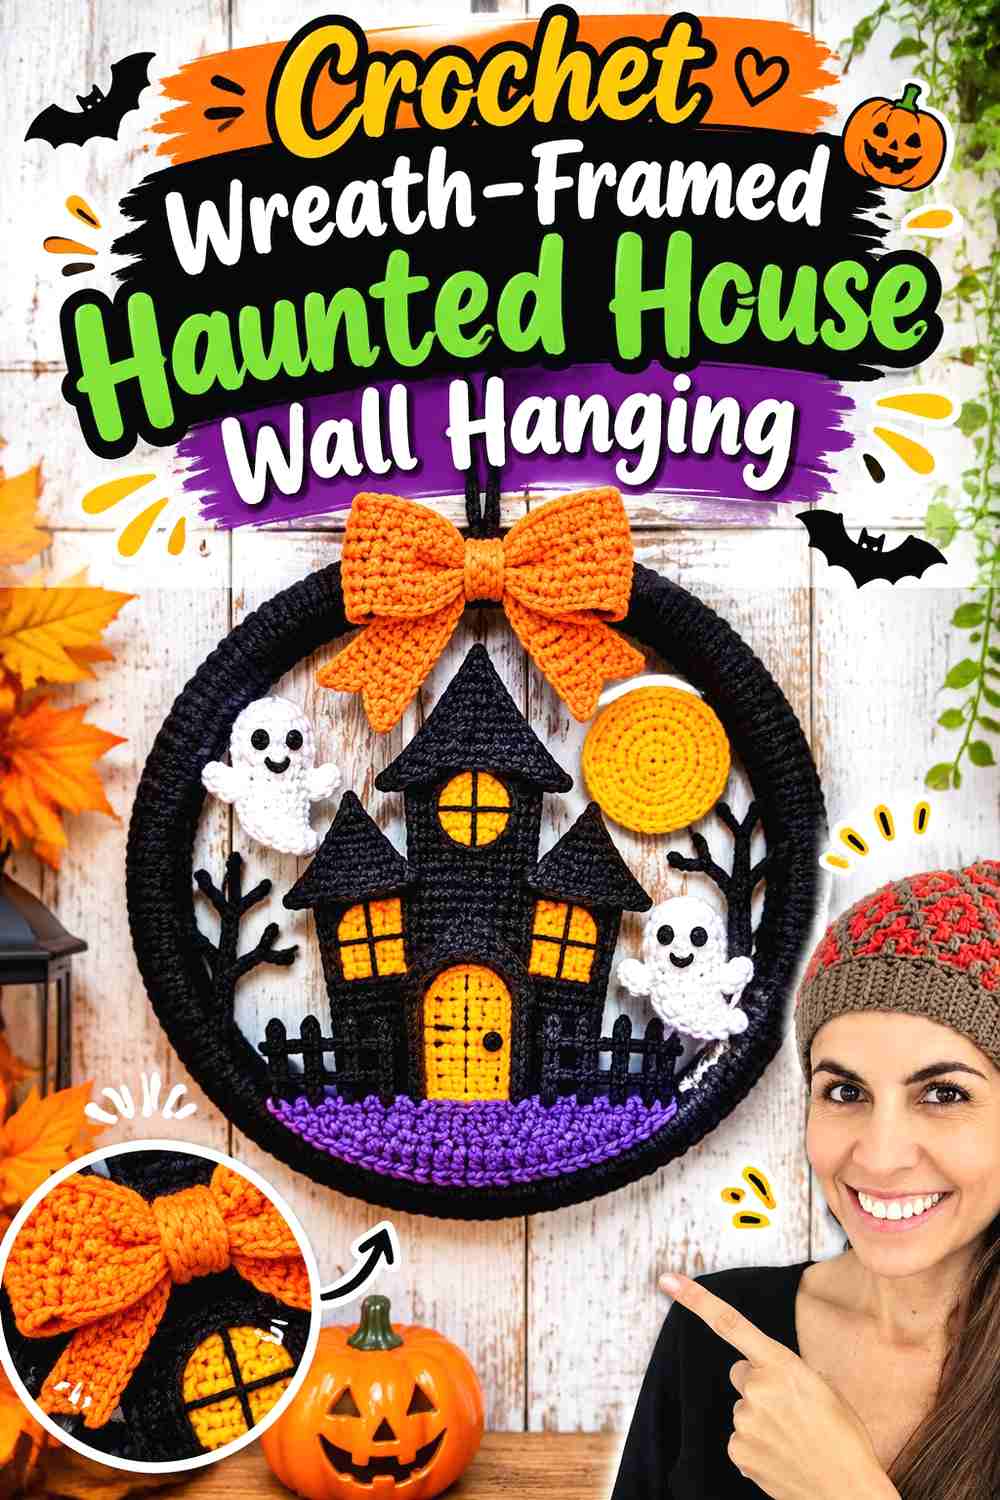
A wreath format creates a clear outer frame and leaves the center available for a miniature haunted-house scene. Ahuyama Crochet’s Halloween tutorial demonstrates a seasonal hanging arrangement using recognizable Halloween motifs, making it a useful structural reference for a house-centered version.
The resulting piece can feel more dimensional and decorative than a tapestry while still hanging in one compact area.
Keep the House Large Enough to Survive the Frame
A wreath already has a strong outer shape. A tiny house placed in the center can look like an afterthought.
Mock up the central silhouette before finishing all surrounding decorations. The house should remain recognizable without requiring the viewer to stand directly in front of it.
Spread Dimensional Weight Around the Ring
If pumpkins, monsters, or other raised motifs are concentrated on only one side, the complete wreath may hang unevenly.
Check the piece vertically during assembly and redistribute decorative weight if the frame repeatedly tilts.
Creator Credit: Ahuyama Crochet
14. Crochet Gothic Ring Haunted House Wall Art
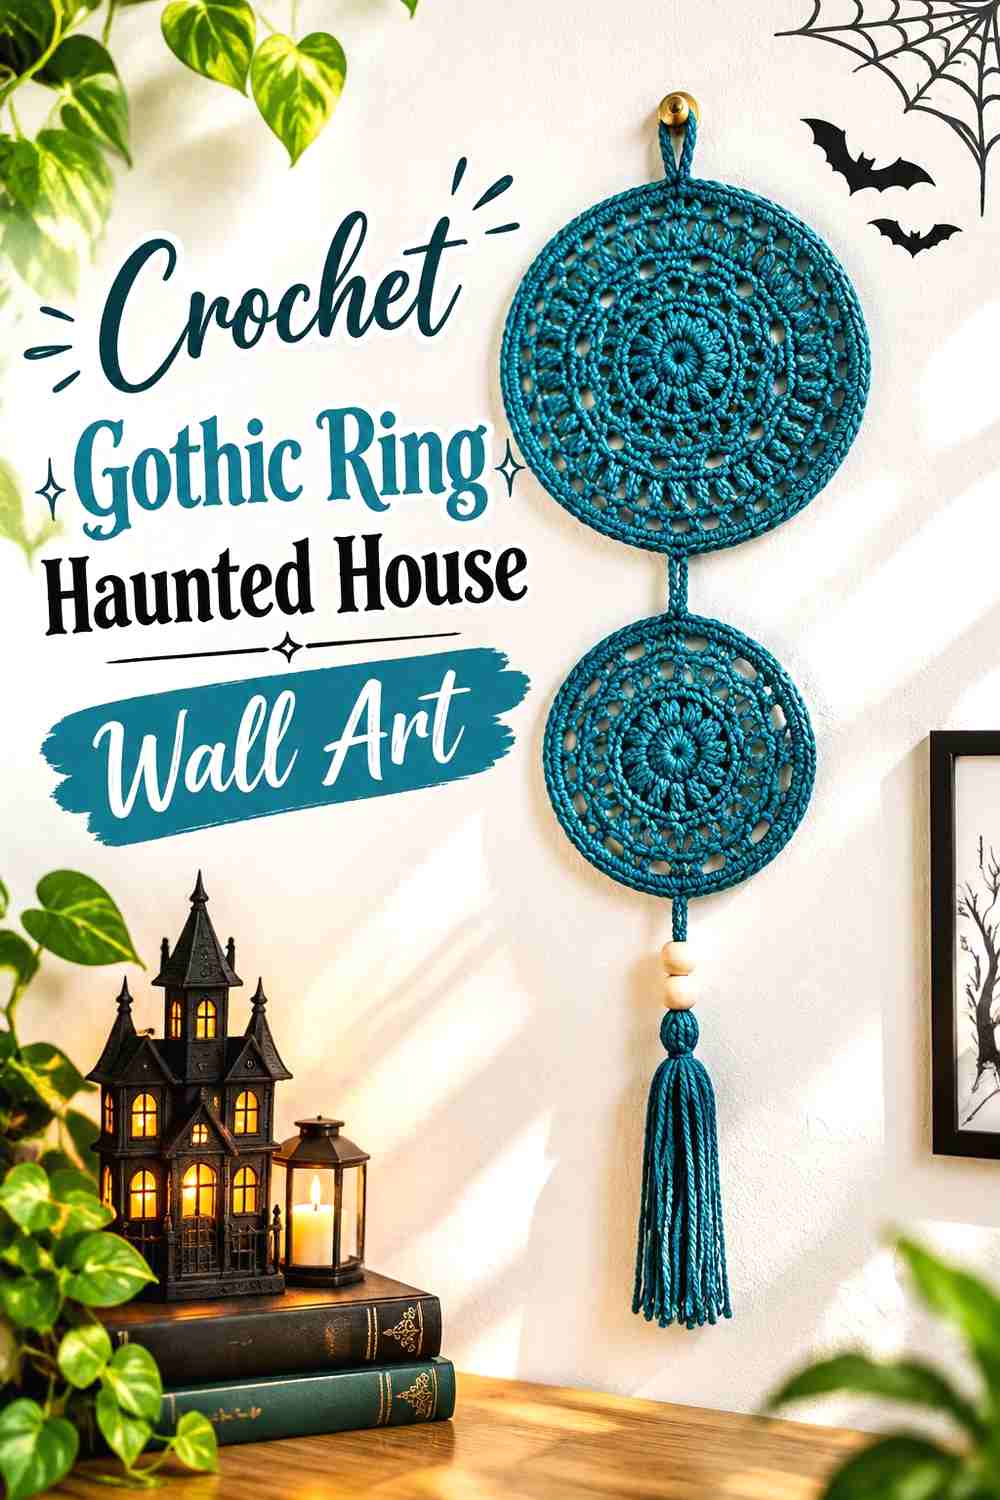
A crochet mandala mounted inside rings offers a more abstract haunted-house interpretation. Mum2makes demonstrates a ring-supported wall hanging with open crochet, layered circular structure, and a suspended lower detail.
For Halloween, the center could suggest a moon or gothic window, while a small dark house silhouette occupies the lower part of the circle.
Let Negative Space Create the Atmosphere
Open ring designs do not need every area filled with yarn. Empty space can suggest night sky and help the house stand out.
This works particularly well when the hanging is displayed against a contrasting wall where the open sections remain easy to see.
Match the House Scale to the Inner Ring
A house that almost fills the entire opening can hide the circular structure. One that is too small can seem disconnected.
Arrange a paper or yarn mock-up inside the finished ring before committing to the final house motif. The ring should still read as an intentional frame.
Creator Credit: mum2makes
15. Crochet Fringe-Base Haunted House Tapestry
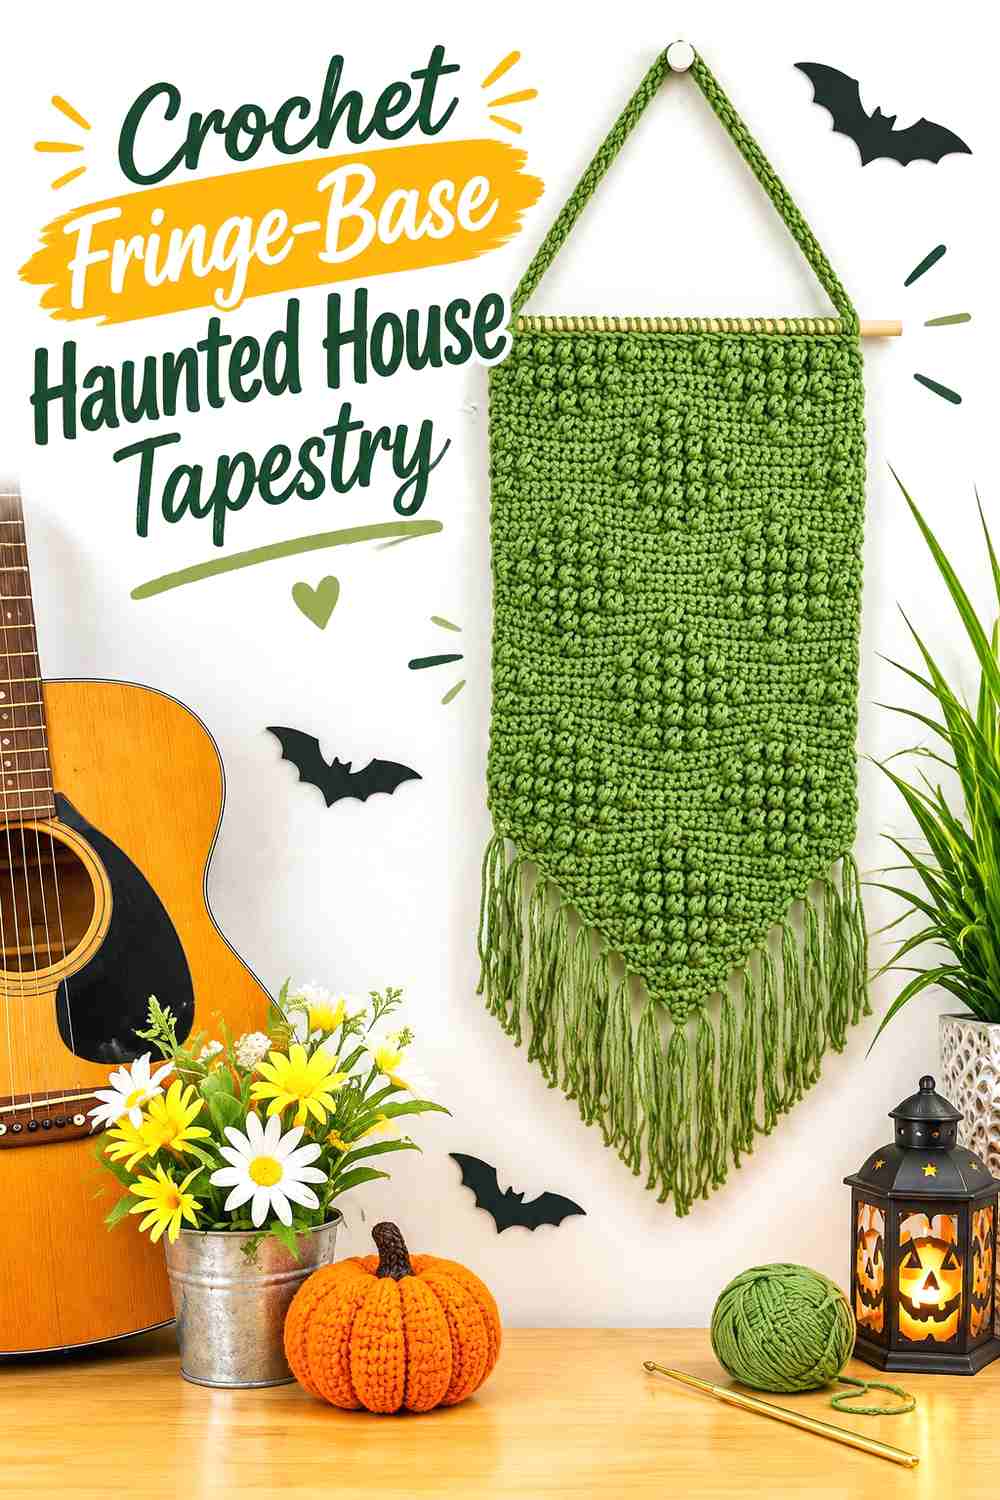
Long fringe changes a haunted-house tapestry from a simple rectangle into a more dramatic piece of fiber art. Jo to the World Creations demonstrates a complete wall-hanging construction with an extended panel, hanging strap, and fringe treatment.
For Halloween, the fringe can visually continue below a house as fog, roots, shadow, or simply a decorative finish.
Finish the Panel Before Trimming the Fringe
A lower edge that is slightly uneven can become much more obvious once a straight fringe line is added beneath it.
Let the panel settle first, attach the fringe, hang the piece vertically, and then judge the final lower shape before making cosmetic adjustments.
Use Fringe to Extend the Silhouette, Not Hide It
The haunted house should end clearly before the fringe begins. If roofs, doors, or lower walls disappear into dense strands, the building loses definition.
Keep the transition deliberate so the fringe feels like part of the presentation rather than an attempt to cover an awkward edge.
Creator Credit: Jo to the World Creations
16. Crochet Moon-Phase Haunted House Wall Hanging
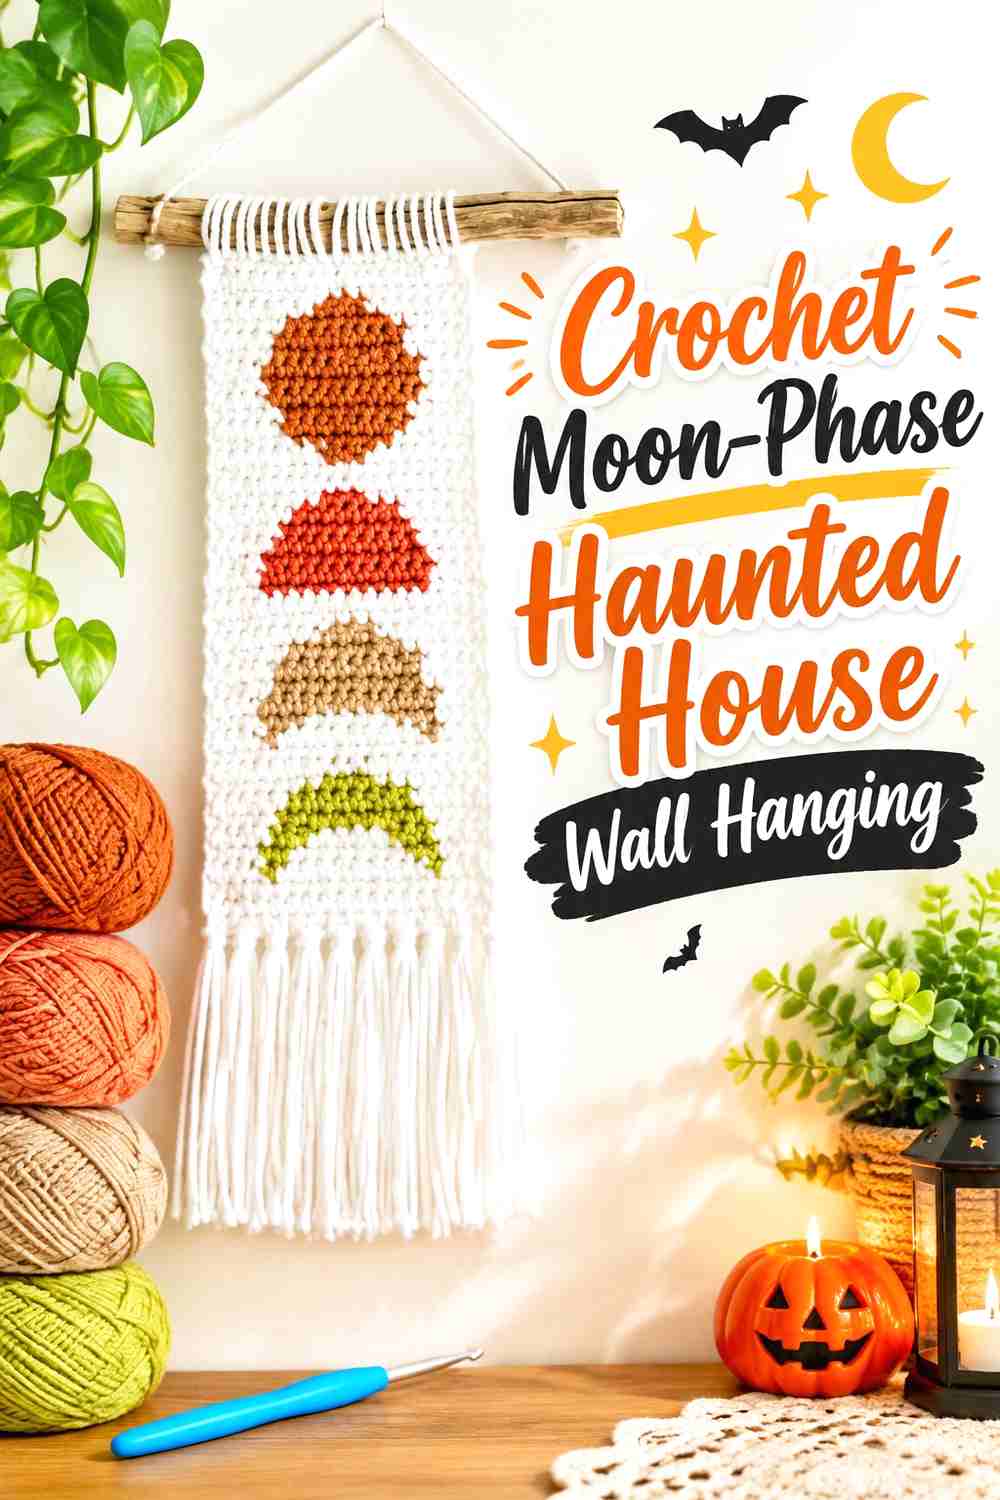
A moon-phase wall hanging is a natural match for haunted-house imagery because the celestial theme already creates a nighttime setting. Love & Stitch’s tutorial demonstrates a finished moon-phase wall hanging and provides a clear foundation for this type of vertical composition.
A haunted-house adaptation can place the building beneath the central moon, between phases, or at the bottom of the hanging so the eye moves from sky to architecture.
Make the Central Moon the Visual Anchor
Several small moons plus a detailed house can create too many equal focal points. Use one moon or phase as the dominant celestial element and let the remaining shapes support it.
A clear hierarchy makes the haunted house feel like part of a night scene instead of a separate motif added at the end.
Vertical Layouts Suit Narrow Wall Spaces
This construction is useful beside a bookcase, door, or tall furniture piece because it directs the eye downward rather than spreading across the wall.
Measure the complete length, including hanging loops and fringe, before deciding whether the lower house will remain above nearby furniture.
Creator Credit: Love & Stitch
17. Crochet Haunted House Pocket Wall Organizer
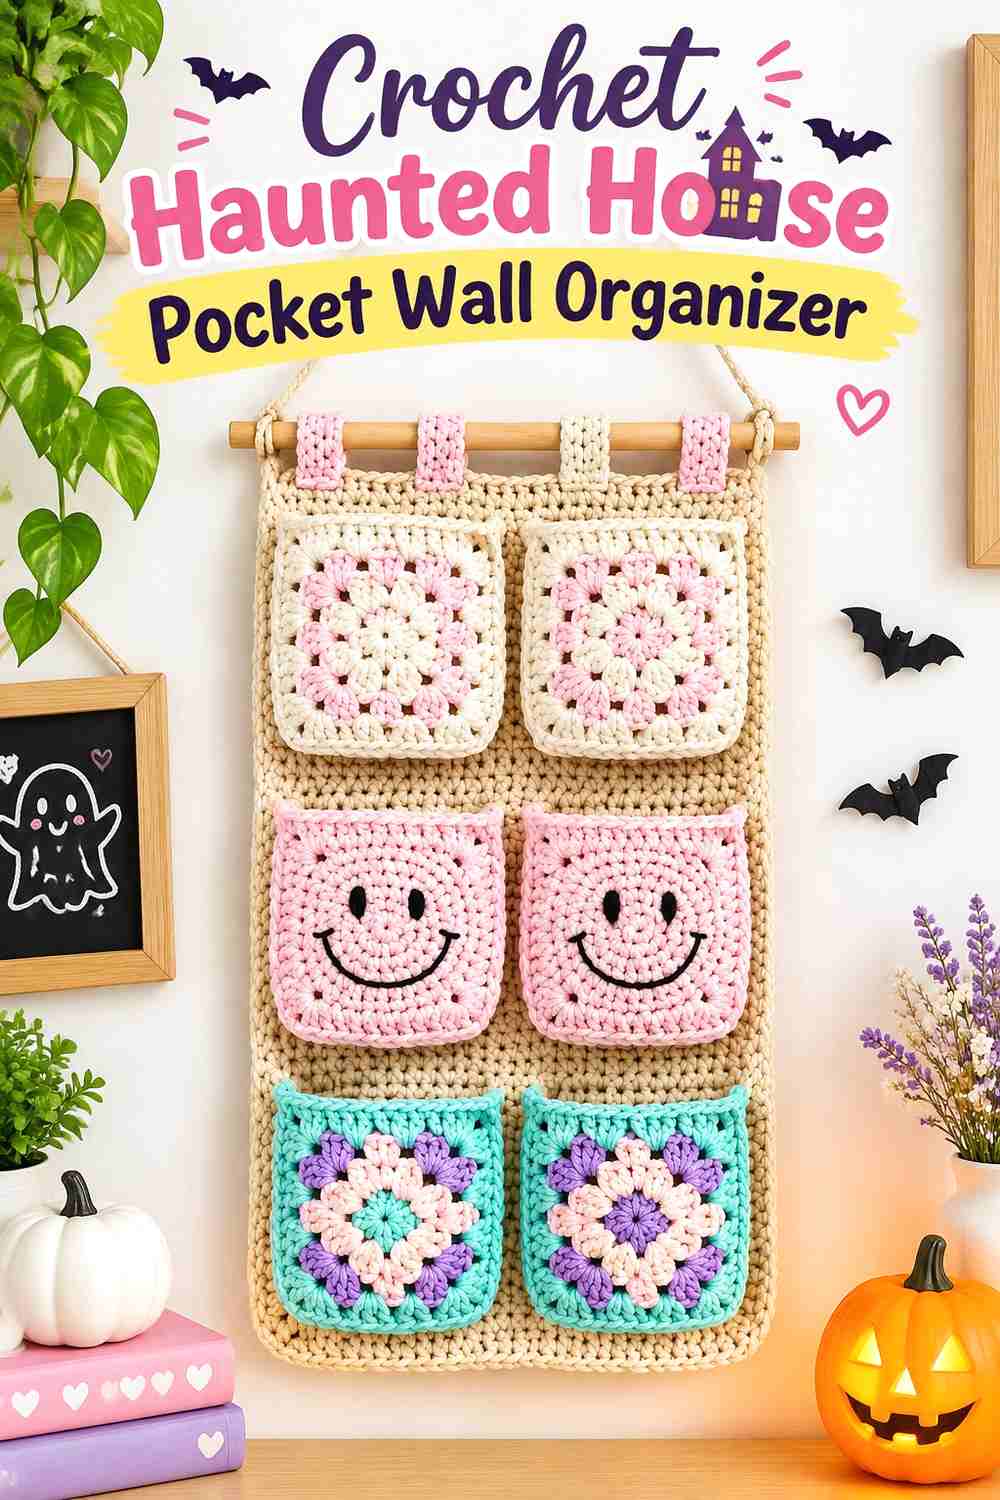
The final idea adds function to the Halloween decor. Daily Crochet & Knit Free Patterns demonstrates a granny-style wall organizer format, which can be reworked visually as a haunted-house facade with the pocket incorporated into the lower portion.
Instead of making a purely decorative panel, the house can hide a shallow storage section for lightweight seasonal items while windows, roof shapes, or motifs provide the Halloween styling.
Make the Pocket Look Intentional
A plain rectangular pouch placed across the front of a detailed haunted house can break the illusion. Treat the pocket edge as part of the architecture.
It could visually align with a porch, lower wall, fence line, or another horizontal feature without requiring complicated construction.
Keep Functional Loads Realistic
Crochet stretches, and wall-hanging hardware has limits. Do not assume a decorative organizer can safely carry substantial weight simply because it has a pocket.
Use it only within the capacity supported by the actual construction, yarn, hanging method, and mounting hardware. If you mainly want the haunted-house appearance, keeping the pocket decorative or lightly used can preserve the shape more effectively.
Creator Credit: Daily Crochet & Knit Free Patterns
Which Haunted House Wall Hanging Style Should You Choose?
For a clear picture-like haunted house, start with the tapestry or C2C ideas. Tapestry crochet gives rooflines and windows a relatively compact surface, while C2C produces a more deliberately pixelated image.
For something lighter and less conventional, the filet or ring-mounted ideas use open space as part of the design. They work particularly well when the wall itself can provide contrast behind the crochet.
Choose granny-square or appliqué constructions when you prefer making separate components and arranging them afterward. They give you more freedom to change the composition before permanent assembly.
For maximum dimension, the bat-roost, wreath, pumpkin-ring, and pocket-organizer ideas move furthest away from flat wall art. They also require more thought about weight, storage, projection from the wall, and attachment points.
Conclusion
The most convincing crochet haunted house wall hanging is not necessarily the one with the greatest number of Halloween details. It is the one whose construction keeps the main idea recognizable.
Choose tapestry crochet when you want crisp graphic architecture, C2C for a pixel-art house, and filet for a lacy silhouette. Granny squares and appliqués make it easier to build the scene from separate components, while wreaths, rings, dimensional bats, and pockets turn the house into a more sculptural piece of seasonal decor.
Before adapting any tutorial, finish the structural planning first: decide how large the piece should appear on the wall, where its main focal point belongs, how it will be supported, and which details remain visible at normal viewing distance. Then use the credited creator tutorial for the exact construction it teaches and adapt only the decorative concept that fits your haunted-house plan.
Frequently Asked Questions
Are all 17 tutorials specifically haunted-house patterns?
No. The collection intentionally combines haunted-house-compatible wall-hanging constructions with Halloween motifs and techniques. Some sources are especially close to the haunted-house concept, while others teach a tapestry, C2C, appliqué, wreath, moon, granny-square, or dimensional construction that can be adapted into a haunted-house wall display.
Is tapestry crochet or C2C better for a haunted house wall hanging?
Tapestry crochet generally creates a denser, finer graphic surface, so relatively small roof and window shapes can remain compact. C2C creates larger pixel-like blocks and gives the finished image a softer, more textured appearance.
The better option depends on the visual style you want and the amount of wall space available.
How can I make a crochet haunted house recognizable from across the room?
Prioritize the silhouette before tiny details. A pointed roof, tower, chimney, contrasting windows, moon, or crooked tree can communicate the haunted-house theme more effectively than numerous miniature decorations.
Check the design vertically and from normal viewing distance while you work.
Can I add crochet bats and ghosts to a finished haunted-house panel?
Yes, separate appliqués can add depth and make it easier to adjust the composition after the main panel is complete. Position them temporarily before sewing so you can judge spacing and balance.
For dimensional pieces, also consider whether they will snag, rotate, or project too far into a walkway.
Should a haunted-house wall hanging be blocked before mounting?
That depends on the construction and fiber. Flat colorwork panels often benefit from appropriate shaping before the rod, fringe, or final embellishments are permanently positioned, but the suitable method depends on the actual yarn.
Follow fiber-specific care instructions and the creator’s finishing guidance rather than automatically applying heat or steam.
What colors work besides black and orange?
The house mainly needs enough contrast to remain readable. Charcoal with cream, black with violet, deep green with warm yellow, burgundy with gray, midnight blue with silver, or muted brown with antique cream can all create different Halloween moods.
Compare the colors under the lighting where the piece will actually hang. Two yarns that look distinct in daylight can merge visually in a dim room.
How should I store a crochet haunted house wall hanging after Halloween?
Flat panels are usually the simplest to store because they can often be laid flat or handled with relatively little bulk. Ring-mounted projects, raised appliqués, stuffed bats, and long fringe need more space so they are not crushed or tangled.
Remove dust before storage when appropriate for the materials, protect dimensional components from snagging, and avoid folding a piece sharply through raised details or rigid supports.