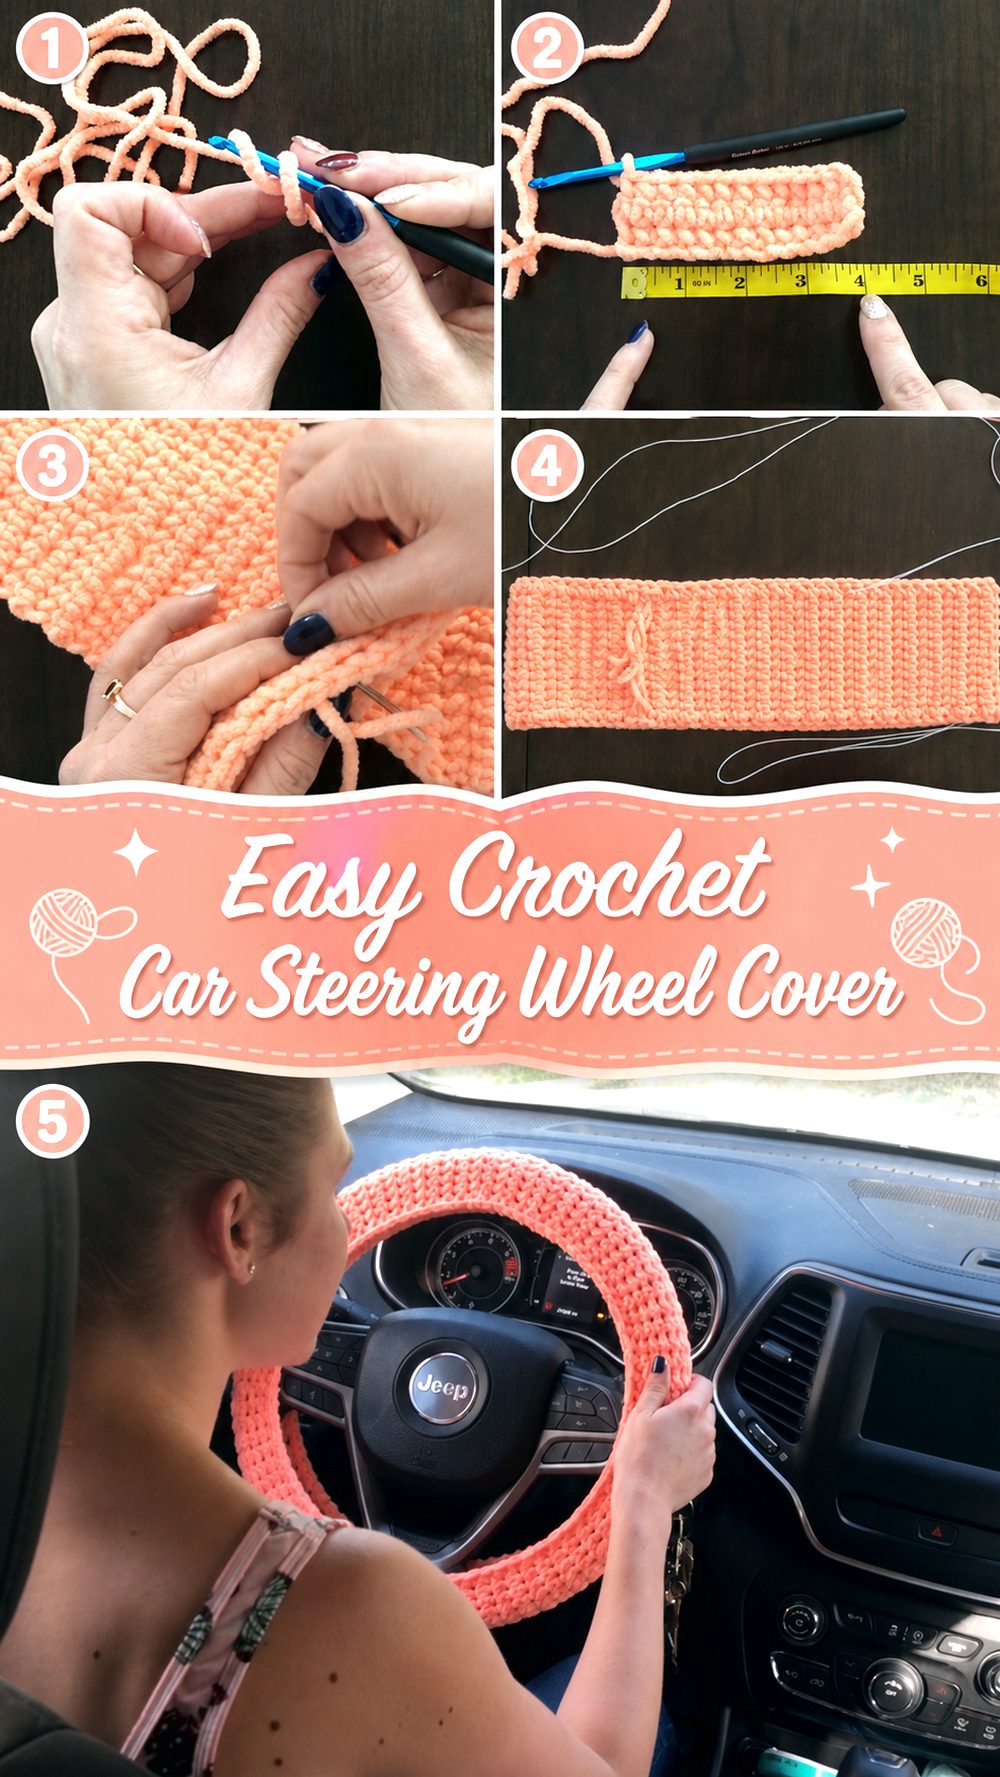
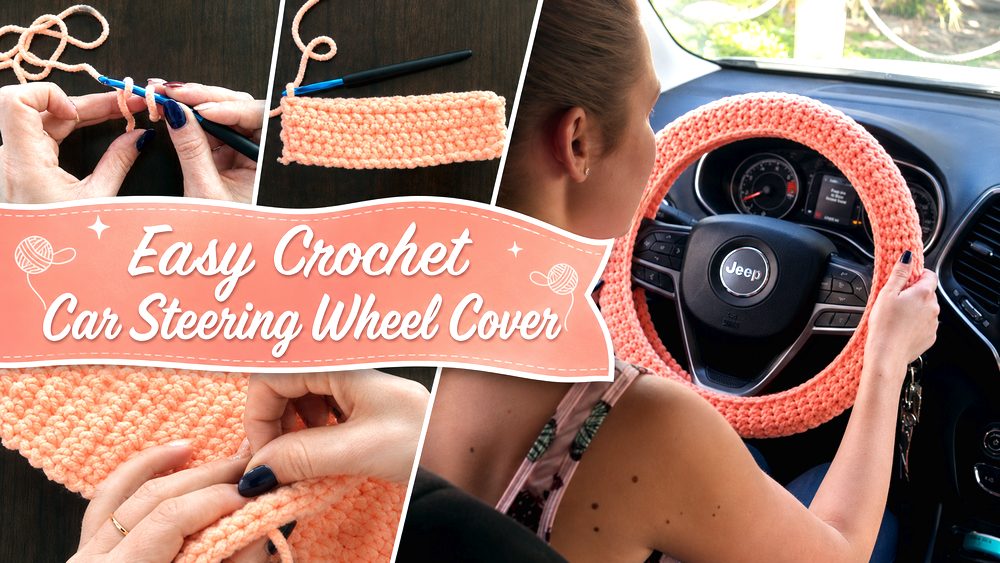
A crochet car steering wheel cover is a fun way to add a soft handmade touch to your car while making your interior feel a little more personal. This project is especially nice for crocheters who enjoy practical makes that are still decorative and cozy-looking. The tutorial I selected shows a simple approach that keeps the design easy to follow, making it a good choice for beginners or anyone who wants a satisfying crochet project without too much shaping. The finished cover has a neat textured look and wraps around the wheel in a way that feels tidy and customizable. You can keep it simple with one color or make it more playful with shades that match your car, your mood, or your favorite aesthetic.
Why You’ll Love This Project:
This project is quick, useful, and very customizable. The tutorial presents it as a beginner-friendly steering wheel cover, and the method is straightforward enough that you can focus on getting a nice fit and enjoying the process instead of worrying about complicated stitch work.
Materials Needed:
- Yarn
- Crochet hook
- Scissors
- Yarn needle
- Measuring tape
- Optional stitch markers
If you are not sure about the exact yarn weight or hook size, use a yarn and hook size that matches your desired fit and texture.
Best Yarn for This Project:
A soft yarn with a bit of body works well for this kind of cover. The selected tutorial uses a plush-style yarn and shows a beginner-friendly approach built around a simple texture, so a soft bulky or velvety yarn can give you that cozy padded look. If you want a lighter feel, you can also use a smoother yarn that still gives clear stitches and a flexible fabric. The main goal is to choose something comfortable to hold and easy to stitch evenly.
Skill Level:
Beginner-friendly.
The tutorial specifically presents this as a beginner-friendly crochet steering wheel cover, and the construction is based on repeating simple stitches rather than advanced shaping. It is a good project for someone who is comfortable making a foundation, working rows, and joining neatly at the end.
Size and Fit Guide:
This project is easy to adjust because you are essentially making a long crochet strip to fit around your steering wheel. The tutorial indicates that the cover is worked until it reaches a target length, with one example given as 121 centimeters, but your own steering wheel may vary, so it is best to measure your wheel and compare as you go. Keep checking the strip around the wheel so the fit feels snug without pulling too tightly.
Stitches Used:
- Chain
- Double crochet
- Joining and finishing with a yarn needle
The selected tutorial snippet clearly states that the cover is worked in double crochet throughout, which helps keep the pattern simple and repetitive.
How to Make It:
Step 1: Start the Foundation
Begin by making your starting chain. Since the tutorial uses a very simple build, the first step is just creating the width you want for the steering wheel cover. This width will become the part that sits across the thickness of the wheel, so you can make it narrow for a sleeker look or a little wider for a cushier feel. Keep your starting chain even so the edges stay neat.
Step 2: Work the Main Pattern
Once your foundation is ready, begin working double crochet. The tutorial describes making the cover in double crochet for the full piece, so this is the main repeat you will continue with. That makes the project relaxing and easy to memorize. Work one row after another, keeping your tension as even as possible so the strip does not bow or ripple.
Step 3: Build a Long Rectangle
Rather than shaping lots of curves, you continue crocheting until you have a long strip. The tutorial gives a measurement example of continuing until the piece reaches 121 centimeters. That tells us the idea is to build length first, then wrap and secure it around the steering wheel. As you crochet, lay the strip around your wheel from time to time to see how close you are to the fit you want. If your wheel is slightly smaller or larger, adjust the final length to match it.
Step 4: Check the Fit
Before joining anything permanently, test the strip around the steering wheel. The fabric should sit comfortably around the wheel without large gaps. If it feels too loose, add fewer rows next time or tighten the join slightly. If it feels too short, simply continue crocheting a little longer. This is one of the easiest parts of the project to personalize because the fit can be adjusted without changing the whole pattern.
Step 5: Join the Cover Around the Wheel
After the strip is long enough, place it around the steering wheel and bring the edges together. One related YouTube result for this style of project describes weaving in and out through the stitches around the steering wheel cover, which suggests a sewn closure method using a yarn needle. That kind of join helps pull the edges together neatly and gives the finished cover a clean handmade seam. Work slowly and evenly all the way around so the seam looks tidy.
Step 6: Finish the Edges
When the seam is complete, weave in all yarn ends carefully. Smooth the cover around the wheel and make sure the stitches are sitting evenly. The final result should look like a soft, textured crochet wrap that fits the steering wheel closely and gives your car a cozy customized look. The tutorial’s overall approach is simple, repetitive, and easy to adapt, which is exactly what makes this project so appealing.
Helpful Tips:
- Measure your steering wheel before you begin so you have a better idea of your target length.
- Keep your double crochet rows even so the strip lies flat.
- Check the fit around the wheel before seaming the cover closed.
- Use stitch markers at the row ends if you want cleaner edges.
- Take your time with the final seam so it looks neat and balanced.
- Choose a yarn texture that gives you the look you want, from plush and cozy to smooth and simple.
Common Mistakes to Avoid:
- Making the starting chain too tight
- Letting the rows gradually widen or narrow
- Forgetting to measure the strip against the wheel as you go
- Making the cover too loose before joining
- Pulling the seam unevenly, which can make the cover look twisted
- Leaving ends unsecured where they may work loose later
Customization Ideas:
You can make this cover in one solid color for a clean classic finish, or use color changes for a striped look. A plush yarn will make it feel soft and cozy, while a smoother yarn will show off the stitch texture more clearly. You can also adjust the width to make the cover slimmer or more cushioned depending on the style you want.
Style Ideas:
A crochet steering wheel cover looks cute in boho, pastel, retro, or cozy car interiors. Match it with crochet coasters, a hanging charm, or small handmade accessories for a coordinated look. It can also make a thoughtful gift for someone who loves crochet and enjoys personalizing their space.
Care Instructions:
Hand wash gently if needed and let it air dry fully before using again. Avoid harsh heat, rough scrubbing, or twisting the fabric too hard. If the stitches flatten over time, reshape it gently with your hands after washing.
Time Needed:
This may take a few hours depending on your speed, yarn, size, and stitch pattern.
Conclusion:
If you want a cute and practical crochet car accessory, this steering wheel cover is a lovely project to try. The method is simple, the stitches are easy to repeat, and the size can be adjusted to suit your own wheel. You can keep it plain, make it plush, or customize it with your favorite colors for a handmade finish that feels personal and fun.
FAQs:
1. Is this project beginner-friendly?
Yes. The tutorial presents it as beginner-friendly and uses a simple repeated stitch pattern.
2. What stitch is mainly used?
Double crochet is the main stitch used throughout the project.
3. Can I adjust the size?
Yes. Measure your steering wheel and keep crocheting the strip until it fits your wheel snugly.
4. What yarn works best?
A soft yarn that gives a comfortable texture and clear stitches works well. Plush yarn gives a cozy padded look.
5. How do I get a neat finish?
Take your time when seaming the edges together and weave in the yarn ends carefully for a clean result.