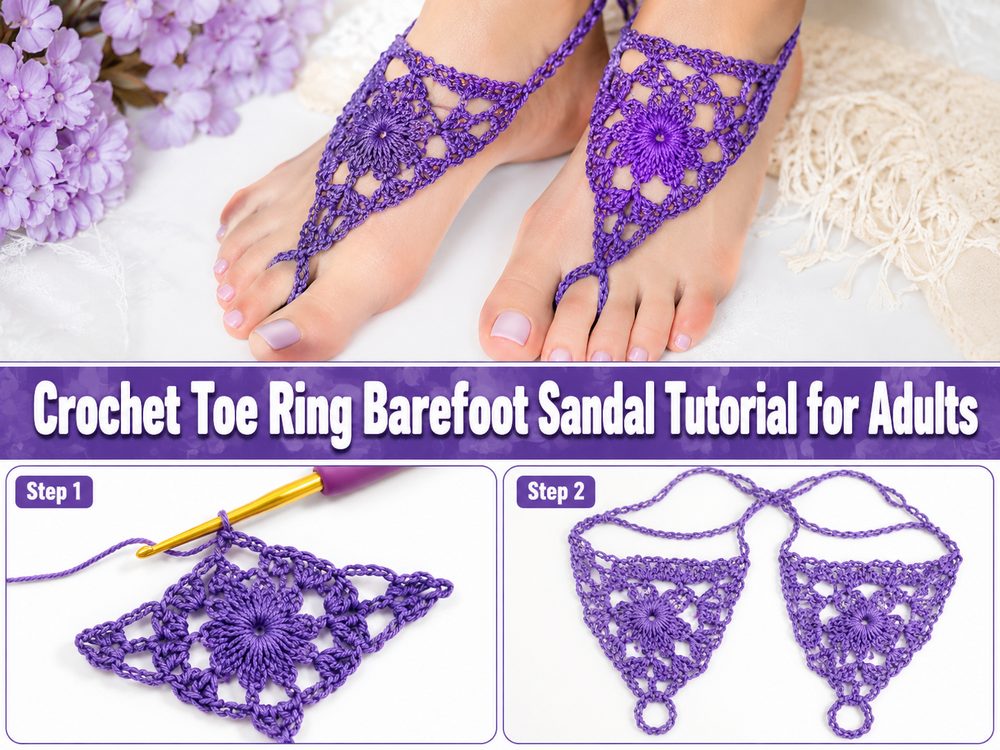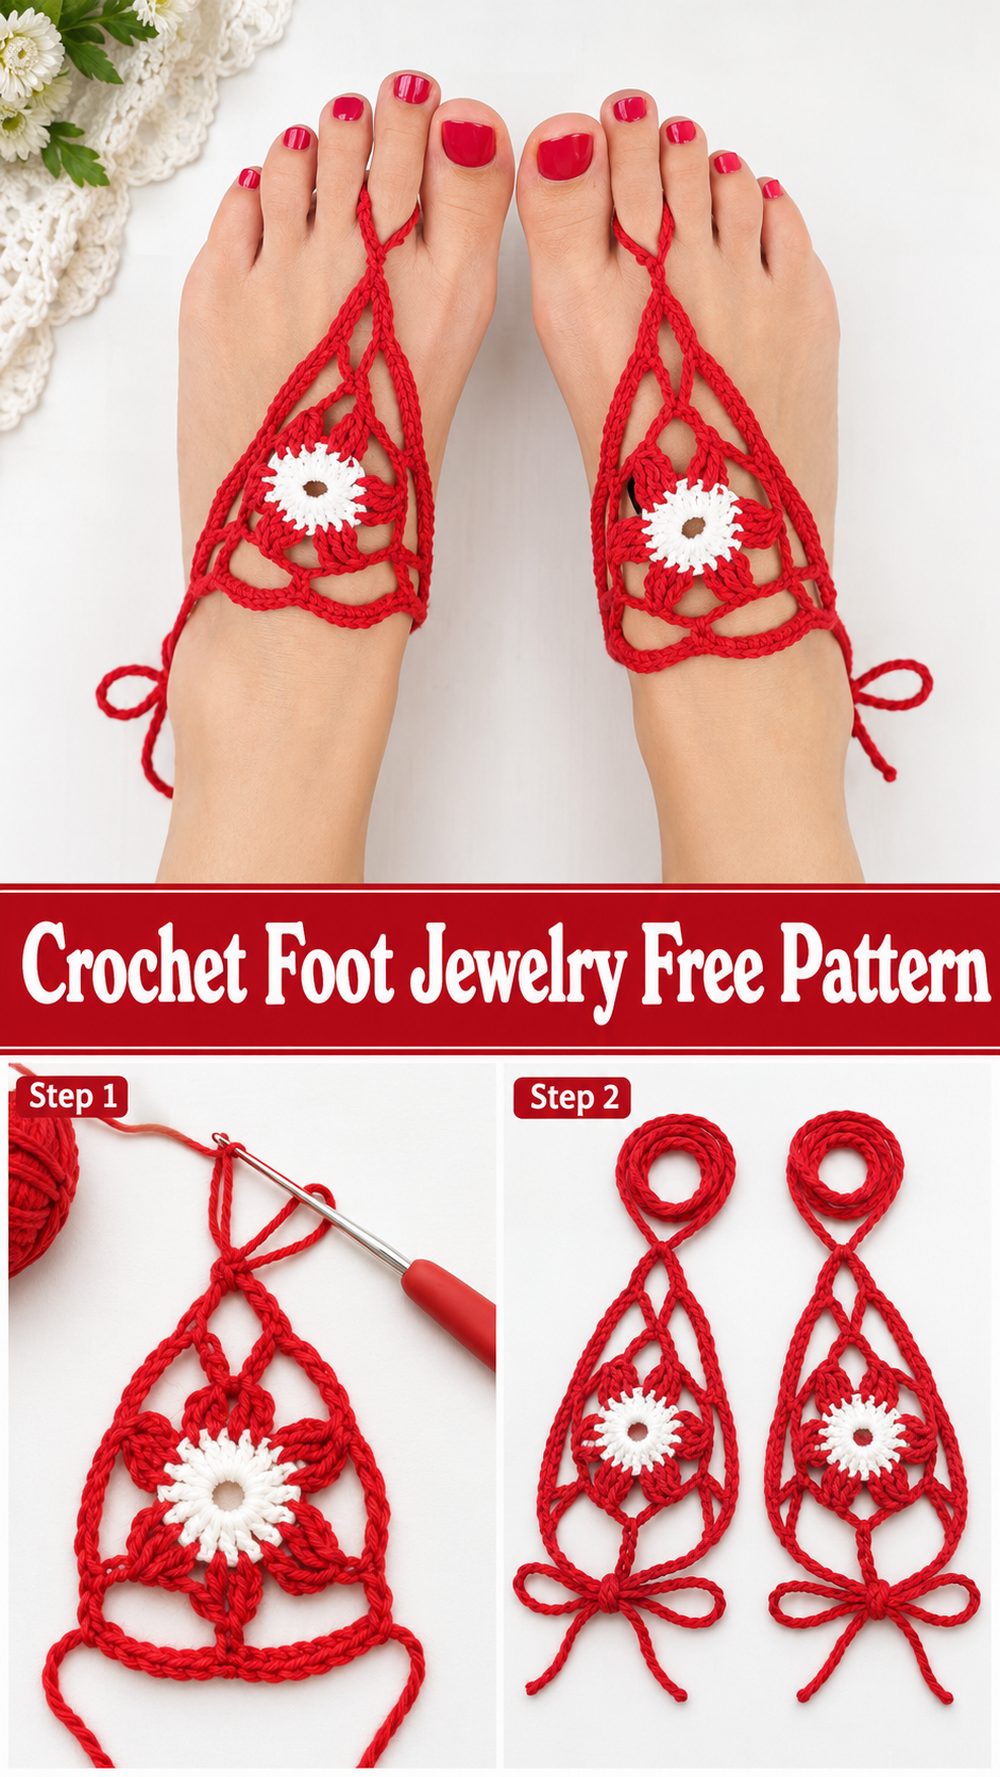
Crochet foot jewelry is such a fun project when you want to make something light, decorative, and a little different from everyday crochet. It gives your feet that soft boho look without feeling heavy, and it works beautifully for beach days, summer outfits, vacations, dancewear, or simple warm-weather styling. The YouTube tutorial I selected specifically teaches how to make crocheted toe jewelry and presents it as a tutorial project rather than just showing the finished piece, which makes it a better fit when you actually want to crochet one yourself. Because this type of accessory is small and wearable, it is also a lovely choice when you want a satisfying make that does not use much material and can be adjusted to suit your own foot and personal style.
Why You’ll Love This Project
This project is small, stylish, and easy to personalize. Since the selected tutorial focuses on crocheted toe jewelry, it is a nice way to make a wearable accessory that feels summery and decorative without taking on a large crochet project.
Materials Needed
- Yarn or crochet thread
- Crochet hook
- Scissors
- Yarn needle
- Measuring tape
- Beads, if you want to add a dressier touch
Use a yarn and hook size that matches your desired fit and texture.
Best Yarn for This Project
For crochet foot jewelry, a lightweight yarn or crochet thread usually works best. A fine cotton thread is especially lovely because it helps the piece stay neat, light, and comfortable in warm weather. Since this is a jewelry-style project, a slimmer material usually looks better than a bulky yarn. It gives the finished accessory a more delicate look and helps it rest more naturally on the foot. A smooth thread or fine yarn also makes it easier to show off the small details of the design.
Skill Level
Beginner-friendly to easy
The selected video is presented as a tutorial for making crocheted toe jewelry, so it suits crocheters who want a small wearable project with a clear decorative purpose. Because this kind of item is usually made from simple stitches and short sections, it works well for beginners who are comfortable with basic crochet handling and want to practice on something quick.
Size and Fit Guide
To get a comfortable fit, measure around the ankle and also check the distance from your ankle area down to the toe where the loop will sit. The piece should lie gently across the top of the foot without pulling too tightly when you move. You can adjust the size by changing the ankle band length, the center connection length, or the toe loop size. Before finishing, try it on and flex your foot a little so you can tell whether it feels secure and comfortable.
Stitches Used
The search result does not list the full stitch breakdown, so it is best to follow the tutorial closely for the exact stitch order and repeats used in the design. What is clear is that the project is taught as a crochet foot jewelry tutorial, so the construction is intended to be followed step by step from the video.
How to Make It
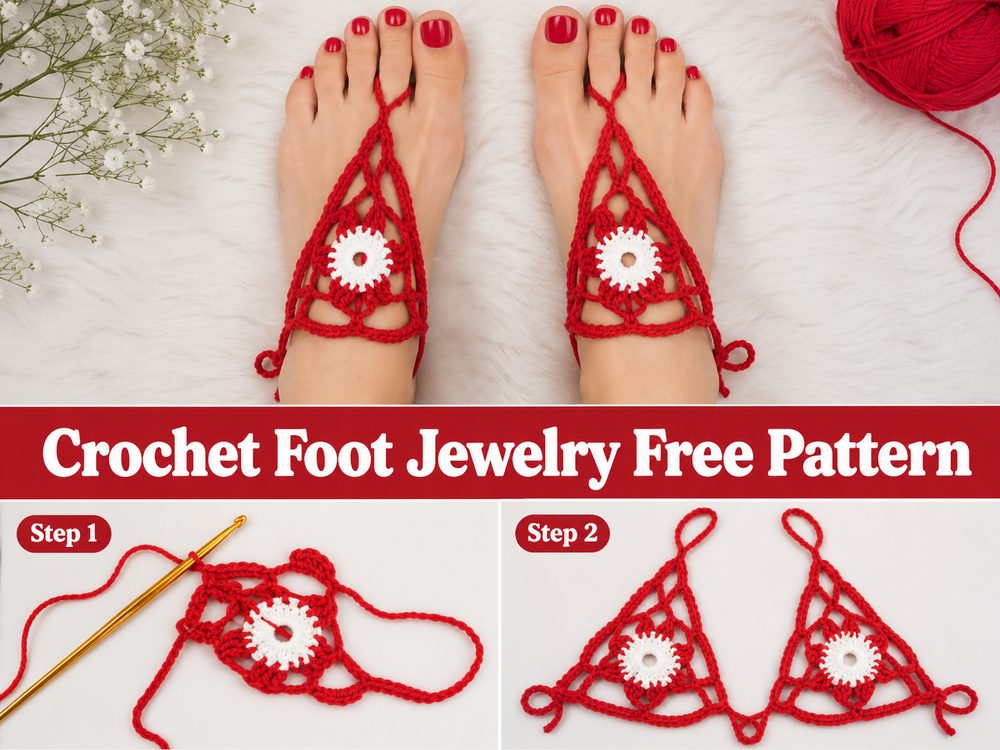
Step 1: Start the Ankle Section
Begin with the part that wraps around the ankle or sits near the top of the foot, depending on how the tutorial builds the design. This section forms the base of the piece, so take your time getting the fit right. You want it to feel neat and secure, but not so tight that it digs in when worn.
For jewelry-style crochet, keeping your tension even really helps. Since the project is small and visible, smooth stitches make a big difference in the final look.
Step 2: Build the Main Decorative Band
Work the main section in the stitch pattern shown in the tutorial. Because this is a foot jewelry design, the fabric usually looks best when it stays slim, airy, and decorative rather than thick. Keep checking that the piece lies flat and does not twist.
This is where the accessory starts to look more polished. Even a simple crochet pattern can look very pretty in a piece like this because the finished design sits so visibly on the foot.
Step 3: Create the Center Connection
Once the ankle section is ready, begin the connecting section that runs down the top of the foot toward the toe. This is what gives the project its foot jewelry look. The connection should be long enough to rest naturally across the foot without feeling strained when you point or relax your toes.
It helps to test this section before you fully finish it. Place the band where it will sit, stretch the connecting part toward your toe, and check how it falls. A comfortable length will look graceful and feel easy to wear.
Step 4: Make the Toe Loop
After the center connection is the right length, form the toe loop. This loop should fit comfortably around your chosen toe. It should feel secure enough to stay in place, but not tight. Since this part gets movement while walking or adjusting your foot, comfort matters a lot.
Try the loop on before fastening it permanently. A small adjustment here can make the whole piece feel much better once worn.
Step 5: Check the Full Fit
Before weaving in the ends, put the full piece on and see how it sits. The ankle band should feel comfortable, the center section should lie smoothly, and the toe loop should stay in place without pulling. Because crochet foot jewelry is decorative, you want it to look balanced as well as feel wearable.
If it feels too loose, shorten one of the sections slightly. If it feels tight across the top of the foot, add a little more length. Small changes can make a big difference on a project this size.
Step 6: Finish Neatly
Once you are happy with the fit, fasten off and weave in all ends carefully. Since this is a delicate accessory, neat finishing matters a lot. A tidy finish helps the piece look more polished and more like a true handmade accessory.
The final look should be light, decorative, and comfortable enough for occasional wear. The selected YouTube result specifically describes the project as a tutorial for crocheted toe jewelry, which matches this simple accessory-style construction.
Step 7: Make the Second Piece if You Want a Pair
If you want matching foot jewelry for both feet, use the first one as your guide. Match the ankle length, center connection, and toe loop size as closely as possible. Lay the first piece beside your work while making the second so both sides look balanced.
Helpful Tips
- Use lightweight thread for a more elegant jewelry-style finish.
- Test the toe loop before fastening off.
- Check the fit while your foot is relaxed and also while moving.
- Keep your stitches even so the accessory looks neat.
- Weave in ends carefully because small projects show finishing details clearly.
- If making a pair, finish the second piece soon after the first so your tension stays similar.
Common Mistakes to Avoid
- Making the toe loop too tight
- Making the ankle section too loose
- Using yarn that is too thick for a delicate design
- Forgetting to check the fit across the top of the foot
- Making the second piece a different length from the first
- Leaving ends untidy on such a visible accessory
Customization Ideas
This project is very easy to personalize. You can keep it simple and minimal, or make it more decorative with beads, tiny motifs, or a slightly wider ankle section. White or cream gives it a soft beachy look, bright colors feel playful for summer, and neutral shades create a relaxed boho style. You can also make the connecting section slightly longer or shorter depending on how you want it to sit on the foot.
Style Ideas
Crochet foot jewelry looks beautiful with beachwear, vacation outfits, dance costumes, summer dresses, and relaxed boho styling. It can also be a lovely handmade gift for someone who enjoys unusual accessories. For photos, special events, or warm-weather looks, this kind of crochet piece adds a soft handmade detail without feeling heavy.
Care Instructions
Hand wash gently if needed and lay flat to dry. Avoid pulling roughly on the toe loop or center connection. If you use cotton thread, you can lightly reshape the piece with your fingers while it is damp so it dries neatly.
Time Needed
This may take a short amount of time depending on your speed, yarn, and how decorative you want the design to be.
Conclusion
Crochet foot jewelry is a lovely little project when you want something quick, wearable, and a bit more unique than everyday crochet makes. It has that delicate handmade charm that feels perfect for summer, and it is easy to adjust to your own fit and style. You can keep it simple, add decorative touches, or make a matching pair for an extra special finish. It is the kind of small project that feels fun from start to finish.
FAQs
Is this beginner-friendly?
Yes. The selected YouTube result presents it as a crochet foot jewelry tutorial, which makes it suitable for crocheters looking for a guided wearable project.
What yarn works best for crochet foot jewelry?
A lightweight cotton thread or fine yarn usually works best for a neat and delicate look.
Can I adjust the size?
Yes. You can change the ankle band, the center connection, and the toe loop to fit more comfortably.
Is this meant for everyday walking?
It is better treated as decorative foot jewelry rather than supportive footwear.
Can I make a matching pair?
Yes. Just make the second piece with the same lengths and fit checks as the first one.