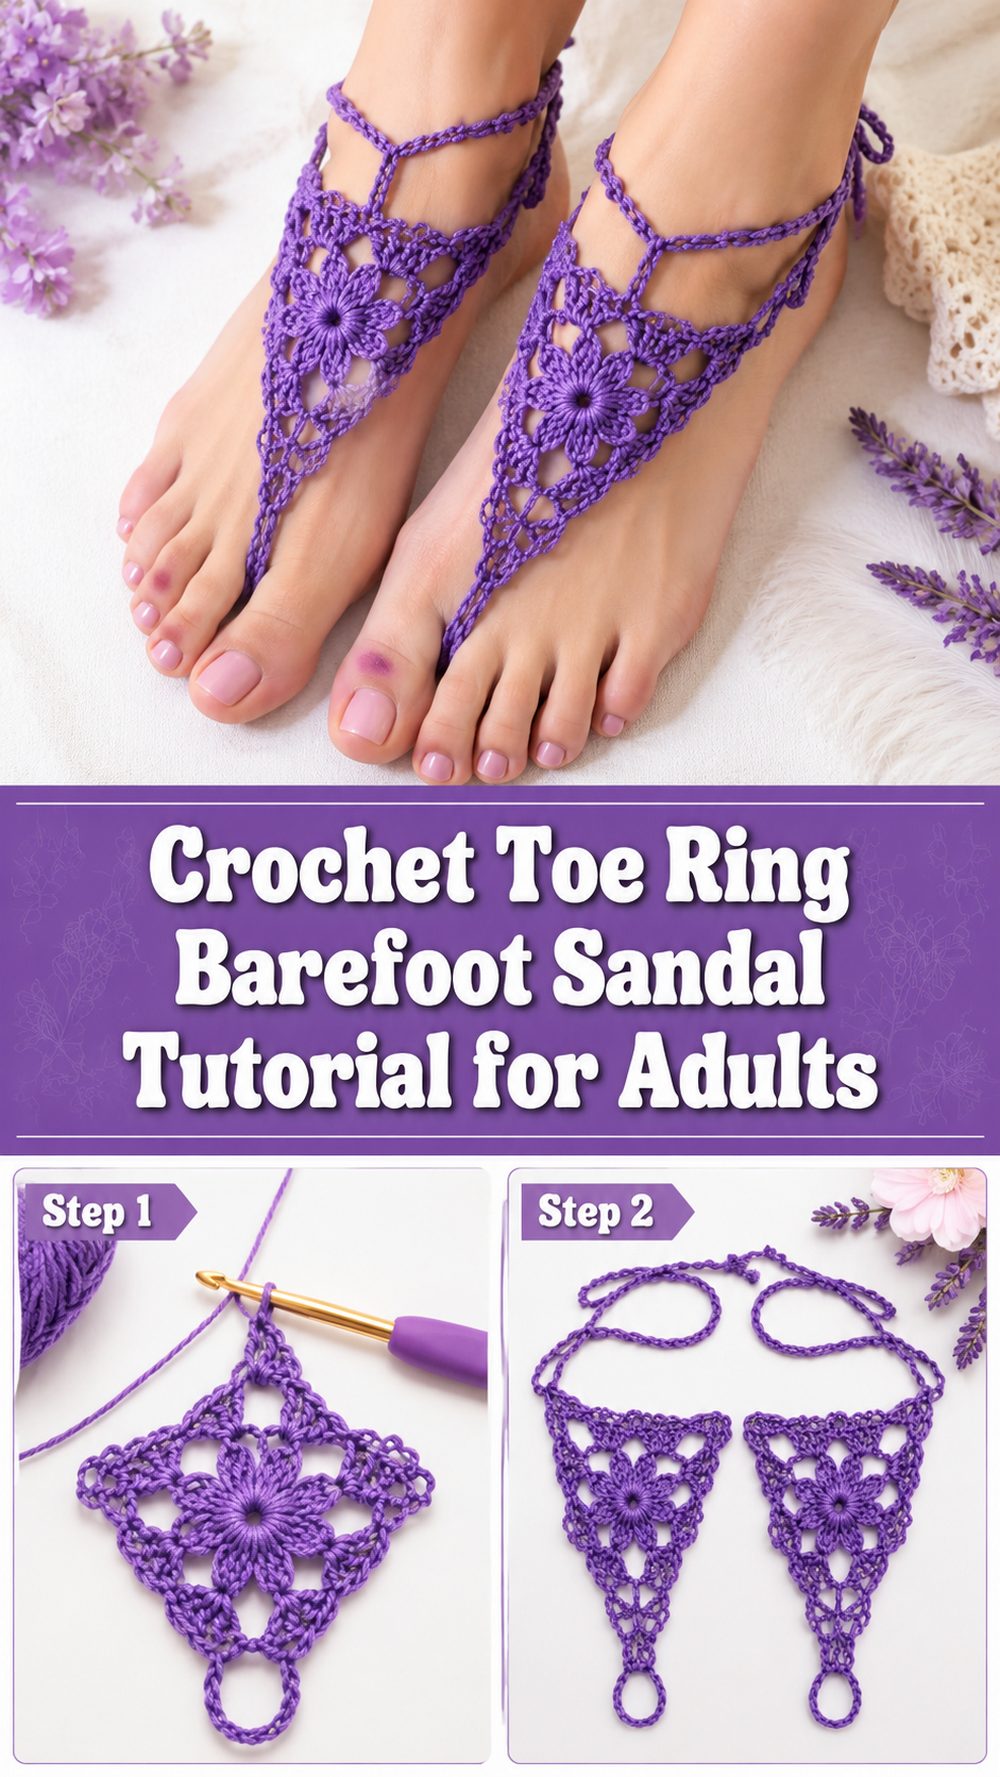
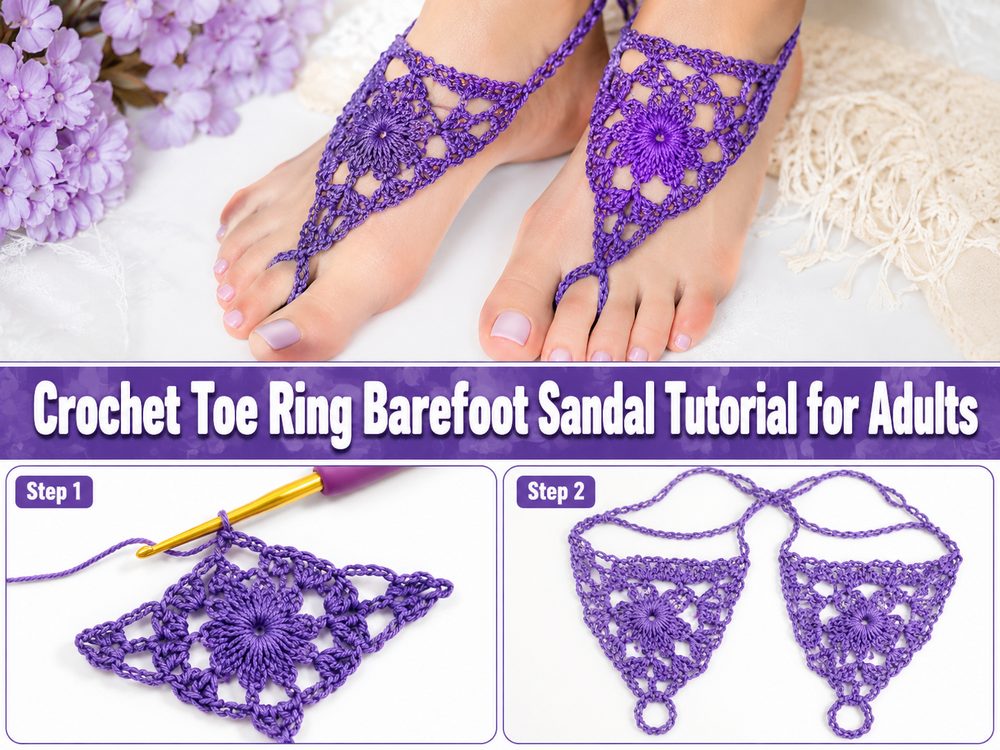
A crochet toe ring design is such a fun little project when you want something light, pretty, and handmade without committing to a big wearable. This style works like a barefoot sandal, with a small crocheted toe loop at the front and decorative stitching that travels up the foot. It is perfect for beach days, summer photos, dance outfits, spa looks, festivals, or simply for making something beautiful with a small amount of yarn. What makes this kind of project especially nice is that it feels creative and wearable at the same time. You can keep it simple and delicate, or dress it up with your favorite color choices and finishing touches. The tutorial I selected is an adult barefoot sandal design that uses slip stitch, chain, single crochet, double crochet, and a treble cluster, which gives the piece a decorative but approachable look.
Why You’ll Love This Project:
This project is quick, stylish, and very satisfying because it gives you that pretty finished look without needing a lot of yarn. It is also easy to personalize, and the open barefoot style makes it especially lovely for warm weather. The selected tutorial presents it as an adult barefoot sandal and uses a mix of basic stitches with a decorative cluster detail.
Materials Needed:
- Yarn
- Crochet hook
- Scissors
- Yarn needle
- Stitch markers if you like marking sections
- Measuring tape
Use a yarn and hook size that matches your desired fit and texture.
Best Yarn for This Project:
For a crochet toe ring or barefoot sandal, soft lightweight yarn is usually the nicest choice because it keeps the design comfortable and flexible on the foot. Cotton is a great option if you want the piece to feel breathable and hold its shape well. A bamboo blend can also work beautifully when you want more softness and drape. If you want a slightly dressier finish, a smooth crochet thread or finer yarn can give the project a delicate jewelry-like look. For hot weather, breathable fibers are usually the best match.
Skill Level:
Easy to intermediate.
This project is friendly for confident beginners who already know the basics and want to try a decorative wearable. The tutorial uses chain, slip stitch, single crochet, double crochet, and a treble cluster, so it helps if you are already comfortable changing between stitches.
Size and Fit Guide:
The easiest way to size a crochet toe ring is to measure as you go. Start by checking that the toe loop sits comfortably without feeling tight. After that, keep laying the piece over the top of the foot to see where the main design should sit. If you need a larger or smaller fit, add or reduce length in the chain sections, space out the decorative area a little differently, or adjust the tie length until it feels secure. Since this is a wearable accessory, trying it on during the process is the best way to get a good result.
Stitches Used:
- Chain
- Slip stitch
- Single crochet
- Double crochet
- Treble cluster
How to Make It:
Step 1: Start the Toe Ring
This project begins with the toe section, which is the part that sits around the toe and anchors the whole design. Make a small loop or ring section that feels secure but still comfortable. You do not want it to dig in, especially since feet can swell a little in warm weather. The front loop should rest neatly at the base of the toe and stay flat.
Step 2: Build the Decorative Center
Once the toe ring is made, begin working upward from that point to create the decorative section that sits on top of the foot. In the selected tutorial, the design uses a combination of basic stitches along with a treble cluster, so this central area likely has more texture and visual interest than a plain chain-only version.
As you build this area, focus on keeping both sides even. This part is what gives the piece its pretty finished look, so it helps to pause now and then, smooth it out with your fingers, and check that the shape is centered.
Step 3: Shape the Main Body
After the front section is established, continue extending the sandal so it reaches comfortably across the top of the foot. Depending on the exact part of the tutorial you follow, this shaping may come from chain spaces, worked stitches, or decorative clusters placed to widen the design. Keep checking the width and length against your foot rather than forcing an exact number.
This is one of those projects where a flexible fit matters more than strict counting. If your foot is narrower, you may stop sooner. If you want more coverage, continue the pattern until the piece looks balanced.
Step 4: Create the Foot and Ankle Connection
Once the main motif reaches the right point on the foot, add the section that helps hold the sandal in place. This may be done with chains, straps, or tie extensions. The goal is to keep the sandal secure while still looking light and graceful. If you want a true barefoot sandal look, longer ties can wrap softly around the ankle. If you prefer something simpler, shorter ties can still give you a neat finish.
When you try it on, the toe ring should stay put and the upper section should lie flat without twisting. If it shifts too much, the connection section may need to be shortened a little.
Step 5: Adjust the Fit
Before fastening off, try the piece on again. This is the best moment to correct anything. Check these three areas:
- the toe loop
- the center motif placement
- the tie or ankle section
The toe loop should feel secure but not restrictive. The center should sit nicely on top of the foot, and the ties should hold the piece without pulling it out of shape. Make any small adjustments now so the finished sandal feels comfortable enough to actually wear.
Step 6: Make the Second Piece
If you are making a pair, crochet the second one to match the first as closely as possible. Count your major sections, compare tie lengths, and lay both pieces side by side before finishing. Matching the pair well makes a big difference in the final look.
Step 7: Finish the Edges
Once the shape looks right, fasten off and weave in the ends carefully. Since this is an open accessory, loose ends can show more easily than on thicker crochet projects. A neat finish helps the piece look polished. If the stitches look a little uneven at first, gentle blocking can help the design settle into shape.
What the Finished Piece Should Look Like
The finished crochet toe ring should look light, decorative, and open, with a secure front toe loop and a pretty stitched section that extends over the top of the foot. Because the selected tutorial uses basic stitches plus a treble cluster, the final style should have a nice mix of structure and decorative texture rather than looking flat or plain.
Helpful Tips:
- Use cotton or another breathable yarn for a comfortable summer feel.
- Check the fit before finishing the ties.
- Keep your tension even so the piece lies flat.
- Make the second piece right after the first so both match better.
- Use stitch markers if you want to keep the center section symmetrical.
- Block the finished sandals lightly if you want a neater look.
Common Mistakes to Avoid:
- Making the toe loop too tight
- Forgetting to test the fit on your foot as you go
- Pulling the stitches too tightly in decorative sections
- Making one sandal longer than the other
- Leaving ties too short for a secure fit
- Weaving in ends poorly so they show or loosen later
Customization Ideas:
You can easily make this project your own. Try a soft neutral shade for a beachy look, or go brighter for a festival style. Add beads, a tiny flower, a picot edge, or a shell-style border if you want more detail. You can also make the center motif wider for more coverage or keep it narrow and delicate for a lighter jewelry-style finish. If you want the piece to feel extra airy for summer, use thinner yarn and looser tension.
Style Ideas:
This crochet toe ring design looks lovely with swimwear, maxi dresses, resort wear, or simple summer outfits. It can also be a cute accessory for beach weddings, dance costumes, or vacation photos. A handmade pair would make a sweet gift for someone who loves boho or beach-inspired accessories.
Care Instructions:
Hand wash gently in cool water if needed. Lay flat to dry and reshape the piece while it is still damp. Avoid high heat, especially if you used a delicate yarn or thread. Store flat so the toe loop and decorative center keep their shape.
Time Needed:
This may take a few hours depending on your speed, yarn, size, and stitch pattern.
Conclusion:
A crochet toe ring barefoot sandal is one of those small projects that feels really special once it is finished. It is pretty, wearable, and easy to personalize for your own style. You can keep it simple for everyday summer looks or dress it up for something more decorative. With a comfortable toe loop, a well-placed center design, and a fit that works for your foot, this project can turn into a lovely handmade accessory you will enjoy making and wearing.
FAQs:
1. Is this beginner-friendly?
Yes, for a confident beginner. It uses basic stitches, but the decorative treble cluster is easier if you already know the fundamentals.
2. What yarn is best for this project?
Lightweight cotton or a soft breathable blend is usually the best choice for comfort and shape.
3. Can I adjust the size?
Yes. You can change the toe loop, center length, and tie length to better fit your foot.
4. Can I make it for summer?
Yes, this is especially nice for summer because the design is open, light, and decorative.
5. How do I make it more comfortable?
Use soft yarn, avoid a tight toe loop, and try it on during the process so you can adjust the fit before finishing.