
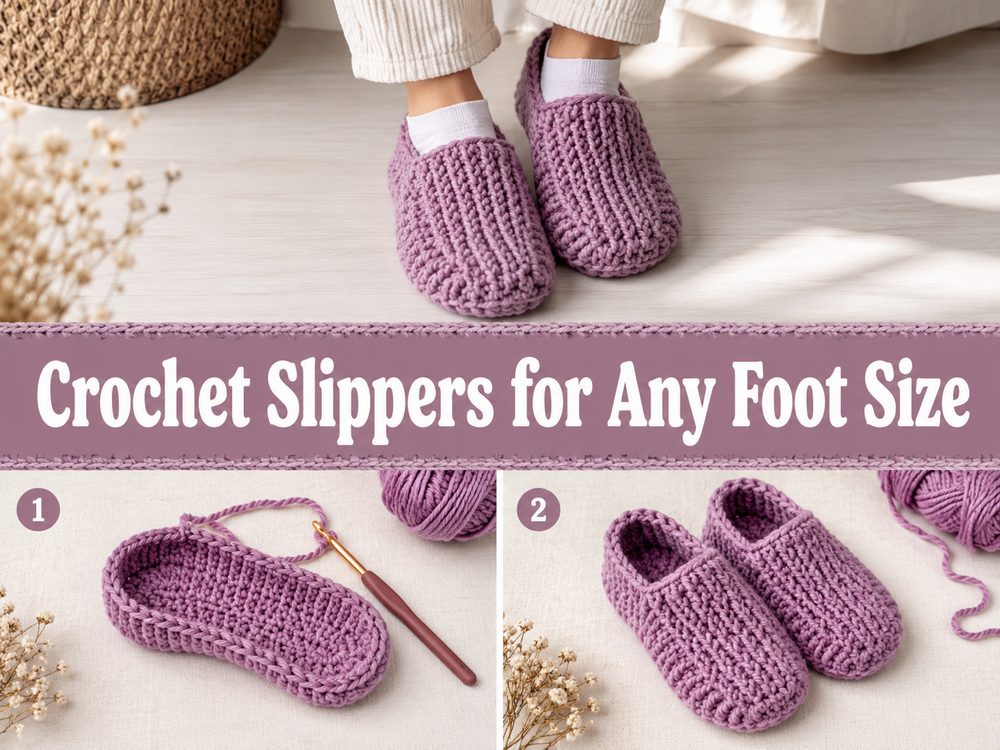
A good pair of crochet slippers is one of those projects that feels useful from the very first stitch. They are cozy, quick to work on, and perfect for wearing around the house when you want something soft and handmade on your feet. This tutorial teaches a simple slipper style that starts with a flat piece and turns into a comfortable house slipper with easy shaping and seaming. That makes it a lovely choice for beginners, but it is also satisfying for experienced crocheters who want a fast gift project. What I really like about this kind of slipper is how flexible it is. You can adjust the size as you go, make them snug or roomy, and choose yarn that feels warm and soft for everyday use. The selected tutorial is a beginner-friendly YouTube video focused on making home slippers in any size.
Why You’ll Love This Project
These slippers are fun because they do not feel complicated, but the finished result is still practical and gift-worthy. Since the tutorial is designed around an easy step-by-step method and can be adjusted for different foot sizes, it is a very approachable project when you want something useful and cozy without a lot of stress.
Materials Needed
- Yarn for cozy slippers
- Crochet hook
- Scissors
- Yarn needle
- Measuring tape
- Stitch markers if you like marking edges
- Optional non-slip finish for the sole
Use a yarn and hook size that matches your desired fit and texture.
Best Yarn for This Project
For everyday house slippers, a soft yarn with a little structure works best. A medium to bulky yarn can make the slippers feel warmer and help them work up faster. If you want a really soft indoor pair, acrylic or an acrylic blend is a practical choice because it is comfortable and easy to care for. If you want a slightly firmer slipper, a cotton blend can help the shape hold nicely, though it may feel less fluffy than acrylic. For extra coziness, look for yarn that feels smooth in the hand and not too stiff.
Skill Level
Beginner-friendly
This project is a nice choice for newer crocheters because the tutorial is presented as easy and adjustable for any size. The overall construction is simple, and the slipper shape comes from a flat piece plus joining, which is much less intimidating than working a heavily shaped shoe pattern.
Size and Fit Guide
This style is easy to customize. Measure the foot length first, then check the width around the widest part of the foot. As you crochet, compare your piece to those measurements instead of relying on fixed numbers. That is especially helpful here because the tutorial is described as suitable for any size. Keep checking the fit as you work. If the slipper looks too loose, reduce the width a little. If you want more coverage, make the piece slightly longer before joining.
Stitches Used
From the tutorial description and the overall style, this project appears to use a simple stitch pattern suitable for beginners, but exact stitch counts are not clearly available from the source I could access. Based on the construction, you will likely use:
- Chain
- Slip stitch
- A basic body stitch such as single crochet or half double crochet
- Seaming/joining stitches
Because the video details are limited in searchable text, I would keep your approach flexible and follow the stitch demonstration shown in the tutorial itself for the exact main stitch sequence.
How to Make It
Step 1: Start the Foundation
This slipper begins with a flat starting piece rather than a complicated shaped sole. That is one of the reasons it feels so manageable. Begin by making your foundation chain or starting row wide enough for the slipper body section shown in the tutorial. The idea is to create a flat base that can later be folded and joined into shape.
Since this is an any-size project, do not worry about matching someone else’s exact stitch count. Focus on your own foot measurement. Keep the starting section even and neat so the edges are easier to seam later.
Step 2: Build the Main Flat Piece
Once the foundation is done, continue working back and forth in rows to form a rectangle or flat panel. The YouTube results available for this tutorial family point to a simple rectangle-style slipper method that is made flat first and then shaped through sewing or joining.
Try to keep your tension steady here. If your rows start pulling inward, the slipper may end up too tight across the foot. If they stretch outward too much, the fit may feel sloppy. A smooth, even fabric usually gives the nicest finish for house slippers.
Step 3: Check the Fit Before Joining
Before turning the flat piece into a slipper, wrap it around the foot or hold it against the foot to see how it will sit. This is the most helpful moment for adjusting the size. You can add more rows for extra length or stop early if you want a snugger fit.
Pay attention to two areas:
- the toe area, where the front will be closed or shaped
- the heel area, where the back seam will help the slipper stay on
A quick fit check now saves you from redoing seams later.
Step 4: Shape the Toe
The front part of the slipper is created by bringing one section of the flat piece together to form the toe. In rectangle-based slipper tutorials, this usually means folding the fabric and seaming the top front area so it curves gently over the toes. The result is a simple house slipper shape without complicated increases and decreases.
When you seam the toe, do not pull too tightly. A tight toe seam can make the slippers uncomfortable. You want enough structure to hold the shape, but still enough ease that the toes can move naturally.
Step 5: Join the Heel
After the toe is formed, join the back section to create the heel. This closes the slipper and gives it that easy slip-on shape. The searchable source material connected to this style specifically mentions sewing the back section after measuring the foot and making the rectangle, which lines up with the overall construction here.
Try the slipper on once the heel is joined. If it slips off too easily, you may want a tighter seam next time or a slightly narrower body. If it feels too snug, make the second slipper with a touch more width.
Step 6: Finish the Edges
Once the slipper shape is complete, tidy the opening edge. You can leave it plain for a clean look or add a simple finishing round for a neater top edge. A small border can help the opening hold its shape better and can also make the pair look more polished.
Weave in all ends carefully, especially around the toe and heel seams since those areas get the most wear.
Step 7: Add Comfort Details
For indoor use, you may want to add a non-slip touch to the bottom. Some makers use a grippy fabric sole, while others add small dots of non-slip puff paint. This kind of finishing detail is often suggested for simple crochet slippers made from flat construction because it makes them more practical on smooth floors.
When finished, the slippers should look soft, simple, and easy to wear, with a comfortable foot-hugging shape made from a flat crocheted piece that has been folded and joined into form. That simple construction is the real charm of this project.
Helpful Tips
- Measure your foot before you begin instead of guessing.
- Check the fit before seaming the toe and heel.
- Keep your tension even so both slippers match well.
- Make the second slipper right after the first while the size is fresh in your mind.
- Use a yarn needle for neat seams.
- Add a non-slip sole finish if you will wear them on smooth floors.
Common Mistakes to Avoid
- Making the starting piece too short for your foot
- Pulling the toe seam too tightly
- Forgetting to compare the width to your actual foot
- Using a hook that makes the fabric too loose and floppy
- Making one slipper and then forgetting to copy the same measurements for the second
- Skipping the finishing step and leaving loose ends in high-stress areas
Customization Ideas
You can make these slippers feel more personal in lots of simple ways. Try a solid neutral color for a classic house slipper look, or use bright stripes if you want something cheerful. Add a contrast edge around the opening, a small button detail, or a little bow for a softer style. If you like more coverage, make the flat piece a bit taller so the finished slipper sits higher on the foot. You can also make them snugger for a sock-like fit or a little roomier for easy lounging.
Style Ideas
These slippers are perfect for slow mornings, gift baskets, guest rooms, and holiday handmade presents. They also pair nicely with lounge sets, pajamas, or cozy cardigans at home. A matching pair in a favorite color can make them feel extra special, especially if you are making them as a gift.
Care Instructions
Hand washing is the gentlest option, especially if your slippers have delicate seams or soft yarn. Use cool or lukewarm water, squeeze out excess moisture gently, and lay them flat to dry. Avoid high heat, since it can change the shape or texture of the yarn.
Time Needed
This may take a few hours depending on your speed, yarn, size, and stitch pattern.
Conclusion
If you want a crochet project that is useful, cozy, and not too fussy, these slippers are a lovely one to try. The construction is simple enough to feel relaxing, and the adjustable sizing makes it easy to shape them for your own feet. You can keep them plain and practical or dress them up with color and edging. Either way, they are the kind of handmade project that feels good to make and even better to wear.
FAQs
1. Is this beginner-friendly?
Yes. The selected tutorial is presented as beginner-friendly and adjustable, which makes it a good project for newer crocheters.
2. Can I adjust the size?
Yes. This slipper style is intended to work for different foot sizes by measuring and checking the fit as you go.
3. What yarn is best for crochet slippers?
A soft medium or bulky yarn is a nice choice for warmth and comfort. Acrylic or a cozy blend works well for indoor slippers.
4. How do I make them more comfortable?
Use a soft yarn, avoid tight seams at the toe, and check the fit before finishing both slippers.
5. Can I add a non-slip sole?
Yes. A simple grippy finish on the bottom can make them safer for indoor floors, and this is commonly suggested with this flat-construction slipper style.