Plaid shoulder bags can look similar at first glance, but the construction choices behind them are surprisingly varied. Some tutorials use crisp two-color checkerboards, others create a softer three-color gingham effect, and one takes “plaid” in a more textured, color-blocked direction. The bags also differ in strap shape, body depth, lining, pockets, closures, and how the colorwork is assembled.
This collection is organized around decisions that affect the finished bag rather than color alone: how the fabric holds its shape, how the strap sits on the shoulder, what happens at seams, and whether the interior needs extra finishing. The result is a mix of compact purses and larger shoulder totes, with original tutorials available for the exact construction details.
Quick List
- Crochet One-Piece Checkerboard Shoulder Bag
- Crochet Fabric-Lined Gingham Flap Shoulder Bag
- Crochet Magnetic-Button Checkerboard Shoulder Purse
- Crochet Tapered-Strap Checkerboard Shoulder Tote
- Crochet Three-Color Gingham Shoulder Tote
- Crochet Adjustable-Size Checkerboard Shoulder Bag
- Crochet Long-Strap Checkerboard Side Bag
- Crochet Pocketed Checkerboard Shoulder Tote
- Crochet Wide-Strap Checkerboard Shoulder Bag
- Crochet Textured Plaid Shoulder Tote
- Crochet Cherry-Accent Checkerboard Shoulder Bag
- Crochet Base-Panel Checkerboard Shoulder Tote
- Crochet Seamed Gingham Shoulder Tote
- Crochet Decreased-Top Checkerboard Shoulder Tote
Pick the Grid Style Before You Pick the Yarn
A two-color checkerboard and a three-color gingham bag need different color planning. Checkerboards rely mainly on alternating blocks, so the contrast between the two yarns determines how graphic the finished grid appears. Gingham usually needs a light, medium, and darker relationship so the color changes suggest overlapping bands rather than simple alternating squares.
That distinction becomes especially important with close-value colors. Three yarns can look different in their skeins yet merge once worked into small blocks. Before starting a large shoulder bag, arrange the colors together in daylight or make a small colorwork sample. If you specifically want tartan-like intersecting lines, inspect the finished tutorial first; many crochet videos labeled plaid or checked actually produce gingham, checkerboard, or broader plaid-inspired effects.
Match the Fabric to the Way the Shoulder Strap Works
A bag’s strap can change more during use than its colorwork. Long crochet straps have more opportunity to lengthen, while broad or tapered straps spread the visual and physical transition into the bag body differently from narrow handles. Fiber, stitch structure, tension, and how the strap attaches all affect this behavior.
Before permanently attaching a shoulder strap, compare its drop with a bag you already find comfortable. Also inspect the attachment area for bulk. If you plan to add a lining, decorative border, or hardware, several layers may converge at the same point. For a wider tote, handle placement should also be checked against the checker columns: a geometric fabric makes an off-center strap easier to notice than a solid fabric would.
Plan the Inside Before the Exterior Is Completely Finished
Some of these tutorials intentionally include interior or closure details while others concentrate on the crocheted shell. This matters because a lining, pocket, flap, zipper, or magnetic button can affect the upper edge and final assembly. Thisfairymade includes fabric lining, a flap, and a button; Let’s All Crochet discusses optional lining and a pocket; Kane Crochet uses a magnetic button and metal loops.
If you want to add features that are not part of your chosen tutorial, finish enough of the bag to confirm its actual shape before cutting lining fabric. For closures, decide even earlier. An opening that works perfectly as an open tote may need different reinforcement or alignment once hardware is introduced.
1. Crochet One Piece Checkerboard Shoulder Bag
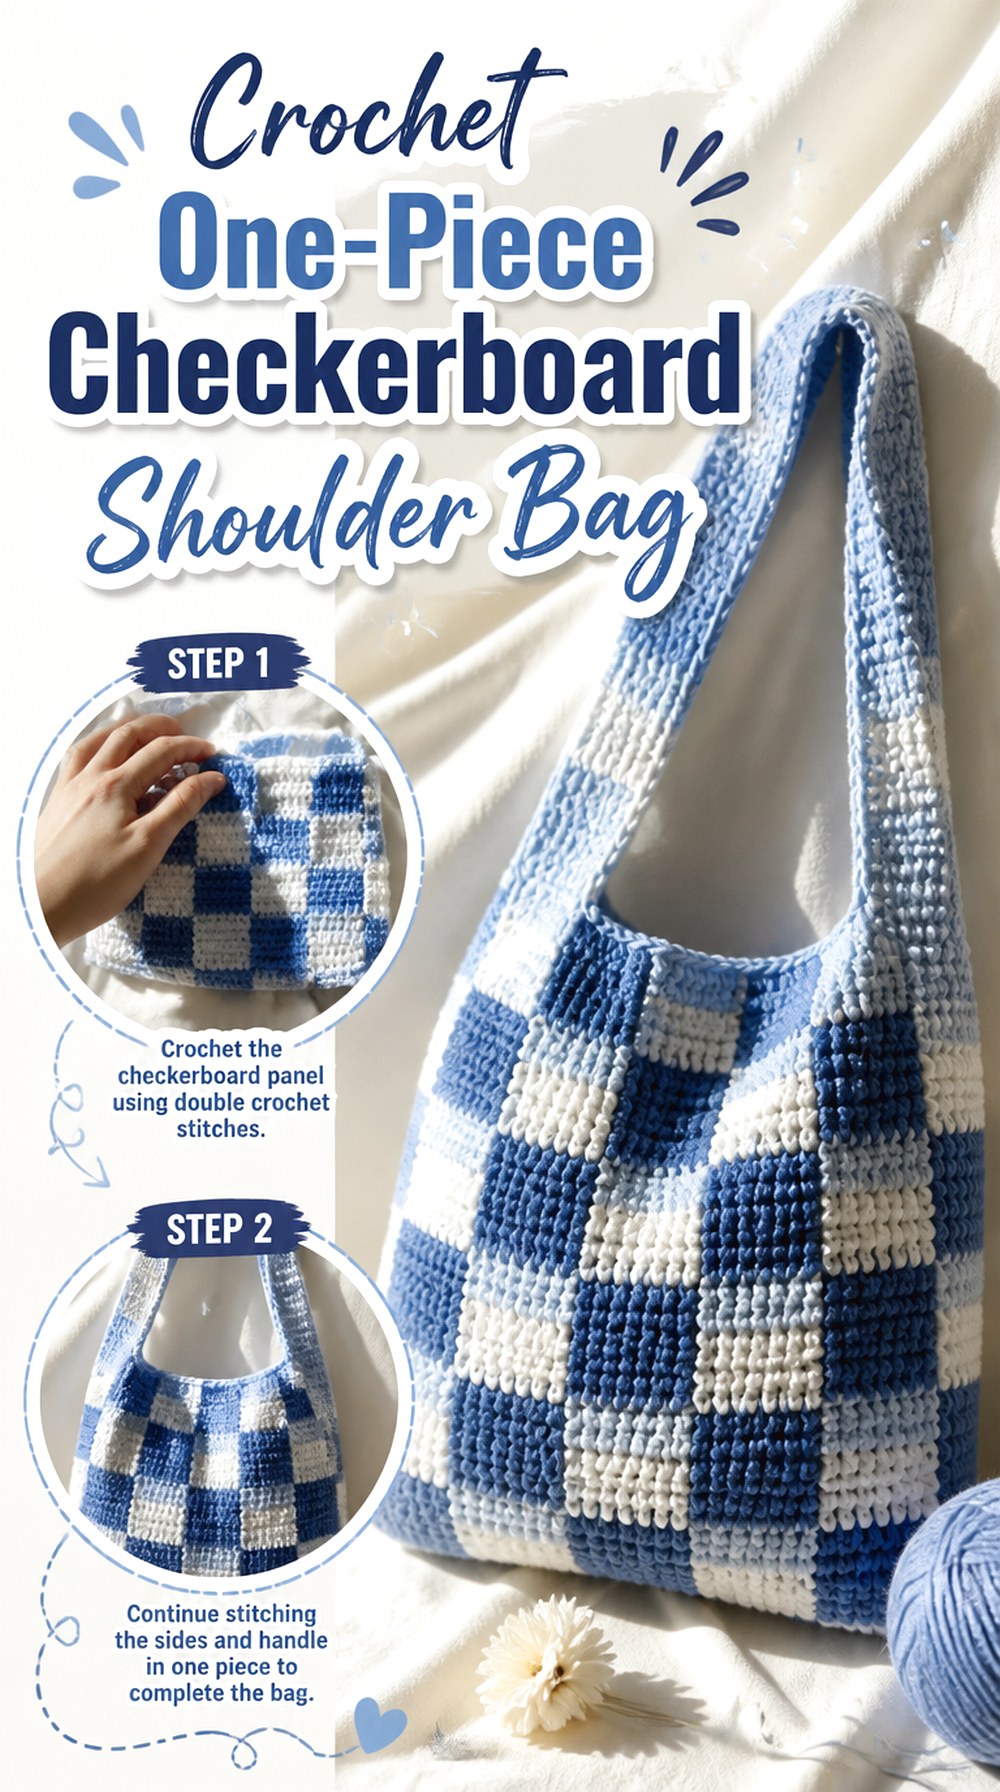
This compact checkerboard design is useful when you want the graphic look without assembling separate front and back panels. VivCrochets builds the bag largely as one piece, with the base, body, and strap forming a coordinated construction and very little sewing. That keeps the blue-and-white example visually clean and reduces the number of side seams where checked blocks could become misaligned.
The body is wider than it is tall, so it reads more like a casual shoulder purse than a deep shopping tote. The tutorial uses tapestry-style color management and shows the finished bag clearly, making it a strong choice for studying how the checks continue through a simple silhouette.
Fewer Seams Put More Attention on Color Changes
A one-piece approach removes some assembly checkpoints, but the trade-off is that uneven color changes remain visible across a continuous fabric. Periodically lay the work flat and view several checker rows together. If one section is beginning to lean or stretch, correcting the tension earlier is more useful than hoping a border will hide it later.
A Wide, Shallow Body Can Limit Downward Distortion
A shoulder bag naturally experiences downward pull when it contains belongings. A wider silhouette distributes the visual pattern differently from a narrow, deep bag, so elongated checks can be particularly noticeable. If you substitute yarn, compare the hanging fabric with the creator’s result rather than relying only on the flat dimensions of a swatch.
Keep Any Added Lining Independent of the Strap Shape
If you decide to line this version, fit the lining to the completed body rather than extending it automatically into the crocheted strap. Keeping the two decisions separate makes it easier to preserve the original shoulder opening and avoid adding unnecessary thickness where the strap flows into the bag. Tutorial
2. Crochet Fabric Lined Gingham Flap Shoulder Bag
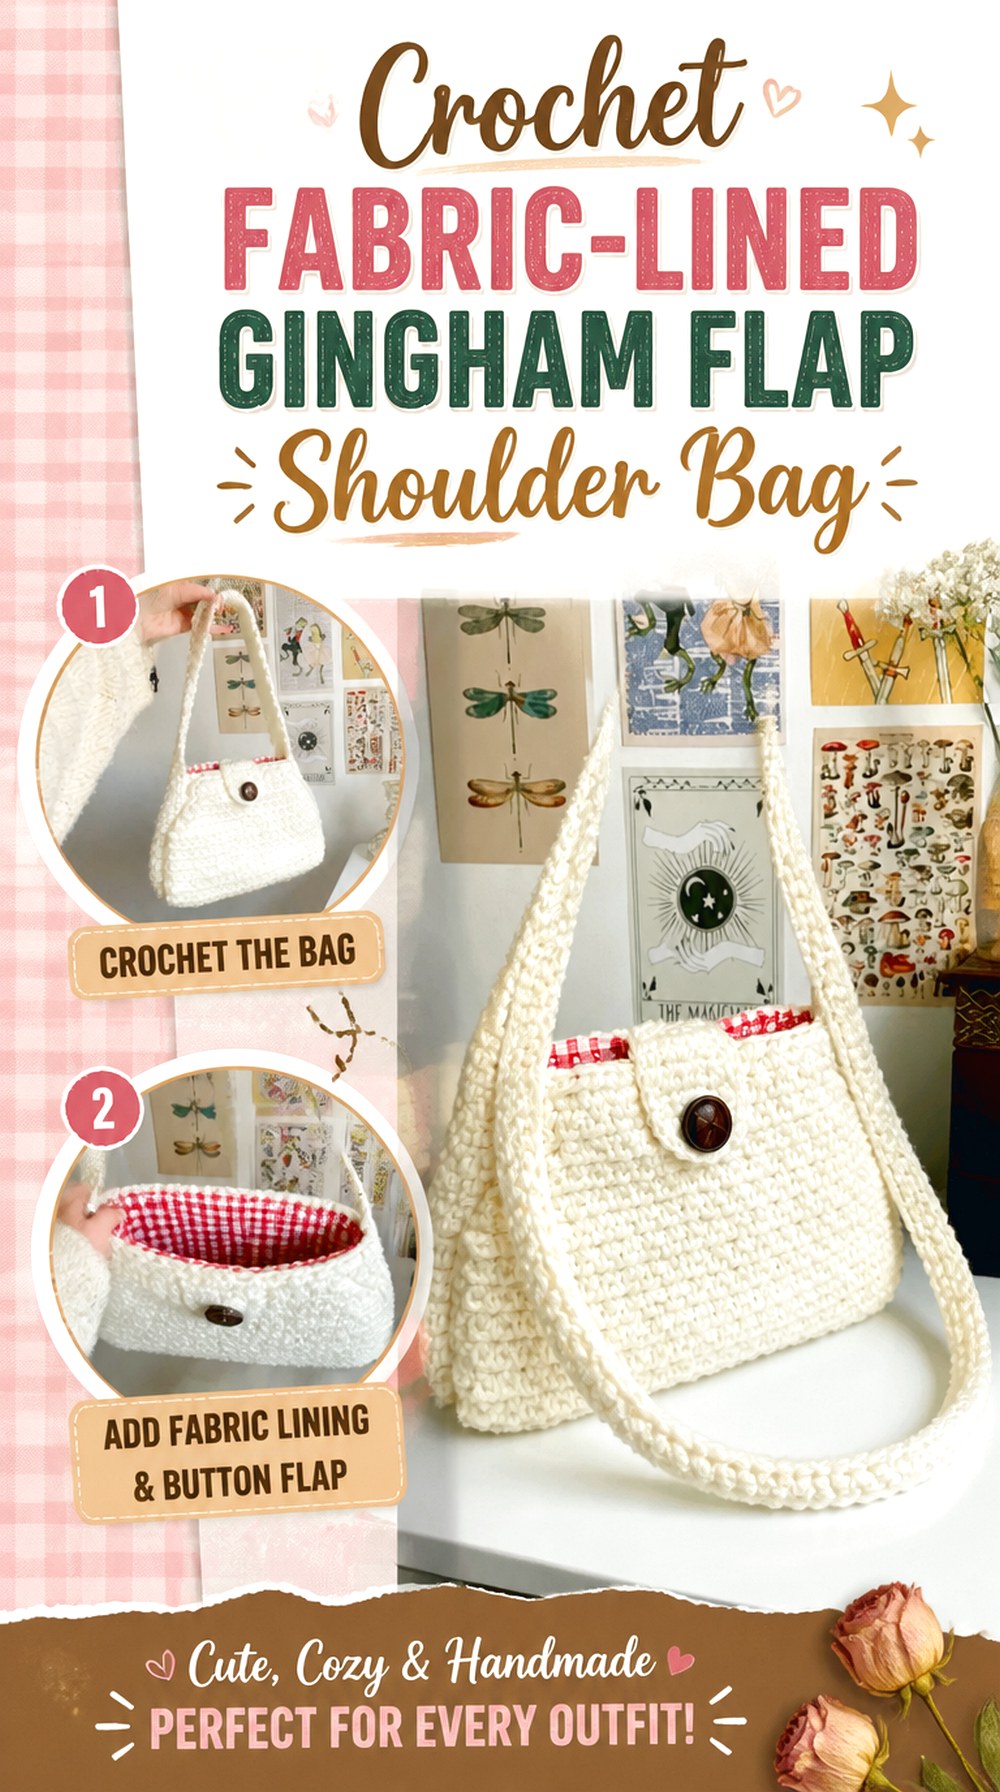
Thisfairymade takes the checked-bag idea beyond the crocheted exterior by combining a gingham-style shoulder bag with fabric finishing. The tutorial covers moss stitch, separate bag work, a strap, fabric panels, a bottom lining section, assembly, a flap, and a button. That gives this project a noticeably more finished purse-like character than an open checkerboard tote.
Choose this direction when the inside of the bag matters almost as much as the outside. The lining can conceal the reverse side of the crochet and provide a smoother interior, while the flap changes how the opening behaves. It is also one of the better references here for readers interested in mixing crochet and sewing in a single accessory.
Fit the Fabric to the Crocheted Shell, Not the Other Way Around
Crochet can change dimensions as it is handled and assembled, so cutting all lining pieces too early can create unnecessary fitting problems. Use the completed or nearly completed shell as the practical reference. Check width, depth, and how the bottom sits before committing to the final fabric shape.
The Flap Changes the Top Edge From Decorative to Functional
Once a flap and button interact with the opening, upper-edge alignment matters more. If you add extra borders or change the bag height, confirm that the flap can still lie naturally over the front without pulling the opening inward. Make this decision before adding decorative finishing that could interfere with the closure area.
A Lined Strap Creates Different Bulk Than an Unlined One
This tutorial includes substantial sewing work around the bag and strap. When adapting the materials, notice how many layers meet at each attachment point. Thick crochet, lining fabric, and seam allowances can produce a very different shoulder feel from a simple crocheted strap, especially near the sides of a small purse.
Original Tutorial and Creator Credit
Creator: thisfairymade
3. Crochet Magnetic Button Checkerboard Shoulder Purse
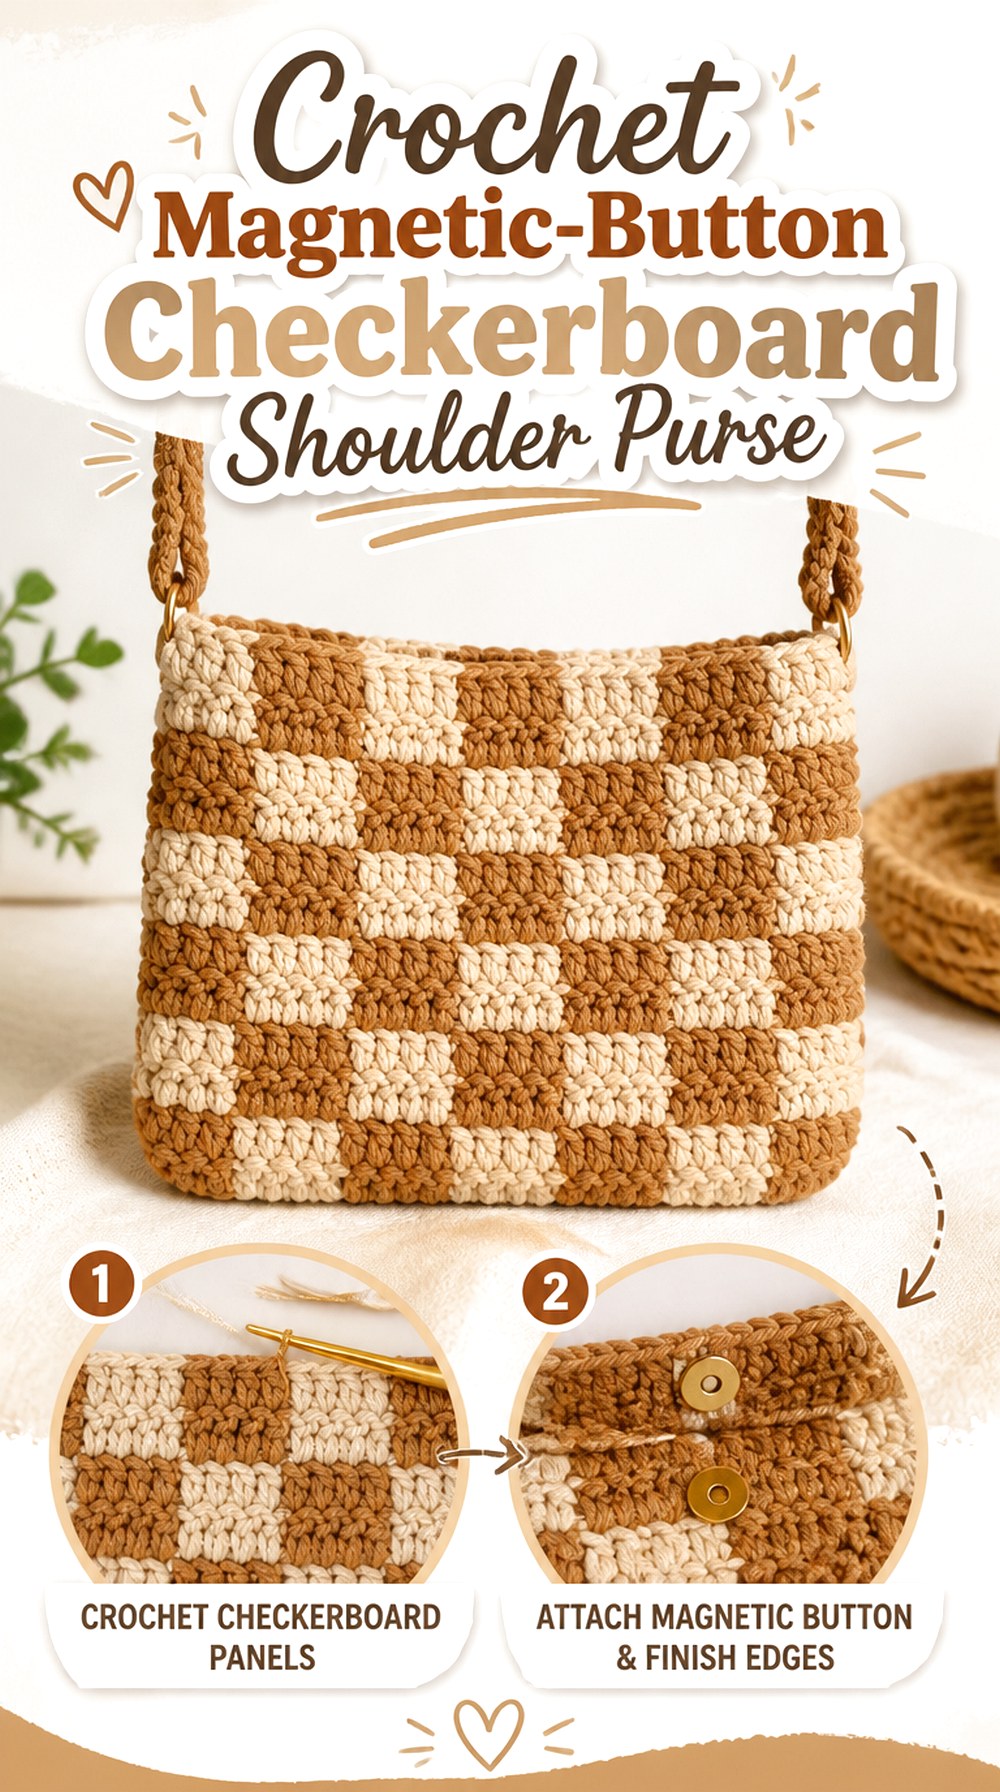
Kane Crochet’s design turns the checkerboard into a compact purse with more defined hardware. The video includes the crocheted body and strap, plus a magnetic button and metal loop rings. That combination makes the project meaningfully different from bags where a long yarn strap is simply sewn directly to the body.
The finished shape is relatively compact and has visible depth rather than reading as a completely flat pouch. The closure is also central to the design instead of an optional afterthought. This makes the tutorial worth considering when you want a checked shoulder purse that feels more structured and intentionally finished at the opening.
Hardware Makes the Strap Attachment a Design Feature
Metal rings create a clear transition between the crochet and strap. If you substitute different hardware, compare the ring opening with the thickness of the crocheted attachment area before finishing it. Oversized rings can visually overpower a small purse, while hardware that is too tight can compress the yarn unnecessarily.
The Magnetic Closure Needs an Even Upper Edge
A magnetic button works best when the two sides of the opening can meet without twisting. Before placing the closure, hold the bag in its natural hanging position and check that the front and back edges align. This is a better checkpoint than judging the opening only while the bag is lying flat.
Compact Checks Need Proportionate Color Blocks
On a smaller purse, each check occupies a larger portion of the visible front. If you substitute substantially thicker yarn, the grid can quickly become coarser than the bag body can visually support. Sample one or two color blocks first and judge them against the overall purse scale you actually want.
Original Tutorial and Creator Credit
Creator: Kane Crochet
4. Crochet Tapered Strap Checkerboard Shoulder Tote
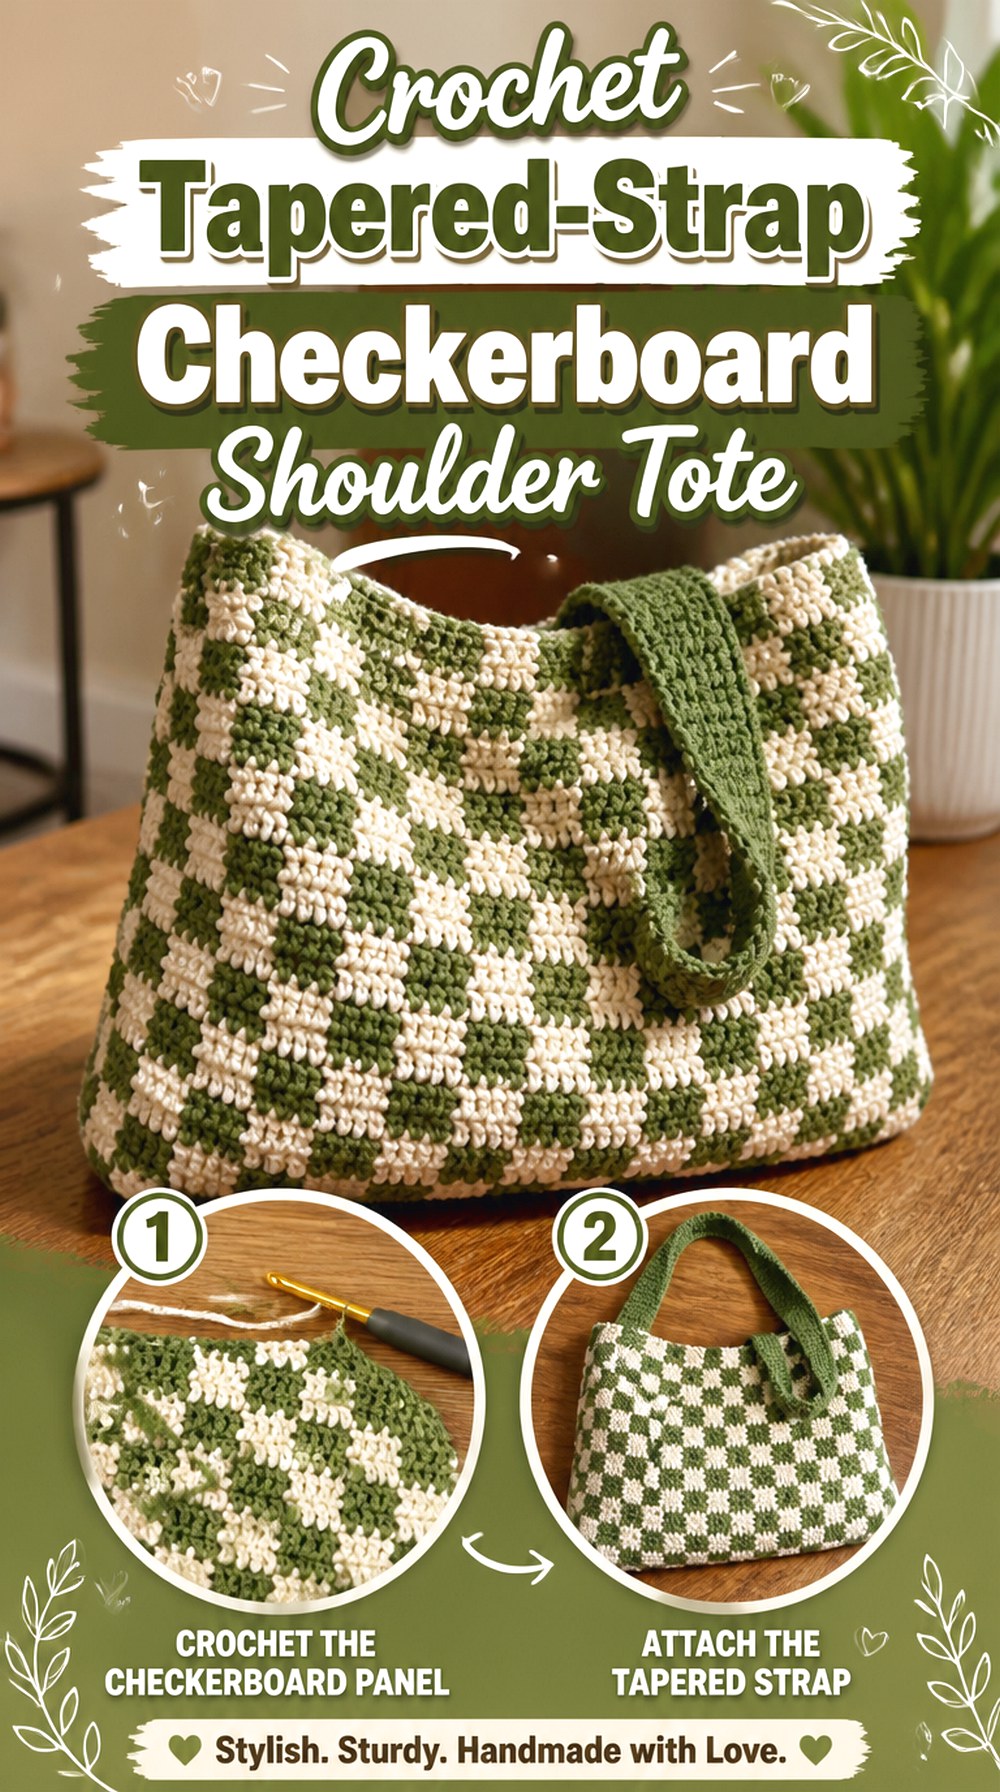
Instead of finishing a checked tote with two uniformly narrow straps, MitchesGetStitches shapes the upper portion into tapered handles. The video works through a defined base, a checkerboard body in continuous rounds, strap placement, decreasing, and a final border. Those transitions give the bag a more integrated silhouette than handles simply attached after the body is complete.
The taper also draws the eye upward from the square grid. If you like a bold checkerboard but want the top of the bag to feel less boxy, this construction is particularly relevant. Because the body continues in rounds, it also provides a different color-management challenge from flat-panel designs.
Tapering Needs to Stay Centered Over the Checker Grid
Geometric fabric makes asymmetry easy to notice. As the upper portion narrows, compare both sides rather than focusing on only one strap. The center of each handle should remain visually balanced against the bag body, particularly if your tension or yarn substitution changes the width of the checks.
Continuous Rounds Need Periodic Alignment Checks
A color offset that appears small at the beginning of a round can repeat through multiple checker rows. Lay the tote flat from time to time and inspect both faces. You are checking whether the vertical rhythm of the blocks remains intentional, not trying to force every design into a universal count.
The Final Border Can Change the Feel of the Opening
A border may seem decorative, but on a shoulder tote it can also alter firmness around the top and handles. If you change yarn or add an interior layer, make sure the completed opening still flexes enough for comfortable use without becoming excessively loose or bulky.
Original Tutorial and Creator Credit
Creator: MitchesGetStitches
5. Crochet Three Color Gingham Shoulder Tote
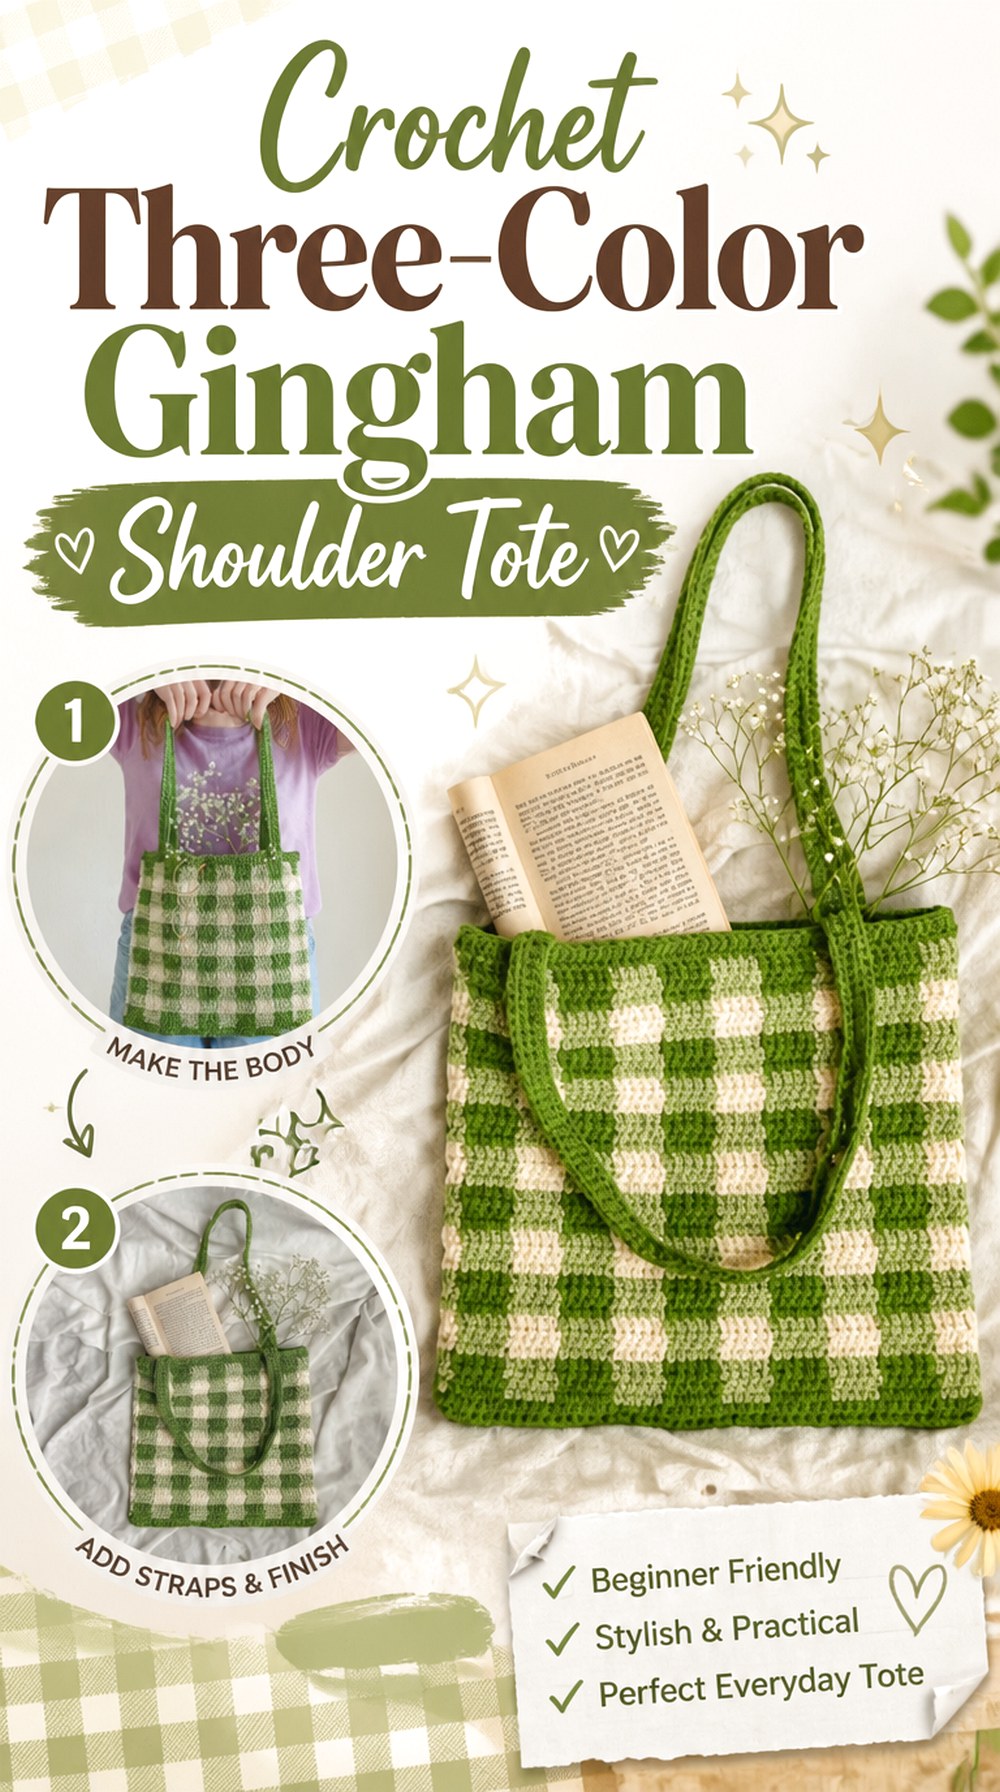
HayHay Crochet’s gingham tote is the clearest traditional gingham option in this group. The demonstrated palette uses two greens with ivory, creating the light-medium-dark relationship that gives gingham more depth than a simple two-color checkerboard. The finished tote has a square body and two long straps that are shown worn over the shoulder.
This is a useful project when the textile effect itself is the priority. The bag has enough surface area for repeated gingham blocks to establish a recognizable rhythm, but its basic tote silhouette does not compete with the colorwork. Separate straps also let you evaluate the finished body before final attachment.
Three Yarn Values Matter More Than Three Random Colors
For a convincing gingham effect, select colors by relative lightness as well as hue. Two green yarns that look distinct in the skein can become nearly identical when surrounded by cream. A quick grayscale photo of the three yarns can help reveal whether there is enough value difference for the intended overlap effect.
Strap Placement Can Be Checked After the Grid Is Established
Because the body gives you a strong set of vertical and horizontal references, use the checker columns when positioning separate straps. Mark both sides temporarily before sewing. This keeps the handles centered not only against the outer edges but also against the visual geometry of the gingham.
Watch for Carried Color Showing Through Pale Blocks
Gingham requires frequent color management. With a pale neutral, a darker strand carried behind or through the work may become more obvious than expected. Sample the exact yarn combination first so you can evaluate show-through, thickness, and the appearance of the interior before committing to the full tote.
Original Tutorial and Creator Credit
Creator: HayHay Crochet
6. Crochet Adjustable Size Checkerboard Shoulder Bag
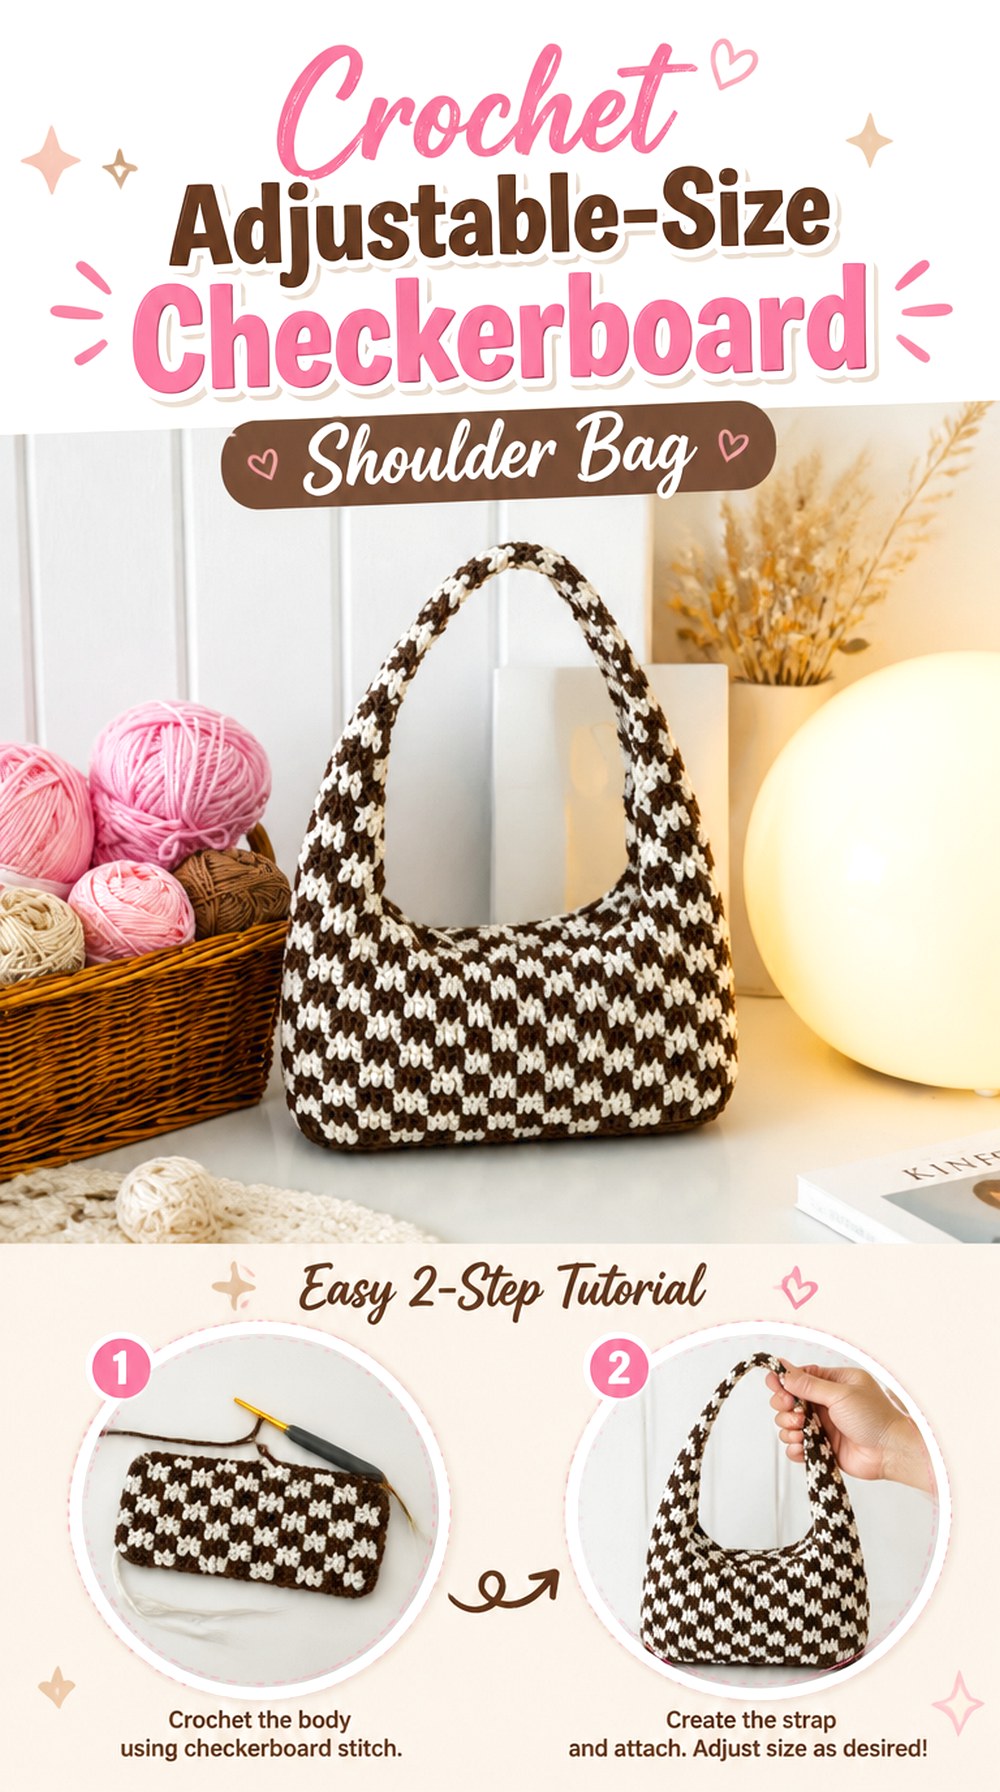
Crochet daniela’s 2026 tutorial focuses directly on a checkered shoulder bag and explains that the construction can be adapted to different sizes. The demonstrated project uses cotton yarn, and the creator also links viewers to separate support for adding a zipper and lining. That makes this a practical reference when you want the basic shoulder-bag shape first but may want a more finished interior afterward.
The appeal here is flexibility rather than unusual ornament. A clean rectangular checked body leaves room to adjust the proportions or color palette without losing the main character of the design. Just remember that changing the body and changing the shoulder opening are related decisions.
Resize the Body and Strap as One System
Making the bag wider without reconsidering strap placement can push the handles too far apart. Making it taller can also change where it sits against the body. Before adapting dimensions, decide on the overall silhouette and shoulder drop you want rather than enlarging the checked panel in isolation.
Cotton Substitutions Still Need a Fabric Test
Even yarns with similar labels can produce noticeably different firmness and stretch. Work a small section of checkerboard using the intended hook and colors, then hang or handle it. The useful question is whether the fabric behaves like the bag you want, not whether the yarn merely matches a generic weight category.
Add a Zipper Only After Checking the New Opening
The creator points viewers to separate zipper-and-lining help. If you resize the bag, do not assume a closure intended for another dimension will fit automatically. Measure the completed opening and confirm the zipper plan before adding borders or finishing that could make installation more difficult.
Original Tutorial and Creator Credit
Creator: crochet daniela
7. Crochet Long Strap Checkerboard Side Bag
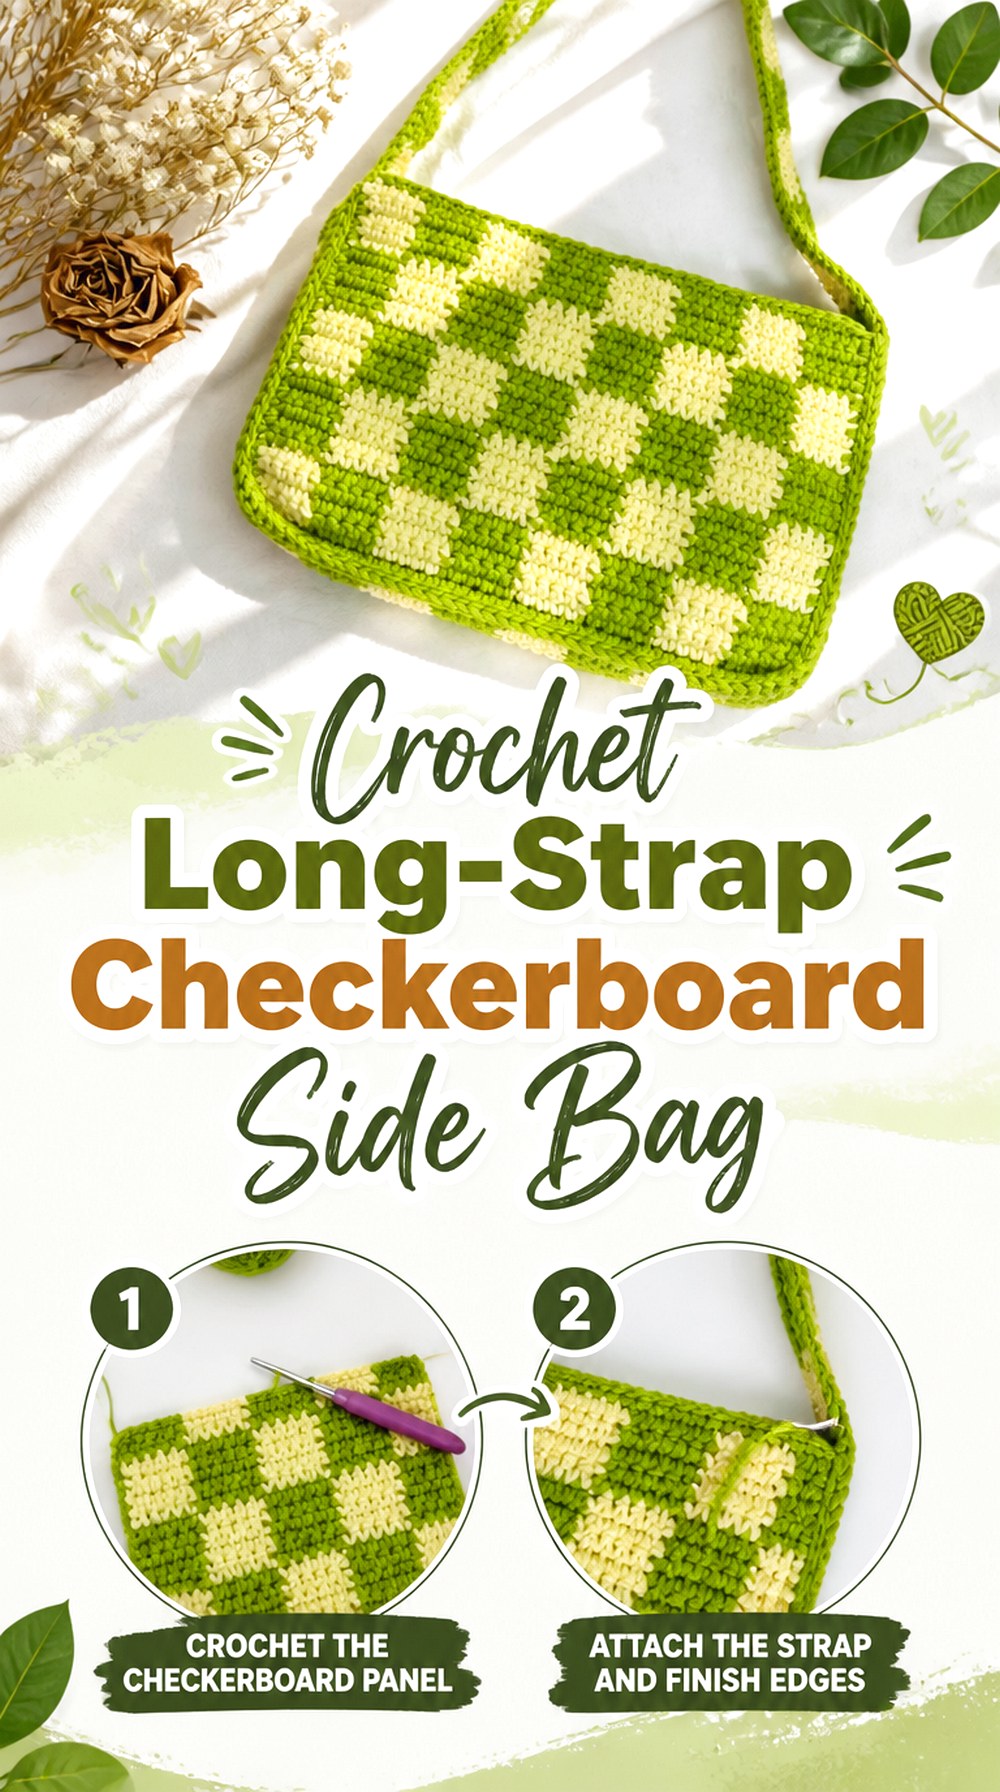
Chenda DIY’s checkerboard bag puts a visibly long strap at the center of the carrying style. The tutorial separates the side-bag construction, strap work, and connecting stage, so the relationship between those components is easy to identify. The resulting shape is more of a casual side bag than a large shopping tote.
This option works well when you want the checked panel to remain compact while the strap creates the stronger vertical line. It also makes strap behavior especially important: a long crocheted strap can change where the bag sits once it carries belongings, even if the body itself remains neatly proportioned.
Test the Drop Before the Strap Is Permanently Connected
Hold the unfinished bag body at the position where you want it to sit, then compare the planned strap with an existing shoulder or crossbody bag. This gives you a real-world reference for the drop. Remember that crochet may lengthen differently once the finished bag is actually carried.
The Connection Area Deserves More Attention Than the Center
The middle of a strap may look perfect while the ends are poorly integrated into the bag. Before final attachment, inspect whether the connection is broad enough for the visual scale of the body and whether any added lining or hardware would crowd the same area.
Lower Contrast Can Soften a Strong Checkerboard
A long strap plus a high-contrast grid creates a very graphic accessory. If you want something easier to pair with patterned clothing, consider two colors that are separated enough to show the checks but closer in value than black and white. Swatch them together and view the sample from several feet away.
Creator: Chenda DIY
8. Crochet Pocketed Checkerboard Shoulder Tote
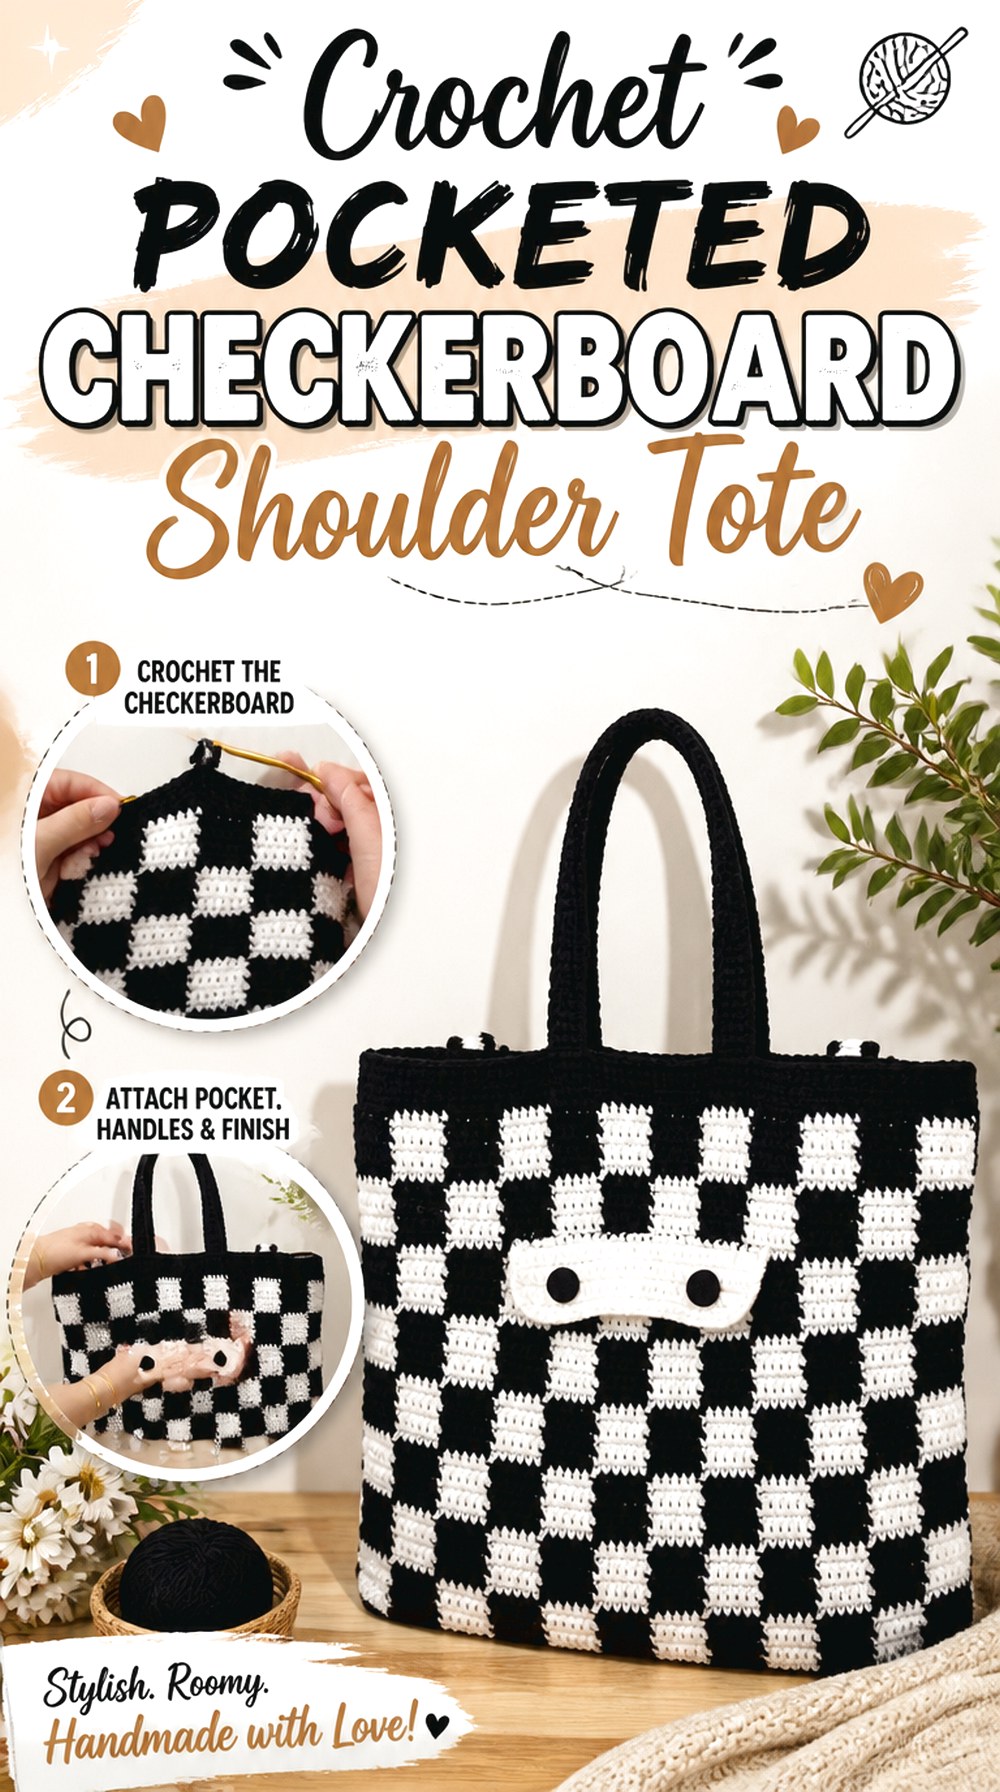
Let’s All Crochet adds practical interior options to the checkerboard concept. The tutorial presents the project as a tote or purse that can be used as a handbag or shoulder bag and includes optional pocket and lining work alongside the crocheted body and handles. That makes it one of the more adaptable utility-focused choices in the collection.
The checkerboard is bold and straightforward, but the real decision is how much finishing you want. You could keep the crochet exposed for a simpler interior, or use the tutorial’s extra sections when concealed strands, pocket organization, or a smoother inside surface matter for the intended use.
Decide What the Pocket Needs to Hold Before Placing It
A pocket should be sized and positioned for a purpose rather than added automatically. Think about whether you want quick access to something small or simply another internal divider. Once the lining is fitted, temporarily place the pocket and check how it sits when the bag is upright.
Lining Can Help Separate Contents From the Colorwork Interior
Checkerboard crochet may leave carried strands or texture visible on the reverse. A lining prevents small contents from rubbing directly against that surface and can create a cleaner interior. It also adds another layer, so fit it to the completed shell instead of assuming the lining should exactly match a flat pre-assembly measurement.
Optional Features Can Change the Bag’s Overall Weight
A pocket, lining, buttons, and extra finishing all add material. None of that automatically makes a bag unsuitable, but it can affect how the handles feel and how the body hangs. Evaluate the completed shell before deciding that every optional feature needs to be included.
Creator: Let’s All Crochet
9. Crochet Wide Strap Checkerboard Shoulder Bag
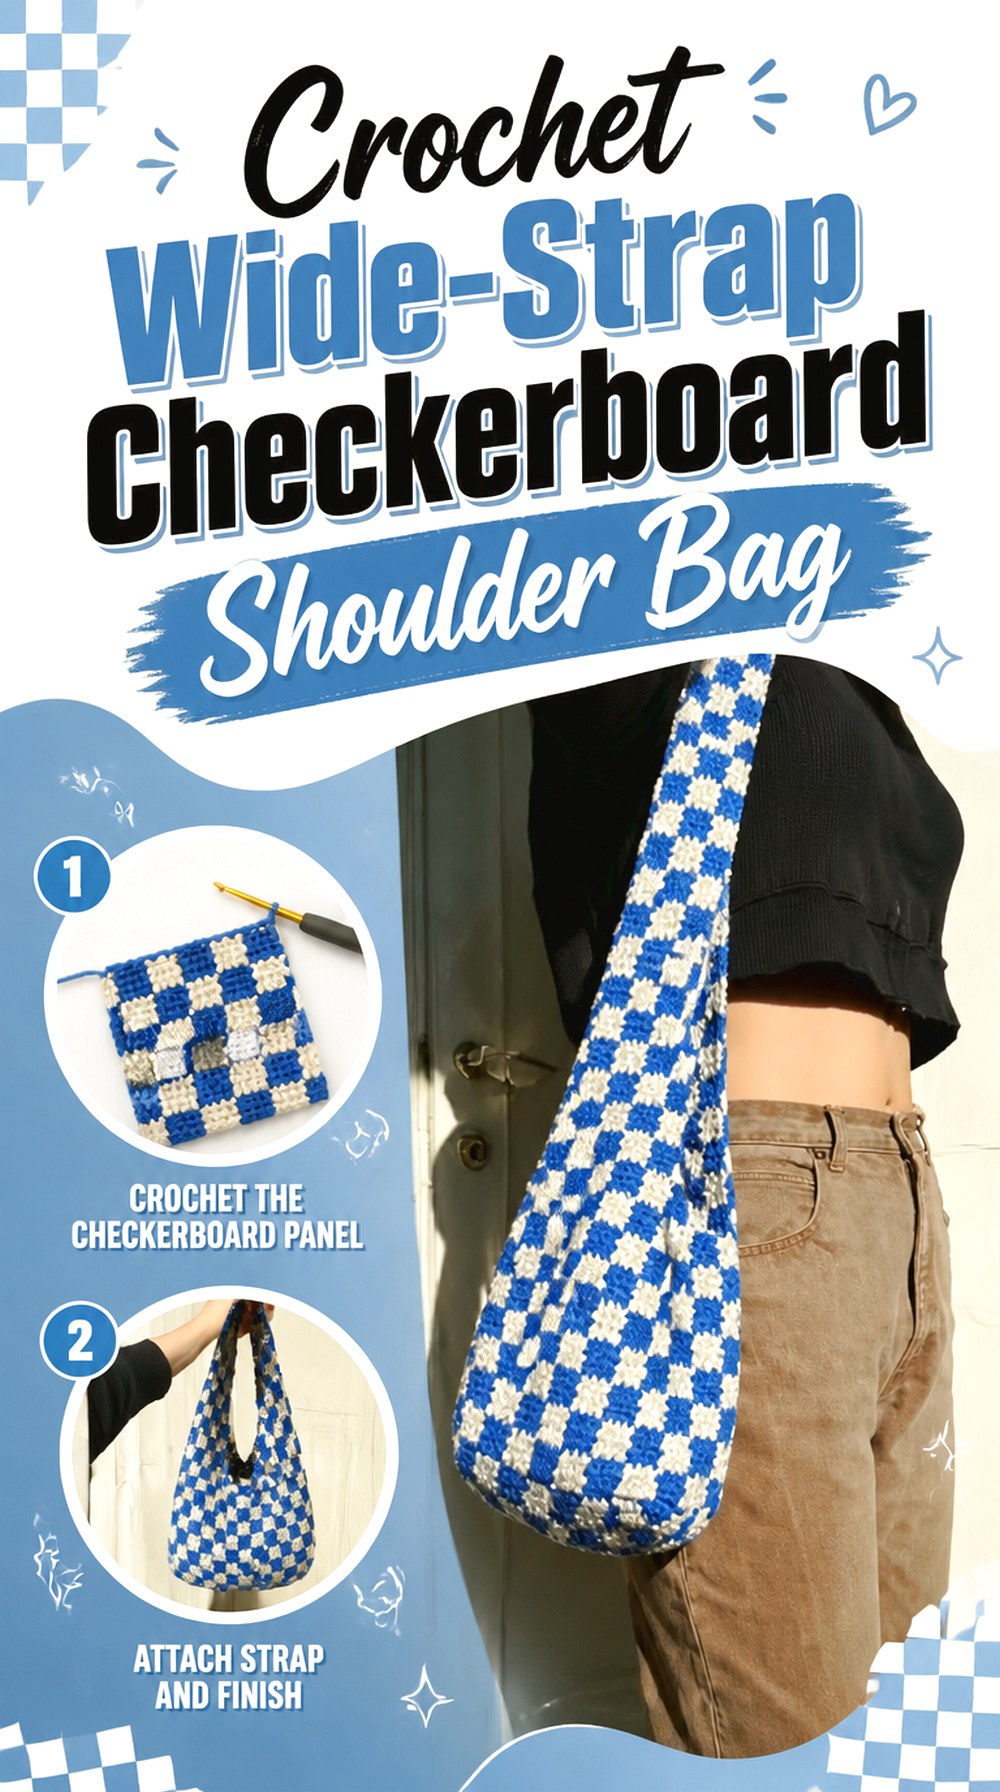
J u ‘ s t u d i o’s checkered bag has a narrow rectangular body and a comparatively broad crocheted strap, giving it a different balance from totes with two slim handles. The tutorial moves through the bottom, body, and strap and explicitly notes that yarn choice can alter the resulting measurements. It also discusses adjusting the number of checker sections when changing the bag size.
The wider strap becomes a continuation of the graphic fabric rather than a thin cord attached afterward. That makes this option useful if you want the checkerboard pattern to remain visually connected from the bag body into the carrying section.
A Broad Strap Needs to Fold Comfortably on the Shoulder
Width alone does not guarantee comfort. Before final finishing, place the strap over the shoulder and see whether the fabric bends naturally or stays too rigid. A very firm yarn substitution can make a broad strap feel bulky even when the bag body holds its shape nicely.
Changing Checker Count Also Changes Overall Scale
Adding or removing blocks changes more than capacity. It affects the relationship between the width of the body, the number of visible checks, and the visual weight of the strap. Sketch a rough grid before resizing so you can judge the proportions before committing to the full colorwork.
Keep the Bottom From Becoming Softer Than the Sides
A defined bottom helps a rectangular checked bag maintain its silhouette. If your substitute yarn produces a very flexible base, the body may sag differently from the demonstrated version. Compare the firmness early, while a hook or material adjustment is still practical.
Original Tutorial and Creator Credit
Creator: j u ‘ s t u d i o
10. Crochet Textured Plaid Shoulder Tote
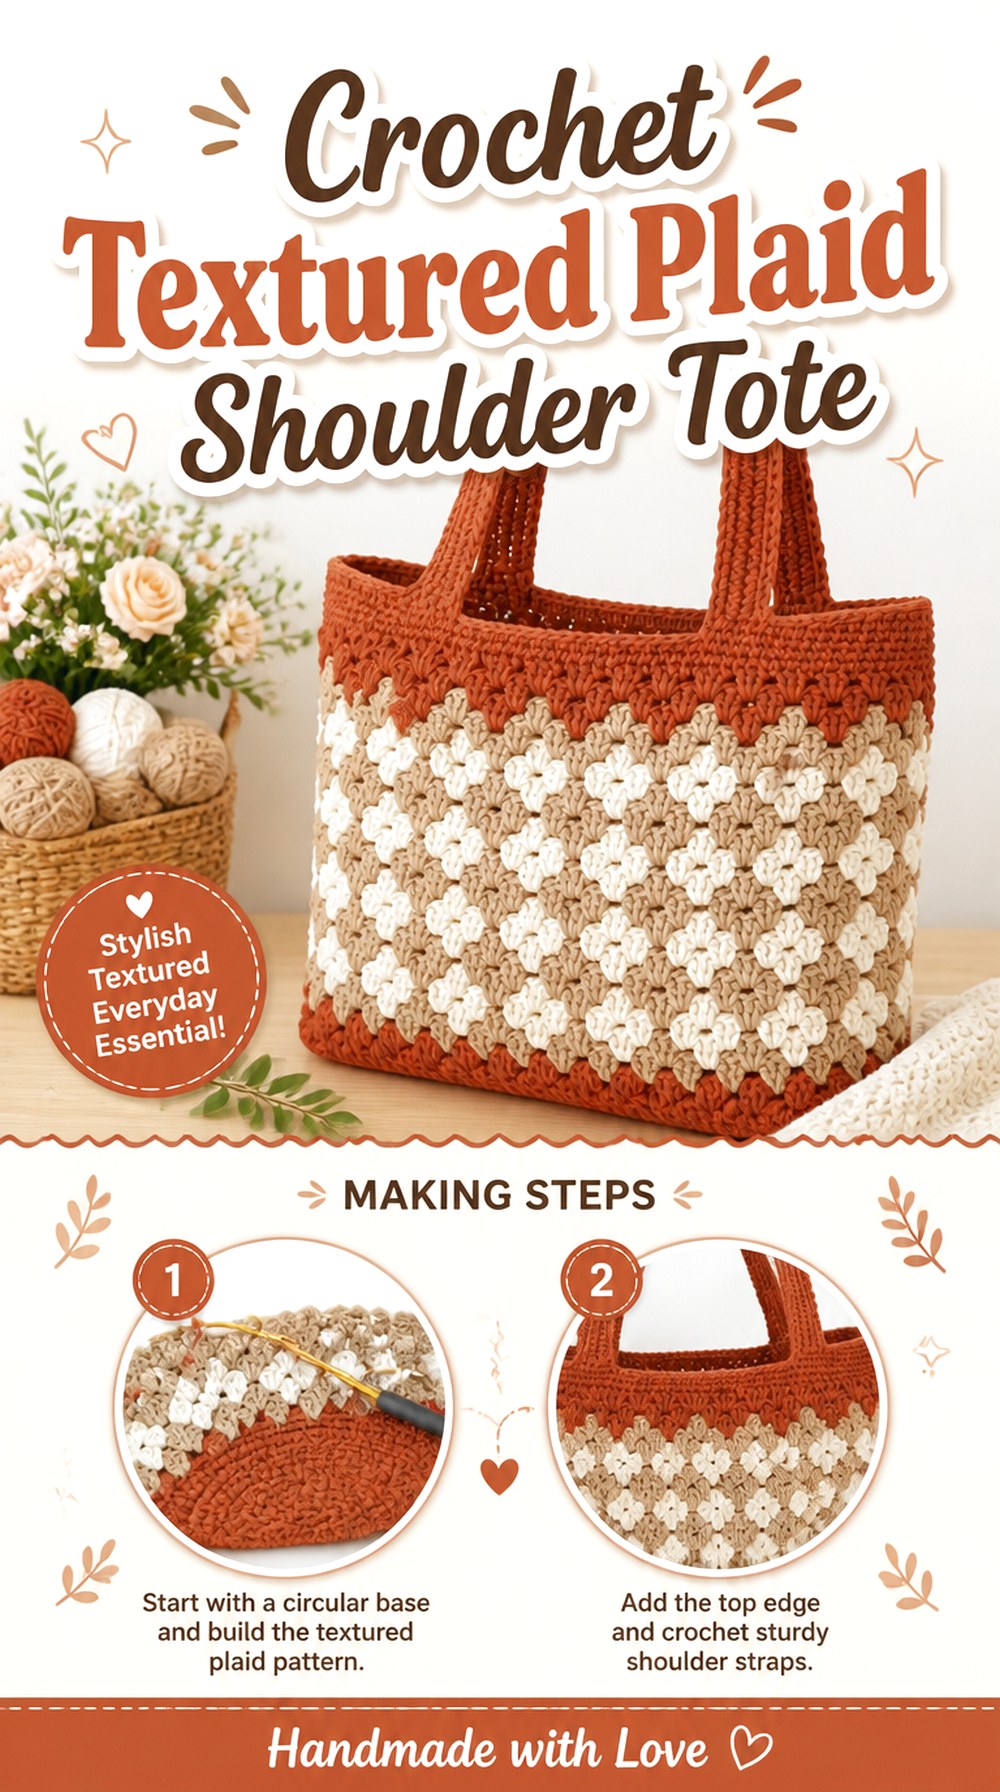
Vicky Crochet’s project broadens the meaning of plaid. Instead of presenting a strict checkerboard or classic three-color gingham grid, the tutorial combines color blocking with a pronounced textured, diamond-like surface. It also covers a structured base, color changes, the patterned body, strap attachment, and finishing.
That makes this the outlier in the collection—and a useful one. Choose it if “plaid” for you means layered color and texture rather than mathematically crisp squares. If what you specifically want is tartan or gingham, preview the finished result before starting; this design has a more dimensional surface than those traditional textile references.
Strong Texture Needs a Simpler Color Decision
Raised stitch detail and multiple colors compete for attention. A restrained palette can let the surface pattern remain visible, while several closely related shades may blur both the texture and the color blocking. Work a small sample and view it in normal room lighting, not just close to the hook.
Base Firmness Sets Up the Dimensional Body
Because this tote includes a deliberately structured foundation, the base is an early checkpoint. If your fabric bends much more easily than the creator’s visible example, the textured sides may hang differently once the project is complete. Decide whether that softer silhouette is acceptable before continuing.
This Is the Option to Preview for Plaid Accuracy
Search terms are broad, and a video title alone cannot tell you whether “plaid” means gingham, checkerboard, tartan, or textured color blocks. Watch the beginning and finished-bag views first. Pick this tutorial because you like its actual dimensional surface, not simply because the word plaid appears in the title.
Original Tutorial and Creator Credit
Creator: Vicky Crochet
11. Crochet Cherry Accent Checkerboard Shoulder Bag
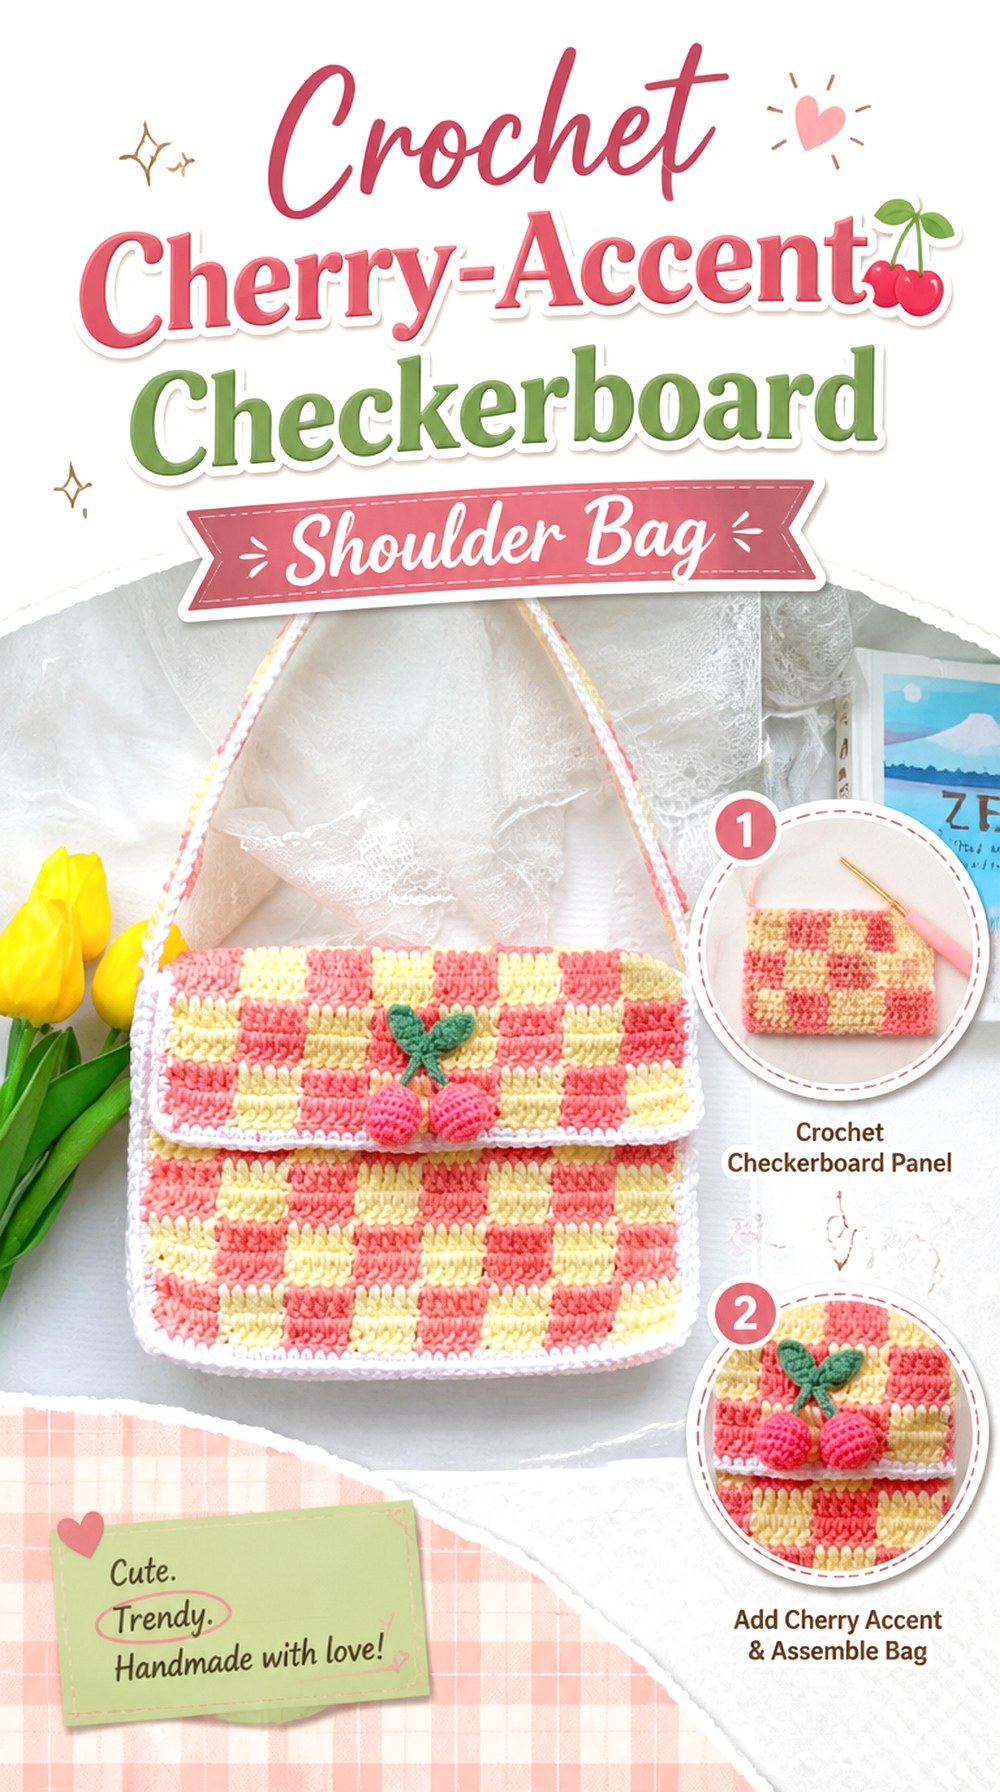
Vivi Crochet 🌷 gives the checkerboard shoulder bag a more decorative direction. The main design uses contrasting checked front and back sections, a long patterned strap, contrast edging, and a joining stage. The video also points viewers to a separate crochet cherry motif, creating the option to turn a geometric bag into a more playful accessory.
This project is useful when you want the strap to carry the same colorwork language as the body rather than switching to a plain band. The contrasting border also frames the individual checked sections, so edging becomes part of the visual design instead of merely covering a raw edge.
Contrast Edging Can Correct the Visual Boundary, Not the Size
A clean border makes checked panels look more deliberate, but it should not be expected to fix substantially different panel dimensions. Compare the front and back pieces before edging and joining. If one has grown noticeably larger, address the tension or shaping issue rather than relying on the border to disguise it.
Patterned Straps Need Their Own Tension Check
Color changes can make a strap behave differently from the bag body because the strip is narrower and handled continuously while working. Lay it flat before attachment and look for twisting, uneven edges, or sections that are noticeably tighter at the color transitions.
Keep the Cherry Accent Optional and Proportionate
A small motif can soften the strong geometry of a checkerboard, but it also introduces another focal point. Position it temporarily before sewing so you can compare centered, corner, or near-strap placement. Leaving the bag unembellished is equally valid if the grid already provides enough visual detail.
Original Tutorial and Creator Credit
Creator: Vivi Crochet 🌷
12. Crochet Base Panel Checkerboard Shoulder Tote
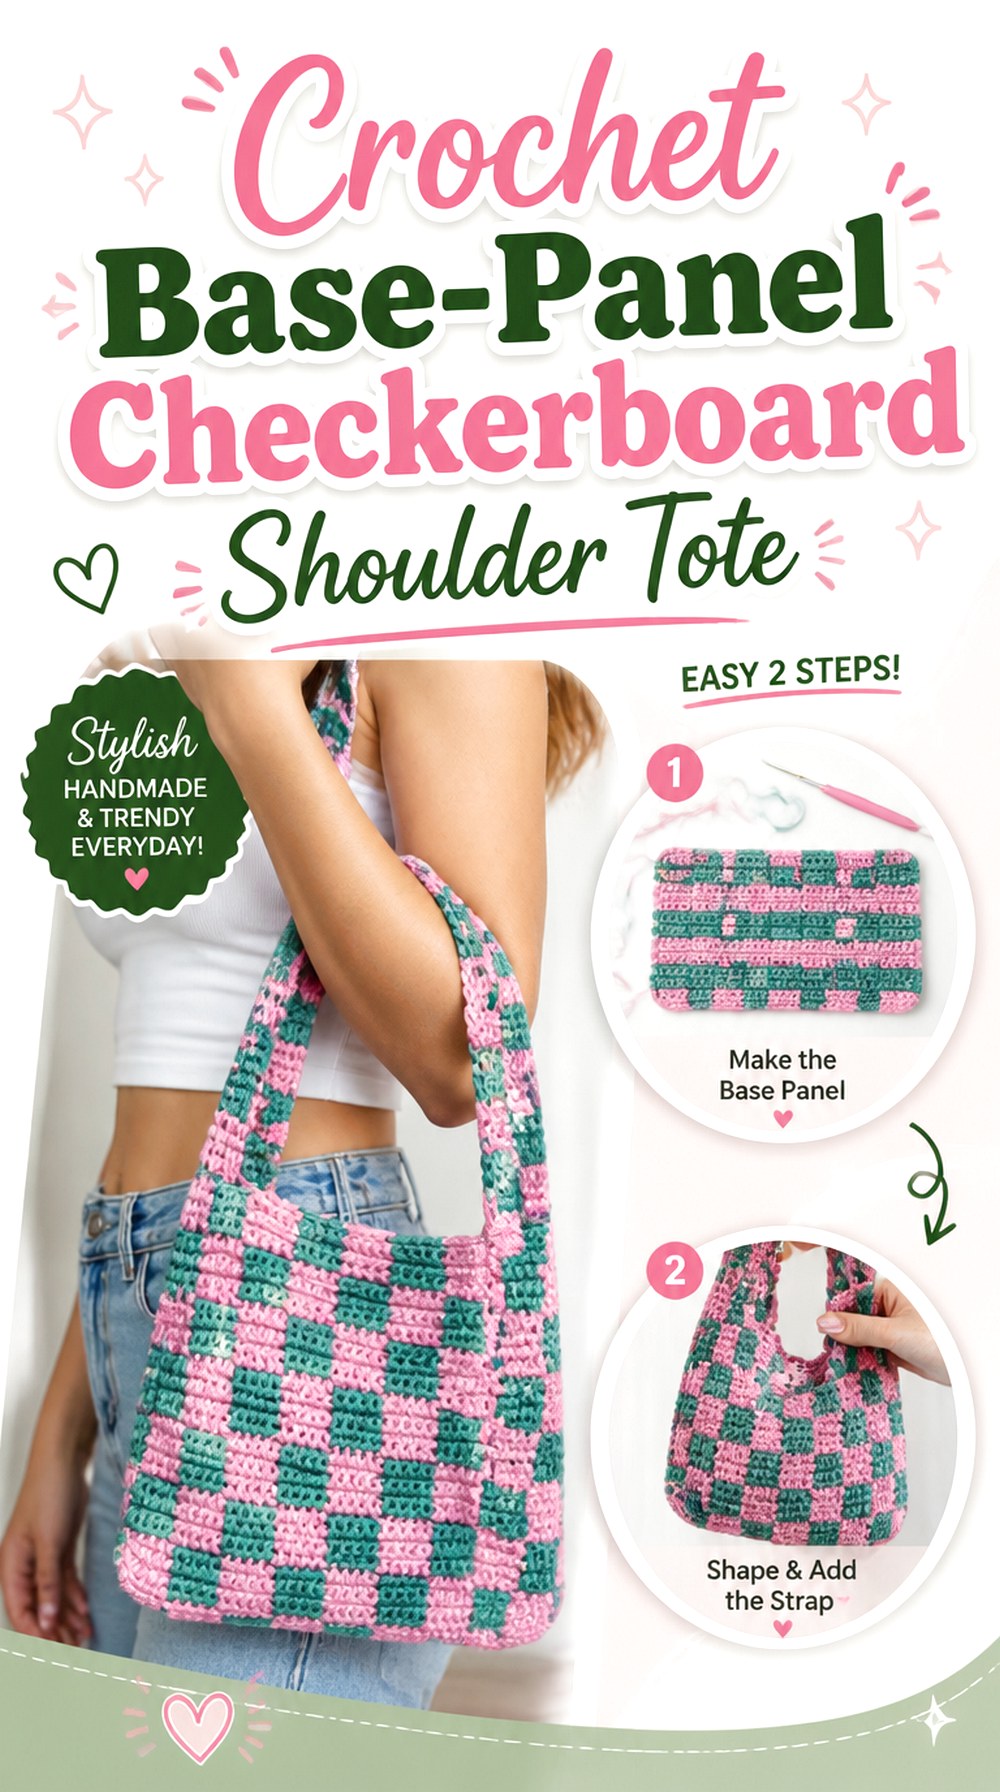
Kenikse Crochet starts this checked tote with a defined base panel before moving into the main colorwork and handles. The tutorial separately identifies the base, color changing, main panel, and handle sections, and it also links additional help for carrying yarn under stitches. The demonstrated version uses DK cotton yarn.
This construction gives you an early structural checkpoint that some flatter bags do not provide. Before investing time in the full checkerboard body, you can assess whether the base is producing the width and firmness you expected. The handles then grow out of a body whose overall proportions are already established.
Treat the Base as an Early Size Warning
If the base is substantially wider or narrower than you expected, the difference will continue into the finished bag. Compare it with an existing tote or your planned use at this stage. Correcting a major scale issue here is much easier than after completing most of the checkerboard.
Carried Yarn Can Make the Fabric Thicker
Working unused color through or under the active stitches reduces repeated cutting, but it puts additional material inside the fabric. Check a small sample for thickness and color show-through. A pale working color may reveal a dark carried strand more readily than a medium or dark combination.
Align the Handles With the Checker Columns
Once the main panel is complete, use the grid itself as a visual measuring tool. Compare both handle positions with the bag edges and with repeated checker columns. This does not replace the tutorial’s construction; it simply helps you notice visual asymmetry before the handles are completely finished.
Original Tutorial and Creator Credit
Creator: Kenikse Crochet
13. Crochet Seamed Gingham Shoulder Tote
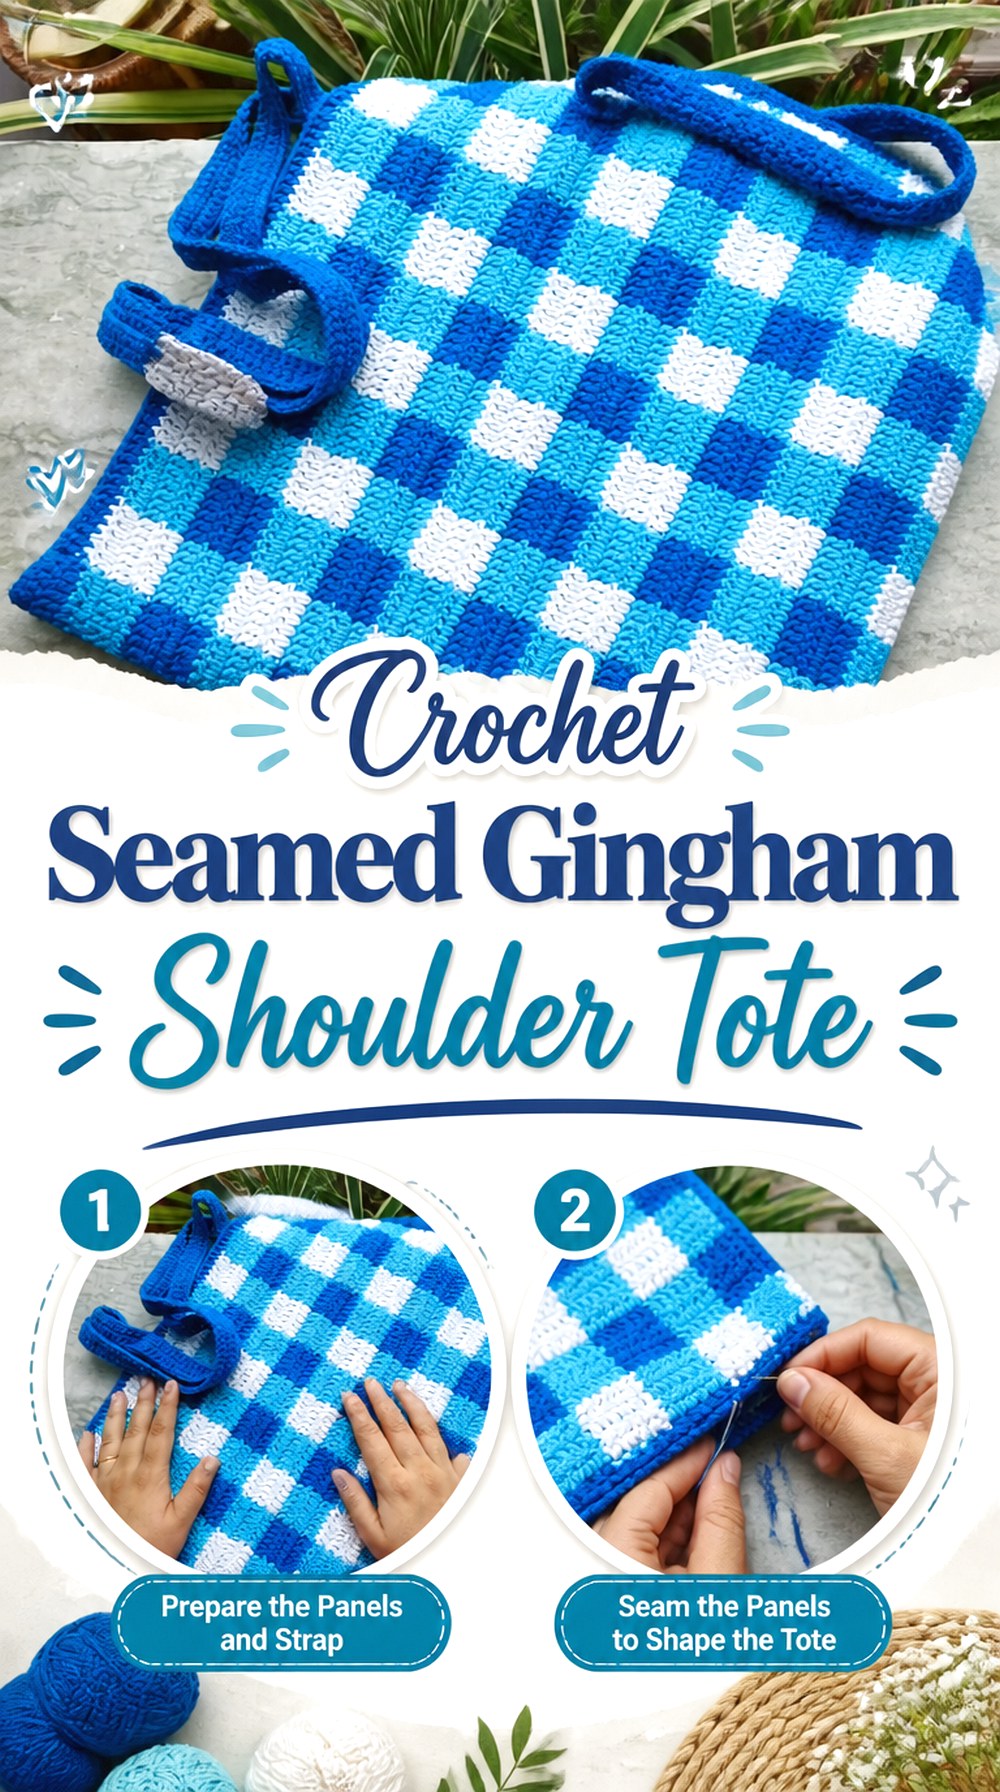
Cute Crochet’s tutorial uses a gingham/checkered surface but builds the bag through separate sections that are later sewn together. The video explicitly moves through one side, the second side, sewing, and the straps. That gives this project a different workflow from bags built continuously around a base.
Flat pieces can make the repeating color pattern easier to inspect because the entire face remains visible during construction. The price of that clarity is assembly: the two pieces need compatible dimensions, and the seam becomes part of the finished geometry. Choose this route if you prefer working flat and do not mind giving joining extra attention.
Compare Both Panels Before the First Permanent Seam
Two pieces made from the same instructions can still differ because of tension changes. Stack or place them side by side and compare width, height, and checker alignment before joining. It is easier to correct a modest difference while both panels are still independent.
Side Seams Can Interrupt an Otherwise Clean Grid
With a geometric pattern, the eye naturally follows the checks toward the edge. Pin or clip the pieces together first and inspect how the color blocks meet around the sides and lower corners. If a particular face looks more balanced, decide which one should become the front before sewing.
Attach Straps Only After the Seamed Body Hangs Naturally
A newly joined tote may settle differently from the flat panels. Hold the assembled body upright, let the seams relax, and then judge handle placement. This keeps the strap decision tied to the three-dimensional bag instead of measurements taken from an unfinished rectangle.
Original Tutorial and Creator Credit
Creator: Cute Crochet
14. Crochet Decreased Top Checkerboard Shoulder Tote
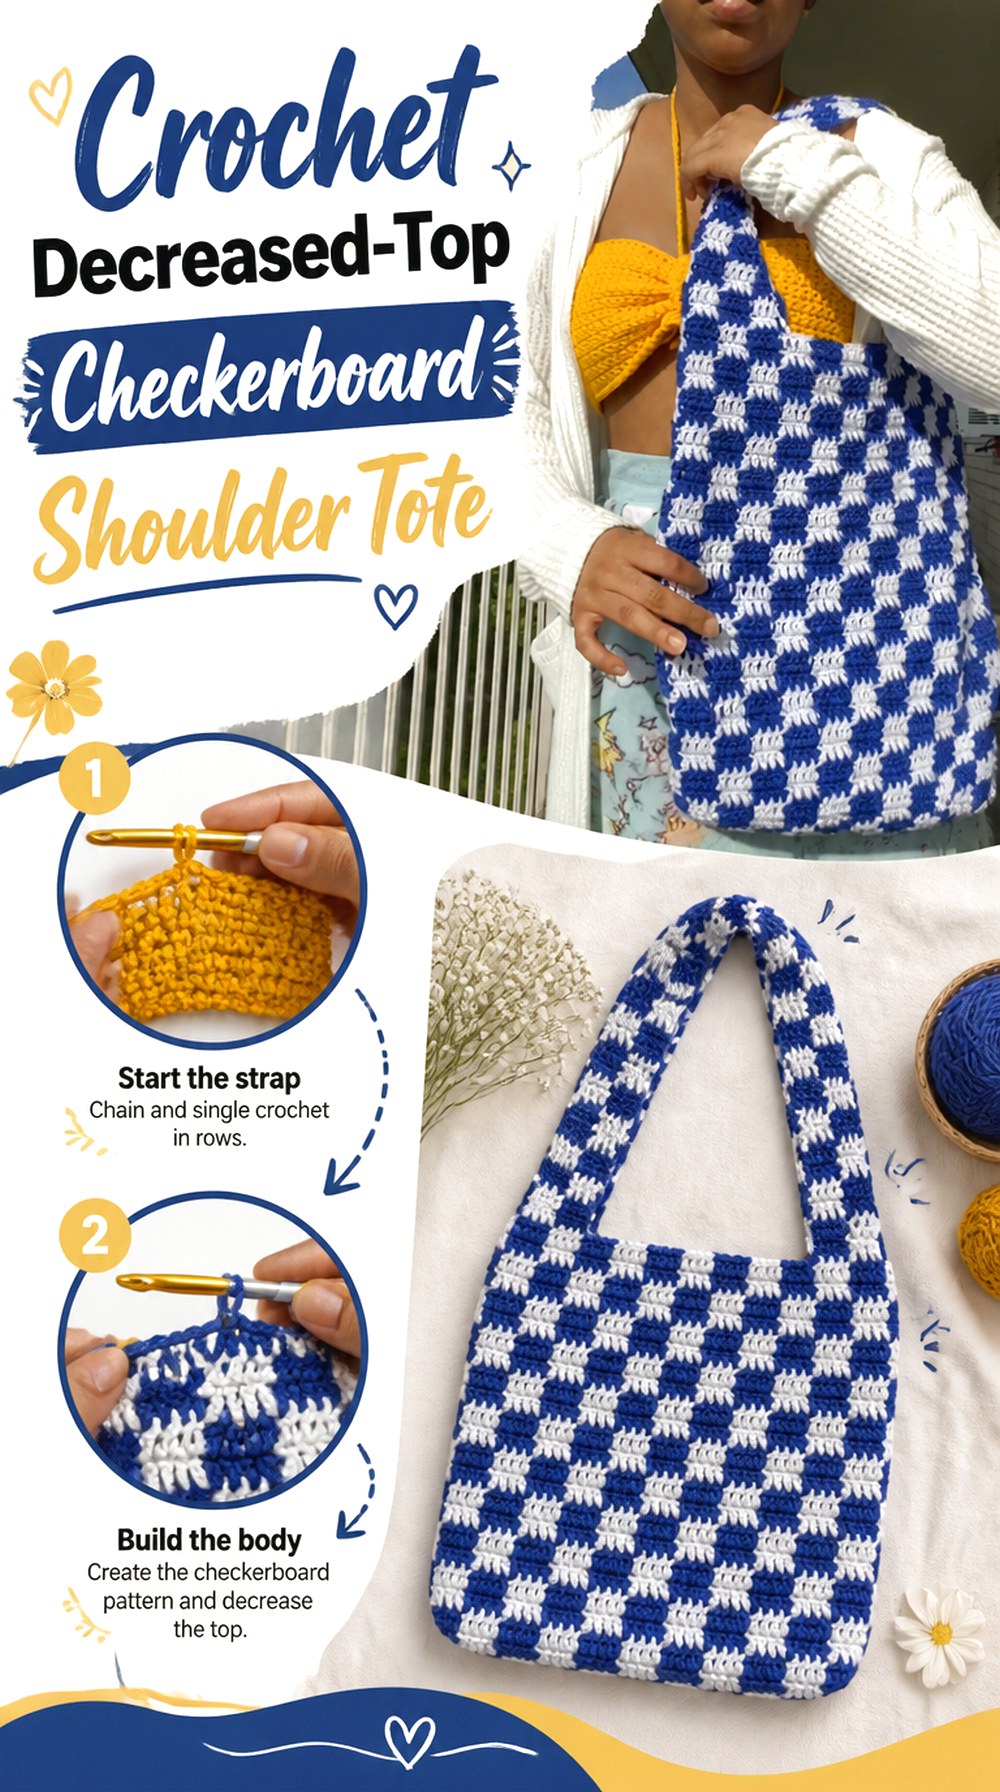
Peculiar’s Crochet provides another construction route for a two-color checkerboard tote. The tutorial covers the basic materials, explains how the creator approaches size alteration, then moves through decreasing, sewing or attaching, and a dedicated shoulder section. That makes the shaping near the top more important than in a basic rectangle with two straps sewn directly onto it.
This is a useful final option if you like a straightforward checked body but want the transition into the shoulder area to be part of the bag’s shaping. The tutorial’s sizing discussion is also relevant for readers who know they want a different overall scale from the demonstrated piece.
Decreasing Changes the Upper Silhouette, Not Just the Opening
As a checked body narrows, fewer blocks remain across the upper portion and the geometry becomes more noticeable. Inspect both sides as the shaping develops so the transition appears intentional. If you alter the starting width, preview how that will affect the number of visible checks near the shoulder section.
Acrylic and Cotton Versions May Hang Differently
The creator demonstrates medium-weight acrylic yarn. Switching to a cotton or another fiber can change flexibility, spring, and the way the bag stretches under use. Rather than assuming one is universally better, make a small checked sample and judge the fabric for the silhouette you actually want.
Size Changes Should Include the Shoulder Portion
A larger body paired with an unchanged upper opening can feel visually or practically out of proportion. If you use the creator’s resizing discussion, also consider where the shoulder section begins and how the finished bag will sit against the body. Treat overall dimensions and carrying fit as connected decisions.
Original Tutorial and Creator Credit
Creator: Peculiar’s Crochet
Which Crochet Plaid Shoulder Bag Style Should You Choose?
| If your priority is… | Consider | Main difference |
|---|---|---|
| Minimal sewing | Crochet One-Piece Checkerboard Shoulder Bag | The body and strap are coordinated through a low-seam construction |
| A finished fabric interior | Crochet Fabric-Lined Gingham Flap Shoulder Bag | Lining, flap, button, and sewing are central to the project |
| A secure compact purse | Crochet Magnetic-Button Checkerboard Shoulder Purse | Hardware and magnetic closure change the opening and strap attachment |
| Traditional gingham | Crochet Three-Color Gingham Shoulder Tote | Three values create a softer woven-looking grid |
| Integrated handle shaping | Crochet Tapered-Strap Checkerboard Shoulder Tote | The bag narrows into shaped upper straps |
| Pocket organization | Crochet Pocketed Checkerboard Shoulder Tote | Optional pocket and lining add interior function |
| Texture instead of strict checks | Crochet Textured Plaid Shoulder Tote | Raised surface and color blocking give a broader plaid interpretation |
| Flat-panel construction | Crochet Seamed Gingham Shoulder Tote | Each side can be inspected before assembly |
Conclusion
The strongest choice depends on what you want the plaid effect to do. For a classic textile look, the three-color gingham tote gives the clearest tonal grid. Choose the one-piece checkerboard bag when minimizing seams matters, or the tapered and decreased-top totes when you want the strap area shaped into the design. The lined flap bag and magnetic-button purse make more sense when interior finishing and closure matter, while Vicky Crochet’s textured tote offers a less literal plaid direction.
Whichever style you choose, compare the color repeat, fabric firmness, shoulder drop, opening, and lining plan before making major substitutions. Use the original tutorials near each project for the creators’ exact construction details.
Frequently Asked Questions
Are crochet plaid, gingham, and checkerboard shoulder bags the same thing?
Not exactly. Checkerboard generally emphasizes alternating blocks, often in two colors. Gingham usually uses three values so the blocks imitate overlapping bands in woven fabric. Plaid is broader and can include intersecting lines, layered colors, or looser interpretations such as textured color blocking. Because tutorial naming is inconsistent, judge the finished bag shown in the video rather than relying only on the word “plaid.”
How should I choose three colors for a crochet gingham shoulder bag?
Start with value contrast. A neutral plus lighter and darker versions of another color family usually makes the overlapping effect easier to recognize. Put the yarns together under natural light, then consider taking a grayscale photo. If the two related shades become almost indistinguishable in grayscale, the finished gingham may look flatter than you expected. A small crochet sample gives the most useful confirmation.
Why can a crochet shoulder-bag strap stretch after the bag is finished?
Crochet fabric can lengthen when it is pulled by the bag’s weight, particularly in a long unsupported strap. The amount varies with fiber, stitch structure, tension, strap length, width, and construction, so there is no universal amount of stretch to predict. Compare the strap with a bag you already like, and check the finished drop before permanent attachment whenever the tutorial’s construction allows that checkpoint.
Does every crochet plaid shoulder bag need a fabric lining?
No. A dense bag with a tidy interior may work perfectly well without one for its intended use. A lining becomes more attractive when carried strands are exposed, the fabric has openings that can catch small belongings, or you want pockets or a cleaner interior finish. Fit lining fabric to the completed crochet shell rather than assuming the flat crochet dimensions will remain unchanged after assembly.
Is an open top, flap, zipper, or magnetic button better for a plaid bag?
Each serves a different purpose. An open tote offers the simplest access and places fewer demands on the upper edge. A flap adds coverage and changes the visual front of the bag. A magnetic button needs opposing edges that meet neatly, while a zipper usually demands more accurate opening dimensions and additional sewing. Choose the closure before adding extra borders or heavily modifying the top.
Can I make the checker blocks bigger without making the whole shoulder bag bigger?
Sometimes, but the proportions will change. Larger blocks mean fewer checks can fit across the same approximate body width; smaller blocks create more repeats and more color changes. The strap placement, side seams, shaping, and closure may also relate to the existing grid. Sketch the intended checker layout or make a sample block first, then use the selected tutorial to determine which dimensions can realistically be adapted.