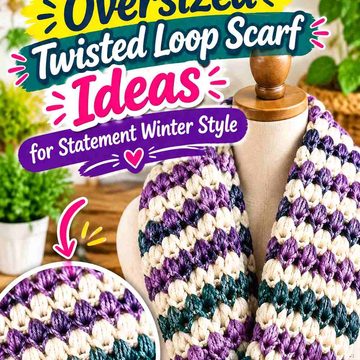
A crochet faux fur hooded collar can change the look of a simple winter coat without requiring you to crochet an entire jacket. Depending on the construction, it can sit like an oversized collar when lowered, pull up into a roomy hood, wrap closely around the neck, or extend into scarf panels for additional coverage.
The tutorials supporting these ideas cover several hooded scarves, cowls, scoodies, and modular hoods rather than nineteen identical faux fur collars. That makes them useful construction routes for this theme. Add faux fur selectively as a face-edge trim, collar border, lining accent, or contrasting panel only after checking how the original hood fits. Very fuzzy yarn can hide stitch placement and add bulk, so substituting it throughout a pattern designed for smooth yarn may change both gauge and drape.
Quick List
- Crochet Tapered Faux Fur Hooded Collar
- Crochet Structured Faux Fur Balaclava Collar
- Crochet Draped Faux Fur Hooded Scarf Collar
- Crochet Button-Wrap Faux Fur Hooded Collar
- Crochet Detachable Faux Fur Hooded Coat Collar
- Crochet Wheat-Texture Faux Fur Hooded Collar
- Crochet Pocketed Faux Fur Hooded Collar Scarf
- Crochet Cable-Panel Faux Fur Hooded Collar
- Crochet Shaped Faux Fur Pocket Hooded Collar
- Crochet Infinity Faux Fur Hooded Collar
- Crochet Two-Panel Faux Fur Hooded Collar
- Crochet Two-Tone Faux Fur Hooded Collar
- Crochet Granny-Square Faux Fur Hooded Collar
- Crochet Patchwork Faux Fur Hooded Collar
- Crochet Join-Detail Faux Fur Hooded Collar
- Crochet Face-Framing Faux Fur Hooded Collar
- Crochet Sophie-Style Faux Fur Hooded Collar
- Crochet Textured-Brim Faux Fur Infinity Collar
- Crochet Turtleneck Faux Fur Hooded Collar
Decide Where the Faux Fur Actually Needs to Go
A full hood made entirely from faux fur yarn creates a very different garment from a smooth crochet hood edged with a narrow plush border. Before buying yarn, decide whether the fur is structural or decorative.
For a coat accessory, a face-framing band is often the easiest adaptation to control. It gives the hood a winter-coat appearance without changing every measurement in the original construction. A fur collar edge can also work well because it remains visible when the hood is lowered.
Using faux fur for the entire hood requires more caution. Long fibers make stitches harder to see, and a thicker fabric can reduce the space inside a hood that originally had a comfortable fit. Swatch with the actual yarn before assuming the original hook or measurements will transfer unchanged.
Check the Hood Over the Coat You Plan to Wear
A hooded collar does not fit in isolation. A tailored coat with a low neckline leaves more room for a thick crochet collar, while a coat with an existing stand collar or hood can create several layers behind the neck.
Try the developing piece over the intended outerwear before finishing the face border, fastening, or scarf ends. Lower the crochet hood as well as raising it. A design that fits comfortably on the head may create too much fabric at the back of the neck once worn as a collar.
Also check the throat area. Buttons, ties, closed cowls, and turtleneck constructions should sit securely without needing to be pulled tightly against the neck.
Work With Faux Fur by Feel as Well as Sight
Plush yarn can obscure individual stitches. Removable markers at important edges, centers, joins, and shaping points can make construction easier to track.
If the main tutorial uses a clearly defined textured stitch, consider keeping that stitch in smooth yarn and reserving the faux fur for the border. Otherwise, the fluffy fibers may conceal the very texture that makes the design distinctive.
Care also matters when two yarns are combined. Check the care instructions for both the main yarn and the faux fur yarn, and follow the more restrictive requirements if necessary rather than assuming the finished piece can be treated like either yarn alone.
1. Crochet Tapered Faux Fur Hooded Collar
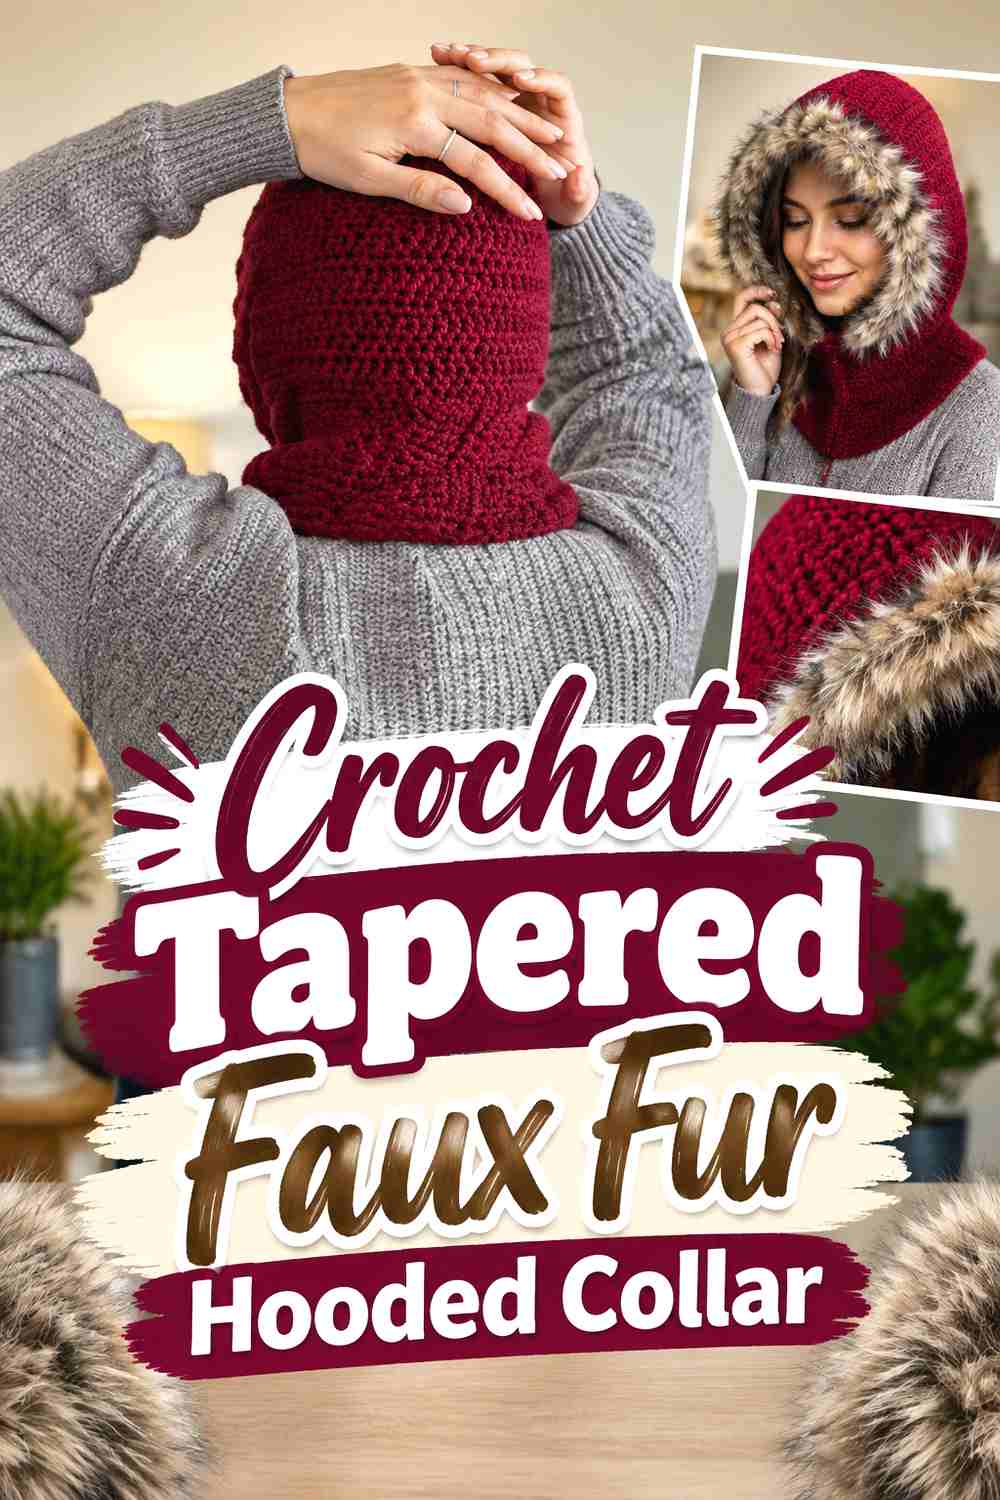
This design route starts with a streamlined tapered hooded scarf and turns its face opening into the focal point with a controlled faux fur border. VivCrochets’ construction uses narrowing scarf sections and a fitted hood, making it especially useful when you want less fabric hanging from the front of a tailored coat.
Keep the Taper Visible
The shaped ends are part of what makes this option feel lighter than a rectangular scarf. Covering too much of them with faux fur would remove that visual advantage.
Keep the fur concentrated around the hood opening or the upper neck edge. This preserves the clean taper while still giving the accessory the plush finish associated with fur-trimmed winter coats.
Check Hood Depth Before Adding the Plush Border
A thick edge can make a face opening feel smaller even when the underlying crochet dimensions have not changed. Try on the finished smooth-yarn hood first, then pin or loosely hold the fur yarn around the edge to judge the extra volume.
If the fur pushes toward the eyes or cheeks, reducing the trim depth may work better than changing the completed hood construction.
Creator Credit: VivCrochets
2. Crochet Structured Faux Fur Balaclava Collar
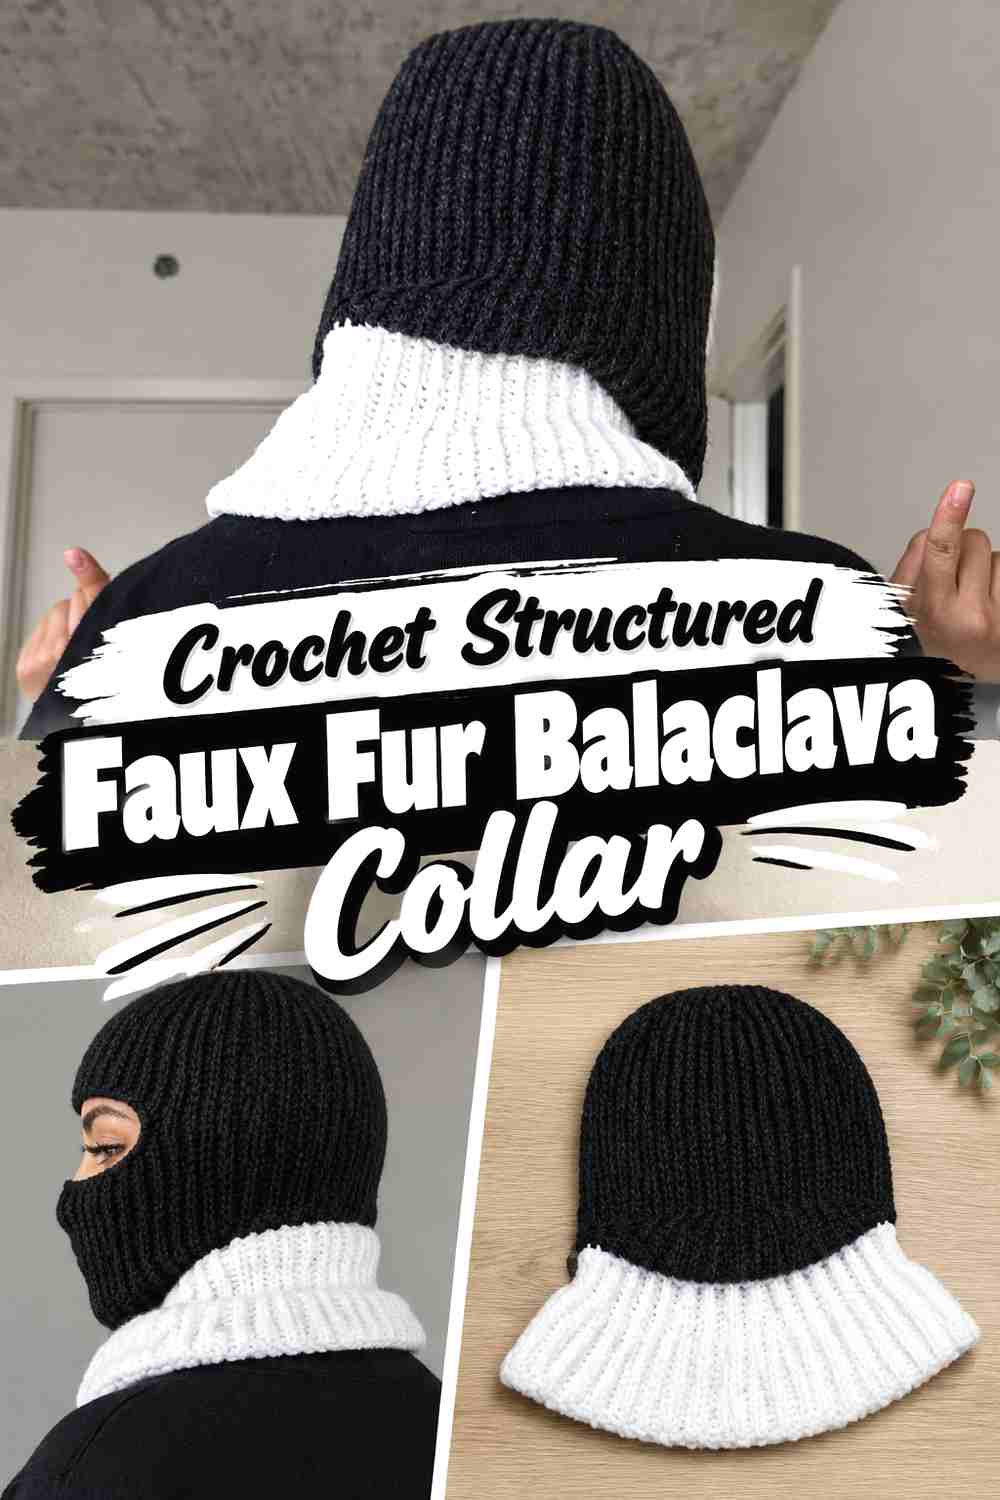
A panel-built winter hood offers a closer, more architectural fit than a loose scarf hood. yaejiyea’s tutorial constructs the hood from separate sections and includes a collar area, making it a useful foundation for a coat accessory that should frame the head more closely.
Use Faux Fur to Soften the Structured Face Edge
A fitted hood already has a defined shape, so it does not need fur everywhere. A narrow plush frame can soften the opening without hiding the panel construction.
This route suits a cleaner coat silhouette particularly well because the underlying hood is more controlled than an oversized snood.
Test the Collar With the Coat Fully Fastened
A structured neck section may overlap the space occupied by a zipped or buttoned coat collar. Try the pieces together before adding the final plush trim.
Turn your head in both directions and lower your chin. The collar should not become uncomfortable simply because the outer coat is closed.
Creator Credit: yaejiyea
3. Crochet Draped Faux Fur Hooded Scarf Collar
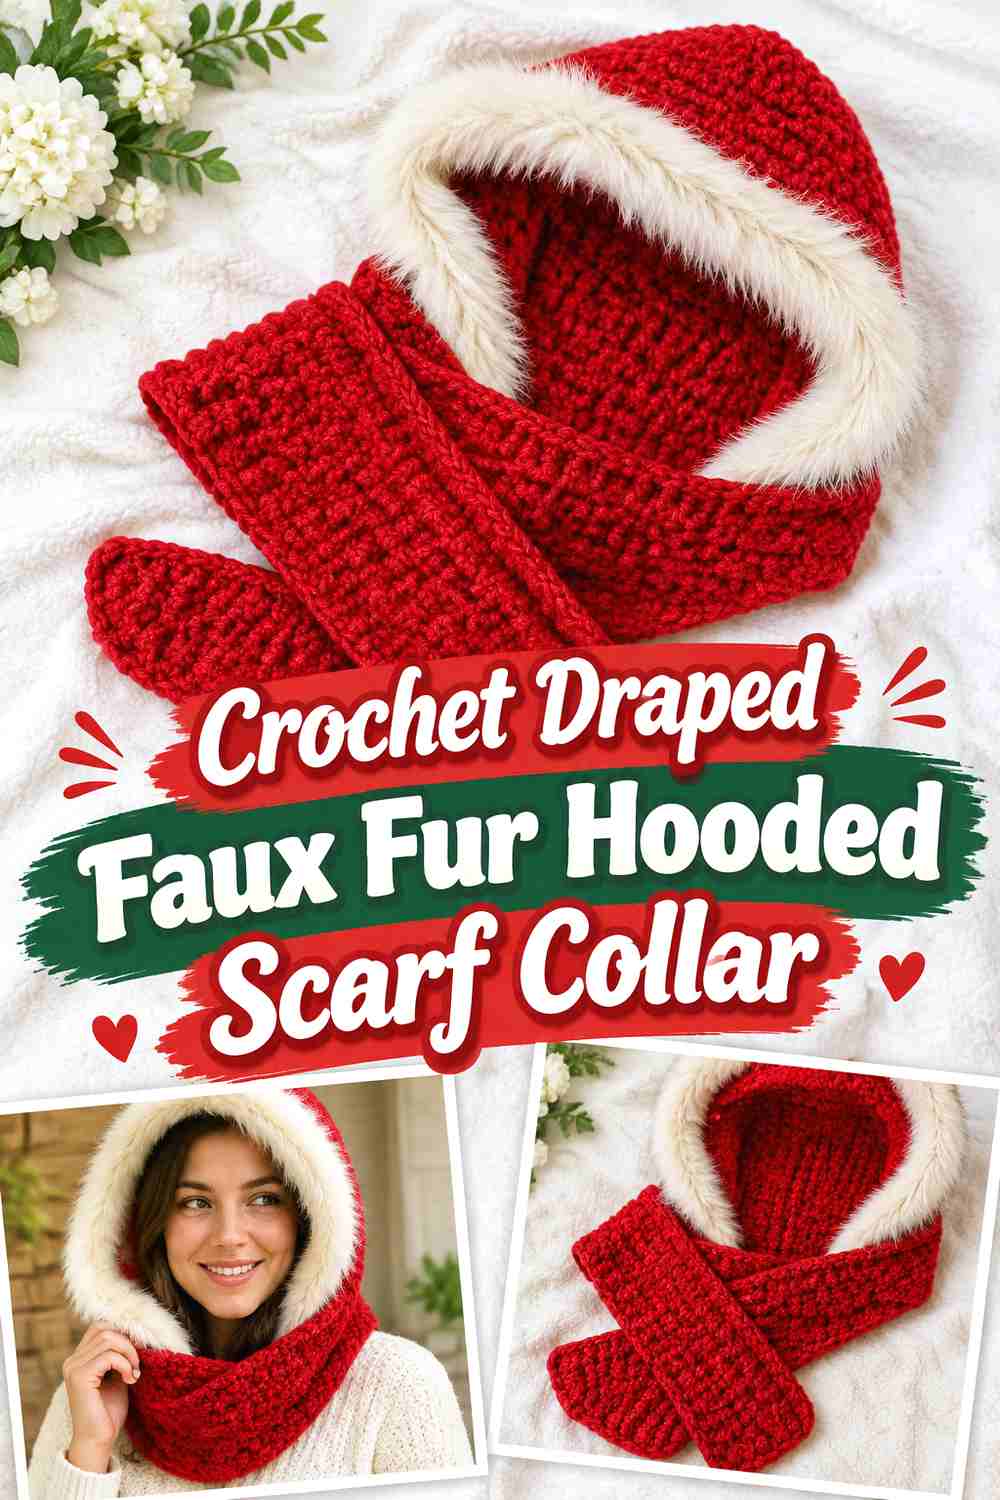
This idea combines a soft hood with scarf sections that narrow toward the ends. yumyam/ゆむやむ demonstrates a hooded scarf with a textured fabric and long tapered extensions, providing a route for a more draped, fashion-led collar rather than a compact cowl.
Let the Fur Frame the Face Instead of the Scarf Ends
Long faux fur tails can become visually heavy when layered over a coat. Keeping the tapered scarf in the original smoother fabric allows the ends to fall naturally.
A plush face border provides contrast exactly where it is most visible while the hood is raised.
Watch the Transition Between Textured Yarn and Fur
If the main fabric has a noticeable stitch pattern, stop the faux fur at a deliberate edge rather than allowing it to blend irregularly into the scarf.
Mark both ends of the trim before attaching it so the framing looks intentional on each side of the face.
Creator Credit: yumyam/ゆむやむ
4. Crochet Button-Wrap Faux Fur Hooded Collar
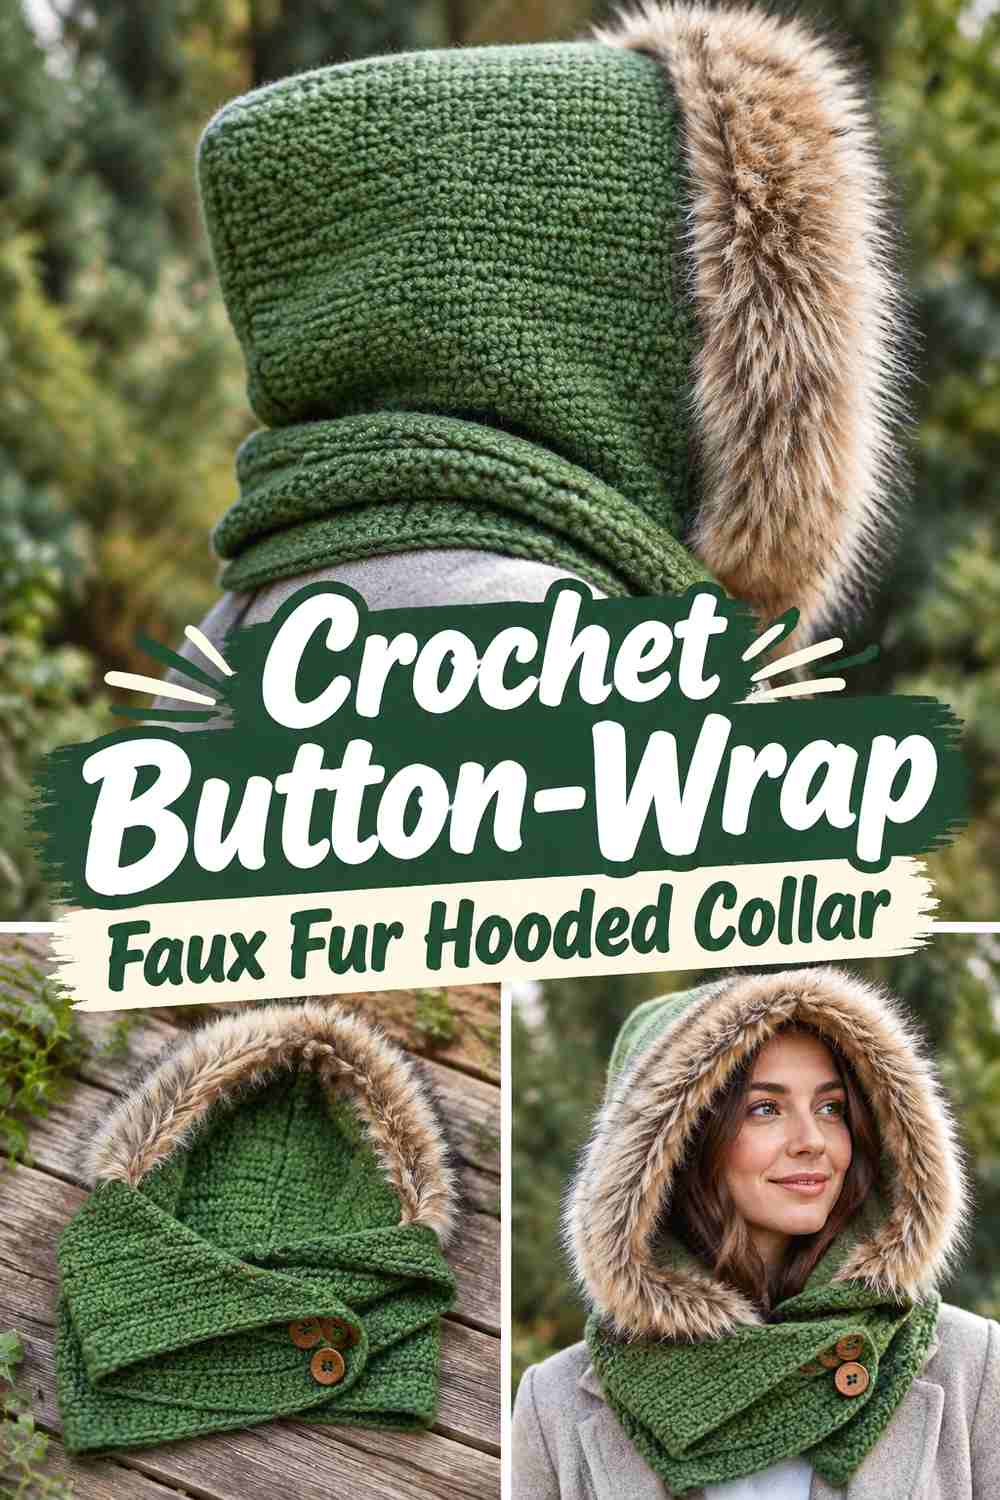
A fastening can turn a hooded scarf into something that behaves more like a coat collar. Winding Road Crochet’s hooded scarf uses an asymmetrical wrap and button, giving you a useful base when you want the front arrangement to stay in place instead of relying on a knot.
Put the Fur Where It Will Still Show When Wrapped
A narrow border along the hood and upper wrap can remain visible whether the hood is raised or resting on the shoulders. Fur placed only at the very ends may disappear once the scarf is buttoned.
Arrange the piece over your coat before deciding the trim placement.
Recheck the Button After Adding Bulk
Faux fur near a fastening can partially cover the opening or make the surrounding fabric thicker. Confirm that the button remains easy to use without pulling excessively on the crochet.
If the fur hides the fastening, keeping a small smooth-yarn area around the button can make the closure easier to locate.
Creator Credit: Winding Road Crochet
5. Crochet Detachable Faux Fur Hooded Coat Collar
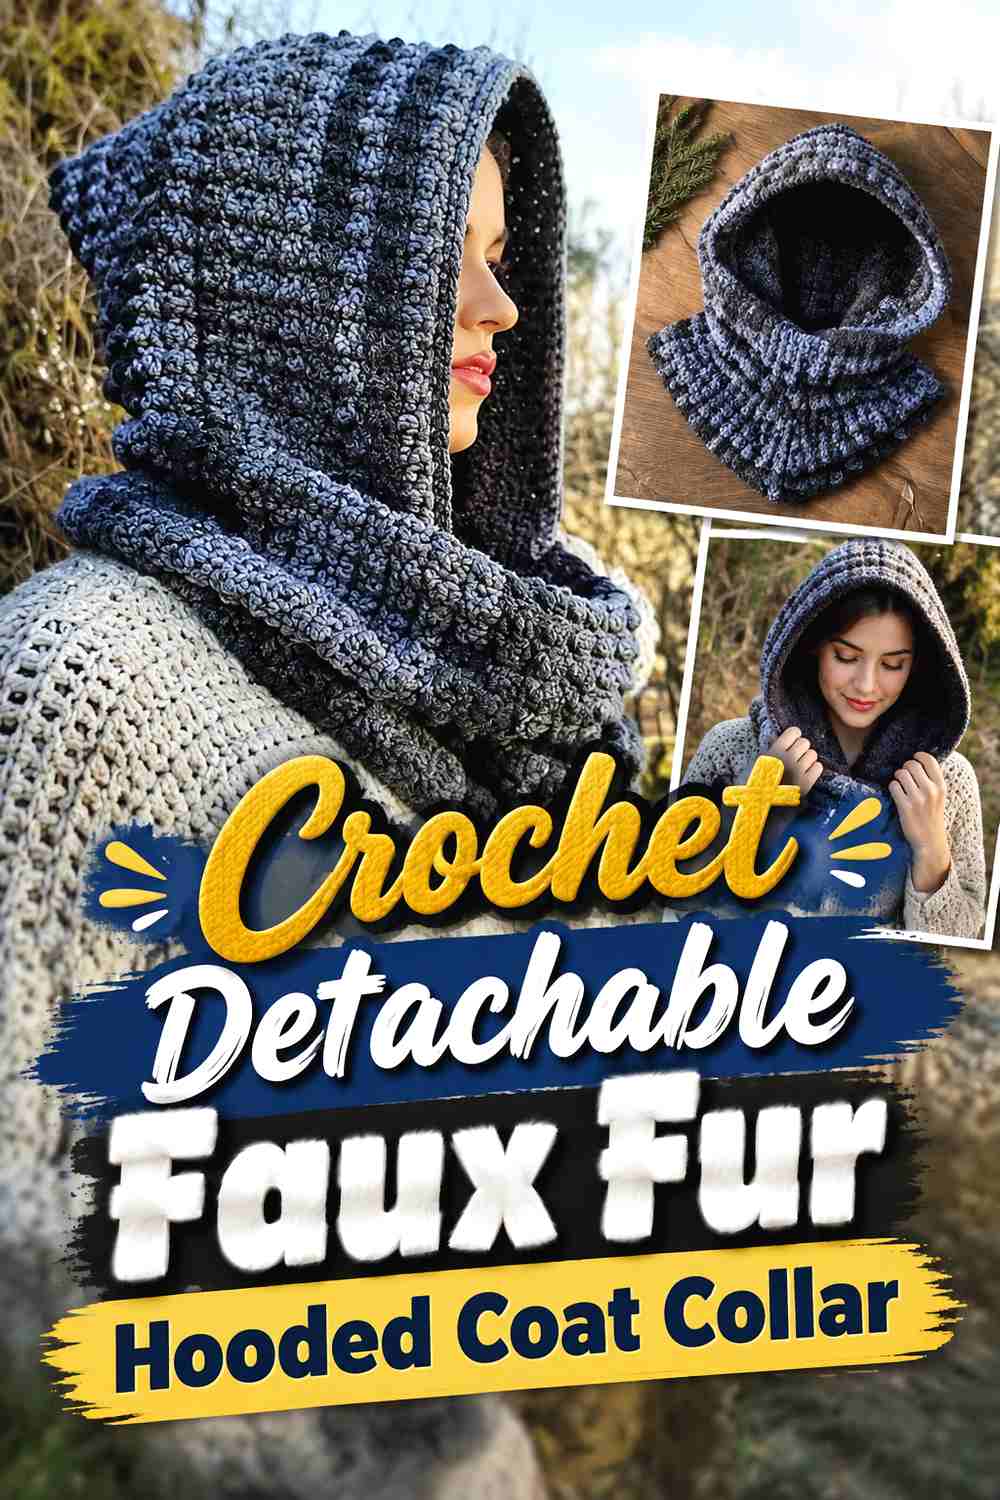
A removable hood is one of the most practical approaches if you own several coats. Bag-O-Day Crochet demonstrates a scarf with a detachable hood, providing a construction route that can be worn in different combinations rather than permanently committing the fur hood to one scarf arrangement.
A Detachable Hood Can Work Across Different Necklines
A collarless coat may have plenty of room for the full hood, while a coat with its own hood may feel better with only the scarf or collar portion.
Try the attachment on each coat you intend to use rather than judging the fit while the piece is lying flat.
Keep the Connection Area Clear of Heavy Fur
The attachment needs to remain accessible and balanced. Dense faux fur directly over the joining points can make them difficult to see and may add unnecessary weight where the hood meets the scarf.
Use the fur along the visible face and outer collar edges instead.
Creator Credit: Bag-O-Day Crochet
6. Crochet Wheat-Texture Faux Fur Hooded Collar
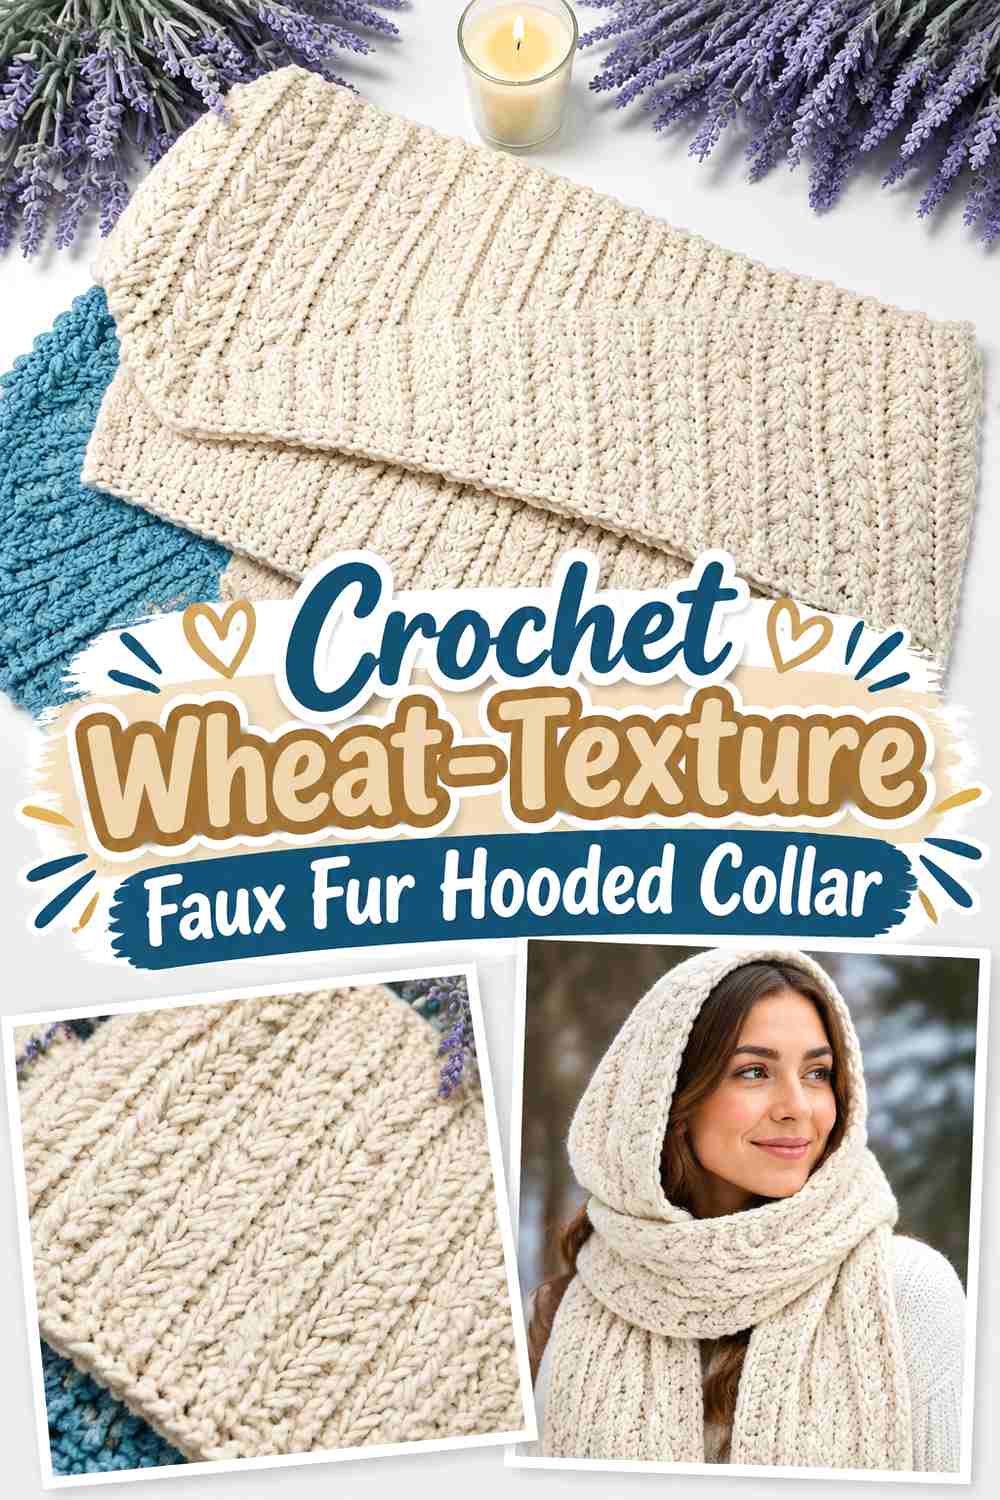
Briana K Designs uses a distinctive textured stitch in its hooded scarf construction. That makes this a strong option when you want the crochet fabric itself to remain visible rather than allowing faux fur to dominate the entire piece.
Preserve the Texture With a Smooth Main Yarn
If you work the textured section in a long-pile fur yarn, much of the stitch definition may disappear. Keep the main hood in a yarn that shows the surface clearly and add faux fur as a contrasting frame.
This creates a useful texture hierarchy: defined crochet across the hood and soft plushness only at the edges.
Swatch the Trim Against the Main Fabric
A lightweight textured hood can behave differently once a dense border is added. Attach a short fur sample to your swatch and observe whether the edge begins to sag or fold.
That test gives you more useful information than comparing the two yarns separately.
Creator Credit: Briana K
7. Crochet Pocketed Faux Fur Hooded Collar Scarf
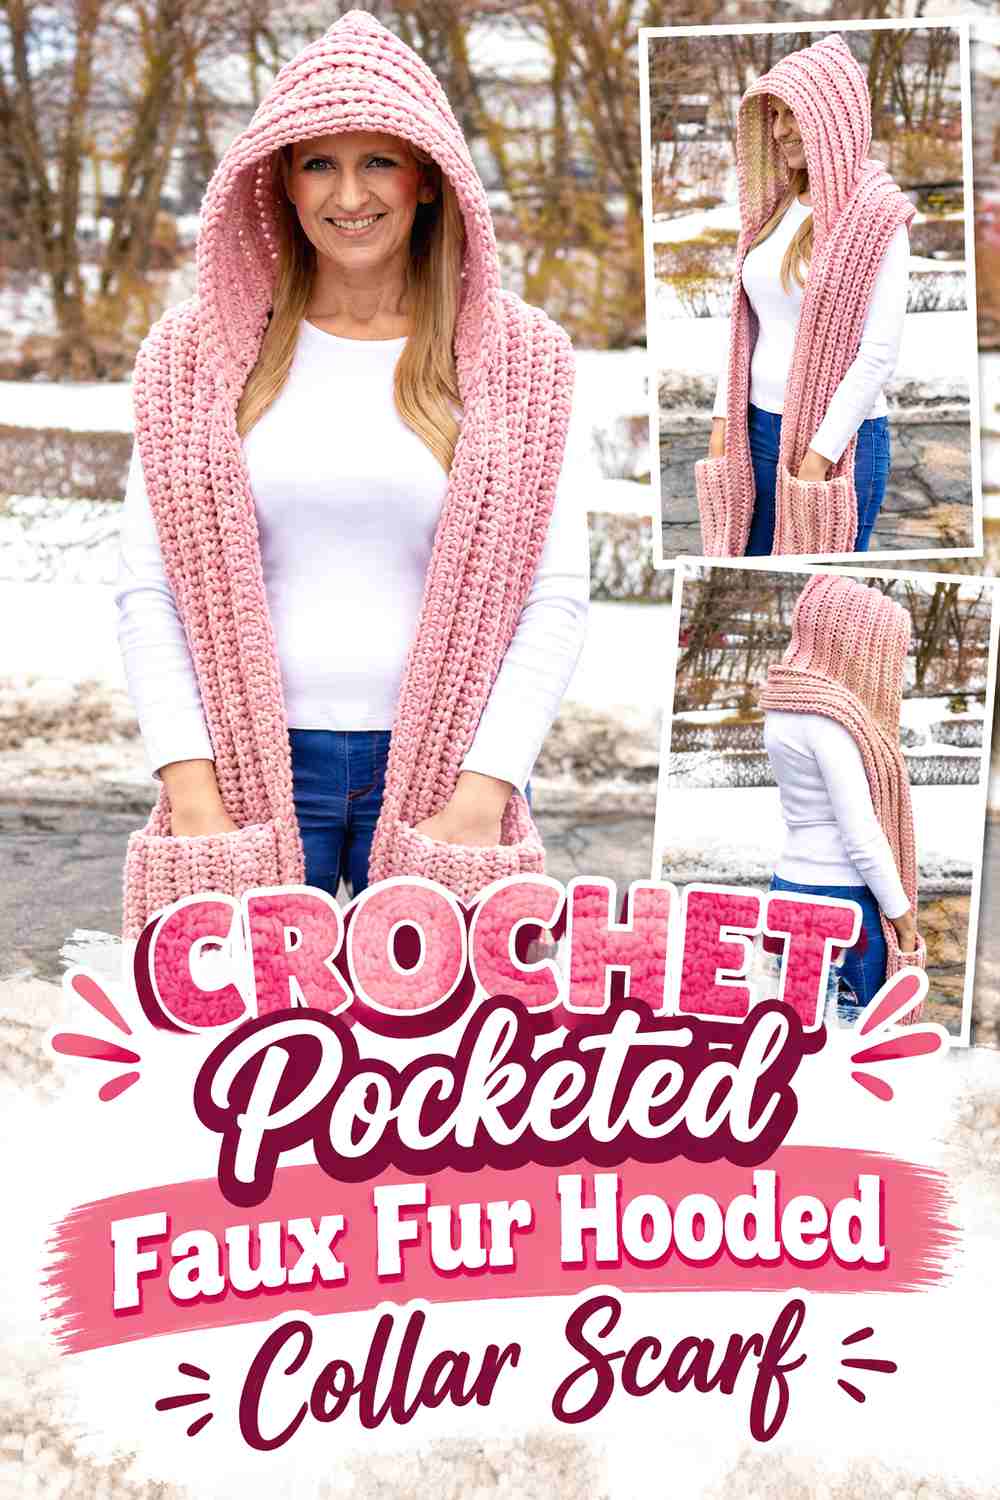
Naztazia’s hooded scarf combines a rounded hood with long scarf panels and pockets. For a faux fur coat accessory, this is the more substantial end of the category: the hood can function as a plush collar when lowered while the long sections extend down the front.
Keep the Fur Above the Pocket Line
Adding plush yarn to the hood and upper collar gives the winter-coat effect without making the pocket ends unnecessarily heavy.
If the pockets are the practical feature you care about most, leave their openings clearly defined so the fur does not make them difficult to find.
Judge the Full Weight While Wearing the Hood
Long scarf ends and pockets already add fabric below the hood. A thick faux fur border contributes more weight at the top.
Let the complete piece hang naturally during a fit check. If the hood begins pulling backward, adding more trim is unlikely to improve the fit.
Creator Credit: naztazia
8. Crochet Cable-Panel Faux Fur Hooded Collar
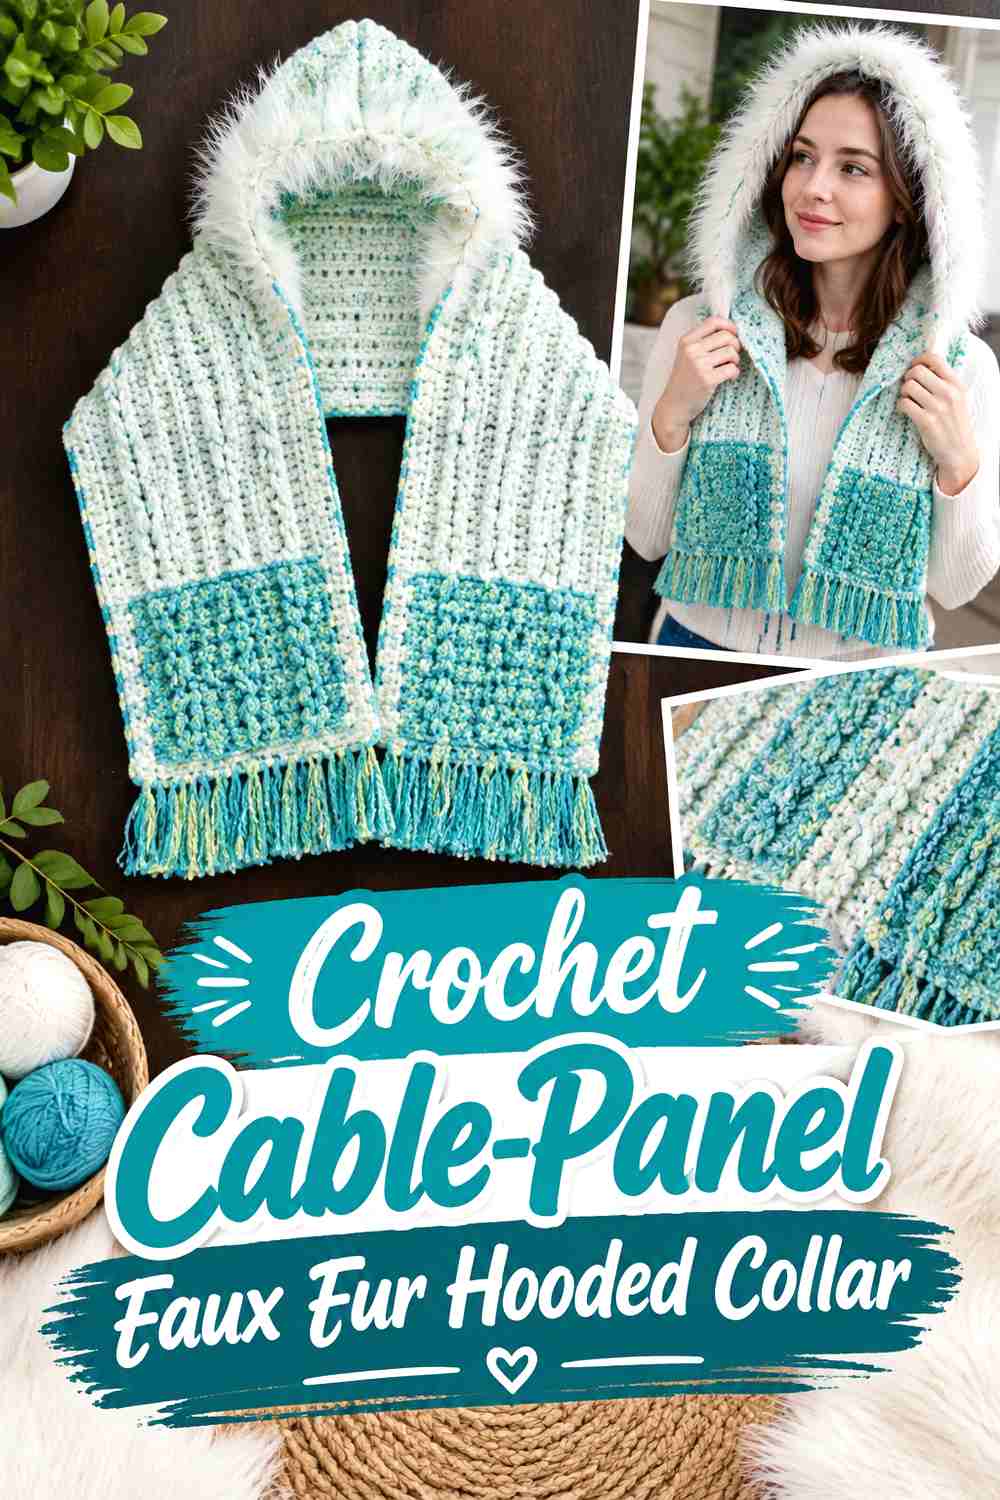
This route pairs structured cable texture with a plush border. Let’s All Crochet demonstrates a hooded scarf with cables, pockets, a border, and fringe, offering several finishing elements that can be simplified into a more coat-focused accessory.
Let Cables and Fur Play Different Roles
Cables provide structured surface detail; faux fur provides softness. Using both across the same area can make the fabric visually crowded.
Keep the cables through the body of the hood and collar, then use the fur like a frame around the face or neckline.
Decide Whether Fringe Still Belongs
A cable scarf can support fringe, but a faux fur hood already introduces another strong texture. Adding both may be more detail than you want with a tailored coat.
Before finishing the ends, compare the piece with and without fringe. The cleaner option may let the coat and hood work together more easily.
Creator Credit: Let’s All Crochet
9. Crochet Shaped Faux Fur Pocket Hooded Collar
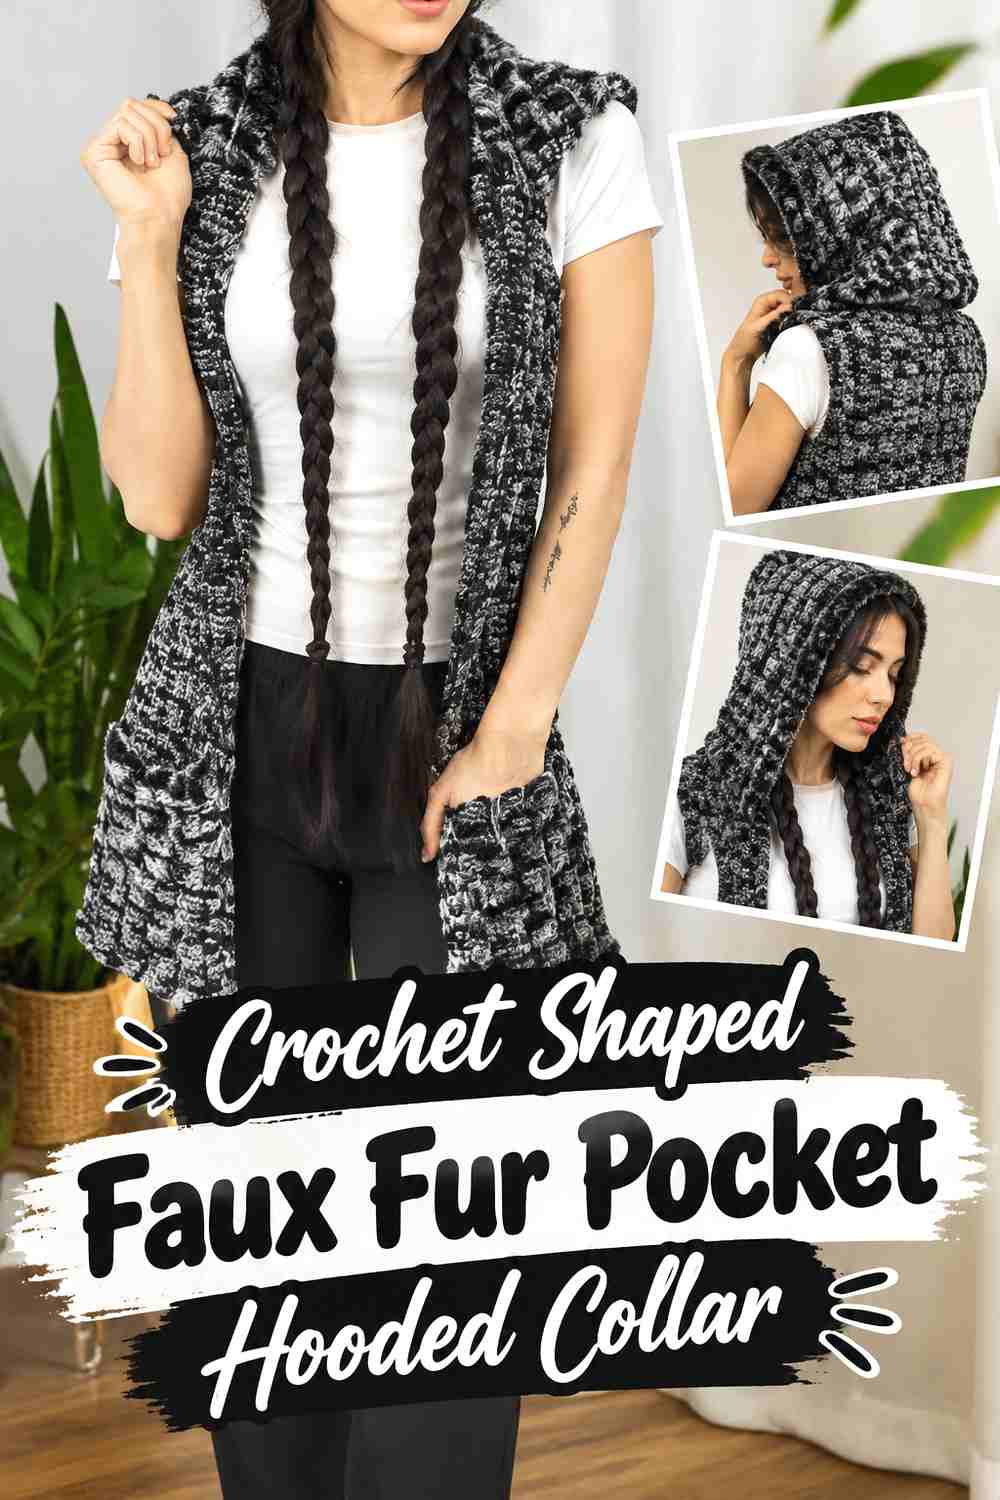
TCDDIY’s hooded scarf uses extended half double crochet, shaped hood sections, and pockets. It provides a different pocket-scarf route from the heavier rounded version because the stitch scale and hood shaping are handled differently.
Finish the Hood Shape Before Deciding the Fur Width
Shaping at the crown affects the way the opening sits around the face. Complete and try the hood before adding a thick border that could disguise those lines.
A narrower fur trim may be enough if the hood already has a strong silhouette.
Keep the Pocket Ends Visually Simple
If both the hood and pockets have heavy trim, the accessory can look visually weighted at both ends. One plush focal area is often easier to style over a coat.
Use the pocket sections to repeat a small accent color instead of necessarily repeating the fur.
Creator Credit: TCDDIY
10. Crochet Infinity Faux Fur Hooded Collar
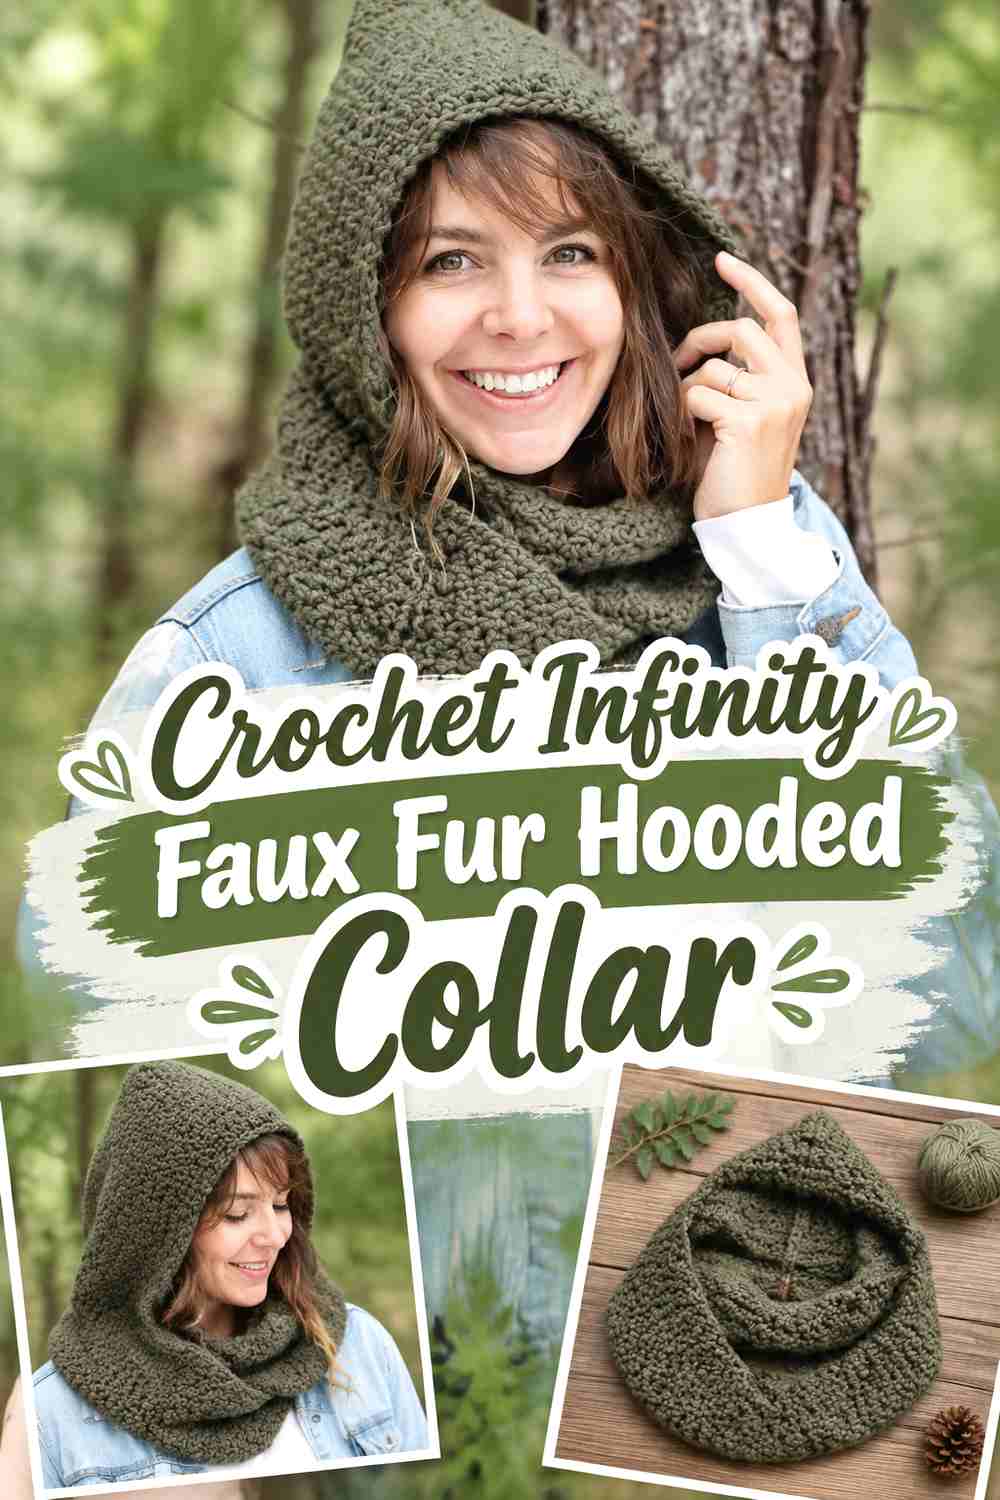
An infinity construction removes loose scarf tails completely. Kay Krochets’ hooded design combines a wrapped loop with an attached hood, which can be adapted into a deep faux fur-edged collar that stays close to the neckline.
The Closed Loop Needs Enough Room for Outerwear
A loop that fits over a sweater may feel restrictive once worn over a coat. Check the circumference with the intended outer layer before completing the final join.
The fur border should not become the part that limits stretch or movement.
Use the Lowered Hood as an Oversized Collar
This construction is particularly useful when the accessory needs to look intentional with the hood down. Arrange the hood around the back of the neck and check how the fur settles on the shoulders.
A trim that looks balanced around the face may need gentle redistribution when the hood becomes a collar.
Creator Credit: Kay Krochets
11. Crochet Two-Panel Faux Fur Hooded Collar
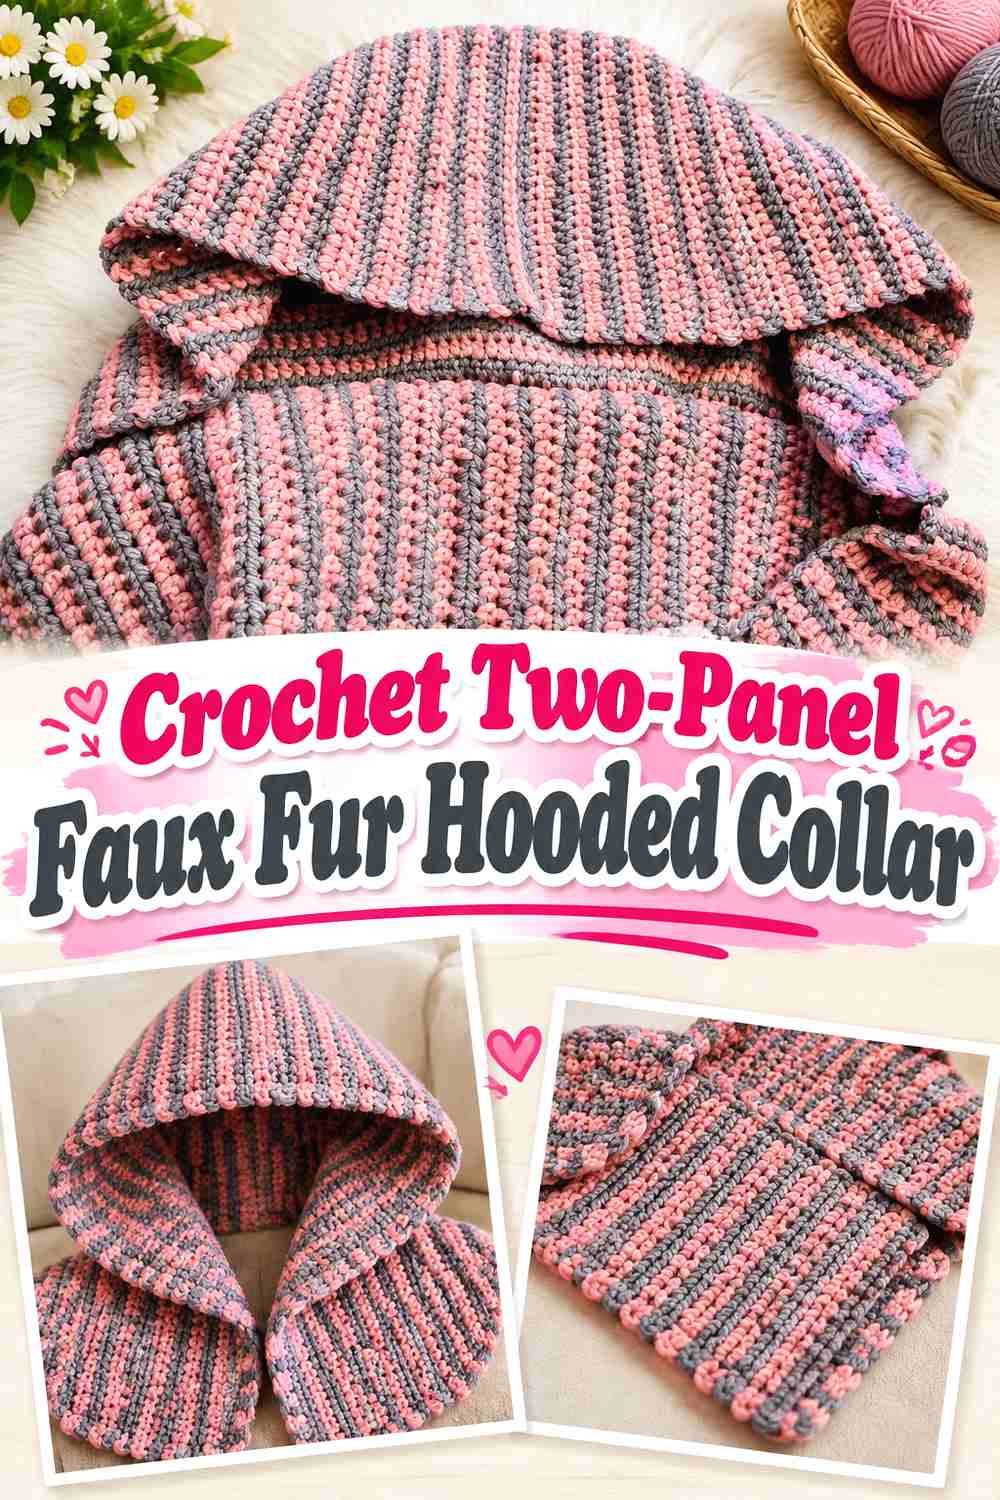
Crochetnotes builds a hooded scarf from separate rectangular sections. That straightforward geometry makes it useful for a two-material adaptation: one fabric can establish the structure while faux fur becomes a clearly defined finishing element.
Separate Pieces Make Fur Placement Easier to Plan
Before joining the hood and scarf sections, lay them in their final arrangement and mark the areas that will remain visible with the hood lowered.
This lets you place the faux fur strategically instead of adding trim around every available edge.
Check the Center Before Making the Join Permanent
The added fur will draw attention to the face opening, so an off-center hood becomes more noticeable. Pin or mark the connection first and compare the length of both front sections.
Make the structural alignment correct before using the trim to finish it.
Creator Credit: Crochetnotes
12. Crochet Two-Tone Faux Fur Hooded Collar
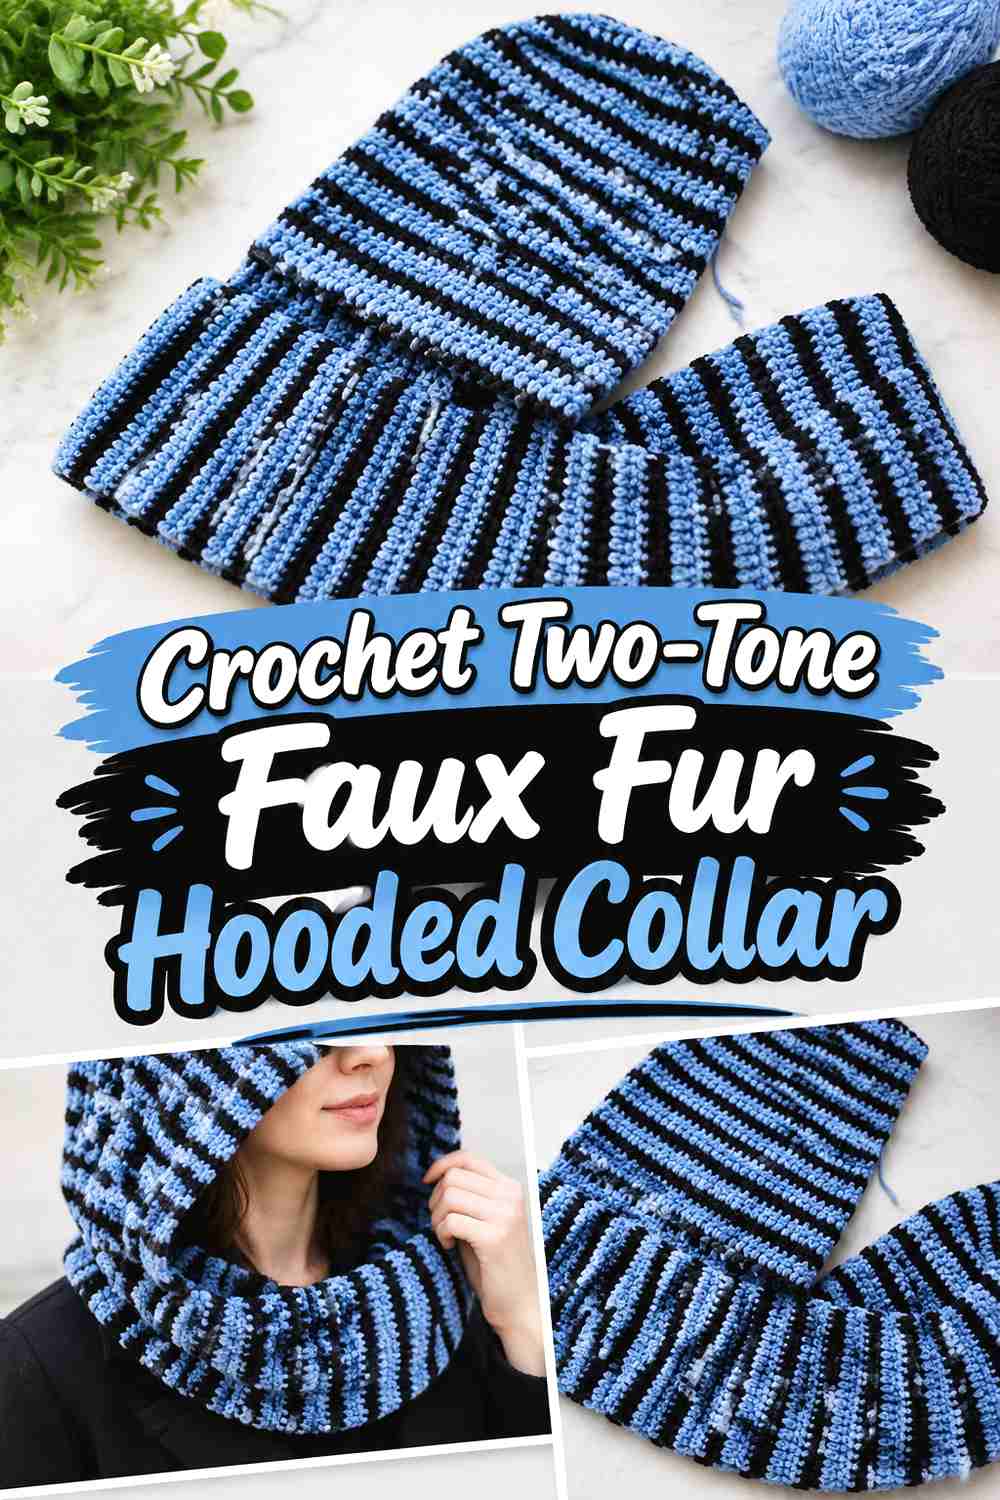
Anna Greene’s hooded scarf uses separate scarf and hood components with two colors. A contrasting faux fur yarn can take over the secondary-color role, producing a clearly framed hood without requiring an all-fur construction.
Let the Fur Become the Contrast Color
A dark hood with a pale fur frame creates a strong face outline, while tonal shades produce a quieter result. Decide which effect suits the coat before purchasing the trim yarn.
Remember that long-pile fur can make a color area appear visually larger than the same number of rows in smooth yarn.
Fit the Separate Hood Before Attaching It
Working the hood independently gives you an opportunity to check crown depth and face coverage before it becomes part of the scarf.
Do that fit check with your hair arranged the way you normally wear it in winter; hairstyle volume can change how a close hood sits.
Creator Credit: Anna Greene
13. Crochet Granny-Square Faux Fur Hooded Collar
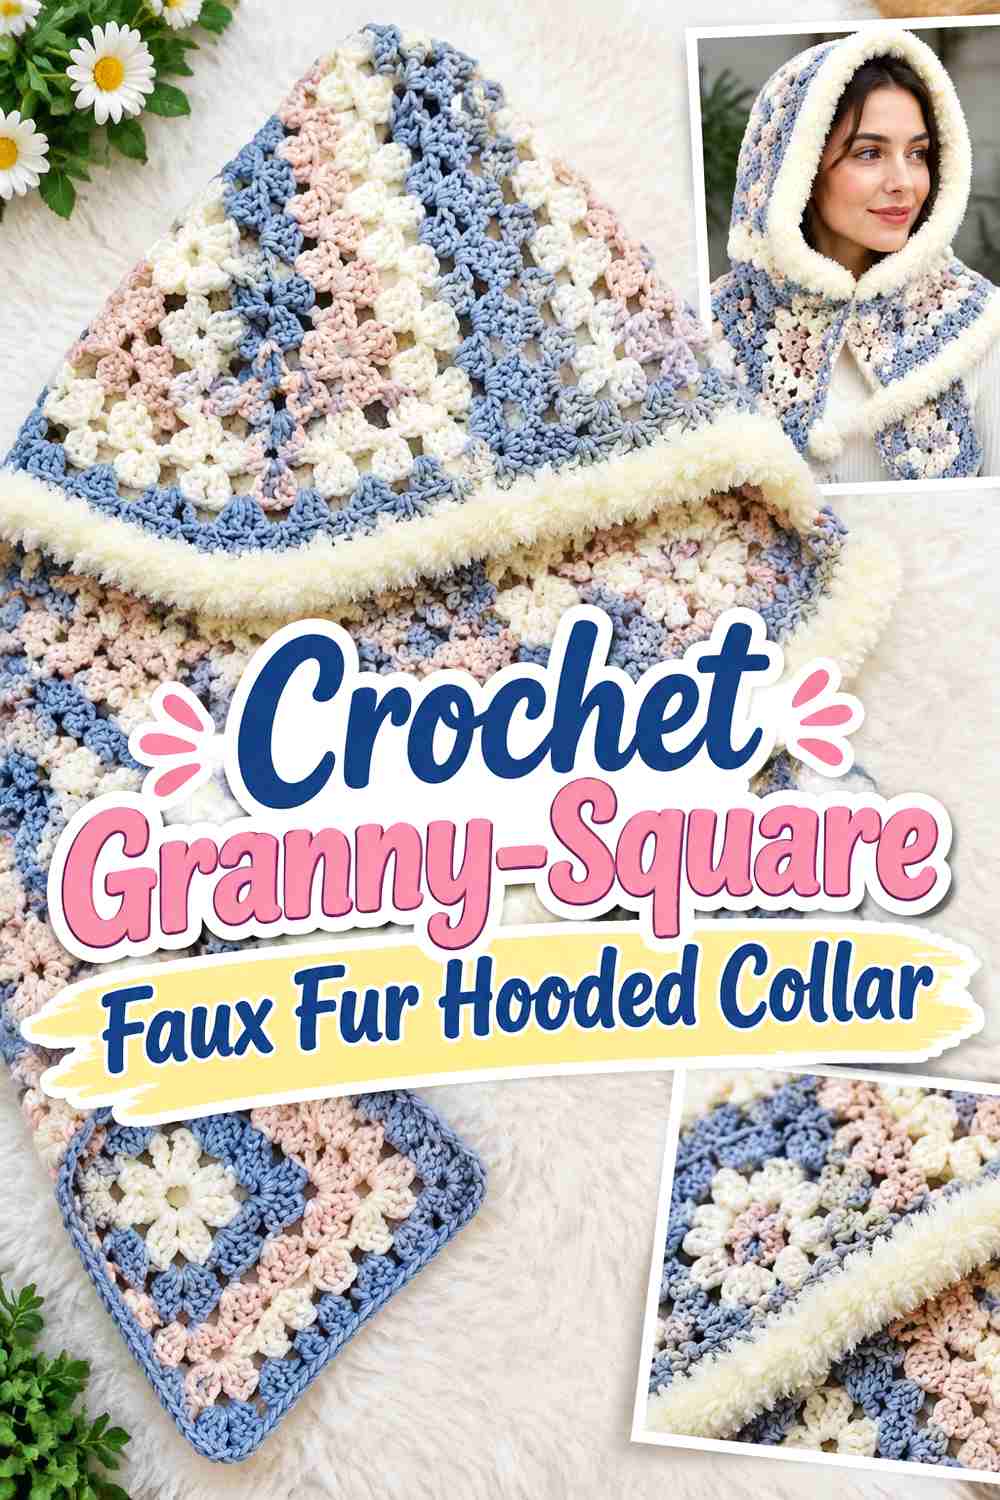
Crochet Musings uses large and smaller granny squares to build a hooded scarf, creating a modular alternative to solid-panel crochet. A restrained fur border can give the colorful motif construction a winter-coat finish without covering the square layout.
Keep Faux Fur Away From the Motif Centers
The granny squares are the visual feature. A wide plush overlay across them would hide the color placement and open structure.
Use the fur around the hood perimeter and possibly the lowest collar edge, where it acts as a frame rather than another motif.
Check the Large Hood Squares First
The hood depends on the dimensions of the larger motifs. Confirm how those squares fold and sit around the head before making all the smaller pieces.
Changing the trim later will not correct a hood whose underlying motifs are the wrong size.
Creator Credit: Crochet Musings
14. Crochet Patchwork Faux Fur Hooded Collar
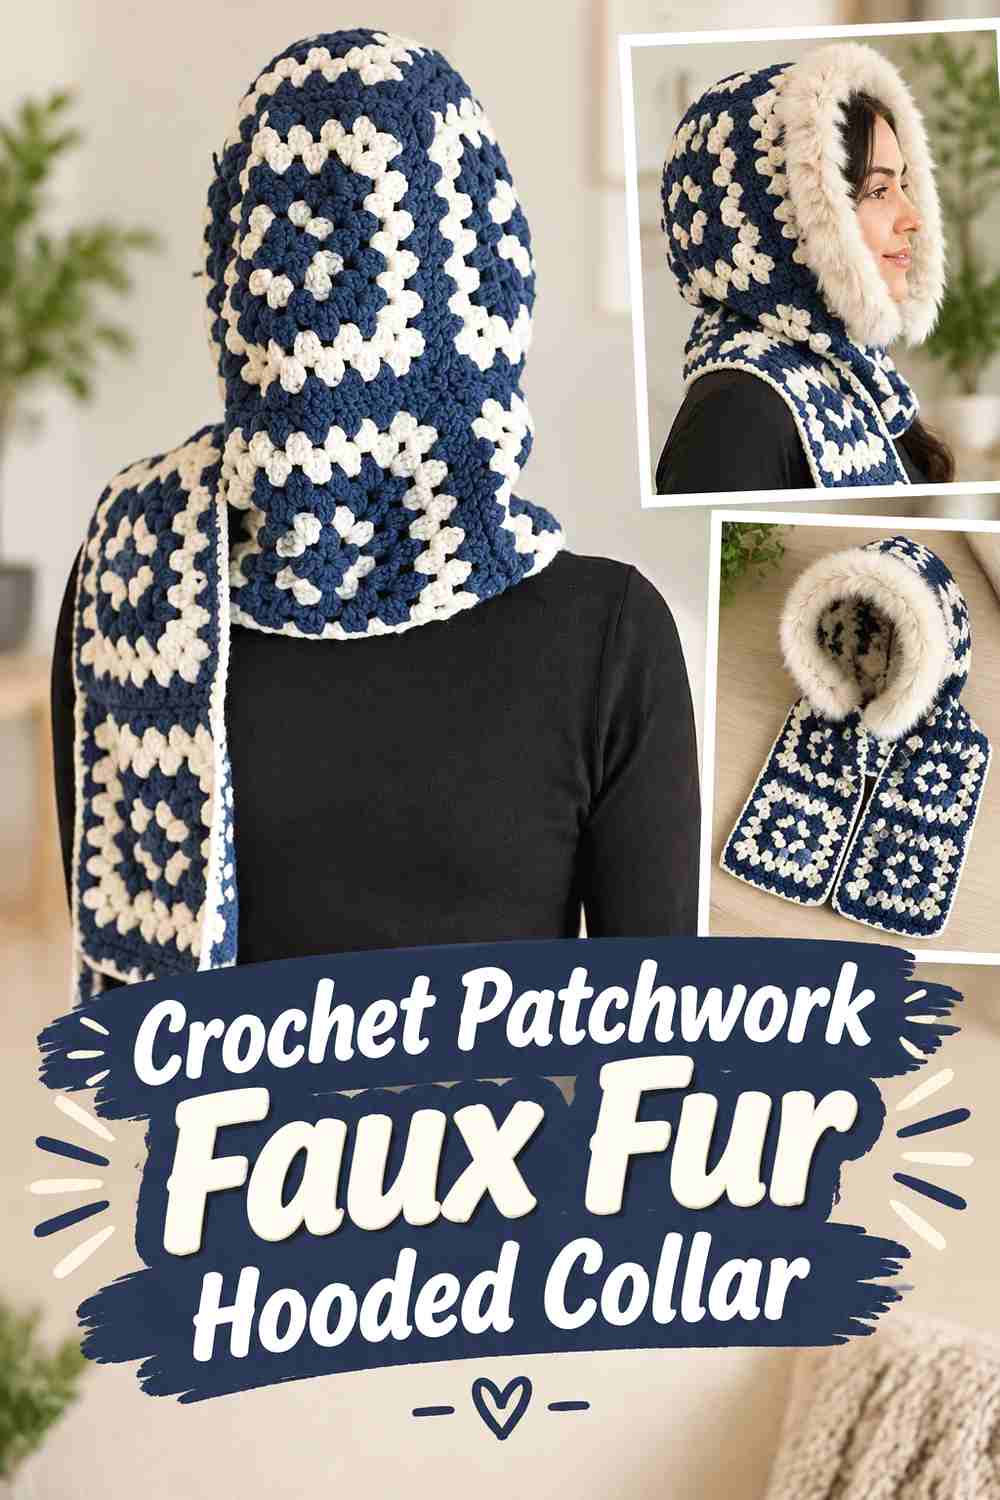
Käthe’s hooded scarf construction relies on joined granny squares throughout the hood and scarf. For a faux fur collar adaptation, the modular surface can be paired with a simple plush face edge to create a patchwork-meets-shearling look.
Make Consistent Squares Before Adding a Statement Border
A fur edge can disguise individual stitches, but it cannot correct inconsistent motif dimensions. Block or shape the squares as appropriate for the yarn and compare them before assembly.
Uniform joins help the hood hang evenly when worn down as a collar.
Keep the Palette Controlled
Patchwork plus faux fur already gives the accessory two strong visual elements. A limited coat-friendly palette can keep the finished piece from becoming overly busy.
Neutral fur around cream, brown, grey, burgundy, or muted green motifs can let the geometry remain readable.
Creator Credit: Käthe
15. Crochet Join-Detail Faux Fur Hooded Collar
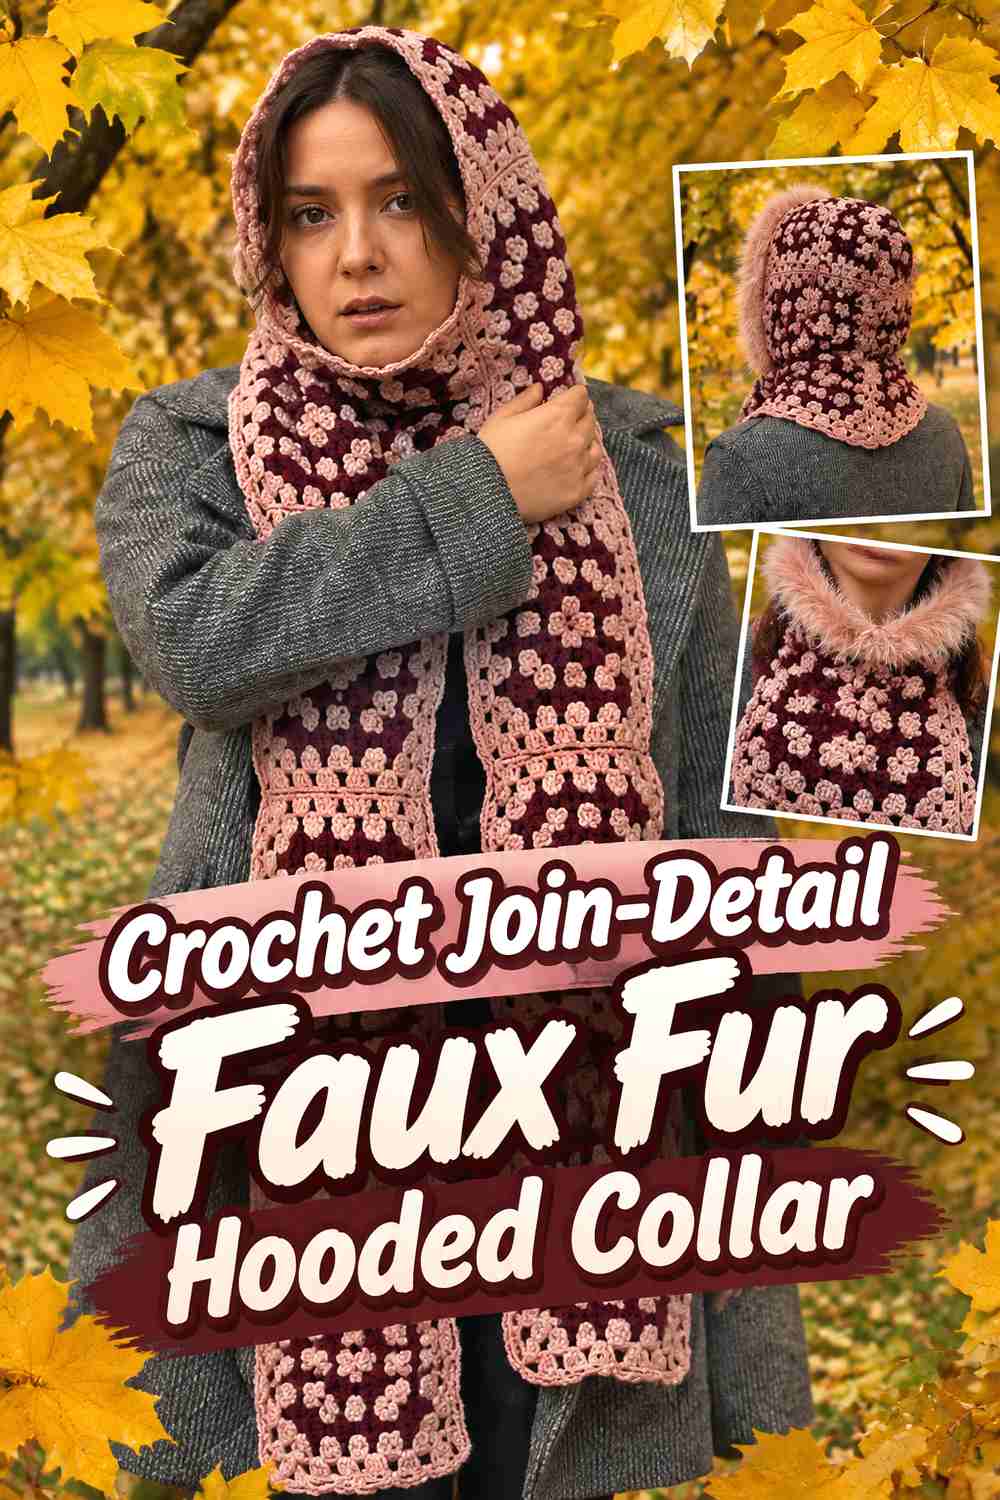
fiorafana demonstrates a granny-square hooded scarf with choices in how the motifs are joined. This provides a useful route when you want the seams themselves to remain part of the design while faux fur is limited to the outer frame.
Choose the Join Before Choosing the Fur
Some joins sit flatter than others, and a hood needs to fold comfortably around the head. Test your preferred join between sample motifs and view it from both sides.
Once the structural finish is settled, choose a fur depth that does not cover the detail you intentionally selected.
Stop the Fur at Logical Corner Points
A modular hood has natural visual boundaries where motifs meet. Use those points to begin and end trim instead of stopping randomly in the middle of a square edge.
That makes the adaptation look planned rather than added as an afterthought.
Creator Credit: fiorafana
16. Crochet Face-Framing Faux Fur Hooded Collar
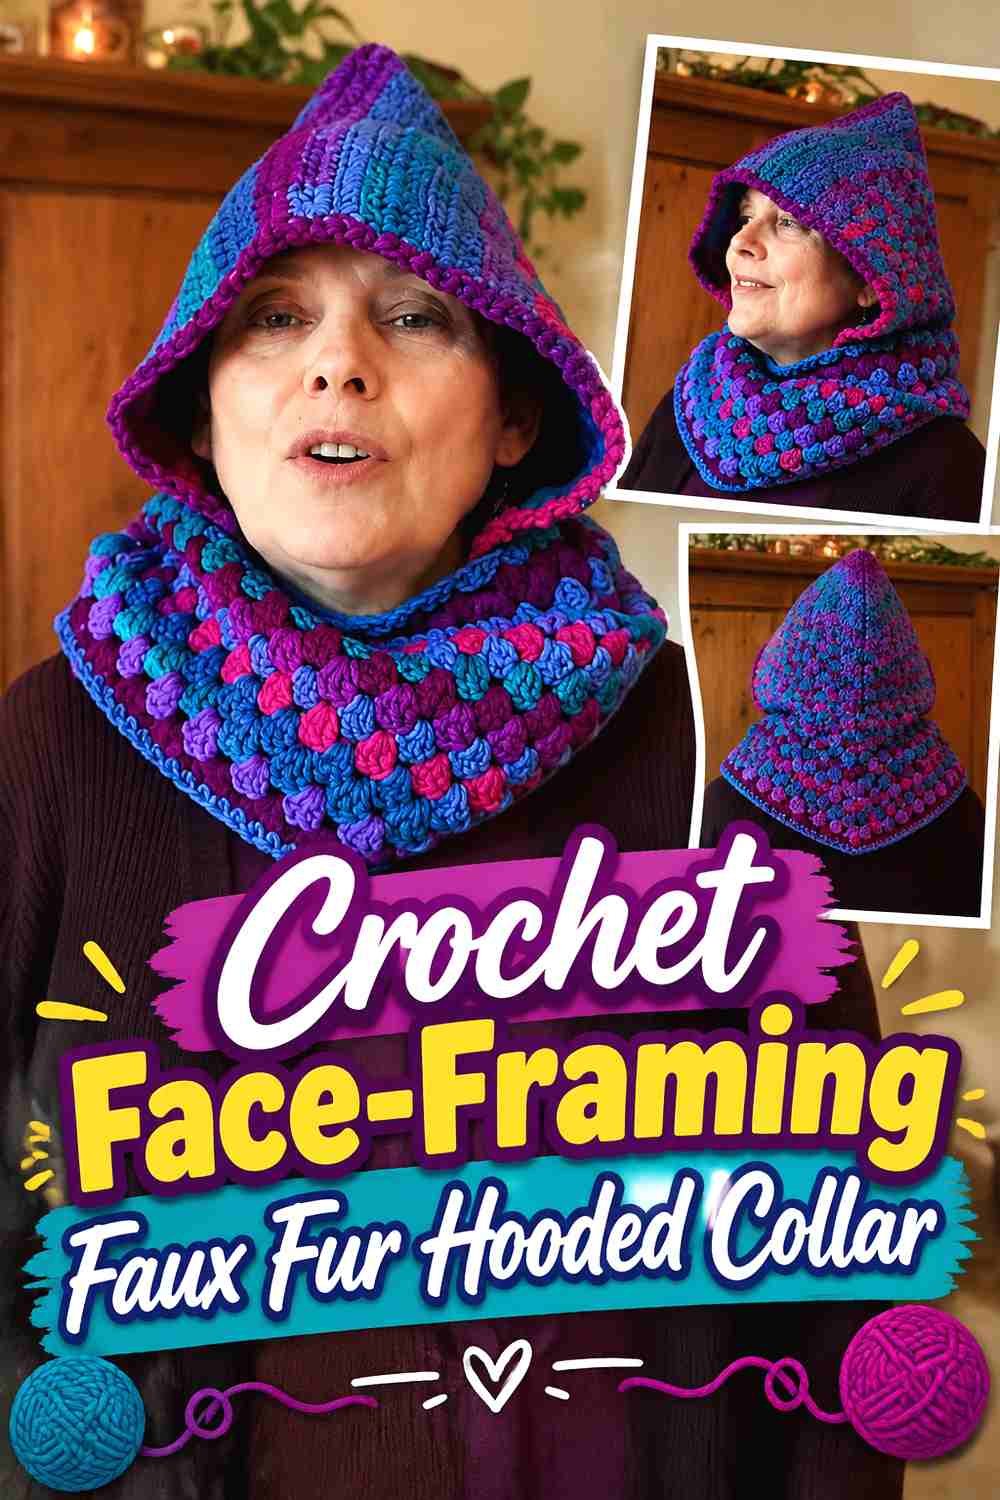
Patricia Fentie demonstrates adding a hood to a scarf and finishing the face opening with a defined border. That edge-focused construction is particularly compatible with faux fur because the trim can replace or visually reinforce the face frame without changing the entire hood fabric.
Treat the Face Edge as a Separate Design Zone
Finish and fit the hood first. Then think of the opening as its own narrow band where you can change texture, color, or yarn.
This approach offers more control than substituting faux fur into the hood’s main stitch pattern.
Avoid Pulling the Fur Border Too Tight
Any border around the face can change the opening if its tension differs from the hood fabric. Work a short section, let it relax, and check whether it begins drawing the edge inward.
A soft-looking trim should still allow the hood to sit naturally around the forehead and jaw.
Creator Credit: Patricia Fentie
17. Crochet Sophie-Style Faux Fur Hooded Collar
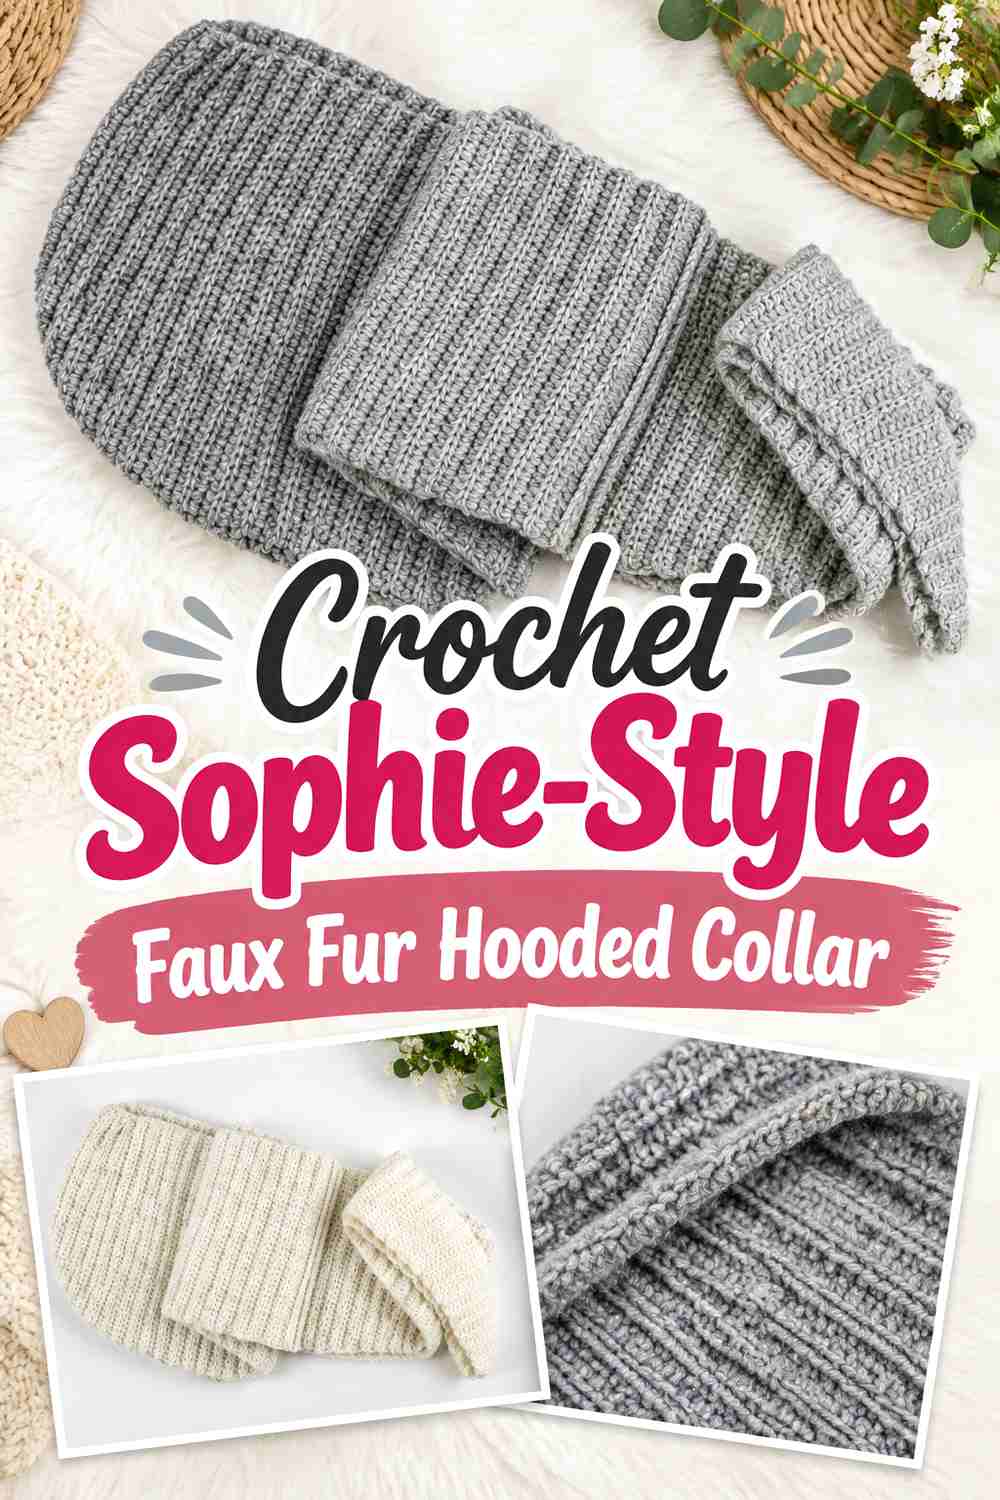
Francesca Uncinettando Crochet&Love offers a crochet hooded scarf with a softer, tapered fashion silhouette. This is a good direction when you want the faux fur to feel like a refined coat accent rather than a bulky outdoor cowl.
Keep the Plush Detail Narrow
A broad fur band can visually overpower a slim tapered scarf. A restrained border around the face maintains the lighter proportions while still creating a luxurious winter finish.
The contrast is especially effective when the main crochet fabric remains smooth and understated.
Judge the Shape With the Hood Down
This style should also work as a collar when you enter a building and lower the hood. Arrange the fabric at the neckline and make sure the fur does not bunch into a single thick roll behind the neck.
The best trim width is the one that behaves well in both positions.
Creator Credit: Francesca Uncinettando Crochet&Love
18. Crochet Textured-Brim Faux Fur Infinity Collar
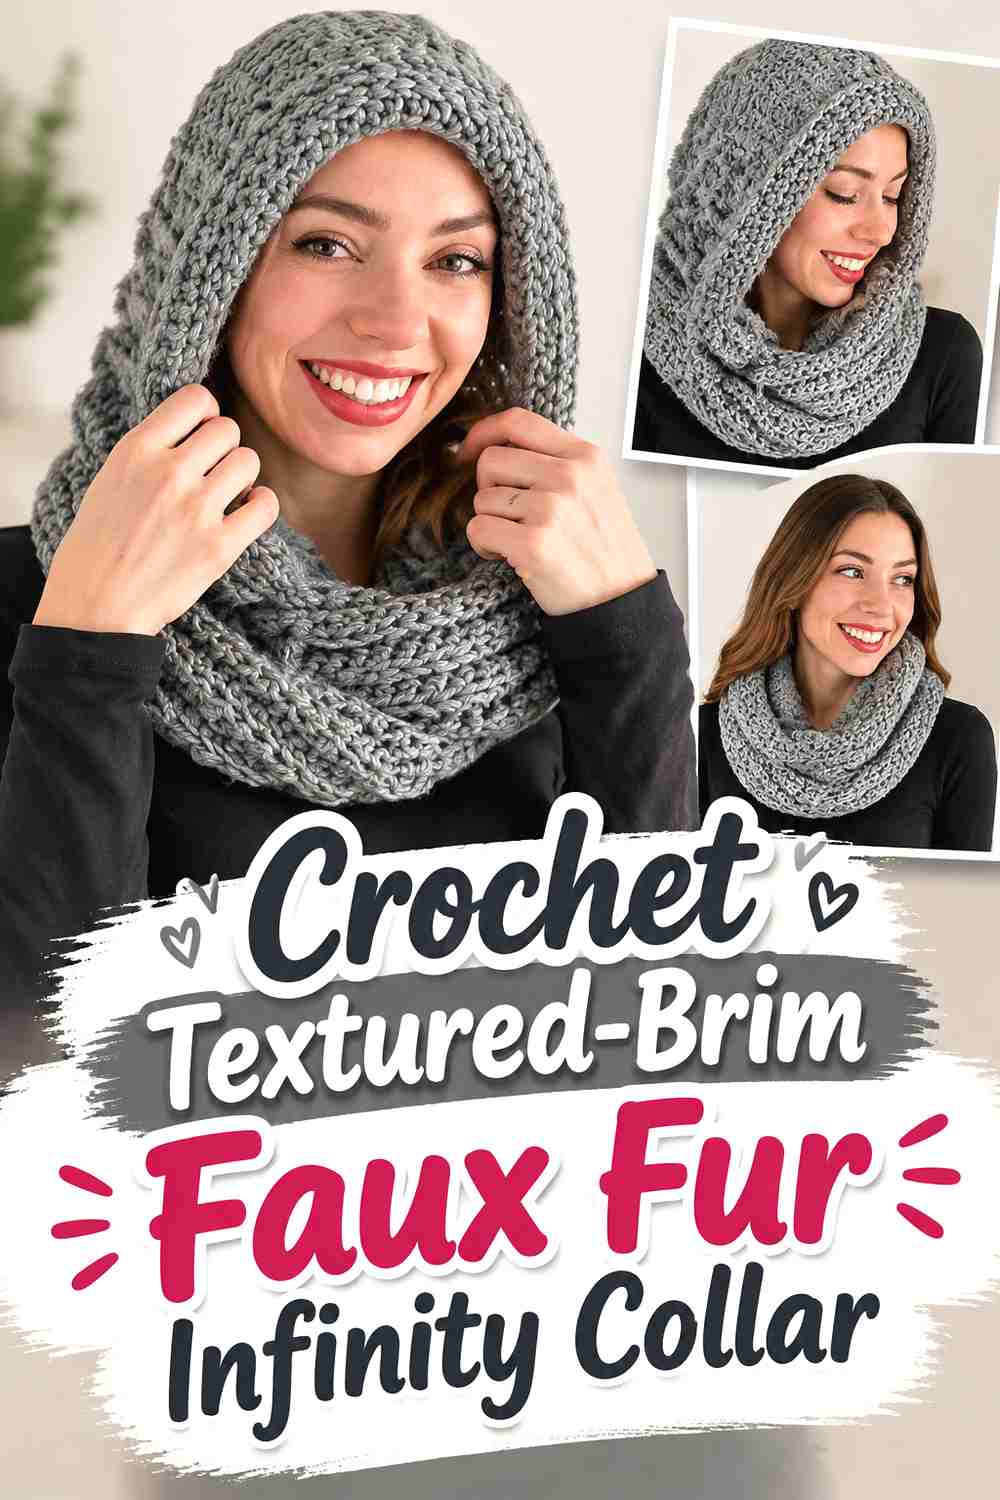
Wilmade’s hooded infinity scarf uses a closed neck loop and a distinct brim around the hood opening. That brim provides a natural location for a faux fur substitution because it already functions separately from the main scarf body.
Replace a Visual Border Without Rebuilding the Hood
Rather than changing the complete pattern fabric, treat the faux fur as an alternative finishing concept for the face edge.
First confirm the original hood and loop dimensions. Then swatch the fur border to see how much width and firmness it contributes.
Check the Pull-On Opening Before Final Finishing
An infinity collar needs to pass over the head comfortably. A bulky trim near the upper opening can alter that experience even if it stretches differently from the body yarn.
Test the unfinished loop before securing every end or adding additional decorative layers.
Creator Credit: Wilmade
19. Crochet Turtleneck Faux Fur Hooded Collar
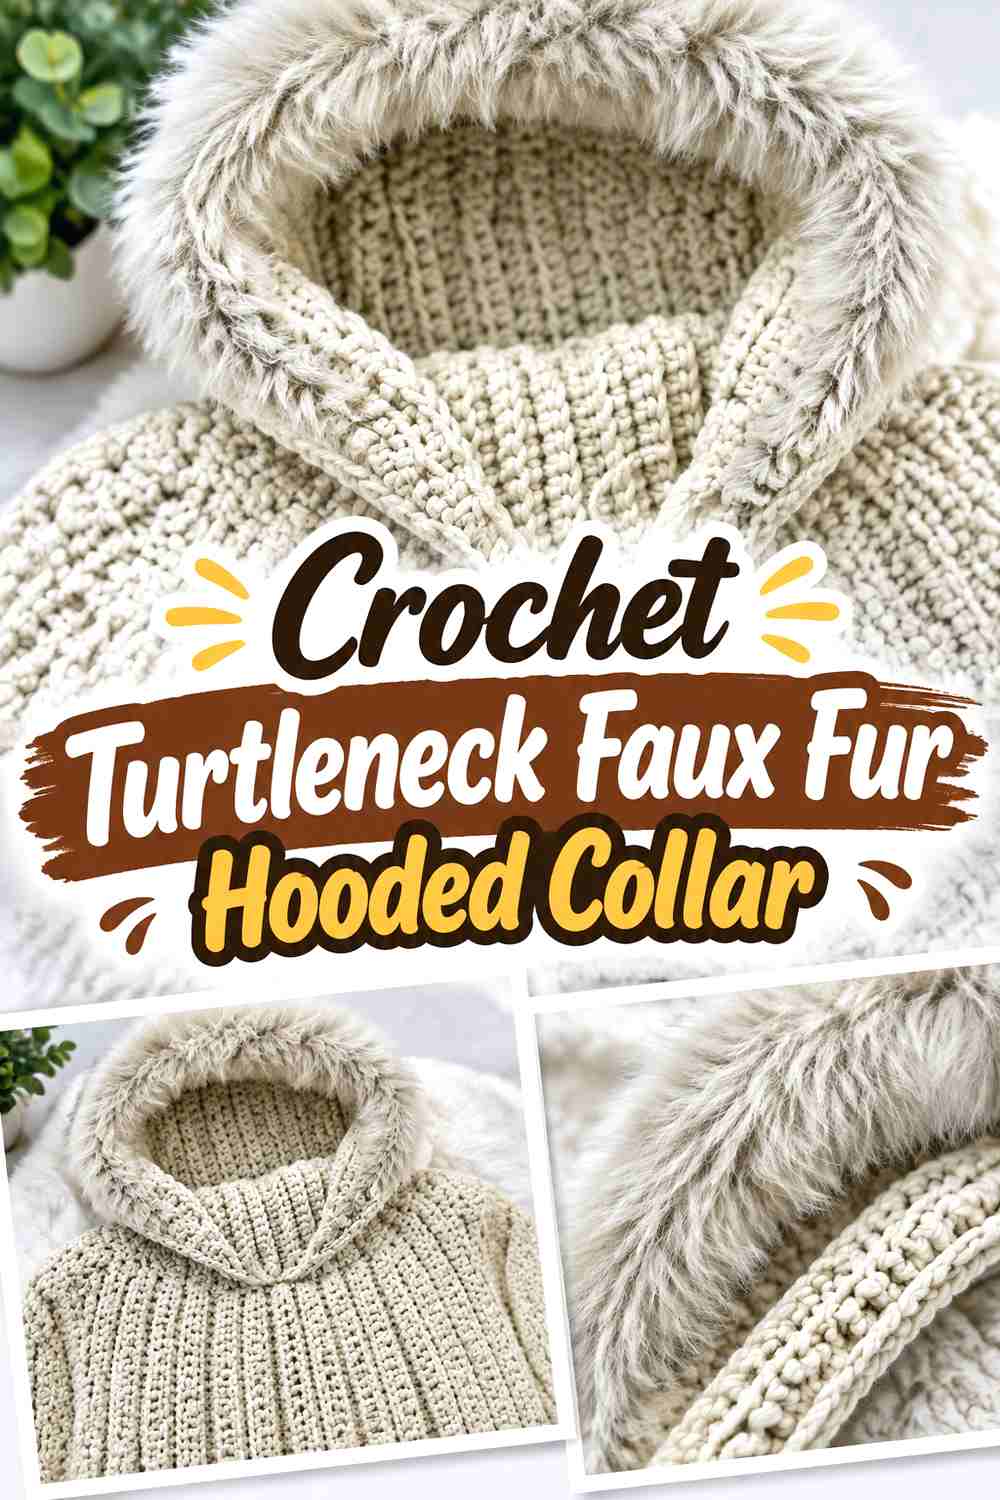
Lana Loca – moderne Handarbeiten combines a hood with a close turtleneck-style neck section. This is the most compact collar-focused option in the collection because it removes long scarf tails and concentrates the fabric directly around the head and neckline.
Use Fur to Highlight the Hood, Not Tighten the Neck
The turtleneck section already provides substantial neck coverage. Keeping faux fur primarily around the hood opening avoids adding unnecessary thickness against the throat.
If you do add plush yarn to the collar, keep comfort and stretch more important than appearance.
Pair This Shape With Lower Coat Collars
A tall crochet neck plus a high structured coat collar can compete for the same space. Try them together before committing to a deep fur finish.
This compact design makes more sense when the outer coat leaves enough room around the neck for the crochet collar to sit naturally.
Creator Credit: Lana Loca – moderne Handarbeiten
Comparing Faux Fur Hooded Collar Shapes
| If you prefer… | Ideas to compare | Main checkpoint |
|---|---|---|
| A neat tailored-coat look | 1, 2, 16, 17 | Keep the fur border narrow enough to preserve the hood shape |
| A removable accessory | 5 | Test the hood attachment while actually wearing the coat |
| Long scarf coverage | 3, 7, 8, 9 | Check whether the hanging fabric pulls on the hood |
| No loose scarf ends | 10, 18, 19 | Confirm the closed opening is comfortable over the head and coat |
| Strong stitch texture | 6, 8 | Keep faux fur from hiding the main crochet surface |
| Patchwork or motif styling | 13, 14, 15 | Establish consistent motif dimensions before adding trim |
| A bold contrasting frame | 4, 12, 16 | Check trim placement from both the hood-up and hood-down views |
For a polished coat accessory, the face-framed, tapered, and Sophie-style versions provide the cleanest starting silhouettes. If function matters more than a minimal outline, the detachable hood, infinity constructions, and pocket scarves offer more ways to adapt the accessory to changing weather.
Conclusion
A successful crochet faux fur hooded collar begins with the right underlying shape. Choose a tapered or face-framed hood when you want a refined accent for a tailored coat, a detachable version when you switch between different outerwear, an infinity or turtleneck construction when you dislike loose scarf ends, or a patchwork design when the crochet itself should remain the visual focus.
Faux fur does not need to cover the whole project to have an impact. In many of these designs, a controlled border around the face or collar gives the strongest coat-like effect while preserving the fit and stitch structure of the original hood.
Use each credited tutorial for its exact construction, sizing, gauge, and assembly. When adapting it with faux fur, swatch the new yarn, test the hood over the intended coat, and make trim decisions only after you know how the original shape sits.
Frequently Asked Questions
Can I replace all the yarn in a hooded scarf pattern with faux fur yarn?
Not automatically. Faux fur yarn can have a different thickness, gauge, stretch, and drape from the yarn specified by the designer. It can also hide shaping stitches. If you want an all-fur hood, make a gauge sample and follow the creator’s sizing guidance rather than assuming a direct yarn substitution will produce the same fit.
Where should faux fur go on a crochet hooded collar?
The face opening and outer collar edge are practical places to start because they let the plush yarn function as trim instead of changing the complete construction. You can also use a fur panel or lining accent, but check how much bulk it adds when the hood is lowered behind the neck.
How can I crochet when faux fur yarn hides the stitches?
Use stitch markers at important intervals and rely on touch as well as sight when locating stitches. A contrasting practice swatch can help you become familiar with the yarn before working around a shaped hood edge. If accurate shaping is difficult to read, keeping the structural hood in smooth yarn and using faux fur only for trim is another option.
How wide should a faux fur hood border be?
There is no universal width because the right amount depends on the hood opening, yarn thickness, and the effect you want. Pin or temporarily position a sample around the completed hood and look at it from the front and side. The border should frame the face without pushing toward the eyes or noticeably distorting the opening.
Can I add faux fur to an existing crochet hooded scarf?
Yes, if the edge has enough stability to support the additional yarn. Before attaching a complete border, test a short section and check whether the trim makes the edge sag, tighten, or roll. Also confirm that the new yarn’s care requirements are compatible with the original piece.
How do I keep a faux fur hooded collar from feeling bulky under a coat?
Avoid stacking several thick elements in the same place. If your coat already has a high collar, consider a tapered, detachable, or face-trim-only design rather than a deep turtleneck or double-wrapped cowl. Try the unfinished crochet piece with the coat fully fastened before adding the final plush border.
Should the faux fur match the coat or contrast with it?
Either can work. Tonal combinations such as charcoal with grey fur or camel with warm brown fur create a quieter finish, while cream fur against a dark coat produces a more pronounced frame. Construction and proportion matter more than color alone, so settle the hood shape and trim width before making color the deciding factor.