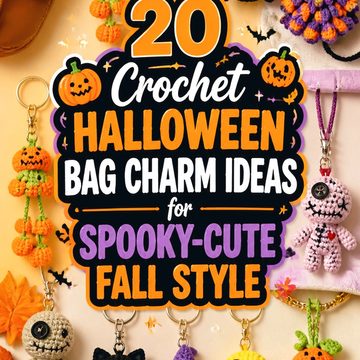
Vintage Halloween crochet can feel playful, eerie, or quietly nostalgic without requiring an actual antique pattern. The most convincing displays usually mix familiar October shapes—ghosts, webs, jack-o’-lanterns, witches, skulls, bats, and candy corn—with faded colors, lace-like texture, graphic faces, and decorations that look collected rather than perfectly matched.
These 18 ideas cover several display styles, from flat doilies and coasters to garlands, wall pieces, pillows, and dimensional shelf decor. The tutorials are modern sources, so “vintage” here describes the styling direction rather than the age of the patterns themselves. Use the comparisons and checkpoints below to decide which projects suit your space, how much storage they require, and which finishing choices can give them a more old-fashioned Halloween character.
Quick List
- Crochet Retro Ghost Appliqué Ornaments
- Crochet Lace Spiderweb Wall Hanging
- Crochet Skull Lace Doily
- Crochet Stuffed Candy Corn Shelf Accent
- Crochet Hanging Bat Decorations
- Crochet Mini Witch Hat Display Accent
- Crochet Pumpkin Table Coasters
- Crochet Sculptural Pumpkin Pillow
- Crochet Mini Cauldron Table Decor
- Crochet Bloodshot Eyeball Coaster
- Crochet Mummy Shelf Doll
- Crochet Halloween Door Wreath
- Crochet Candy Corn Mantel Garland
- Crochet Jack-o’-Lantern Table Sculpture
- Crochet Ribbed Pumpkin Garland
- Crochet Hanging Spider Accent
- Crochet Ghost Drink Coaster
- Crochet Retro Witch Shelf Doll
What Makes Halloween Crochet Look Vintage?
A vintage-inspired Halloween display does not depend on making every project brown or artificially aged. Color relationships matter more. Warm cream beside soot black, burnt orange beside mustard, or faded chartreuse beside dark plum can evoke older Halloween cards and decorations without making the finished pieces look dirty or dull.
Texture helps too. Fine openwork naturally pushes a spiderweb or skull toward an old lace look, while ribbing and compact stitches can give pumpkins and candy corn a handmade folk-art quality. Graphic silhouettes—especially bats, ghosts, witches, and jack-o’-lantern faces—often feel more convincing than layers of novelty embellishment.
For a coordinated display, repeat two or three colors across unrelated projects rather than giving every item exactly the same palette. That keeps the collection connected while preserving the collected-over-time character that suits vintage seasonal decor.
Choose the Display Format Before the Halloween Motif
The place where an item will live should influence the project you choose. Flat ghosts, lace pieces, coasters, and garlands take relatively little storage space and can layer easily with framed prints, dishes, or other seasonal objects. A dimensional pumpkin, mummy, witch, cauldron, or candy corn creates more visual presence but also needs shelf depth and protected off-season storage.
Hanging pieces need different planning. Before committing to a long garland, make the first motif and use its actual finished dimensions to estimate how many will suit the mantel, window, or doorway. For wreaths, consider door clearance as well as the front-facing appearance.
This is also a useful way to avoid an overcrowded collection. A few dimensional focal objects usually pair better with flatter background pieces than a shelf filled entirely with similarly sized stuffed characters.
Yarn, Structure, and Finishing Change the Mood
The tutorial should remain your starting point for yarn and construction, especially when a creator has designed around a particular fabric behavior. If you substitute materials, remember that fiber, yarn thickness, hook choice, and tension can change scale, stiffness, drape, stitch definition, and how easily a piece holds its shape.
For lace pieces, clear stitch definition and careful finishing help the negative space remain visible. Dimensional decorations need even shaping and secure finishing so the intended silhouette does not disappear. Flat table pieces deserve a final check on a hard surface; decorative tails, facial embroidery, or bulky joins underneath can make a coaster wobble.
Seasonal placement matters as well. Keep yarn decorations away from open flames, hot bulbs, and other significant heat sources. Flameless lighting is the more practical choice when you want the glow of candles around a crochet Halloween display.
1. Crochet Retro Ghost Applique Ornaments
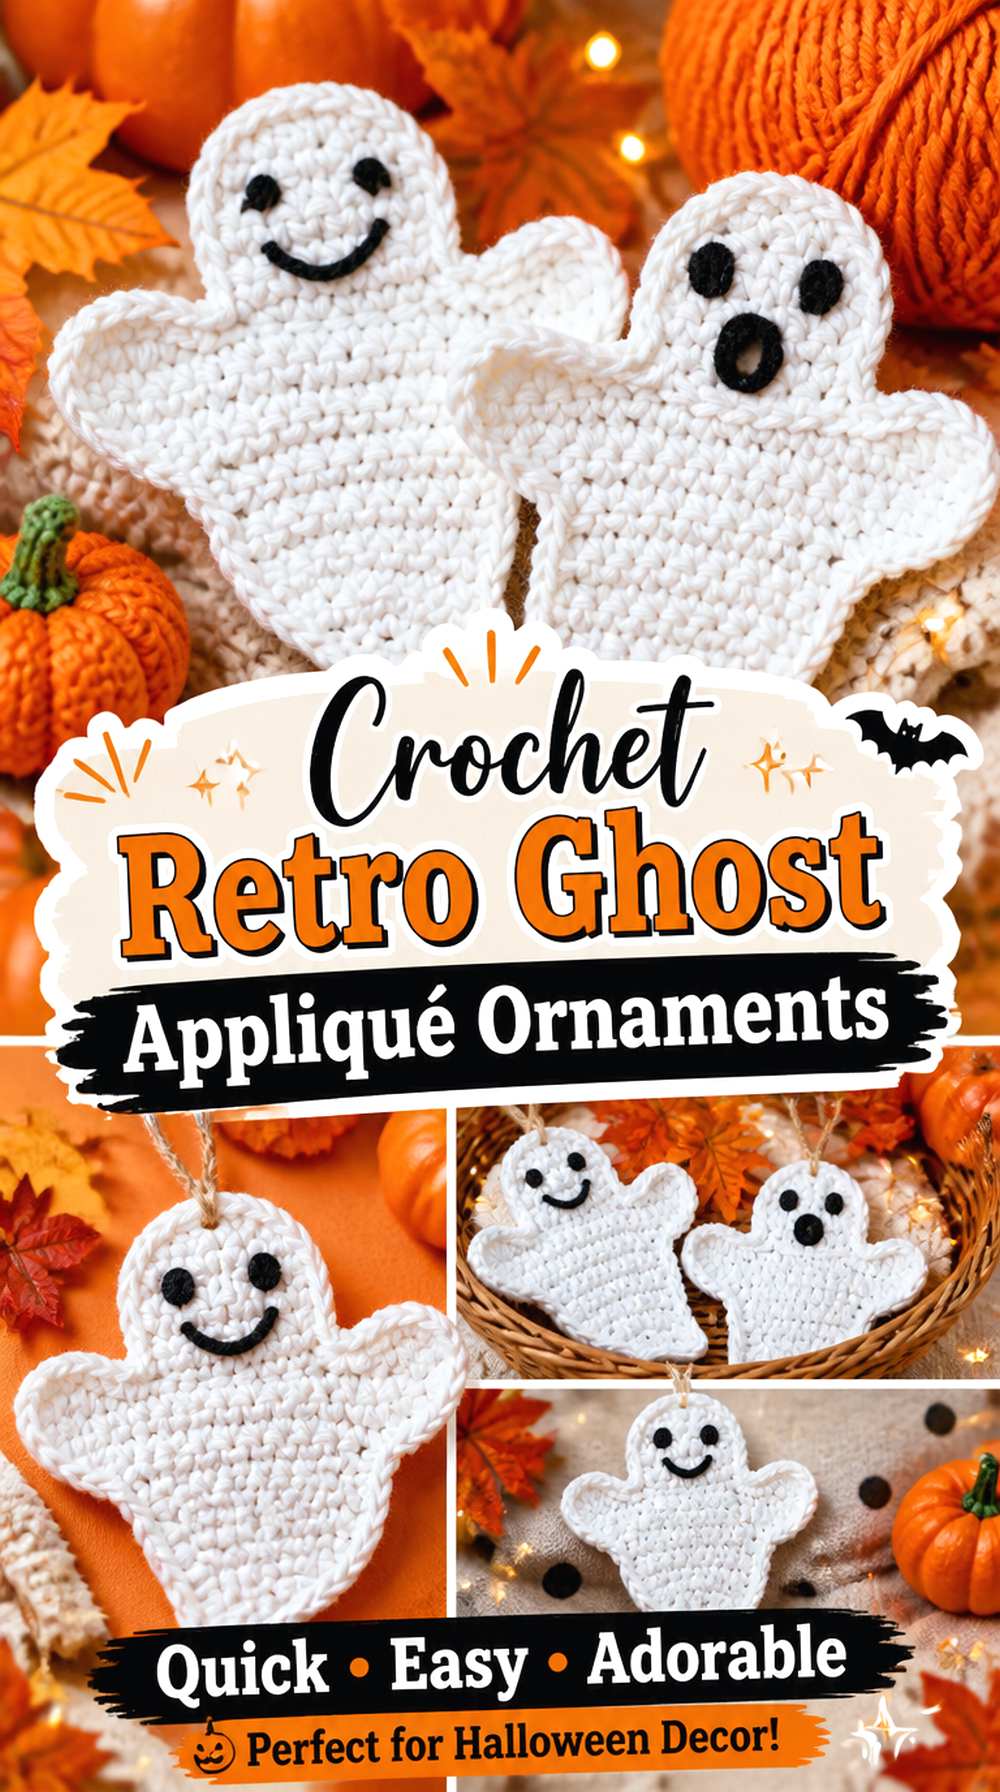
A flat crochet ghost is one of the easiest shapes to blend into an old-fashioned Halloween display because the silhouette does most of the work. Craft Fix knitting & crochet shows a finished ghost motif that can function as a hanging decoration or appliqué, with different facial expressions providing the personality.
For a vintage treatment, consider warm ivory instead of optic white and pair it with black facial details rather than adding many extra colors. A group of these ghosts can work across a cabinet, framed seasonal display, garland, or Halloween tree. Their flat construction also makes them a practical choice when storage space is limited.
Let the Face Carry the Character
A simple ghost becomes noticeably different once the expression changes. If you are making several, sketch or plan the facial moods first rather than improvising every face after assembly. A mix of round, surprised, and more traditional spooky expressions can create variety without changing the underlying motif.
For a vintage graphic effect, keep the facial features readable from the distance at which the ghosts will actually be displayed.
Plan a Repeating Display After the First Ghost
Avoid deciding garland spacing before seeing the completed motif. Finish one ghost, measure its actual width, then hold it against the intended mantel, doorway, or cabinet. That gives you useful information about both motif count and negative space.
If the ghosts are being used individually, a discreet hanging loop keeps them versatile; they can move between branches, knobs, wall hooks, or gift embellishments from one season to the next.
Original Tutorial and Creator Credit
Creator: Craft Fix knitting & crochet
2. Crochet Lace Spiderweb Wall Hanging
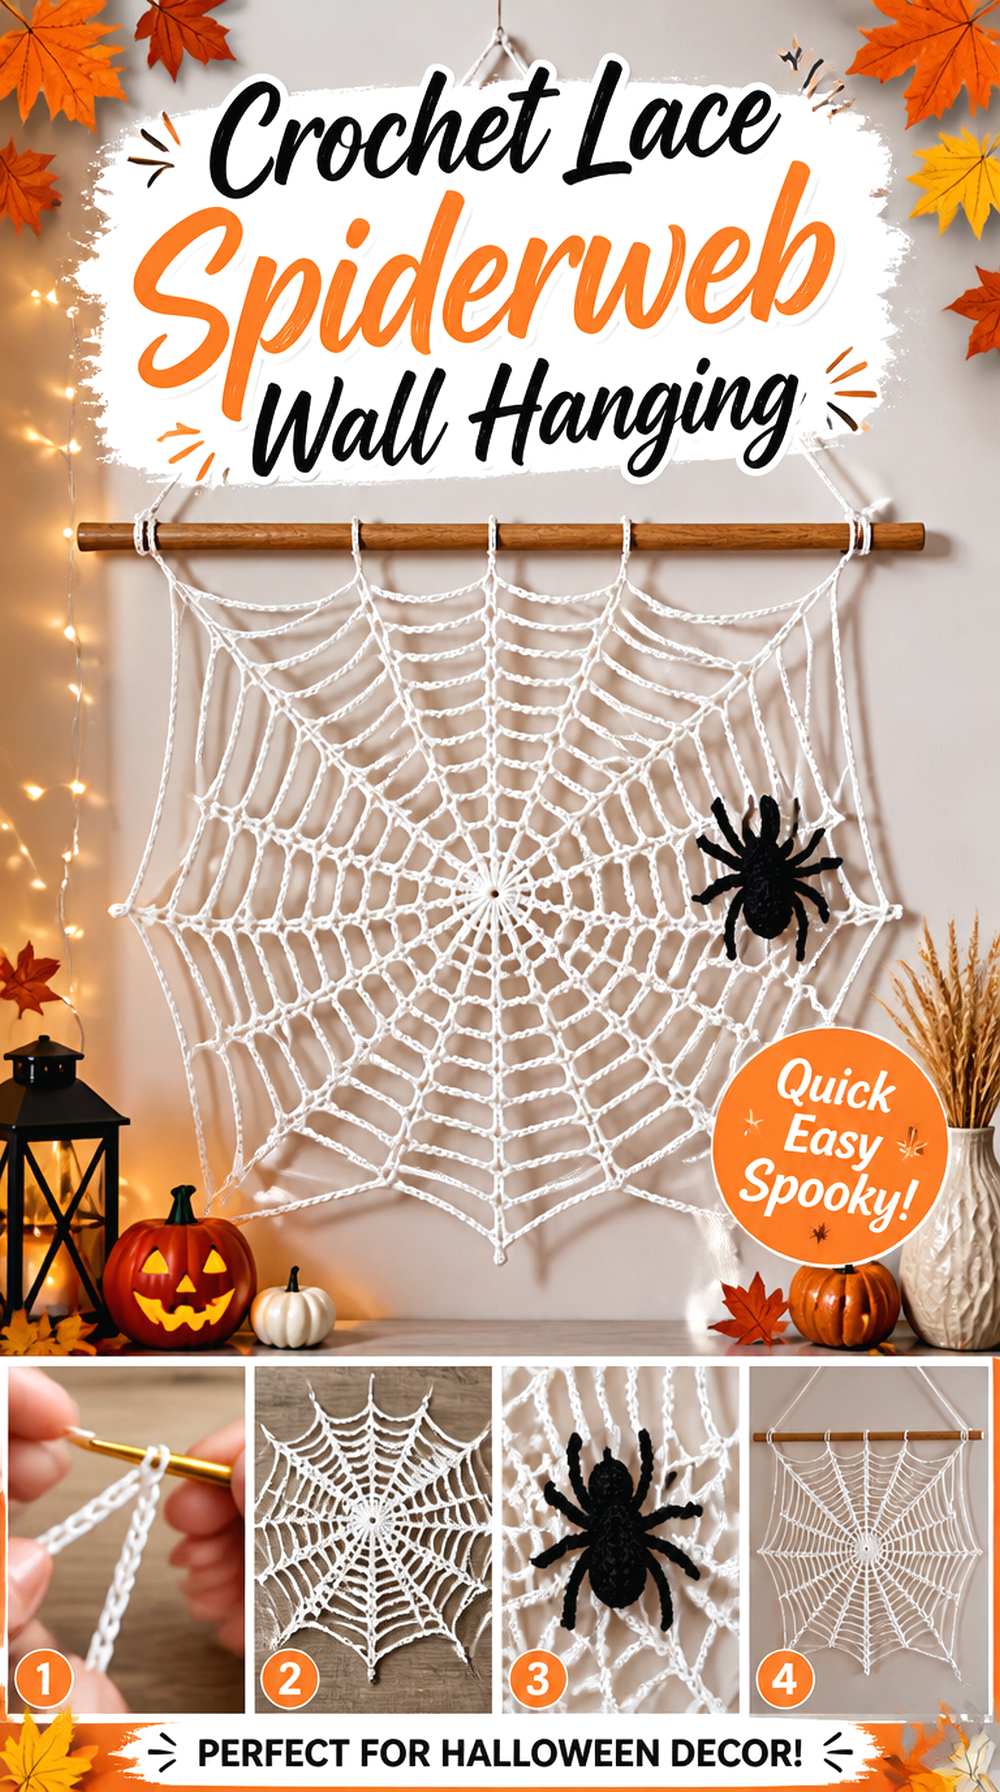
Spiderwebs are particularly well suited to vintage Halloween styling because open crochet already resembles old lace. Brunaticality’s tutorial presents two web formats, making this idea more adaptable than a single centered motif. A rounded version can become a standalone hanging accent, while a corner-style web can visually frame another piece of seasonal decor.
Cream, aged ivory, gray, or black can all shift the mood considerably. Instead of deciding by yarn color alone, consider the wall or furniture behind the web. Openwork relies on visible contrast, so a beautifully stitched dark web may disappear against equally dark paneling or fabric.
Give Openwork a Contrasting Background
A spiderweb is mostly negative space, which means its surroundings become part of the finished appearance. Test a small section against the actual door, mirror, frame, or wall before committing to the display.
Warm cream against dark wood can feel older and more lace-like, while black against a faded painted surface produces a sharper graphic effect. The better choice is whichever lets the web structure remain obvious from normal viewing distance.
Blocking Can Decide Whether the Web Reads Clearly
Open crochet can look compressed immediately after it comes off the hook. Finish according to the yarn’s care requirements and the creator’s guidance, then evaluate the final shape before adding permanent hanging hardware.
The goal is not simply to make the piece larger. Even spacing and a recognizable radial structure are what allow the web to read as intentional lace instead of loosely arranged loops.
Pick the Location Before Choosing the Web Format
A round web and a corner web solve different decorating problems. A centered piece works as its own motif, whereas a corner treatment can frame a mirror, artwork, shelf, or doorway without occupying the middle.
Choosing the location first prevents you from finishing a beautiful piece only to discover that its overall geometry competes with the architecture of the intended display.
Original Tutorial and Creator Credit
Creator: Brunaticality
3. Crochet Skull Lace Doily
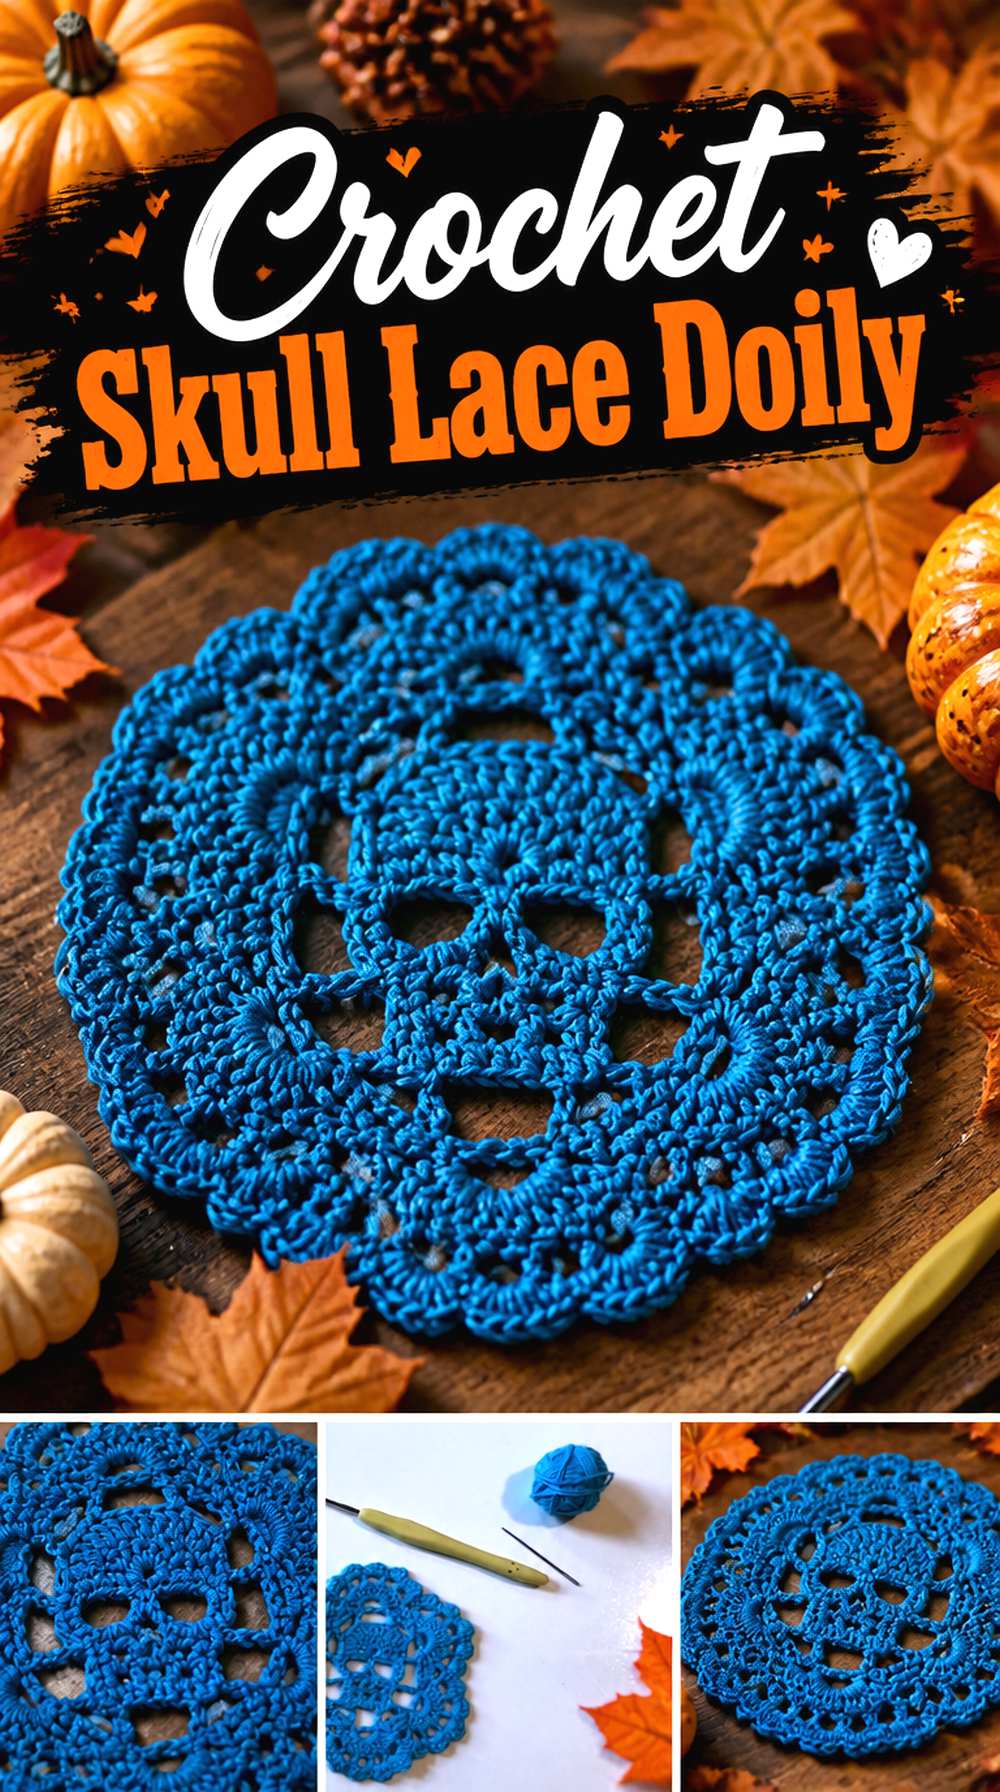
A crochet skull rendered as lace creates a very different Halloween mood from plush amigurumi. Someday Sarah’s tutorial centers the skull within a delicate doily-style piece, making it useful for a side table, vanity, framed display, or layered Halloween vignette where an old-fashioned textile feels appropriate.
This is a good project to treat almost like graphic art. The skull must remain recognizable while the surrounding openwork stays visually quiet enough to support it. Cream or parchment tones can emphasize the antique-lace direction, while black creates a more Gothic interpretation. Either way, the surface beneath the piece strongly affects visibility.
Finer Yarn Changes More Than the Scale
A thinner yarn can make lace appear delicate, but changing the tutorial’s material may also change drape, stitch visibility, blocking behavior, and final dimensions. Do not assume a substitution will preserve the same proportions automatically.
If you want to modify the material, work enough of the project to judge whether the skull remains distinct before committing to a whole coordinated set of tabletop pieces.
Choose the Surface Under the Skull Carefully
Busy wood grain, patterned tablecloths, or multicolor displays can compete with intricate openwork. Place the finished doily over a simple contrasting surface and view it from standing distance, not only close up.
If the skull disappears until you lean over the table, the issue may be display contrast rather than the crochet itself. A plain tray or solid fabric layer can give the motif more visual clarity.
Protect the Shape During Seasonal Storage
Lace takes little storage space, but that does not mean it should be crushed into a small decoration box. Let the piece become fully dry after any cleaning or finishing, then store it flat or gently supported.
Avoid folding directly through the strongest visual features when possible. A distorted center or deeply creased skull can require extra reshaping when the piece returns to the Halloween display.
Original Tutorial and Creator Credit
Creator: Someday Sarah
4. Crochet Stuffed Candy Corn Shelf Accent
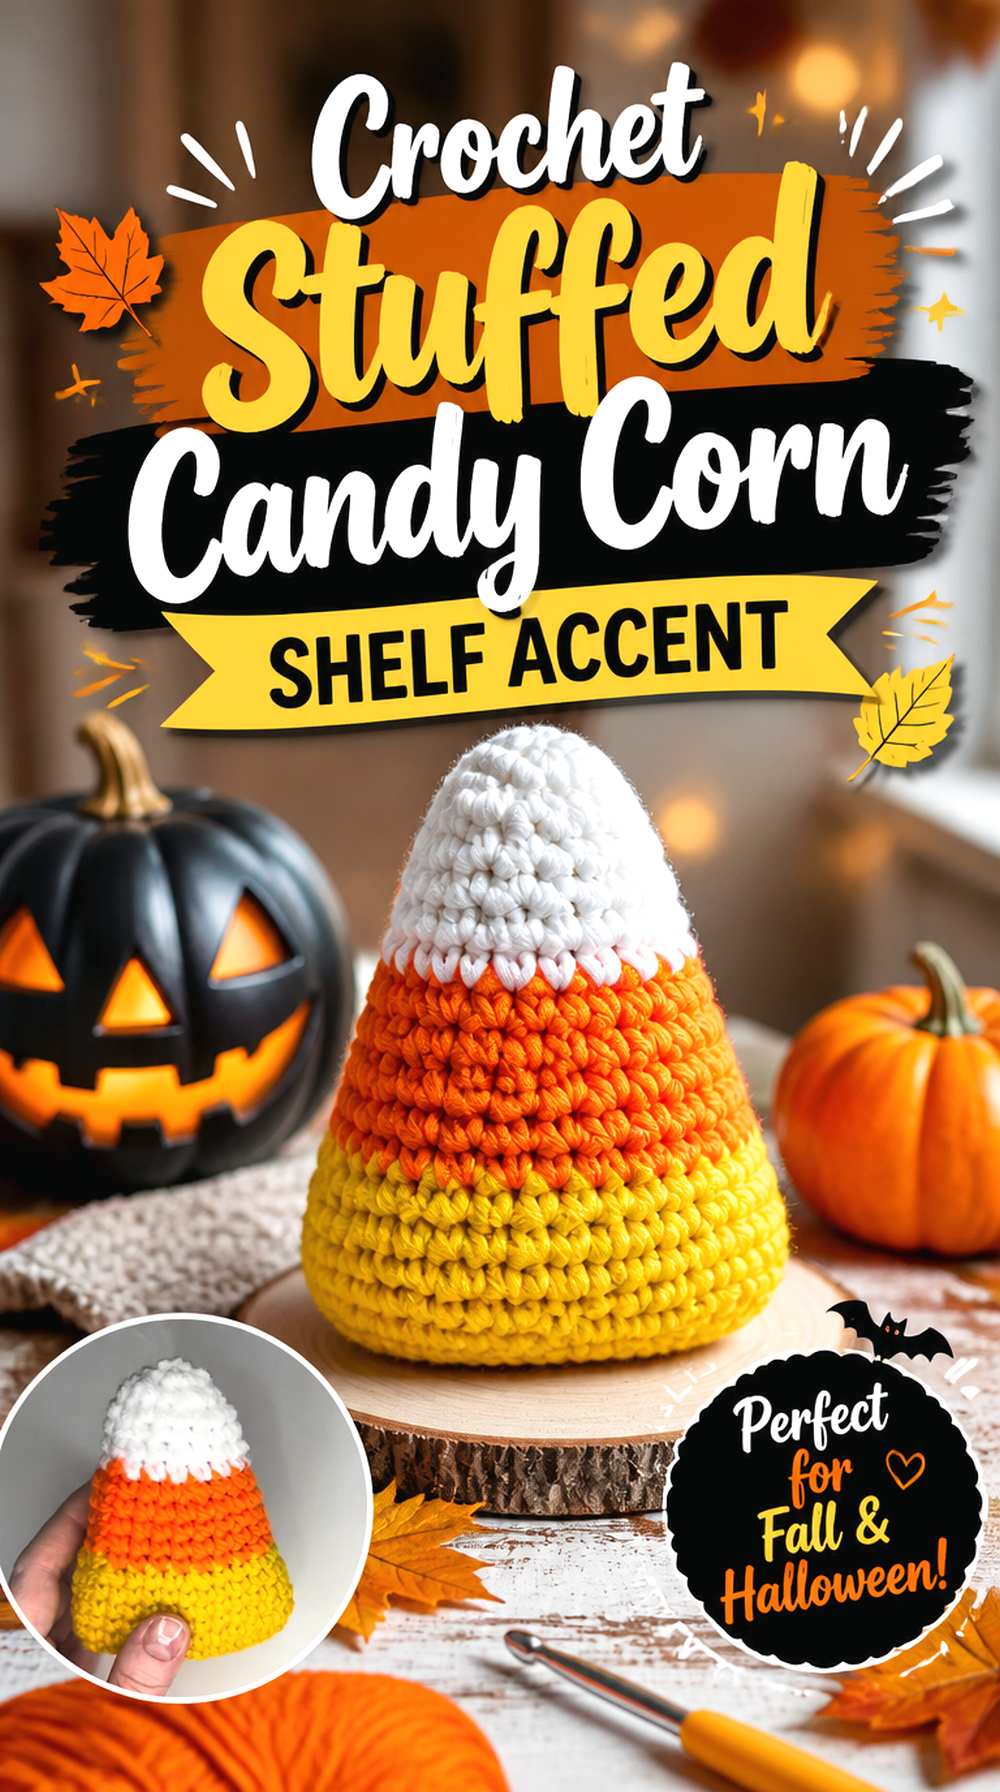
Candy corn can easily look bright and contemporary, but a softer palette turns the same familiar triangle into nostalgic Halloween shelf decor. DIY FROM HOME CROCHET’s tutorial produces a dimensional candy corn decoration rather than a flat appliqué, giving it enough presence for a tiered tray, bookshelf, entry table, or group of miniature seasonal objects.
For a vintage-inspired version, consider cream, ochre, and muted pumpkin rather than extremely saturated yellow and orange. Keeping the three recognizable color zones matters more than matching a commercial candy wrapper exactly. The soft sculpture also creates useful contrast beside flatter lace and paper decorations.
Muted Color Can Change the Entire Era
Candy corn depends on its color arrangement for immediate recognition, so you can soften the shades without losing the motif. Warm cream, faded orange, and mustard can feel less novelty-driven than brilliant white, neon yellow, and vivid orange.
Before purchasing new yarn, compare scraps together under the room’s actual lighting. Colors that look quietly aged in daylight can become muddy when placed in a darker shelf display.
Make Sure the Finished Piece Actually Sits Well
Shelf decor is most useful when it stays where you put it. After completing the candy corn, set it on the intended surface and view it from the front and side. If the piece leans, first check shaping and stuffing distribution rather than hiding the problem behind other objects.
A stable silhouette also makes several pieces easier to group without constantly repositioning the arrangement.
Original Tutorial and Creator Credit
Creator: DIY FROM HOME CROCHET
5. Crochet Hanging Bat Decorations
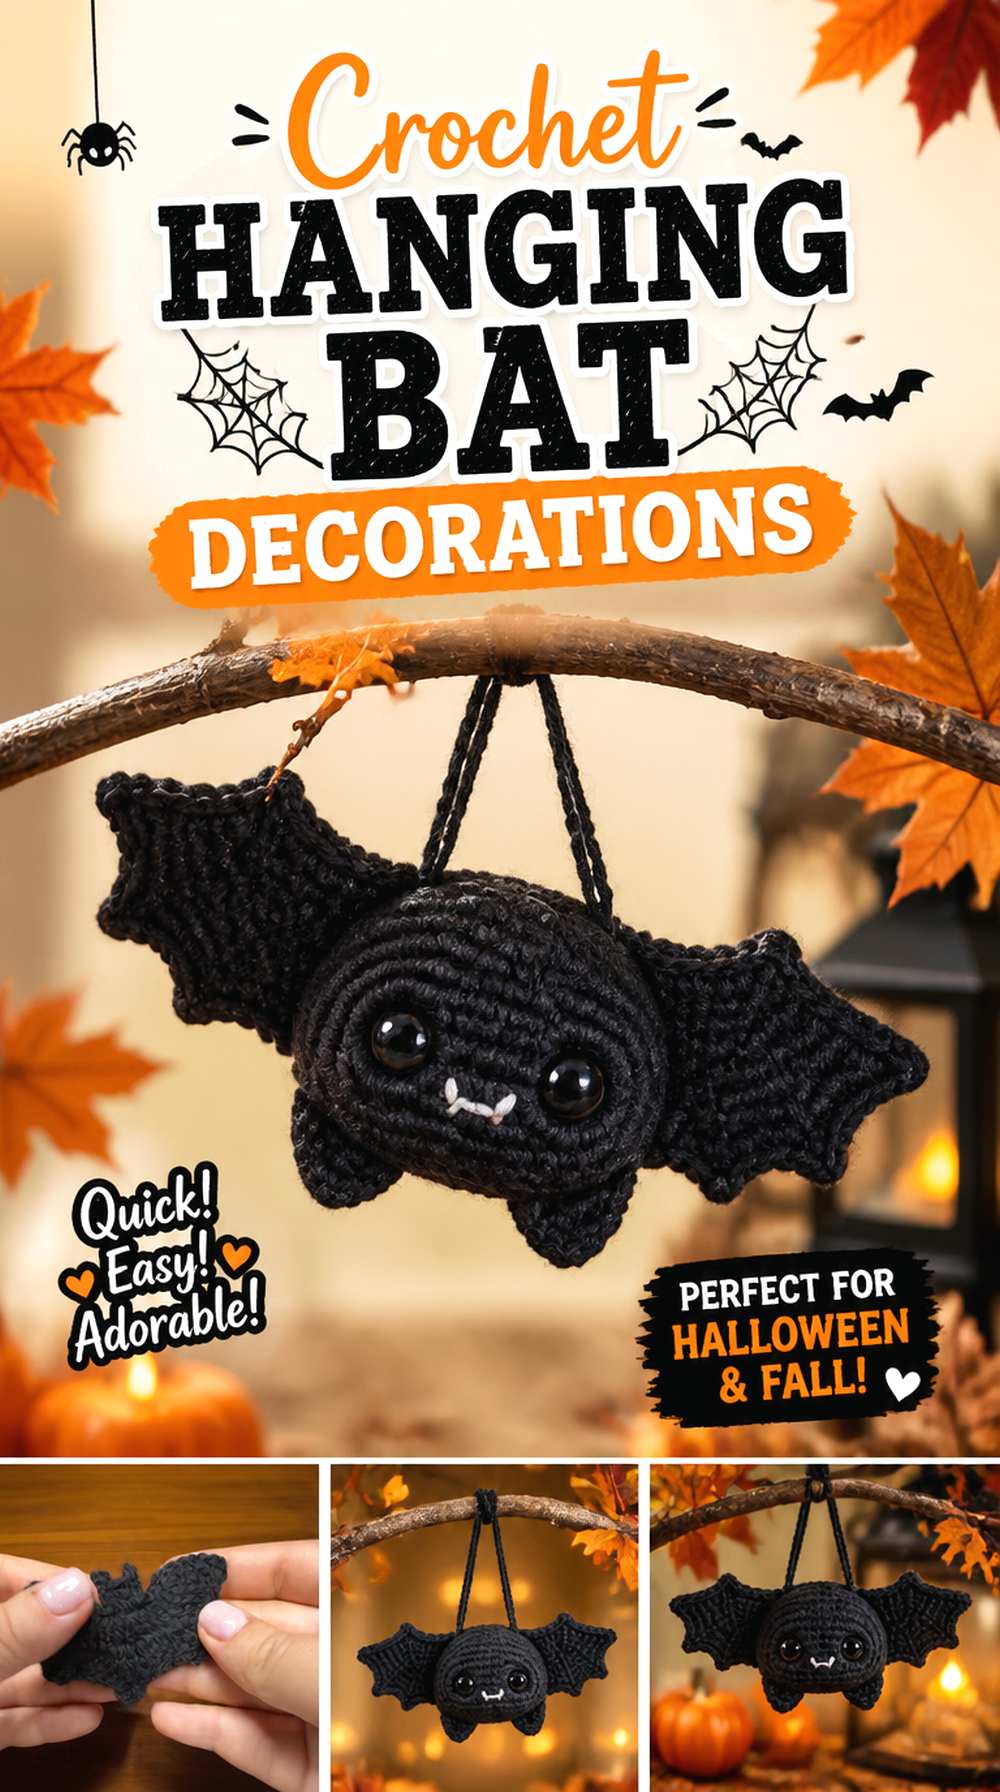
A bat silhouette brings the strong black graphic shapes seen in older Halloween imagery into a crochet display. Butterfly Craft’s tutorial offers a bat that can be used decoratively, including as part of a garland, which makes it adaptable to windows, branches, cabinet knobs, or a cluster above a mantel.
Black is the obvious vintage choice, but very dark plum, charcoal, or brown-black can soften the result without sacrificing the recognizable wings. Because a bat’s identity depends heavily on its outline, resist the urge to bury the silhouette beneath too many beads, bows, or other embellishments.
Keep the Wings Visually Clear
A hanging bat looks strongest when its wing shape remains visible rather than folding into nearby decor. Before adding several bats to a branch or garland, hang one at the intended height and check whether gravity changes the silhouette.
If the wings overlap foliage, ribbons, or other dark elements, move the bat forward or create more empty space around it instead of adding brighter decorative details.
Add Hanging Hardware Only After Seeing the Bat
Finish the crochet body first and then decide where a loop or attachment point provides the best balance. The center that looks correct while the piece lies on a table may not be the point from which it hangs level.
This small checkpoint is particularly useful if the bats will appear in a row, since inconsistent hanging angles can make an otherwise coordinated display feel accidental.
Original Tutorial and Creator Credit
Creator: Butterfly Craft
6. Crochet Mini Witch Hat Display Accent
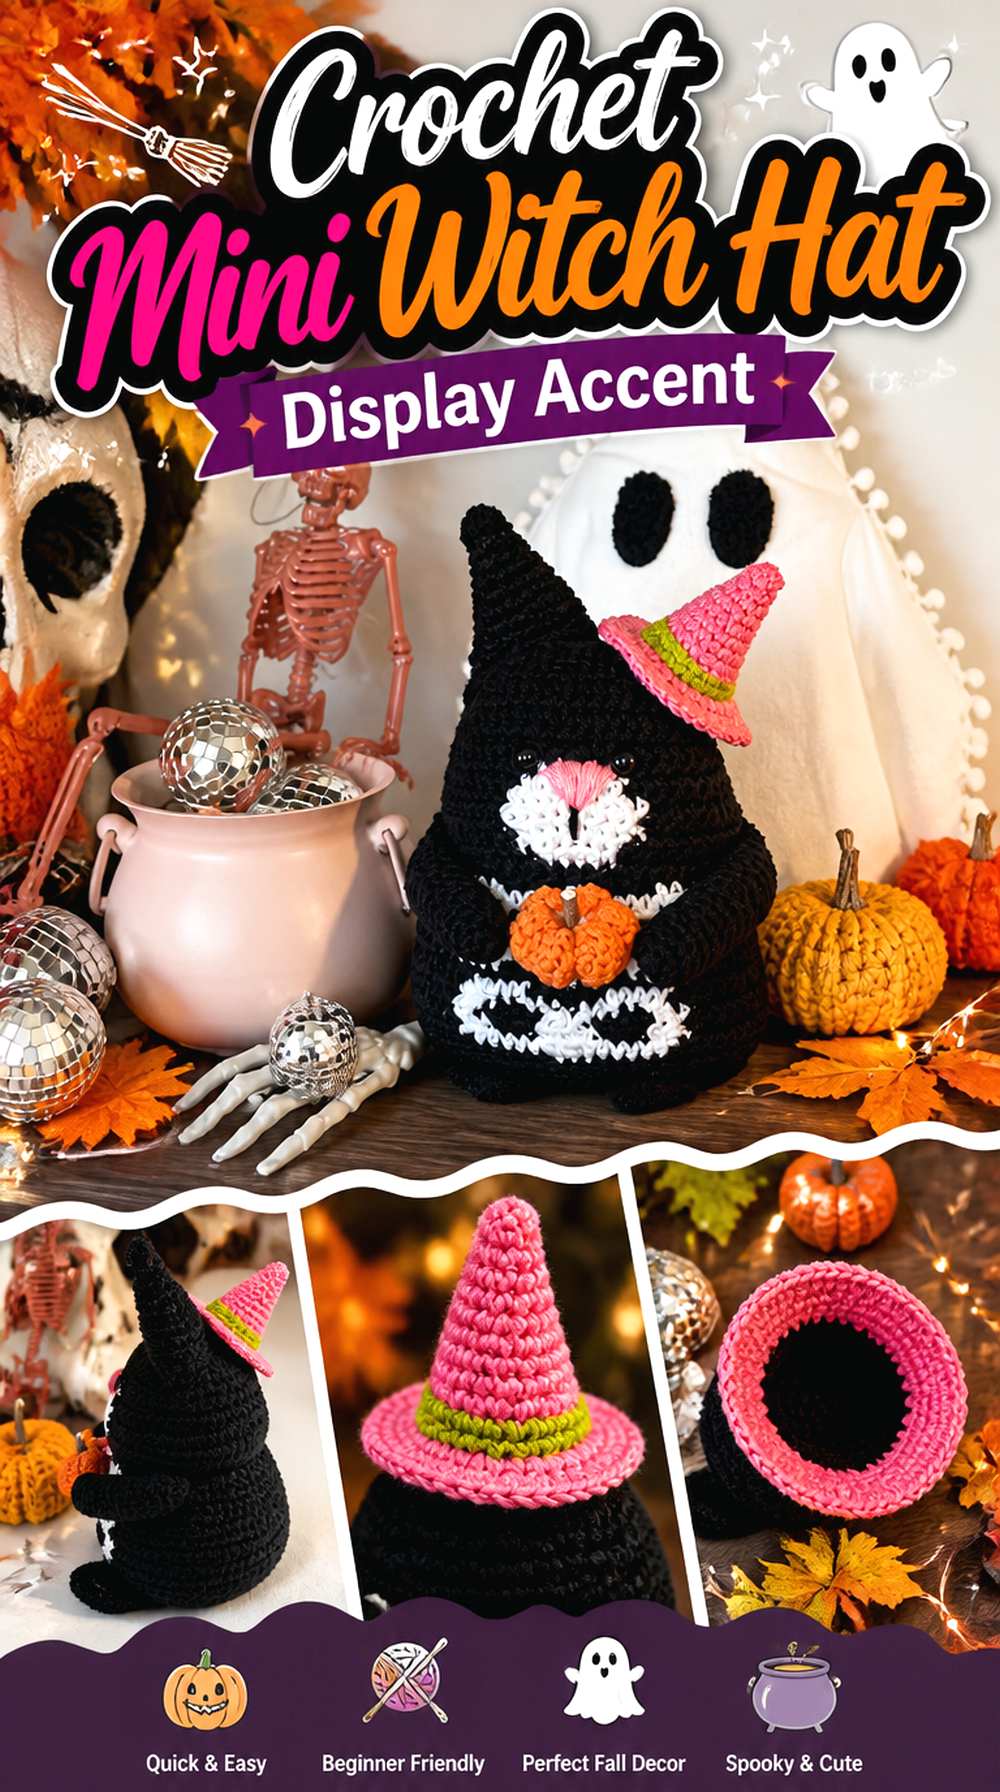
A tiny witch hat is useful when you want Halloween character without committing to another full stuffed figure. A Crafty Concept’s tutorial creates a freestanding-looking miniature hat that the creator suggests for several decorative uses, including garlands and pumpkin toppers.
For a vintage collection, the hat can become a small punctuation mark among pumpkins, books, candlesticks, or framed prints. Black and faded orange feel traditional, but dark violet with aged gold or moss green can also suit an early Halloween-card palette. Because this is a small accent, a strong color combination can work without taking over the entire arrangement.
The Brim Controls the Hat’s Personality
A neat, open brim makes the silhouette easier to identify from across a shelf. Once the hat is complete, assess it on a flat surface before attaching it permanently to another decoration.
If your chosen yarn leaves the brim curled or uneven, use finishing methods appropriate for that fiber rather than forcing it into place with unrelated heavy embellishments. The outline should remain the focal point.
Use the Hat to Transform Existing Decor
One miniature accessory can turn an otherwise ordinary pumpkin or seasonal figure into a Halloween-specific piece. This is especially useful when you prefer to reuse autumn decor instead of crocheting a completely separate object for every holiday.
Check the actual scale first. A tiny hat that looks balanced on one pumpkin may disappear on a larger object or overwhelm a very small one.
Original Tutorial and Creator Credit
Creator: A Crafty Concept
7. Crochet Pumpkin Table Coasters
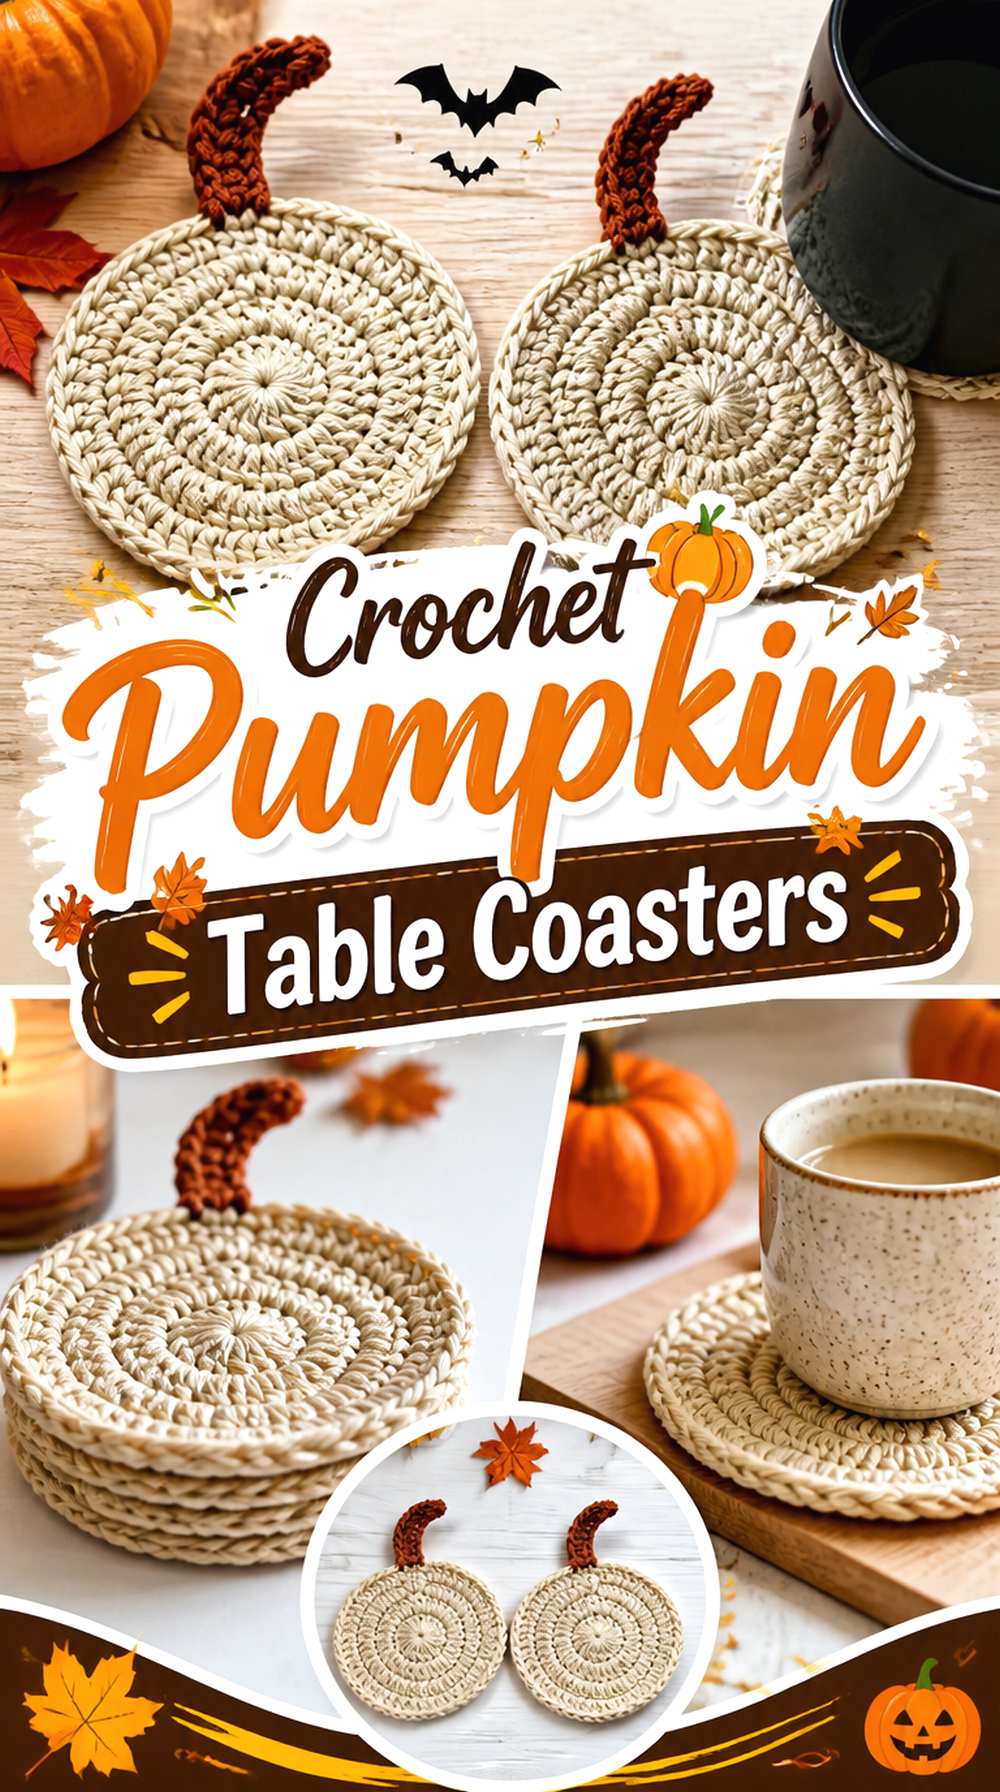
Pumpkin-shaped coasters bring Halloween color to the table without requiring a large centerpiece. The Crochet Chemistry’s tutorial creates a flat pumpkin motif designed for coaster use, which makes it a practical companion to more purely decorative pieces.
To move the look toward vintage Halloween rather than general autumn, choose an orange with some brown or rust in it and pair it with cream, black, or muted green tableware. The pumpkin outline should remain visible after the mug is placed down, so function matters as much as color. Make one first and test it with the drinkware you actually use.
Flatness Comes Before Decorative Perfection
A coaster should rest evenly on the table. Once the ends and decorative details are finished, place it on a smooth hard surface and press lightly around the perimeter. Any bump that causes rocking deserves attention before you make a full matching set.
Do this check with the coaster completely finished; the crochet body can appear flat before tails and other details are secured on the reverse.
Keep the Stem Outside the Main Cup Area
A decorative stem gives the pumpkin its recognizable silhouette, but it does not need to support the mug. Position drinkware over the broad central body so raised or narrow details stay visible rather than becoming pressure points.
If you use unusually wide cups, test one coaster first. Finished dimensions can change when yarn or hook choices differ from the source.
Original Tutorial and Creator Credit
Creator: The Crochet Chemistry
8. Crochet Sculptural Pumpkin Pillow
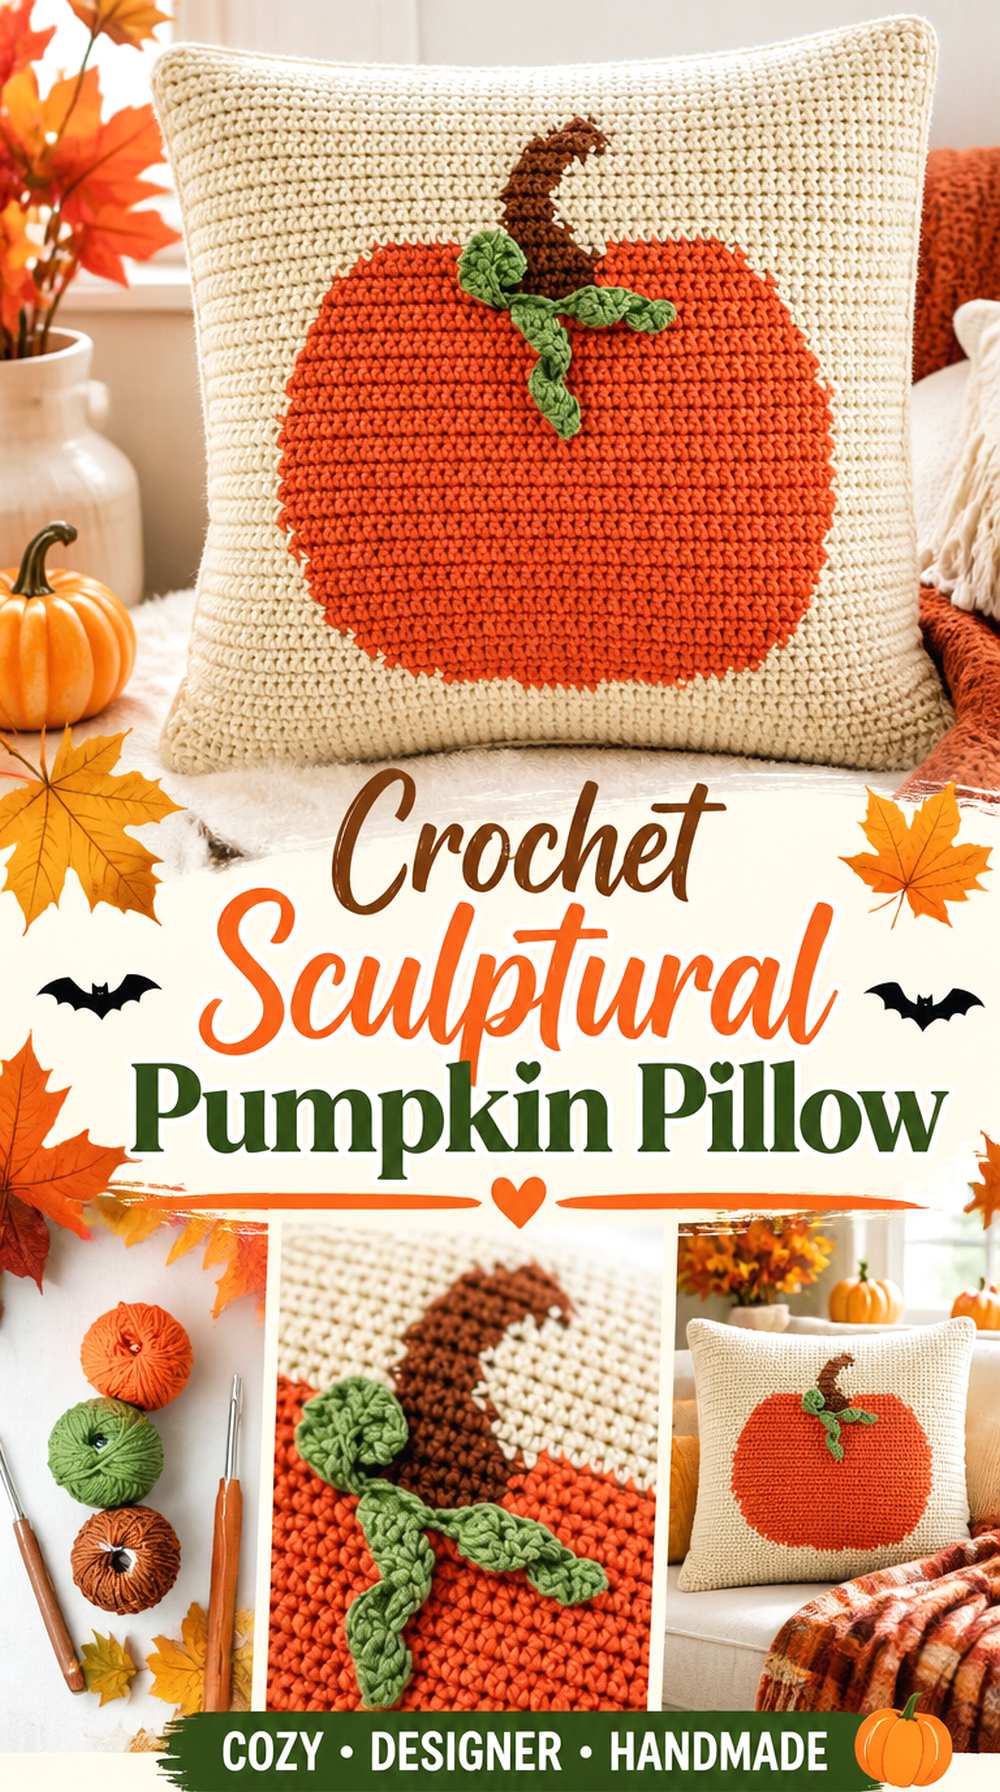
A pumpkin pillow adds a much larger soft shape than the small tabletop projects in this collection. Jo to the World Creations’ tutorial produces a dimensional pumpkin cushion intended for fall and Halloween decor, making it suitable for an armchair, bench, bed, or reading corner where a tiny amigurumi would disappear.
For vintage Halloween styling, think beyond plain bright orange. Rust, tobacco brown, faded mustard, warm cream, or even soot black can let the pumpkin sit comfortably beside old wood, quilts, ticking stripes, or antique-inspired textiles. Because it occupies significant visual space, one well-chosen pillow can carry more seasonal color than several small objects.
Even Shaping Matters on a Large Soft Piece
Small differences that disappear on a miniature pumpkin become much more noticeable on a pillow. Look at the finished object from several angles and check whether the sculptural sections feel balanced.
If one area looks flatter, review stuffing distribution and the creator’s finishing guidance before assuming the crochet itself is wrong. Consistent shaping gives the pumpkin its recognizable form without requiring extra decorative additions.
Give the Pillow Enough Visual Space
A dimensional pumpkin loses its impact when wedged among several equally bulky cushions. Try it with simpler neutral textiles so its outline remains visible.
This also helps a vintage palette read clearly. A muted orange pumpkin against cream or faded plaid can feel intentional, whereas the same piece surrounded by many competing Halloween graphics may read as general novelty decor.
Let Texture Do More Than Added Embellishment
The pumpkin shape already provides considerable surface interest. Before attaching bows, plaques, or multiple appliqués, assess whether the crochet texture itself supplies enough character.
A restrained finish can fit vintage styling better because the silhouette and yarn surface remain visible. If you do add decoration, concentrate it in one area rather than covering every section.
Original Tutorial and Creator Credit
Creator: Jo to the World Creations
9. Crochet Mini Cauldron Table Decor
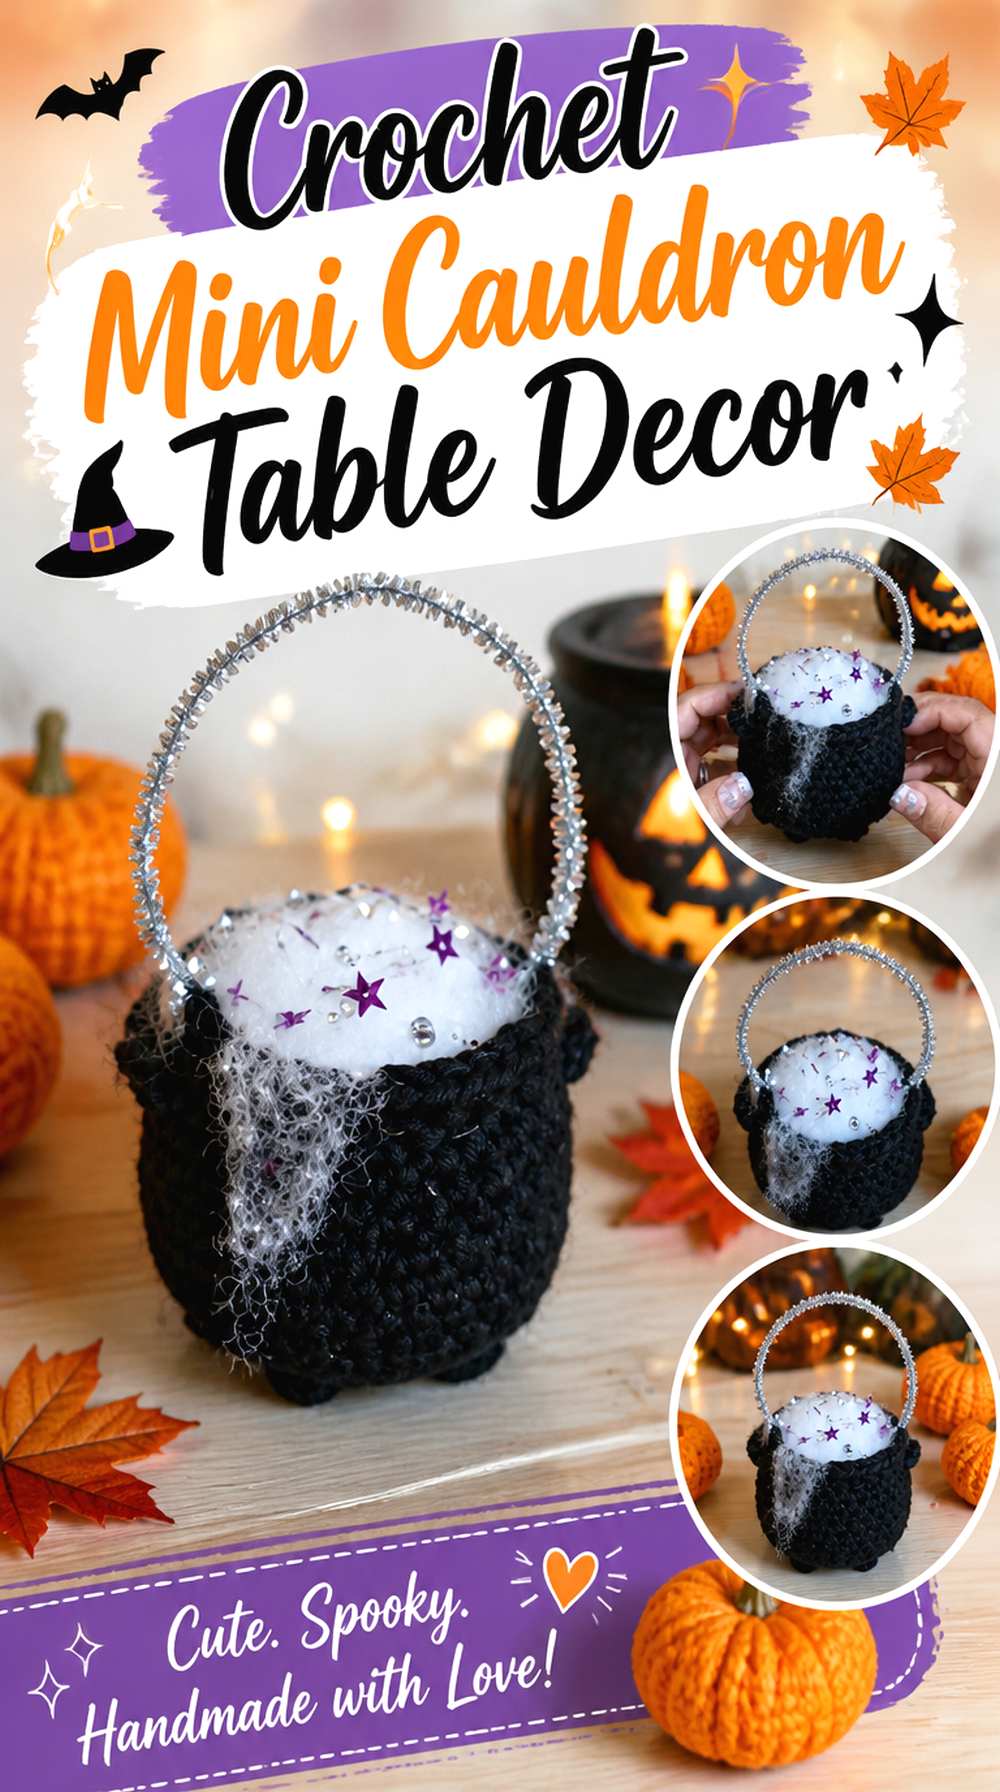
A little black cauldron gives the collection a witchy object rather than another character face. Stitches n Scraps presents a dimensional Halloween cauldron with several finishing options, including different handle approaches and an optional covered top.
The compact vessel shape works particularly well in a vintage-inspired vignette with faux potion labels, dried botanicals, old-looking books, or flameless candles placed nearby. You can keep the cauldron almost entirely black for a graphic silhouette or use restrained colored contents as the focal point. Because the source includes different finishing possibilities, decide how you want to display the opening before committing to the final presentation.
An Open or Covered Top Changes the Function
An open cauldron visually invites you to add lightweight decorative fill, while a covered version reads more like a complete soft sculpture. Choose between those looks based on what will surround it.
If you add your own decorative contents, make sure they do not distort the sides or overwhelm the opening. The cauldron should remain recognizable before the extra styling is added.
Handles Need to Support the Silhouette
The source offers handle options, so consider how prominently you want those details to read. On a dark object, side handles can disappear against a black background unless there is enough separation.
Display the finished cauldron where light reaches its outer edges. That can reveal the vessel shape more effectively than introducing a contrasting yarn simply to outline every feature.
Treat It as Decor, Not a Real Vessel
Soft crochet construction changes what a cauldron can safely hold. Avoid assuming it is suitable for liquids, hot materials, burning incense, or candles simply because a real metal cauldron might be.
Use dry, lightweight decorative elements if desired, and keep actual flames or significant heat away from the yarn. The visual reference is enough; the crochet piece does not need to duplicate a cauldron’s real-world function.
Original Tutorial and Creator Credit
Creator: Stitches n Scraps
10. Crochet Bloodshot Eyeball Coaster
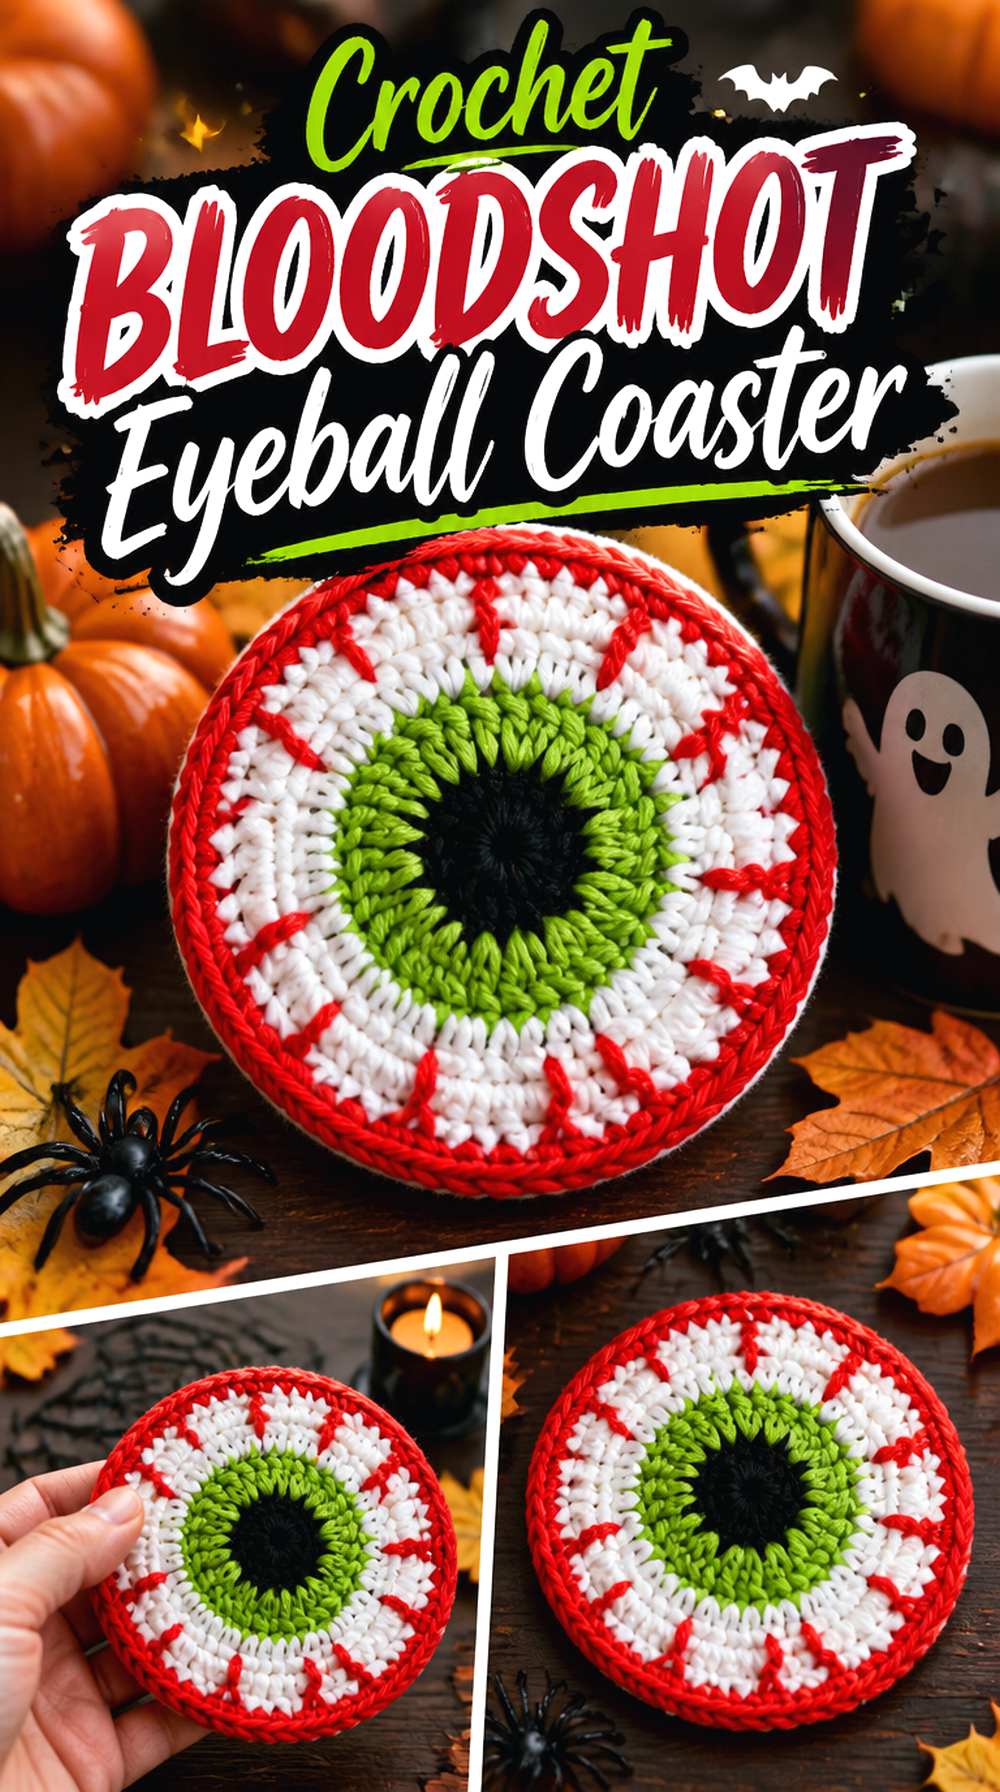
An eyeball coaster creates a more theatrical table detail than pumpkins or ghosts. Martenitsa Spirit’s Halloween coaster tutorial uses the eye itself as the finished graphic, making it well suited to a vintage mad-scientist, fortune-teller, or oddities-cabinet theme.
The strongest version does not necessarily need the brightest possible colors. An off-white eye, faded red detailing, and a muted iris can keep the creepy motif while blending with older-looking Halloween decor. Since the piece is functional as well as decorative, preserve enough flat central area for the mug and keep any finishing on the reverse as smooth as practical.
Contrast Determines How Quickly the Eye Reads
The iris, pupil, and surrounding eye need enough separation to remain recognizable when partly covered by a cup. Lay your chosen yarn colors together before starting rather than judging each skein individually.
If two adjacent colors are similar in value, the eye may look indistinct from across the table even if the individual shades are attractive up close.
Inspect the Back Before Using It on a Table
Facial and vein-like details can create additional yarn ends or attachment points. When the coaster is complete, run your hand over the reverse and then set it on a hard surface.
A small concentration of bulk can matter beneath a cup. Make one functional sample and resolve any finishing issue before repeating the design for a full Halloween table set.
Original Tutorial and Creator Credit
Creator: Martenitsa Spirit
11. Crochet Mummy Shelf Doll
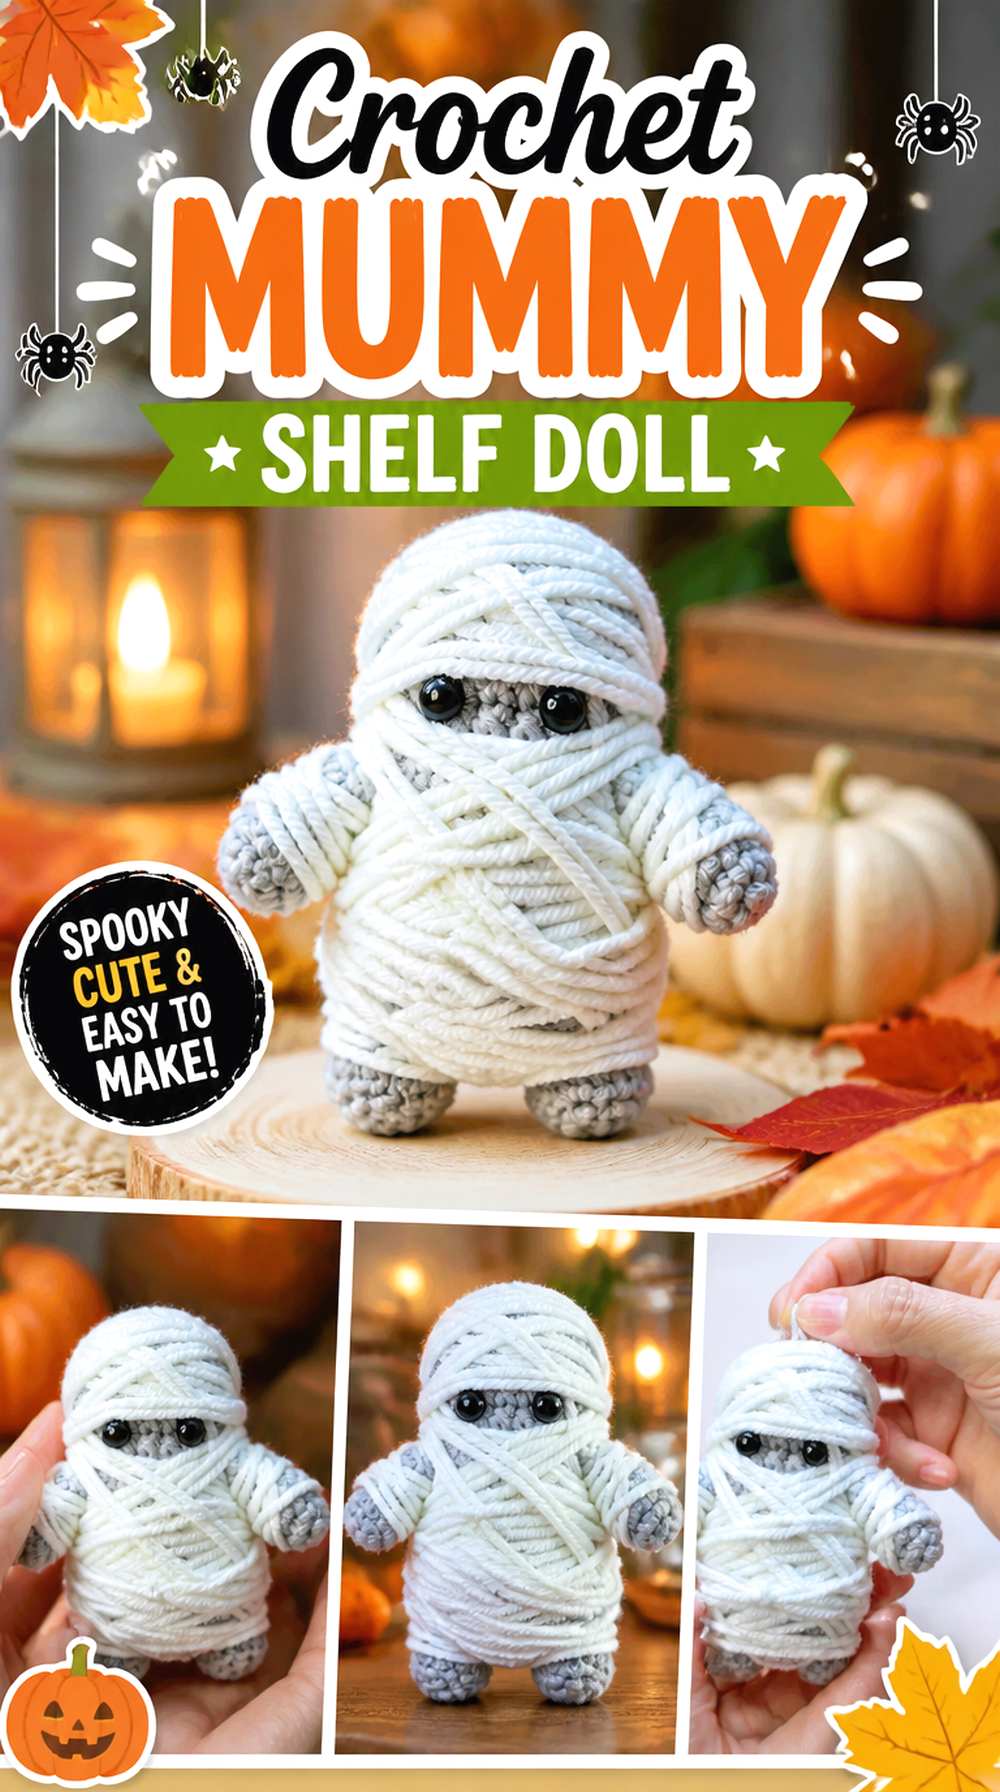
A mummy introduces a tall wrapped character silhouette that breaks up a display dominated by round pumpkins and candy shapes. Crochiquely’s tutorial creates a complete crochet mummy figure, making this idea appropriate for a shelf, desk, tiered display, or small grouping of Halloween characters.
For a vintage look, warm ivory or oatmeal tones can suggest aged wrappings without resorting to artificial staining. Pair the figure with black, rust, or tarnished-gold-looking accessories elsewhere in the vignette. Its strongest feature is texture, so there is little need to compete with that texture through an overly busy background.
Let the Wrapped Texture Stay Readable
A mummy depends on the suggestion of layers or bandaging. Strongly variegated yarn can compete with that surface and make the silhouette harder to understand.
If you want color variation, keep it subtle enough that the texture remains the first thing you notice. Display lighting from the side can also reveal raised surface detail better than flat frontal light.
Facial Placement Changes the Mood
Small changes in the visible face area can make a mummy feel humorous, surprised, eerie, or sweet. Before permanently securing facial details, look at the figure upright from normal viewing distance.
This is more useful than judging it in your hand. Shelf decor is usually seen from several feet away, and tiny details that look prominent during assembly can nearly disappear once the figure joins a larger arrangement.
Review Small Details Before Gifting
If the mummy will be handled by a young child rather than used only as adult seasonal decor, review every added eye, accessory, and embellishment for suitability. Small detachable parts require particular attention.
Do not assume an amigurumi-style object is automatically appropriate as a toy. The tutorial can guide construction, but the intended recipient and final finishing determine how the piece should be used.
Original Tutorial and Creator Credit
Creator: Crochiquely
12. Crochet Halloween Door Wreath
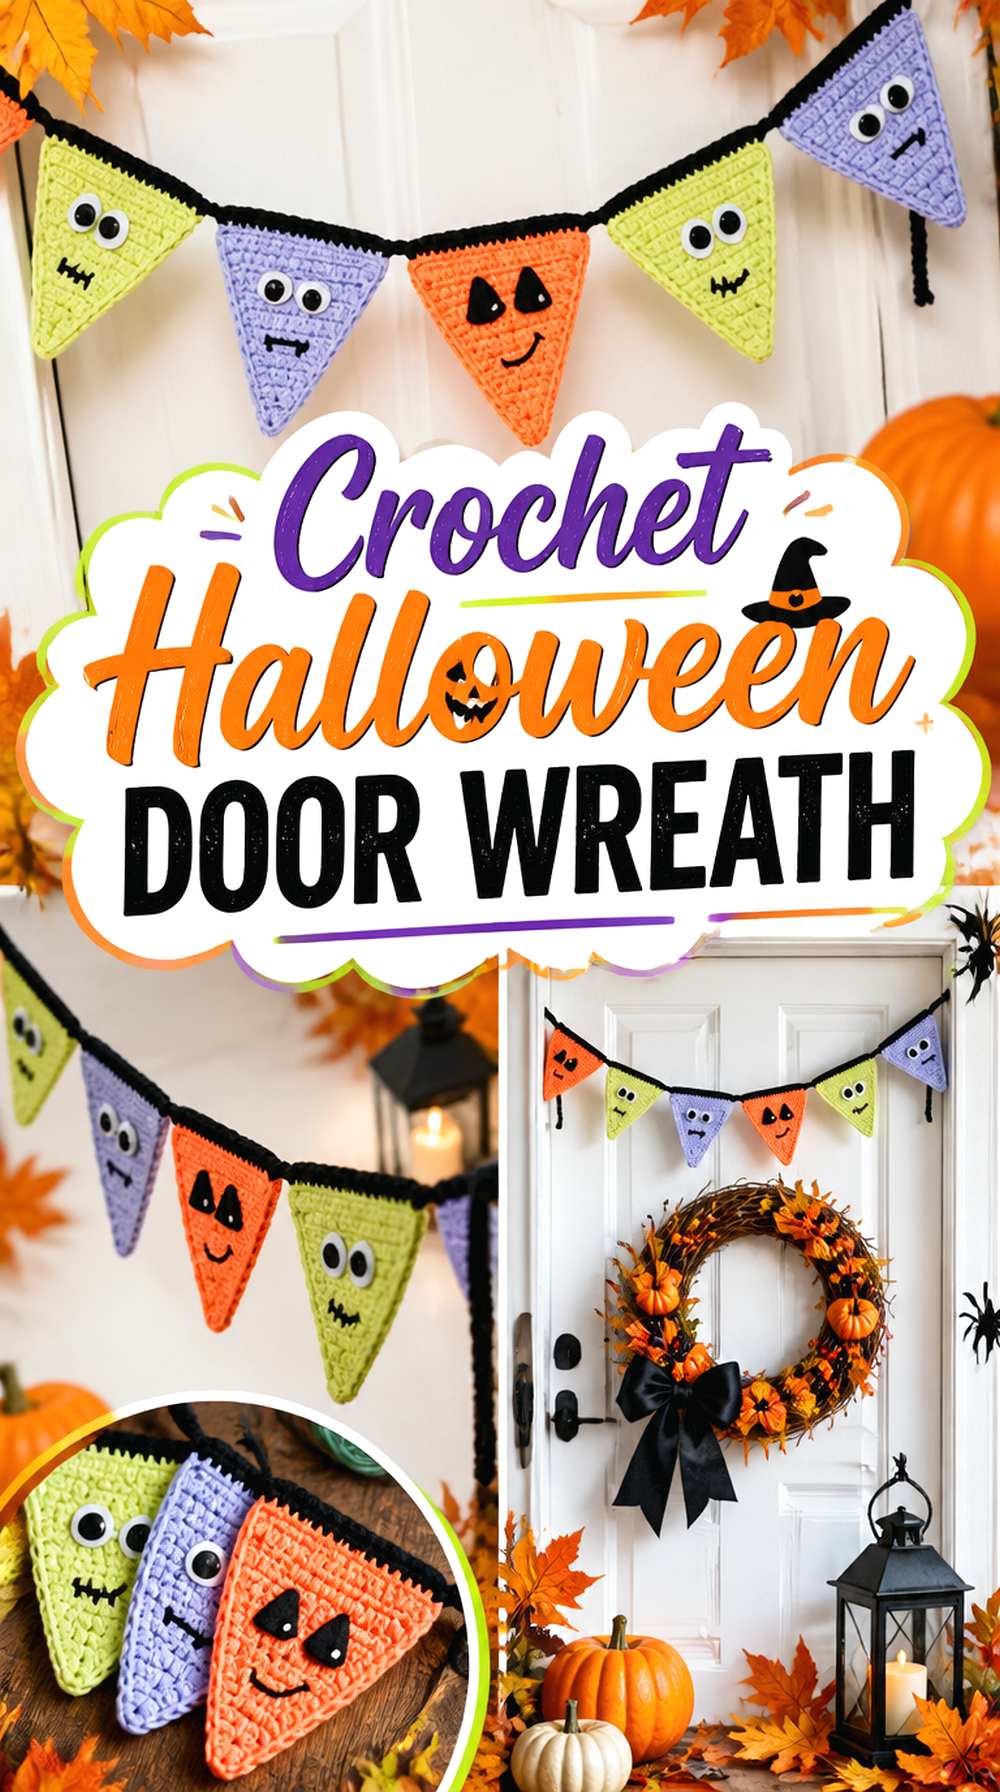
A wreath gives vintage-inspired Halloween crochet a clear focal point before guests even enter the room. Ahuyama Crochet’s tutorial is specifically presented as a Halloween wreath, offering a larger hanging project among this collection of smaller motifs and tabletop accents.
This is a good place to consolidate the palette used elsewhere. Black, pumpkin, cream, violet, and antique green can all work, but the wreath will feel more cohesive if one color dominates and the others behave as accents. Because it may be hung on a working door, practical concerns such as projection, hanging security, and storage deserve as much attention as the front view.
Door Clearance Can Limit Dimensional Details
A wreath can look perfectly proportioned on a worktable yet interfere with a storm door, wall, cabinet, or nearby trim once hung. Check the intended location before adding bulky decorative elements.
Open and close the door gently with the display position mocked up if needed. A flatter wreath can sometimes be more practical than a highly dimensional one, particularly in a narrow entry.
Anchor the Palette With One Vintage Color
Instead of making every Halloween shade equally prominent, select one dominant color and repeat smaller amounts of the others. Burnt orange with black and cream accents feels different from black with faded orange and plum.
This simple hierarchy can keep a multi-element wreath from becoming visually scattered, especially when several shapes and textures are already competing for attention.
Store the Wreath Without Crushing Its Front
A wreath occupies more off-season space than a doily or garland. Decide where it will go in November before permanently adding fragile or protruding details.
A shallow container or protected hanging location can preserve dimensional components better than stacking heavier decorations on top. Good storage matters when the same handmade piece is intended to return for multiple Halloweens.
Original Tutorial and Creator Credit
Creator: Ahuyama Crochet
13. Crochet Candy Corn Mantel Garland
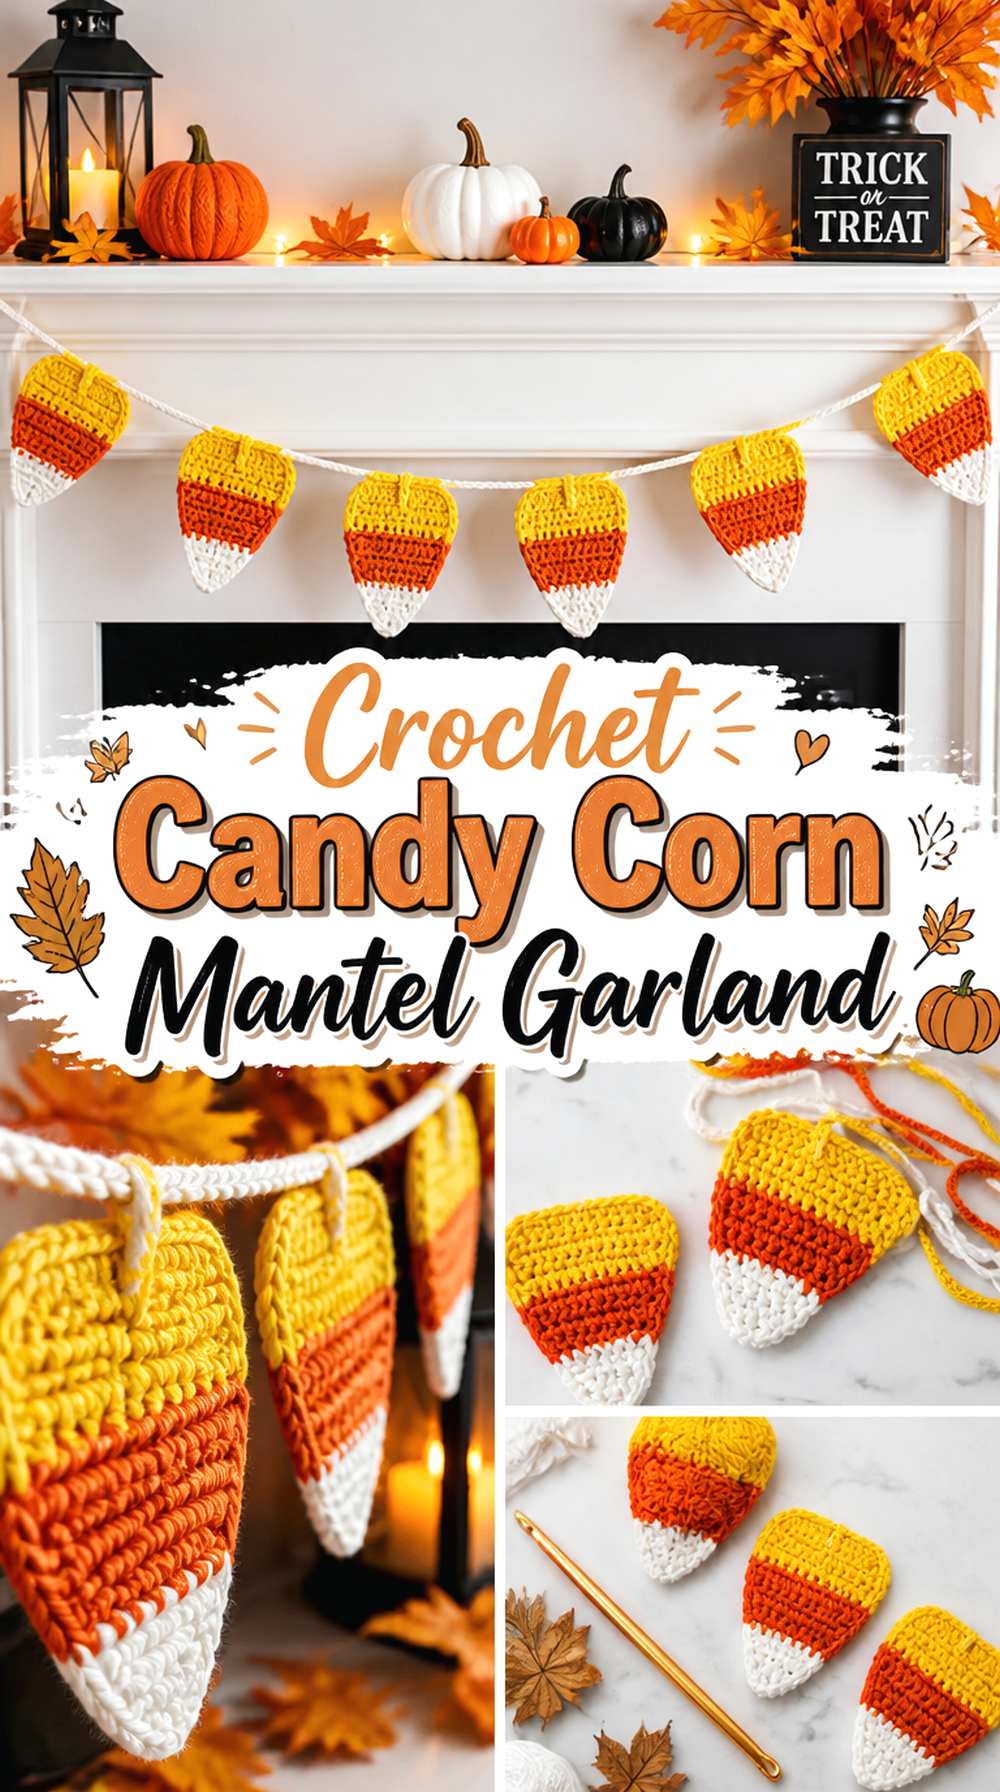
Heather Corinne Crochets presents candy corn motifs that can be used as coasters or combined into a garland, making this project especially useful when you want one crochet shape with more than one possible purpose. For this article, the repeated garland format creates a flat, graphic mantel decoration that contrasts with the dimensional candy corn shelf piece earlier in the list.
Try faded cream, burnt orange, and mustard if you want the recognizable candy-corn arrangement without a bright commercial-candy look. The triangular motifs can also work beneath an antique-style mirror or across a painted hutch where their simple geometry stays easy to read.
Flat Motifs Simplify Seasonal Storage
A motif garland generally compresses more easily than a row of stuffed ornaments. That matters if you already have several bulky pumpkins, pillows, and character figures competing for storage space.
Before packing it away, make sure every piece is clean and fully dry. Coil the connecting strand loosely rather than twisting the motifs tightly around one another so the points and edges keep their intended shape.
Spacing Controls the Visual Rhythm
Identical motifs can feel crowded or airy depending on the distance between them. Finish the candy corn pieces first, arrange them across the actual mantel or shelf, and decide on spacing before permanently assembling the display.
This is more reliable than calculating solely from an expected motif size, especially if your yarn substitution has changed the dimensions from the creator’s original example.
Original Tutorial and Creator Credit
Creator: Heather Corinne Crochets
14. Crochet Jack O Lantern Table Sculpture
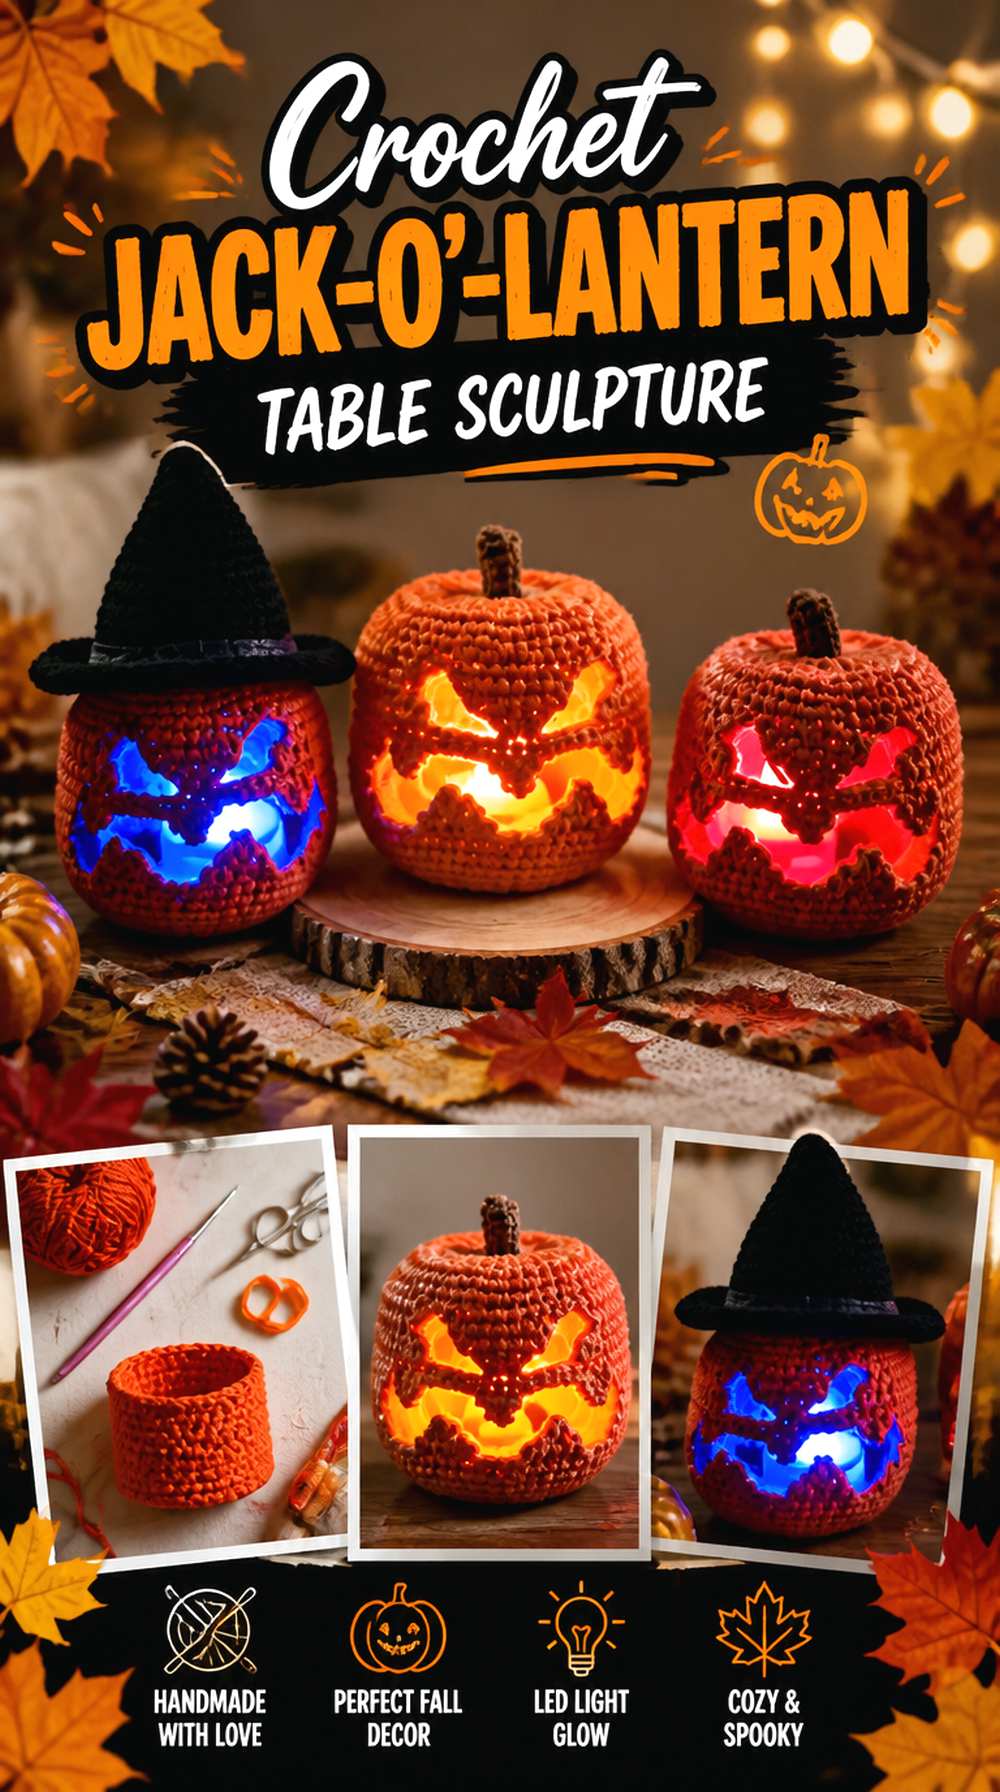
A jack-o’-lantern gives a crochet pumpkin an unmistakably Halloween-specific identity. Laura Wilson Designs’ tutorial centers on a crochet jack-o’-lantern/pumpkin, giving this project a more sculptural presence than the flat pumpkin coaster and a different purpose from the soft pillow.
For vintage styling, let the face stay bold and graphic. Burnt orange with a dark face resembles classic printed Halloween imagery more readily than a pumpkin covered in many small decorative accents. Place it where the expression is visible from the room rather than hidden behind taller objects, and consider pairing it with one or two plain pumpkins so the carved-face effect remains the focal point.
Facial Contrast Needs to Work From Across the Room
A jack-o’-lantern face can disappear if the features are too close in value to the body. Test the planned face color against the pumpkin yarn under the lighting where the finished object will sit.
Then step back. Shelf and table decor should read from normal viewing distance, not only when held close enough to see individual stitches.
Check Dimensional Details From Every Side
A table sculpture may be viewed from more than one angle. After assembly, rotate it and look for features that lean, twist, or disappear from the side.
If the tutorial includes separate top or facial details, follow the creator’s placement guidance rather than attaching them solely according to a front-facing photograph. A balanced three-dimensional silhouette makes the piece easier to use in an open display.
Pair One Face With Quieter Shapes
Several highly expressive pumpkins in the same small vignette can compete with one another. A single jack-o’-lantern surrounded by plainer ribbed or fabric pumpkins often gives the face more impact.
This also helps the vintage mood: one strong graphic character can function like an old postcard illustration while the remaining objects provide texture and color rather than additional expressions.
Original Tutorial and Creator Credit
Creator: Laura Wilson Designs
15. Crochet Ribbed Pumpkin Garland
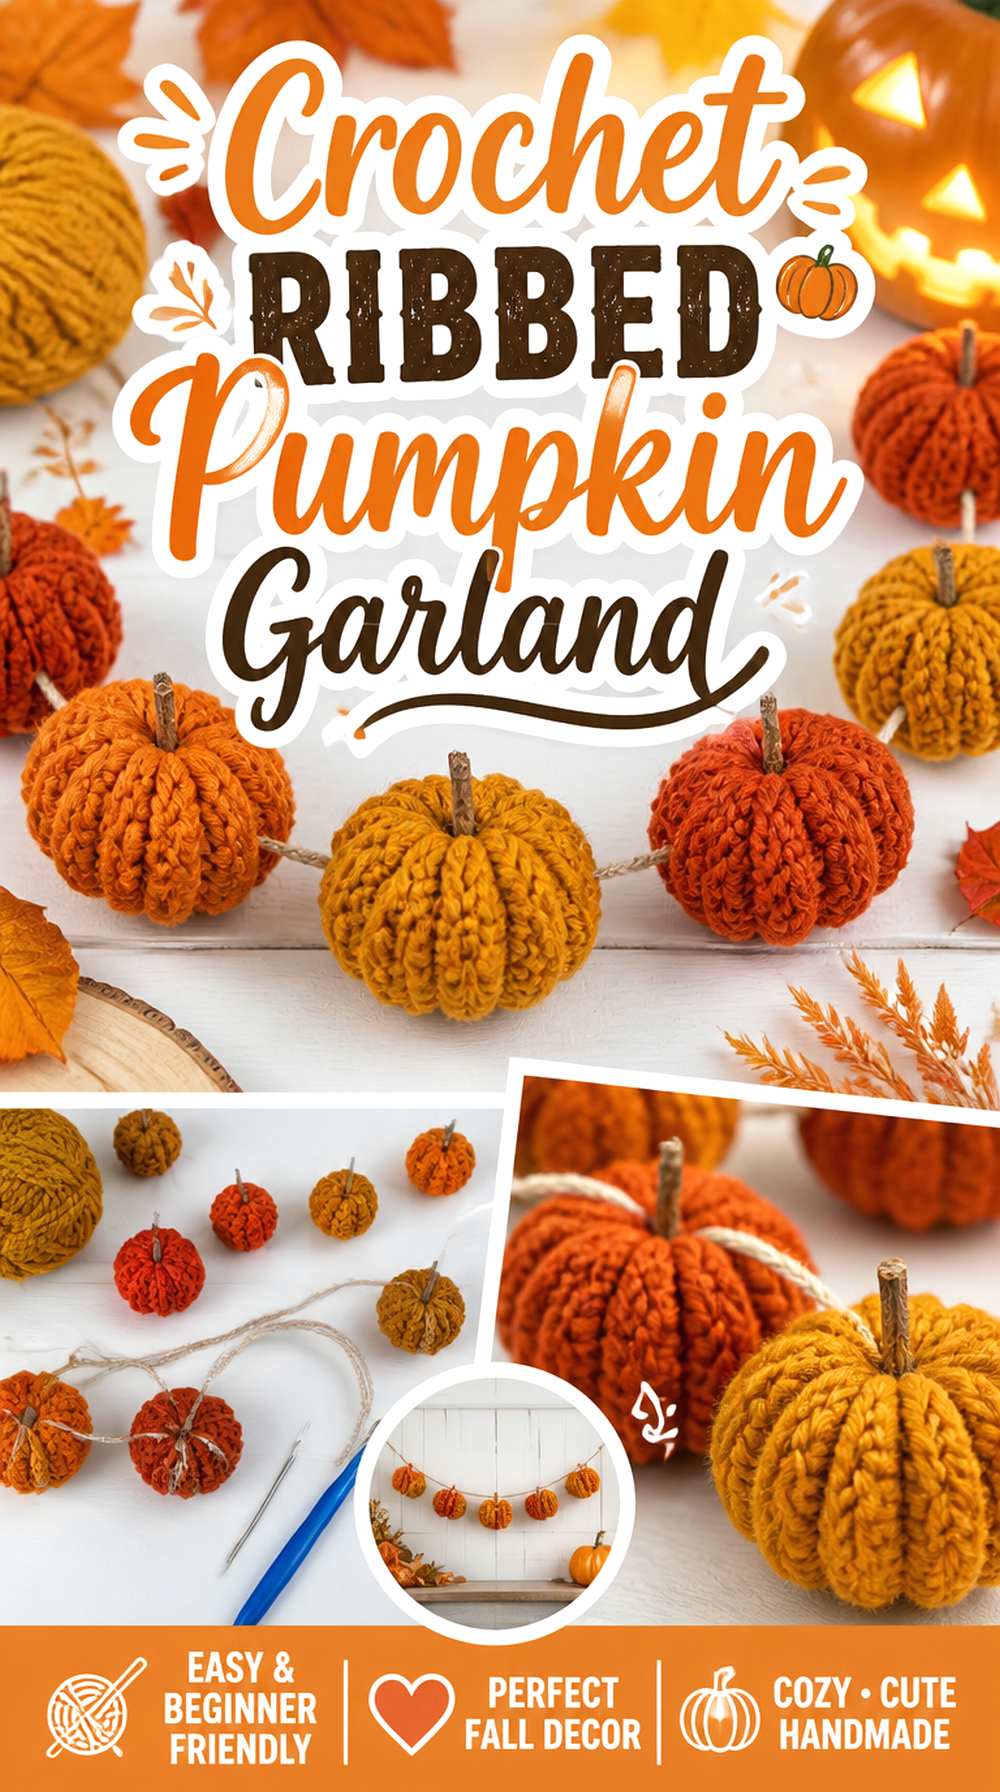
Simply Made by Erin Crochet’s pumpkin garland combines dimensional ribbed pumpkins with additional garland elements strung on twine, producing a fuller mantel decoration than a line of flat appliqués. The creator presents it as a fall project, so the vintage Halloween character comes from your styling rather than from pretending the source itself is specifically historical or spooky.
For an October version, faded orange pumpkins mixed with black, cream, or muted mustard elements can shift the arrangement away from Thanksgiving. It works especially well where you want visible texture across a mantel, staircase rail, or substantial shelf edge.
Ribbing Supplies the Old-Fashioned Texture
The raised pumpkin surface already creates visual interest, so the garland does not need many additional novelty motifs to feel decorative. Let light fall across the ribbing and use a restrained palette to emphasize the shape.
If you change the yarn from the tutorial, sample first. Different thicknesses can affect not only each pumpkin’s scale but also how heavy the completed strand feels when several pieces are combined.
Set the Garland Length in the Actual Room
Mantels and shelves vary too much for a one-size decorative length to be useful. Make enough components to test a section, then arrange them along the intended surface before finalizing the strand.
Decide whether you want a straight line, a shallow drape, or a fuller swag. That display choice affects the amount of visible spacing more than the number of pumpkins alone.
Avoid Packing the Pumpkins Too Tightly
Dimensional motifs need some breathing room to remain visibly pumpkin-shaped. When components press hard against one another, the ribbing and individual silhouettes can get lost.
Before securing the arrangement permanently, temporarily position the pieces and view the garland from across the room. If it reads as one heavy rope of yarn rather than a sequence of pumpkins, increase the visual separation.
Original Tutorial and Creator Credit
Creator: Simply Made by Erin Crochet
16. Crochet Hanging Spider Accent
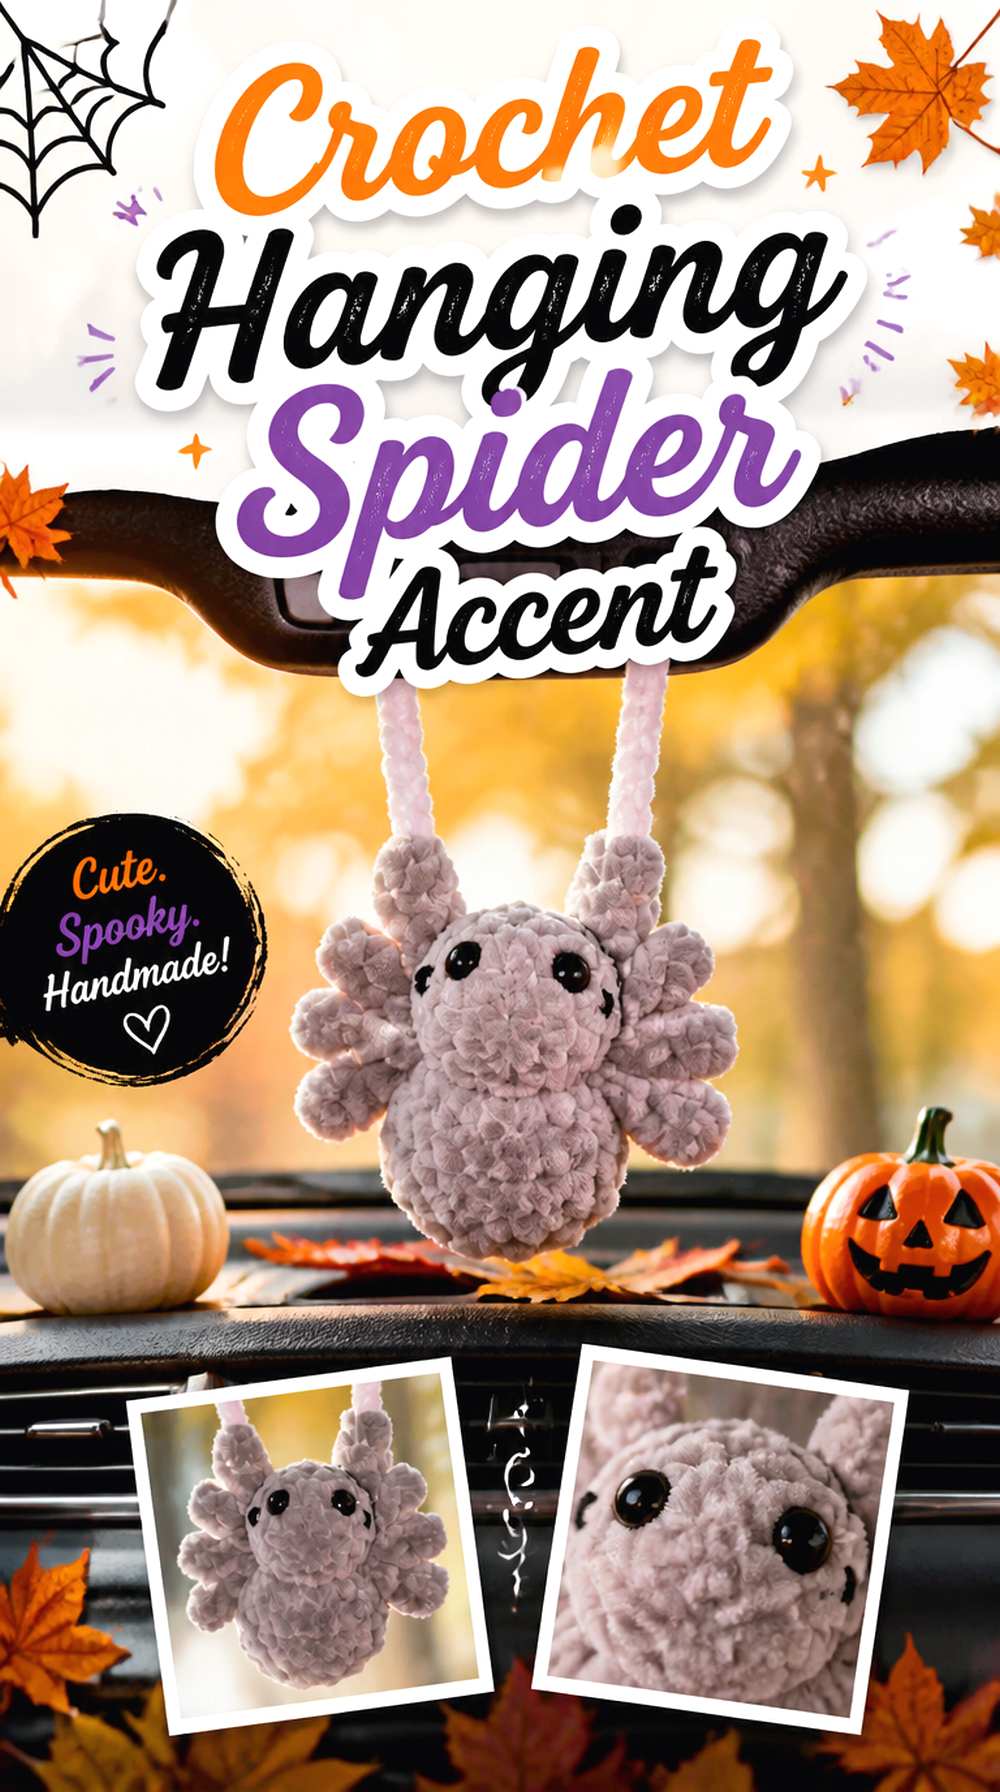
A dimensional spider introduces movement and a slightly stranger silhouette than a flat web. crochetcalls’ tutorial creates a no-sew amigurumi spider and explicitly includes a hanging loop for decorative use, so the finished piece can work from a branch, hook, desk display, or Halloween arrangement.
Black keeps the look traditional, but charcoal or deep brown can reveal the legs more clearly against a dark background. This project pairs especially well with the lace spiderweb earlier in the article: one provides a broad open backdrop while the other supplies the three-dimensional character.
Give the Legs Enough Empty Space
A spider’s outline becomes difficult to recognize when the legs disappear into a similarly dark wreath, garland, or pile of objects. Hang the finished piece in front of a lighter or uncluttered area if the silhouette is part of the appeal.
Before changing colors for visibility, try changing placement. Better contrast from the background can preserve the vintage black-spider look without modifying the project itself.
Choose the Hanging Height Before Final Display
A dangling decoration behaves differently from an object resting on a shelf. Test the spider at several heights and make sure it does not regularly brush faces, food, doorways, or hot light fixtures.
A shorter drop may work better over a mantel, while a longer one can suit a decorative branch in an open corner. Placement should make the spider noticeable without turning it into an obstruction.
Original Tutorial and Creator Credit
Creator: crochetcalls
17. Crochet Ghost Drink Coaster
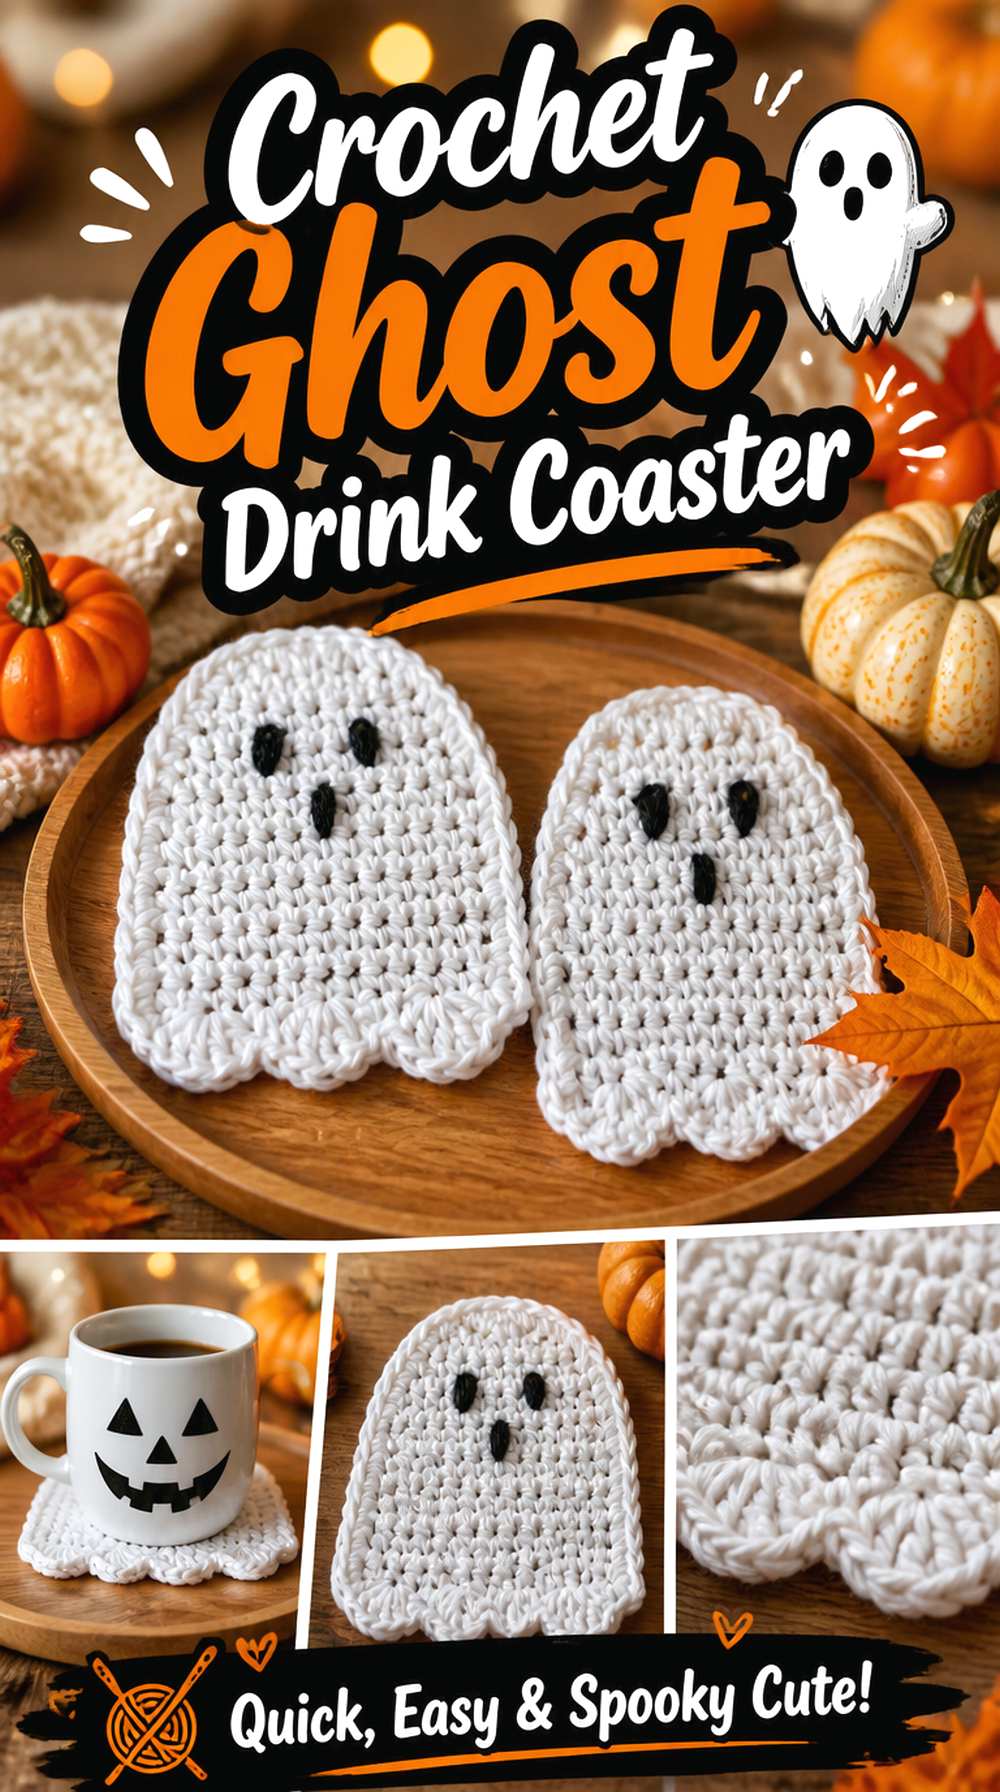
Caro-stitched’s ghost coaster turns the entire table piece into a recognizable character instead of placing a small ghost on a conventional circle or square. That makes it useful for a Halloween coffee station where the coasters are meant to remain visible even when no drinks are present.
For a vintage treatment, warm cream or very pale gray can replace bright white, while a clean black face keeps the old cartoon-ghost contrast. Because the perimeter is decorative, judge usable space by the central body rather than the overall width. The arms and shaped lower edge contribute to the silhouette without necessarily providing the best area for a cup.
Leave the Decorative Hem Visible
The lower outline is part of what makes a flat white shape immediately read as a ghost. Place the mug over the broader central section so the shaped bottom can remain visible.
Use your own cup as the checkpoint. A coaster can look generous in a close video shot yet leave very little visible character around a particularly wide mug base.
Keep the Face From Creating a Reverse-Side Bump
Decorative facial details should not compromise the flat surface. Once the face is complete and all ends are secured, turn the coaster over and check for concentrated bulk.
Place it on a hard table and gently set the intended mug on top. If it rocks, inspect the reverse finishing before assuming the main crochet body needs reshaping.
Original Tutorial and Creator Credit
Creator: Caro-stitched
18. Crochet Retro Witch Shelf Doll
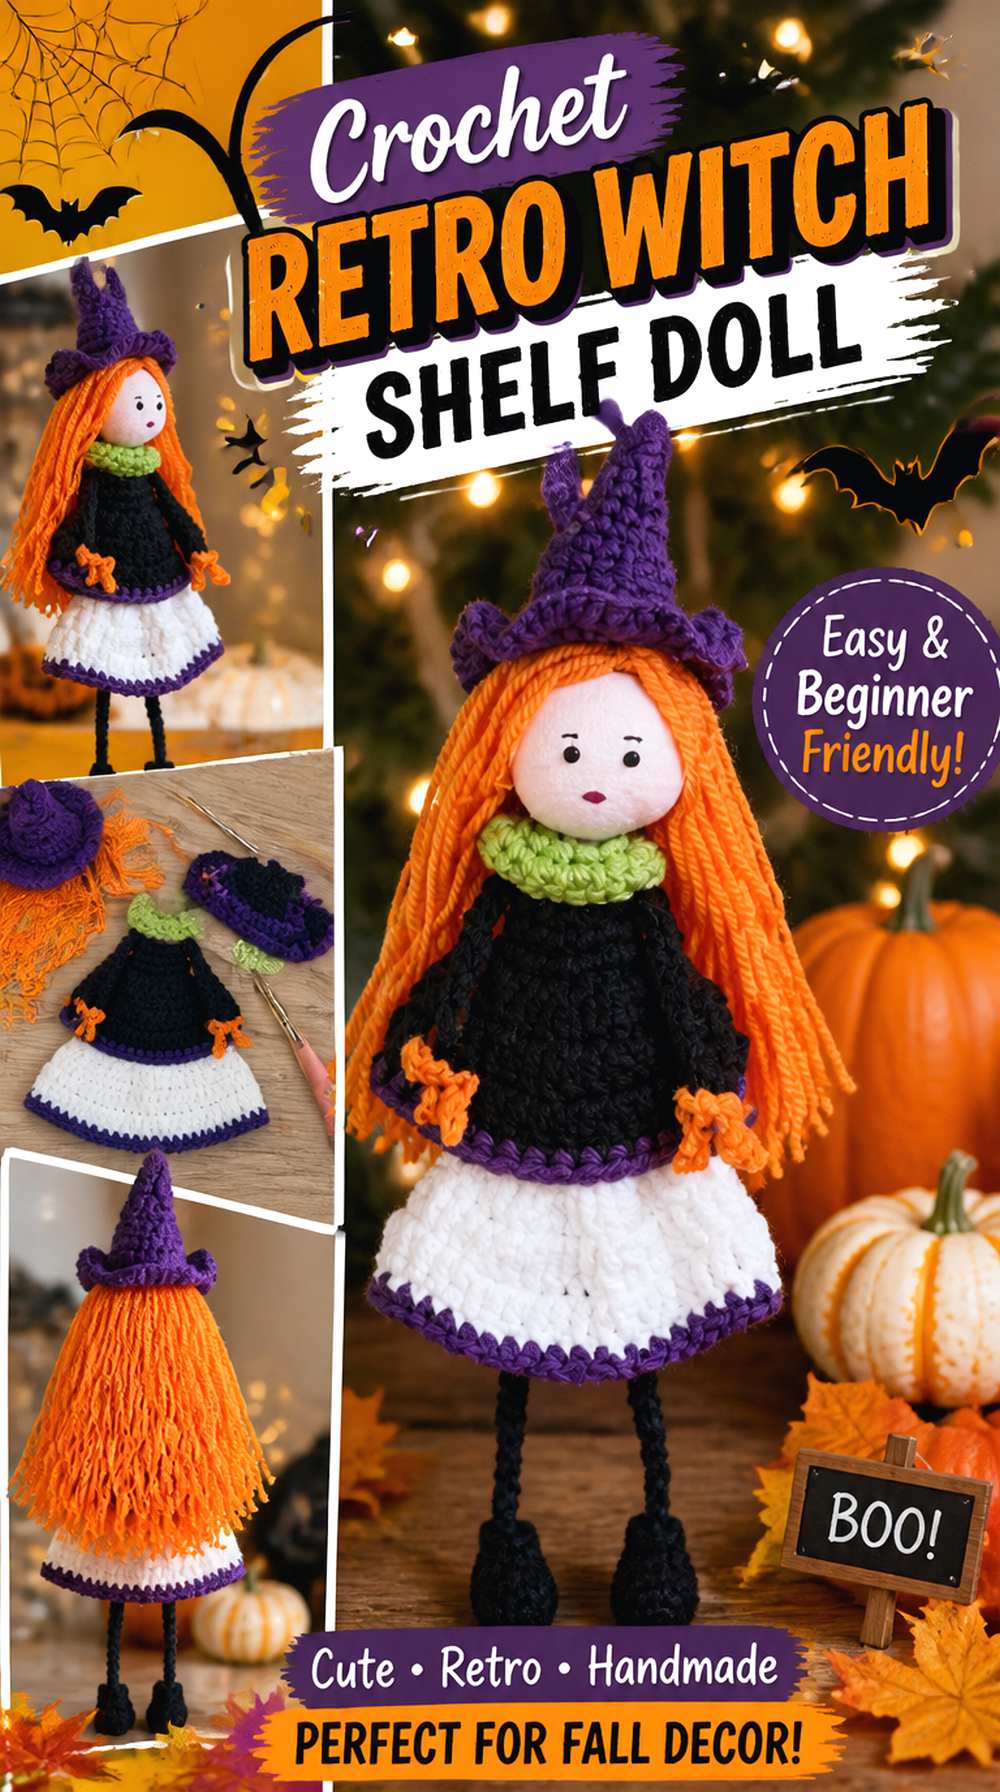
A witch figure gives the collection a complete character piece and creates a natural focal point among smaller pumpkins, bats, and lace motifs. Crochet by Ruby’s August 2026 tutorial presents a finished Halloween witch doll specifically as seasonal decor, making it a current tutorial that can still be styled toward an older visual direction.
Instead of relying on bright novelty colors, try building the surrounding display around black, aubergine, faded orange, moss green, or cream. The doll can sit among old-looking books, miniature pumpkins, or framed Halloween illustrations, where the recognizable pointed-hat silhouette connects the entire arrangement.
Match the Figure to the Scale of the Shelf
A character can dominate a vignette simply because it is taller than every object around it. Complete the witch before purchasing or making a large group of companion pieces, then build the arrangement around its actual finished proportions.
Aim for visible height changes rather than lining every piece along one level. A few lower pumpkins or flat lace elements can keep the display from becoming a row of similarly sized dolls.
Accessories Can Shift the Style Quickly
Witches invite extra details, but restraint helps when the goal is vintage-inspired decor. One strong accessory or contrasting color often establishes more character than several competing bows, beads, charms, and appliqués.
Before adding anything beyond the tutorial, place the finished witch in the intended setting. The surrounding objects may already provide enough storytelling that the doll itself needs very little additional decoration.
Consider Who Will Handle the Doll
If the witch is strictly decorative, it can be arranged on a protected shelf according to the tutorial and your display plan. If children will handle it, review all attached details and any small components separately for suitability and security.
A decorative crochet doll should not automatically be treated as a child-safe toy. The intended audience matters when choosing or modifying facial features and accessories.
Original Tutorial and Creator Credit
Creator: Crochet by Ruby
Choosing Between Flat, Hanging, and Dimensional Halloween Crochet
For a display that needs to pack away compactly, the ghost appliqués, spiderweb, skull doily, flat coasters, and candy corn garland require less volume than stuffed figures. They also layer easily with non-crochet decorations, which can help a vintage-inspired room feel collected rather than dominated by yarn.
Choose dimensional pieces when you need stronger focal points. The pumpkin pillow can anchor a chair or bench, while the cauldron, jack-o’-lantern, mummy, candy corn, spider, and witch give shelves recognizable silhouettes at different heights. The wreath and pumpkin garland make more sense when vertical or linear display space is available.
A balanced arrangement can combine these formats: one larger dimensional object, a few smaller figures, and a lace or garland element usually creates more depth than repeating the same type of amigurumi across every surface.
Conclusion
These 18 vintage Halloween crochet decor ideas work best when you choose by placement and texture rather than trying to make every classic October motif at once. Use lace spiderwebs and skulls for an older, more delicate mood; ghosts, candy corn, and coasters for compact graphic accents; pumpkins and the cauldron for tabletop shape; and the wreath, garlands, witch, or mummy when the display needs stronger presence.
A limited palette can connect very different projects without making them identical. Once you have chosen the pieces that fit your room and storage space, use the original tutorials for each creator’s exact construction, material guidance, shaping, and finishing details.
Frequently Asked Questions
Are these actual vintage Halloween crochet patterns?
No. The tutorials in this collection are modern sources, including several published in recent years. “Vintage” describes the decorating direction: faded Halloween colors, lace, graphic silhouettes, old-fashioned seasonal motifs, and restrained finishing. If you specifically want a documented historical pattern, check its original publication date and provenance rather than assuming that a modern pattern becomes vintage simply because it uses black and orange yarn.
How can I make modern Halloween crochet look more vintage?
Start with palette and texture rather than adding artificial aging. Warm cream, soot black, rust, mustard, faded orange, dark plum, and muted green can create an older mood when used selectively. Lace and openwork reinforce that feeling, as do simple graphic ghosts, bats, witches, and jack-o’-lantern faces. Keep embellishments controlled; too many bright novelty details can pull attention away from the silhouette and handmade texture.
Which Halloween crochet decorations are easiest to store compactly?
Flat motifs generally occupy less storage volume than stuffed objects. Ghost appliqués, coasters, lace spiderwebs, doilies, and flat garland components can often be stored with relatively little bulk as long as they are protected from hard creases and crushing. Dimensional pumpkins, dolls, wreaths, and pillows require more room because their shapes need protection. Consider off-season storage before making several large pieces for the same room.
What yarn should I use for vintage-style Halloween crochet?
Follow the tutorial’s recommended material when you want results closest to the creator’s example. For substitutions, think about the fabric you need rather than choosing by color alone. Fine, defined yarn can highlight lace; a yarn that produces a firmer fabric may suit structured decor; softer yarn can work for cushions and plush pieces. Always remember that changing fiber or thickness can alter dimensions, drape, stiffness, and finishing behavior.
Can crochet Halloween coasters be used with hot drinks?
Do not assume a coaster is heat-resistant simply because it is crocheted. Check the yarn manufacturer’s care and heat information, the creator’s intended use, and any relevant material guidance. The coaster should also lie completely flat beneath your cup. Keep it away from open flames and extremely hot objects, and avoid making safety claims based only on whether the yarn appears to be cotton or another familiar fiber.
How do I keep a mixed Halloween crochet display from looking cluttered?
Repeat a limited palette while varying scale and construction. For example, a dimensional jack-o’-lantern can be the focal point, a cream skull doily can provide a flat background layer, and several small bats can carry dark shapes upward. Give major pieces some negative space instead of filling every gap. Repeating one or two colors is usually enough to connect different motifs without forcing every object to match exactly.
Is it safe to place crochet Halloween decorations around candles?
Keep crochet and other yarn decorations away from open flames, hot candle containers, hot bulbs, and significant heat sources. If you want candlelight inside or near a Halloween arrangement, flameless LED candles are a more practical decorative option. Also check hanging pieces for movement: a garland, web, spider, or ghost that seems safely distant when still should not be able to swing or fall toward a heat source.