A ghost blanket can feel playful, eerie, nostalgic, or surprisingly subtle depending on how the characters are built into the fabric. For a vintage Halloween look, the strongest designs usually rely on more than orange, black, and bright white. Warm cream, faded pumpkin, dusty rose, old-gold, muted plum, mossy green, and charcoal can make modern crochet motifs feel closer to old Halloween postcards and well-loved seasonal textiles.
The ideas below use a mix of complete ghost-blanket tutorials, full ghost granny-square tutorials, and smaller ghost motifs that can be adapted to a throw. When the linked source teaches only a square, appliqué, or coaster rather than an entire blanket, that difference is noted so you can plan the base, joining, border, and finished size separately.
Quick List
- Crochet Vintage Pastel Patchwork Ghost Throw Blanket
- Crochet Repeating Ghost Granny-Square Grid Throw Blanket
- Crochet Center-Framed Ghost Patchwork Throw Blanket
- Crochet Witch-Hat Ghost Granny-Square Throw Blanket
- Crochet Solid-Background Boo Ghost Throw Blanket
- Crochet Alternating Framed Ghost Throw Blanket
- Crochet Sew-On Ghost Appliqué Throw Blanket
- Crochet Raised Ghost Motif Throw Blanket
- Crochet Tiny Scatter Ghost Throw Blanket
- Crochet Oversized Ghost Medallion Throw Blanket
- Crochet Ghost Parade Border Throw Blanket
- Crochet Mixed-Expression Vintage Ghost Throw Blanket
- Crochet Retro Video-Store Ghost Sampler Throw Blanket
- Crochet Scary-Face Ghost Block Throw Blanket
- Crochet Corner-Cluster Ghost Appliqué Throw Blanket
- Crochet Ghost Procession Stripe Throw Blanket
How to Give a Ghost Throw a Vintage Halloween Look
A vintage effect is usually more convincing when the palette is limited. Instead of adding every familiar Halloween color, choose one pale ghost color, one dark anchor, and one or two aged-looking accents. Warm ivory against soot black and faded pumpkin feels very different from bright white against neon orange.
Contrast still matters. A cream ghost may suit the vintage mood, but it needs enough difference from its background to remain readable across a room. Before committing to dozens of motifs, place your first sample on the sofa or chair where the blanket will be used and view it from several feet away.
Repetition also helps. Old textile designs often feel cohesive because a small palette repeats predictably. Alternating two background colors, using one shared border color, or repeating ghost blocks at regular intervals can make a varied throw feel intentionally collected rather than visually crowded.
Choose the Ghost Construction Before the Blanket Layout
Ghost motifs in this collection fall into several construction families. A complete ghost granny square already gives you a modular blanket block. A separate appliqué offers more placement freedom but adds another layer and another finishing stage. A large flat ghost can become a focal medallion, while a smaller motif works better for scattered placement or a border.
These differences affect the reverse side too. A blanket made from integrated blocks can have a relatively consistent surface, while multiple sewn-on ghosts create raised areas and visible attachment points on the back. That may be perfectly suitable for a decorative couch throw, but it is worth deciding before you make dozens of pieces.
Full blanket tutorials reduce some of that planning because the creator addresses the project as a complete object. When adapting a square or appliqué tutorial, you are responsible for choosing a compatible base, deciding the layout, and determining how the finished pieces will be joined.
Measure One Finished Motif Before Planning the Throw
A tutorial thumbnail cannot tell you how large your version will be with your yarn, hook, and tension. Finish one representative square or appliqué first and prepare it the way you intend to prepare the final blanket. Then measure it without stretching.
For a simple planning example, if a finished block measures 6 inches wide, five blocks placed side by side span about 30 inches before any joining treatment or outer border is considered. That is planning math, not a universal blanket formula. Your actual joins and border can change the finished dimensions.
This step becomes even more important when combining tutorials. Two ghost squares that look similar on screen may finish at different sizes or have very different outer edges. Compare real samples before committing to a mixed layout.
1. Crochet Vintage Pastel Patchwork Ghost Throw Blanket
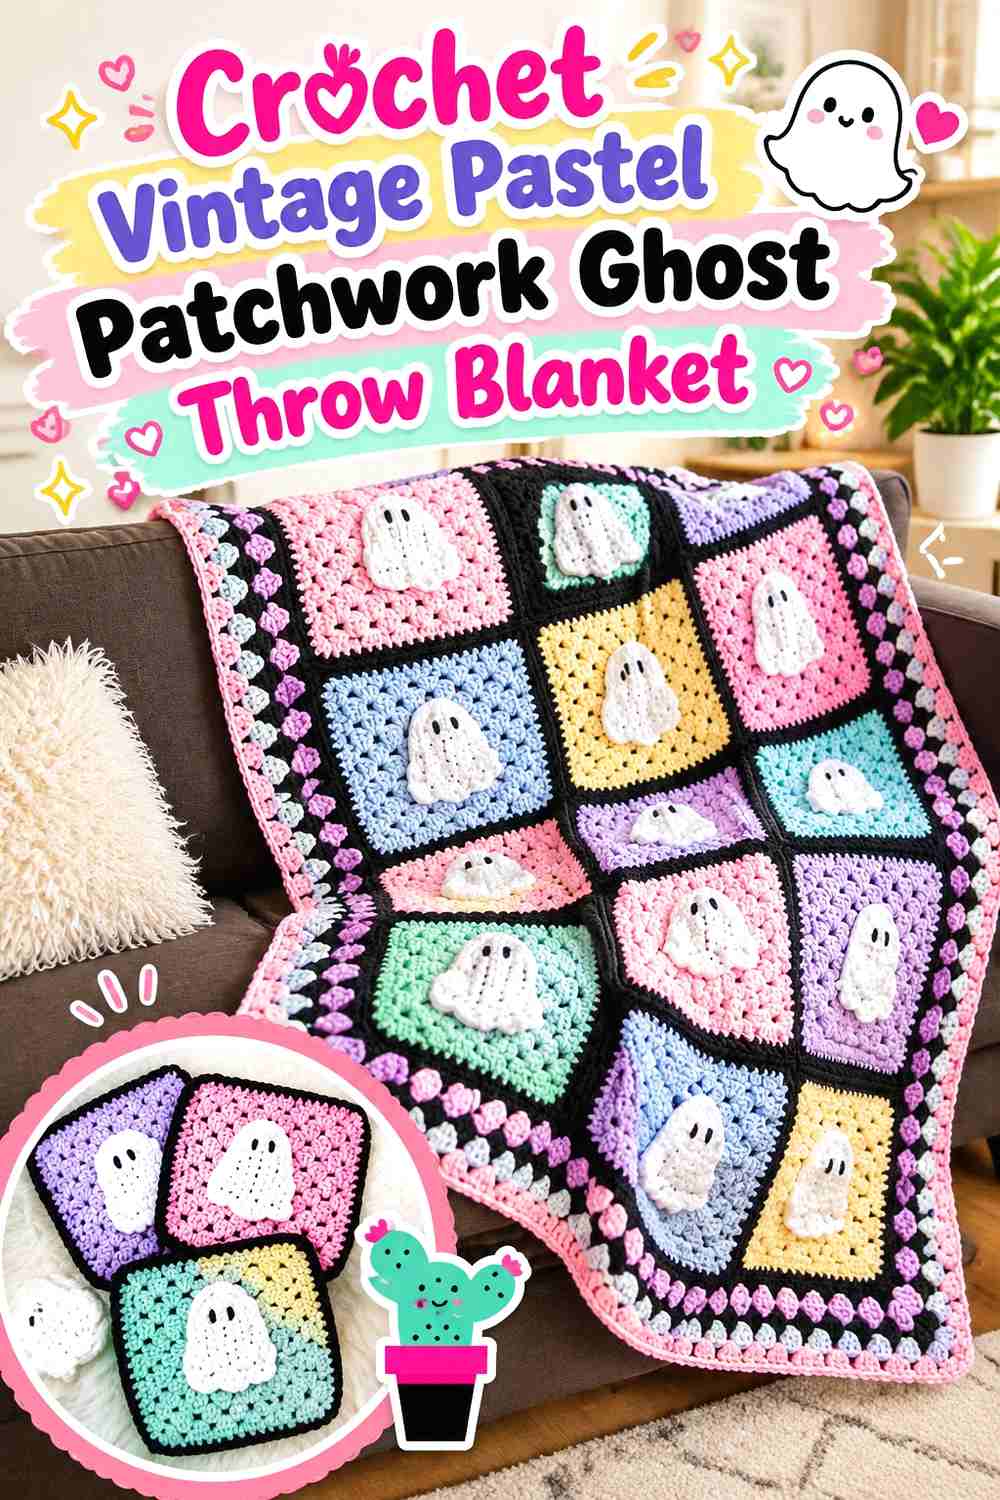
This patchwork direction is a strong choice if you want a complete blanket source instead of assembling a throw concept from separate tutorials. The linked tutorial works through granny-style squares, separate ghosts, joining, and an outer border, so it gives you a useful whole-project framework rather than only a character motif.
For a more vintage result, shift the palette toward dusty pink, faded plum, cream, charcoal, and muted pumpkin instead of relying on highly saturated Halloween colors.
The Separate Ghosts Make Color Planning Flexible
Because the ghost is layered onto the square, the background color becomes an independent design decision. That makes it possible to alternate faded colors while keeping the ghosts consistent throughout the blanket.
Lay several finished background squares together before attaching every ghost. A palette that looks balanced one square at a time can become much busier once repeated across the full throw.
Let the Join Become Part of the Antique-Textile Look
A visible join can reinforce the patchwork character instead of being something you try to hide. Using one consistent joining color creates a grid that visually contains multiple background shades.
If you want a quieter result, keep that joining color close to the border color. Too many independent outlines can make a vintage palette feel fragmented.
Check Layered Blocks Before Making the Full Set
Finish one complete square with its ghost attached and compare its drape with a plain square. The added layer can change how the fabric bends.
That small test is especially useful if you are adapting the tutorial with a different yarn type or significantly changing the color-block arrangement.
Creator Credit: Laura’s Art Design
2. Crochet Repeating Ghost Granny-Square Grid Throw Blanket
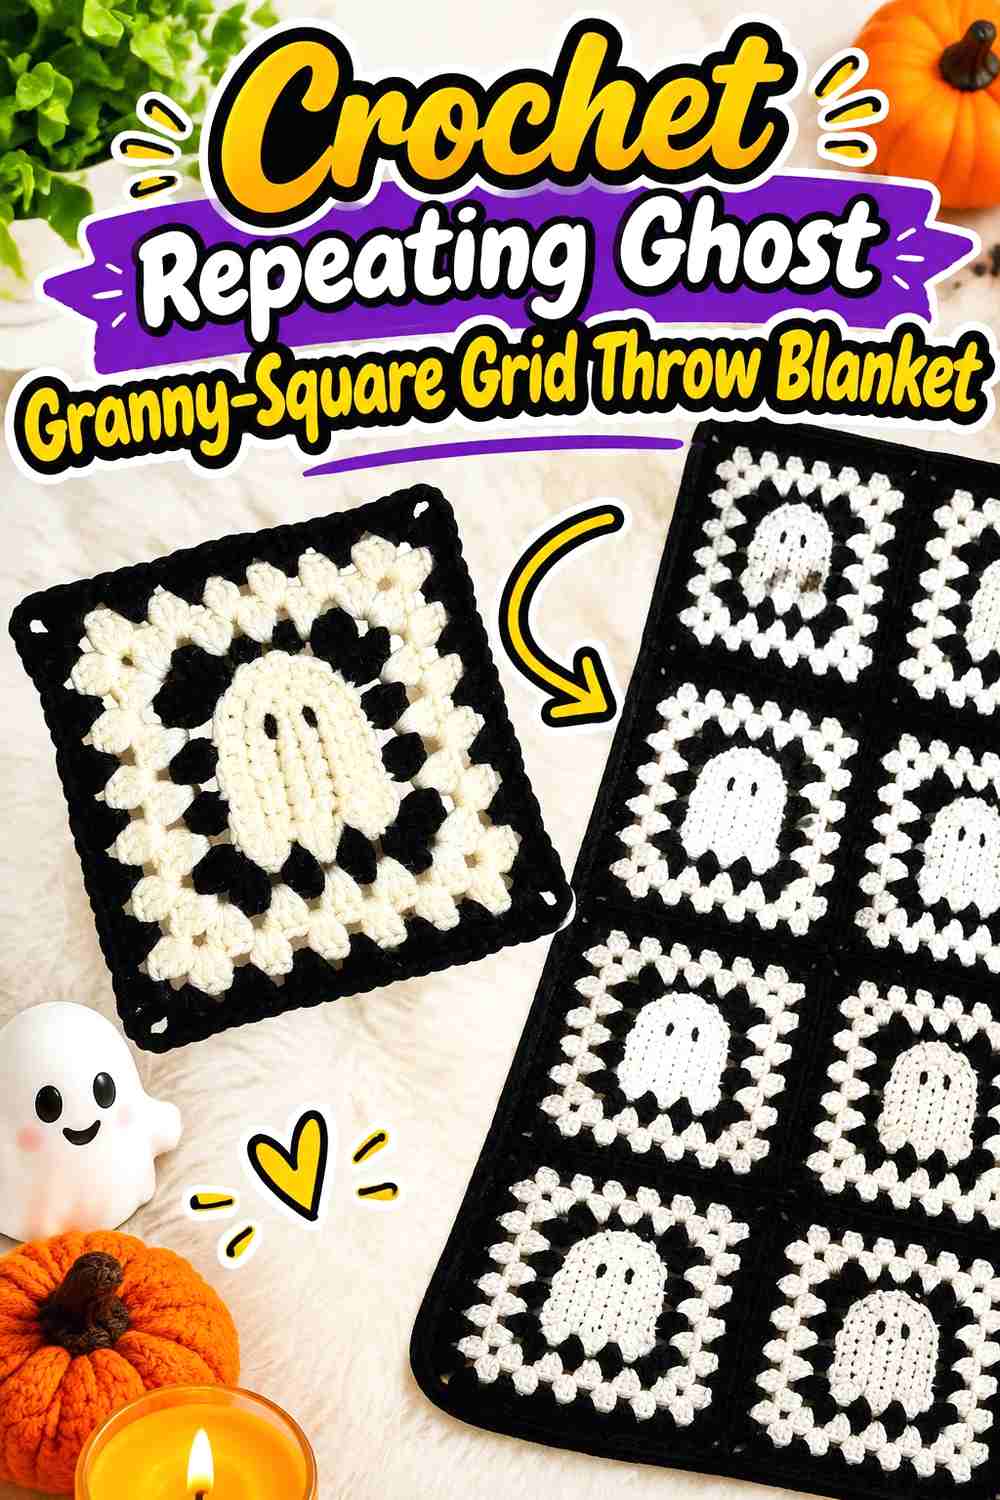
A repeated grid is one of the cleanest ways to turn a single ghost square into a recognizable blanket. ElyseCrochets’ source teaches the complete ghost granny square and specifically presents it as a motif that can be used for projects including blankets. The overall throw layout remains your adaptation.
This version suits readers who enjoy portable modular crochet and want every block to carry the Halloween theme.
One Sample Square Controls the Whole Blanket Plan
Finish your first square before deciding how many blocks the throw needs. Measure its prepared dimensions and use those actual numbers to estimate the grid.
This also tells you whether the character feels large enough at couch-viewing distance. A ghost that looks detailed in your hands can read quite differently when repeated across a room.
Plain Squares Can Give the Ghosts More Breathing Room
A ghost does not need to appear in every grid position. Alternating character blocks with compatible plain squares can create a checkerboard rhythm and reduce visual density.
If you take this route, compare the outer edges of both square types first. Similar-looking blocks are not automatically compatible for the same joining method.
Mark the Top Before Joining
Ghosts are directional. A rotated square may not be obvious while the blanket is spread on the floor, but the mistake becomes noticeable once the characters are viewed together.
A removable marker on the top edge of each finished block can make final layout planning much easier.
Creator Credit: ElyseCrochets 💌
3. Crochet Center-Framed Ghost Patchwork Throw Blanket
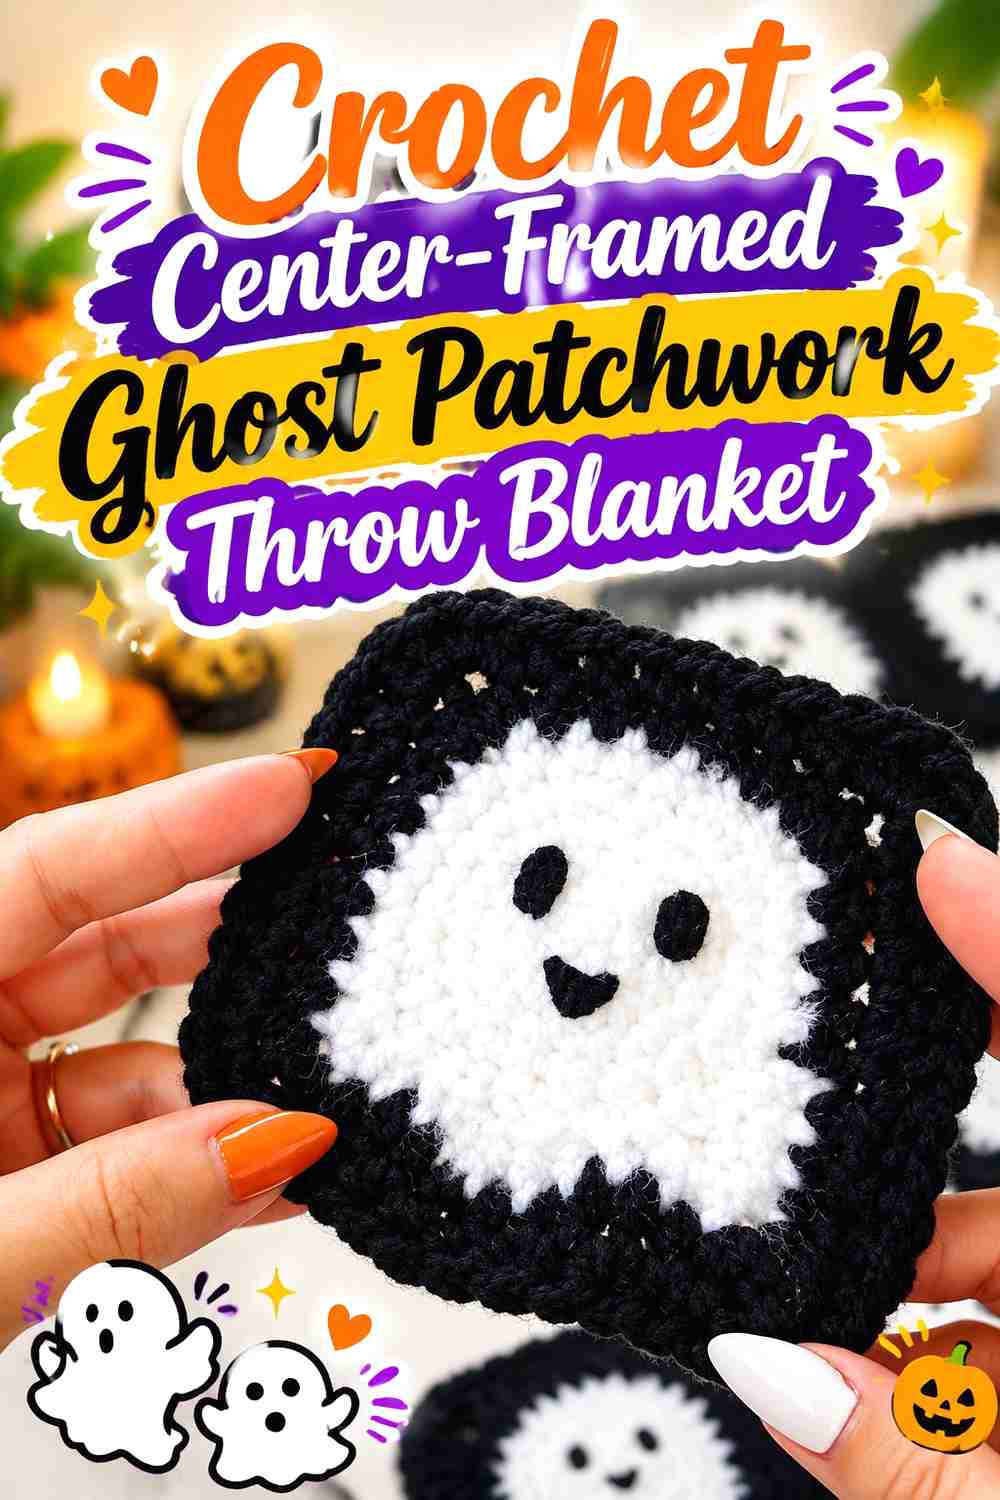
This idea treats each ghost as the center of its own framed textile tile. Krystal Everdeen’s tutorial provides the ghost granny-square source, while the larger patchwork arrangement is a blanket adaptation.
The framing effect works especially well with an old-postcard palette because each ghost can sit inside a different muted field while a shared outer color unifies the final throw.
The Frame Can Control a Mixed Palette
If you want rust, faded gold, plum, and moss backgrounds in the same blanket, repeat one consistent outer framing color on every block. It creates a visual boundary between colors that might otherwise compete.
Black is not the only option. Charcoal, dark brown, or deep aubergine can produce a softer aged effect while still outlining pale ghosts.
Keep the Ghost Centered in the Finished Block, Not Just the Motif
A character can appear centered during construction but feel visually off once its surrounding border is complete. Judge the finished square as a whole.
Place several blocks side by side before joining. Differences in negative space become much easier to see when neighboring squares establish a repeated grid.
Creator Credit: Krystal Everdeen
4. Crochet Witch-Hat Ghost Granny-Square Throw Blanket
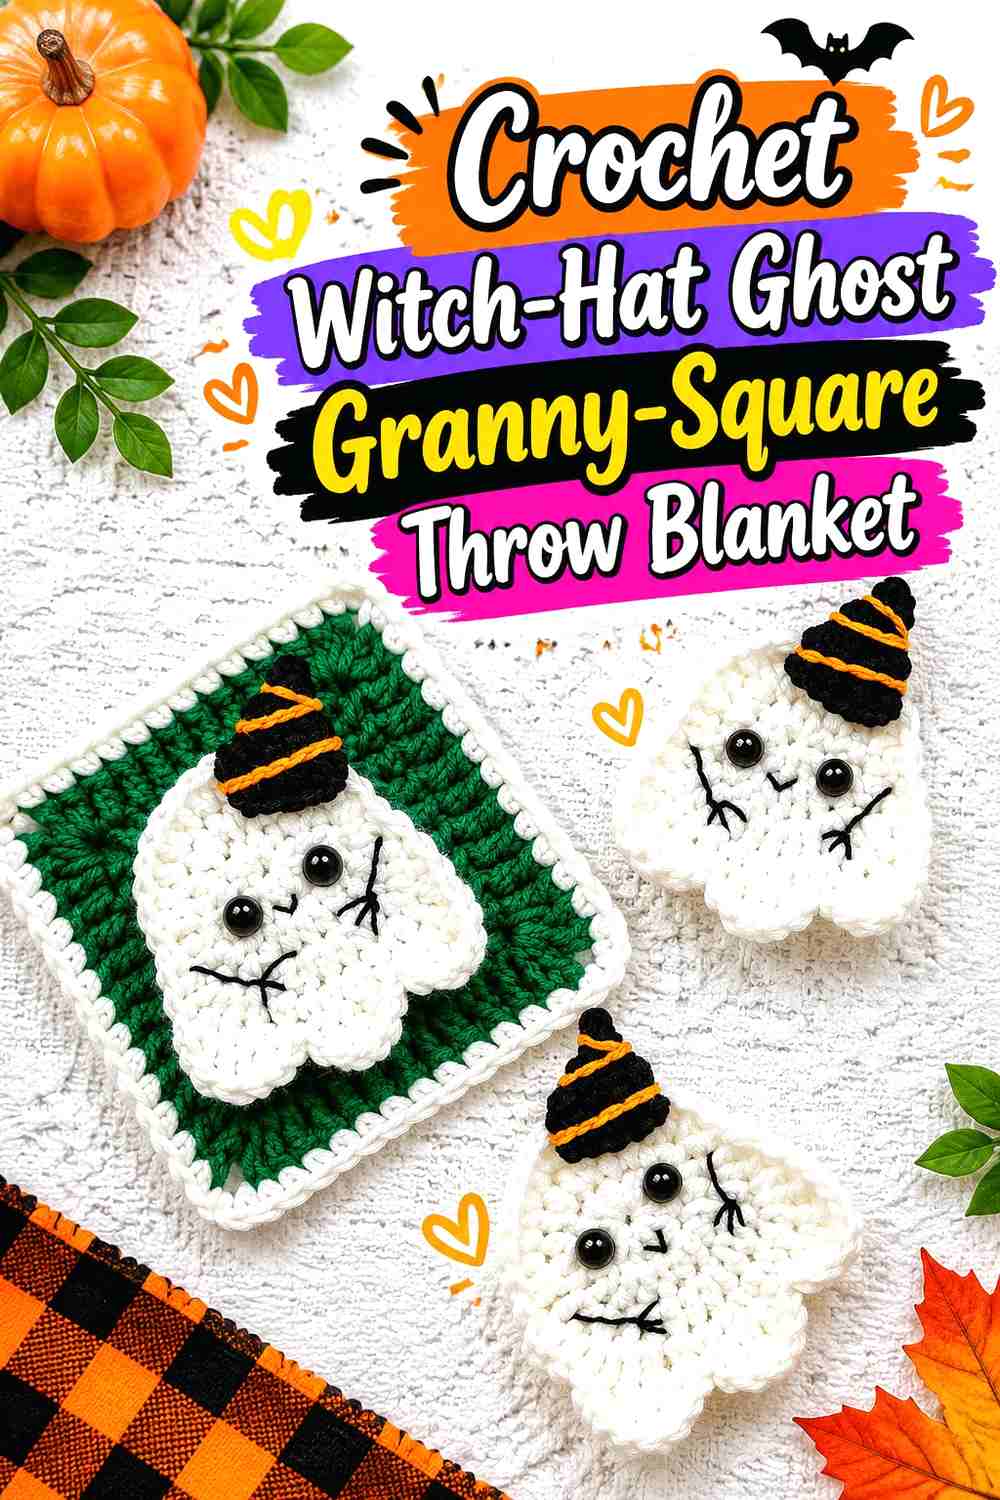
A costumed ghost introduces more personality than a plain sheet-ghost repeat. Loopara’s ghost-square source includes additional character detail, which makes it particularly suitable for a throw where individual blocks are meant to be noticed rather than simply forming background texture.
For a vintage Halloween mood, reserve stronger colors for the character details and keep the surrounding square relatively restrained.
Extra Character Details Need More Visual Space
A face, flowing outline, accessory, and border all need room to remain readable. Packing multiple detailed blocks together without any quieter areas can make the throw look much busier than expected.
Consider alternating these squares with plain granny blocks or low-detail striped squares so the costumed ghosts remain focal points.
Keep Every Character Facing the Same Direction
Directional accessories make orientation even more noticeable than it is on a simple ghost. Arrange the entire blanket before joining so no character ends up accidentally rotated.
This matters particularly around corners if you are considering a decorative border with a strong directional pattern of its own.
Let the Hat Supply the Accent Color
Instead of changing the ghost color repeatedly, keep the body consistent and use the accessory as the small vintage-color accent. Mustard, dusty rose, faded orange, or muted purple can add variation without weakening the ghost silhouette.
Creator Credit: Loopara
5. Crochet Solid-Background Boo Ghost Throw Blanket
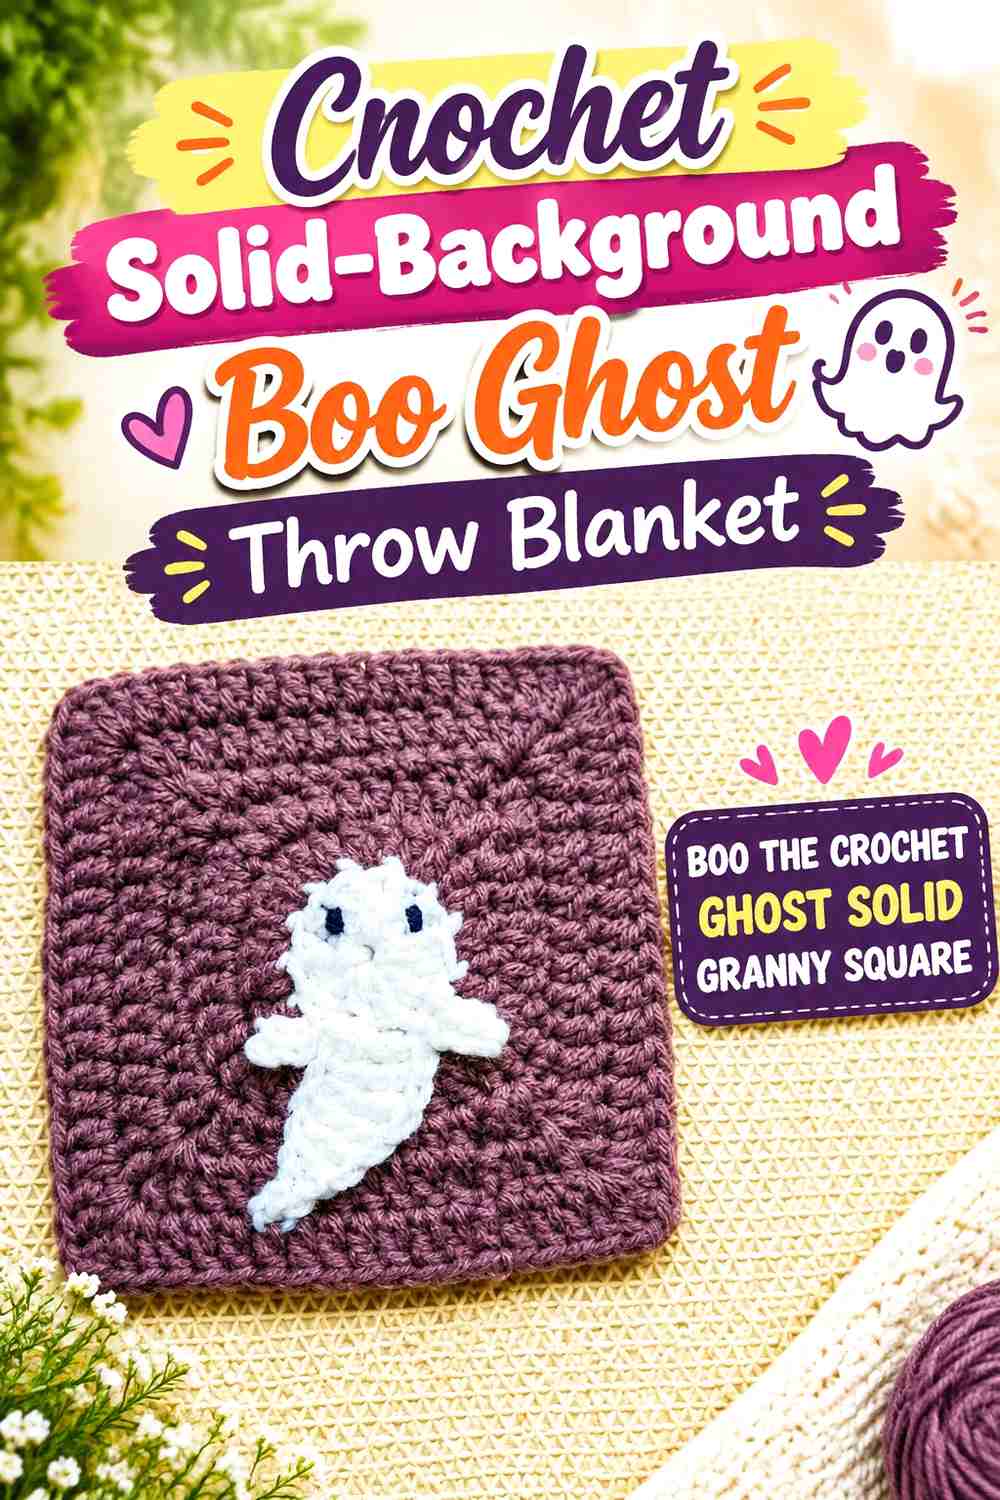
Raji’s Craft Hobby offers a useful alternative to open granny-style fabric by placing the ghost in a more solid-looking square. The source specifically presents the block as suitable for joining into blankets.
That denser field creates a graphic, illustrated effect that can look especially striking in a limited cream-and-charcoal vintage palette.
Solid Blocks Change the Visual Weight
A denser square creates fewer interruptions behind the ghost, so the character can read more like a printed image. The trade-off is that the fabric may feel different from a very open granny construction.
Make one complete block and handle it next to any companion squares you intend to use. Visual compatibility does not guarantee similar drape.
This Style Can Carry a Two-Color Blanket
If you prefer a restrained antique look, this is a strong candidate for using very few colors. A pale ghost, dark field, and perhaps one border accent can provide enough contrast without turning the throw into a multicolor sampler.
The simplicity also makes the repeated faces more prominent, so decide whether every block needs a ghost or whether occasional plain squares would make the composition calmer.
Creator Credit: Raji’s Craft Hobby
6. Crochet Alternating Framed Ghost Throw Blanket
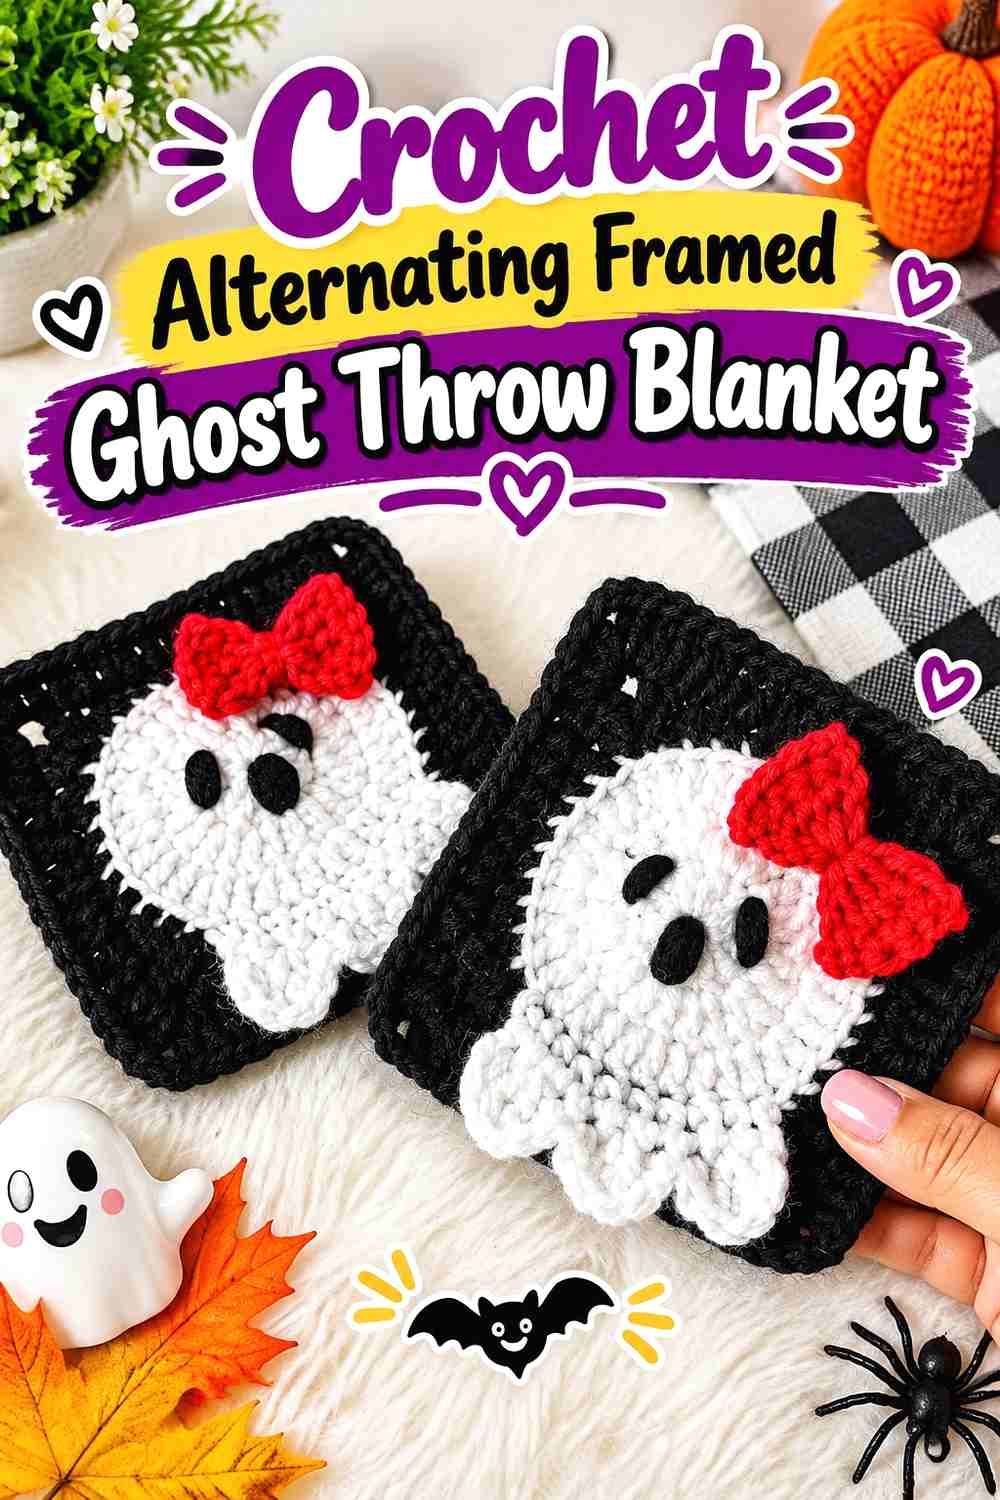
Crochet Mili’s tutorial supplies another complete ghost granny-square option that can become the repeated unit in a throw. Rather than duplicating the same color arrangement on every square, use the finished block as the basis for alternating frames.
One row might use charcoal framing while the next shifts to muted pumpkin or faded mauve, with the ghost itself remaining consistent.
Alternating Frames Create Rhythm Without Changing the Ghost
Changing only the frame is an efficient way to create visual movement. The blanket still reads as one collection because the character remains recognizable from block to block.
Plan the order before making a large number of squares. A deliberate AB or ABC repeat usually looks more cohesive than distributing frame colors randomly at the end.
Outer Corners Matter More Than the Center During Joining
The ghost naturally attracts attention while you crochet, but the perimeter determines how successfully the blocks meet.
After finishing the first few squares, lay them together without stretching. If corners or side lengths differ, solve that compatibility issue before multiplying the problem across the entire throw.
Creator Credit: Crochet Mili
7. Crochet Sew-On Ghost Appliqué Throw Blanket
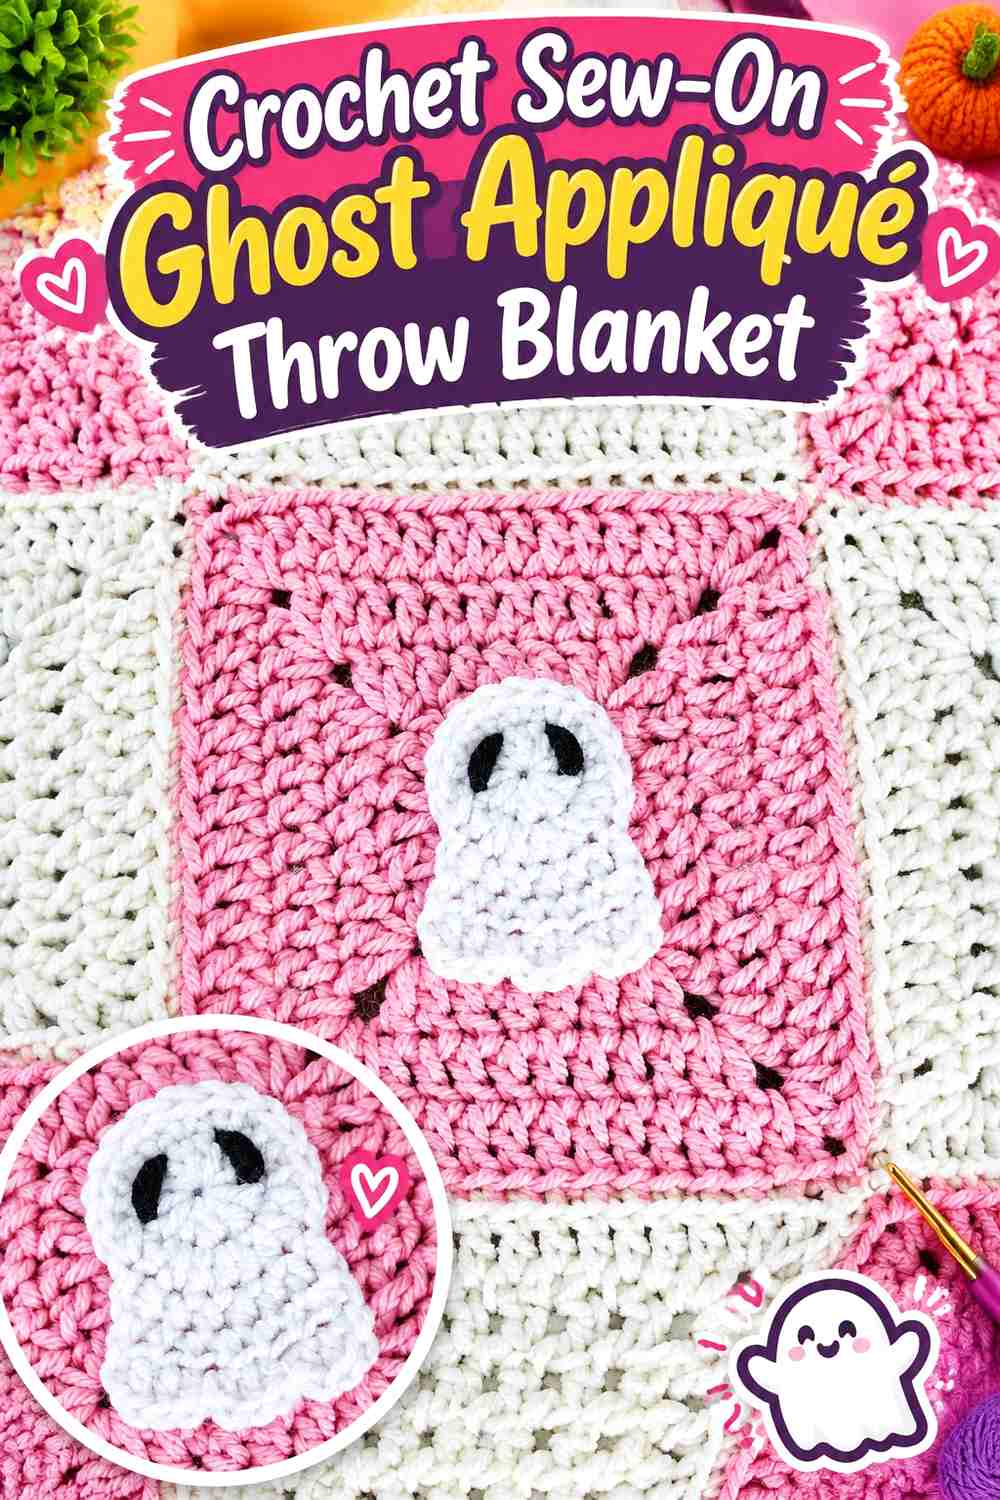
Maria’s Blue Crayon teaches a separate ghost appliqué and specifically connects the motif with Halloween granny-square blanket use. This makes the source particularly relevant if you want to crochet the blanket background independently and decide on ghost placement afterward.
That freedom is useful for a vintage throw because you can create a calm field of muted squares first, then add only as many ghosts as the composition needs.
Attach Ghosts Only After Seeing the Whole Layout
Resist sewing each appliqué onto the first available square as soon as it is finished. Arrange the background blocks first and place loose ghosts on top.
You may discover that a ghost on every square feels too busy. Corner ghosts, a central cluster, or an alternating arrangement can provide more impact with fewer layered motifs.
The Reverse Side Deserves Attention
An appliqué throw has attachment work on the back that an integrated motif does not. If both sides of the blanket will be visible, consider how neatness, yarn tails, and attachment tension affect the reverse.
Check one completed sample block before repeating the method throughout the project.
Use Consistent Backgrounds for a Collected Vintage Look
When the appliqués provide the character detail, the base squares do not need to compete. Repeating two or three faded background shades can make the finished throw resemble a coordinated collection of old textile tiles.
Creator Credit: Maria’s Blue Crayon
8. Crochet Raised Ghost Motif Throw Blanket
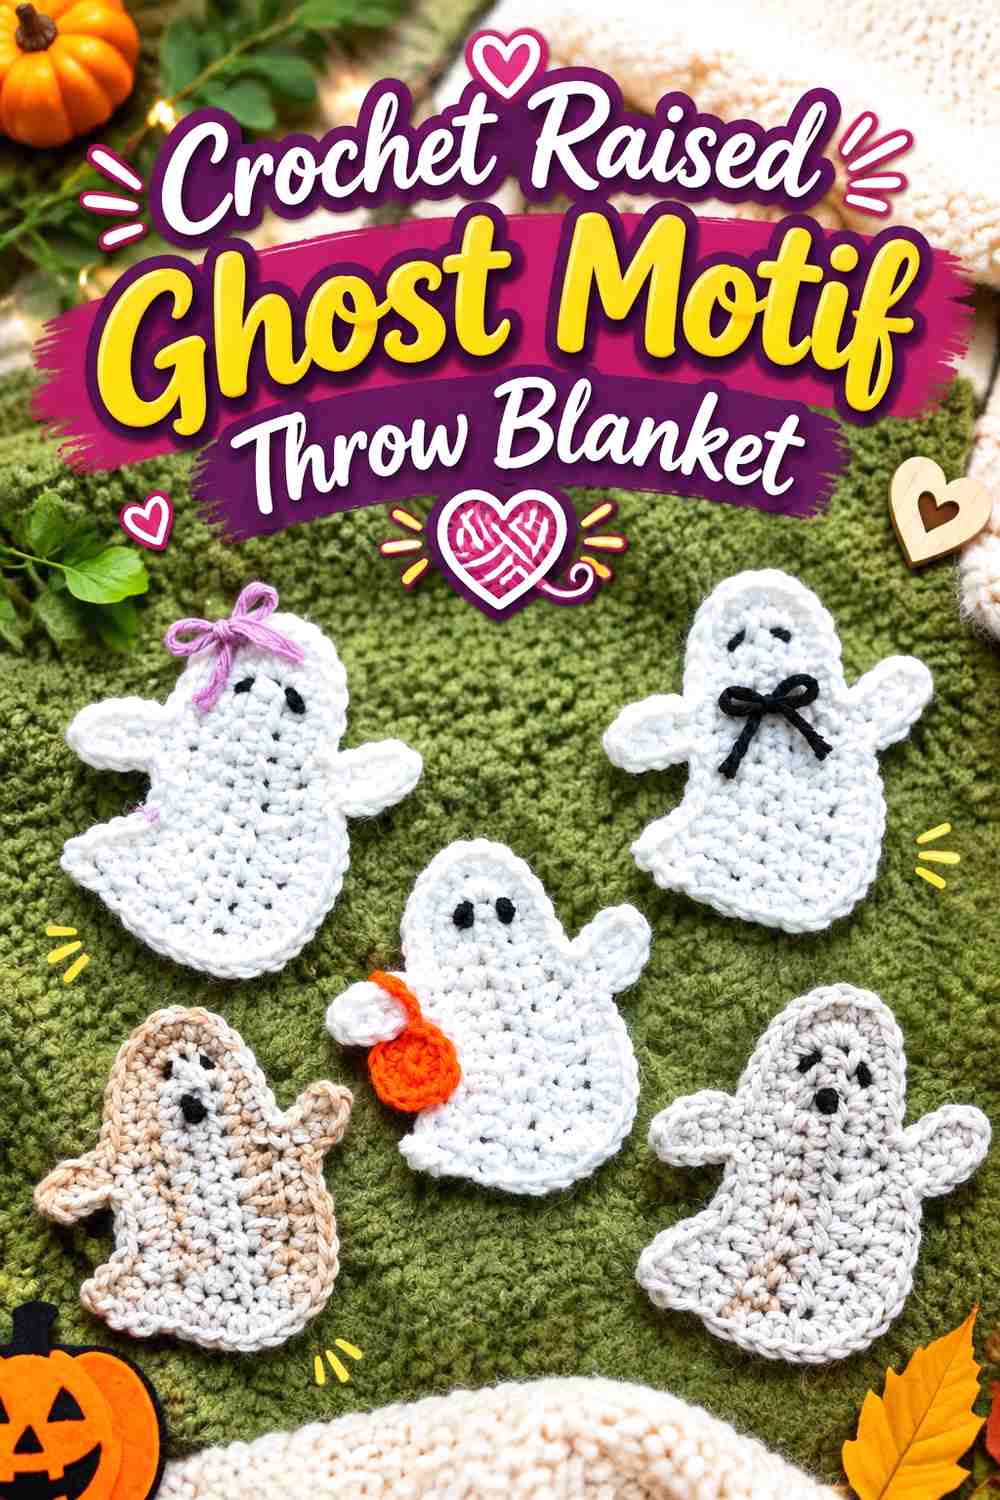
OhMeOhMyCrochet’s source focuses on a flat ghost appliqué rather than a complete blanket, making this a layered adaptation.
Instead of placing a ghost on every square, use raised motifs selectively across a relatively plain throw. The result can feel more like a vintage embellished textile than a conventional character-grid blanket.
Raised Motifs Should Not Crowd the Joining Lines
Keep each ghost comfortably inside its background area. An appliqué that reaches too close to a seam can interfere visually with the grid and may make the attachment area feel congested.
Test the motif on a finished background before deciding the scale of every surrounding block.
Surface Texture Changes How the Throw Feels
A raised character adds tactile variation. That can be attractive on a decorative blanket folded over an armchair, but consider whether you want the same dimensionality across the entire surface of a blanket used regularly for lounging.
Selective placement can preserve the decorative effect while leaving larger smooth areas.
Avoid Stretching the Base While Attaching
The ghost and background should lie naturally when they are secured together. If the square must be stretched to meet the appliqué—or the appliqué must be pulled outward to fit—the finished area may pucker.
Check the block on a flat surface several times during attachment rather than hoping final finishing will correct major distortion.
Creator Credit: OhMeOhMyCrochet
9. Crochet Tiny Scatter Ghost Throw Blanket
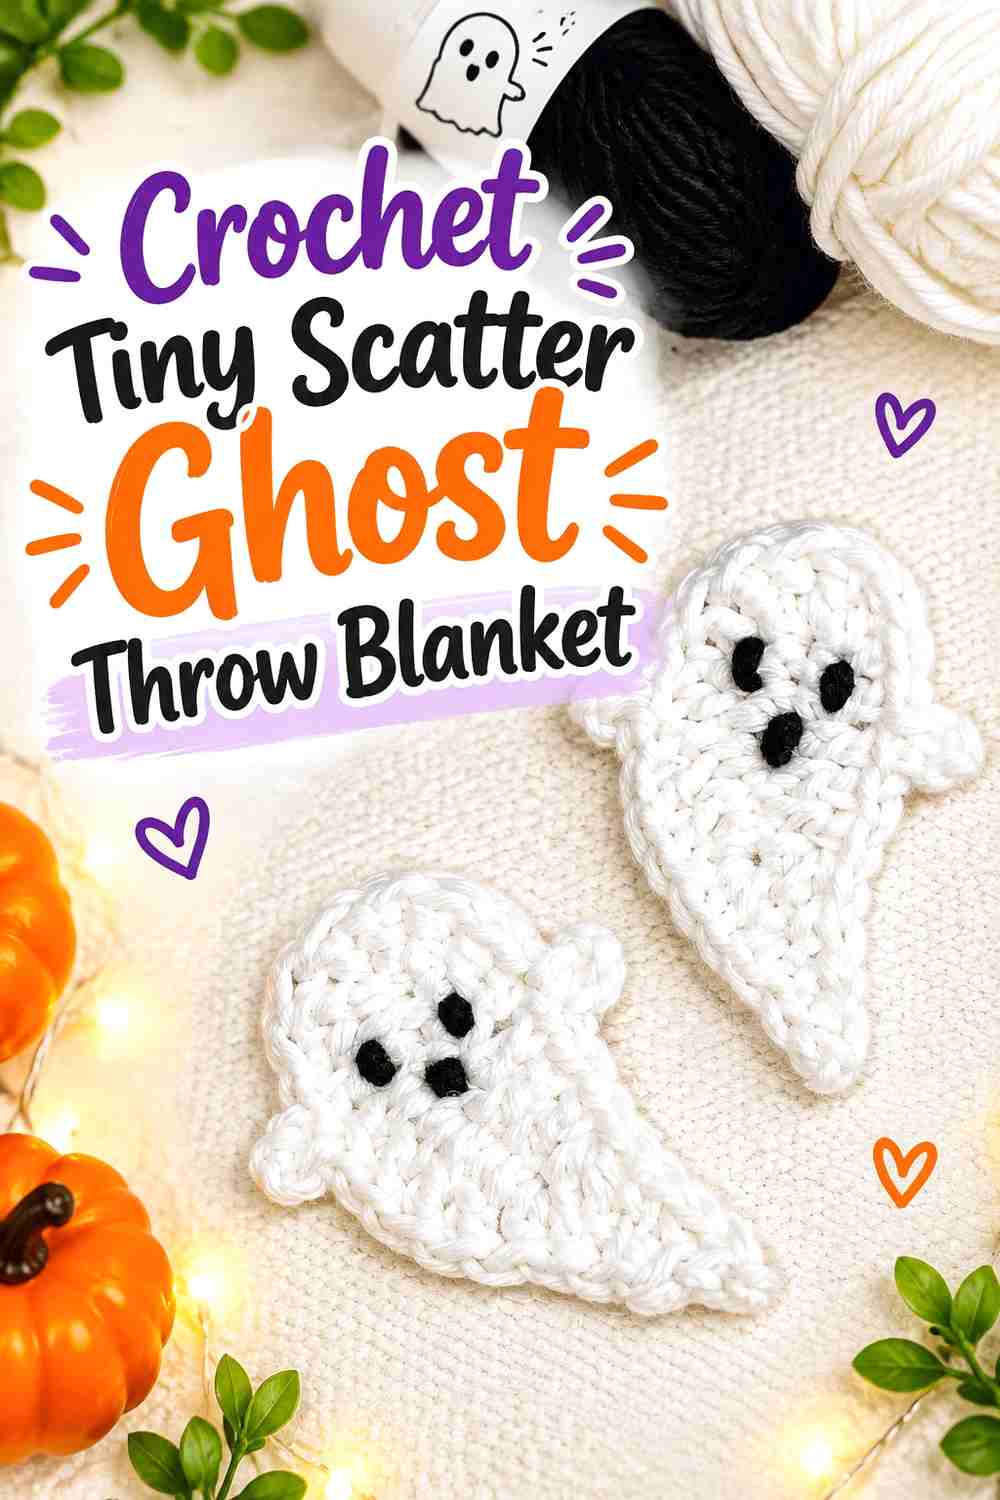
Jolly Lizard’s tutorial focuses on a compact ghost appliqué rather than a complete blanket. That smaller motif opens a different design route: scatter numerous little ghosts across a larger, quieter background instead of framing each one inside a square.
The finished concept can resemble a vintage novelty print, particularly when the ghosts repeat over a muted solid or lightly striped base.
Random-Looking Placement Still Needs Planning
True randomness often produces accidental clusters and empty gaps. Lay the finished throw flat and arrange all loose ghosts before attaching any of them.
Step back and look at the blanket as a whole. The goal is irregularity that feels balanced, not mathematical spacing.
Small Ghosts Work Well With More Negative Space
Tiny motifs need room around them to remain recognizable. Crowding many together can erase the advantage of their smaller scale.
A restrained cream-and-black combination can be especially effective here because the silhouette does most of the design work.
Creator Credit: Jolly Lizard
10. Crochet Oversized Ghost Medallion Throw Blanket
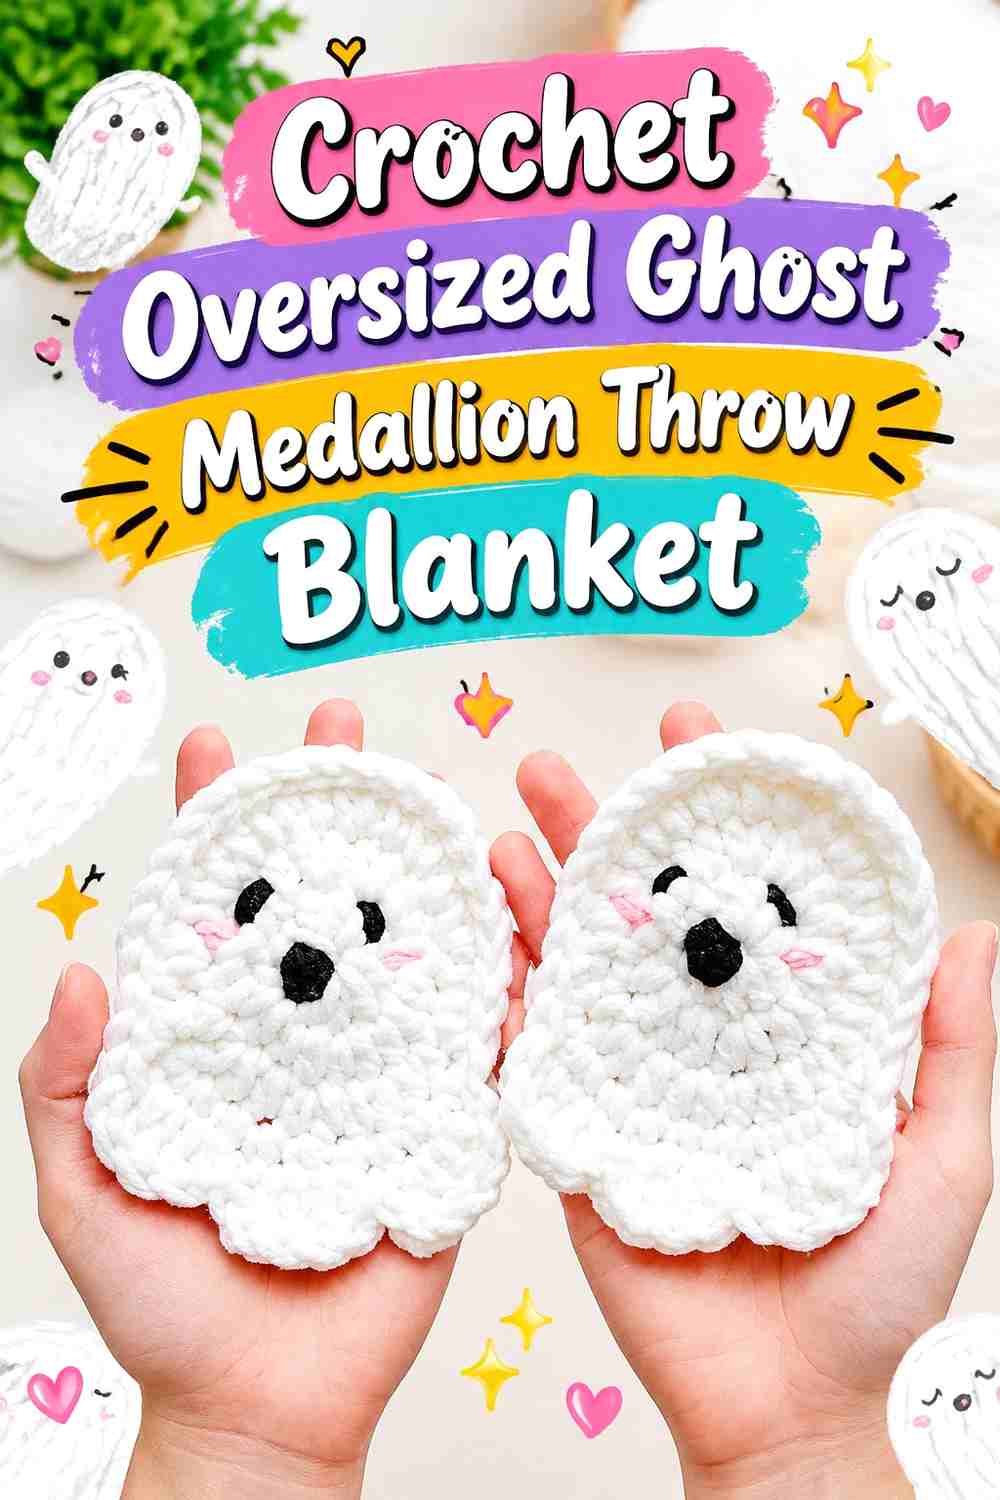
The stringbbeans source teaches a complete ghost-shaped coaster rather than a blanket. For this throw idea, use the broad flat ghost as inspiration for one large focal character or a small group of substantial medallions on a separately planned blanket base.
This approach is especially useful when you want a dramatic ghost blanket without crocheting dozens of character squares.
One Large Character Can Replace a Busy Grid
A central ghost surrounded by generous plain space creates an entirely different mood from an allover repeat. It can feel more graphic and more intentionally retro.
Before attaching a large motif, fold or drape the blanket the way it will normally be used. Make sure the focal ghost will not disappear permanently into a fold or sit too close to an edge.
Larger Motifs Make Attachment Tension More Visible
The longer the perimeter, the more opportunities there are to accidentally gather the base fabric. Position the entire ghost first and check the blanket repeatedly as you secure it.
If the background starts pulling inward, correct the problem during attachment rather than depending on aggressive blocking later.
Use the Border to Echo the Medallion
A simple outer border in the same dark accent used around the focal ghost can connect the center and edge without adding another competing motif.
That is often enough to make a large central appliqué feel integrated into the blanket rather than placed on top as an afterthought.
Creator Credit: stringbbeans
11. Crochet Ghost Parade Border Throw Blanket
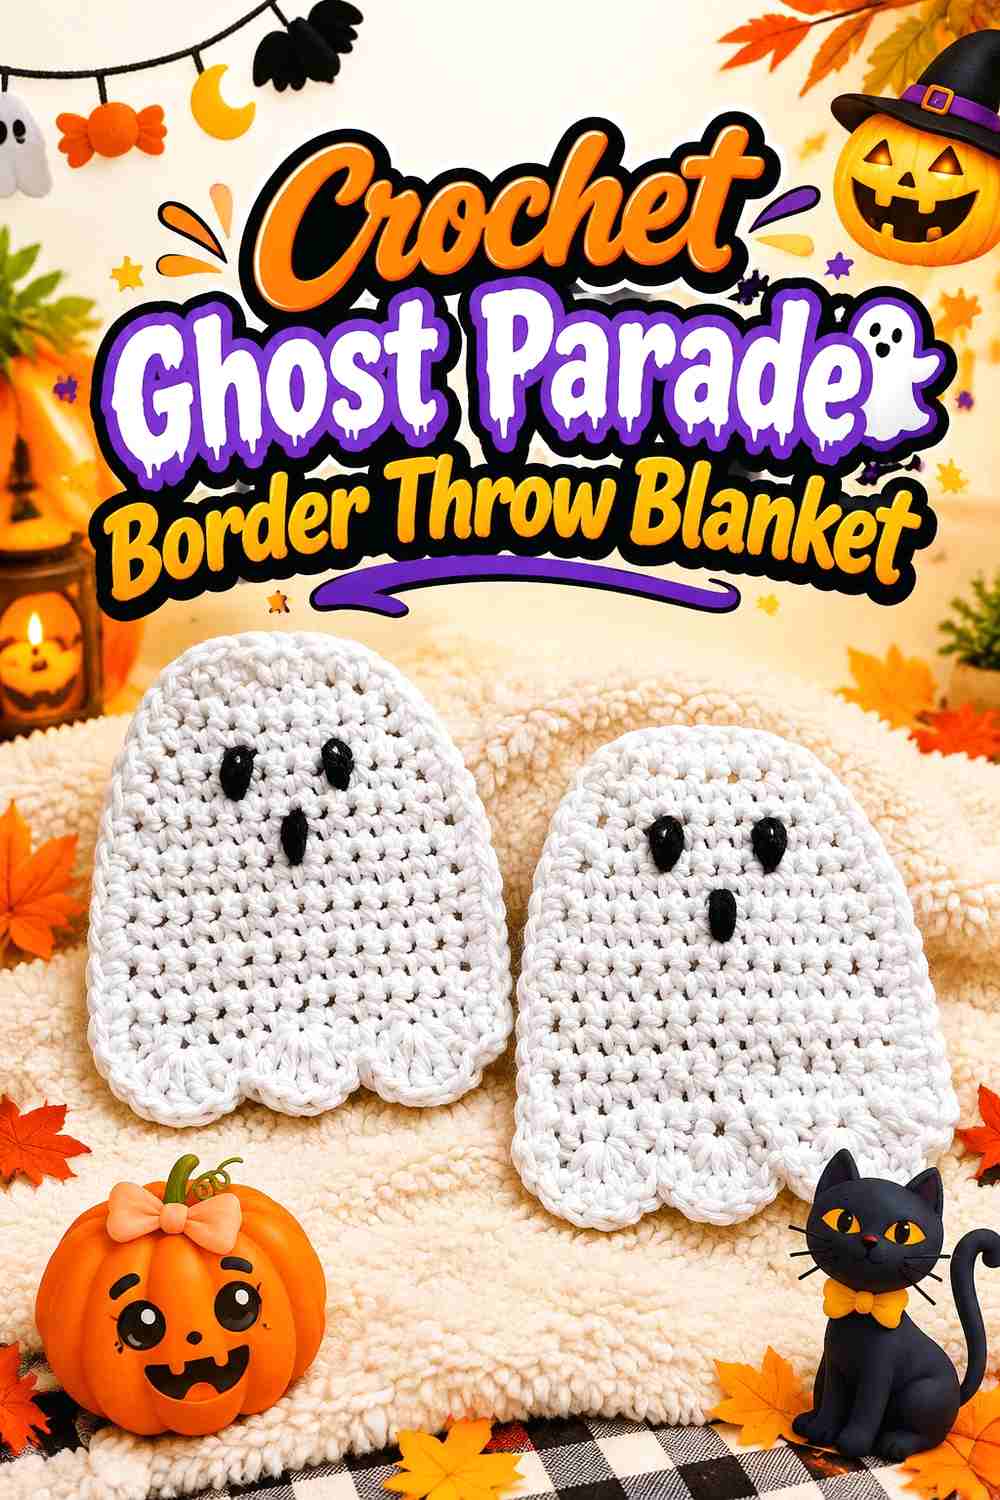
Caro-stitched’s source is another flat ghost coaster rather than a blanket tutorial. Instead of enlarging one ghost for the center, this adaptation places substantial ghost silhouettes around the perimeter of an otherwise quieter throw.
The effect can resemble a procession of old Halloween characters surrounding a framed textile center.
Keep the Middle Quieter Than the Border
A motif-heavy border works because the center gives the eye somewhere to rest. A solid, striped, or understated granny field can provide that contrast.
If the center already contains several large motifs, a full ghost parade around the edge may make the blanket feel crowded.
Corner Placement Needs Its Own Plan
A repeated border rarely divides perfectly at the corners by accident. Lay out the loose motifs first and decide whether each corner gets a ghost, a gap, or a different spacing treatment.
Symmetry is not mandatory, but repeated corners should look intentional.
Check the Motifs When the Blanket Is Draped
Characters positioned at the very edge may hang vertically when the blanket is over a sofa or chair. Test the arrangement in its real display position before permanent attachment.
A ghost that looks upright on the floor can appear upside down or sideways once the edge folds over furniture.
Creator Credit: Caro-stitched
12. Crochet Mixed-Expression Vintage Ghost Throw Blanket
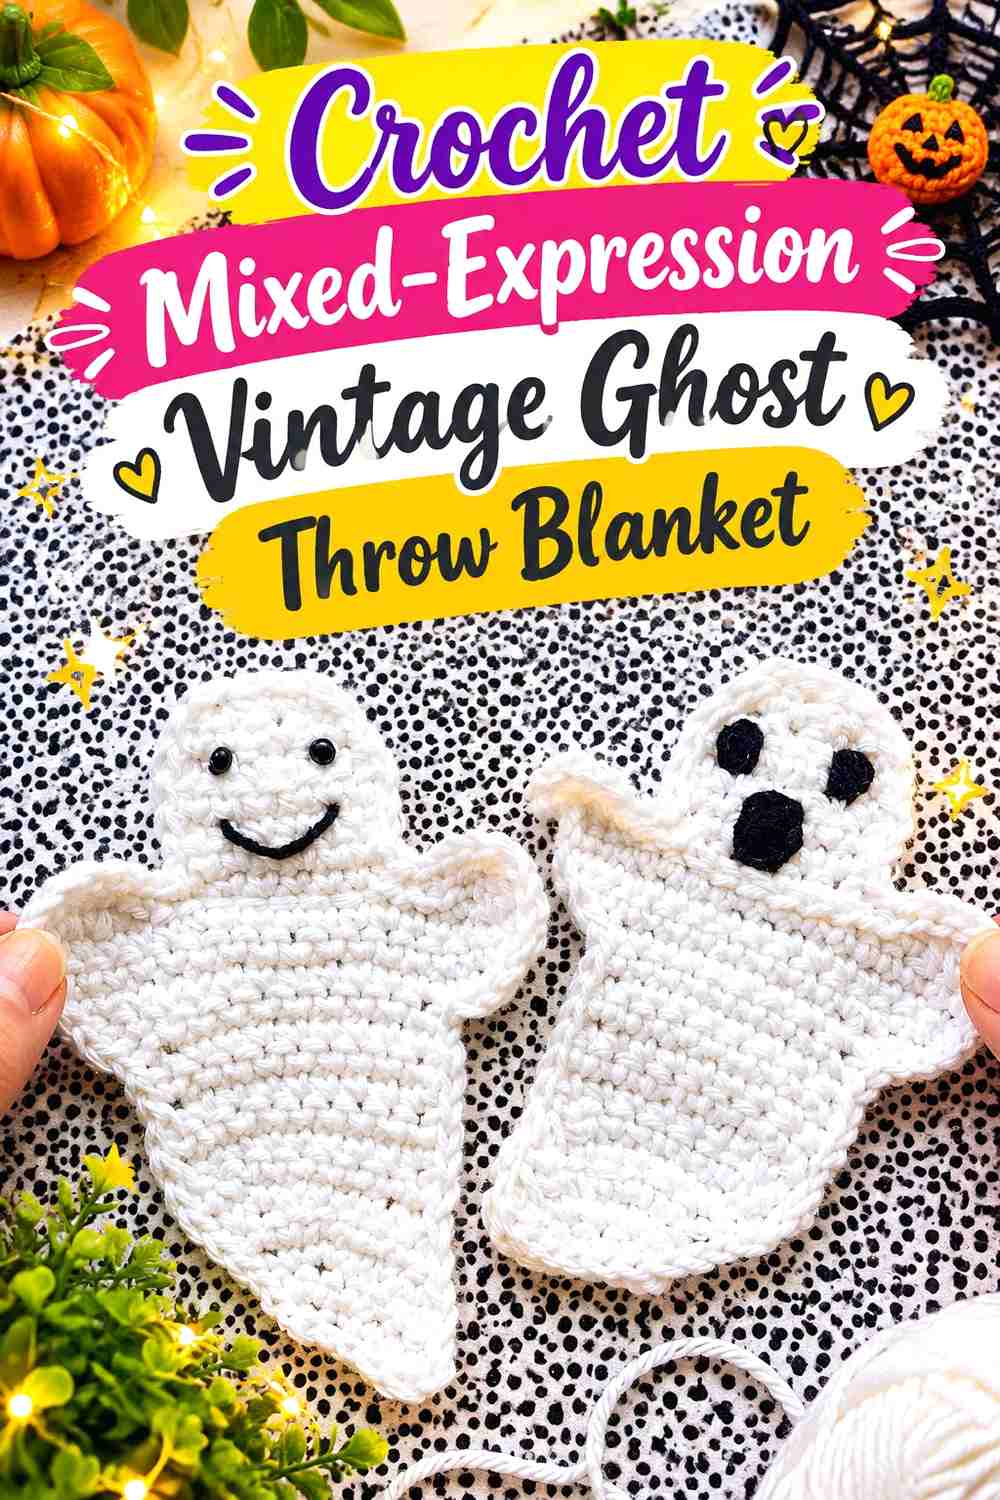
A blanket can gain variety without requiring 10 different ghost shapes. Craft Fix knitting & crochet demonstrates flat ghosts with different facial expressions, giving this adaptation a useful way to build personality into repeated appliqués while keeping the overall silhouette related.
Use friendly, startled, and spookier faces across otherwise consistent background blocks for a throw reminiscent of illustrated vintage Halloween characters.
Change the Face, Not Every Other Detail
If the expressions are supposed to create the variation, keep other elements reasonably consistent. Using the same ghost color, background format, and general placement helps the faces remain the noticeable difference.
Changing every block color and every expression simultaneously can turn a character study into visual noise.
Embroidered Features Keep the Surface Relatively Flat
Facial stitching can provide expression without adding large projecting pieces to the blanket surface. That makes this concept practical when you want noticeable character but do not want every face to create extra bulk.
Check each expression from normal viewing distance. Small differences that look dramatic while stitching may become almost invisible across a room.
Warm Ivory Strengthens the Vintage Mood
Bright white is not required for a recognizable ghost. Cream, parchment, or pale oatmeal can soften the contrast while maintaining the classic silhouette against a sufficiently dark background.
Test the combination in evening room light as well as daylight, since this is a blanket intended for cozy Halloween-night use.
Creator Credit: Craft Fix knitting & crochet
13. Crochet Retro Video-Store Ghost Sampler Throw Blanket
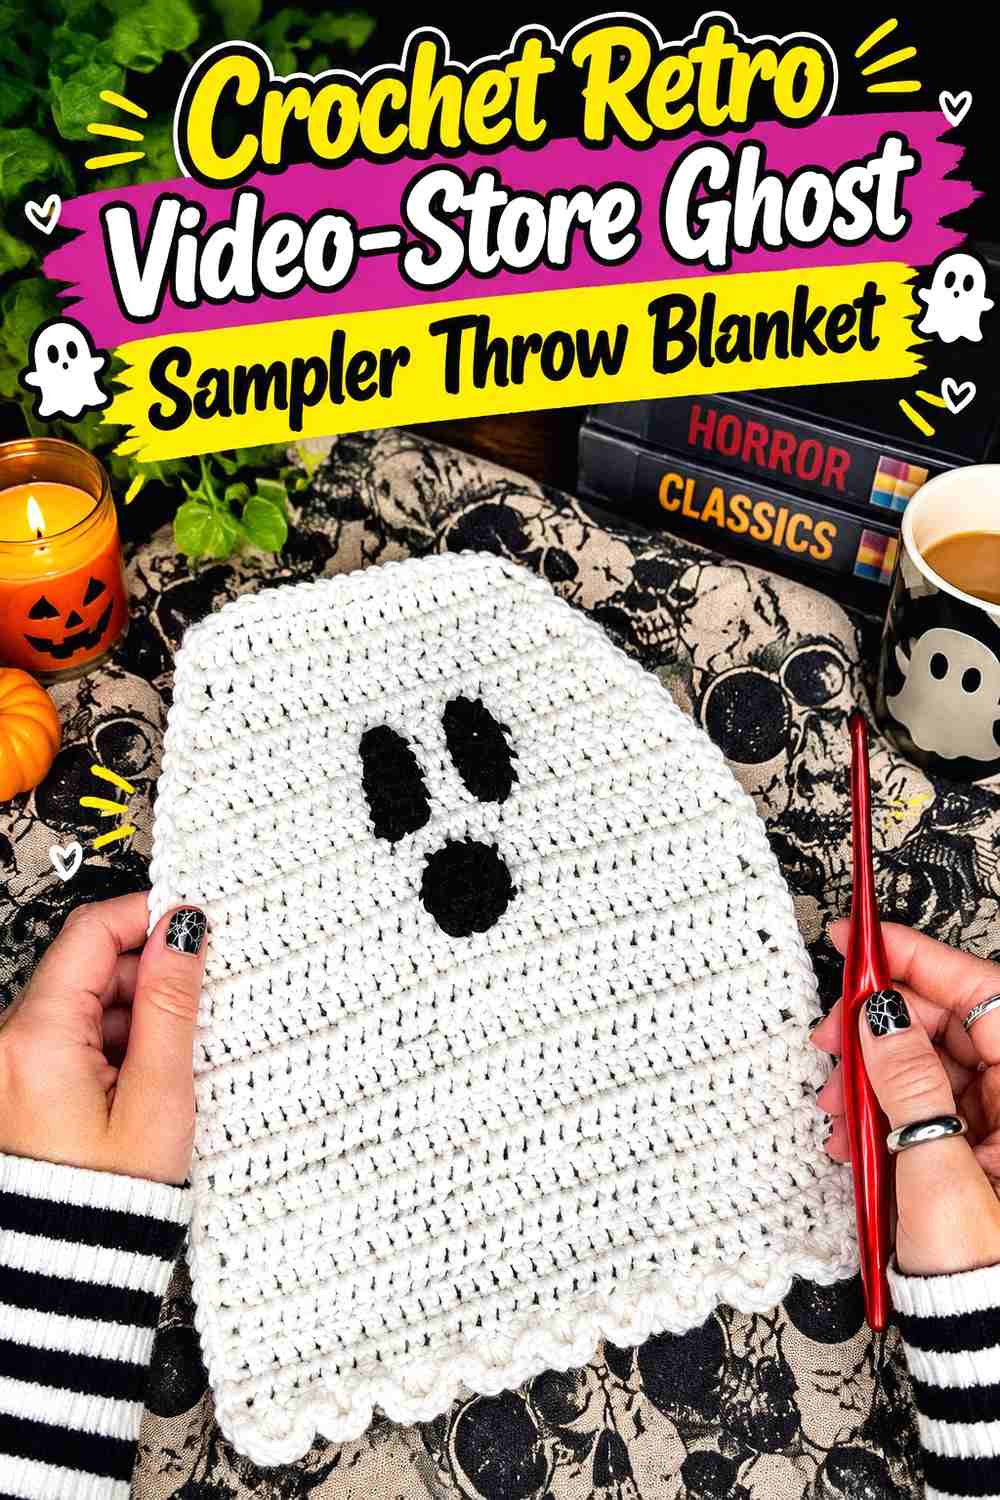
Alt Knots takes the theme in a very different direction: the ghost appears as part of a larger retro horror-inspired blanket project rather than as the only motif. The source is part of a themed blanket crochet-along, so it is useful for readers who like sampler-style storytelling.
This is the strongest option in the collection when “vintage” means retro pop culture rather than antique Halloween postcards.
A Sampler Needs a Whole-Blanket Color Plan
Different motifs can easily become disconnected if each section introduces an unrelated palette. Choose a small group of recurring colors and let them travel through the entire blanket.
Faded purple, cream, dark red, acid-leaning green, and charcoal can support a retro horror mood without relying exclusively on classic orange and black.
Ghosts Work Better as Accents in a Story Blanket
When pumpkins, signs, horror references, and other shapes are also present, the ghost does not need to dominate every section.
Use it as one recurring character or visual punctuation mark. This keeps the sampler feeling varied while still giving the blanket a recognizable Halloween identity.
Keep Multi-Part Tutorial Sections Organized
A crochet-along requires more source management than a one-video blanket. Keep track of which component belongs to which portion of the project and review the broader sequence before committing to the finished layout.
That prevents a single component from being treated as though it represents the complete blanket construction.
Creator Credit: Alt Knots
14. Crochet Scary-Face Ghost Block Throw Blanket
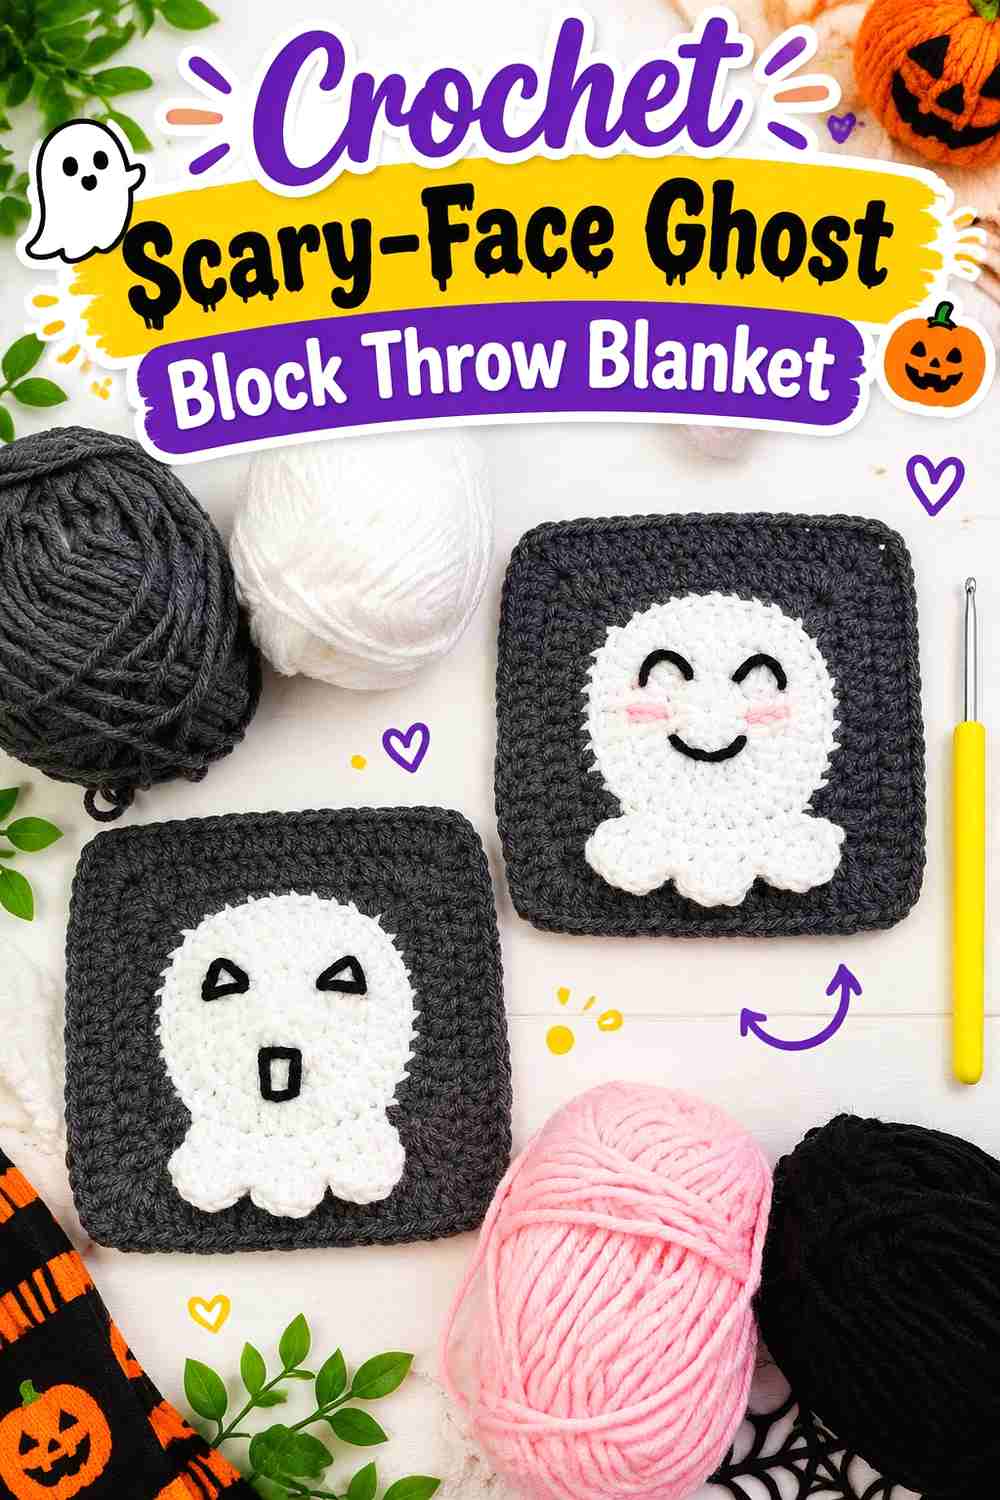
Not every ghost blanket needs to be cute. Crochet Squares provides a more overtly spooky ghost-square direction that can support a high-contrast grid or occasional scary focal blocks in a mixed throw.
A limited black, cream, and faded-orange palette can make this version feel closer to early Halloween illustration than modern pastel decor.
Strong Faces Need Quiet Space Around Them
Expressive character squares compete more easily with neighboring motifs. If every square has a strong face, keep borders and background colors restrained.
Another option is to space the scary ghosts between solid or low-detail squares so each expression gets a clear visual field.
Repetition Changes Scary Into Graphic
One dramatic ghost can feel like a focal character. A complete grid of identical faces reads more like patterned fabric.
Sketch both arrangements before making multiples. You may prefer a few strategically placed ghosts rather than an uninterrupted field.
Photograph the Sample to Check Contrast
A quick photo can reveal whether the facial features remain readable when the entire square is viewed at once. If the ghost merges into its background, adjust the contrast before repeating the block.
This is especially useful with aged or muted color palettes where neighboring values can become too similar.
Creator Credit: Crochet Squares
15. Crochet Corner-Cluster Ghost Appliqué Throw Blanket
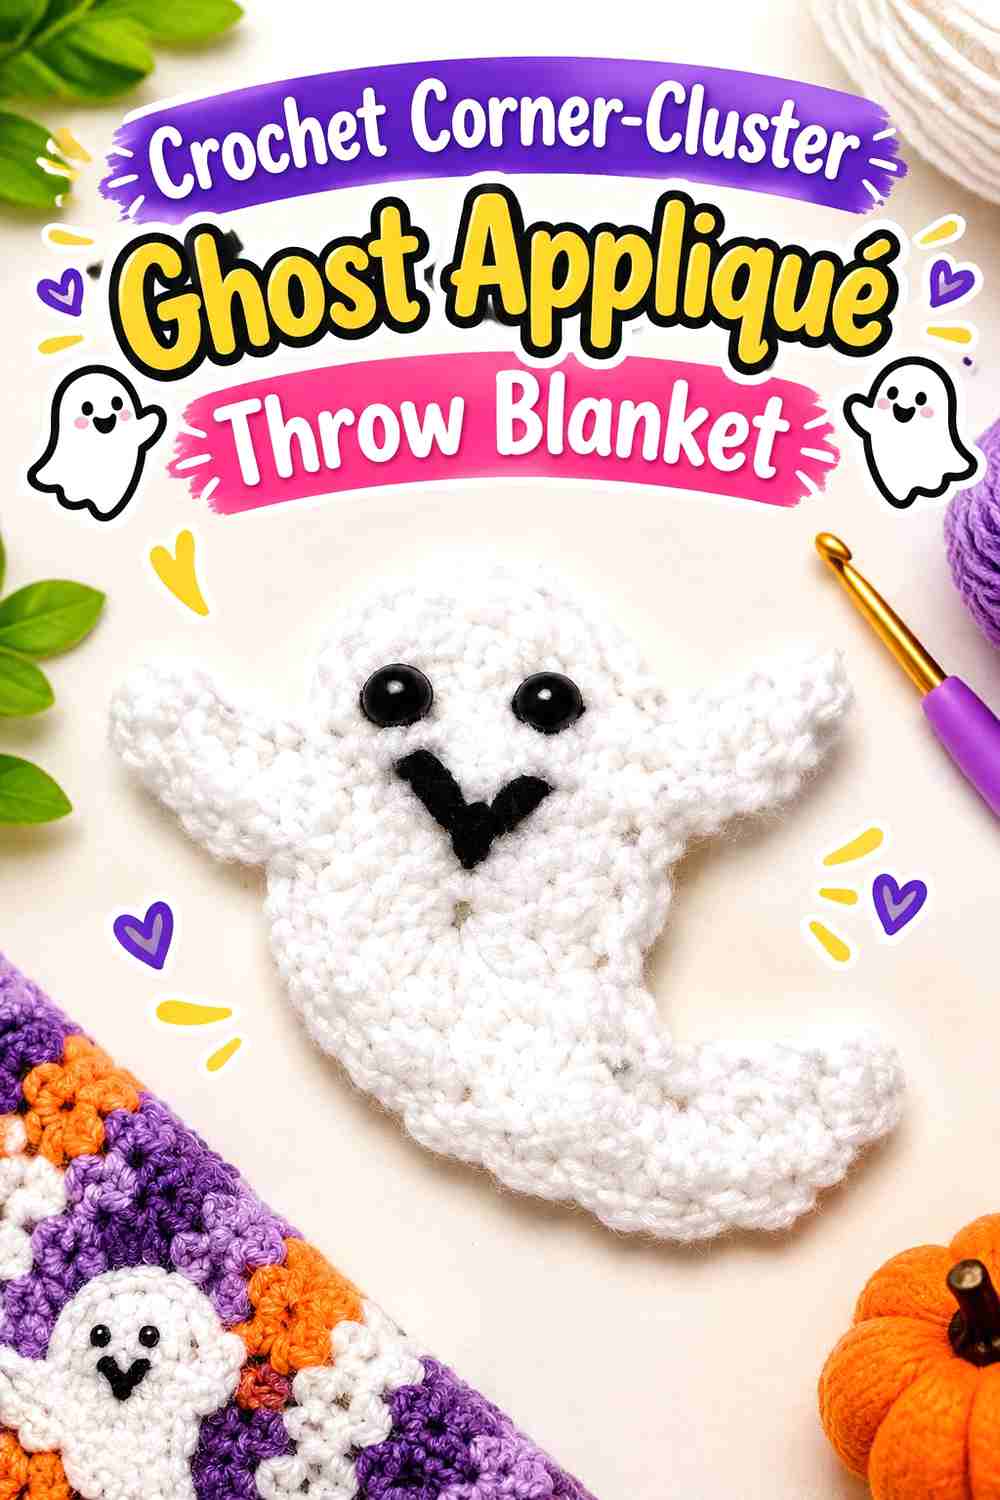
Dani West’s ghost source is a small separate appliqué rather than a blanket tutorial, making it suitable for a throw where the motifs appear only in selected areas instead of covering the entire surface. The published pattern information also shows that the original project can use small attached eye components, which deserves consideration when adapting it to a regularly handled blanket.
One effective layout is to gather several ghosts near the four corners while leaving the central field relatively simple.
Corner Clusters Make a Folded Blanket More Decorative
When a throw is folded over the arm of a chair, corners often remain visible while the middle disappears. Concentrating character details near those areas can keep the Halloween theme noticeable even when the blanket is not fully spread out.
Arrange the ghosts in place while the blanket is folded as well as flat before sewing them down.
Decide How Flat You Want the Facial Details
Small projecting pieces may be perfectly acceptable on adult seasonal decor, but embroidered features can be worth considering when you prefer a smoother, easier-to-handle surface.
If the blanket may be accessible to young children or pets, evaluate small detachable embellishments carefully rather than assuming decorative components are appropriate for every setting.
Keep the Four Corners Visually Related
The clusters do not have to be mirror images, but give them at least one shared element—similar ghost counts, a repeated background color, or comparable spacing.
That connection helps the asymmetry feel intentional.
Creator Credit: Crochet Crafters 1
16. Crochet Ghost Procession Stripe Throw Blanket
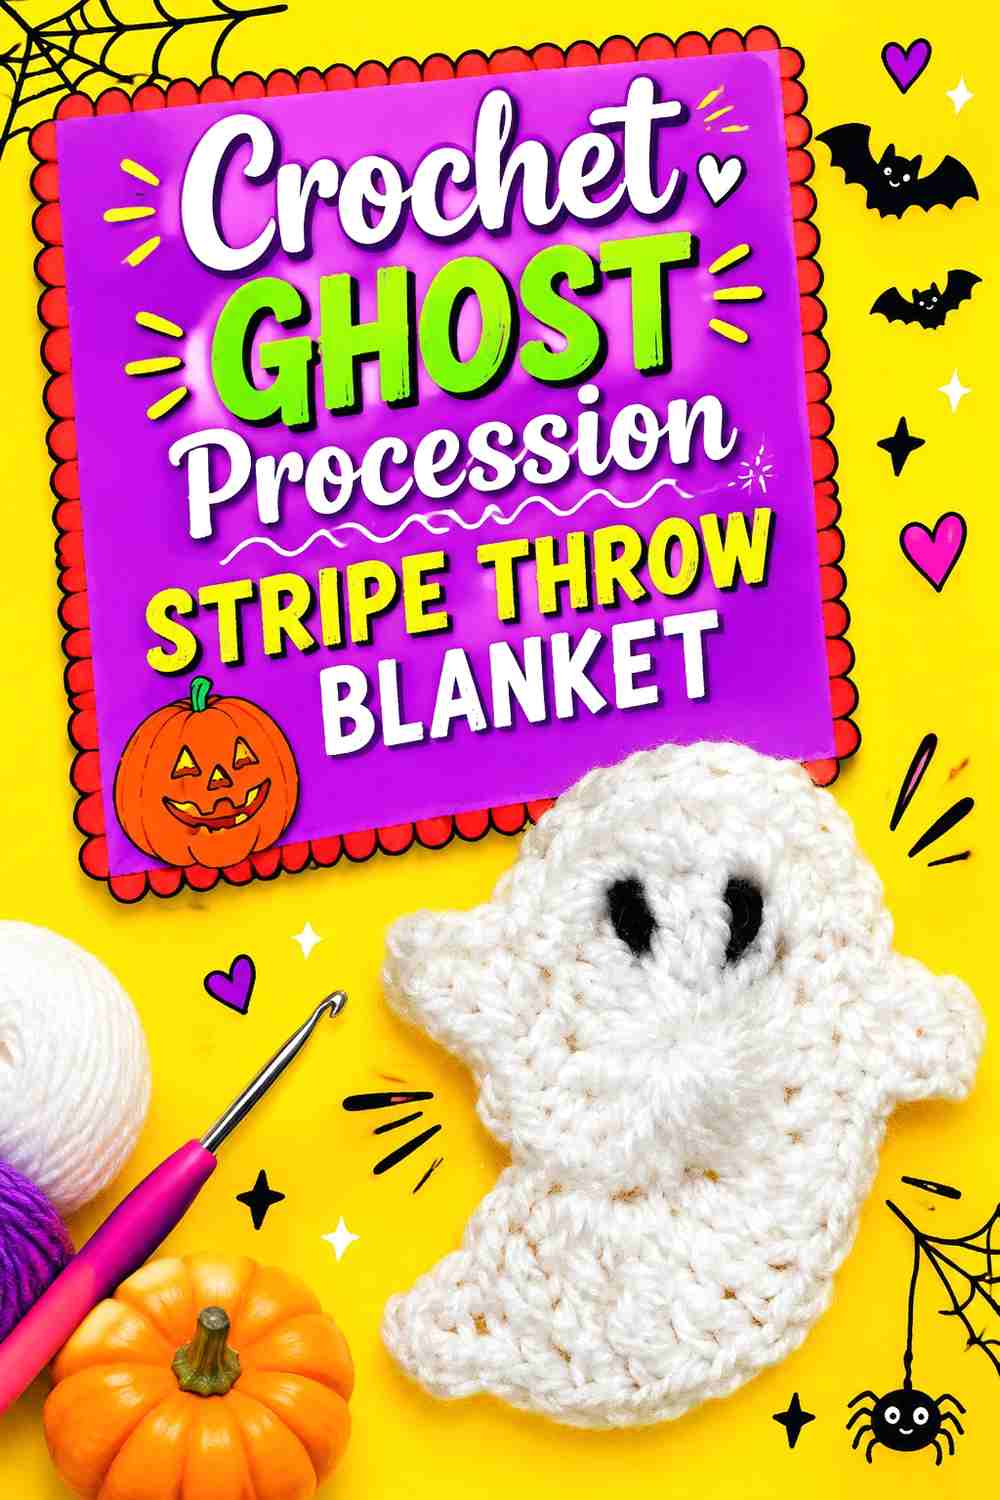
A small ghost patch can become more distinctive when it is arranged in a deliberate line instead of scattered randomly. Katie Jones’ ghost motif source can support a throw adaptation in which little ghosts march across one or more horizontal bands on a separately crocheted base.
This layout is especially suited to a mid-century or vintage-novelty-textile look because the repeated figures form a graphic stripe instead of a conventional granny-square grid.
A Single Ghost Band Can Be Enough
You do not need to cover the entire blanket with characters. One procession across the lower third or center can establish the theme while leaving most of the throw visually calm.
That also gives you space to use subtle stripes or blocks of faded color without competing with dozens of ghost faces.
Test the Procession With the Blanket Folded
Horizontal motif bands can disappear inside a fold. Before attaching anything, drape the blanket over a chair and check which portion normally remains visible.
Moving the character stripe slightly higher or lower can make a large difference to how the finished throw displays.
Keep Spacing More Consistent Than the Expressions
If you want individual ghosts to have different faces or slight personality changes, repeated spacing can still hold the procession together.
Mark approximate positions across the finished background before attachment so the final band does not gradually drift upward or compress toward one side.
Creator Credit: Katie Jones
Which Ghost Throw Construction Should You Choose?
| Blanket Direction | Main Construction | Good Choice When You Want | Main Checkpoint |
|---|---|---|---|
| Complete ghost blanket | Whole-project tutorial | Less independent layout planning | Confirm the final style suits your intended throw |
| Repeating ghost squares | Modular blocks | Portable crochet and a strong grid | Match finished block dimensions |
| Alternating ghost and plain squares | Mixed modular grid | More negative space | Keep outer square edges compatible |
| Sew-on ghost appliqués | Layered motifs | Maximum placement freedom | Avoid puckering during attachment |
| Scattered mini ghosts | Small motifs on a base | A novelty-print effect | Arrange the whole surface before sewing |
| Large ghost medallions | Oversized focal motifs | Fewer, bolder characters | Prevent the base from gathering |
| Ghost border | Edge-focused appliqués | A quieter center | Plan corners and drape |
| Retro sampler | Multiple themed components | Storytelling and motif variety | Keep the full palette coordinated |
Conclusion
If you want the most direct route to a finished ghost throw, the complete blanket tutorials from Laura’s Art Design or OTH Crochet Nook reduce the amount of independent construction planning. For a traditional patchwork look, the full ghost granny-square sources offer more modular flexibility, especially when you want to alternate character and plain blocks.
For a more distinctive vintage result, the appliqué options open up several possibilities that a standard grid cannot: tiny scattered ghosts, a single oversized medallion, a parade around the border, corner clusters, or one horizontal procession. The Alt Knots sampler is a particularly different choice if your idea of vintage Halloween leans toward retro horror rather than old-fashioned postcard imagery.
Whichever direction you choose, finish and measure one representative motif before committing to the whole blanket. Check contrast, drape, orientation, attachment, and the way the piece looks when folded over furniture. Then use the original creator tutorials for their exact crochet construction while building the larger throw layout around the pieces you actually make.
Frequently Asked Questions
Are these actual vintage crochet ghost blanket patterns?
No. The tutorials are modern crochet sources. “Vintage” in this collection refers to the styling direction: aged-looking colors, restrained palettes, retro layouts, classic ghost silhouettes, and design choices inspired by older Halloween graphics and textiles.
Can I turn a crochet ghost appliqué tutorial into a throw blanket?
Yes, but an appliqué tutorial only supplies the ghost component. You still need a compatible blanket or square construction, a layout, an attachment plan, and any joining or border treatment. Make one complete sample area before producing many motifs.
Should all ghost granny squares be exactly the same size before joining?
Consistent outer dimensions make modular joining much easier. Finish and prepare your sample squares as intended, then compare their edges rather than relying on the size they appear to be during crocheting. If you combine designs from different creators, compatibility should be tested rather than assumed.
How do I keep cream ghosts visible in a muted vintage palette?
Focus on contrast between the ghost and its immediate background. Warm cream can replace stark white, but it may disappear against beige, tan, or pale dusty colors. A darker charcoal, plum, brown, muted green, or pumpkin field can help preserve the silhouette.
Is an integrated ghost square better than a sewn-on appliqué for a couch throw?
They solve different problems. Integrated squares give you a more unified modular block with fewer separate attachment stages. Appliqués let you reposition characters and control how many ghosts appear, but they create an additional layer and require careful attachment. For a heavily used couch blanket, make one layered sample and decide whether you like its surface and reverse side before repeating it.
How can I make a ghost blanket feel vintage without using only orange and black?
Use a small palette with slightly softened colors. Warm ivory, faded pumpkin, mustard, dusty rose, muted plum, mossy green, tobacco brown, charcoal, and near-black can all support a vintage Halloween direction. Repeating the same few colors consistently usually creates a stronger old-textile effect than introducing a new color in every block.
How should I wash a crochet ghost throw blanket?
Follow the care instructions for the actual yarn or yarns you use rather than assuming every crochet blanket can be washed the same way. Layered appliqués, embroidered details, joins, and borders should all be considered as part of the finished item. If you combine different fibers, confirm that their care requirements are compatible before making the full blanket.