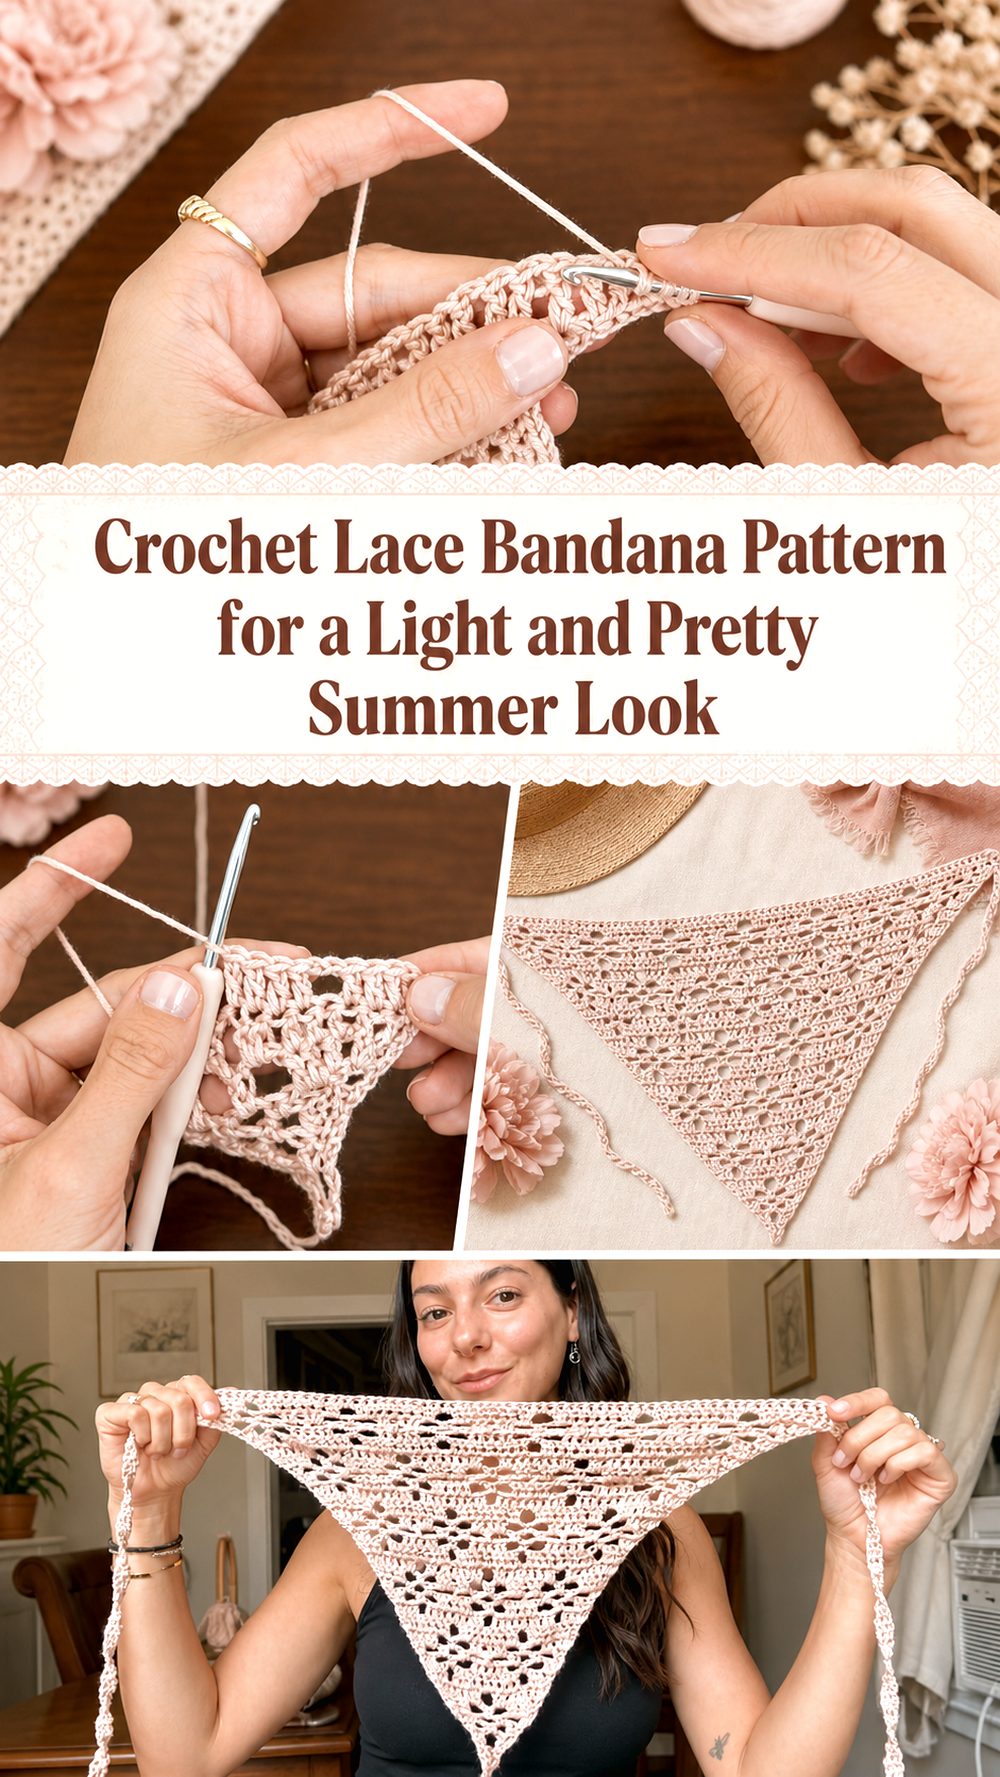
A crochet lace bandana is one of those small projects that feels instantly rewarding. It works up into a soft, airy accessory that adds a handmade touch without feeling too heavy or bulky. The tutorial I selected shows a floral lace style that gives the bandana a delicate, open look, which makes it especially nice for warm weather, festivals, beach days, or just adding something sweet to a simple outfit. It is the kind of project that looks detailed once finished, but the overall idea is approachable when you take it one section at a time. If you enjoy wearable crochet that is practical, feminine, and easy to personalize with your favorite yarn color, this is a lovely project to try. The chosen tutorial is presented as an easy summer headscarf and runs as a full-length lesson rather than a short clip.
Why You’ll Love This Project
This bandana is fun because it gives you that pretty lace look without becoming too thick or stiff. It is stylish, easy to wear, and light enough for warmer days, so it feels both useful and beautiful at the same time. The selected tutorial specifically presents it as a flower lace bandana and an easy summer headscarf, which makes it a great choice if you want something decorative but still practical.
Materials Needed
You will need the usual basics for a small wearable crochet project:
- Yarn
- Crochet hook
- Scissors
- Yarn needle
- Stitch markers
- Measuring tape
Use a yarn and hook size that matches your desired fit and texture.
Best Yarn for This Project
For a lace bandana like this, lightweight yarn tends to look and feel the best. Cotton is a really nice option because it helps the bandana keep its shape while still feeling breathable. A bamboo blend can also work beautifully if you want extra softness and drape. Since this is a summer-style accessory, choose a yarn that feels light on the head and does not become too warm after wearing it for a while. Smooth yarn usually helps the lace pattern stand out more clearly, especially when the design has open spaces or floral details.
Skill Level
This project is beginner-friendly to easy, especially for crocheters who already feel comfortable with basic stitches and working into repeats. The lace look may seem fancy at first glance, but it becomes much easier once you settle into the pattern and see how the shape grows.
Size and Fit Guide
The easiest way to size a bandana is to measure across the part of your head where you want it to sit, then check the piece as you go. Because this is a triangle-style headscarf, you can usually make it larger or smaller by adding or reducing pattern rows. Try holding it up or lightly placing it on your head before finishing so you can decide whether you want more coverage, a smaller tied look, or a longer drape at the back.
Stitches Used
From the tutorial title and presentation, this project uses a lace-based construction with a floral effect, so the bandana is built from simple stitches arranged in an open pattern rather than dense fabric. Common stitches used in projects like this include:
- Chain
- Slip stitch
- Basic stitches used to build lace sections
- Repeats that create the floral openwork look
The selected video presents the project as beginner-friendly, which suggests the stitch work is meant to be manageable even if the finished texture looks detailed.
How to Make It

Step 1: Start the Foundation
Begin by making the starting section for the top of the bandana. Most lace bandanas start small and gradually widen, which helps create that classic triangle shape. Work carefully into the first few stitches, because this part sets up the rest of the pattern. If your tension is too tight at the beginning, the top edge can pull in, so try to keep your chains and early stitches relaxed and even.
Step 2: Build the First Lace Section
Once the foundation is ready, begin forming the lace pattern. This is where the bandana starts to develop its airy look. In a floral lace design, the open spaces and repeated stitch groups are what give the fabric its decorative feel. Take your time with the first repeat and count slowly if needed. After a few rows, the pattern usually becomes much easier to recognize, and you can see the design opening up nicely.
Step 3: Grow the Triangle Shape
As you continue, the piece widens row by row. This gradual shaping is what turns the bandana into a wearable triangle instead of a flat strip. Keep an eye on both edges so the sides stay even. If the tutorial includes increases as part of the repeat, follow them consistently on each row so the shape stays balanced. When done correctly, the piece should spread smoothly and lie flat without curling too much.
Step 4: Let the Lace Stay Light
One of the nicest things about a lace bandana is how breathable it feels. To keep that soft summer texture, avoid pulling your stitches too tightly. Openwork designs look best when the spaces between stitches are clear and visible. If you are using cotton or another smooth lightweight yarn, the pattern will usually show up especially well. This is part of what gives the finished bandana that delicate, easy-to-wear look instead of making it feel thick or heavy.
Step 5: Check the Fit as You Go
After several rows, pause and check the size. Fold or hold the bandana against your head to see if it gives you the amount of coverage you want. Some people like a smaller bandana that sits high and ties neatly, while others prefer a fuller shape that covers more of the hair. This kind of project is very easy to personalize just by adding more rows for depth or stopping earlier for a lighter look.
Step 6: Shape the Final Rows
As the piece gets closer to your preferred size, continue the lace pattern evenly so the final rows match the rest of the fabric. Try to keep the tension steady here. The last few rows can make a big difference in how polished the finished bandana looks. If the edges seem uneven, using a stitch marker at each end can help you catch missed stitches before moving on.
Step 7: Add the Ties or Finishing Edge
A wearable bandana usually needs a simple way to secure it. Depending on the exact construction shown, this may be done with ties worked directly onto the corners or with a neat finishing edge that prepares the piece for tying. Keep these sections comfortable and not too stiff. Since this is a head accessory, you want it to feel secure without digging in. A clean edge also helps the lace look more finished and tidy.
Step 8: Weave In the Ends
Once the crochet is complete, trim the yarn and weave in all loose ends carefully with a yarn needle. Because lace fabric has open spaces, it is worth taking a little extra time here so the ends stay hidden and secure. Weaving through several nearby stitches helps keep everything neat without disturbing the design.
Step 9: Finish and Shape the Bandana
If needed, lightly shape or block the finished bandana so the lace opens up and the floral design becomes more visible. This can make a huge difference in the final appearance. Once shaped, the bandana should look airy, soft, and triangular, with a pretty lace texture that works beautifully as a summer headscarf. The selected tutorial is specifically framed around that lightweight flower lace result.
Helpful Tips
Use a breathable yarn if you want the bandana to feel comfortable in warm weather. Check the size before you finish the last rows so you can adjust the fit easily. Keep your stitch tension even so the lace pattern looks clean from one side to the other. If your edges tend to wander, place stitch markers at the ends of the rows. And if you want the floral lace pattern to look its best, block the finished piece gently before wearing it.
Common Mistakes to Avoid
A very common mistake is making the foundation too tight, which can distort the whole shape. Another is forgetting the repeat pattern and accidentally throwing off the lace design. Some crocheters also stop too early and end up with a bandana that feels too small to tie comfortably. Uneven edge stitches can make the triangle look lopsided, so it helps to check both sides often. Using yarn that is too thick can also hide the lace effect and make the bandana feel heavier than intended.
Customization Ideas
You can easily change the look of this bandana with color alone. Soft neutrals give it a delicate everyday feel, while bright shades make it more playful and summery. You could also make it slightly longer for more coverage or keep it smaller for a lighter accessory. A decorative edging can add extra charm, and a softer drapey yarn will give it a gentler finish. If you love making matching accessories, this would also be cute in a coordinated set with a top, bag, or wristlet in the same yarn.
Style Ideas
This kind of crochet lace bandana looks lovely with loose hair, messy buns, or simple summer braids. You can wear it for a casual daytime outfit, a beach walk, a market trip, or a festival-inspired look. It also makes a sweet handmade gift because it feels personal without being too large or time-consuming.
Care Instructions
Hand wash gently in cool water if possible, especially if you want the lace shape to stay neat. Lay it flat to dry so it does not stretch out. Avoid high heat, and if it needs reshaping after washing, smooth it back into place while damp.
Time Needed
This may take a few hours depending on your speed, yarn, size, and stitch pattern.
Conclusion
A crochet lace bandana is such a satisfying project when you want something pretty, useful, and relaxing to make. The floral lace style gives it a light handmade beauty, and the size is easy to adjust to suit your own comfort and style. Try it in a soft summer yarn, have fun with the color, and make it as delicate or as bold as you like.
FAQs
Is this beginner-friendly?
Yes, it is a good project for beginners who are comfortable with basic stitches and ready to try a simple lace repeat.
What yarn is best for this project?
Lightweight cotton or a soft breathable blend works especially well for a summer bandana.
Can I adjust the size?
Yes. You can continue adding rows until you reach the coverage and fit you want.
Will it be comfortable for warm weather?
Yes, lace bandanas are great for warmer days because the openwork keeps them lighter and more breathable.
How do I make it look neater?
Keep your tension even, count carefully through the lace repeats, and block the finished bandana for a cleaner final shape.