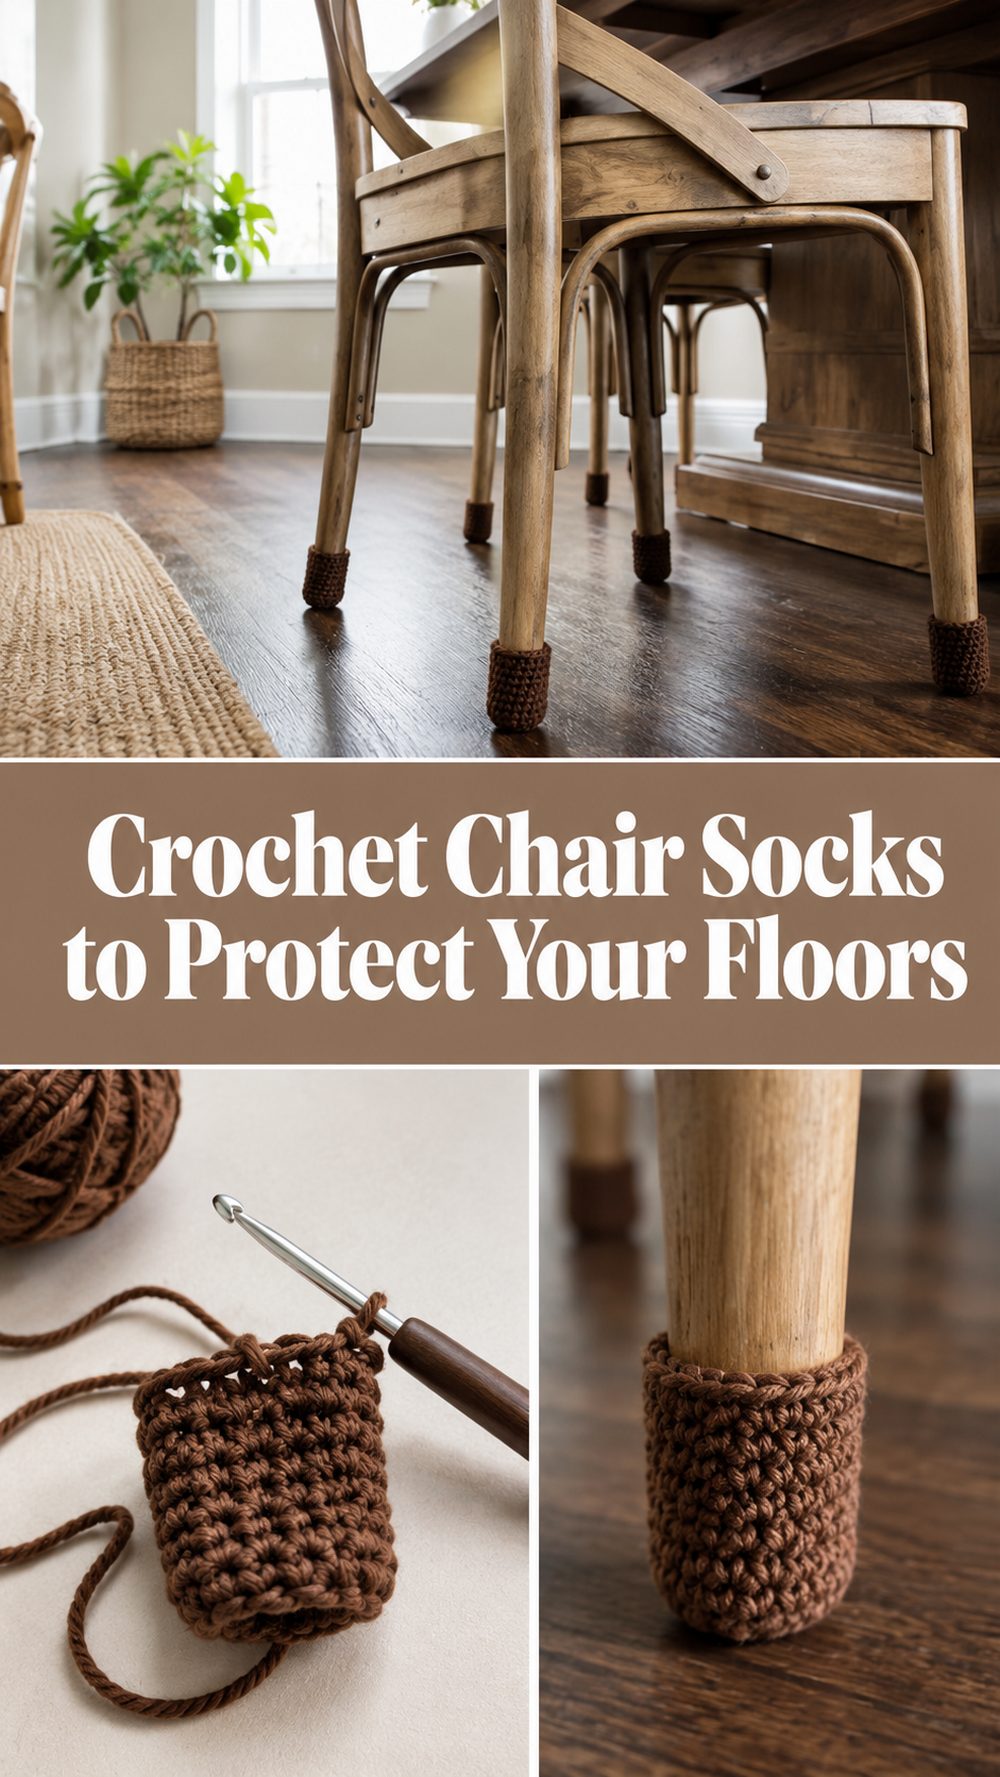
Crochet chair socks are one of those small projects that make a surprisingly big difference around the house. They help soften the sound of chairs scraping across the floor, add a bit of protection to chair legs, and give plain furniture a cute handmade touch. This kind of project is especially nice if you enjoy quick crochet makes that are useful right away. The design in this tutorial creates little fitted footies that slide over the bottom of chair legs, making them practical for dining chairs, desk chairs, or other everyday furniture. They are simple, neat, and easy to customize with color. If you have leftover yarn and want a fast home project that is both charming and functional, these crochet chair socks are a lovely thing to make.
Why You’ll Love This Project:
This project is quick, practical, and satisfying. It uses a small amount of yarn, works up into something useful, and helps reduce floor scratches and noise from moving chairs. It is also a fun way to use simple crochet stitches for a home item you can actually see and use every day.
Materials Needed:
- Medium weight yarn
- Crochet hook size E / 3.50 mm
- Scissors
- Yarn needle
- Fabric glue
The tutorial recommends a non-textured size 4 yarn, with cotton suggested but not required.
Best Yarn for This Project:
A smooth, sturdy yarn works best for chair socks. Cotton is a very good option because it holds up well and gives the footies a firmer feel. Since these little covers will rub against the floor and get regular use, a yarn with too much fluff or stretch may wear out faster or look messy sooner. A plain medium-weight yarn gives a clean finish and helps the shape stay neat. If you want them to feel snug and practical, stick with a smooth yarn rather than a fuzzy one.
Skill Level:
This is a beginner-friendly project.
It uses small shaping and simple round-by-round construction, so it is a nice make for anyone who is comfortable with basic crochet and wants to try a useful home item. The small size also makes it feel manageable and quick.
Size and Fit Guide:
These chair socks are meant to be adjusted to the chair you already have. Before you begin, measure around the lower part of the chair leg and think about how tall you want the sock to be. The base should fit the bottom of the leg closely, and the body should rise high enough to stay on securely without looking bulky.
As you crochet, test the fit often. The best chair sock is one that feels slightly snug, because it will usually relax a bit once it is used. If your chair legs are wider, make a slightly larger base before building upward. If they are narrower, keep the base smaller and work fewer rounds. The nice part about this project is that you can easily stop and check the fit as you go.
Stitches Used:
- Magic circle or chain-2 start
- Single crochet
- Increases
- Working in rounds
- Slip stitch for finishing if needed
The related tutorial details mention a magic circle or chain-2 start and single crochet rounds, which suits this fitted footie style very well.
How to Make It:
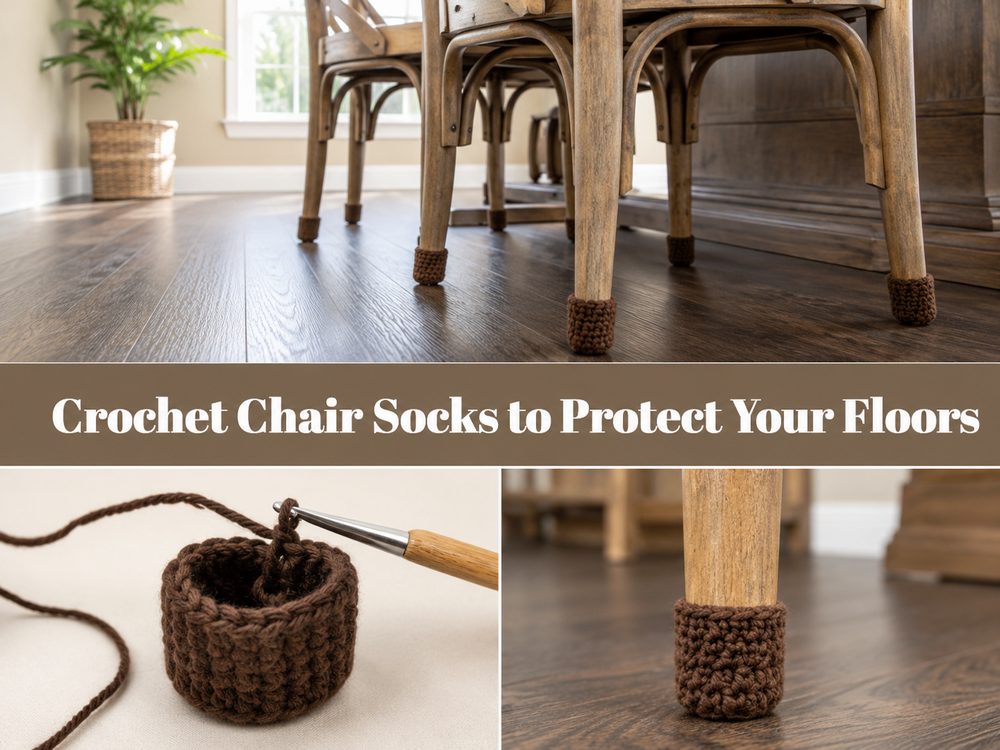
Step 1: Start the Small Base
This project begins at the bottom of the chair sock. You start with a very small center, usually with a magic circle or another compact round start, and work single crochet stitches into it. Because the sock needs to cover the bottom of the chair leg neatly, this first section is kept tight and tidy.
This tiny beginning becomes the base of the footie. Since chair socks are meant to fit closely, it is a good idea to crochet with a firm, steady tension from the very start. Loose stitches may make the bottom wear out faster, while a neat, compact base will look better and hold up more nicely over time.
Step 2: Increase to Match the Chair Leg
After the center is made, the next few rounds widen the piece so it can match the shape of the chair leg. This is where you slowly build the base out just enough to fit the foot of the chair. The increase rounds should stay smooth and even so the bottom does not turn wavy.
At this stage, place the crochet piece against the bottom of the chair leg now and then. You do not need a complicated measurement system here. Just aim for a shape that looks close to the size of the leg bottom and feels comfortably fitted rather than loose. A snug start will help the finished sock stay in place better once it is pulled on.
Step 3: Turn the Shape Upward
Once the base is about the right size, stop increasing and begin working evenly around. This changes the shape from a flat circle into a little cup or tube. That upward turn is what creates the actual chair sock.
This part is very satisfying because it starts to look like a finished footie quite quickly. Keep the stitches consistent so the sides rise neatly. Since the tutorial is aimed at making socks that meet the needs of the chair in your home, this is the perfect time to compare the piece to your chair leg and decide whether you want a shorter, shallower sock or one that comes a bit farther up for extra hold.
Step 4: Build the Body
Continue working in rounds to make the body of the sock. This is the section that wraps around the lower part of the chair leg. The length does not need to be exact for every chair, so it is best to think in terms of fit rather than strict numbers. Work until it looks tall enough to stay on well and protect the bottom section of the leg.
A simple body made in single crochet gives the sock a dense, practical texture. That is a nice choice for furniture because it creates a compact fabric without too many gaps. If you are making several for one set of chairs, count your rounds or compare them side by side so all of them come out the same height. That little bit of consistency makes the finished set look much more polished.
Step 5: Check the Fit as You Go
One of the best parts of this project is that it is very easy to test while you work. Slide the sock onto the chair leg once the sides begin to form. If it feels too loose, you may need a slightly smaller base or tighter tension on the next one. If it feels too tight, a few more increase stitches near the base can help before you continue upward.
Because furniture legs can vary a lot, even within the same home, checking as you go is much better than assuming all dimensions are identical. Some chairs have straighter legs, while others taper slightly. This fitted footie style is meant to adapt to those differences, so a little adjusting along the way is completely normal.
Step 6: Finish the Top Edge
When the sock is tall enough, finish off the top edge neatly. You want the opening to feel secure without being so tight that it becomes hard to slide onto the chair. A clean edge helps the whole project look finished, especially on such a small item where every stitch is visible.
The tutorial materials also mention fabric glue, which suggests an optional extra step for helping the socks stay put or adding support where needed. If you choose to use that kind of finishing help, keep it light and practical. The goal is simply to make the socks more secure for everyday use, not to make them stiff or difficult to remove.
Step 7: Make a Matching Set
Since chairs usually need more than one sock, repeat the same process until you have a full set. This is a good scrap-yarn project because each sock is small, but try to keep the yarn type the same across the set so the fit and wear stay consistent.
Lay the finished socks together before using them. Check that the height, width, and overall shape look similar. Small home accessories look especially nice when they match well, and with something as tiny as chair socks, it does not take much extra effort to make the set feel tidy and intentional.
Step 8: Put Them On and Test Them
Once the socks are woven in and finished, slide them onto the chair legs and test them on your floor. Move the chair gently to see how they sit and whether they feel smooth and secure. They should soften the contact between chair and floor while giving the furniture a cute handmade detail.
The finished look should be simple and practical: small rounded crochet footies that fit the bottom of the chair legs snugly and neatly. They are not meant to be bulky. They should just add a quiet little layer of protection and a bit of crochet charm.
Helpful Tips:
- Use a smooth yarn instead of fuzzy yarn for a cleaner finish.
- Keep your stitches fairly tight so the socks hold their shape well.
- Test the fit on the chair leg before making the whole set.
- Count rounds so all the socks match.
- Cotton is a great choice if you want a sturdier result.
- Weave in ends securely since the socks will get regular movement.
Common Mistakes to Avoid:
- Making the base too wide, which can make the sock slip off
- Crocheting too loosely so the fabric wears out faster
- Forgetting to test the fit before copying the size for the rest
- Making one sock taller than the others
- Using heavily textured yarn that catches and looks uneven
- Finishing the top edge too tightly to pull onto the chair leg
Customization Ideas:
You can keep these chair socks plain and practical, or have fun with them. Try matching them to your dining room, using leftover yarn in coordinating colors, or making a subtle striped set for a playful look. You can make them shorter for a minimal look or slightly taller if you want more coverage around the chair leg. For seasonal decor, changing the colors is the easiest way to make them feel fresh without changing the simple shape.
Style Ideas:
These work well on dining chairs, desk chairs, side tables, and even stool legs if the shape is suitable. They are especially nice in homes with hard floors where scraping sounds are a constant annoyance. A full matching set can make everyday furniture feel a little softer and more thoughtful.
Care Instructions:
Because these get close to the floor, they may collect dust more quickly than other crochet items. Gentle hand washing is a good option. Let them dry fully before putting them back on the chair legs. If they stretch slightly after use, washing and reshaping can help them feel snug again.
Time Needed:
This may take a short amount of time for each sock, depending on your speed, yarn, and chair leg size.
Conclusion:
Crochet chair socks are a tiny project with a very useful result. They help protect floors, soften noise, and give ordinary furniture a sweet handmade touch. The simple rounded footie shape makes them easy to adapt to your own chairs, and once you make one, the rest usually come together quickly. It is a great little crochet project when you want something practical, tidy, and satisfying to finish.
FAQs:
1. Is this project beginner-friendly?
Yes, it is a very approachable project for beginners who know basic crochet stitches and can work in rounds.
2. What yarn is best for crochet chair socks?
A smooth medium-weight yarn works well, and cotton is especially useful if you want a sturdy finish.
3. Can I adjust the size for different chair legs?
Yes. You can make the base slightly larger or smaller and add or reduce rounds until the fit feels right.
4. Do I need exact measurements?
Not necessarily. This project is easiest when you compare the sock directly to the chair leg and adjust as you go.
5. Can I use scrap yarn?
Yes, this is a great scrap-yarn project, as long as the yarn is sturdy enough and you keep the fit consistent across the set.