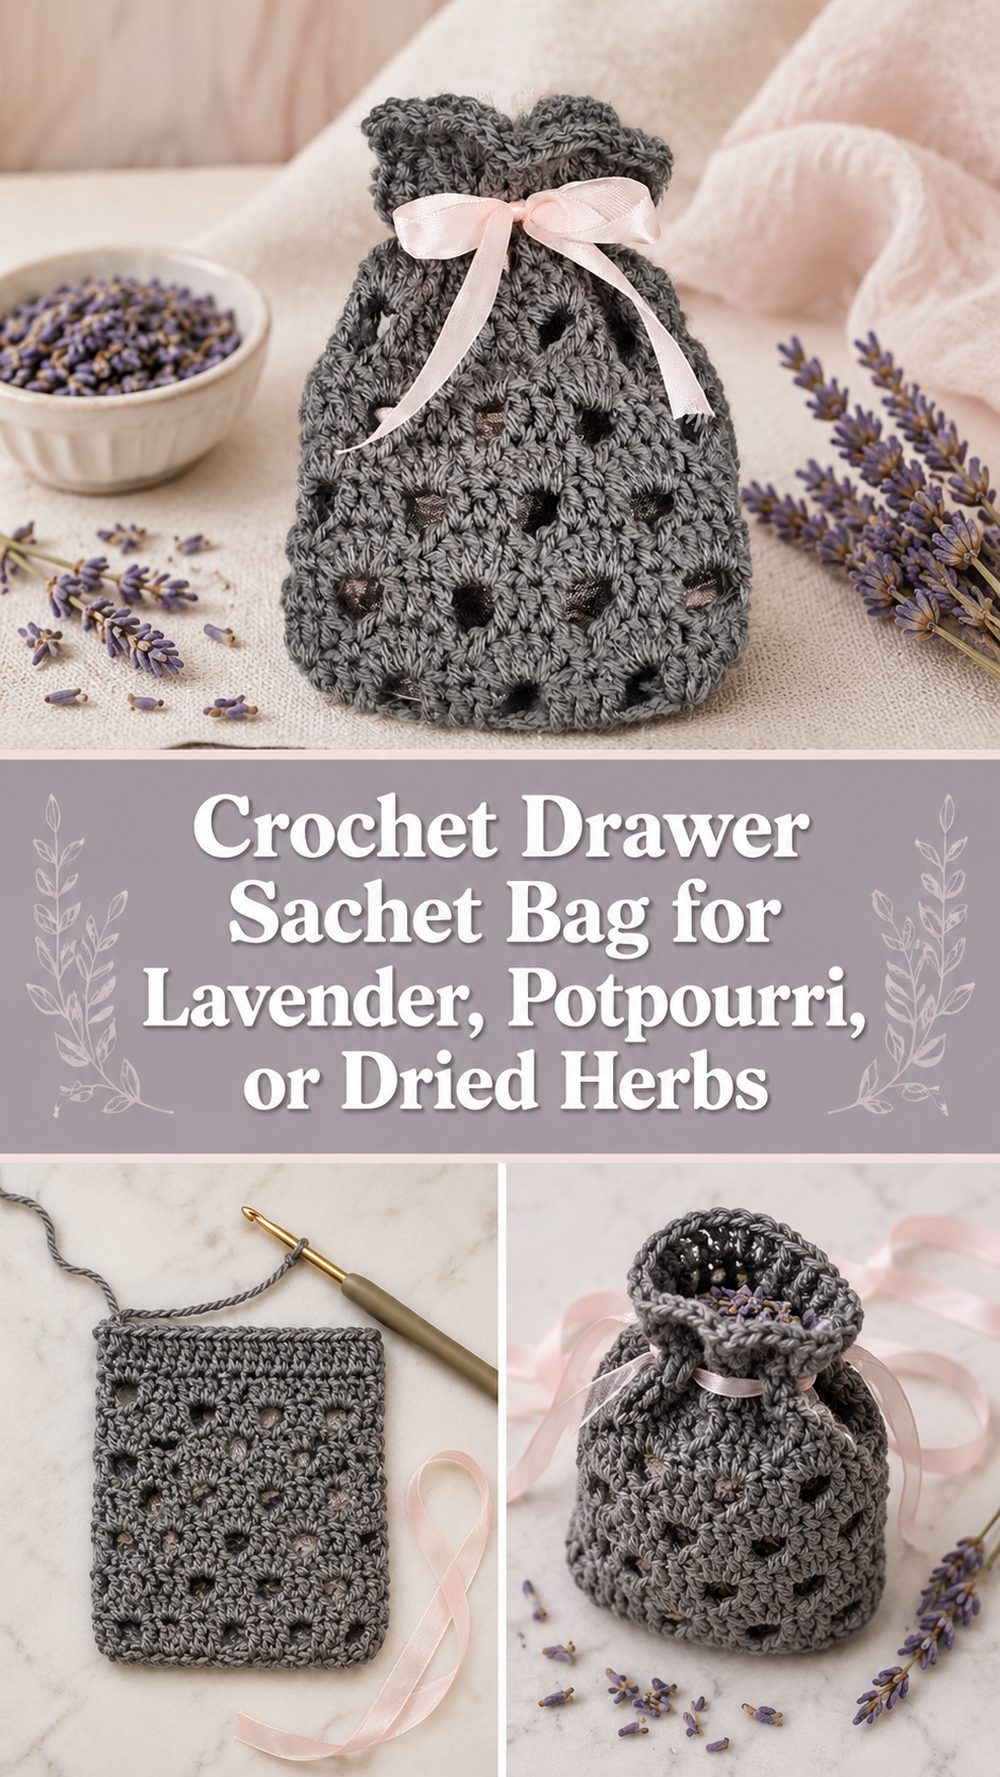
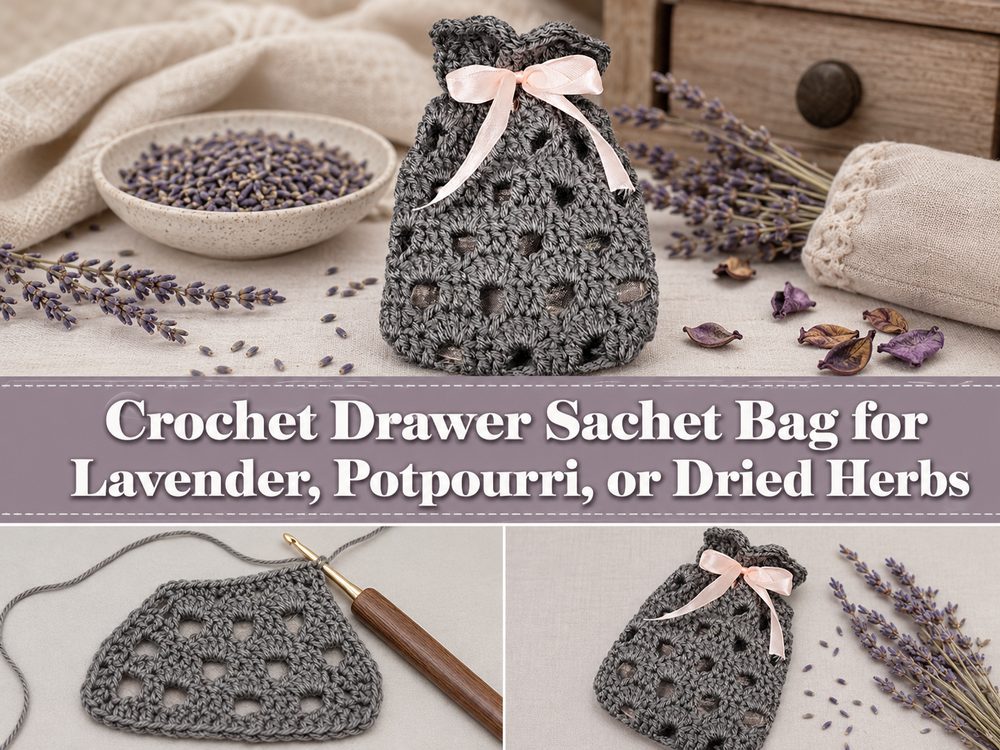
A crochet drawer sachet is one of those little projects that feels sweet, useful, and easy to enjoy from start to finish. It is a small handmade pouch designed to hold lavender, potpourri, cedar, or other lightly scented fillers, so your drawers, shelves, or closets get a soft fresh smell with a cozy handmade touch. The tutorial I selected shows a simple crochet potpourri sachet in a drawstring bag style, which makes it especially practical because you can open it, refill it, and use it again whenever you like. It is a lovely project for using small amounts of yarn, making thoughtful gifts, or adding a pretty little detail to your home. If you enjoy fast crochet projects that are both decorative and genuinely useful, this one is a very nice choice.
Why You’ll Love This Project:
This project is charming because it is quick, practical, and easy to personalize. The sachet bag style makes it useful for drawers, linen shelves, gift baskets, or closet spaces, and the drawstring top gives it a tidy finished look while keeping the scented filling tucked inside. The selected tutorial presents it as an easy crochet potpourri sachet that uses only a small amount of supplies, which makes it especially inviting for a relaxed home crochet project.
Materials Needed:
- Yarn
- Crochet hook
- Scissors
- Yarn needle
- Stitch marker if needed
- Potpourri, dried lavender, cedar chips, or another drawer-safe scented filling
- Ribbon, cord, or crocheted tie for the drawstring if desired
Use a yarn and hook size that matches your desired fit and texture.
Best Yarn for This Project:
For a drawer sachet, a smooth yarn with a soft but tidy finish usually works best. Cotton is a lovely option because it has a clean look and lets the little pouch keep its shape nicely. It also suits home projects very well and feels fresh and neat for something that will sit among clothing or linens. If you want the scent to gently move through the stitches, avoid making the fabric too thick or overly dense. A simple yarn with a comfortable drape and a slightly open stitch texture works beautifully for this kind of project.
Skill Level:
This is beginner-friendly to easy.
It is a nice project for someone who already knows the basic crochet stitches and wants to make something small and useful. Since the sachet is worked as a little pouch and finished with a drawstring top, it feels manageable and satisfying even if you are still building confidence.
Size and Fit Guide:
A drawer sachet does not need exact sizing, which makes it a very forgiving project. You can make it small enough to tuck into a sock drawer, a little fuller for linen storage, or slightly longer if you want more room for dried herbs or potpourri. If you like a flatter sachet, stop sooner and fill it lightly. If you want a plumper little bag, add more rounds and leave enough room for the filling to sit comfortably without stretching the stitches too far apart. A good rule is to crochet the pouch first, then test how full it looks before closing the top.
Stitches Used:
- Chain
- Slip stitch
- Single crochet
- Double crochet
- Chain spaces
- Drawstring opening or eyelet-style section
The selected tutorial is presented as an easy crochet potpourri drawstring bag, so the construction centers around a small pouch shape with an opening at the top for closing the sachet neatly.
How to Make It:
Step 1: Start the Base
This kind of sachet begins as a small pouch, so the first part is creating the bottom. You can think of it as making the foundation for a tiny bag. The opening stays at the top, which means the lower part needs to be neat and balanced so the whole sachet sits nicely once it is filled.
At this stage, keep your tension even and pay attention to the shape. Since this is a small project, little differences show up quickly. A tidy beginning helps the entire sachet look polished, especially if you plan to place it in a gift basket or tuck it into a drawer where it will sit beside folded linens.
Step 2: Build the Body of the Pouch
Once the base is started, continue working upward to form the body of the sachet. This is the part that creates the little storage space for lavender, potpourri, or other scented filling. Because the project is meant to be light and useful, the body usually stays simple and repetitive, which makes it relaxing to work on.
You do not need to make it very large. A drawer sachet is usually best when it stays compact and easy to tuck into a small space. As the pouch grows, you can gently imagine how much filling you would like it to hold. A lightly filled sachet often sits more neatly inside a drawer and feels softer against fabric.
Step 3: Create a Soft, Breathable Texture
For a sachet, a slightly open crochet texture can be really lovely. It helps the piece feel decorative, and it also allows the scent inside to drift out more gently. You do not want huge gaps that let the filling spill, but a small airy stitch pattern or eyelet detail near the upper section works nicely.
This is one of the reasons a crocheted sachet feels more special than a plain fabric bag. The texture adds charm while still keeping the project practical. If you are filling it with loose dried lavender or very fine potpourri, you may want to place the scented material in a tiny inner bag first, then tuck that inside the crochet pouch.
Step 4: Shape the Top Opening
Since the selected tutorial is a drawstring sachet bag, the upper section is made so it can close neatly. This part usually involves leaving space for a cord, ribbon, or crocheted tie to pass through. Once you reach that point, take a little extra care to keep the openings even so the drawstring gathers nicely instead of bunching awkwardly on one side.
This step gives the project its practical finishing touch. A drawstring top is especially nice for a drawer sachet because it makes refilling easy. When the scent fades, you can open the little bag, refresh the herbs or potpourri, and use it again without needing to remake the whole piece.
Step 5: Add the Drawstring
After the pouch is tall enough, make or thread the drawstring through the top opening. This can be a simple crocheted chain, a cord, or even a ribbon if that suits the look you want. Pull it through evenly and test how the top closes before fastening everything off.
The nice thing about a drawstring finish is that it looks sweet and practical at the same time. It keeps the sachet secure, but it also gives the little pouch a soft gathered shape that feels decorative. For gift-making, this makes the finished project feel especially pretty with very little extra work.
Step 6: Fill the Sachet
Now comes the part that makes the project really useful. Open the pouch and add your chosen filling. Lavender is a classic option for drawers, but dried rose petals, cedar blends, or ready-made potpourri can work beautifully too. Fill it enough that the sachet feels softly rounded, but not so much that the stitches stretch too far.
Once filled, pull the drawstring closed and shape the sachet in your hands. It should feel soft, lightly plump, and neat. You want it to sit comfortably among clothing or linens rather than feeling bulky or hard.
Step 7: Finish and Tidy the Details
Weave in the ends carefully and check that the opening closes well. Because the sachet is small, the finishing touches matter. A neat top edge, even drawstring, and balanced shape will make the little bag look much more polished.
The finished sachet should look like a simple handmade mini pouch with a soft gathered top and enough room inside for fragrance. It is the sort of crochet project that feels useful right away, which is part of what makes it so enjoyable.
Helpful Tips:
- Keep the pouch fairly compact so it fits neatly in a drawer.
- Use cotton if you want a crisp, clean finish.
- Do not overfill the sachet or it may stretch awkwardly.
- If your dried filling is very loose, place it in a tiny inner bag first.
- Check that the drawstring slides smoothly before finishing.
- Make a few at once if you want matching sachets for different drawers.
Common Mistakes to Avoid:
- Making the stitches too loose for the type of filling you plan to use
- Overstuffing the sachet so it loses its shape
- Making the drawstring opening uneven
- Choosing a pouch that is too large for the drawer space
- Forgetting to secure the ends well
- Using a very fuzzy yarn that hides the neat little bag shape
Customization Ideas:
There are so many easy ways to personalize this project. You can make it in soft neutral shades for a clean linen-drawer look, or use pretty floral colors if you want it to feel more gift-like. A ribbon drawstring gives it a delicate finish, while a crocheted tie keeps the whole project fully handmade. You could add a tiny edging, a shell border, or even a simple flower applique if you want the sachet to look extra decorative. For seasonal gifts, changing the yarn color and scent blend can make the same basic pattern feel completely different.
Style Ideas:
These little sachets are lovely in dresser drawers, linen cupboards, bathroom shelves, guest rooms, and gift baskets. They also make sweet handmade additions to Mother’s Day gifts, holiday bundles, or bridal shower presents. A small set tied in matching colors can look especially pretty stacked beside folded towels or tucked into storage baskets.
Care Instructions:
Keep the sachet dry and away from heavy moisture. If the outer crochet bag needs cleaning, remove the scented filling first if possible. Hand wash gently and let it dry fully before refilling. Refresh the herbs or potpourri whenever the scent fades so the sachet stays useful.
Time Needed:
This may take a short amount of time depending on your speed, yarn, and the size of your sachet.
Conclusion:
A crochet drawer sachet is a lovely little project when you want something simple, handmade, and practical. It works up into a neat mini pouch that can freshen drawers and shelves while adding a soft personal touch to your home. The drawstring style makes it easy to refill and reuse, which makes the project even more appealing. It is a wonderful small make for gifts, stash yarn, and peaceful afternoon crocheting.
FAQs:
1. Is this beginner-friendly?
Yes, it is a very approachable project for beginners who know the basic crochet stitches and want to make a small pouch.
2. What can I put inside a crochet drawer sachet?
Lavender, potpourri, cedar, dried herbs, or another light drawer-safe scented filling all work well.
3. What yarn is best for this project?
A smooth cotton yarn is a great choice because it gives the sachet a neat shape and a clean home-decor look.
4. Can I make it bigger?
Yes. You can widen the pouch or add more rounds to make a fuller sachet if you want it for larger storage spaces.
5. How do I keep the filling from falling out?
Use a fairly tidy stitch pattern, avoid overlarge gaps, and place very loose filling in a small inner bag before putting it inside the crochet sachet.