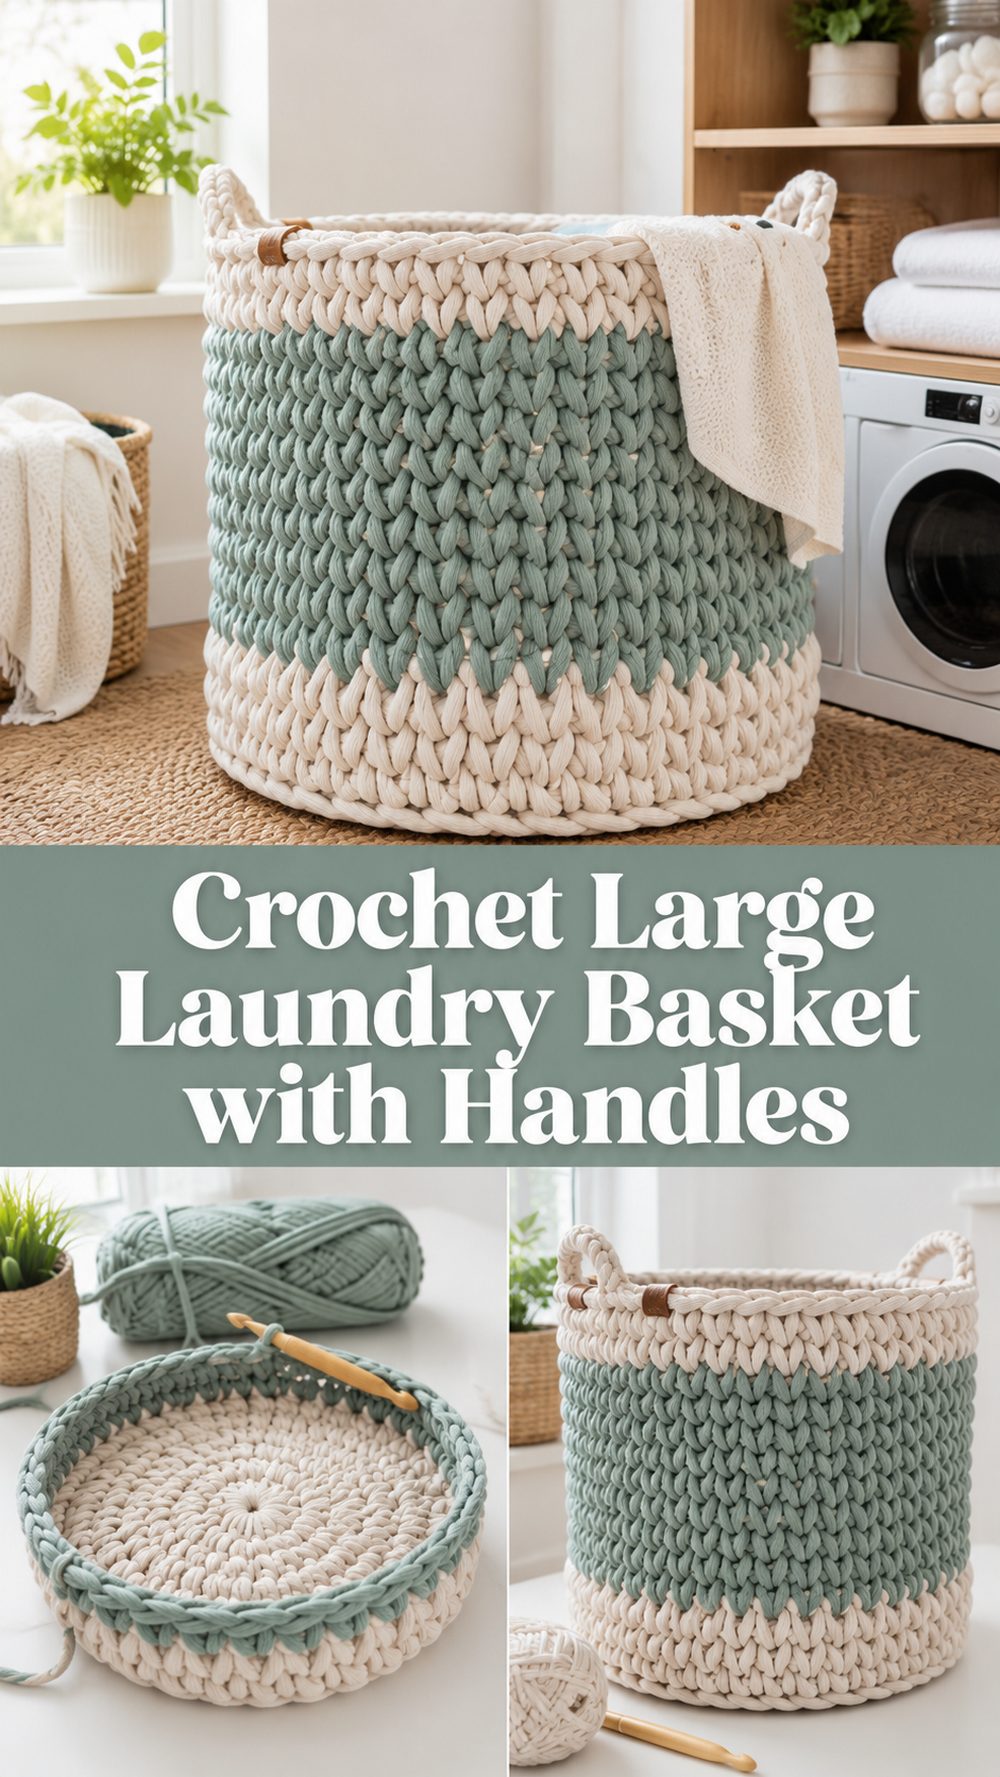
A big crochet laundry basket is one of those projects that feels both fun and practical. You get the satisfaction of making something by hand, but you also end up with a useful storage piece you can actually put to work right away. This style of basket is great for holding laundry, towels, blankets, or even extra yarn, and the handles make it much easier to move from room to room. What makes this project especially appealing is the chunky look and sturdy shape. It has that cozy handmade feel, but it still looks neat and modern in a bedroom, bathroom, or craft corner. If you enjoy crochet projects that are simple, useful, and a little more impressive than they are difficult, this is a lovely one to try.
Why You’ll Love This Project:
This crochet laundry basket is satisfying to make because it grows quickly with thick yarn or cord, and it turns into something genuinely useful. It is a great mix of home decor and practical storage, and the finished basket has a lovely chunky texture that makes it feel polished and substantial.
Materials Needed:
- Thick bulky yarn, t-shirt yarn, rope yarn, or crochet cord
- Large crochet hook
- Scissors
- Yarn needle
- Stitch markers
- Measuring tape
If the exact yarn and hook size are not available to you, use a yarn and hook size that matches your desired fit and texture.
Best Yarn for This Project:
For a laundry basket, a sturdy yarn is the best choice. Thick cotton cord, t-shirt yarn, or a firm bulky home-decor yarn works especially well because it helps the basket hold its shape. If you want a softer basket, you can use chunky yarn, but the sides may be less structured. Cotton-based fibers are a good option when you want strength, a clean finish, and a basket that feels durable enough for regular use.
Skill Level:
This project is best for confident beginners or easy-level crocheters.
The stitches themselves are not complicated, but keeping the basket even, sturdy, and properly shaped takes a little attention. If you are comfortable working in rounds and counting your stitches carefully, you should be able to enjoy this project.
Size and Fit Guide:
The nice thing about a crochet basket is that the size can be adjusted as you go. Start by deciding how wide you want the bottom to be. A laundry basket usually needs a roomy base, so keep increasing the bottom until it looks wide enough for your needs. After that, work the sides upward until the basket reaches your preferred height. If you want it deeper, add more rounds. If you want it easier to carry, stop sooner and keep it shorter. You can also test the handles against your hand as you make them to make sure they feel comfortable.
Stitches Used:
- Chain
- Slip stitch
- Single crochet
- Increases
- Working in the round
If your chosen yarn or basket style creates texture through tight stitches or special loops, keep your tension steady so the shape stays neat.
How to Make It:
Step 1: Start the Foundation
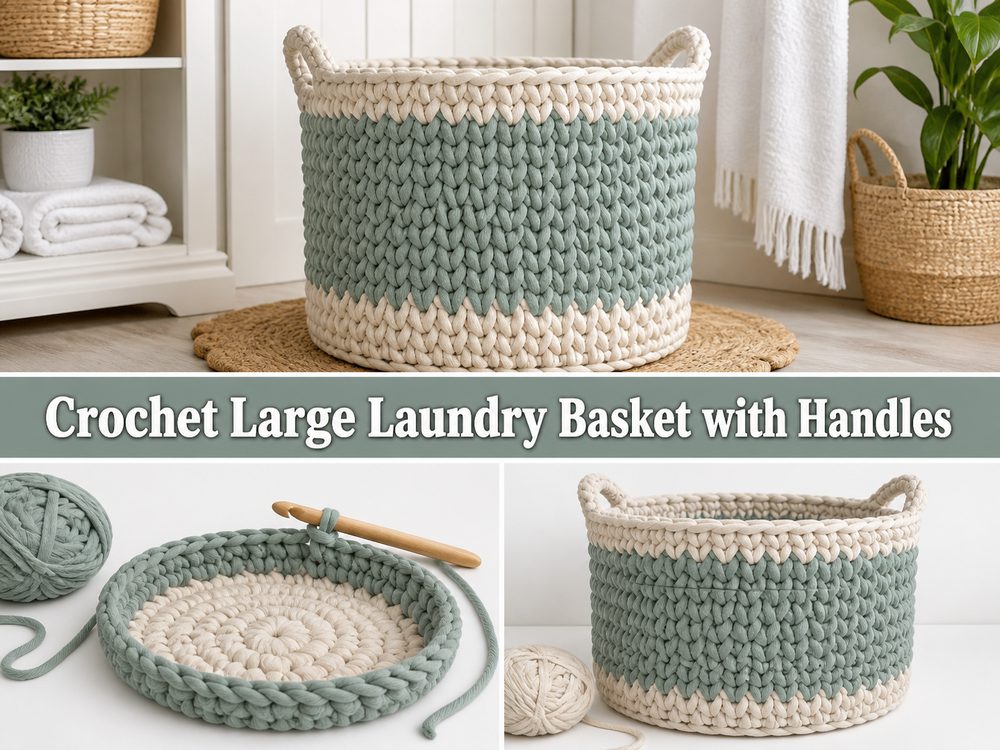
This basket begins at the bottom. You usually start with a small center ring or foundation, then crochet outward in joined or continuous rounds. The goal is to create a flat circular base. At this stage, the important thing is to space your increases evenly so the bottom stays smooth and flat instead of turning wavy or cupping too early.
Use stitch markers if needed, especially if you tend to lose the start of your round. Because this is a larger basket, it helps to check the base often by laying it flat on a table or floor. If it sits nicely without curling, you are on the right track.
Step 2: Build the Base
Keep working around the circle, adding increases where needed to widen the basket bottom. Since this is meant to function like a laundry basket, you will want a generously sized base rather than a small decorative one. The larger the base, the more stable the basket will feel once it is standing up.
Take your time here. A strong base makes the whole basket look better. If your stitches are too loose, the bottom may feel floppy. If they are too tight, your hands may tire quickly, especially with chunky yarn or cord. Find a tension that feels firm but manageable.
Step 3: Turn the Work Upward
Once the base is the size you want, the next step is to form the sides. This usually happens by stopping the regular increase pattern and crocheting evenly around the basket. As you continue without widening, the work naturally begins to turn upward.
This is the point where the basket starts to look exciting because it shifts from a flat circle into a real storage piece. Keep your stitches consistent and snug so the walls stand nicely. With thick yarn or cord, the basket should begin to feel substantial quite quickly.
Step 4: Build the Main Body
Now continue working round after round to create height. This section is straightforward, and it is where the project grows fast. A large crochet laundry basket works best when the sides are tall enough to hold clothing, towels, or household items, but not so tall that it loses stability.
Check the height every few rounds. If you plan to use it in a bathroom, beside a bed, or in a laundry space, you can hold it up against the area where it will sit. For a lighter and more flexible basket, keep the walls a little lower. For a fuller hamper style, continue until it reaches your desired depth.
Step 5: Shape and Position the Handles
The handles are what make this basket especially practical. Instead of adding separate straps later, this style usually builds the handles right into the top rounds. When your basket is tall enough, decide where you want the handles to sit. Try to place them directly across from each other so the basket looks balanced and carries evenly.
To create them, you typically crochet to the handle position, chain across the opening, then skip a section below and continue around. On the next round, work into or around the chained space to secure the handle and blend it into the top edge. This gives you an opening that is useful but still sturdy.
Make sure the handles are wide enough for your hand and not too thin for the basket size. Since a laundry basket may carry some weight, reinforced handles are a smart choice. If they feel too loose, work another round around the top to strengthen everything.
Step 6: Finish the Top Edge
After the handles are formed, finish the basket with a clean top edge. A final round or two can help make the rim look tidy and give the basket more structure. This also helps the handles feel more secure and polished.
If the basket looks a little soft at the top, do not worry. Thick cord and tighter stitches often help it settle nicely once the project is complete. You can also shape it gently with your hands, especially around the rim and handles, to help it sit evenly.
Step 7: Weave in Ends and Shape the Basket
Once the crocheting is done, weave in the yarn ends carefully. With a project this large, secure finishing matters because the basket may be lifted and used often. After weaving in the ends, stand the basket upright and smooth out the sides and base.
The finished basket should look roomy, sturdy, and softly structured. It should hold its shape well enough to stand on its own, while still feeling handmade and flexible. The chunky texture and built-in handles give it that lovely mix of comfort and usefulness that makes crochet home projects so appealing.
Helpful Tips:
- Use a firm yarn if you want the basket to stand up better.
- Keep your tension as even as possible from the base to the top.
- Check that the bottom stays flat before building the sides.
- Place the handles evenly so the basket carries nicely.
- Add an extra round around the top if you want more support.
- Use stitch markers to track the beginning of each round.
Common Mistakes to Avoid:
- Making the base too loose, which can cause sagging
- Increasing unevenly so the bottom becomes ruffled or misshapen
- Switching to looser tension on the sides
- Placing the handles unevenly
- Making the basket too tall without enough structure
- Forgetting to check the shape as you go
Customization Ideas:
You can easily personalize this basket to suit your home. Try a soft neutral shade for a modern look, or go with bold color for a playful laundry room accent. You can make it shorter for toy storage, taller for blankets, or wider for towels. A contrasting top edge can add a simple decorative touch. If you want extra strength, you can work with tighter stitches or choose a firmer cord. You could even line the inside with fabric if you want a smoother finish.
Style Ideas:
This basket works beautifully in a bedroom for laundry, in a bathroom for rolled towels, or in a craft room for yarn storage. It also makes a thoughtful handmade housewarming gift. If you make a set in different sizes, they can create a lovely coordinated storage look around the home.
Care Instructions:
If your yarn allows it, gentle hand washing is the safest option. Reshape the basket while damp and let it dry flat or upright. Avoid high heat, especially with synthetic fibers, since it can affect the structure. If the basket softens over time, reshape it by hand after cleaning.
Time Needed:
This may take a few hours depending on your speed, yarn, size, and stitch pattern.
Conclusion:
A crochet laundry basket is a wonderful project when you want to make something that looks good and gets used every day. It is simple in construction, easy to adjust, and satisfying to watch grow. You can make it larger, softer, firmer, taller, or more decorative depending on your yarn and your space. Once you finish one, it is easy to imagine making more for other rooms in the house.
FAQs:
1. Is this project beginner-friendly?
Yes, it is suitable for confident beginners, especially if you already know how to work in rounds and keep track of your stitches.
2. What yarn is best for a crochet laundry basket?
Firm cotton cord, t-shirt yarn, or bulky home-decor yarn usually works best because it gives the basket more structure.
3. Can I change the size?
Yes. You can make the base wider or smaller, then add as many side rounds as needed for your preferred height.
4. Will the basket stand up on its own?
It usually will if you use a thick, sturdy yarn and keep your stitches fairly tight.
5. Can I use it for things other than laundry?
Absolutely. It is also great for towels, blankets, toys, yarn, or general household storage.