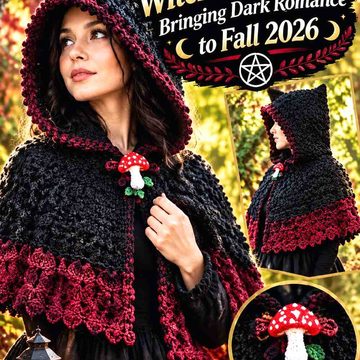
Fall layering makes a useful testing ground for crochet upcycling. A sweatshirt with worn sleeves can gain a completely different texture, plain denim can carry crochet panels or motifs, and a sweater you rarely wear may only need a stronger collar, cuffs, or neckline to feel relevant again.
The projects below range from relatively reversible additions to alterations that involve removing fabric and rebuilding part of a garment. That difference matters. A small collar or surface motif leaves most of the original clothing unchanged, while replacement sleeves, yokes, inserts, and skirt conversions require much closer attention to fit, stretch, weight, and the strength of the remaining fabric.
The goal is not to make every old garment worth saving. Start with pieces whose useful parts are still sound, then choose a crochet treatment that solves a real problem or adds a feature you actually want to wear through fall.
Quick List
- Crochet Statement Sleeve Sweatshirt Upcycle
- Crochet Mixed Media Denim Jacket With Replacement Sleeves
- Crochet Freeform Granny Denim Jacket Makeover
- Crochet Hooded Cardigan Conversion
- Crochet Airy Back Panel Cardigan Rework
- Crochet Peter Pan Collar Cardigan Refresh
- Crochet Collar And Cuff Sweater Update
- Crochet Side Panel Graphic T Shirt Refit
- Crochet Motif Yoke T Shirt Renewal
- Crochet Rebuilt T Shirt Neckline
- Crochet T Shirt Poncho Refashion
- Crochet Lace Hem Shirt Extension
- Crochet Granny Insert Jeans Makeover
- Crochet Flower Applique Jeans Refresh
- Crochet Statement Patch Denim Jeans Update
- Crochet Panel Pants To Skirt Upcycle
- Crochet Scalloped Edge Cardigan Refresh
Start With a Garment That Can Support the Alteration
Crochet can disguise damage, replace an unwanted section, or add visual interest, but it cannot restore strength to fabric that is failing everywhere.
Inspect the area where yarn will meet the original garment. Denim around a cutout should still feel sound. Sweatshirt armholes need enough stability to carry replacement sleeves. A cardigan neckline should not already be badly stretched if you plan to add the weight of a hood.
Small additions usually create less risk. A detachable collar, appliqué, or narrow edging can often be tested before permanent attachment. Cutting away sleeves, necklines, backs, or trouser sections should come later, after the crochet piece and garment measurements have been compared.
Match Crochet Weight and Stretch to Fall Fabrics
A chunky crochet panel may look appealing beside lightweight jersey but still be too heavy for it. The opposite mismatch can happen with denim: an extremely soft, loose insert may not behave like the rigid fabric surrounding it.
Pin or baste larger crochet pieces in place and let the garment hang. Then wear it over the type of layer you expect to use in fall. Shoulder droop, neckline distortion, twisting side seams, or a hem that begins pulling downward are useful warnings before permanent assembly.
Care also becomes a shared decision once two materials are combined. Check both the garment label and the yarn label rather than assuming the original washing routine will remain appropriate.
Plan Irreversible Cuts Last
Whenever an upcycle removes existing fabric, make the crochet component—or at least a meaningful sample—before treating the cut line as final.
Blocked motif dimensions can determine the size of a denim opening. A finished yoke affects how much of a T-shirt neckline can be removed. A replacement sleeve should be compared with both the armhole and the old sleeve before the original one disappears.
Keeping the removed garment section available as a template can also help with proportion even when the crochet replacement has a completely different construction.
1. Crochet Statement Sleeve Sweatshirt Upcycle
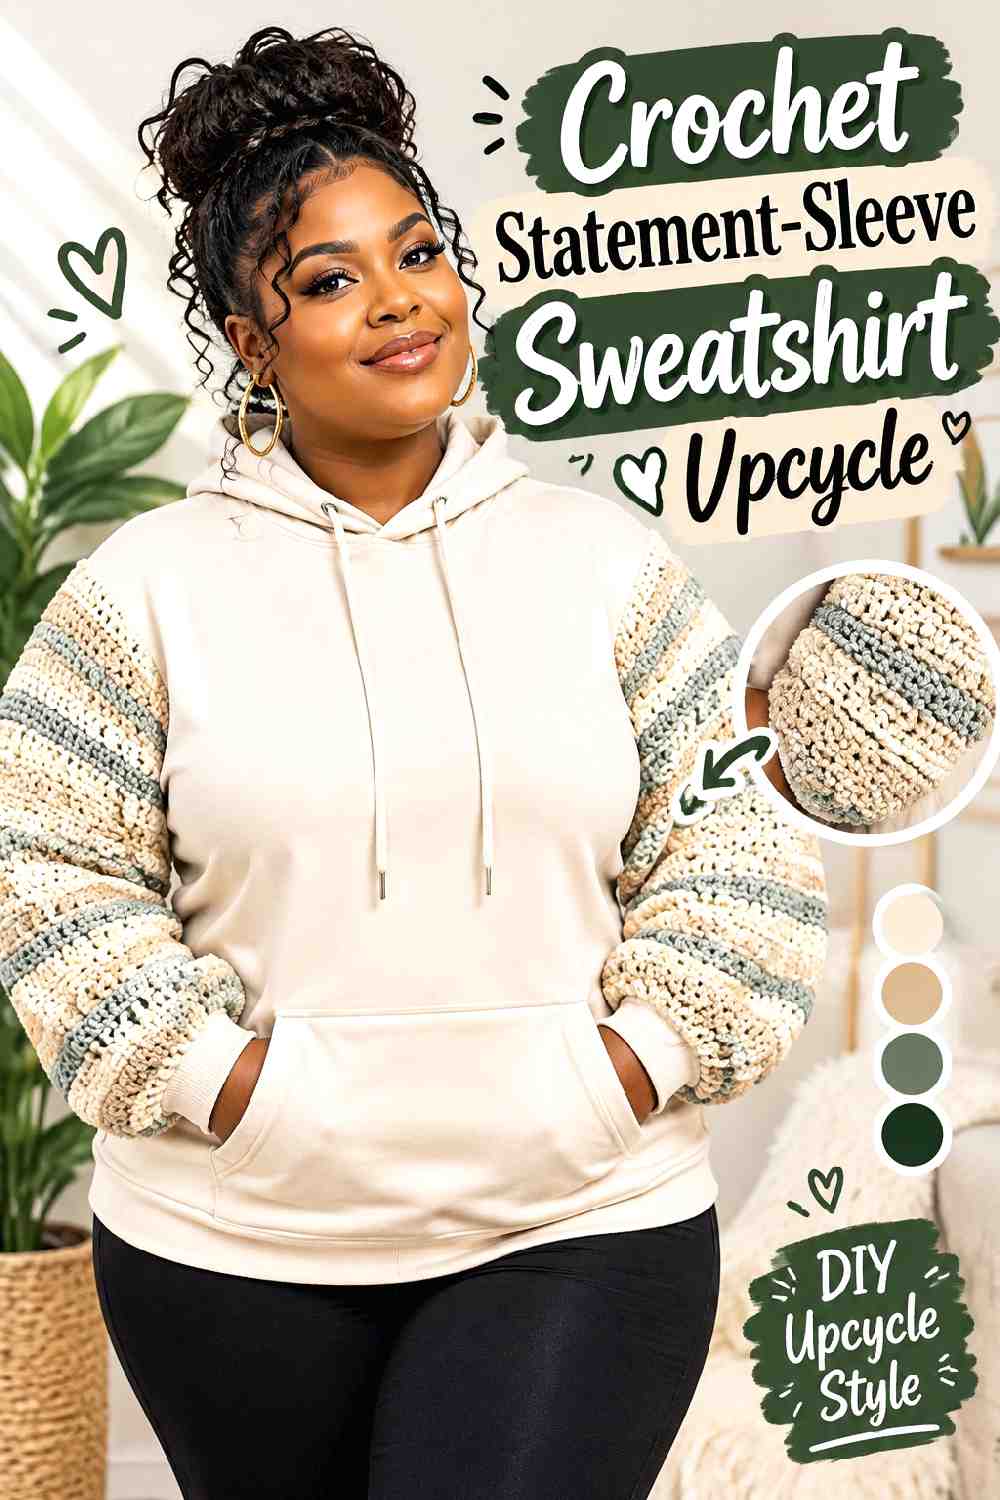
A basic crewneck sweatshirt becomes a much more distinctive fall layer when its ordinary sleeves are replaced with crochet. The soft sweatshirt body remains familiar, while the yarn adds enough texture to make the alteration immediately visible. Dress it up Debra demonstrates this kind of sweatshirt transformation in a dedicated crochet-sleeve upcycle tutorial.
This approach is particularly useful when the torso, neckline, and ribbed hem still work but the sleeves are damaged or simply the least interesting part of the garment.
Treat the Armhole as the Critical Fit Point
The sleeve length can be adjusted comparatively easily, but a poor connection at the upper arm affects the whole garment.
Before permanent attachment, distribute the crochet around the armhole and check for bunching, stretching, or gaps. Raise both arms and reach forward as well as standing normally. A sleeve that looks balanced with your arms down can pull strongly once the shoulder moves.
Decide Whether the Original Cuffs Deserve to Stay
Keeping a usable sweatshirt cuff can visually connect the old garment with the new sleeve, but worn ribbing should not be preserved just because it is original.
Check whether each cuff still recovers after stretching. If it is permanently loose or distorted, plan the crochet sleeve around a different finish rather than building a fresh alteration around a failing component.
Creator Credit: Dress it up Debra
2. Crochet Mixed Media Denim Jacket With Replacement Sleeves
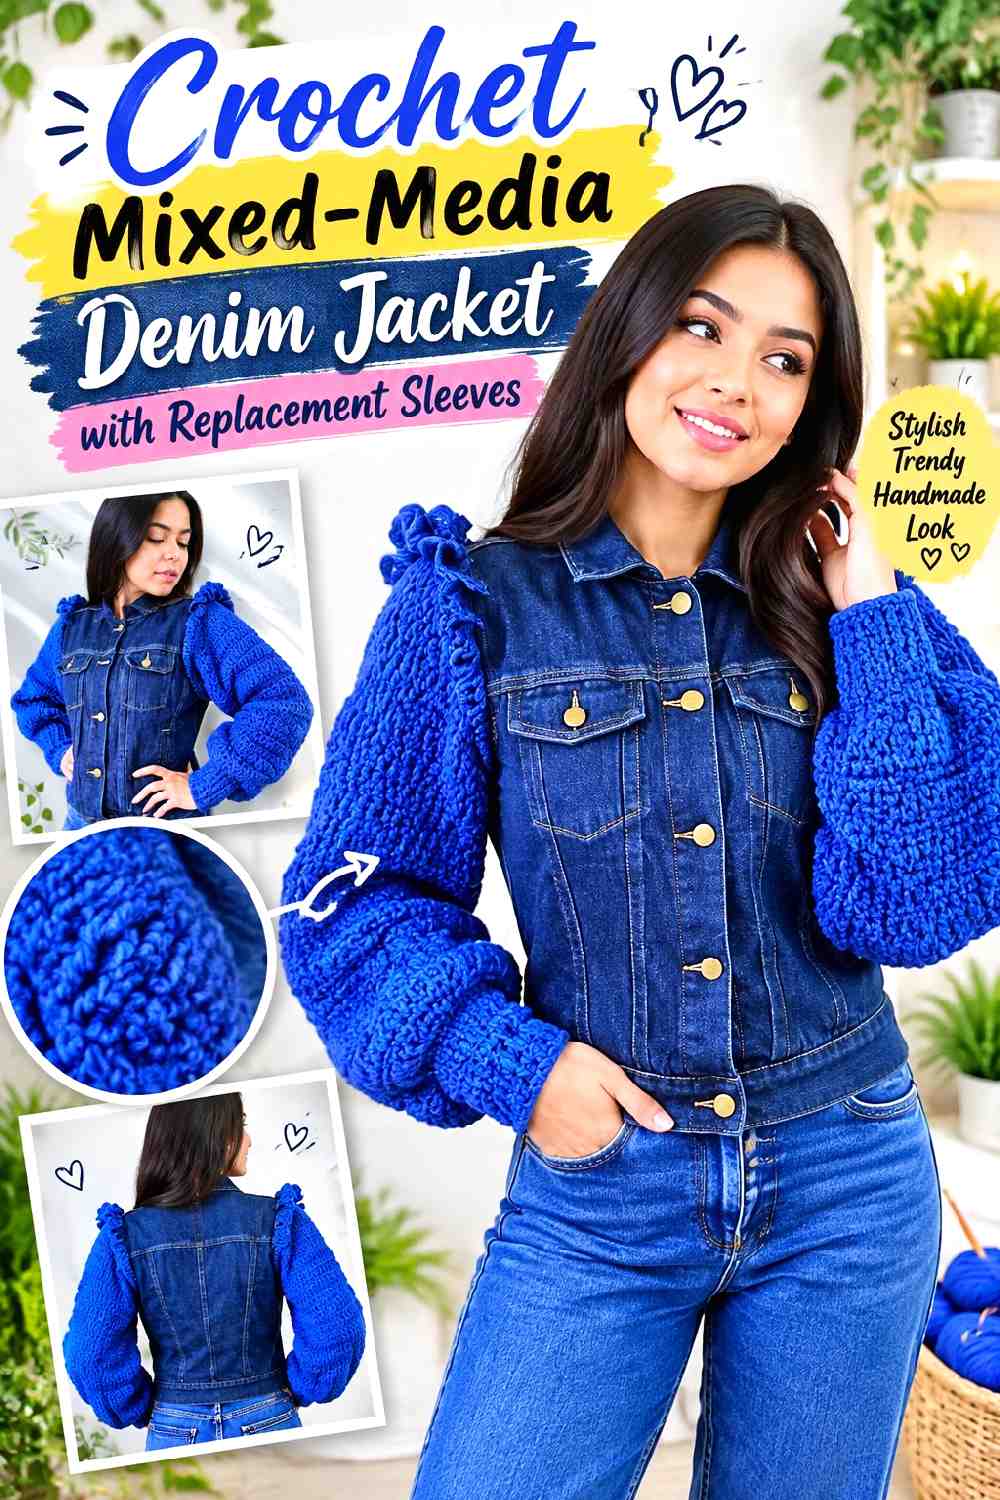
Denim provides a structured torso while crochet replacement sleeves introduce softness and movement. Gense demonstrates a denim-jacket transformation built around crocheted sleeves, making this a useful reference for a substantial fall outerwear upcycle.
Unlike adding an appliqué, this alteration changes how the jacket behaves around the shoulders and arms. It is worth choosing a jacket whose body, collar, front closure, and shoulder seams are still in good condition.
Keep the Old Sleeve Until the New One Fits
The removed denim sleeve contains useful information about upper-arm width, taper, overall length, and where the original cuff sat.
Your crochet sleeve does not need to copy it exactly, but comparing the two can expose a major proportion problem before the new section is attached.
Watch for Shoulder Droop
Crochet can hang more heavily than the fabric it replaces.
Temporarily attach the sleeve and place the jacket on a hanger for a while. If the shoulder line noticeably drops or the denim armhole begins pulling outward, reconsider the crochet density or weight before reinforcing the attachment and hoping the problem disappears.
Creator Credit: Gense
3. Crochet Freeform Granny Denim Jacket Makeover
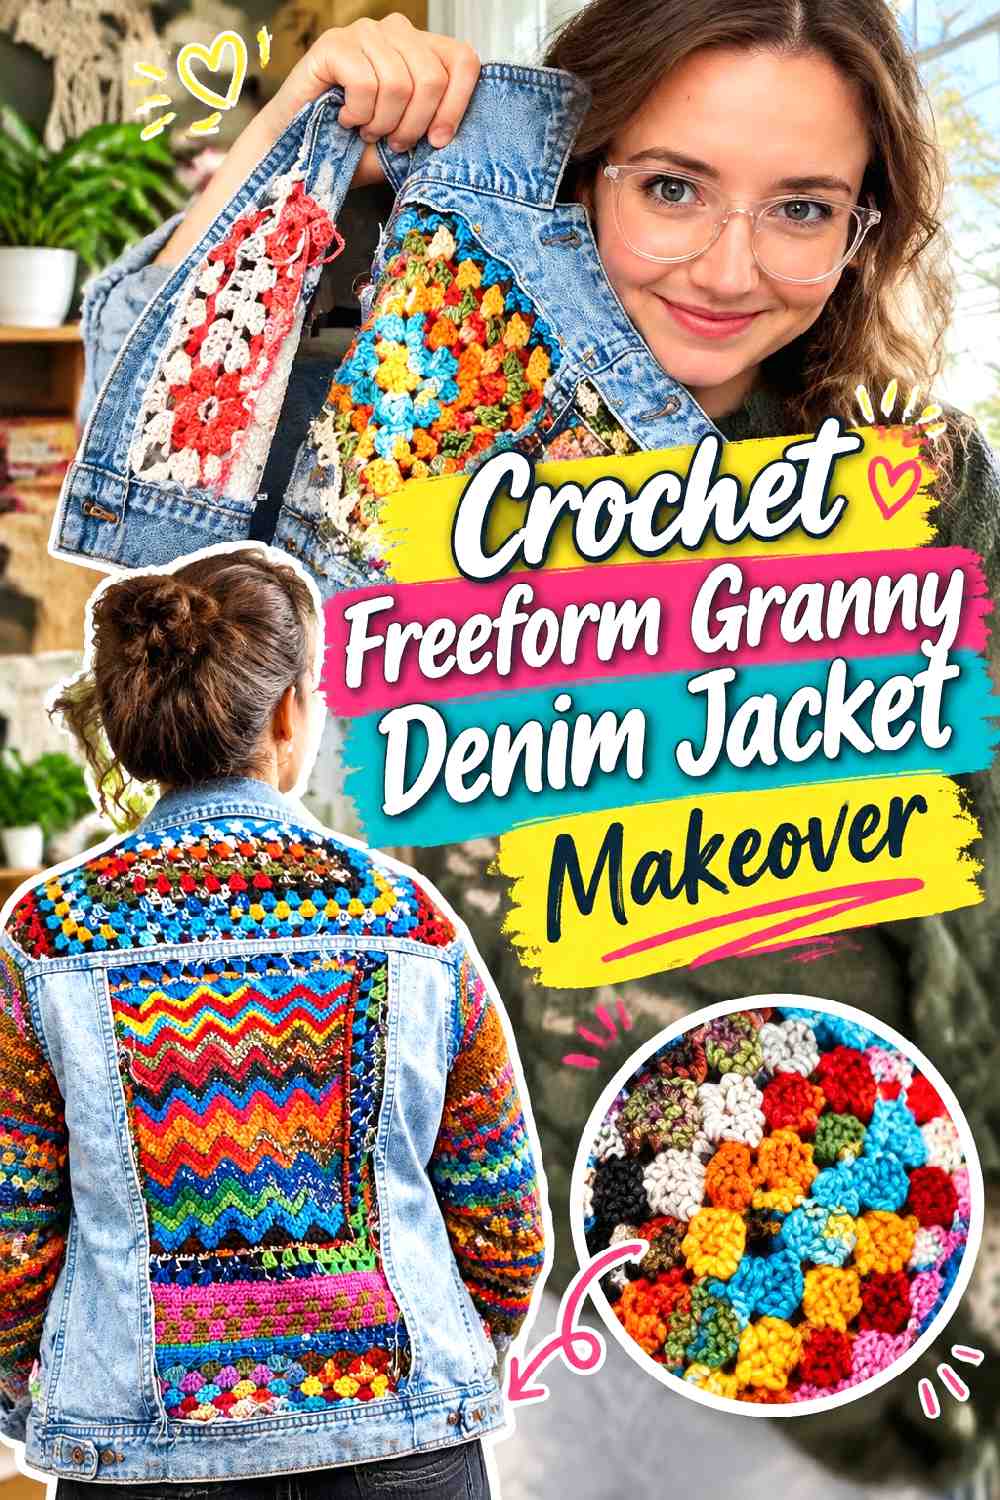
Instead of limiting crochet to the sleeves, this option turns a thrifted denim jacket into a broader mixed-media piece through granny-square and freeform crochet sections. Coulee Craft shows a finished denim-jacket refashion centered on this more expressive treatment.
It suits a jacket that still has a useful overall silhouette but feels too plain to become a regular fall layer.
Plan Large Crochet Areas Before Small Decorations
Start with the sections that most strongly change the garment—such as a back or large panel—before scattering smaller motifs across the remaining denim.
A strong focal area often needs more empty denim around it than expected. Filling every open space can hide the contrast that makes mixed-material clothing interesting in the first place.
Freeform Crochet Still Needs Stable Attachment Zones
An irregular edge does not remove the need for sound fabric underneath it.
Check the denim along the entire planned joining path. If one area is frayed or unusually thin, reposition or stabilize the design rather than relying on decorative crochet to carry weakening cloth.
Creator Credit: Coulee Craft
4. Crochet Hooded Cardigan Conversion
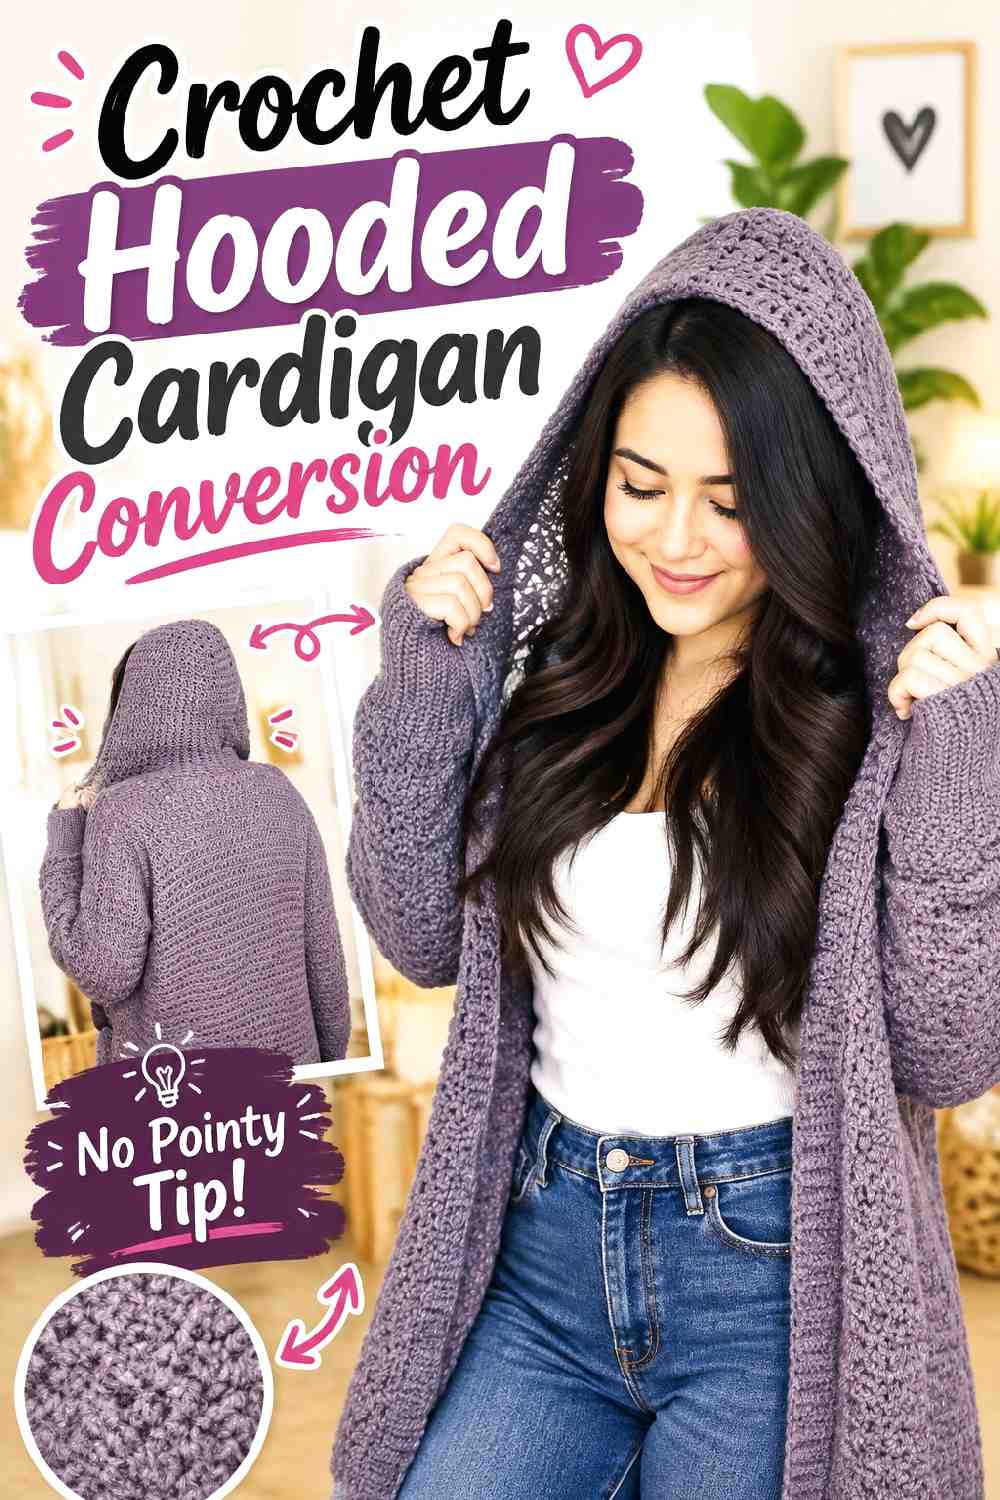
A crochet hood can push a conventional cardigan toward a more casual fall-jacket look without rebuilding the body. The Knotty Lace provides a hood construction that can be considered for an existing cardigan or compatible sweatshirt, making it useful when the neckline and shoulders are still strong enough to carry a larger addition.
The hood is not merely decorative. Its weight influences the back neckline and can slightly change how the fronts hang when it is down.
Test the Neckline Under Added Weight
Before making the hood permanent, pin a similarly weighted crochet sample or fabric piece around the back neck.
Let the cardigan hang and then wear it. If the neckline already stretches backward or the front edges shift noticeably, the base garment may not be a good candidate for a substantial hood.
Check the Cardigan Over Your Actual Fall Layers
A conversion that fits over a T-shirt may behave differently over a long-sleeve top.
Try the cardigan with the thickness you normally expect underneath. Pay particular attention to the neck and shoulders, because added bulk underneath can change how the hood attachment sits.
Creator Credit: The Knotty Lace
5. Crochet Airy Back Panel Cardigan Rework
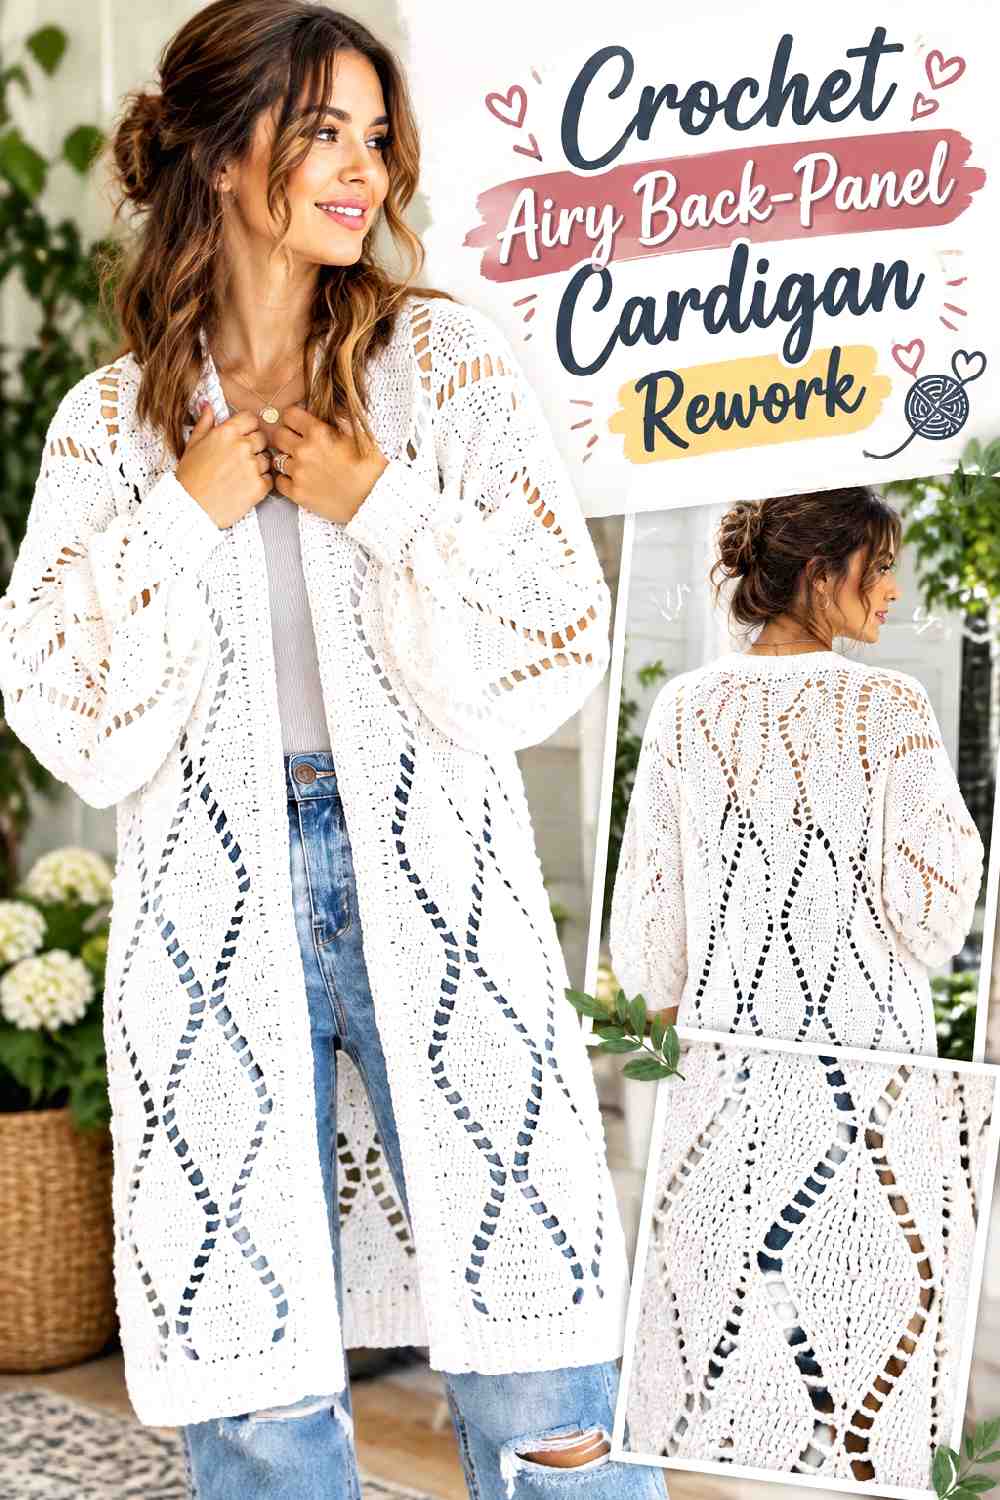
Replacing or visually transforming part of a cardigan back with open crochet produces a very different effect from small patches or edging. A lighter-looking back panel can break up a solid knit layer and make the crochet the main feature when the garment is viewed from behind. Lakeside Loops provides a compatible openwork cardigan construction reference for planning this kind of adaptation.
A true cutaway panel is a major alteration, so an overlay is worth considering when the original back remains structurally sound.
Compare Overlay and Replacement Before Cutting
An overlay preserves the existing garment and is easier to reverse, but it creates two layers.
Removing the original panel avoids that bulk but introduces the much harder problem of stabilizing cut knit fabric. Decide which trade-off suits the particular cardigan before treating replacement as the only route.
Use the Existing Back as the Size Reference
Measure the cardigan rather than relying on the tutorial garment’s proportions.
Back width, shoulder spacing, and the intended lower edge of the new panel should relate to the layer you are modifying. A beautiful insert that is slightly too narrow can pull the surrounding fabric inward once attached.
Creator Credit: Lakeside Loops
6. Crochet Peter Pan Collar Cardigan Refresh
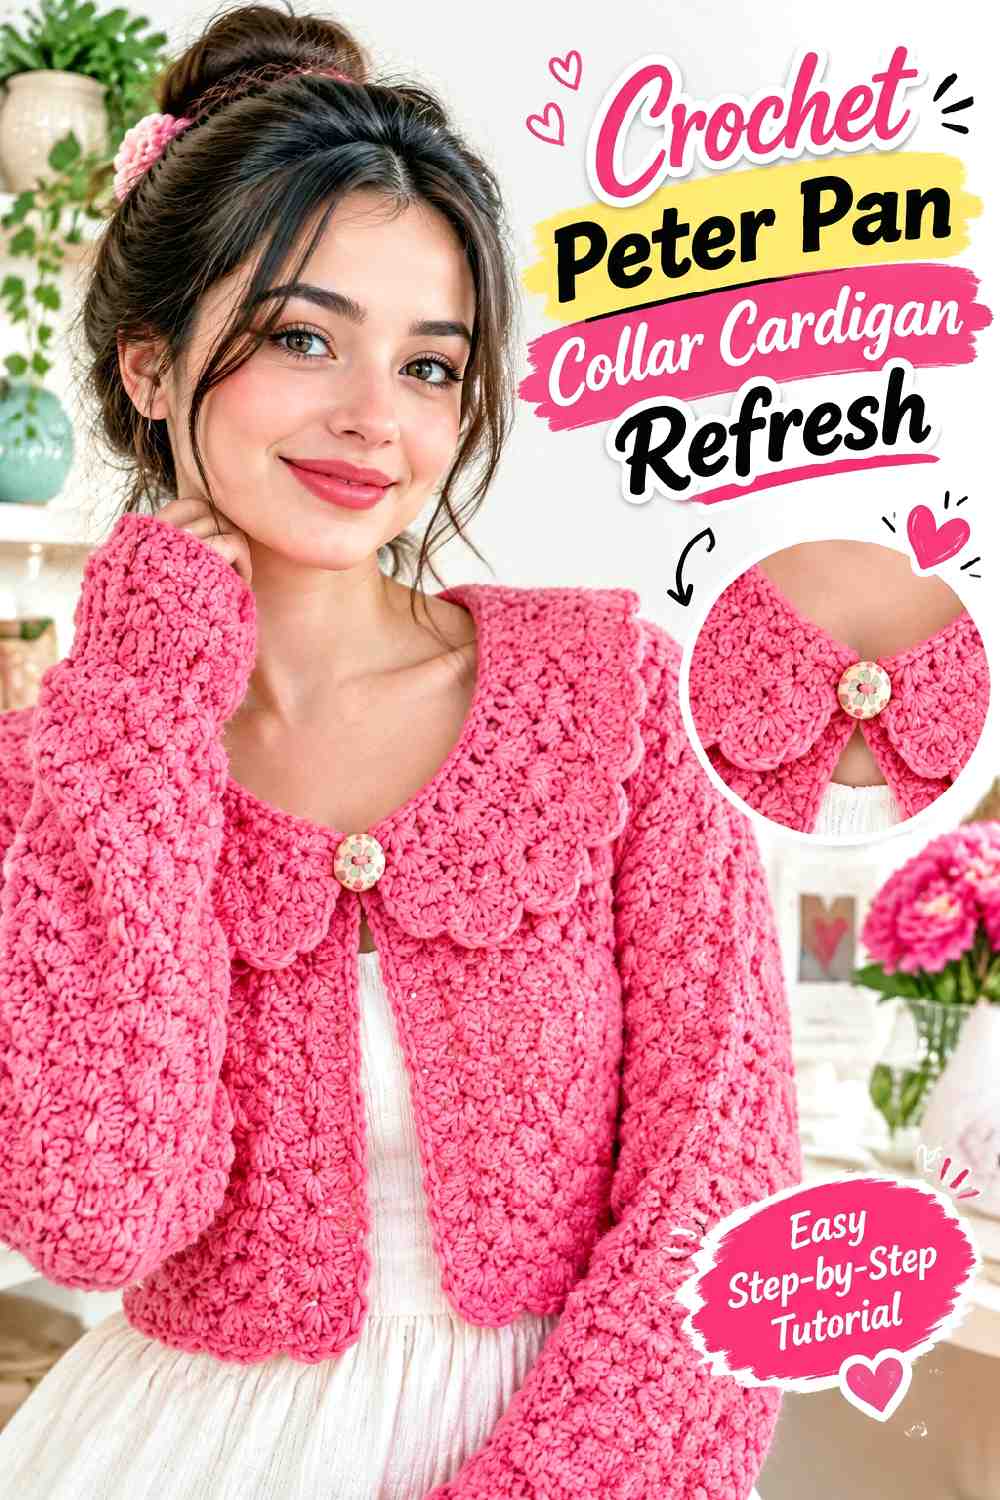
A Peter Pan collar offers a smaller fall update for a cardigan that already fits. Instead of altering the sleeves or body, the crochet concentrates attention around the neckline. Ahuyama Crochet’s collar tutorial provides a useful construction reference for this type of addition.
The collar can also be tested as a removable accessory before you decide whether it belongs permanently on one cardigan.
Test the Collar Without Sewing It Down
Wear the finished collar over the cardigan first.
Check whether it stays flat, interferes with existing buttons, or shifts toward the back while you move. A removable version may turn out to be more useful because it can refresh several fall layers instead of becoming fixed to one.
Scale the Collar to the Garment
A collar that looks balanced on a fitted crewneck can appear undersized on a broad, oversized cardigan.
Judge its depth against shoulder width and neckline shape. The collar should look intentional when the whole garment is visible, not just attractive when photographed by itself.
Creator Credit: Ahuyama Crochet
7. Crochet Collar And Cuff Sweater Update
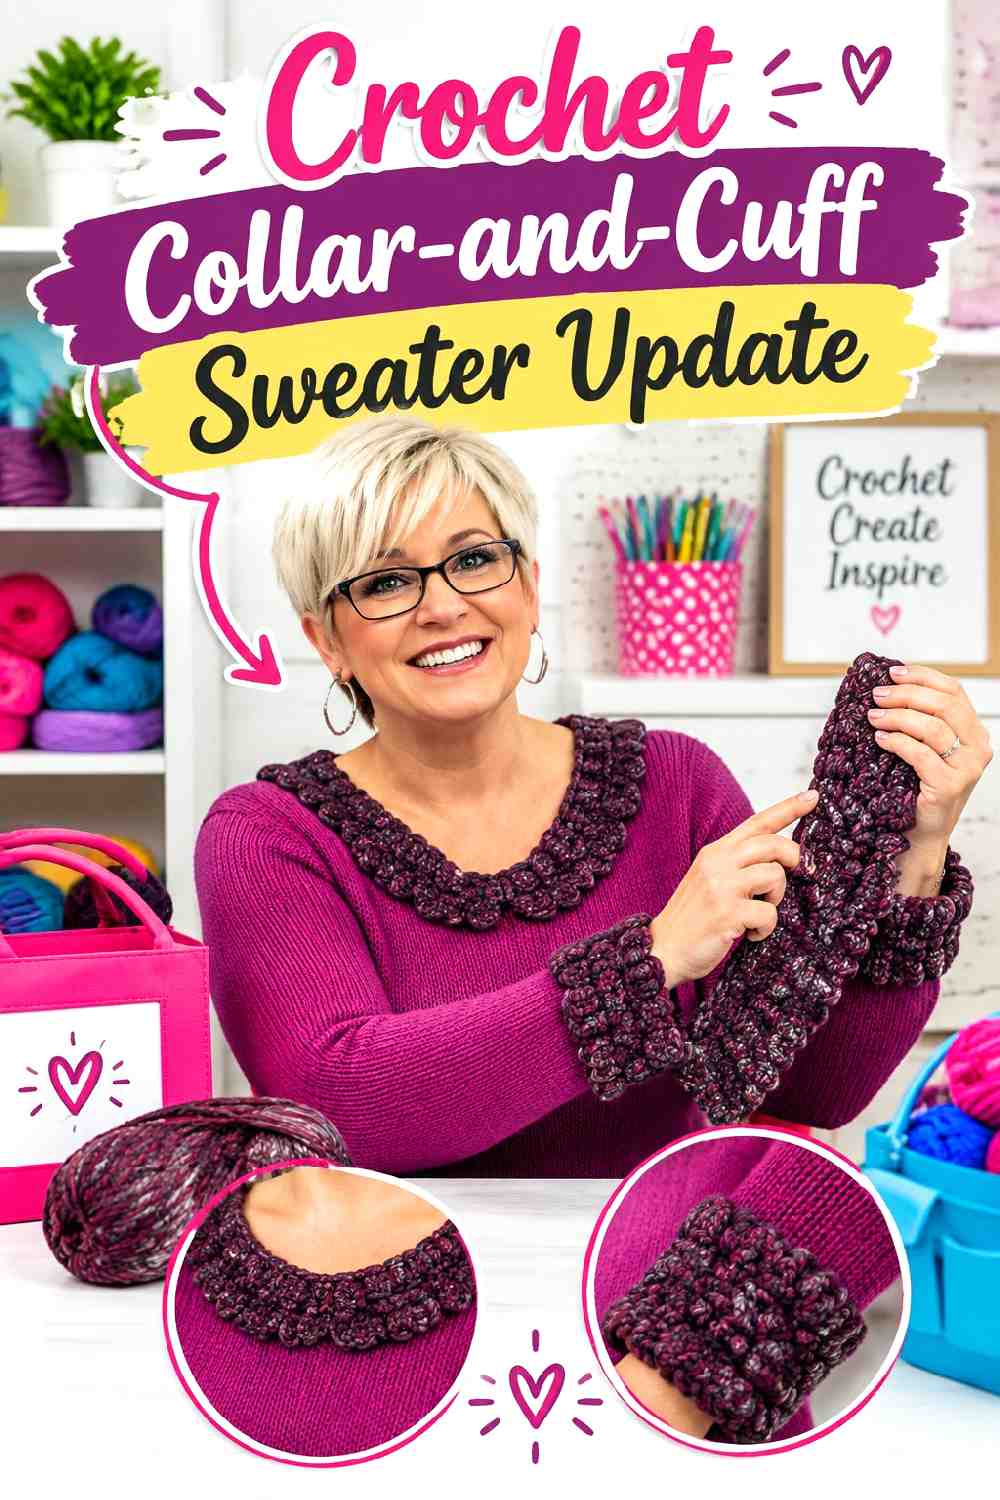
Repeating crochet at the neckline and wrists creates a coordinated way to refresh a plain sweater without replacing its main knitted sections. CrochetSoiree provides the tutorial reference for this paired-detail approach.
This is a useful middle ground between a tiny embellishment and a full reconstruction. It changes the parts most visible beneath coats and jackets while leaving the established sweater fit largely intact.
Make the Cuffs Work With the Existing Sleeve Shape
A narrow, firm cuff attached to a wide sleeve can create deliberate gathering. The same cuff on an already fitted sleeve may feel restrictive.
Check the sweater on your arm rather than choosing cuff dimensions in isolation. Wrist movement and sleeve ease matter more than making both components look perfectly flat on a table.
Plan Care Around Both Fibers
The new yarn and original sweater may respond differently to moisture, heat, and agitation.
Check both labels before attaching anything permanently. When the care requirements differ, the finished sweater generally needs to be treated according to the more cautious option rather than whatever routine was previously convenient.
Creator Credit: CrochetSoiree
8. Crochet Side Panel Graphic T Shirt Refit

A favorite graphic tee that has become too narrow can sometimes be more useful as an alteration project than as fabric scrap. Crochet side panels keep the recognizable front and back while introducing extra width through the seams. Shiny Crochet provides a tutorial source for this side-panel approach.
For fall, the result can work as a relaxed top layered over a fitted long-sleeve shirt.
Measure the Needed Extra Room on the Body
Do not decide panel width only by measuring the shirt flat.
Try it on, determine where the restriction actually occurs, and consider how much additional ease you want. A panel that solves tightness at the chest but adds excessive width at the hem may create a completely different silhouette.
Stretch Mismatch Can Distort the Side Seam
Jersey often stretches differently from crochet.
Hold samples together and gently pull them in the direction the garment moves. If the T-shirt stretches dramatically while the crochet barely changes, the transition seam may become a stress point during wear.
Creator Credit: Shiny Crochet
9. Crochet Motif Yoke T Shirt Renewal
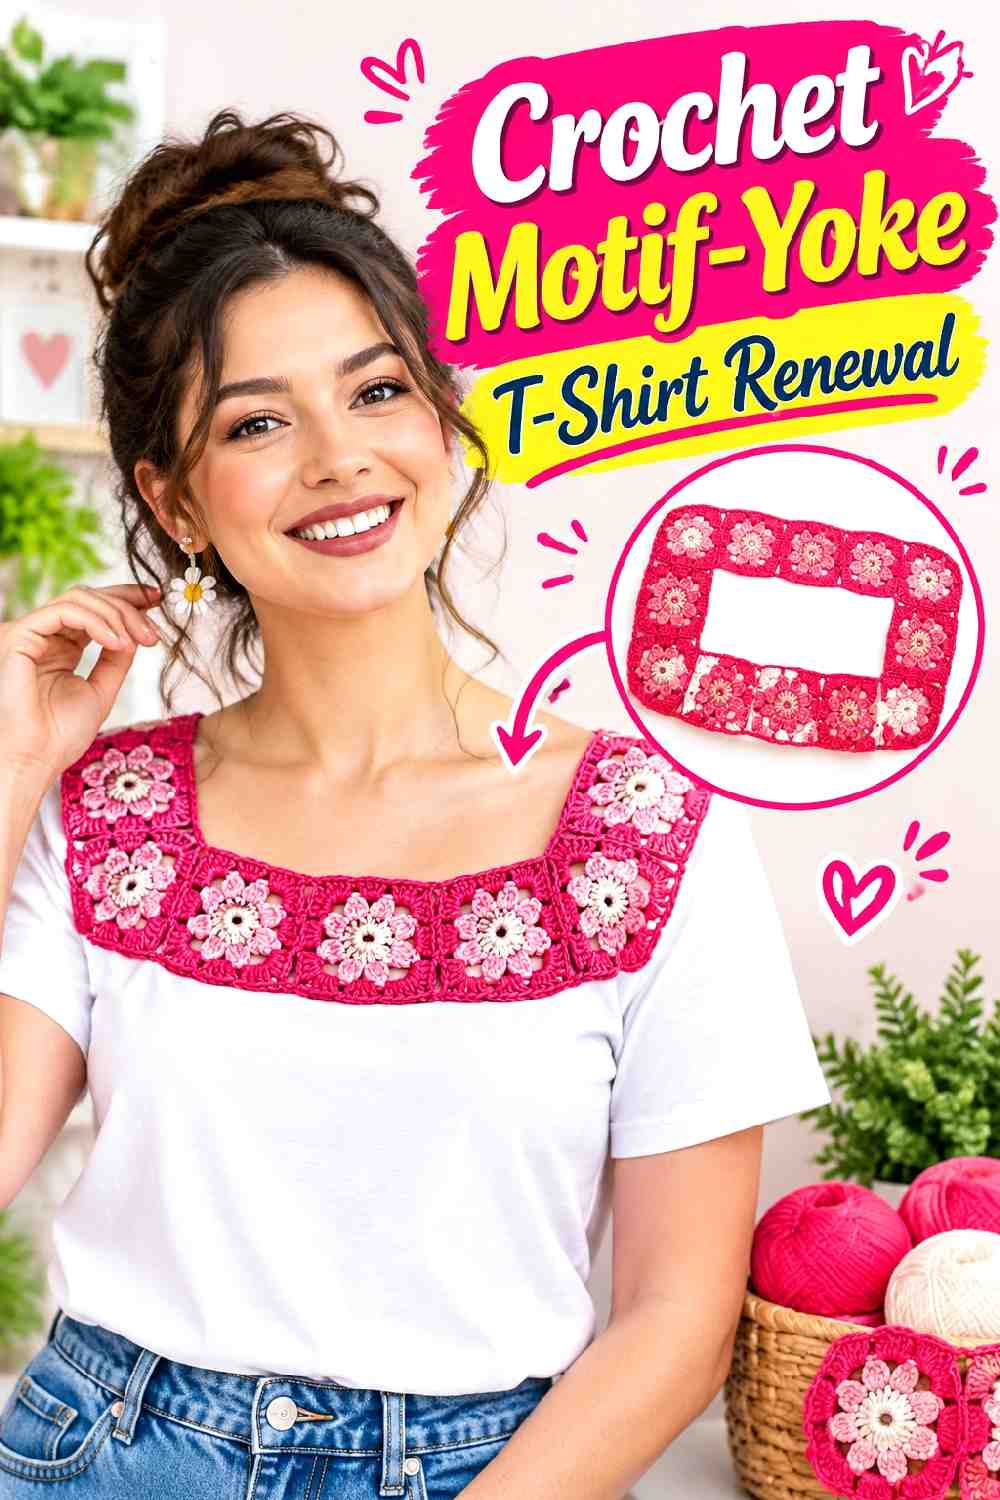
A motif yoke preserves much of an old T-shirt while making the neckline and shoulders the focus. Kristin Omdahl demonstrates a fabric-and-crochet T-shirt upcycle built around a joined motif yoke.
This is a stronger alteration than adding trim because the crochet becomes part of the garment’s upper structure.
Finish the Motif Layout Before Committing to the Cut
Motif size determines how much area the crochet can replace.
Block the motifs and compare the assembled section with the intact shirt before removing jersey. A small difference repeated around the entire yoke can produce a much larger sizing problem than expected.
Keep the Shoulder Area From Becoming Too Heavy
Several motifs together can weigh much more than one sample square suggests.
Hold the completed yoke around the shirt while it hangs and look for neckline sagging. Lightweight jersey needs particular care because the shoulder fabric carries everything below it.
Creator Credit: Kristin Omdahl
10. Crochet Rebuilt T Shirt Neckline
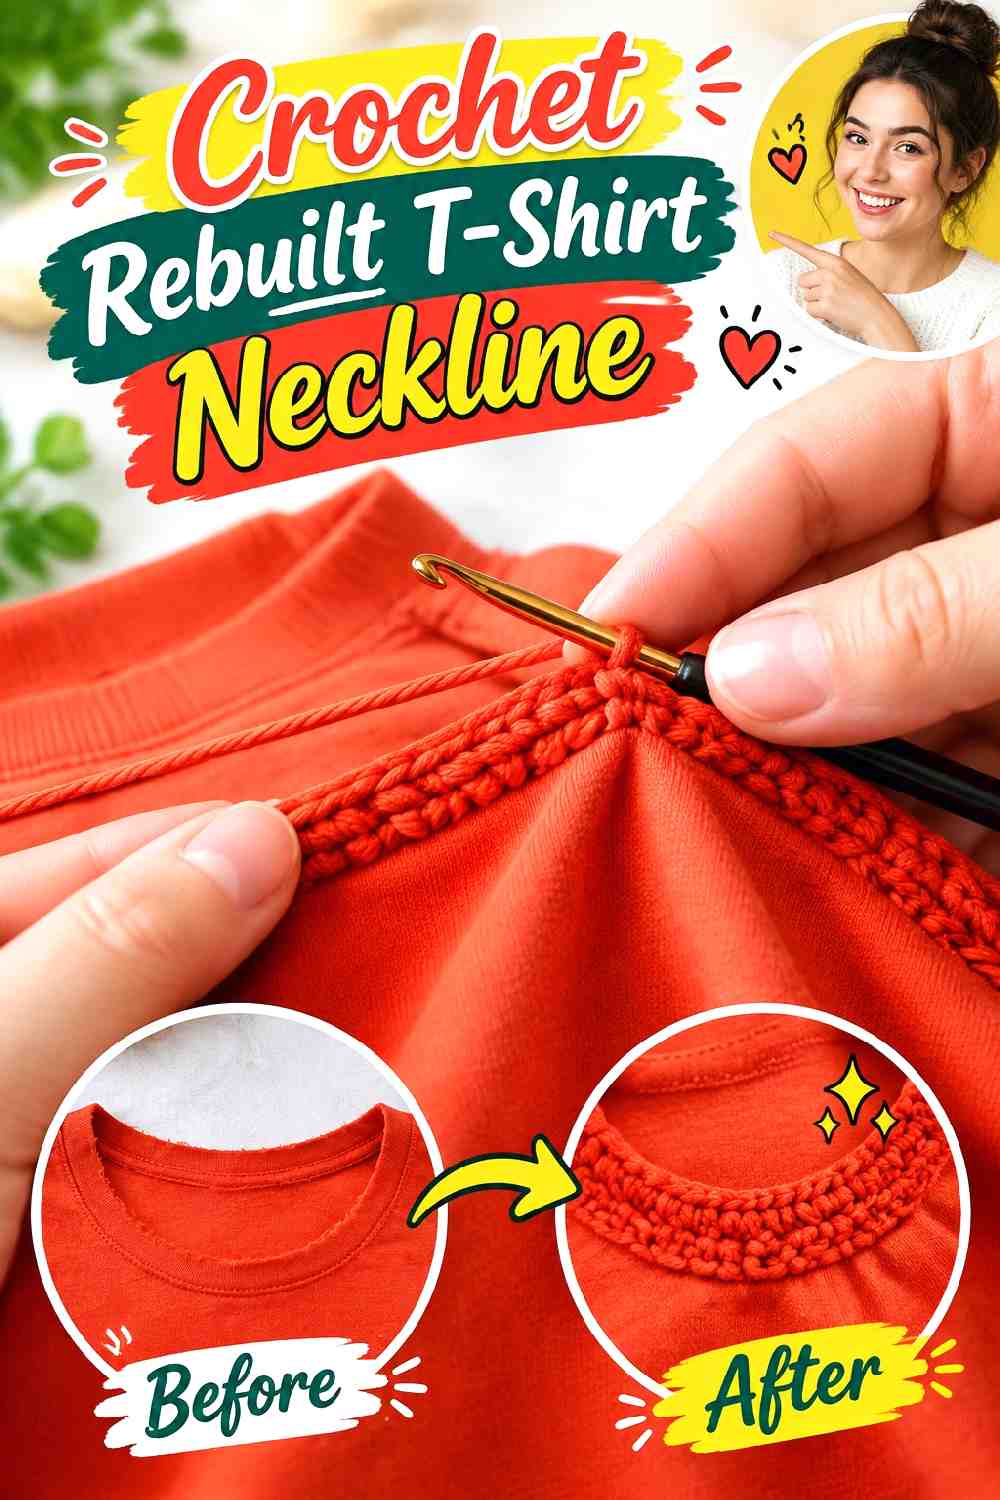
A worn or unwanted neckline can become the specific section you rebuild rather than the reason the whole shirt is discarded. ThreadBanger provides the tutorial reference for this kind of crochet-and-T-shirt reconstruction.
The physical area is small, but neckline fit makes this a precision alteration. Too tight and the shirt becomes difficult to pull on; too loose and the new edge may no longer sit where intended.
Draw the New Opening Before You Cut
Mark the proposed neckline on the intact shirt and try to visualize it while worn.
A change that seems modest when the garment is flat can expose considerably more once it wraps around the shoulders. Making the cut gradually gives you more control than immediately removing the maximum amount.
Anchor Crochet Into Healthy Fabric
If the original neckline is damaged, do not automatically attach the new crochet directly beside the weakest threads.
The new edge needs stable jersey to support it. That may mean positioning the redesigned neckline slightly beyond the worn area rather than following the existing opening exactly.
Creator Credit: ThreadBanger
11. Crochet T Shirt Poncho Refashion

A poncho conversion is useful when you want to preserve a shirt’s central fabric or graphic but no longer want its conventional fitted shape. The Snugglery demonstrates this broader T-shirt refashion direction, using crochet to change the silhouette rather than simply repair a seam.
For fall, the roomier shape can function as a light layer rather than a standard short-sleeve tee.
Let the Crochet Hang Instead of Pulling
The new crochet sections should support the wider silhouette rather than drawing the jersey upward.
Check the developing garment while hanging vertically. If the shirt body starts bunching toward the crochet, the added section may be too tight or too heavy relative to the fabric.
Decide How Open the Sides Should Feel
Arm openings affect whether the result reads as a slightly altered top or a true poncho-style layer.
Try the garment over the base layer you expect to wear in fall. More openness adds movement but can also change coverage considerably when the arms are raised.
Creator Credit: The Snugglery
12. Crochet Lace Hem Shirt Extension
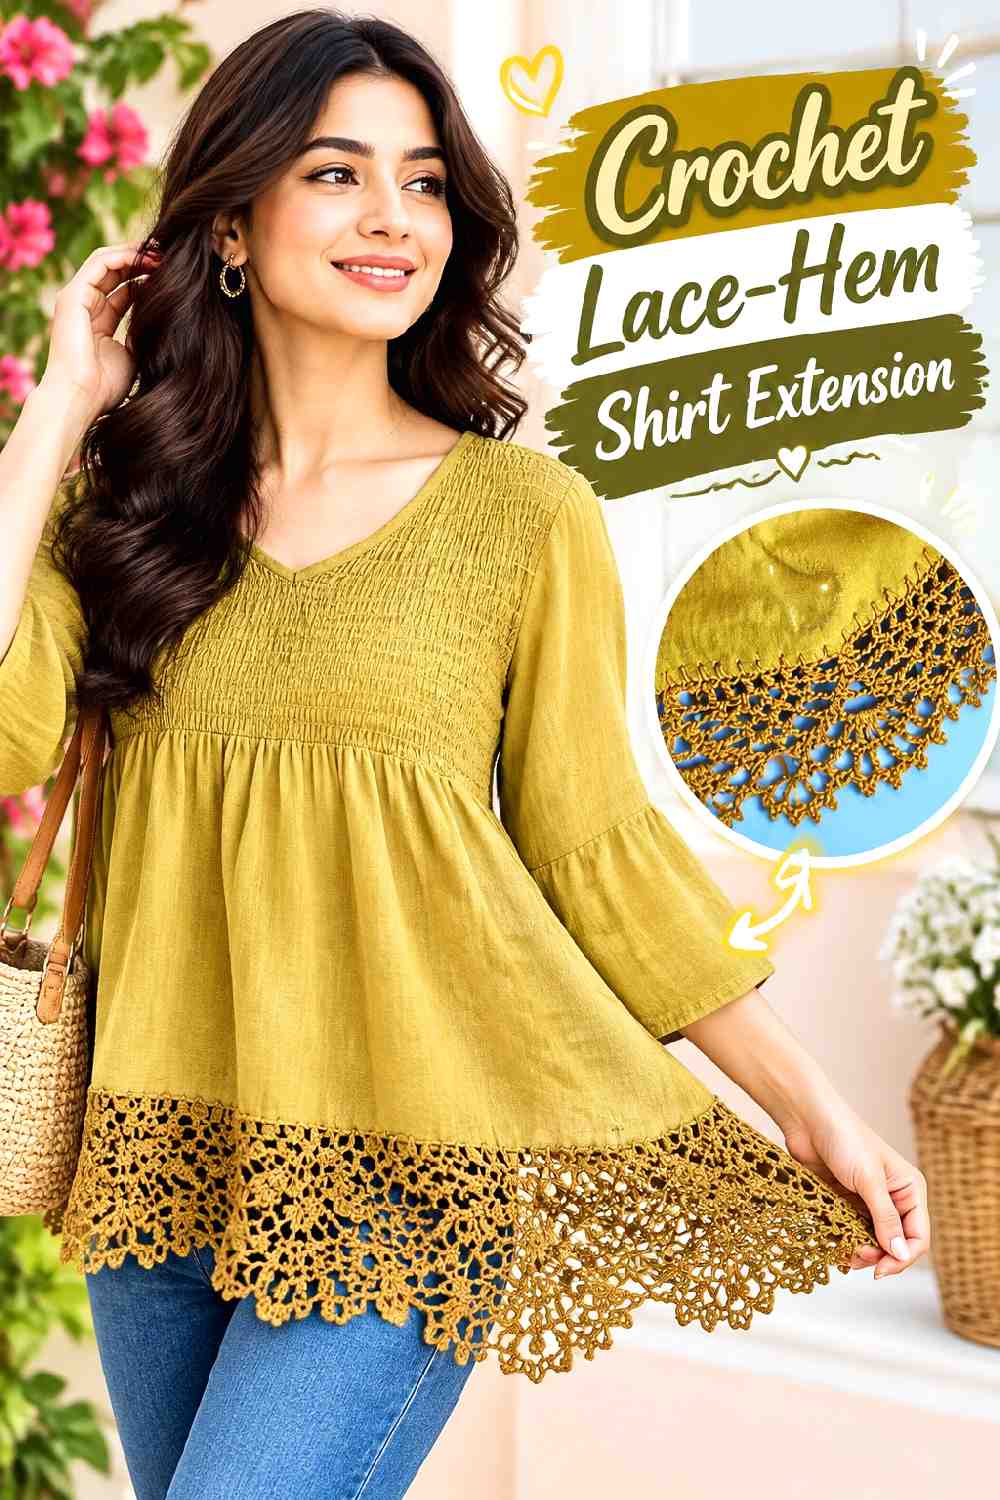
A crochet lace hem can give a shirt extra visual length while leaving its shoulders, sleeves, and upper fit alone. Creative Crochet Corner demonstrates adding crochet edging directly to clothing, including the kind of treatment that can extend or transform an existing hem.
It works well when you like how a shirt fits above the waist but want more coverage or a more layered appearance for fall.
Build an Even Transition Before Adding Depth
A decorative border cannot easily disguise an attachment edge that already gathers or ripples.
Concentrate first on how evenly the crochet meets the fabric. Let the shirt hang after the initial connection and correct distortion before investing in a deeper lace section.
Judge the Finished Length With the Bottoms You Wear
A longer border changes the proportion of the shirt against jeans, skirts, and trousers.
Try the developing piece with a few likely fall outfits before assuming that a deeper crochet extension is automatically more useful.
Creator Credit: Creative Crochet Corner
13. Crochet Granny Insert Jeans Makeover
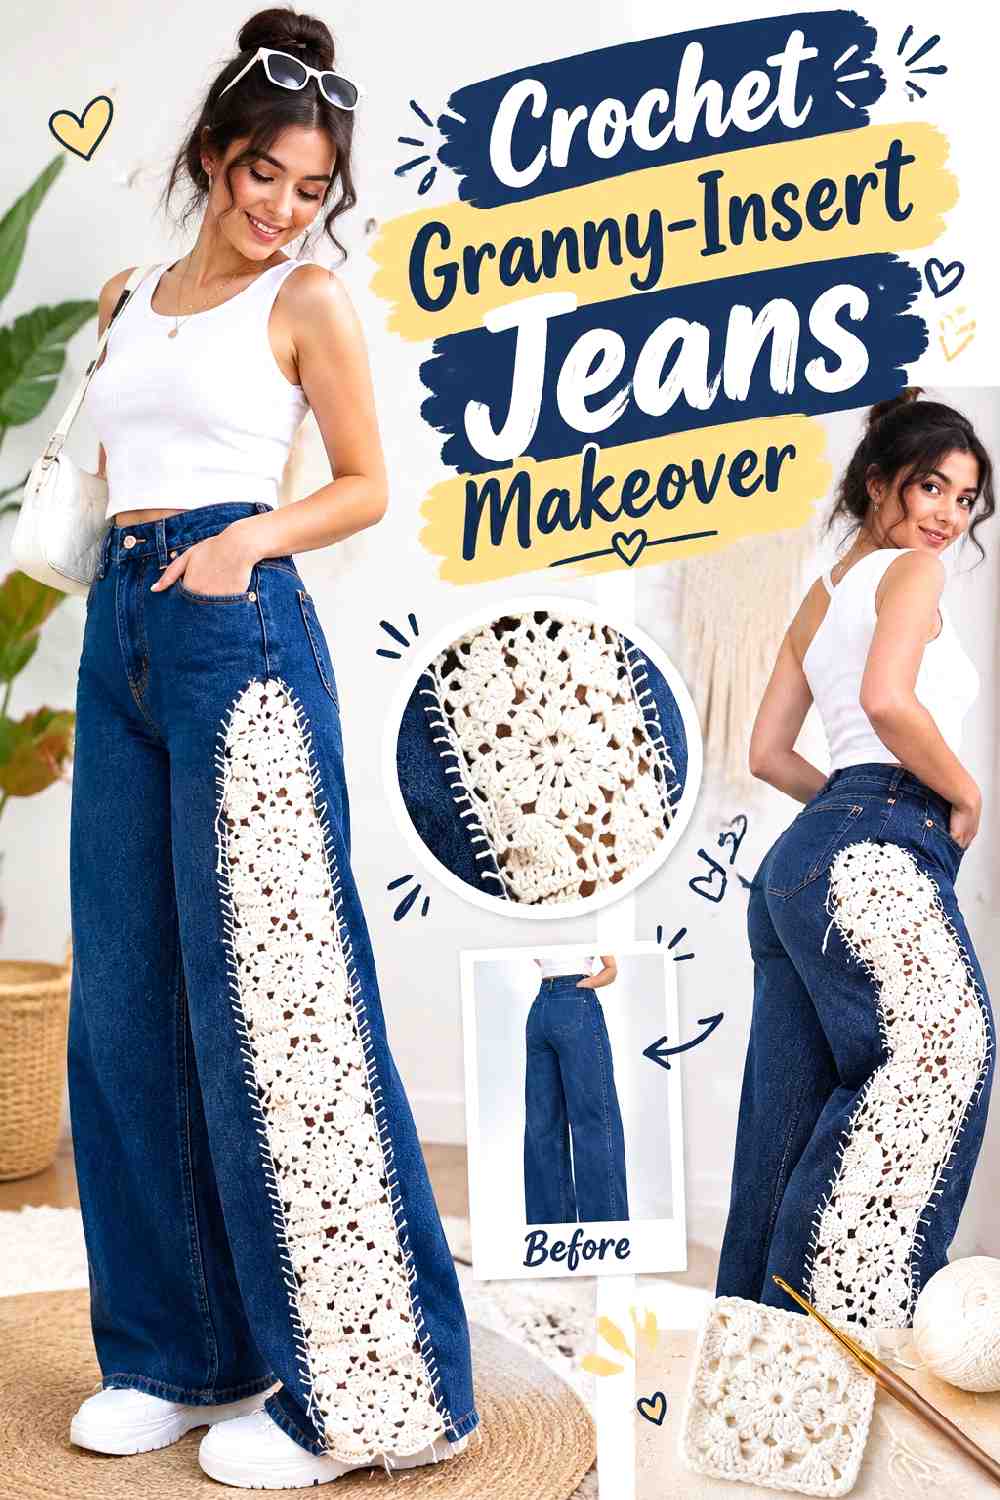
Granny-style inserts turn crochet into part of the denim construction rather than placing decoration on top. The knitting diary provides the tutorial source for this jeans transformation.
Because sections of denim are replaced or opened, this project requires more planning than a sewn-on motif. Placement affects both the look and how freely the jeans bend.
Let the Crochet Determine the Opening Size
Make and block the motif before finalizing the cutout whenever possible.
If the denim opening is larger than the finished crochet, solving the gap can distort the insert. If the motif is much larger, forcing it into a smaller space can make the surrounding jeans pucker.
Keep Dense Inserts Away From Awkward Flex Points
The knee and hip repeatedly change shape while walking and sitting.
A dense square that feels comfortable on the lower leg may become restrictive across a joint. Try the motif in several positions before deciding that the most visually dramatic location is also the most wearable.
Creator Credit: The knitting diary
14. Crochet Flower Applique Jeans Refresh
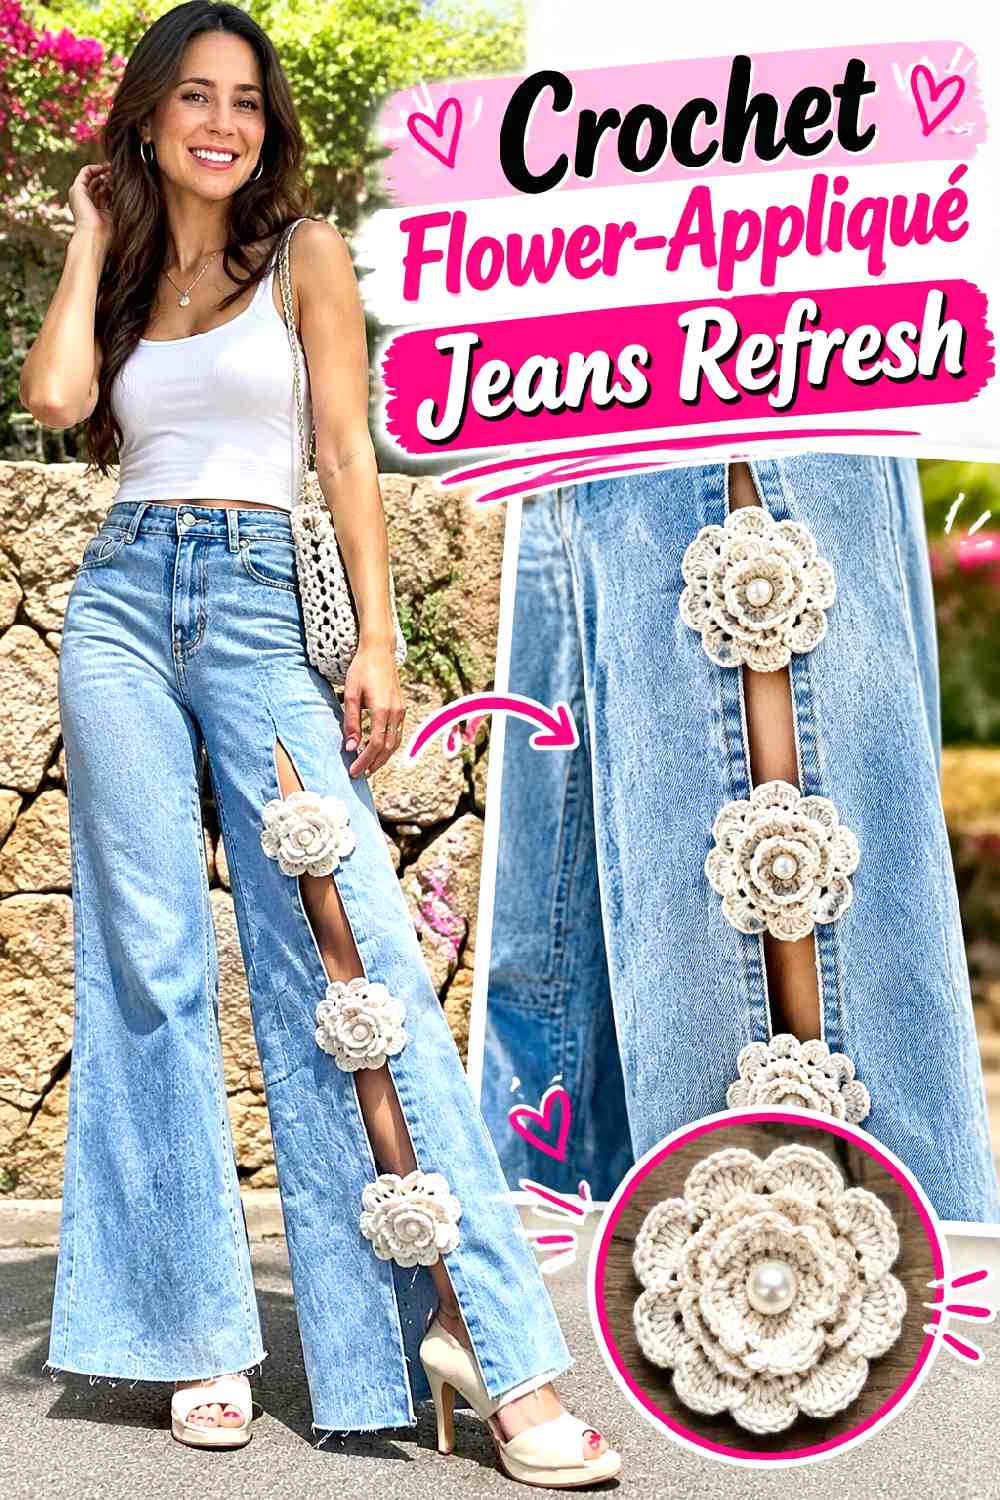
Crochet flowers create a lower-risk denim update because the original jeans can stay structurally intact. Maison Saint Bonnet supplies the tutorial reference for adding crochet floral details to denim.
A small cluster near a pocket creates a different effect from motifs distributed down one leg, so placement becomes the main design decision.
Arrange the Entire Cluster Before Sewing
Make enough motifs to see the intended composition instead of attaching the first flower immediately.
Lay the jeans flat, photograph several arrangements, and then view them from a normal distance. This helps reveal when the design is too concentrated around pockets or seams.
Avoid Areas With Constant Abrasion
Raised petals can catch or flatten more quickly in high-friction locations.
Outer-leg and pocket-adjacent placements may behave differently from inner thighs or areas that repeatedly rub against a bag. Choose position with daily wear in mind, not only the flat-lay appearance.
Creator Credit: Maison Saint Bonnet
15. Crochet Statement Patch Denim Jeans Update
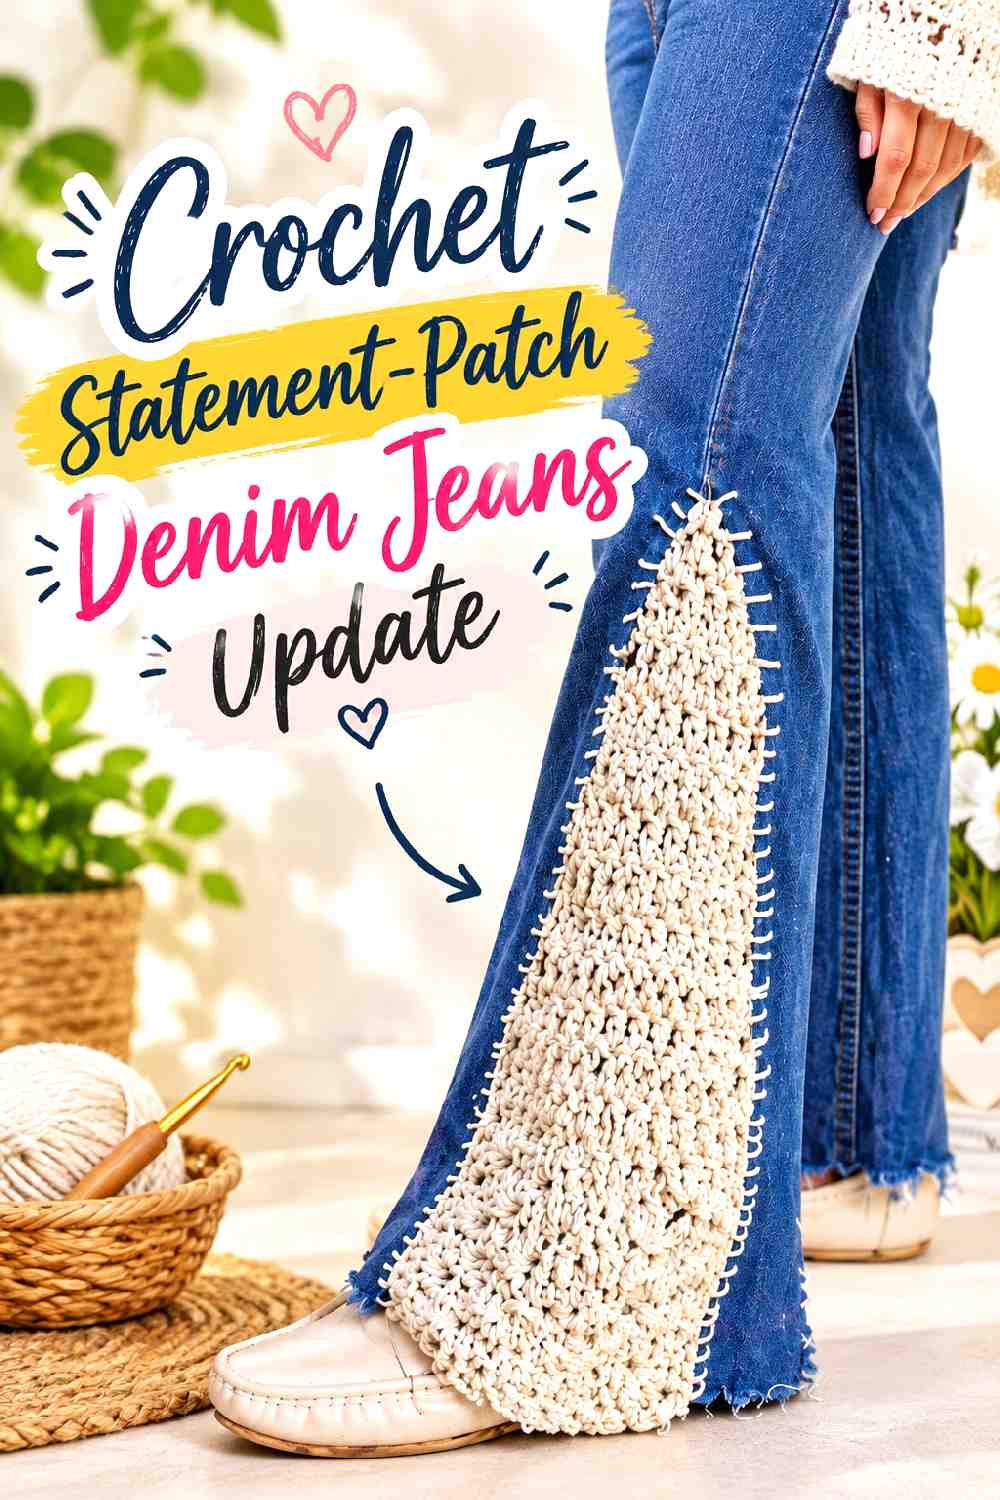
A crochet patch can turn plain or aging jeans into a more graphic fall piece without requiring a complete panel replacement. Hooked Creations.”Handmade With Love” demonstrates an old-jeans transformation using crochet as a visible denim design feature.
This route sits between a tiny appliqué and a full cutout insert. It is useful when you want the crochet to be clearly visible but do not need to reconstruct the entire leg.
Decide Whether the Patch Is Decorative or Structural
A motif covering healthy denim has a different job from one covering an actual hole.
When repair is involved, inspect beyond the visible damage and make sure the attachment reaches fabric strong enough to support it. Decorative placement gives you much more freedom because the underlying denim remains intact.
Test the Patch While Sitting
A flat leg section changes shape when you bend at the knee or hip.
Temporarily pin the crochet in place and move normally before final attachment. If the patch feels stiff or creates tension in the surrounding denim, shifting it slightly can make the finished jeans far more comfortable.
Creator Credit: Hooked Creations.”Handmade With Love”
16. Crochet Panel Pants To Skirt Upcycle
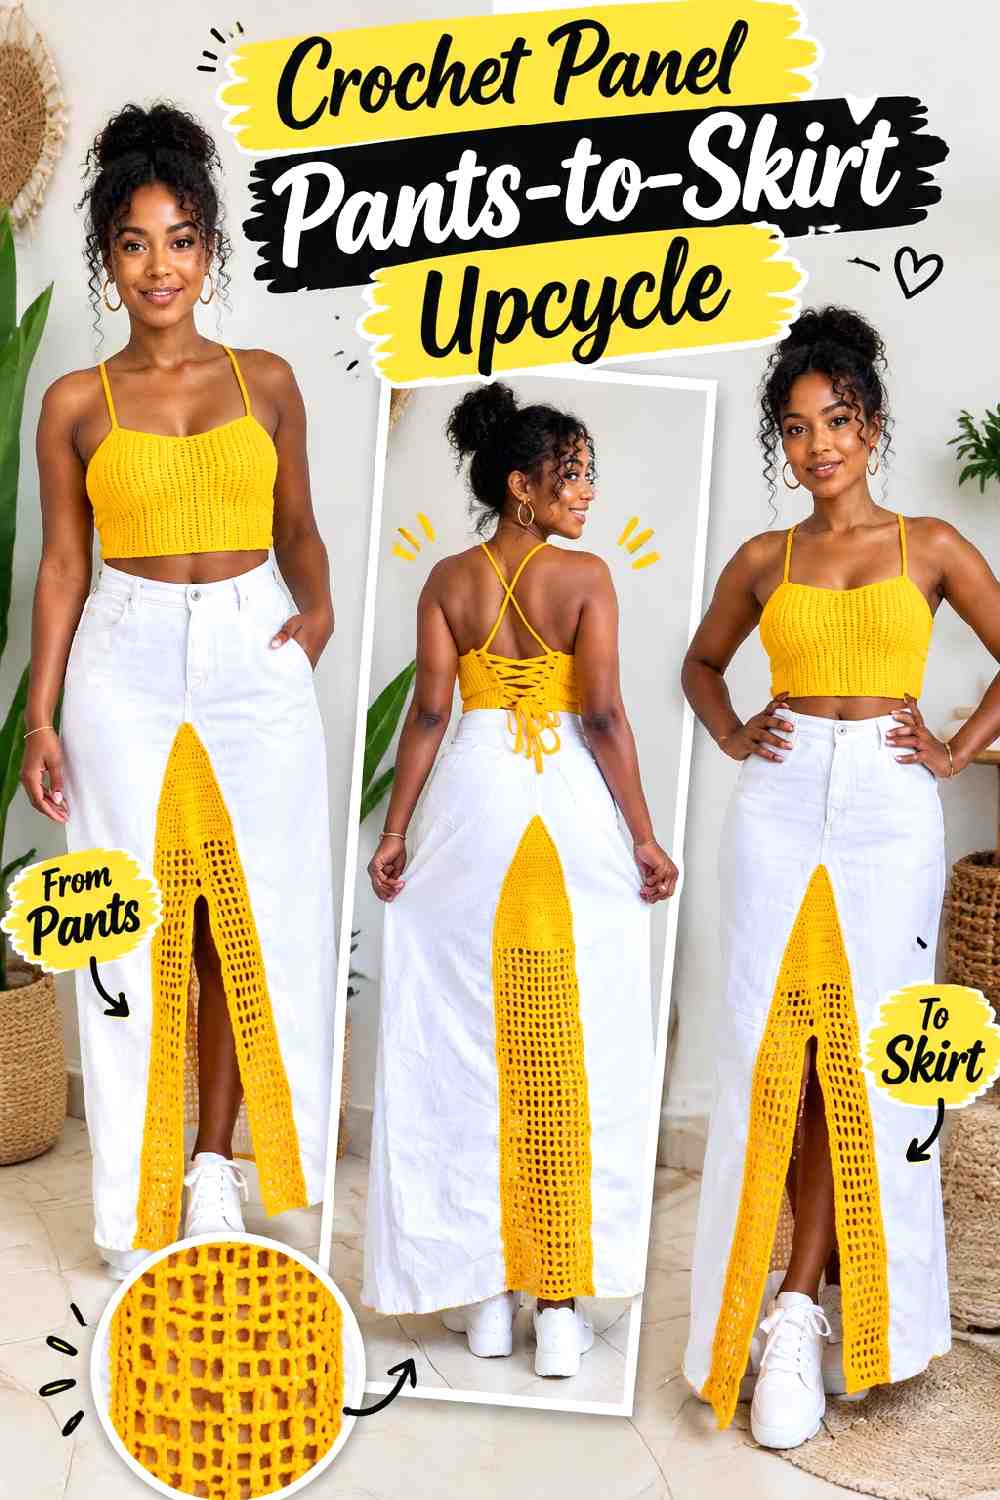
This alteration goes beyond decoration by changing the garment category altogether. LaDenser Crochets demonstrates transforming an old pair of pants into a skirt with crochet incorporated as a panel detail.
It can be especially useful when the waistband and upper portion still fit but the trouser legs are damaged, dated, or simply no longer part of your fall wardrobe.
Preserve the Fit You Already Know Works
The waistband and upper hip area are valuable because they already contain the garment’s engineered fit.
Avoid changing those areas unnecessarily while rebuilding the lower portion. Try the developing skirt on periodically because changes below the hip can still affect how the garment hangs above it.
Let the Crochet Panel Control Movement
A skirt panel needs enough flexibility for walking and sitting.
Consider where the crochet sits and how widely the skirt needs to open in motion. A dense panel can behave differently from the surrounding woven fabric, so test movement before finalizing the lower shape or attachment.
Creator Credit: LaDenser Crochets
17. Crochet Scalloped Edge Cardigan Refresh
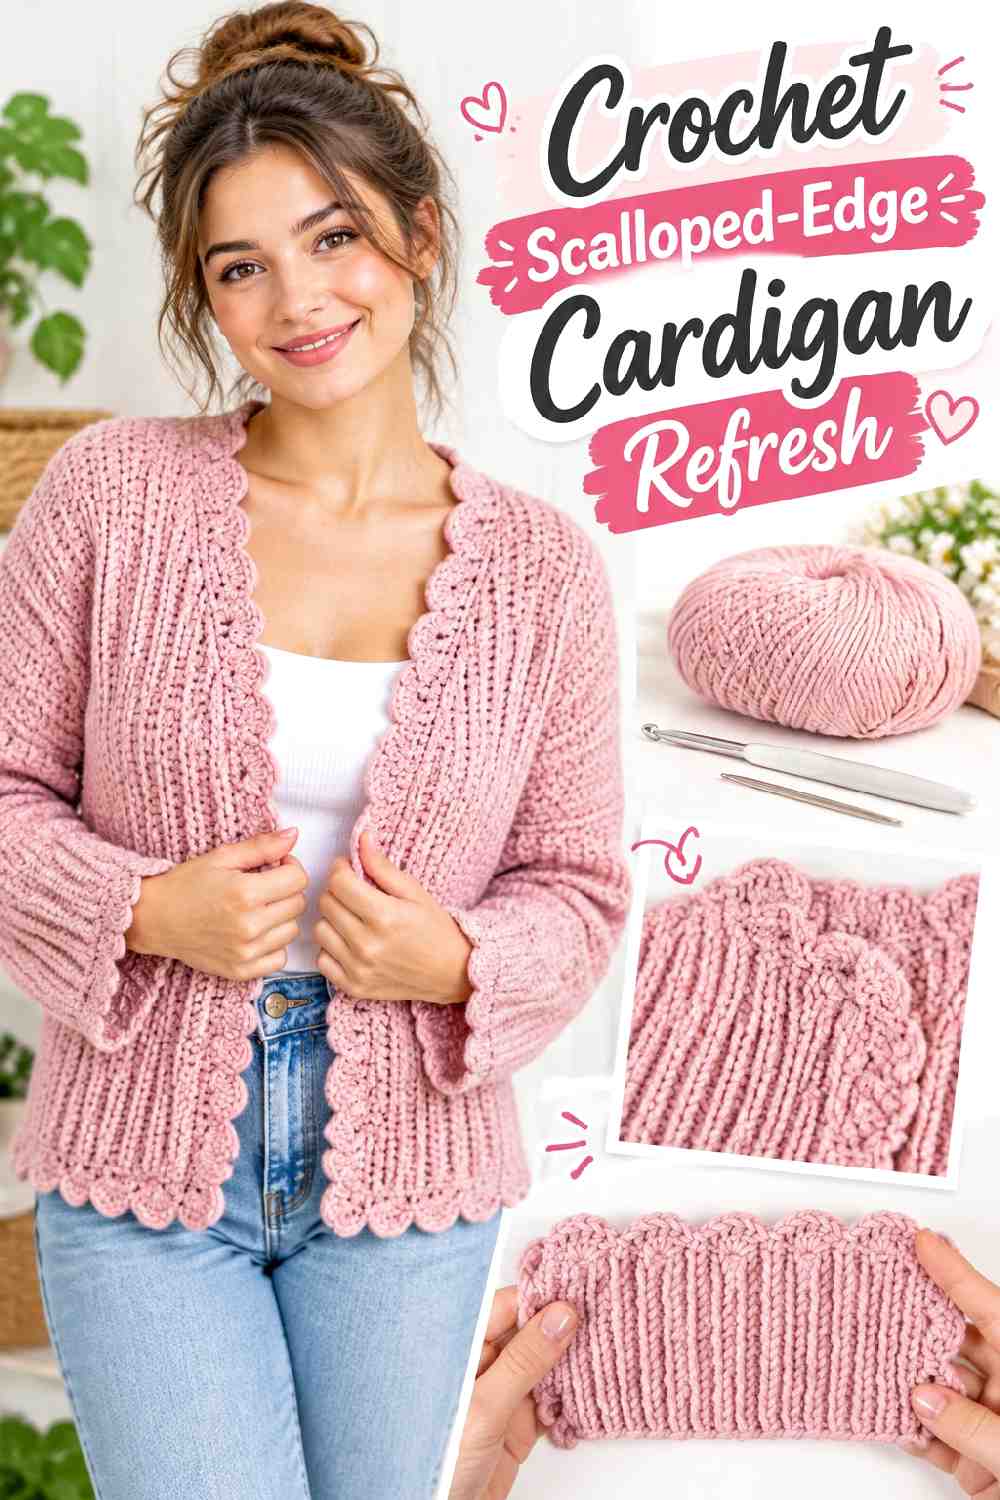
A scalloped border offers one of the less invasive ways to update a cardigan for fall. It can frame the front opening, finish the cuffs, or create a decorative lower edge without changing the underlying garment construction. WOOLANDTHEGANG provides the crochet edging tutorial reference for this style of finish.
This works particularly well when the cardigan already fits and only needs a clearer handmade detail.
Start With an Edge That Is Already Stable
Scallops will not automatically correct a cardigan opening that has stretched or become wavy.
Look at the proposed attachment line while the cardigan hangs. If the base edge twists before crochet is added, address that problem first rather than expecting the decorative border to conceal it.
Remember That Scallops Add Visual Width
A curved border projects beyond the original edge.
Along a front opening this can create a stronger frame; around the hem it can make the lower body appear fuller. Test a short section or temporary mock-up before repeating the treatment everywhere.
Creator Credit: WOOLANDTHEGANG
Choosing the Right Fall Upcycle
For the smallest commitment, start with the Peter Pan collar, flower appliqués, scalloped edging, or a coordinated collar-and-cuff refresh. These keep most of the garment intact and make it easier to judge the crochet before permanent attachment.
The middle-ground options are the shirt hem extension, jeans patch, side-panel T-shirt, and freeform denim decoration. They visibly change the garment but can preserve most of its original construction.
Replacement sleeves, motif yokes, cutout jeans inserts, back panels, hoods, and the pants-to-skirt conversion require more planning because crochet becomes part of the garment’s structure. Those projects make sense when the piece is worth saving and you are comfortable changing its original construction.
Conclusion
A useful crochet upcycle starts with the clothing you already have rather than with a decorative idea looking for somewhere to go.
If an old sweatshirt still has a great body, replacement sleeves can make the most of it. If your jeans only need a focal detail, flowers or a patch avoid unnecessary reconstruction. A shirt that has become too tight may benefit more from side panels than from embellishment, while a cardigan you already wear can gain a completely different personality from a hood, collar, or back panel.
For any project that involves cutting, replacing structural sections, or fitting crochet around an existing garment, use the original creator tutorial for the exact construction method and test the alteration before making irreversible changes.
Frequently Asked Questions
What kinds of clothes are good candidates for a fall crochet upcycle?
Look for garments with useful sections that are still structurally sound. Denim jackets with a good torso, sweatshirts with intact necklines, shirts that fit through the shoulders, and sweaters with stable bodies can all provide workable starting points. Widespread thinning or failing seams are signs that crochet may only move the problem rather than solve it.
How do I stop crochet additions from stretching a sweatshirt or cardigan?
Keep the added weight appropriate for the base garment and test the alteration while the clothing is hanging. Large sleeves, hoods, pockets, and motif panels create more pull than narrow edging or a small appliqué. Temporary pinning or basting can reveal shoulder sagging and neckline distortion before permanent attachment.
Should crochet motifs be blocked before attaching them to clothing?
Blocking can be especially useful when motif dimensions determine a cutout, yoke, panel, or repeated layout. Compare the crochet in its intended finished state with the actual garment before cutting fabric or joining multiple motifs permanently.
What should I check before cutting denim for a crochet insert?
Make sure the crochet piece and proposed opening are compatible in size, leave sound denim around the attachment area, and consider how the location moves when worn. A placement across a knee behaves differently from one farther down the leg.
Can I combine different fiber types in one upcycled garment?
Different fibers can be combined, but their stretch, weight, and care requirements may differ. Check both the original clothing label and the yarn label before joining them permanently, and plan care around the more restrictive material when necessary.
How can I make a crochet upcycle feel appropriate for fall without relying only on autumn colors?
Focus on function and layering. Replacement sleeves, hoods, longer hems, sweater cuffs, denim panels, and relaxed T-shirt refashions can all change how useful a garment feels in cooler weather. Color can support that direction, but construction, texture, coverage, and compatibility with other layers usually matter more.