Halloween blankets can go in very different directions. Some turn a single pumpkin, ghost, skull, or spiderweb into the focal point, while others build the theme through rows of texture, granny squares, bold striping, or a full sampler of spooky motifs. Construction matters just as much as the artwork because it changes how portable the project is, how much joining or color management it requires, and how easily the finished blanket can be adjusted.
The 21 ideas below cover round blankets, C2C designs, filet silhouettes, mosaic sections, mile-a-minute strips, modular squares, sampler throws, and quieter autumn options for readers who want seasonal color without an obvious character motif. Each section also highlights practical decisions to check before committing to a larger project.
Quick List
- Crochet Diagonal Spooky-Stripe C2C Throw
- Crochet Round Spiderweb Ripple Blanket
- Crochet Allover Ghost Statement Throw
- Crochet Jack-O’-Lantern Graphgan Blanket
- Crochet Trick-or-Treat Icon Sampler Blanket
- Crochet Pumpkin-Spice Even-Moss Throw
- Crochet Monster-Face Halloween Block Blanket
- Crochet Mile-a-Minute Spooky Stripe Throw
- Crochet Long-Format Halloween Square Afghan
- Crochet Classic Halloween Granny-Square Throw
- Crochet Pumpkin Grid Texture Blanket
- Crochet Bobble-and-Stripe Spooky Sampler Blanket
- Crochet Pumpkin Filet Silhouette Blanket
- Crochet Gothic Skull Center-Out Blanket
- Crochet Retro Haunted Video-Store Blanket
- Crochet Spooky-Spider Mosaic Strip Blanket
- Crochet Autumn Jacob’s-Ladder Spooky-Season Throw
- Crochet Fall Ripple Spooky-Season Afghan
- Crochet Ghost Granny-Square Grid Blanket
- Crochet Skull Granny-Square Patchwork Blanket
- Crochet Black-Cat Filet Panel Blanket
Choose the Construction Before the Halloween Motif
The picture may attract you first, but construction often determines whether you will enjoy making the blanket. C2C and graph-style projects suit readers who like watching an image emerge while managing color areas. Granny squares and mile-a-minute strips divide a large blanket into portable sections, although they add joining and finishing work later. Filet crochet creates imagery through open and solid areas, so stitch definition and blocking become especially noticeable.
A center-out or round blanket behaves differently again: increasing and overall shape are part of the design rather than simply determining length. Sampler and crochet-along projects offer more stitch variety, but they also require careful attention to the dimensions of each completed section. Choose based on the kind of repetition, color management, and finishing you actually want—not only the Halloween graphic.
Think About Weight, Drape, and Seasonal Use
A Halloween blanket does not automatically need to be thick. Super-bulky strip construction can produce a substantial, cozy throw, while sport-weight filet crochet creates a lighter-looking piece with more visible negative space. Dense colorwork and heavily textured stitches can also add weight as the blanket grows.
Before substituting yarn, decide whether the finished piece is primarily for sofa use, decorative display, a lap blanket, or a larger bed covering. Staying within the yarn category and gauge information supplied by a creator is the safest route when you want a similar result. If you change fibers or weights, make a swatch and evaluate both dimensions and flexibility. Dark Halloween colors can hide stitch definition, so textured designs may benefit from enough contrast and lighting to keep their raised details visible.
Plan Motifs and Joins Before Making a Large Stack
Motif blankets reward planning early. Block a sample square or panel first, then measure the actual fabric you produced rather than relying only on an assumed square size. If one blocked square measures 6 inches across, for example, five squares placed side by side would span about 30 inches before the effects of joining and outer borders are considered.
Also look at direction. Ghosts, skulls, cats, jack-o’-lantern faces, and text-like motifs usually have an obvious top, so a stack of completed squares should be labeled or laid out before joining. Mixed-motif samplers need another check: different stitch structures can reach slightly different dimensions even when they use similar yarn. Correct those differences before final assembly instead of asking a tight seam to pull mismatched pieces into line.
1. Crochet Diagonal Spooky Stripe CC Throw
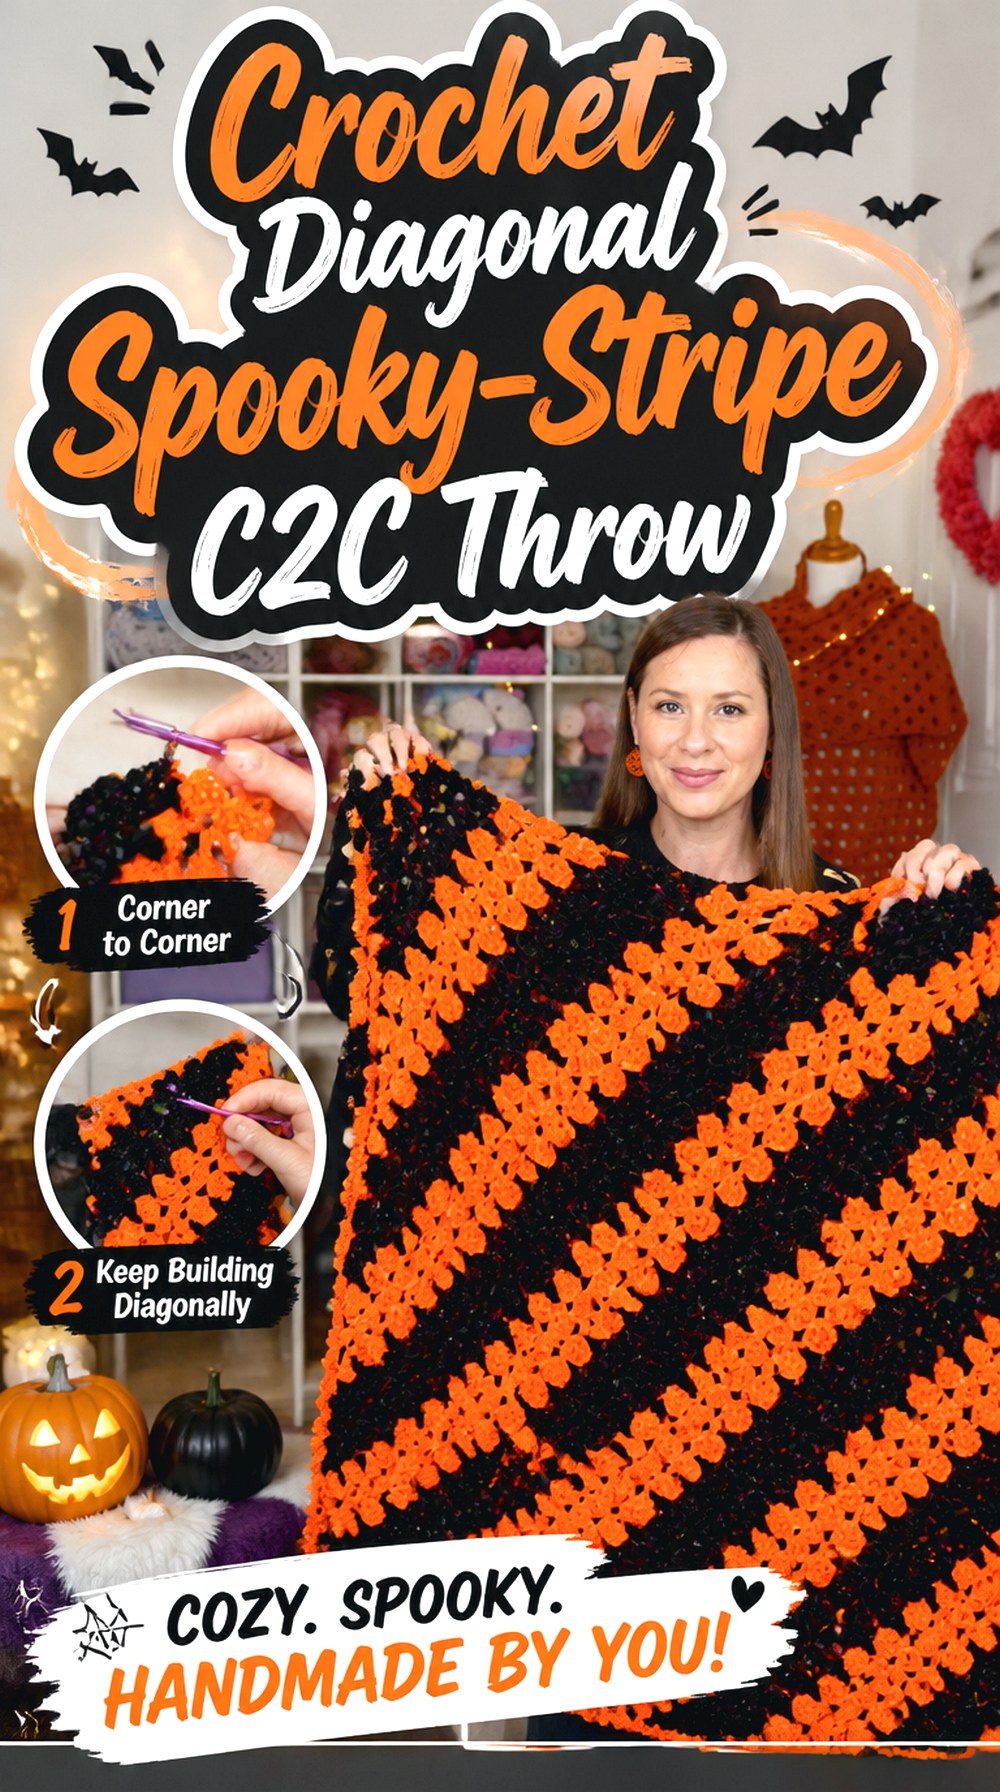
A diagonal C2C blanket gives Halloween color a graphic look without requiring a large character chart. Fiber Flux’s spooky blanket uses the corner-to-corner approach and emphasizes diagonal striping, making it a useful option when orange, black, cream, purple, or another seasonal palette is enough to establish the mood. The diagonal growth also makes the blanket visually different from ordinary horizontal stripe throws.
This route suits crocheters who enjoy building fabric in blocks and changing color periodically but would rather avoid outlining a complicated pumpkin or haunted-house picture. It can also transition into general fall decor more easily than a strongly character-based blanket.
Diagonal Growth Makes Proportions Easy to Watch
C2C construction lets you see both width and length developing from the corner, which is useful when you are trying to judge whether the blanket still suits the intended chair, sofa, or lap use. If you plan to alter the tutorial’s proportions, understand where increasing stops and decreasing begins before changing anything. That decision controls the finished shape.
Stripe Width Changes the Entire Mood
Thin alternating bands create a busier Halloween effect, while broader blocks of dark and warm colors make the blanket look calmer. Before starting, place the intended yarn colors beside one another in daylight. Black next to a very dark purple, for example, may read as one large dark area rather than two intentional stripes.
Original Tutorial and Creator Credit
Creator: Fiber Flux
2. Crochet Round Spiderweb Ripple Blanket
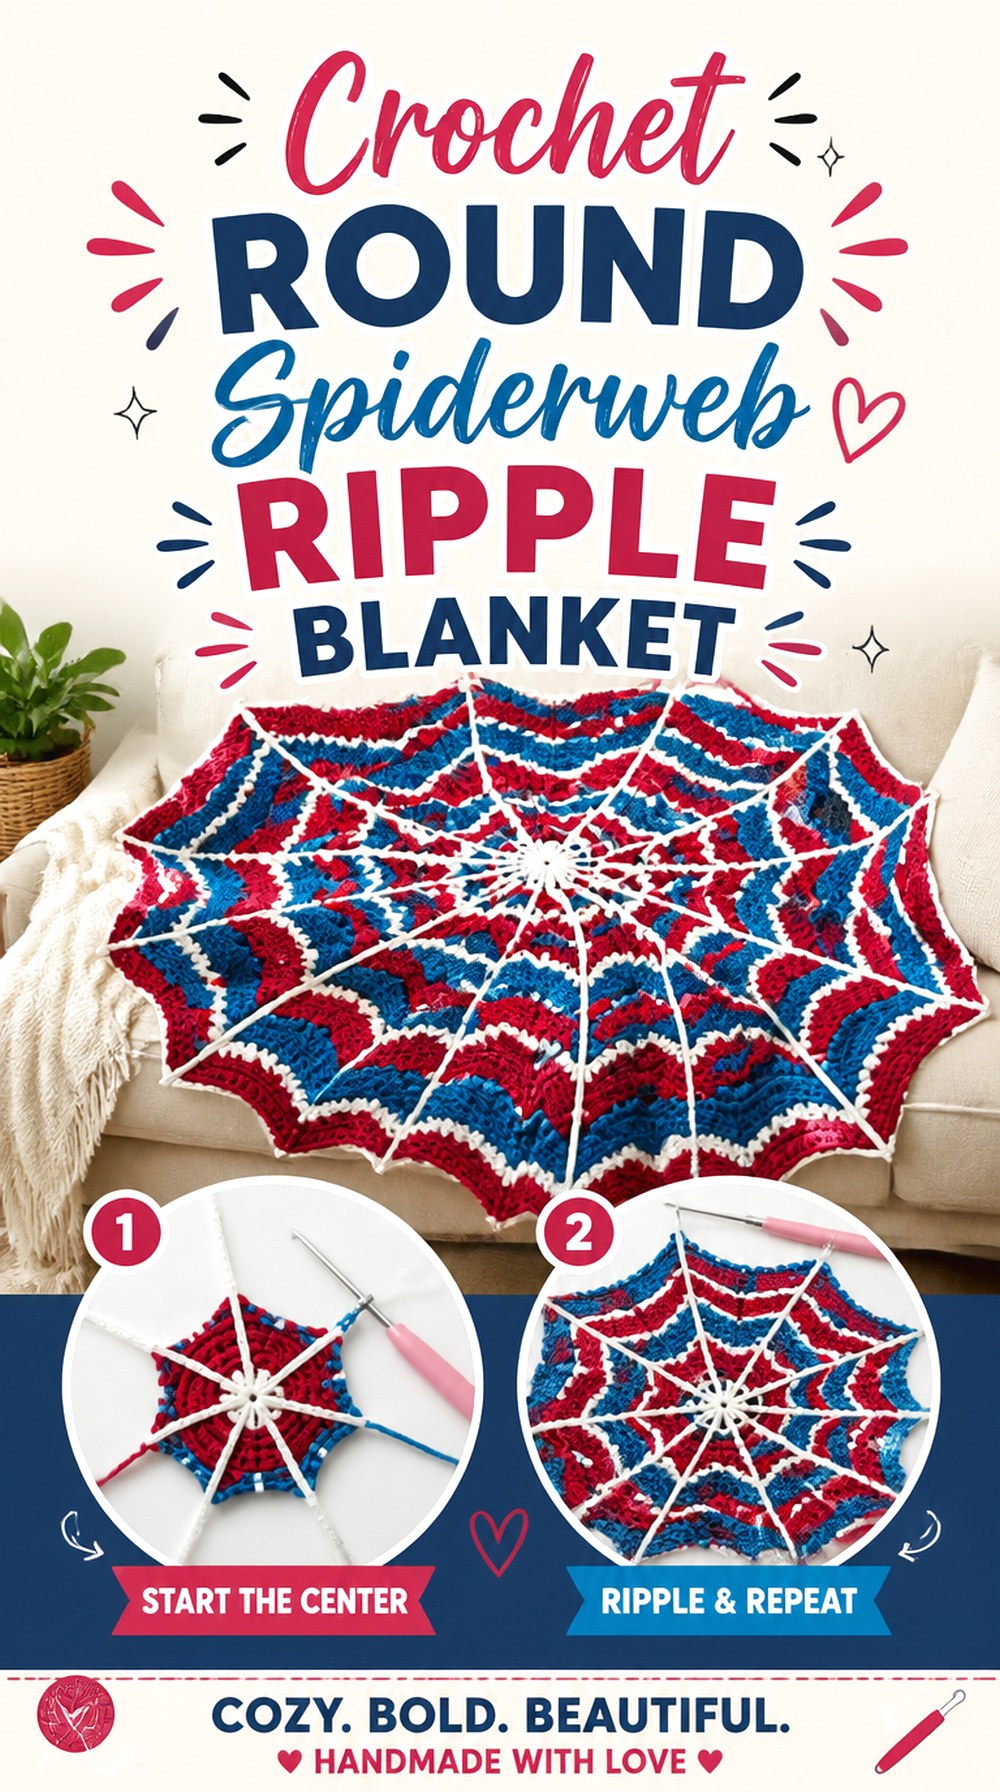
Instead of another rectangular throw, this project turns the blanket itself into a web. The Crochet Crowd tutorial uses a 12-point ripple form and adds lines radiating from the center to strengthen the spiderweb effect. That makes the silhouette part of the Halloween design rather than simply placing a web motif inside an ordinary rectangle.
A circular blanket can work especially well over the back of a chair, across a reading nook, or as a dramatic seasonal display. It may be less natural than a standard rectangle for neatly covering the full length of a sofa, so choose it because you want the statement shape.
The Outer Points Need Room to Show
A pointed ripple loses much of its visual impact when every edge is folded underneath furniture. Before committing to the shape, think about where the blanket will actually be displayed. A round design usually looks strongest when enough of the perimeter remains visible for the repeated points to read clearly.
Web Lines Should Sit on the Blanket, Not Distort It
The added radiating lines are important to the finished illusion, but decorative overlays should not pull the underlying ripple inward. Lay the work flat as you finish those details. If the center begins cupping or the points draw toward one another, reassess the tension before completing every spoke.
Original Tutorial and Creator Credit
Creator: The Crochet Crowd
3. Crochet Allover Ghost Statement Throw
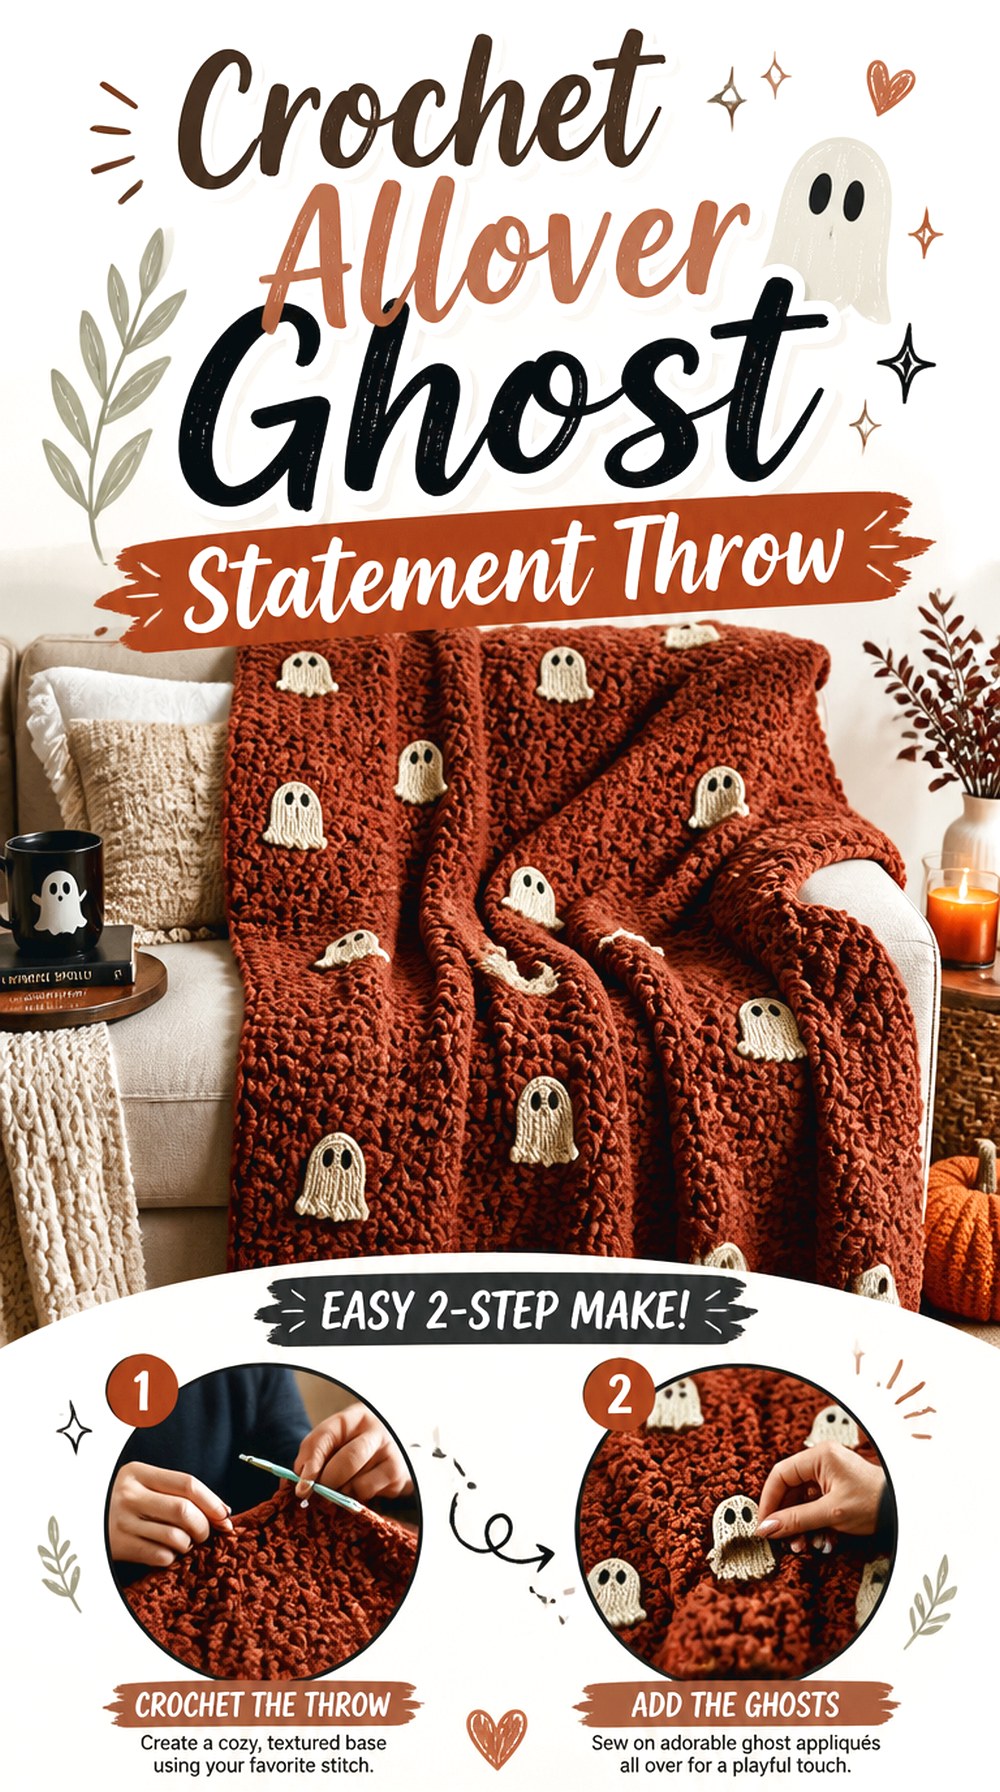
A ghost blanket creates an immediate Halloween focal point without depending on several unrelated motifs. OTH Crochet Nook’s tutorial is based on the popular decorative ghost-blanket look, giving this roundup a project where repeated ghost imagery carries the entire theme.
This style makes sense for someone who wants the blanket itself to be recognizable from across a room. Because the repeated pale ghosts need to remain distinct from their background, color contrast matters more here than it does in a subtle texture-only throw. A monochrome black-and-cream interpretation could feel more graphic, while a softer neutral background would create a quieter spooky-season effect.
Test the Ghost Contrast From Several Feet Away
A motif that looks clear while it is inches from your hook may disappear once the finished throw is viewed across a room. Before purchasing the entire yarn quantity, place your ghost and background colors together and step away. Strong value contrast usually matters more than choosing stereotypical Halloween colors.
Decide How Decorative the Blanket Needs to Be
If the blanket will be used frequently rather than mainly displayed, pay attention to how the motif fabric feels when folded and handled. Decorative details should not make one area substantially stiffer than another. Follow the creator’s construction for the intended result and check the yarn label before deciding how the finished blanket will be cleaned.
Original Tutorial and Creator Credit
Creator: OTH Crochet Nook
4. Crochet Jack O’ Lantern Graphgan Blanket
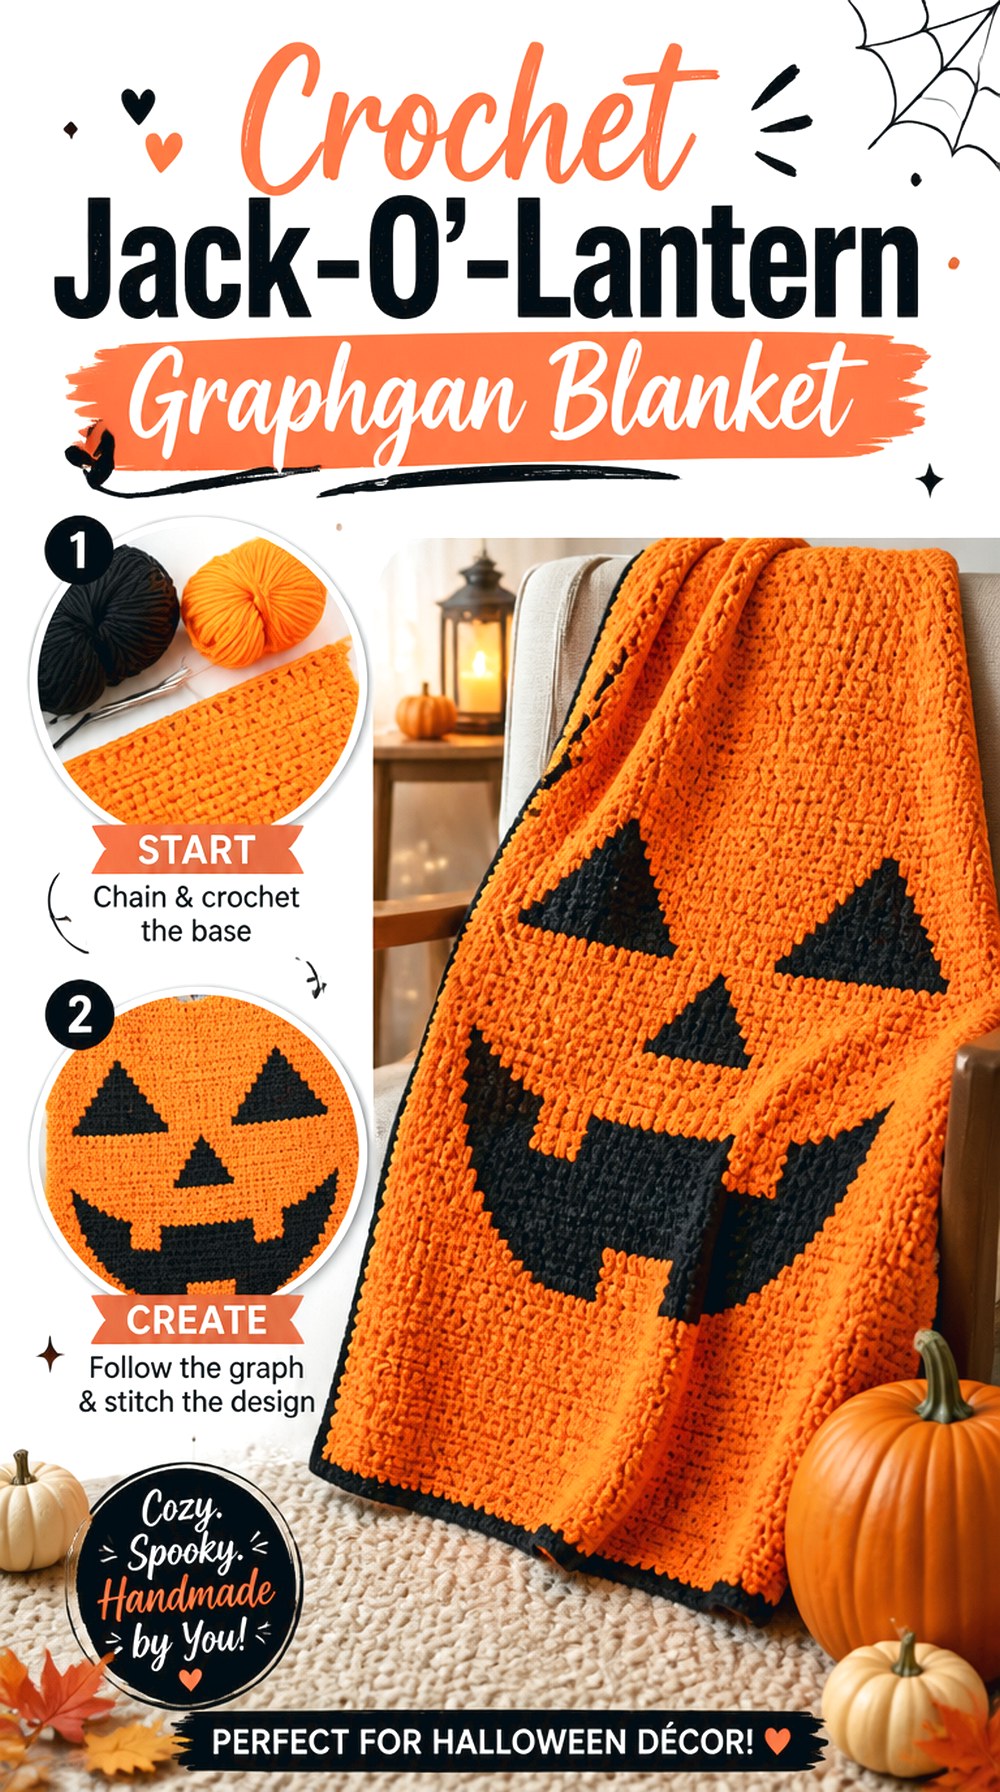
This jack-o’-lantern design takes the opposite approach from an allover motif blanket: one bold pumpkin face dominates the finished piece. The Yarnspirations tutorial with Repeat Crafter Me works from a chart and demonstrates color-changing considerations for the graphgan construction.
A large graphic like this gives Halloween decor strong visual impact without the joining work of dozens of squares. The trade-off is concentration during colorwork. Readers who prefer following a chart and watching an image develop may enjoy this more than repetitive modular construction, while those who dislike managing color changes may prefer stripes or textured motifs instead.
Keep the Face Readable Before Adding More Colors
The jack-o’-lantern works because its facial features have strong separation from the pumpkin field. If you change the palette, preserve that visual contrast first. A trendy muted orange can work, but pairing it with another mid-value shade may soften the expression too recessibly.
Chart-Based Blankets Reward Frequent Orientation Checks
When you work closely row by row, the design can become difficult to judge. Periodically lay the blanket down and view it from farther away. That simple checkpoint helps catch an incorrect color block while it is still close enough to correct, rather than after many additional rows have covered the mistake.
Original Tutorial and Creator Credit
Creator: Yarnspirations
5. Crochet Trick or Treat Icon Sampler Blanket
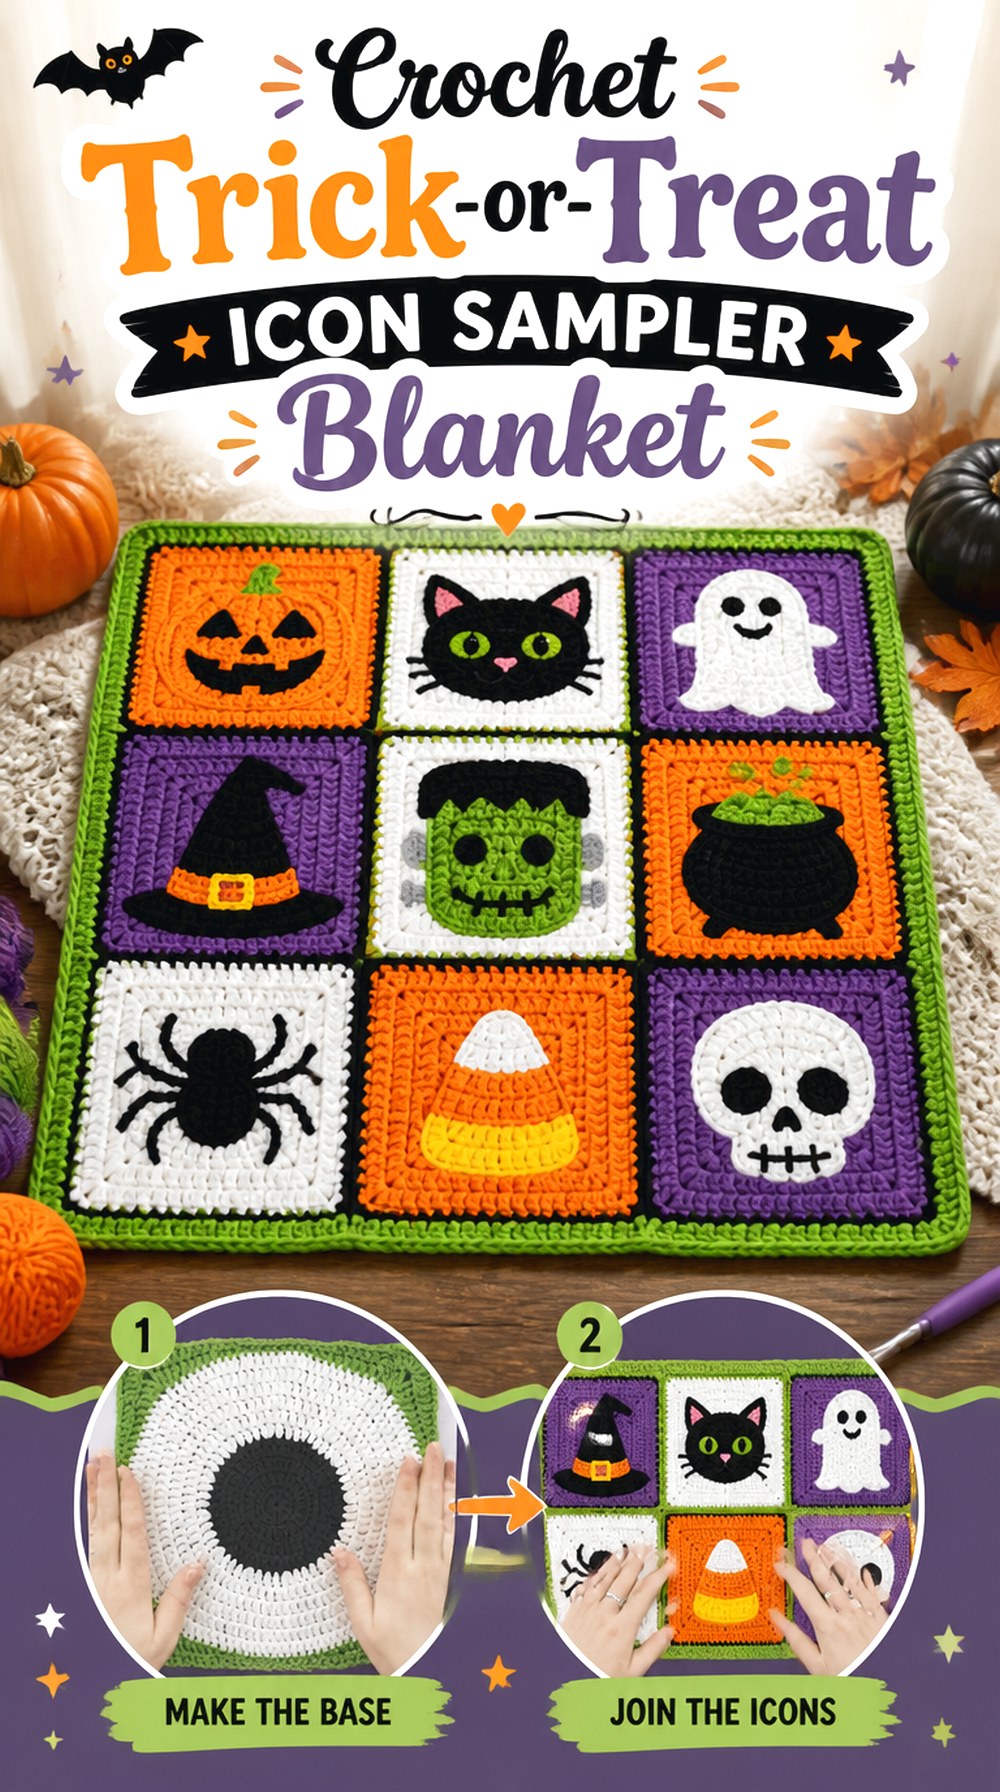
For readers who want more than one Halloween character, the Sirdar Trick Or Treat crochet-along creates a blanket from themed sections rather than repeating one picture. The opening tutorial includes full-moon corner squares featuring bats and cats, and the overall project continues as a multi-week CAL.
A sampler like this creates more visual variety than a uniform granny-square blanket, but that variety raises a practical issue: completed sections still need to cooperate during assembly. It suits someone who enjoys changing techniques and seeing several recognizable Halloween elements accumulate over time.
Consistent Square Size Matters More Than Fast Progress
When a sampler changes stitches or motifs, two squares can feel correct individually yet finish at slightly different dimensions. Check each completed section against the others after blocking. Correcting one inconsistent square is much easier than forcing an entire row into alignment during the final join.
A Crochet-Along Works Best With an Organization System
Because the project is divided into releases, store finished pieces with their orientation and section information. A simple photo of the intended arrangement can prevent later confusion. This matters particularly for directional imagery such as bats, cats, moons, faces, or lettering, where rotating one component is immediately noticeable.
Original Tutorial and Creator Credit
Creator: Knitsirdar
6. Crochet Pumpkin Spice Even Moss Throw
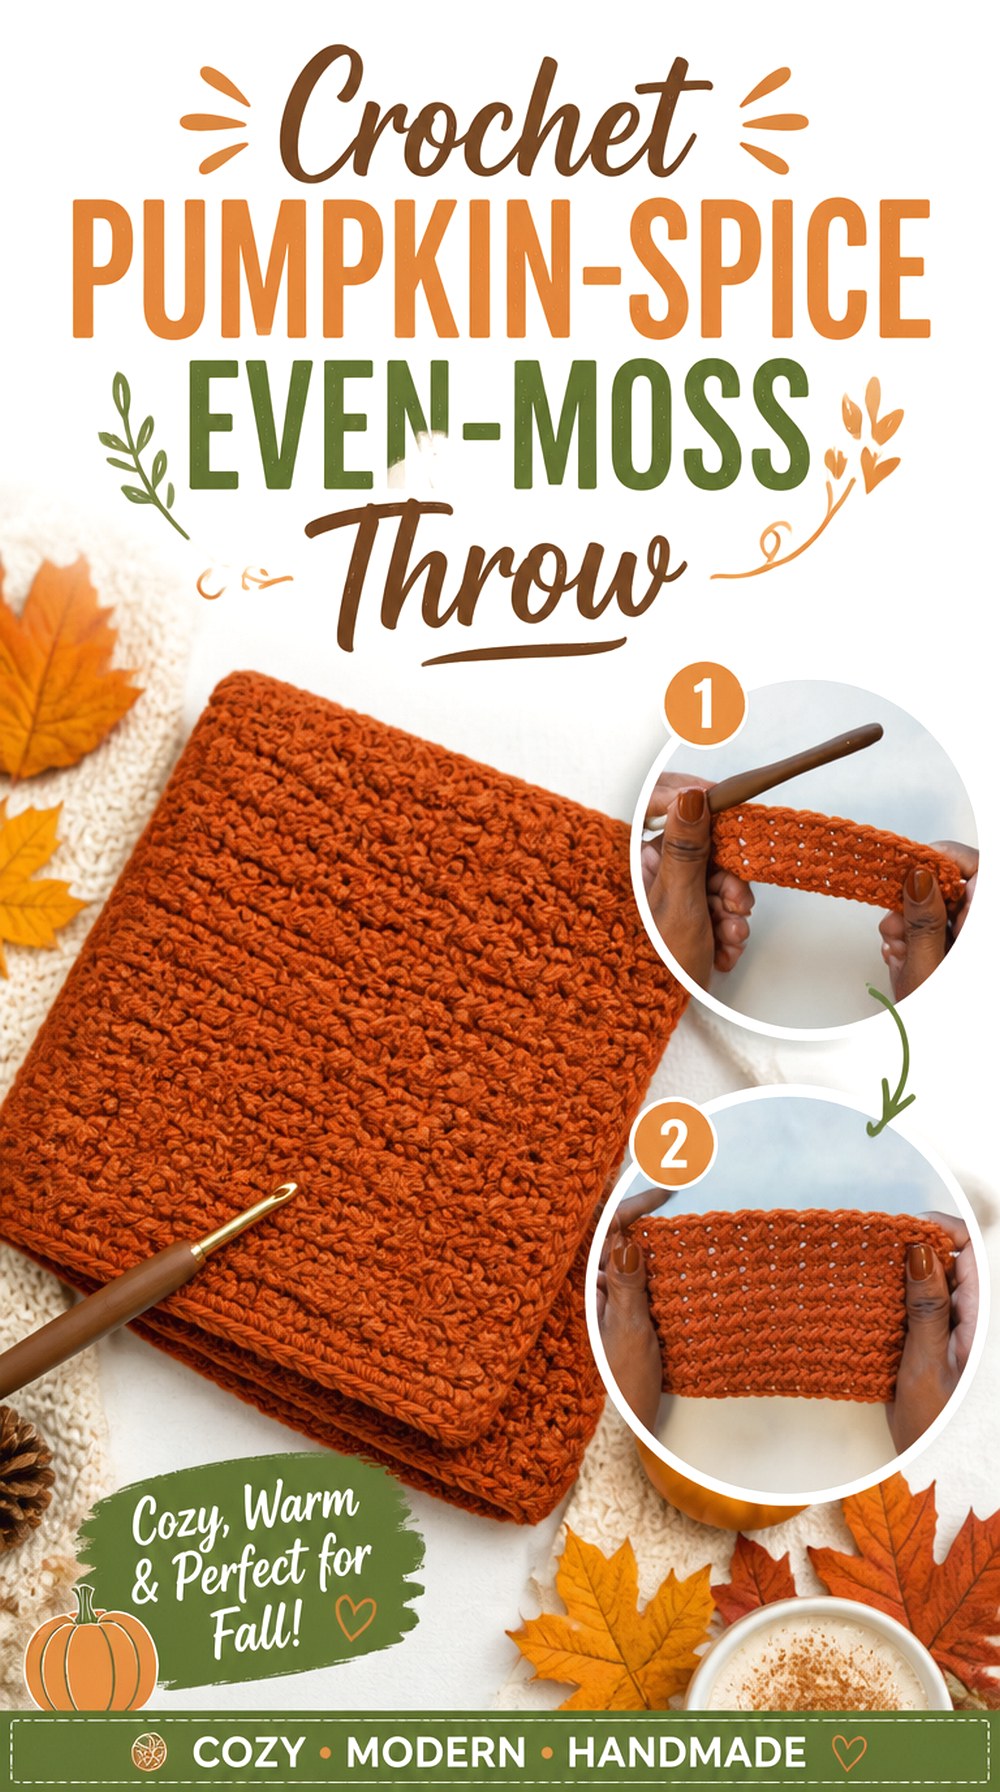
Not every spooky-season blanket needs ghosts or skulls. Beautiful Dawn Designs uses the even moss stitch for a textured Pumpkin Spice blanket, making this a calmer option for homes where fall colors need to work from September through Thanksgiving rather than only around Halloween.
The appeal is largely in texture and palette instead of an illustrated motif. That means yarn choice has a bigger visual role: subtle stitch definition can disappear in very fuzzy yarn, while a smoother yarn allows the alternating texture to show. It is also an easy style to recolor because there is no charted picture that depends on specific color placement.
Let Texture Carry the Design
When there is no large Halloween graphic, the fabric surface becomes the focal point. Look at a swatch under normal room lighting before committing to a very dark yarn. If all of the stitch shadows disappear, consider reserving the darkest color for borders or accents rather than the entire blanket.
This Is the Easier Route to a Longer Seasonal Window
A pumpkin-spice palette can remain on a sofa long after overt Halloween decor comes down. If storage space is limited, this type of blanket may earn more use than a strongly themed jack-o’-lantern or skull throw. Choose the degree of seasonal specificity based on how long you realistically want the blanket displayed.
Original Tutorial and Creator Credit
Creator: Beautiful Dawn Designs
7. Crochet Monster Face Halloween Block Blanket
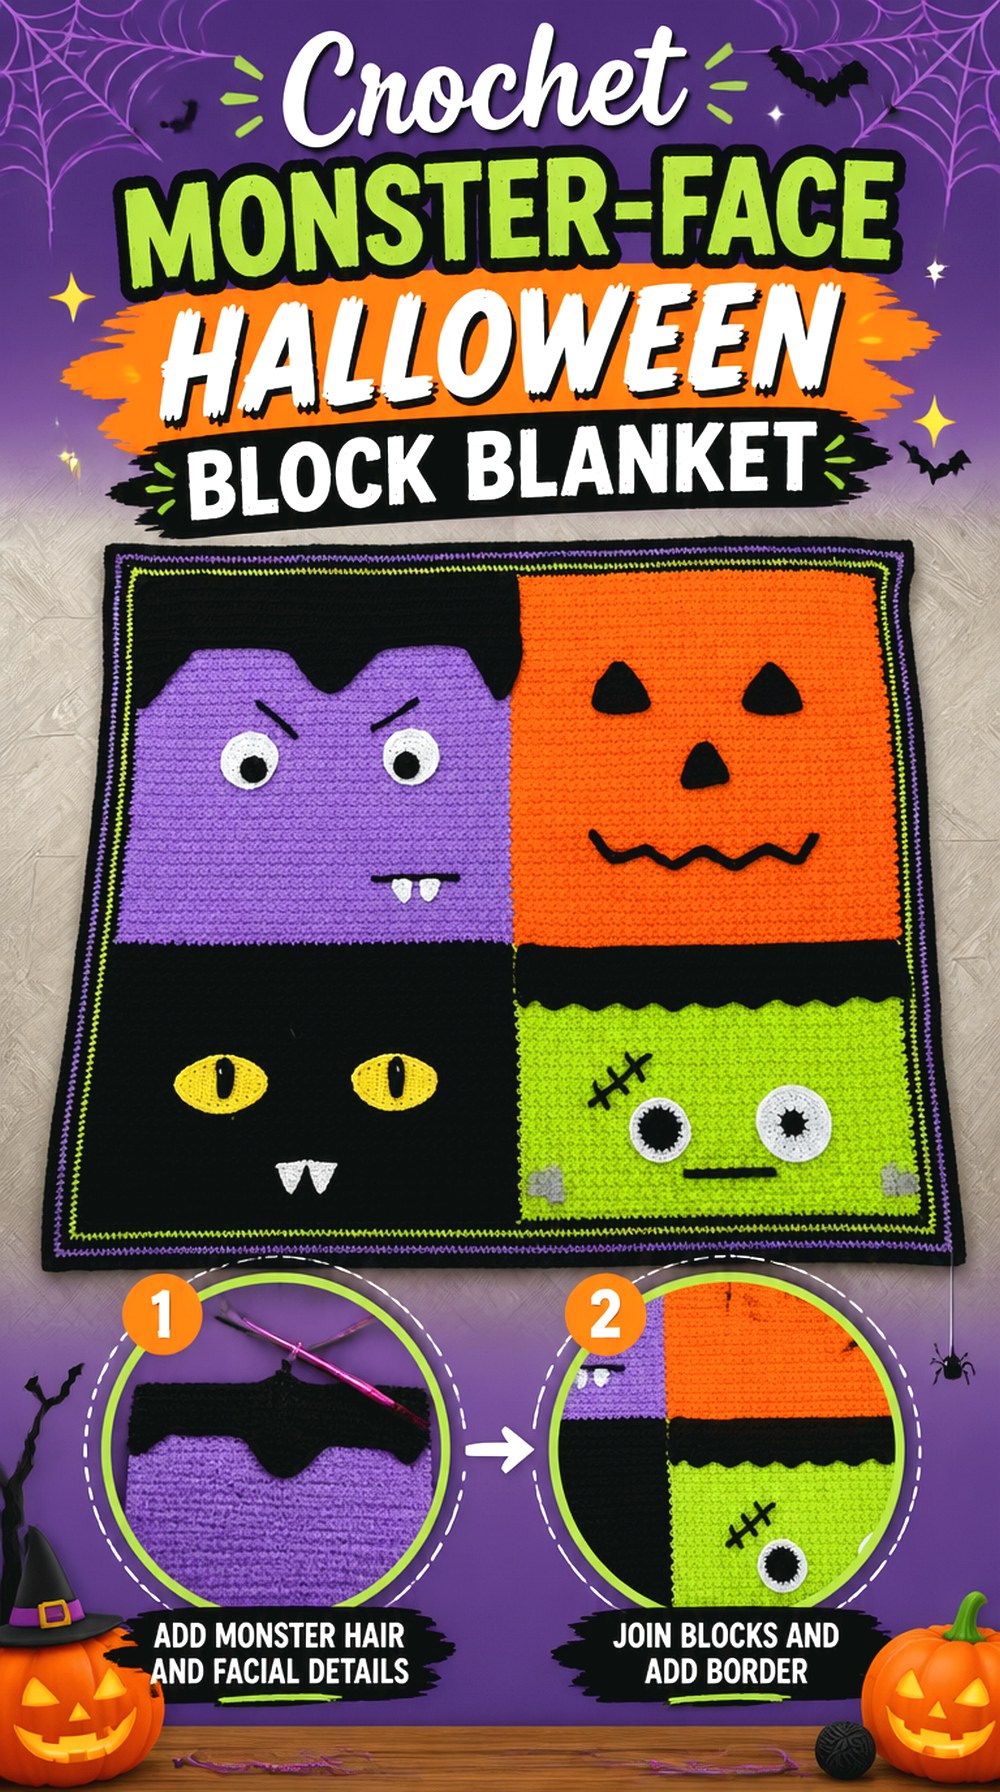
Maria’s Blue Crayon’s 2026 Halloween blanket combines a one-piece color-blocked background with separately crocheted facial embellishments. The finished design includes Halloween characters such as a pumpkin, vampire, black cat, and Frankenstein-style face, so it offers a completely different look from blankets made from dozens of individually joined motif squares.
That hybrid construction is useful when you like the appearance of distinct blocks but do not necessarily want seams between every background section. The character pieces add dimension afterward, which also means attachment quality deserves as much attention as the base blanket itself.
A One-Piece Base Removes Some Joining Work
Large color sections can mimic the visual order of a block blanket while keeping the foundation continuous. The trade-off is that color changes happen while the main fabric is in progress rather than after a stack of independent squares has been completed. Decide which type of yarn management feels more comfortable.
Face Placement Deserves a Dry Run
Before permanently attaching the character details, lay every piece on the finished base and inspect the blanket from a distance. Small positioning changes can affect whether a face appears centered or tilted. Maria’s written guidance also discusses sewing embellishments as a more secure alternative to relying only on adhesive.
Original Tutorial and Creator Credit
Creator: Maria’s Blue Crayon
8. Crochet Mile a Minute Spooky Stripe Throw
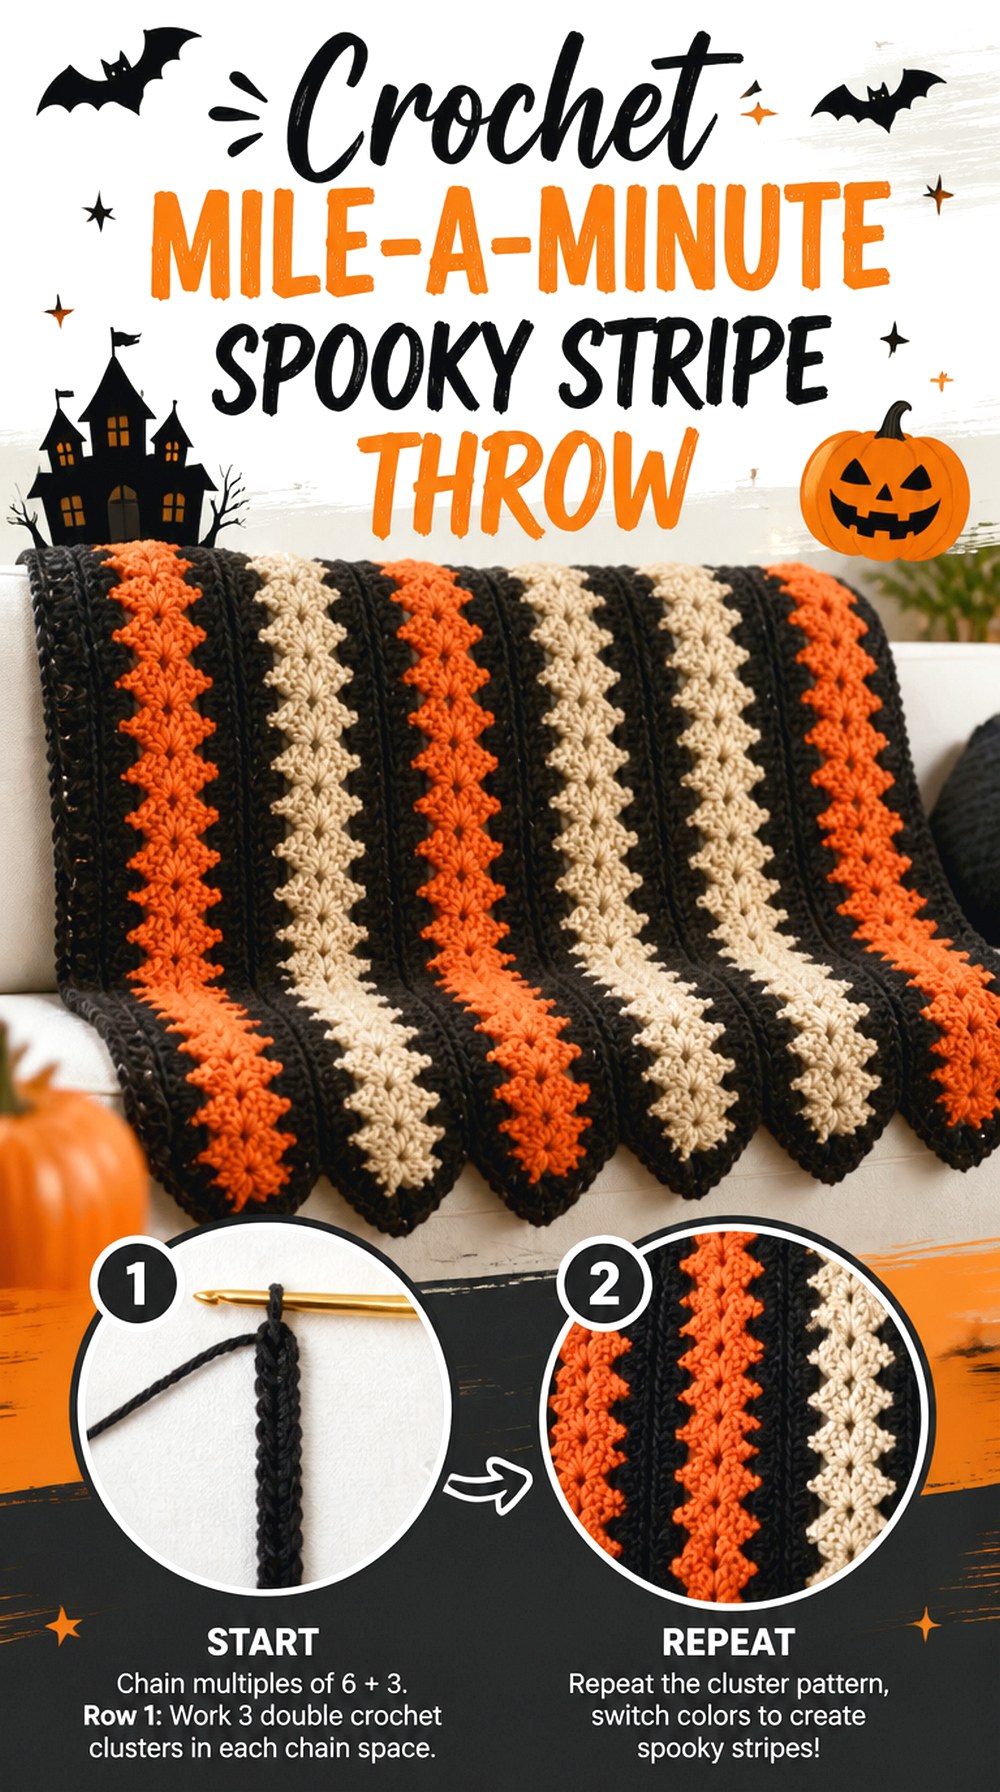
Maisie and Ruth’s Spooky Strips blanket uses classic mile-a-minute construction, with the throw worked as separate strips and joined afterward. The tutorial uses a super-bulky yarn and a pumpkin, oatmeal, and black palette, making the finished blanket visibly chunkier than many of the graphgan and filet options here.
This construction is useful if a full-width blanket becomes cumbersome on your lap while crocheting. Individual strips remain comparatively manageable, and the joining lines become a deliberate part of the final geometry. The trade-off is obvious: finishing is not over when the last strip is complete.
Strip Construction Keeps the Working Piece Portable
Making one narrow section at a time can be easier to transport and rotate than handling an increasingly large throw. It also creates natural progress milestones. Before making every strip, complete and measure one first so that any tension or yarn substitution issue is discovered before it has been repeated across the entire blanket.
Joining Tension Can Change the Finished Length
If seams are worked much tighter than the strips themselves, they can draw the blanket inward or make the joins feel stiff. Lay several connected strips flat before completing the whole assembly. The joined section should remain relaxed rather than forming ridges or contracted channels.
Original Tutorial and Creator Credit
Creator: Maisie and Ruth
9. Crochet Long Format Halloween Square Afghan
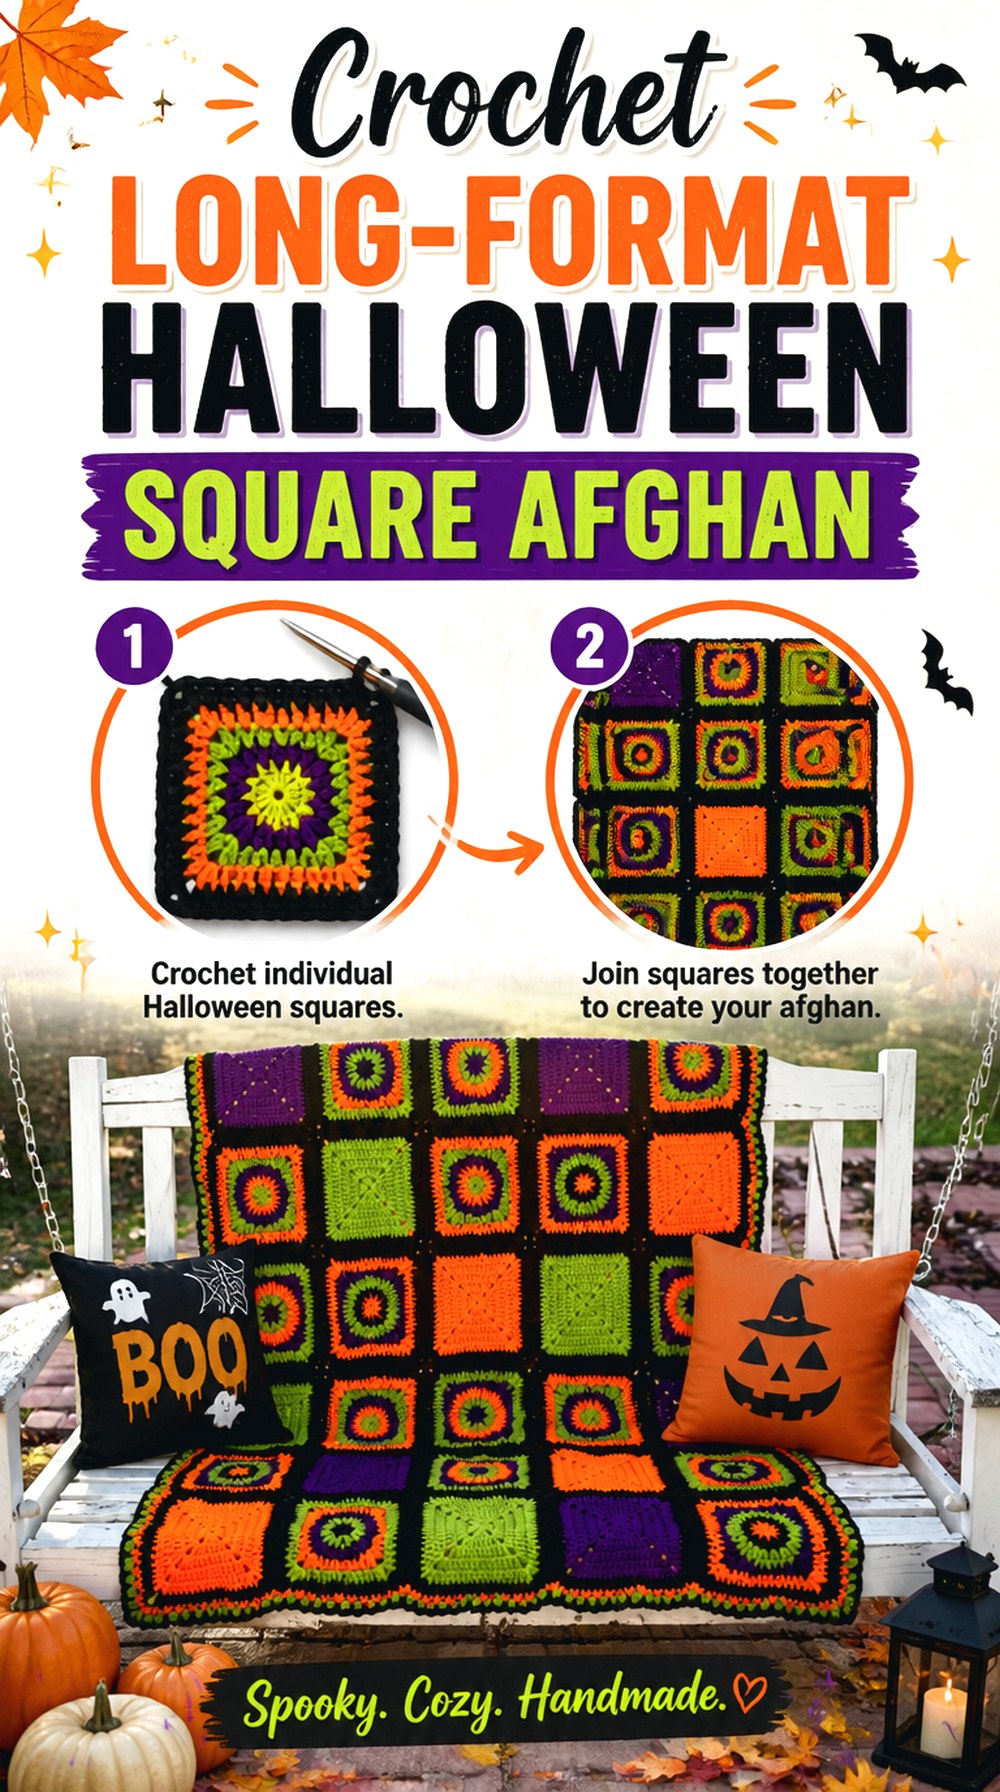
Pamela’s Adoring Crochet offers a Halloween afghan tutorial with noticeably long rectangular proportions, giving this collection an alternative to compact lap blankets and square motif throws. The project also involves assembling crocheted sections, so it is a useful choice for readers who prefer building a larger blanket piece by piece rather than maintaining one continuous panel on the hook.
A longer afghan can provide more leg coverage on a sofa, but proportion should be considered before casually adding or removing motifs. Changing only the number of rows of squares may create a shape that feels unusually narrow or wide.
Plan the Rectangle Before Multiplying Squares
Work backward from the intended display or use. If the blanket needs to cover a particular sofa seat or stretch comfortably over someone’s legs, compare the blocked dimensions of a finished section with the number of sections required in each direction. Include joins and borders in the final estimate rather than assuming squares touch edge to edge without added width.
Assemble on a Flat Surface When Possible
With a long modular afghan, a small orientation error can travel through several rows before it becomes obvious. Arrange the sections first, photograph the order, and then join. That checkpoint is especially helpful if multiple square colors or directional motifs are involved.
Original Tutorial and Creator Credit
Creator: Pamela’s Adoring Crochet
10. Crochet Classic Halloween Granny Square Throw
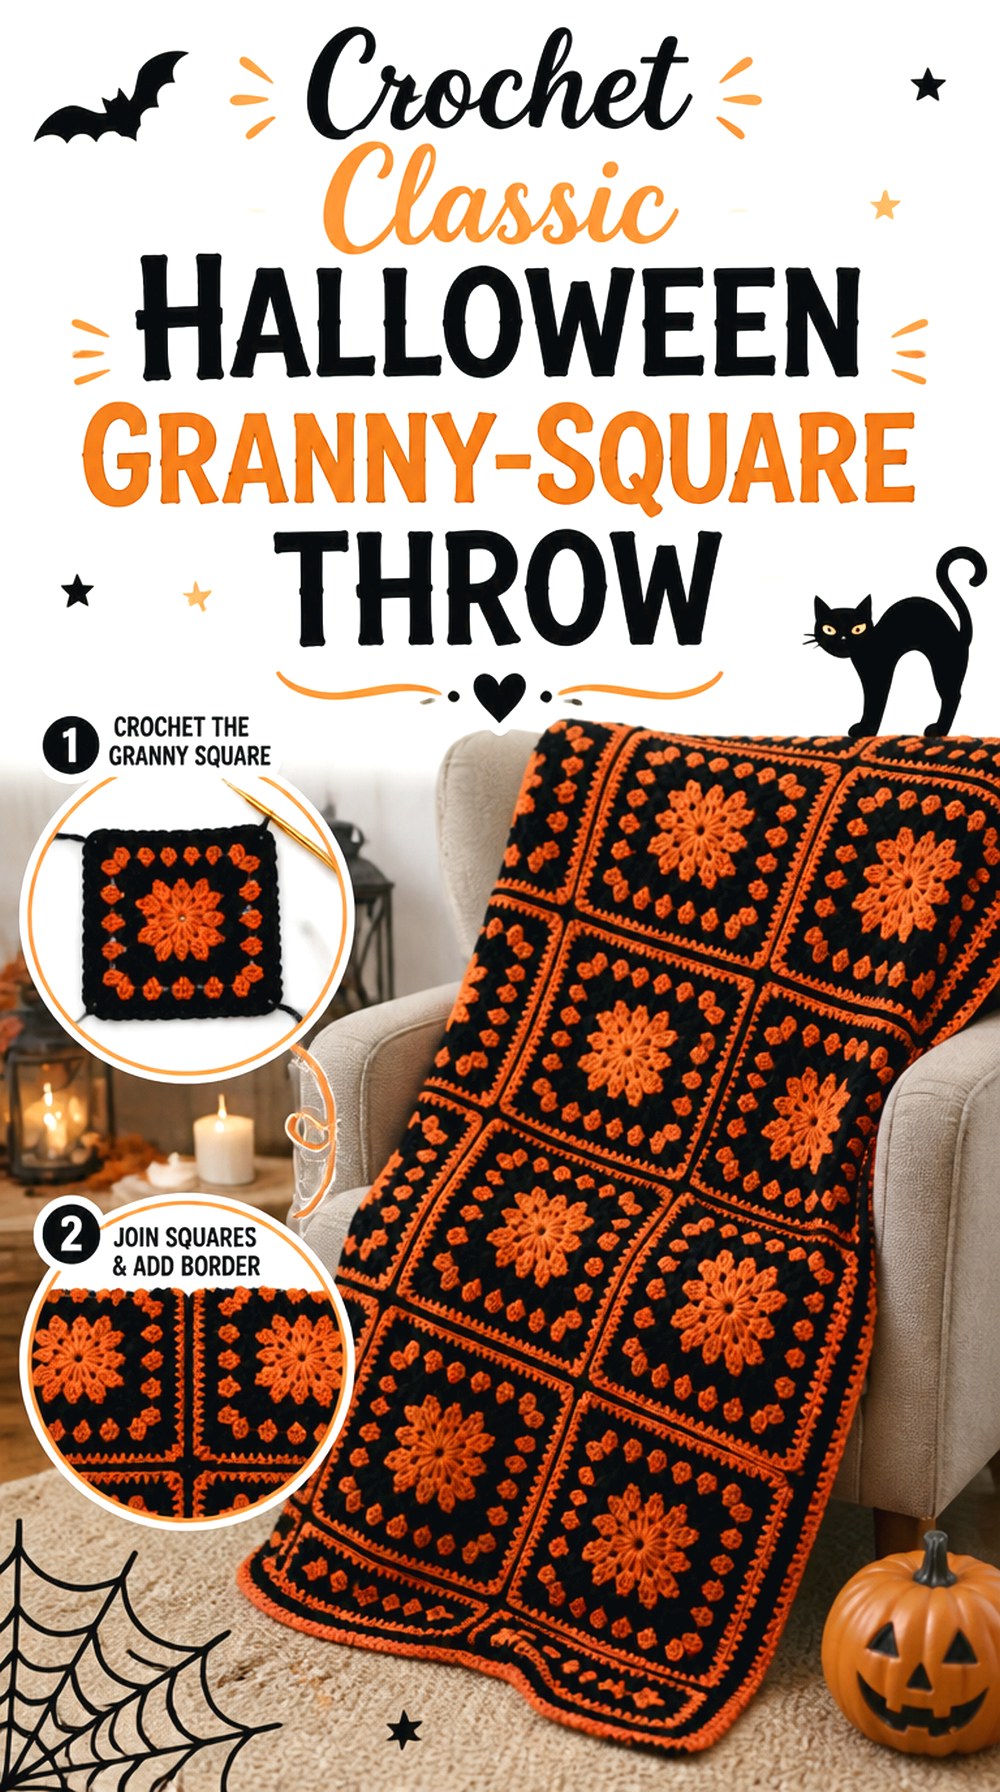
Crazy Cool Crochet’s Halloween throw takes the familiar granny-square route and turns it into seasonal decor through strong Halloween color contrast and a deliberate joining method. The video is a full blanket tutorial and specifically includes joining guidance, which makes it more useful than a source that demonstrates only one isolated square.
This is a good construction to consider when you enjoy repetitive motifs and want a project that can be completed in smaller sessions. Unlike an image graph, the blanket does not depend on reaching a specific point before the design becomes recognizable. The visual rhythm comes from repetition itself.
Granny Squares Make Color Distribution Easy to Edit
Before joining, spread the entire collection on the floor or a large table. Move squares until the orange, black, or other Halloween tones feel balanced. This flexibility is one of the main strengths of modular construction: the color layout can still change after the individual pieces have been crocheted.
Treat the Join as Part of the Design
A contrasting join creates a visible grid, while a matching join allows individual squares to blend more quietly. Neither approach is automatically better. Decide whether you want the seams to frame each motif or disappear into the blanket, then test the joining color between two completed squares before assembling everything.
Original Tutorial and Creator Credit
Creator: Crazy Cool Crochet
11. Crochet Pumpkin Grid Texture Blanket
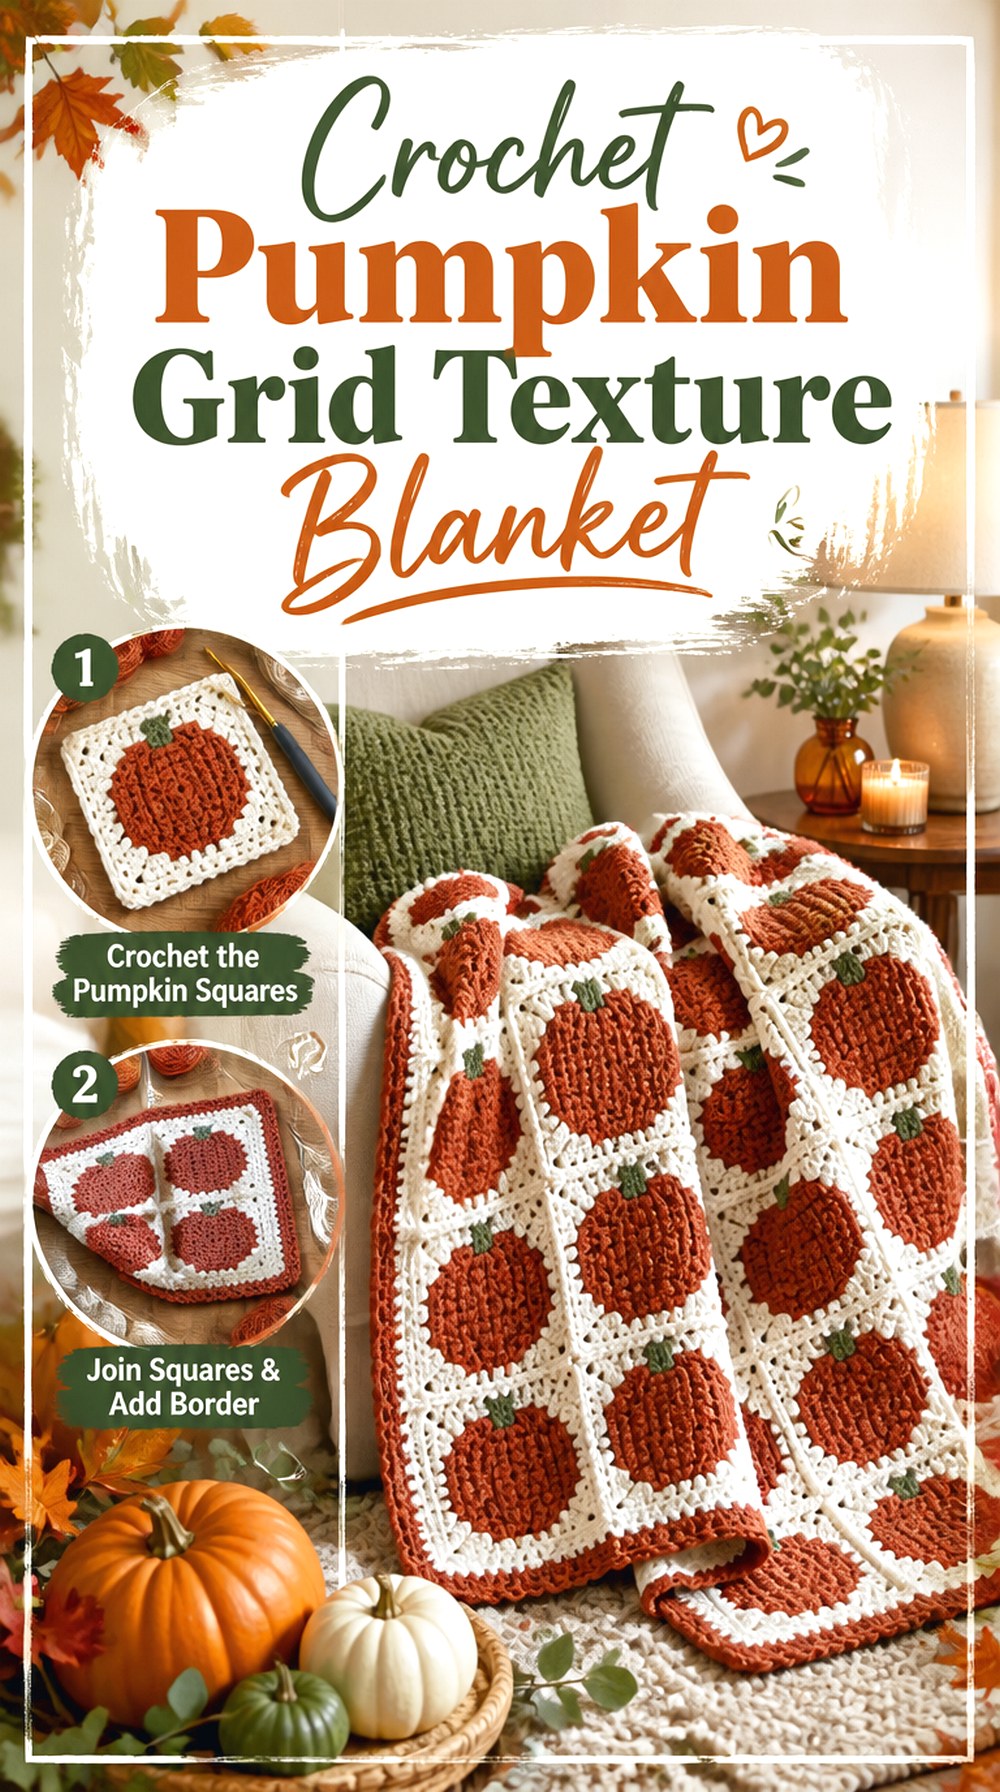
The Knotted Nest Crochet combines recognizable pumpkin squares with substantial texture, giving the finished blanket more dimension than a flat charted pumpkin image. The creator’s tutorial presents the design as a pumpkin-square throw and also notes its suitability for a table-runner format, showing how the repeating unit can translate into different rectangular layouts.
This option is especially appealing when you want pumpkins to repeat across the surface rather than dominate as one oversized jack-o’-lantern. Repetition also gives you more freedom to decide how wide or long the final grid should become, provided the individual units stay consistent.
Raised Pumpkin Texture Needs Clear Definition
A highly variegated yarn can compete with a textured pumpkin motif. If the shape is created partly by shadows and raised stitches, use a swatch to see whether the pumpkin still reads from a normal viewing distance. A quieter background can make dimensional details easier to recognize.
Grid Repetition Makes Sizing More Predictable
Complete and block a representative pumpkin unit before planning the whole blanket. Once you know its actual dimensions, you can estimate how another column or row would change the overall span. Remember that joining and border treatment can add additional width and length beyond the raw motif grid.
Original Tutorial and Creator Credit
Creator: The Knotted Nest Crochet
12. Crochet Bobble and Stripe Spooky Sampler Blanket
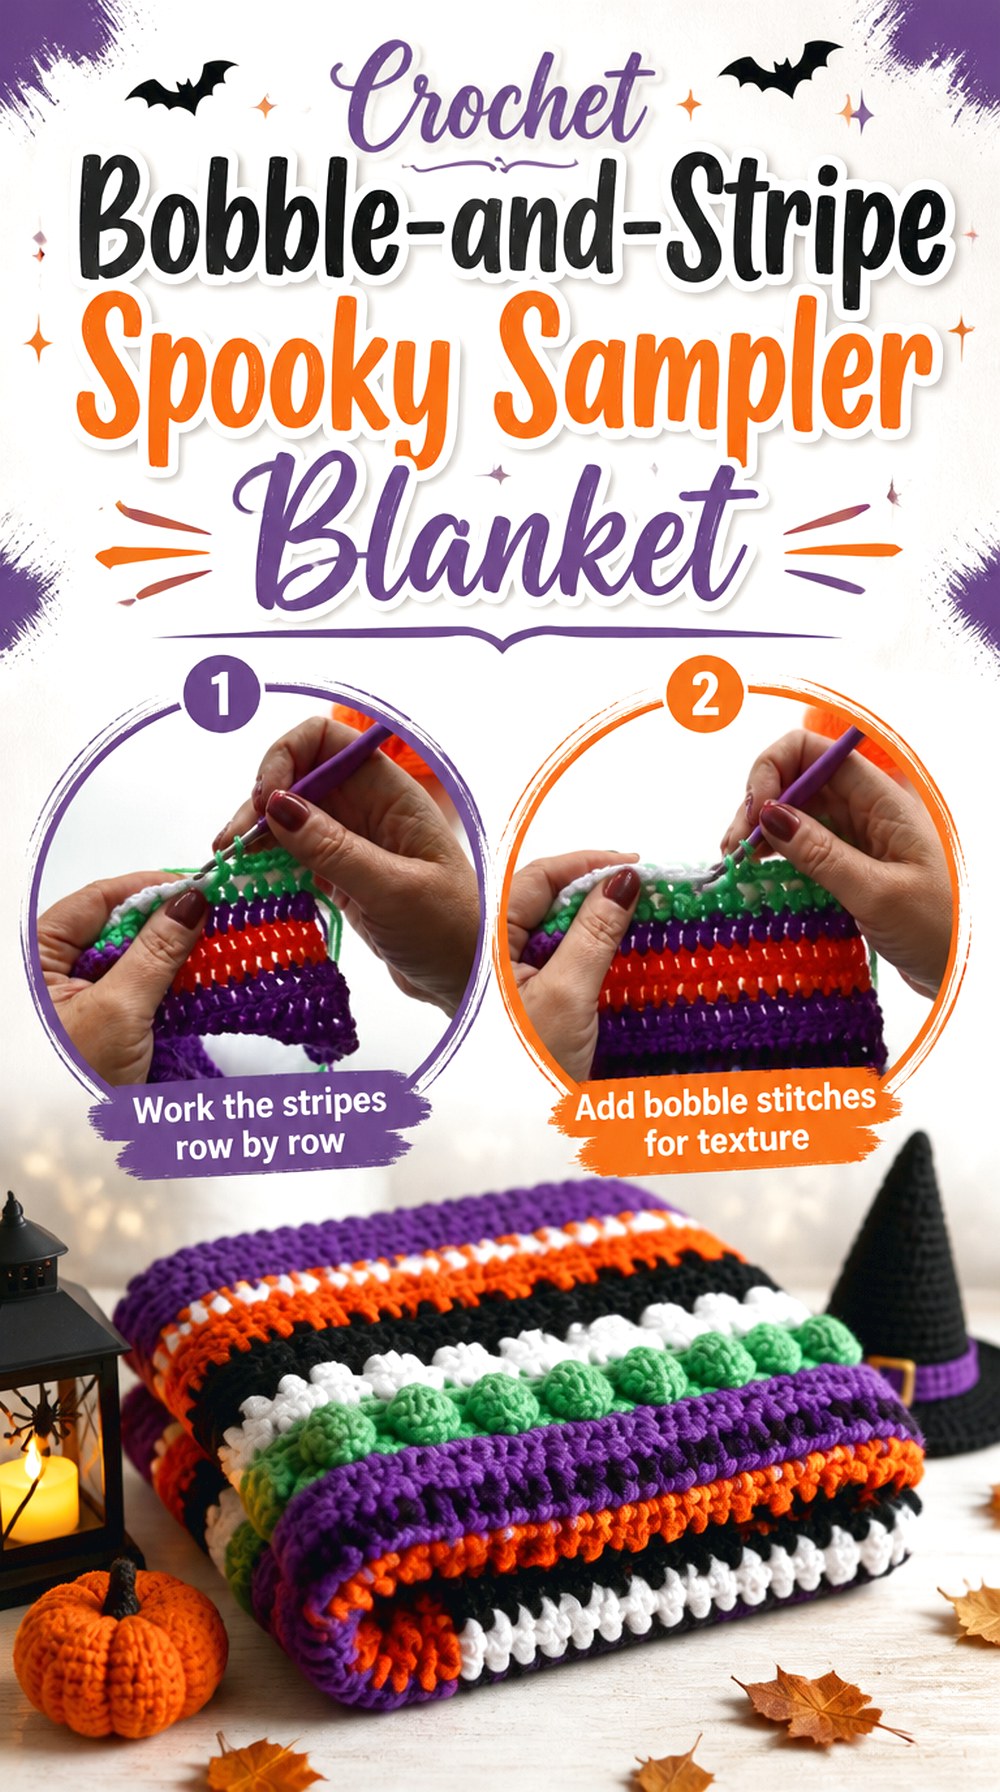
Madebyanita’s Halloween Dreams project mixes treble-crochet stripes, bobbles, and additional stripe treatments instead of relying on one repeated stitch. The first tutorial is part of a larger two-video sequence, making this a better match for crocheters who enjoy changing textures as the blanket grows.
The result belongs firmly in the sampler-style category. Different sections can provide visual interest even when the palette is limited, but they can also behave differently in width and stretch. That makes periodic measuring more useful than simply counting completed sections and assuming the fabric remains unchanged.
Texture Transitions Are Natural Measurement Points
Whenever the stitch style changes, lay the work flat and compare its width with the previous section. Bobbles, open stitches, and denser rows can consume yarn and stretch differently. Catching a change early gives you a chance to evaluate tension before the next texture compounds it.
Multi-Part Tutorials Need a Complete Materials Check
Because the source continues beyond part one, review the full project information before buying yarn based only on the opening section. A later portion may introduce another texture or finishing requirement. Planning from the whole blanket prevents the first attractive stripe sequence from becoming the only information guiding your material choices.
Original Tutorial and Creator Credit
Creator: Madebyanita
13. Crochet Pumpkin Filet Silhouette Blanket
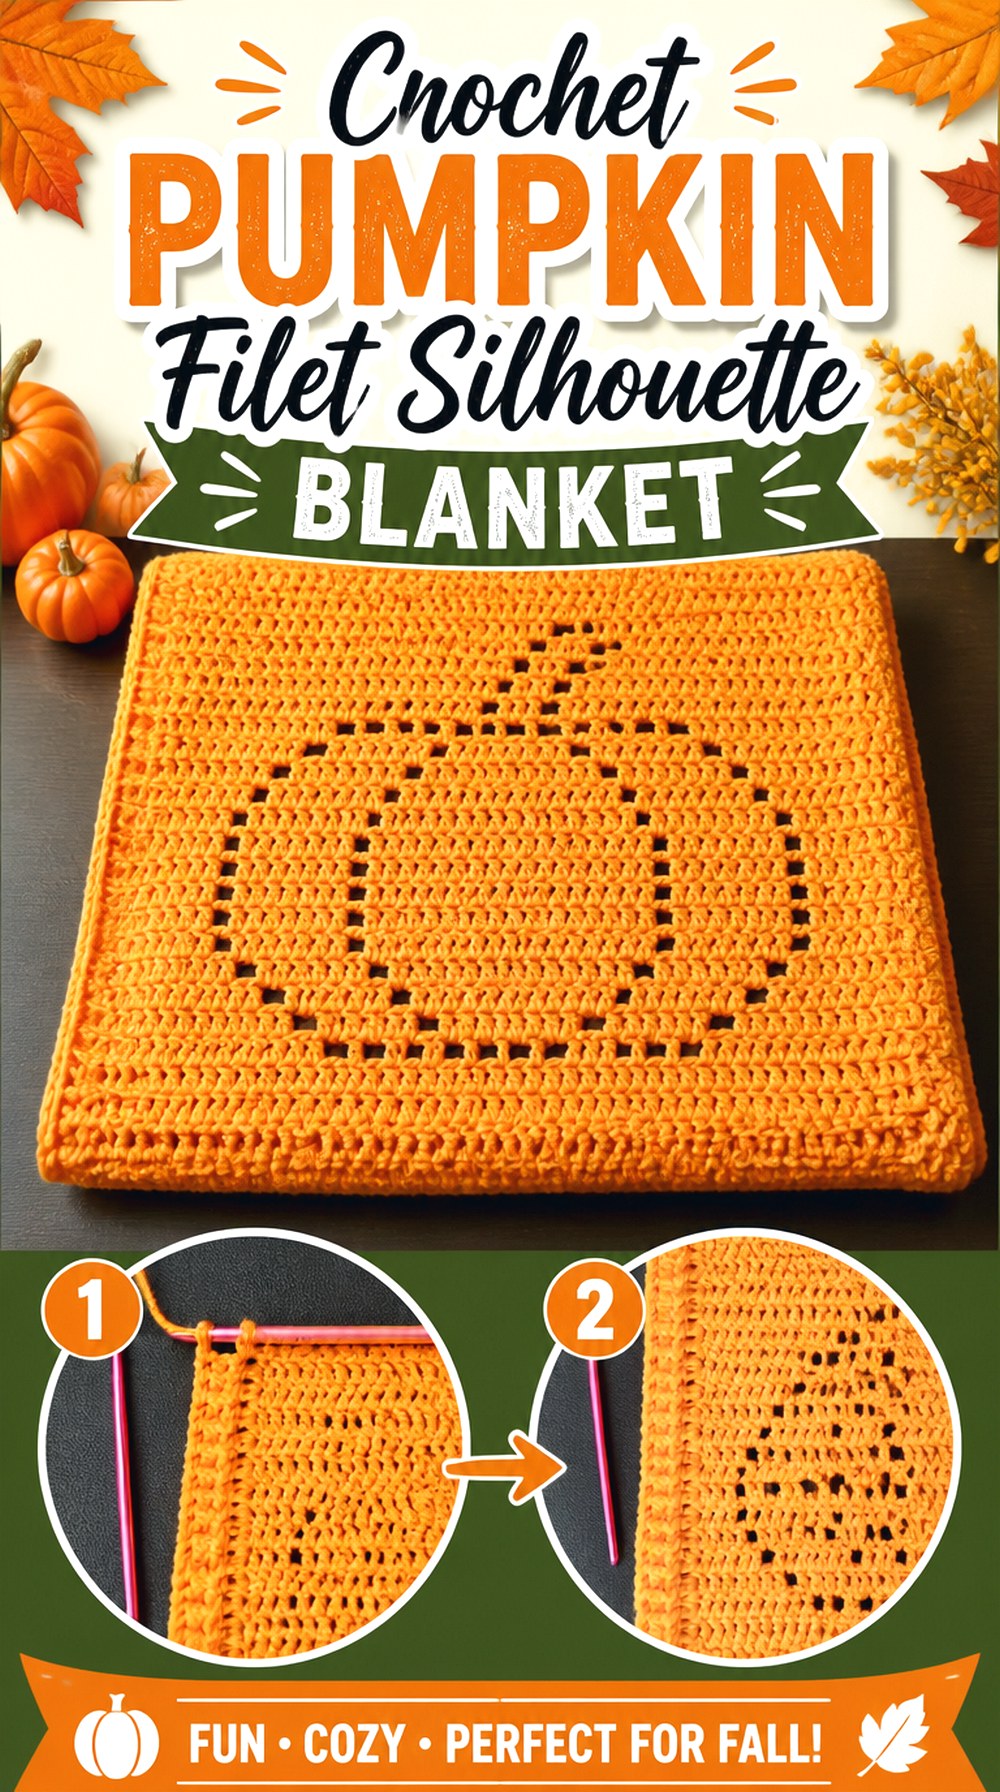
Crochessica’s Halloween filet blanket creates its pumpkin imagery through the relationship between open and filled crochet spaces. That produces a lighter, more architectural effect than dense tapestry colorwork and makes the silhouette itself part of the fabric structure.
This is a strong choice when you want a recognizable Halloween image without managing many separate yarn colors. Filet work does demand attention to open and closed blocks, however, and the shape is easiest to judge after the fabric is laid flat. The tutorial uses sport-weight yarn, reinforcing the lighter visual character of this option compared with chunky strip blankets.
Blocking Has More Visual Impact on Filet
Uneven openings can blur a silhouette even when the stitch sequence is correct. Once the project is complete, finish it according to the yarn’s care requirements and let the mesh settle into a consistent shape. Do not aggressively stretch simply to force the blanket to a guessed measurement.
Negative Space Needs a Calm Background
The pumpkin is visible because open and solid areas contrast structurally. Busy variegation may compete with that effect even if the yarn colors are attractive individually. If the silhouette is the reason you chose the project, prioritize stitch readability over adding extra color changes.
Original Tutorial and Creator Credit
Creator: Crochessica
14. Crochet Gothic Skull Center Out Blanket
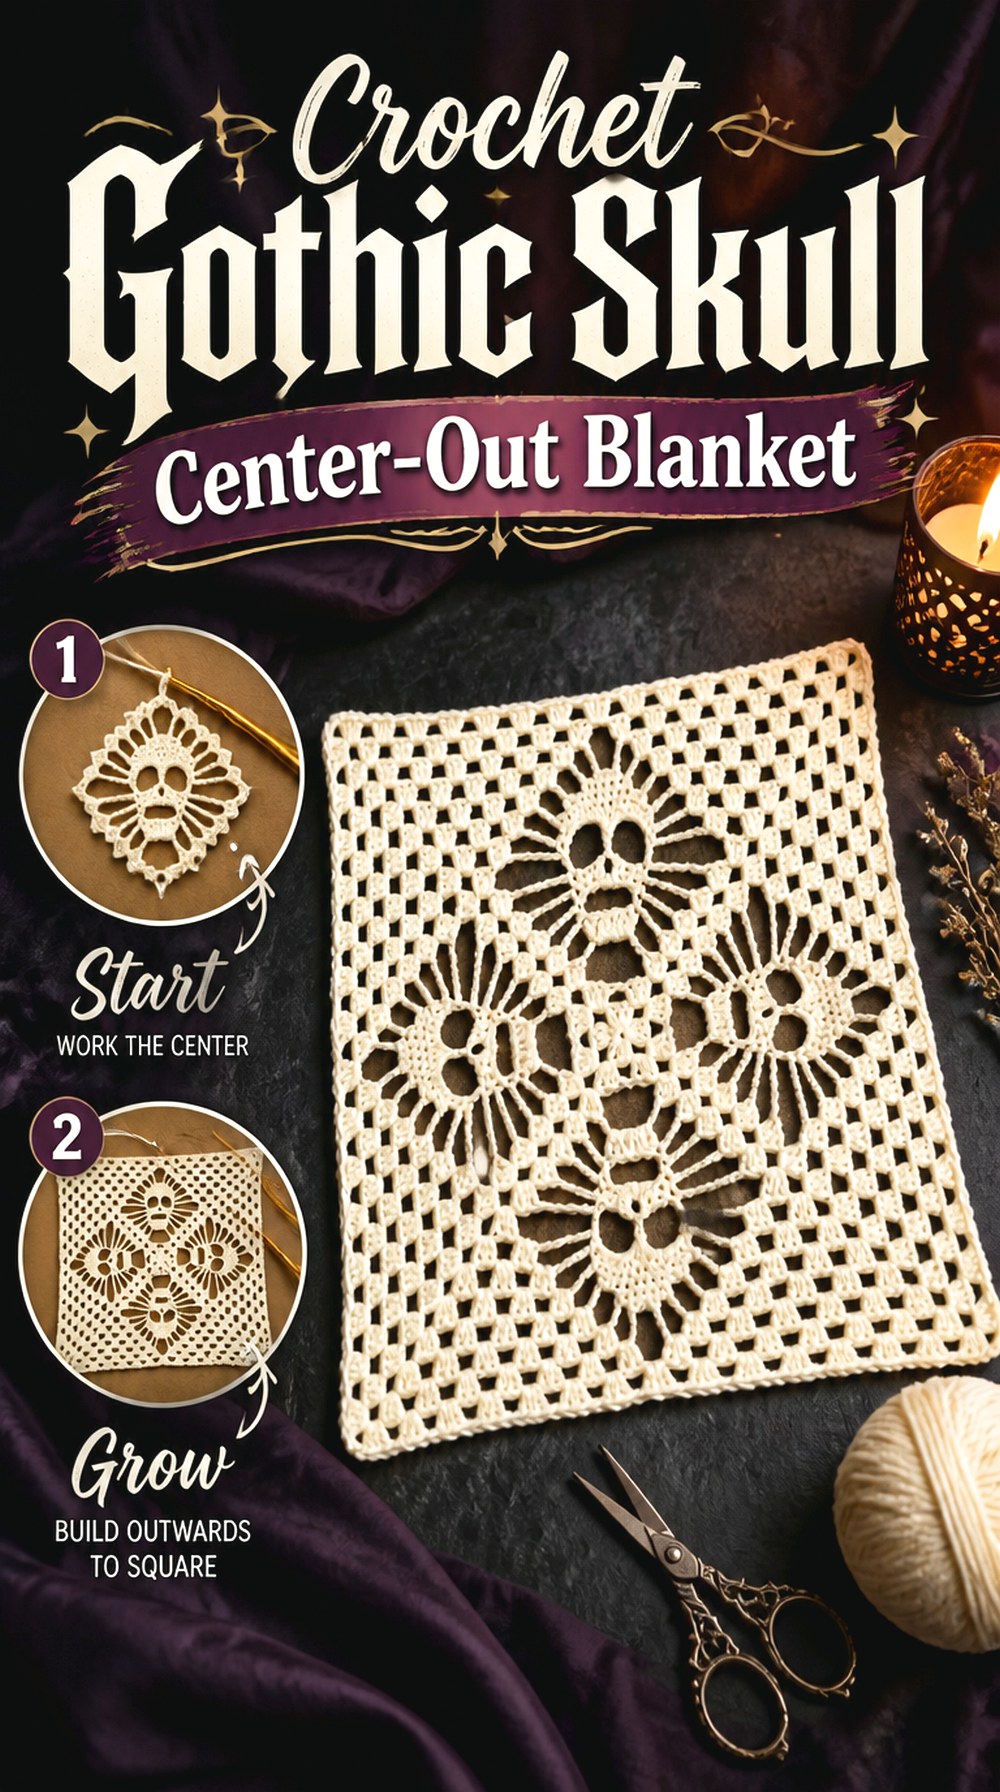
Fiber Spider’s Lost Souls blanket adapts skull imagery into a blanket project and is taught across more than one video, with the first installment establishing the early rounds. The creator also credits the underlying Lost Souls design source in the video information.
This option is much darker in mood than the smiling pumpkins and friendly ghosts elsewhere in the roundup. It suits gothic Halloween decor or a year-round skull theme, particularly for someone who likes watching a center-out design expand instead of assembling repeated conventional squares.
Skull Negative Space Must Stay Legible
The skull effect depends on the relationship between openings, solid stitches, and the surrounding fabric. If you substitute a fuzzy yarn, work a sample section and make sure the openings remain recognizable. A soft halo can be attractive, but too much character density can blur graphic negative-space designs.
Treat Part One as the Beginning, Not the Whole Project
This is a multi-part tutorial. Review the continuation before starting so you understand how much instruction, finishing, and joining remains after the first video. That is especially important if you prefer projects contained in one uninterrupted tutorial rather than a sequence.
Original Tutorial and Creator Credit
Creator: Fiber Spider
15. Crochet Retro Haunted Video Store Blanket
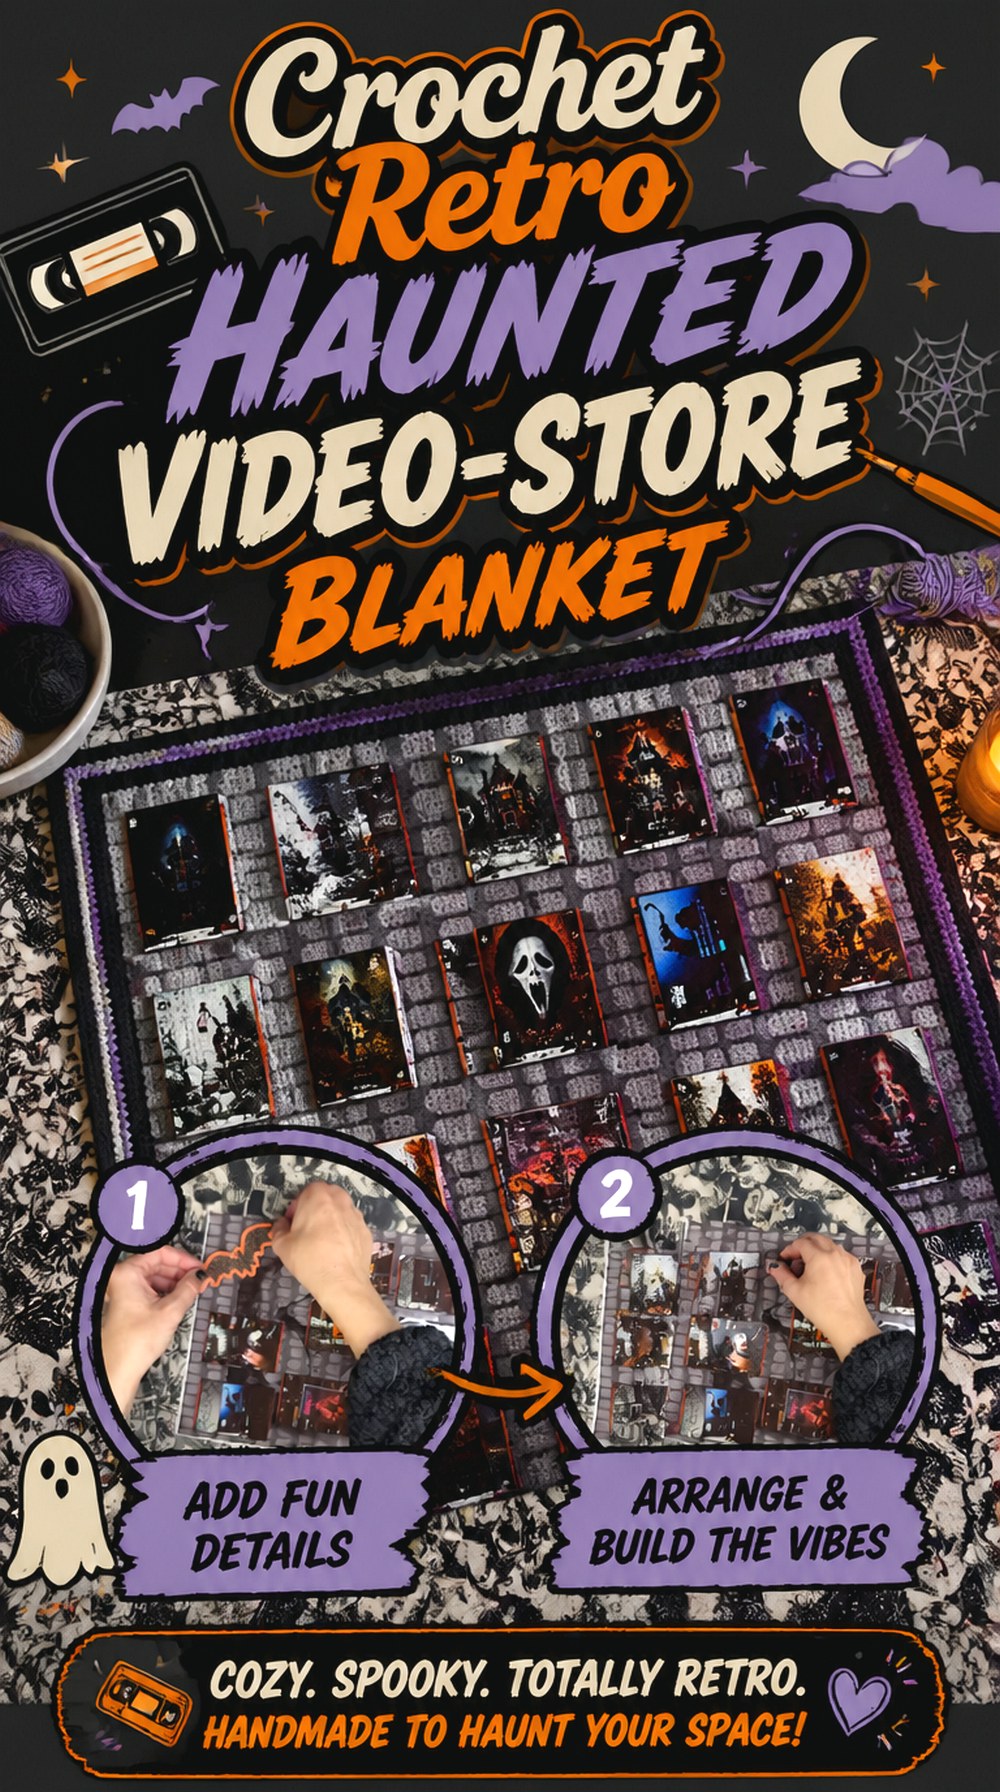
Alt Knots’ Haunted Video Store Blanket turns Halloween crochet into a themed crochet-along rather than a single repeating motif. The cited video is week five of the 2025 CAL, so this is a project for readers who enjoy following a larger sequence and gradually building a coordinated spooky blanket.
Its retro horror concept also sets it apart from traditional pumpkins and spiderwebs. A concept-driven sampler gives you more narrative variety across the finished blanket, but it requires more organization than a single-stitch throw. Before beginning, locate the earlier portions of the CAL and review the complete project sequence.
Keep Every CAL Section Traceable
Save the week number with each finished component or progress photo. When a project contains several distinct motifs, it can become difficult to remember which tutorial controlled a particular detail. Good organization also makes it easier to return to a section if a dimension needs checking before assembly.
Retro Themes Can Handle a Less Traditional Palette
You are not restricted to orange and black. Acid green, faded purple, cream, dark red, or intentionally muted “old video-store” colors can support the concept, provided the design elements still have enough contrast. Compare the palette as a group instead of choosing each color independently.
Original Tutorial and Creator Credit
Creator: Alt Knots
16. Crochet Spooky Spider Mosaic Strip Blanket
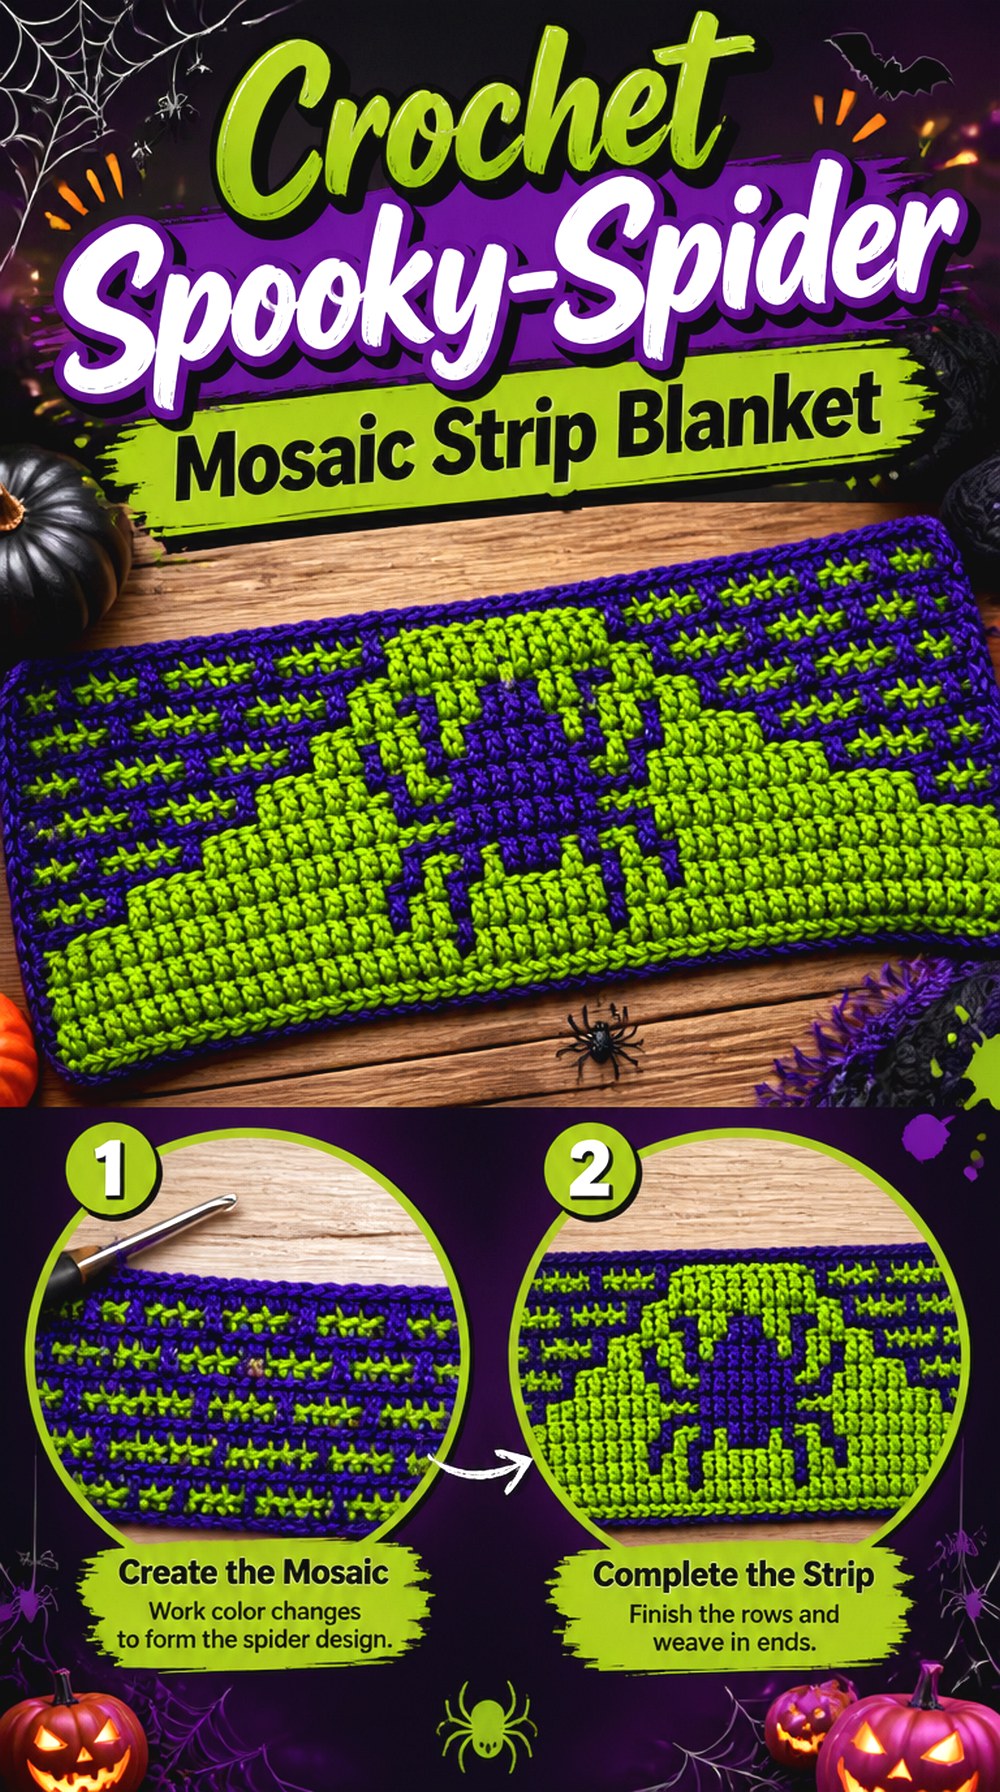
Remington Lane Crochet’s 2025 Halloween mosaic crochet-along begins with a Spooky Spiders strip. The right-handed tutorial covers the blanket foundation and the first mosaic section, making this an option for readers who want crisp two-color imagery woven directly into horizontal bands.
Mosaic construction offers sharper repeated icons than many textural stitches, but contrast is crucial. If the two yarns are too two-subgrateana-spot-and-bead-sheet-pdf, you may crochet every stitch correctly and still lose the spider design from a distance. The horizontal-strip format also makes it easier to see each new motif as a distinct chapter in the finished blanket.
Choose Colors by Value Contrast First
Take a grayscale photo of two proposed yarn colors. If they collapse into nearly the same gray, the mosaic may not read as clearly as you expect. Halloween colors do not have to be literal, but foreground and background need enough separation for the spiders and later CAL imagery to stay visible.
The First Strip Does Not Represent the Whole CAL
The linked tutorial teaches the foundation and opening spider section rather than every later motif. Review the remaining CAL sections before buying a carefully calculated color assortment or deciding which strip should be your dominant accent. The full blanket is intentionally built from multiple releases.
Original Tutorial and Creator Credit
Creator: Remington Lane Crochet
17. Crochet Autumn Jacob’s Ladder Spooky Season Throw
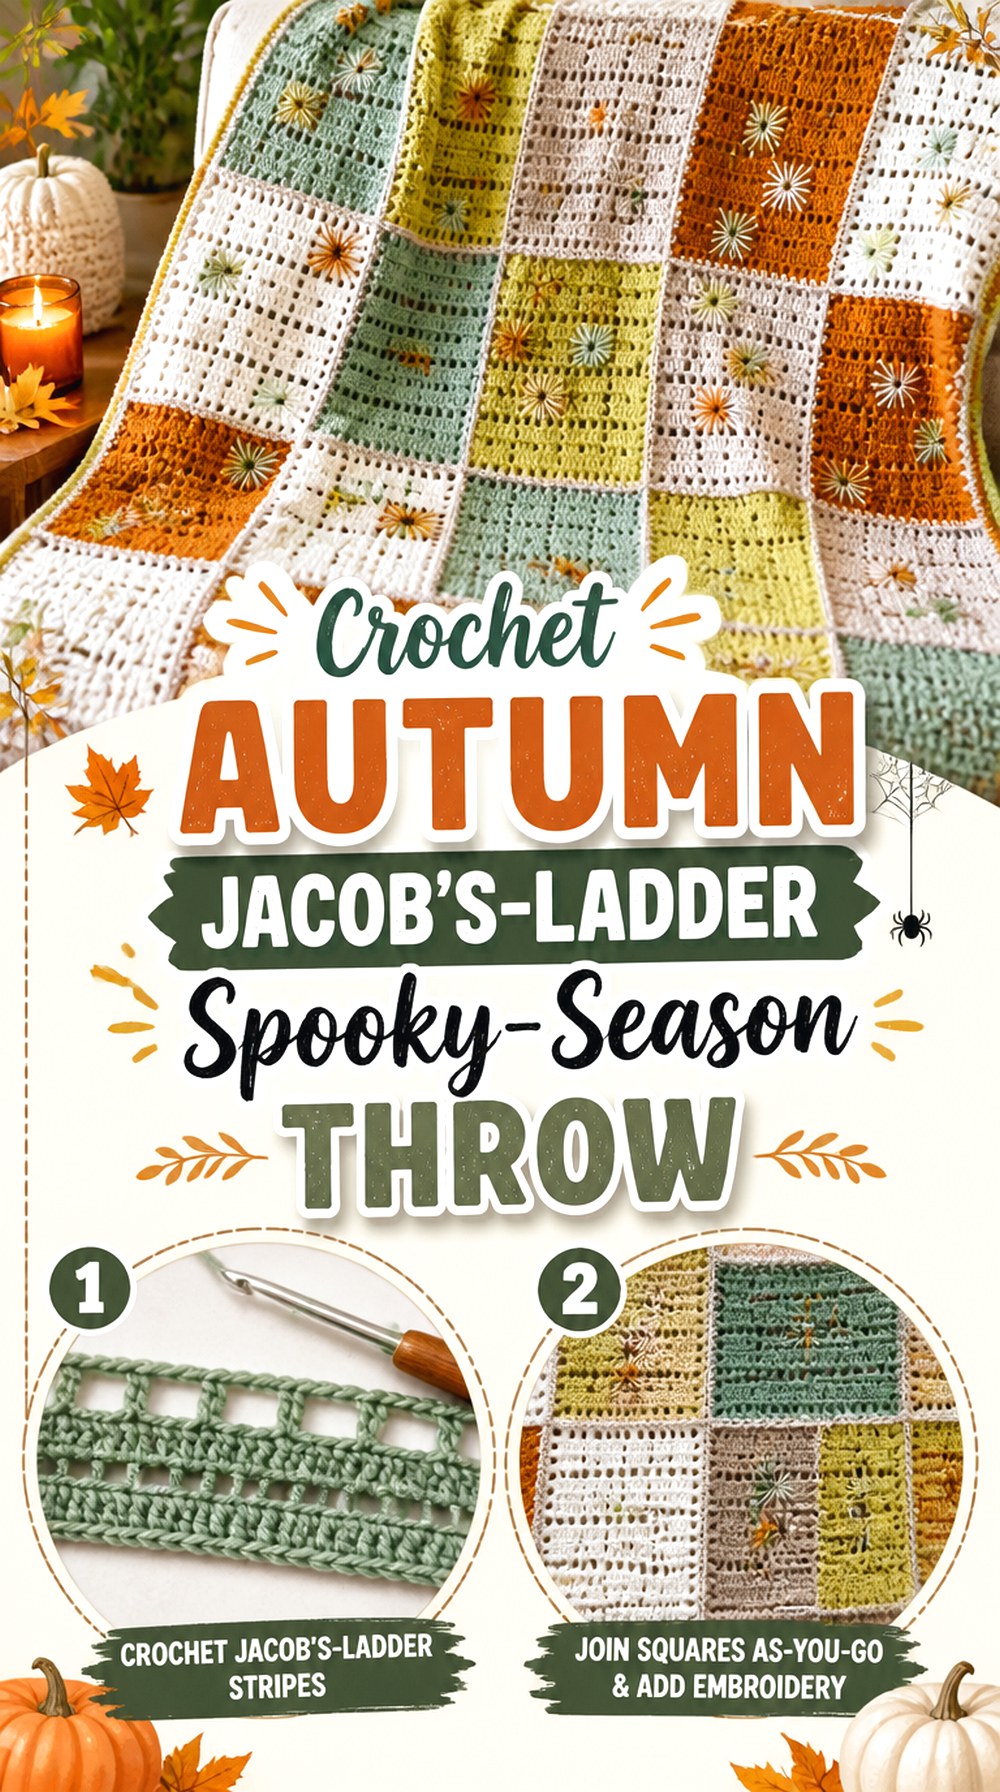
Ophelia Talks Crochet offers a fall blanket built around the Jacob’s Ladder technique, giving this list a seasonal option that feels at home beside Halloween decor without using a literal ghost or pumpkin picture. The tutorial demonstrates the autumn blanket and its characteristic laddered texture.
This is a useful choice for readers who care more about fall atmosphere than overt Halloween imagery. Deep orange, brown, charcoal, plum, moss, or cream can create a spooky-season palette while allowing the blanket to remain in the room after October.
The Ladder Detail Needs to Remain Visible
The structural loops are a focal feature, so think about stitch definition before choosing a highly fuzzy fiber. If you substitute yarn, make a small sample and manipulate it the same way the ladder treatment will be handled. The texture should remain clear without becoming rigid.
Seasonal Color Can Do the Halloween Work
A technique-driven blanket does not need added appliqués simply to fit the theme. If your home already has pumpkins, bats, candles, and other seasonal decor, a quieter textile may create better balance than another highly illustrated piece.
Original Tutorial and Creator Credit
Creator: Ophelia Talks Crochet
18. Crochet Fall Ripple Spooky Season Afghan
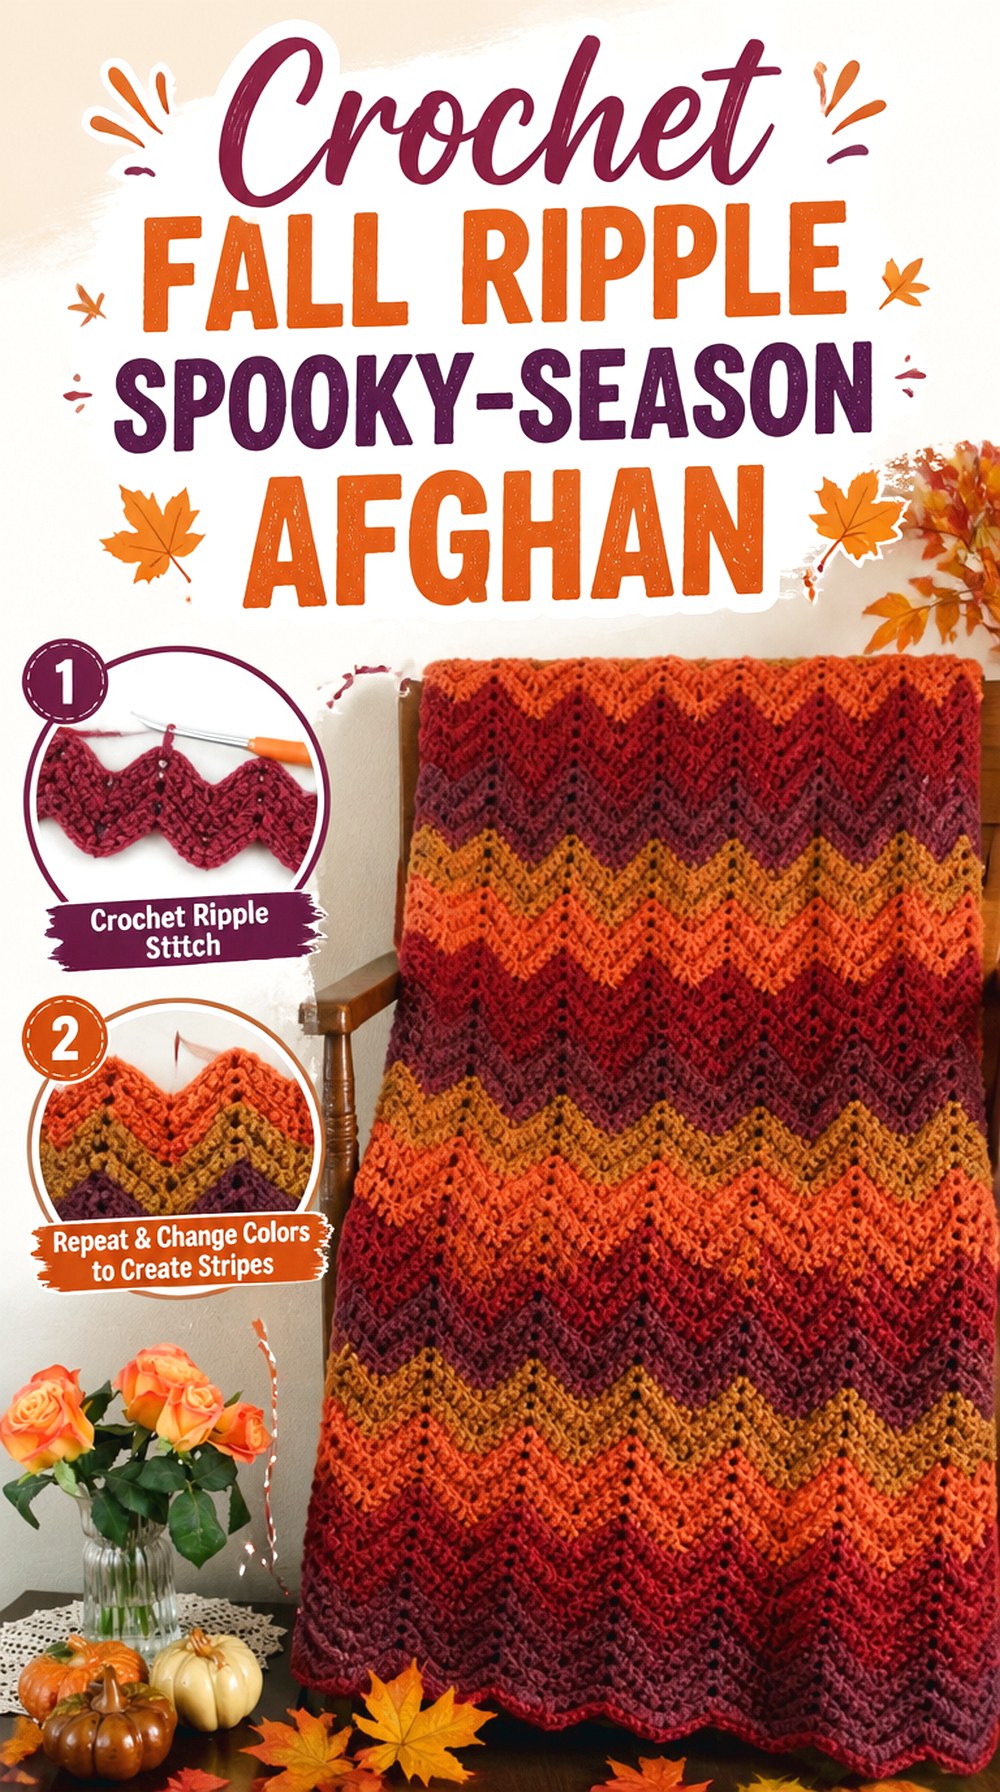
Olga Poltava’s fall afghan uses a ripple stitch rather than Halloween imagery, making it another flexible seasonal choice. The video demonstrates a warm fall-colored ripple blanket worked in worsted-weight yarn.
A ripple is worth considering if you like bold horizontal movement but do not want the later assembly required by squares or strips. Recoloring also changes the personality quickly: orange, charcoal, cream, and purple can move the design toward Halloween, while rust, gold, and brown keep it more generally autumnal.
Decide Whether the Zigzag or the Palette Is the Focal Point
A high-contrast palette emphasizes every peak and valley. Closely related fall colors create a softer landscape effect. Neither is inherently more successful, so decide whether you want the ripple geometry to dominate or simply provide movement behind the color changes.
Think About the Edge Before the Final Row
Ripple blankets naturally produce shaped top and bottom edges. If you prefer a perfectly rectangular visual finish, check the creator’s treatment and consider the implications before starting. Do not assume that every border style used on a straight-edged blanket will transfer neatly to pronounced peaks and valleys.
Original Tutorial and Creator Credit
Creator: Olga Poltava
19. Crochet Ghost Granny Square Grid Blanket
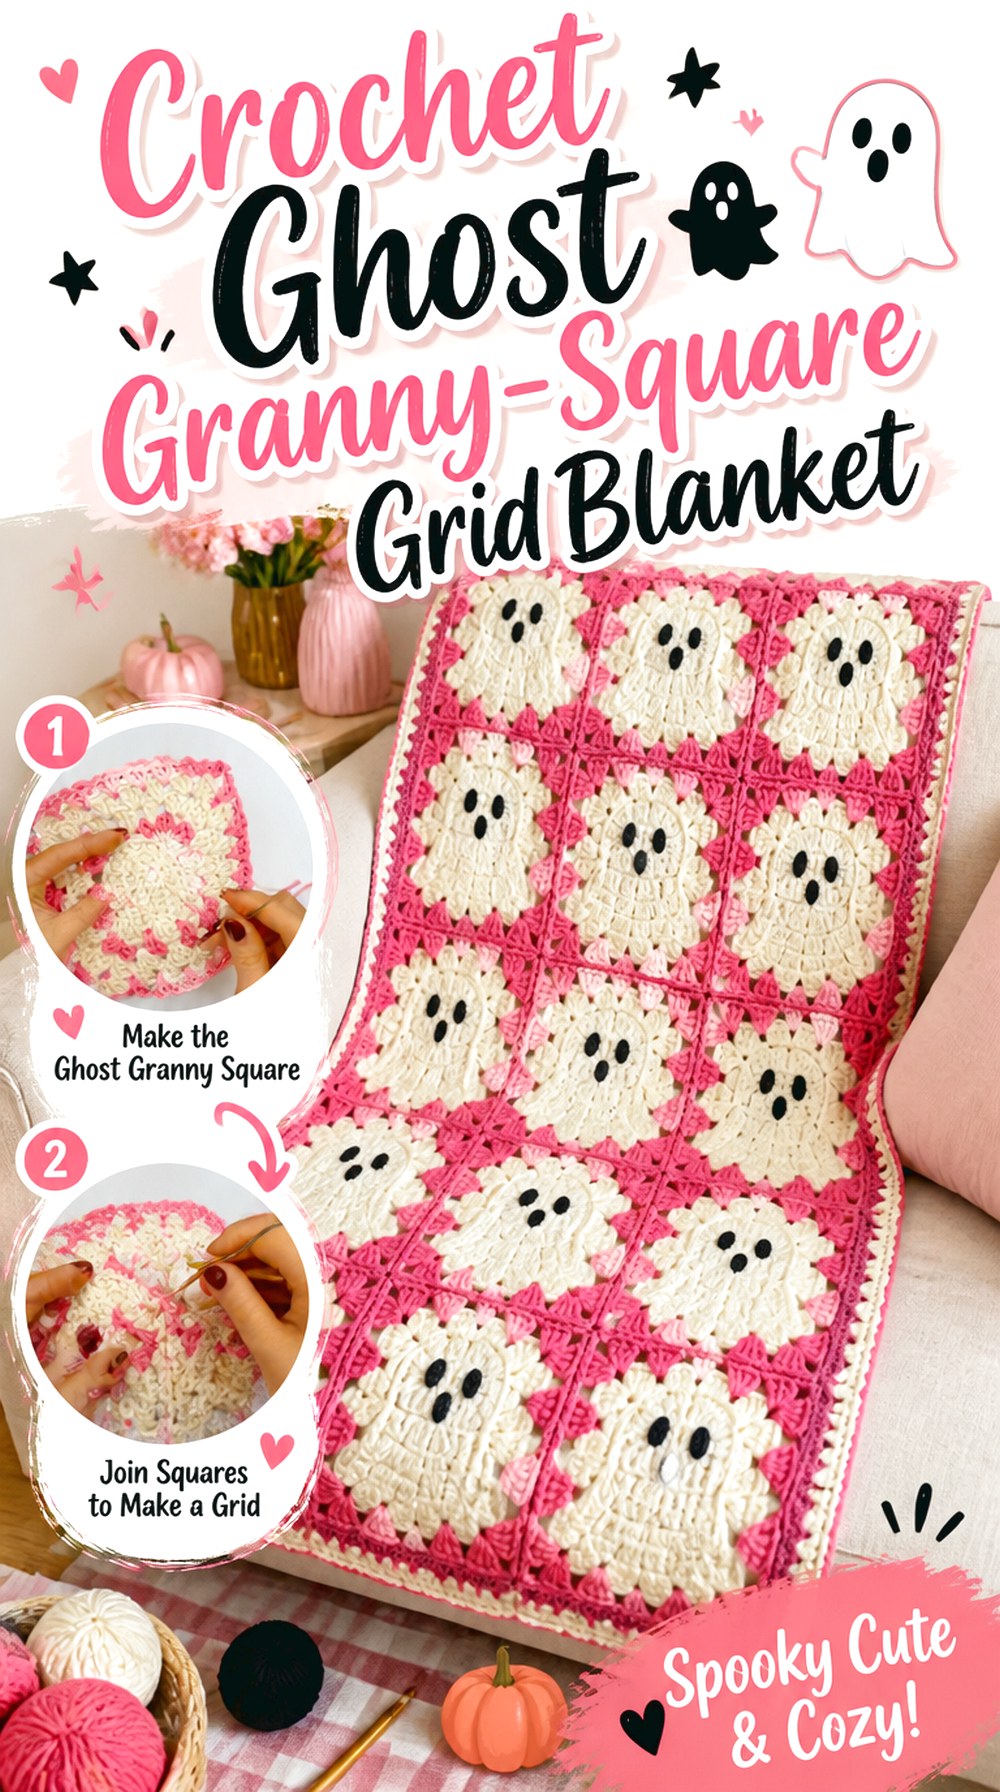
ElyseCrochets teaches a complete ghost granny square that the creator specifically suggests using for projects including blankets. The source is a square tutorial rather than a complete blanket walkthrough, so this idea is an adaptation route for readers who want to build a repeated ghost grid themselves.
That distinction gives you flexibility but also more planning responsibility. You need to decide how many blocks suit the intended blanket, whether every square will feature a ghost, and what joining and border approach will connect them. Repeating the same ghost creates a cleaner graphic rhythm than a mixed Halloween sampler.
Measure One Block Before Choosing the Grid
Finish and block one representative ghost square first. If your block measures 7 inches across, for example, four blocks would cover about 28 inches before the join and border are added. That kind of simple planning prevents a “throw” from accidentally finishing closer to a small lap blanket.
Alternate Plain Squares to Reduce Visual Density
Twenty or thirty identical ghost faces can become visually busy. One adaptation is to alternate motif squares with plain blocks made to the same blocked dimensions. If you take that route, confirm that both square constructions finish with compatible stitch counts or edges for your intended join.
Original Tutorial and Creator Credit
Creator: ElyseCrochets 💌
20. Crochet Skull Granny Square Patchwork Blanket
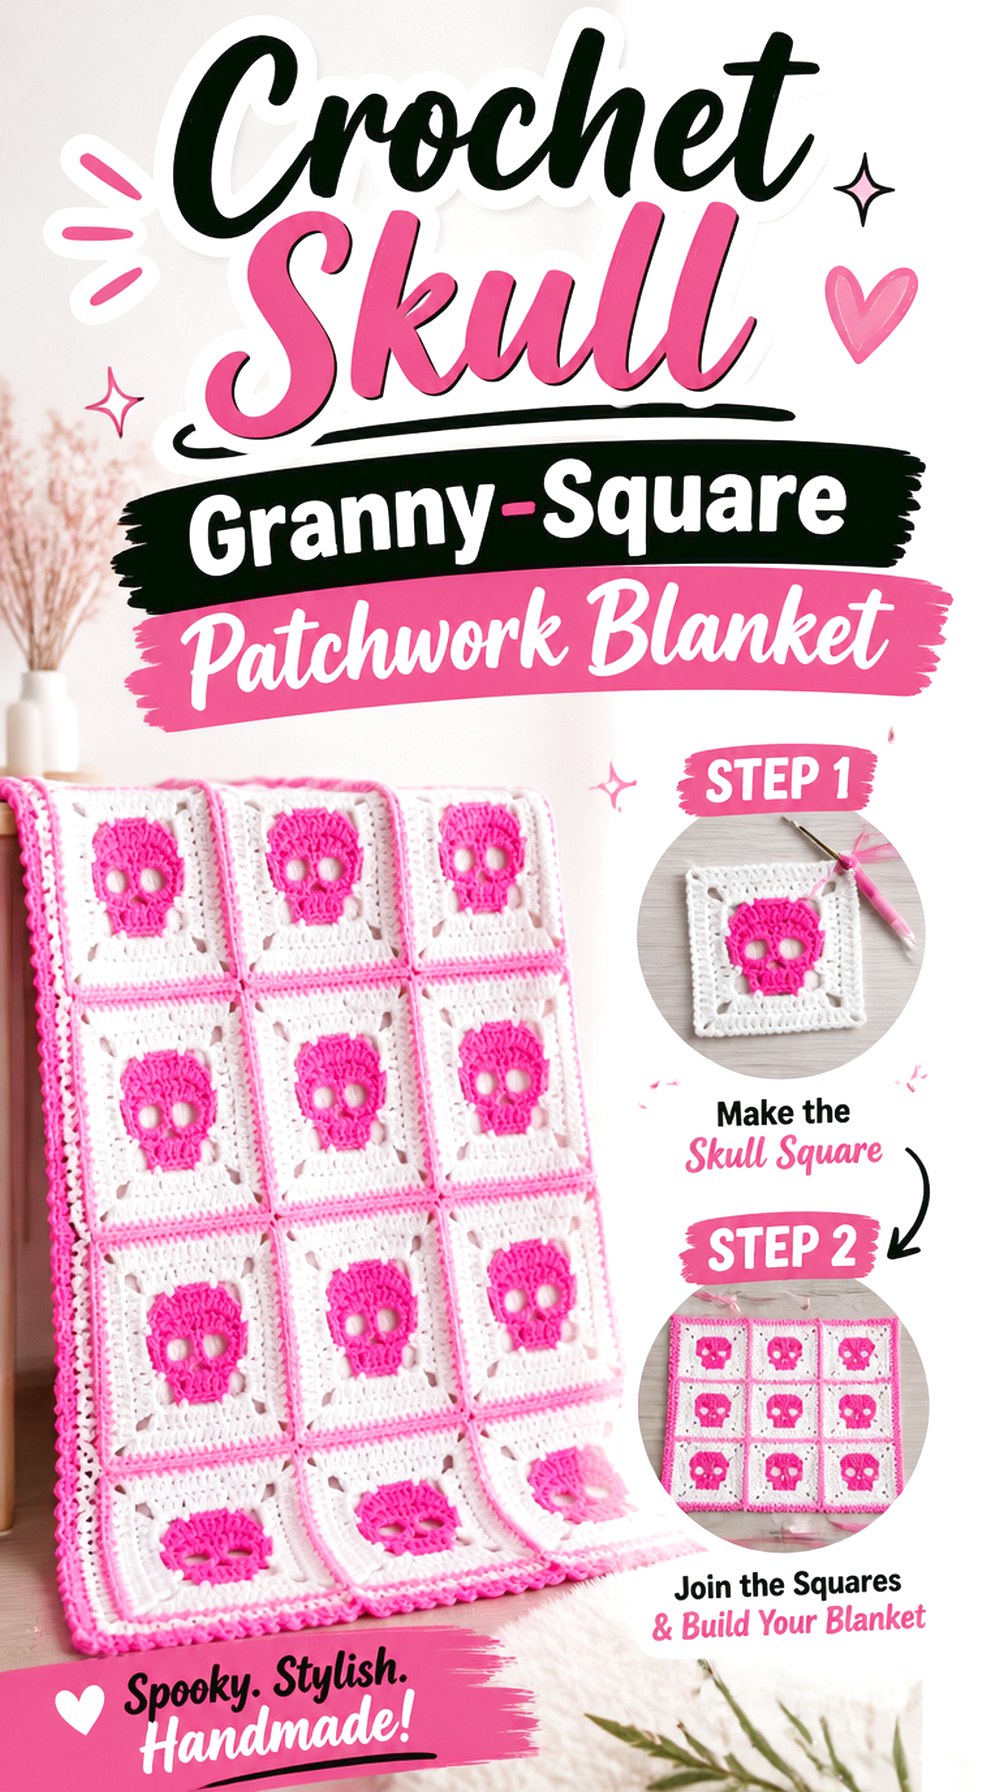
Pora Pora Crochet’s skull granny square provides another motif-to-blanket route, but its mood is very different from the friendly ghost grid. The creator explicitly lists Halloween blankets among the possible uses for the completed skull square, so it works as a foundation for a gothic patchwork throw.
Because the source teaches the square rather than a prescribed full blanket layout, you can decide whether skulls cover the entire field or act as accents among plain blocks. That freedom is useful, but compatible blocked dimensions become your responsibility before joining begins.
Skull Shapes Need Strong Positive-Negative Contrast
A skull motif relies on recognizable holes, outlines, and surrounding fabric. Before making a large stack, place the first square on the surface where the blanket will usually be seen. If the skull disappears from a few feet away, increase contrast before repeating the color combination twenty times.
Patchwork Lets You Control How Gothic the Blanket Feels
An all-skull grid makes an unmistakable statement. Alternating skulls with solid granny squares produces more breathing room and may also reduce motif-making fatigue. Either layout can work; map the whole blanket before joining so the skulls do not accidentally cluster in one section.
Original Tutorial and Creator Credit
Creator: Pora Pora Crochet
21. Crochet Black Cat Filet Panel Blanket
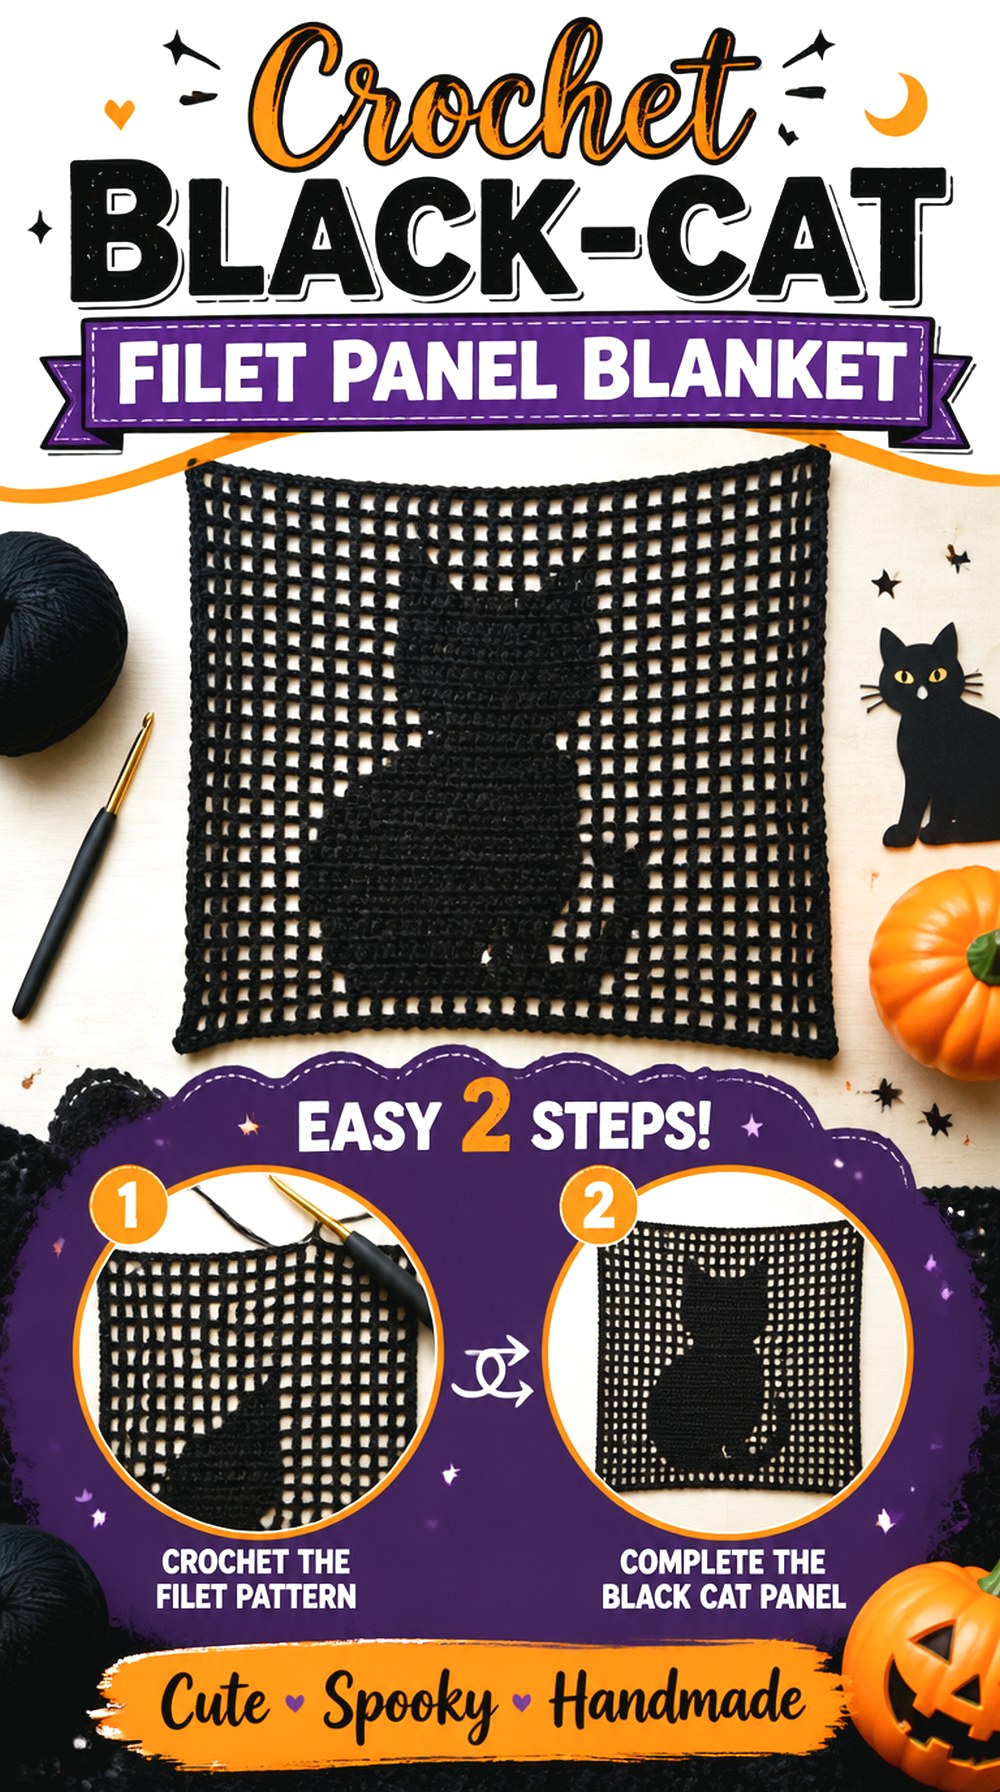
Crochet with Lisa’s black-cat tutorial teaches a filet motif rather than an entire afghan, and the creator specifically notes that the finished motif can be incorporated into an afghan. The tutorial’s sample motif is approximately 13 inches square, making it substantially larger than many conventional granny squares and therefore useful as a statement panel.
Instead of repeating dozens of tiny cats, you could use a smaller number of large filet panels separated by compatible plain sections. This creates a cleaner black-cat theme and reduces the number of joins while keeping the Halloween imagery prominent.
Match Filler Panels to the Cat After Blocking
Do not choose a filler-square pattern merely because its written dimensions sound similar. Crochet the cat panel, block it appropriately, and measure the fabric you actually produced. Then adjust or select surrounding sections that meet the same edge dimensions without being stretched into place.
Contrast Behind Filet Changes the Cat Dramatically
Open filet spaces show whatever lies behind the blanket. A cat motif may look bold against a light sofa and less obvious against a dark chair. If the blanket will have a consistent backing or be used over particular furniture, preview the panel against that background before choosing the final yarn color.
Original Tutorial and Creator Credit
Creator: Crochet with Lisa
How to Choose Between These Halloween Blanket Styles
| If You Prefer… | Start With |
|---|---|
| One large recognizable Halloween image | Jack-o’-Lantern Graphgan or Pumpkin Filet Silhouette |
| Portable pieces instead of one growing blanket | Mile-a-Minute Strips, Granny Squares, Pumpkin Grid, Ghost Grid |
| Strong texture without lots of character imagery | Pumpkin-Spice Even-Moss or Jacob’s-Ladder Throw |
| A dramatic unusual blanket shape | Round Spiderweb Ripple |
| Several different Halloween motifs | Trick-or-Treat Sampler, Monster-Face Blanket, or Haunted Video-Store CAL |
| Crisp geometric colorwork | Spooky-Spider Mosaic |
| Gothic rather than cute Halloween decor | Gothic Skull Blanket or Skull Granny-Square Patchwork |
| A project that can stay out beyond Halloween | Fall Ripple, Pumpkin-Spice Throw, or Autumn Jacob’s-Ladder Blanket |
Conclusion
The right Halloween blanket depends on how much theme, texture, and finishing you actually want. Choose the round spiderweb for a dramatic display shape, the graphgan or filet options for large readable imagery, or granny squares and mile-a-minute strips when portable sections appeal more than one growing piece. Samplers and crochet-alongs offer the most motif variety, while the even-moss, ripple, and Jacob’s-Ladder throws keep the seasonal mood subtler.
For any design involving repeated motifs, make and measure one finished section before multiplying it across an entire blanket. Once you have chosen the construction that fits your working style, use the original tutorials for the creator’s exact stitch sequence, materials, and assembly details.
Frequently Asked Questions
Which crochet Halloween blanket construction is easiest to resize?
Blankets based on repeated squares or strips usually give you straightforward layout flexibility because additional units can change the overall grid, although borders and joins still affect final measurements. Plain stripe blankets can also be adaptable. A graphgan with one large picture is less casual to resize because changing the dimensions can alter the proportions of the charted image.
Should Halloween granny squares be blocked before joining?
Blocking can be very useful when a blanket depends on many squares matching cleanly. Finish a representative square, follow the yarn’s appropriate care method, and compare its dimensions with the other motifs before final assembly. This is especially important when ghosts, skulls, pumpkins, or other character squares use different stitch structures from the filler blocks.
Can I combine Halloween squares from different tutorials in one blanket?
Potentially, but matching yarn weight alone does not guarantee compatible blocks. Compare the blocked dimensions, edge structure, stitch count along the joining side, thickness, and flexibility of the squares you want to combine. If one block is substantially smaller or denser, forcing it into the same join can make the finished blanket buckle or pull around that section.
How can I make a Halloween blanket feel less heavy?
Consider a lighter yarn category where the chosen pattern supports it, a smaller lap-blanket scale, or a construction with more open fabric such as filet crochet. Dense colorwork, heavy bobbles, super-bulky yarn, and a large number of thick joined motifs can all contribute to physical weight. Do not change yarn weight blindly, however; check the creator’s sizing and gauge information before substituting.
What colors work besides orange and black?
Cream with charcoal creates a quieter ghost or skull look, while plum, deep green, rust, mustard, gray, burgundy, and muted orange can still feel seasonal. For mosaic, filet, graphgan, and character motifs, the more important question is whether foreground and background remain distinguishable. A fashionable palette is not useful if the spider, pumpkin, cat, or skull disappears.
How should a crochet Halloween blanket be stored after the season?
Clean it according to the yarn label and make sure it is fully dry before long-term storage. Fold rather than aggressively compressing blankets with raised appliqués, bobbles, or textured motifs if you want those details to retain their shape. When bringing a modular blanket back out the following season, inspect joins and attached decorations before regular use.