A crochet bow scarf can look like a tiny 1950s-style neck tie, a slim ribbon knotted over a blouse, a practical pull-through scarf, or a substantial winter bow. Those differences affect much more than appearance. The way the bow forms changes the amount of fabric at the neck, how adjustable the scarf is, and whether it works better over a dress, cardigan, sweater, or coat.
The 17 ideas below intentionally mix tutorials with built-in bows and keyholes with narrow neckerchief or scarflette tutorials that can be tied into a retro bow. That distinction is noted where it matters. Rather than treating every scarf as the same project in another color, this collection compares shape, drape, closure, volume, texture, and styling so you can choose a construction that suits the vintage-inspired look you actually want.
Quick List
- Crochet Lace Bowtie Neckerchief Scarf
- Crochet Ribbon Neckline Bow Scarf
- Crochet Sculpted Bow-Front Scarf
- Crochet Buttoned Bow Collar Scarf
- Crochet Compact Pull-Through Bow Scarf
- Crochet Ribbed Keyhole Bow Scarf
- Crochet Chunky Bow-Tie Neck Scarf
- Crochet Oversized Applied-Bow Winter Scarf
- Crochet Tassel-and-Bow Statement Scarf
- Crochet Understated Keyhole Bow Scarf
- Crochet Soft Bow Neck-Warmer Scarf
- Crochet Classic Pull-Through Retro Scarf
- Crochet Lacy Scarflette Bow Tie
- Crochet Delicate Skinny Retro Bow Scarf
- Crochet Long Skinny Bow-Tie Scarf
- Crochet Textured Vintage Mini Bow Scarf
- Crochet Petite Kerchief Bow Scarf
How the Bow Is Formed Changes the Whole Scarf
Start by deciding whether you want to tie a bow or have the construction create one for you. A skinny scarf or neckerchief leaves the arrangement flexible: the knot can sit centrally, off to one side, or lower on the chest. That flexibility is especially useful for a vintage blouse-and-cardigan look.
A keyhole scarf behaves differently. One end passes through an opening, creating a controlled crossed front without relying on a conventional knot. Buttoned designs are more fixed again, while an applied bow is primarily decorative and does not necessarily fasten the scarf.
None of these mechanisms is automatically better. A true tied bow gives more styling freedom, while a pull-through or buttoned design may require less rearranging. Decide which behavior matters before choosing colors or embellishment.
Drape Versus Definition Matters for a Retro Bow
A successful bow scarf usually needs a balance between movement and shape. A skinny scarf that is meant to knot needs enough flexibility to curve through a bow without creating a hard lump. A sculptural or applied bow benefits from more body so its loops remain visually distinct.
That is why a yarn substitution can change more than gauge. Plush yarn can enlarge the apparent bow, fuzzy fibers can soften crisp edges, and a very dense fabric can make a small neck scarf feel disproportionately bulky. On the other hand, an extremely loose fabric may let an intended statement bow collapse.
When substituting materials, handle a sample rather than judging only its flat appearance. Fold it, bend it, and loosely knot it. The question is whether the resulting fabric behaves like the type of bow you want to wear.
Check the Neck Fit With the Outfit You Plan to Wear
Short bow scarves have less margin for fit changes than long wraps. A few extra inches on a full scarf can disappear into another wrap, but extra length in a tiny collar scarf may move the bow away from its intended position. Too little length can make the fastening uncomfortably close.
Try the developing piece with the neckline you expect to wear most often. A bow that looks balanced with a crewneck sweater may compete with a high coat collar, while a delicate neckerchief may sit particularly well in the open space above a blouse or cardigan.
For keyhole designs, also consider the relationship between the opening and the thickness of the finished end. If yarn, edging, or overall scale changes, confirm that the end still passes through without excessive pulling or bunching.
1. Crochet Lace Bowtie Neckerchief Scarf
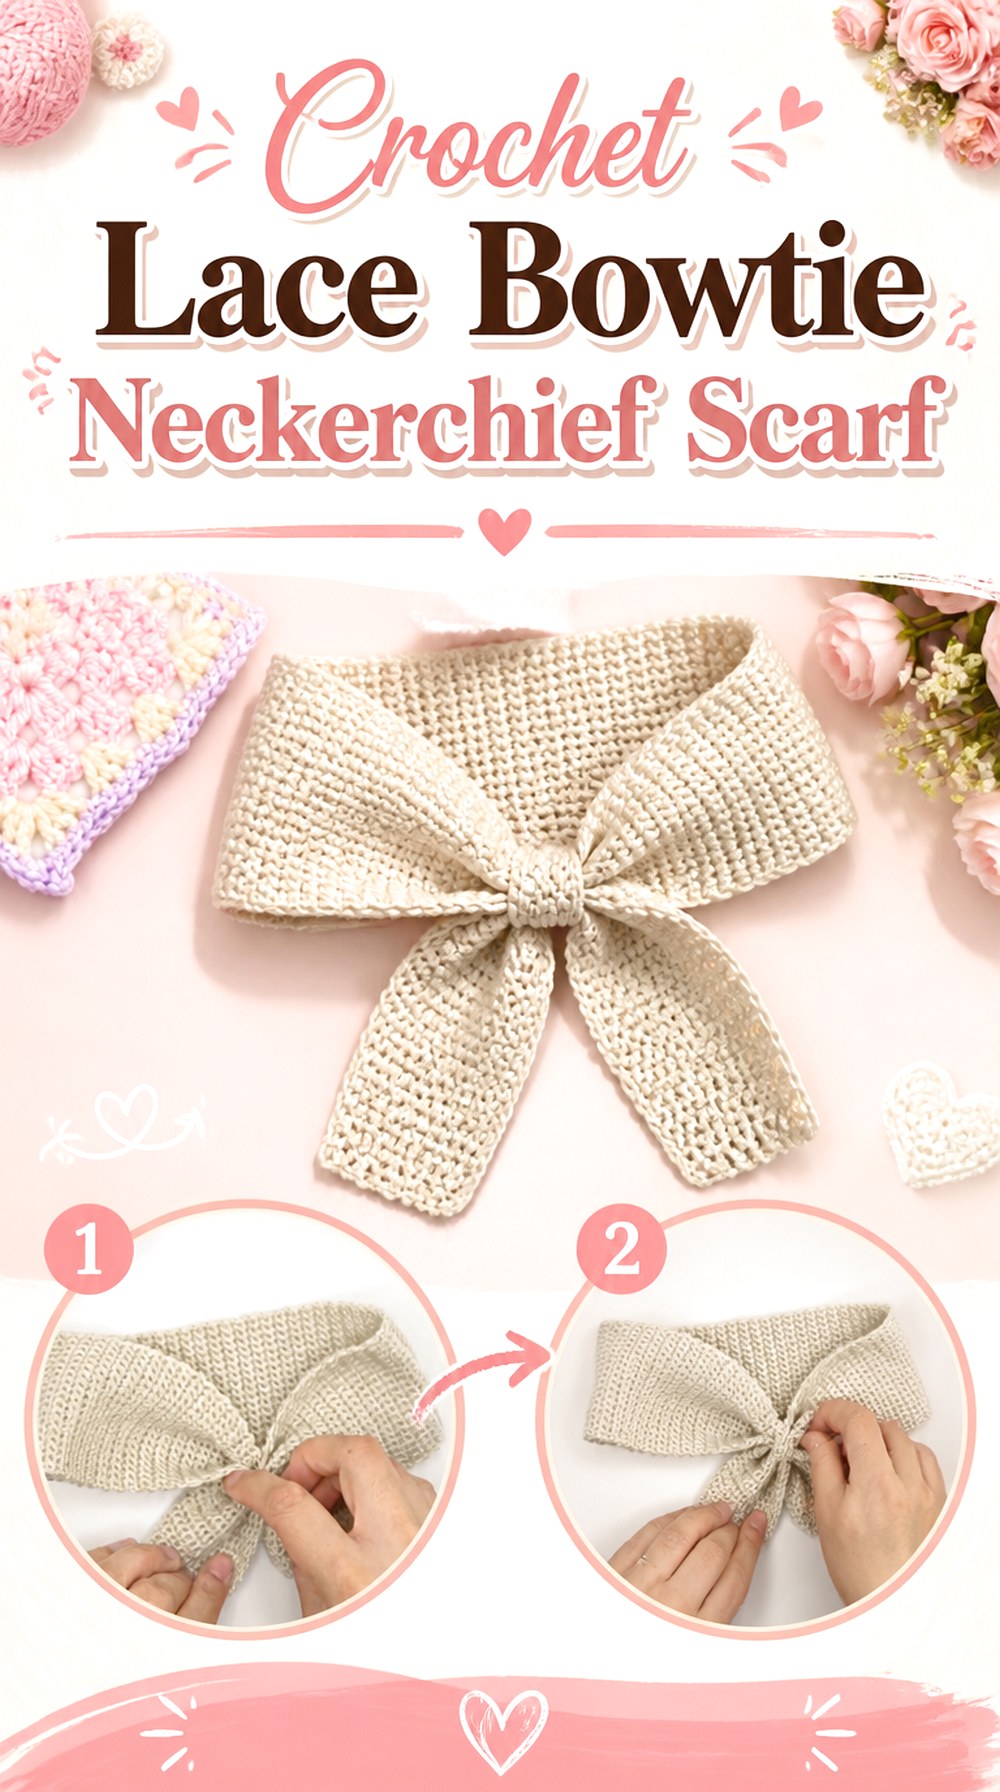
This fine bowtie neckerchief is one of the clearest choices for a genuinely vintage-looking result. Jess Crafting’s source project uses a delicate neckerchief format rather than the volume of a winter scarf, so the finished accessory reads more like a decorative neck tie. The construction includes openings that help establish the intended bowtie arrangement.
It is especially appealing with blouses, dresses, fine cardigans, and fitted sweaters where a thick knot could overwhelm the neckline. Compared with a chunky keyhole scarf, the emphasis is on graceful proportion and a small, controlled focal point.
Fine Fabric Keeps the Bow From Becoming Puffy
A delicate neckerchief depends on the scale of its fabric. Moving to a substantially thicker yarn may enlarge the overlapping areas as well as the overall scarf, producing a much fuller bow than the source design suggests.
If you want the same light visual effect with another yarn, compare the thickness and flexibility of your sample rather than matching color alone. The finished bow should look intentional at the neckline instead of behaving like a miniature winter muffler.
The Openings and Scarf Ends Must Work Together
The openings in this design are functional parts of its arrangement, not simply decorative holes. If the scarf end becomes thicker through a yarn substitution or additional border, an unchanged opening may no longer behave the same way.
Before finishing every detail, test how the relevant scarf section moves through the opening. It should pass without severe bunching while still creating the controlled neckerchief presentation that makes this design distinctive.
Original Tutorial and Creator Credit
Creator: Jess Crafting
2. Crochet Ribbon Neckline Bow Scarf
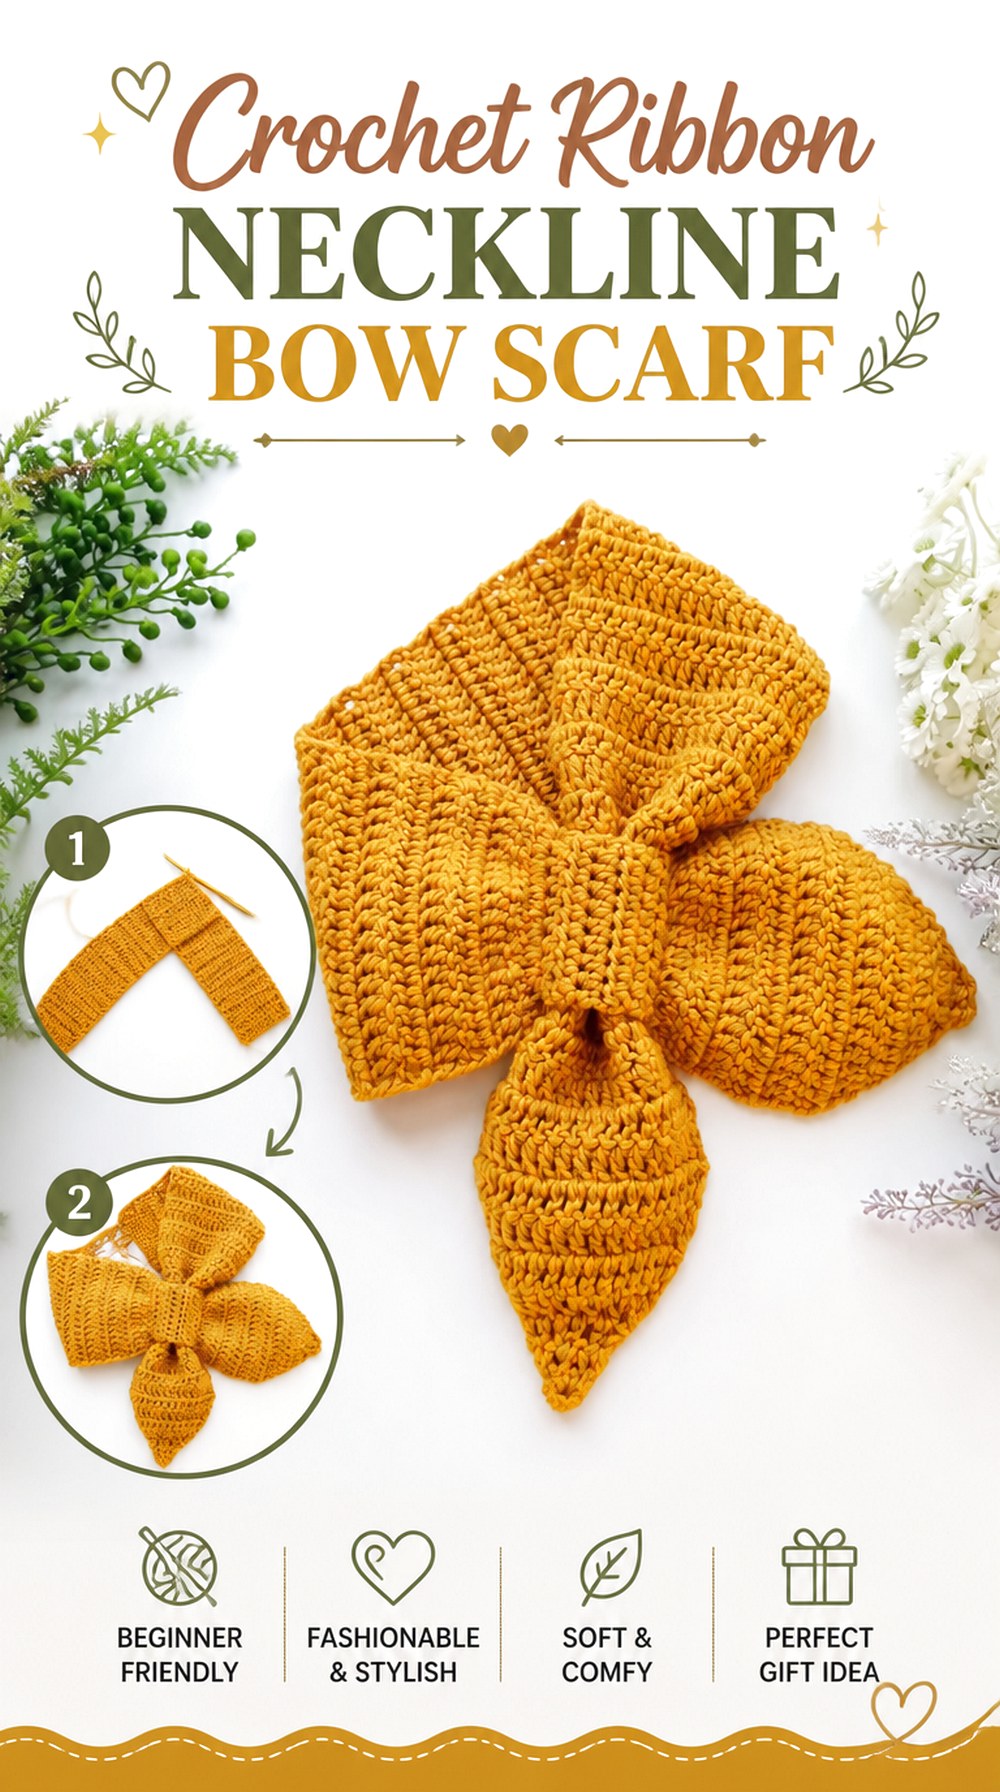
Adel handmade’s ribbon scarf keeps most of the fabric close to the neckline, creating a compact ribbon-shaped accessory rather than a conventional long scarf. The creator’s source also distinguishes adult and child versions, reinforcing how important proportion is with such a short design.
For retro styling, this shape works particularly well when you want a visible bow above a cardigan or coat opening without long tails hanging down the torso. Its polished outline makes it noticeably different from the looser skinny scarves later in the collection.
Short Length Gives You Less Room to Correct the Fit
A long scarf can compensate for extra fabric through another wrap or a looser knot. This shorter format cannot. If you change yarn or scale, check the developing scarf around the intended wearer before assuming that simply adding or removing length will preserve the original proportions.
Look at where the front detail sits as well as overall circumference. A bow positioned too high can crowd the chin, while one placed too low can lose the neat ribbon-collar effect.
Resize the Bow and Neck Section as One Design
The creator provides separate sizing direction for adults and children rather than treating one scarf as universally sized. That is a useful planning principle even when making the scarf for another adult.
If you change the neck section substantially, reconsider the visual scale of the front ribbon at the same time. Enlarging only one area can make a formerly balanced bow look either undersized or unusually dominant.
Clear Edges Make the Ribbon Shape Easier to Read
Much of this project’s personality comes from the outline. Highly fuzzy yarn can soften that outline, while very stiff fabric can make the front stand away from the body.
If a retro graphic ribbon is your goal, prioritize a sample with visible edges and enough flexibility to follow the neckline. A softer halo can still work, but it will produce a gentler, less sharply defined interpretation.
Original Tutorial and Creator Credit
Creator: Adel handmade
3. Crochet Sculpted Bow Front Scarf
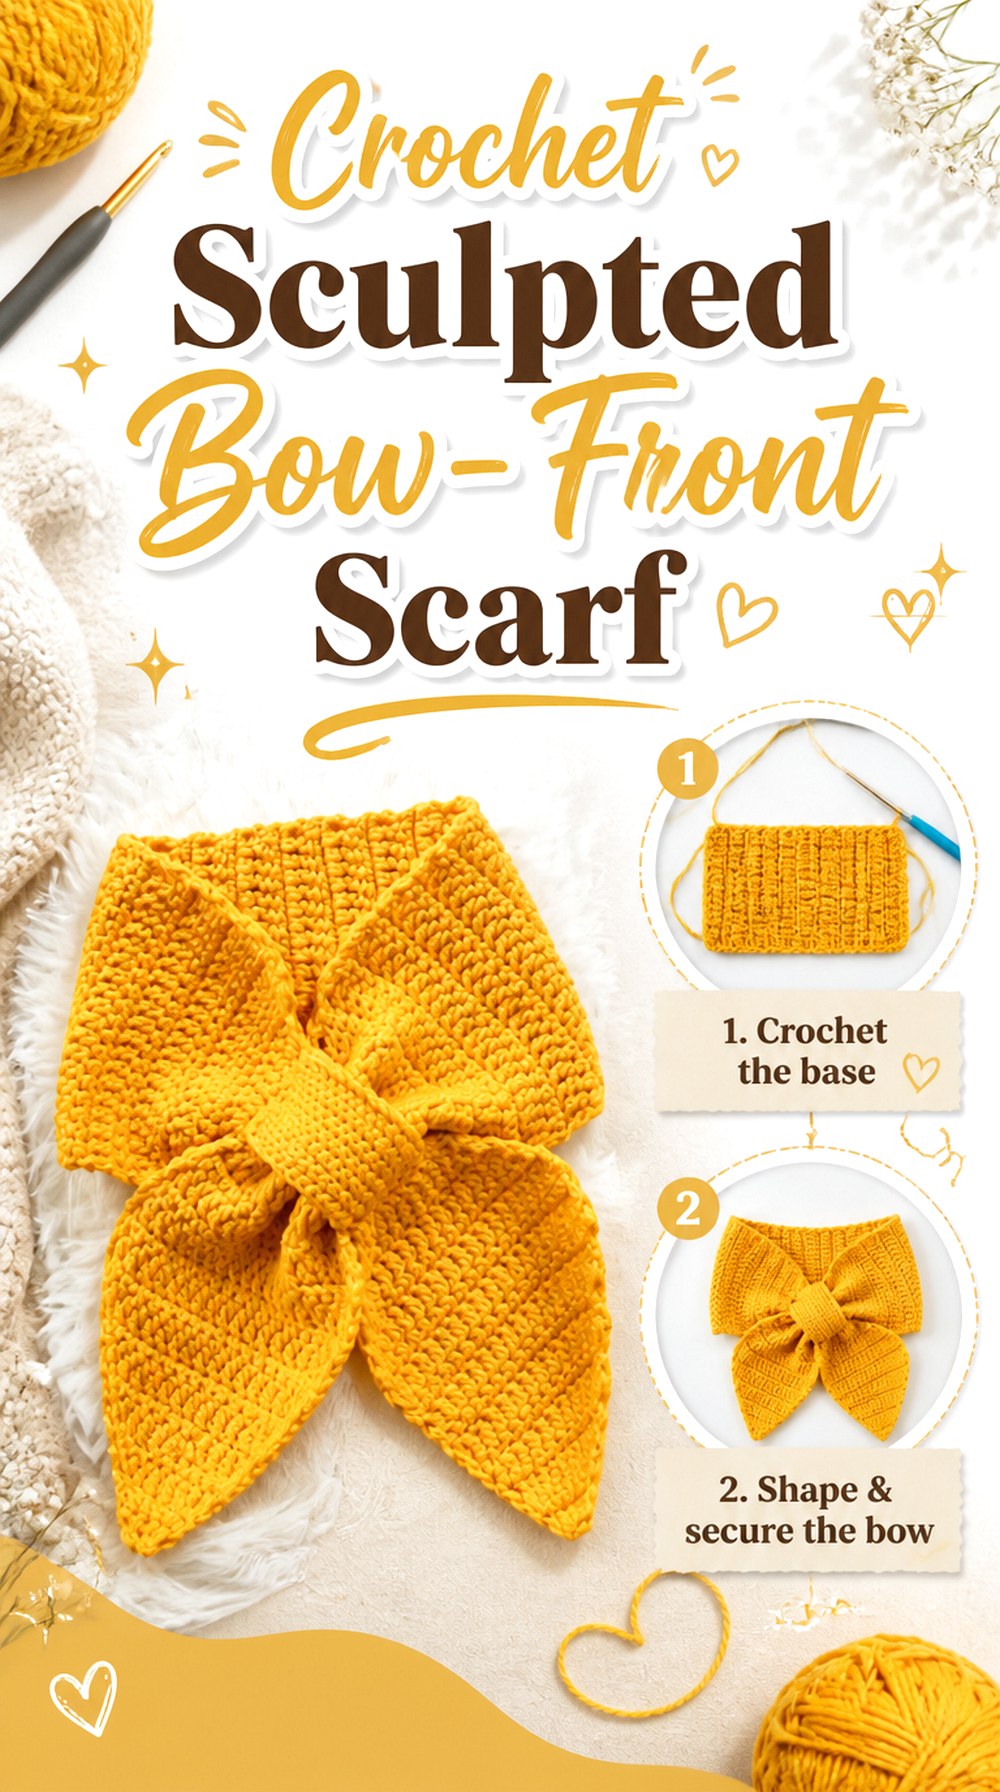
This tutorial from Vyva ‘s Crochet is explicitly centered on a bow-shaped scarf, making it a strong choice when you want the bow to be unmistakable rather than created only through styling. The finished front has enough shape to act as the main design feature while the scarf remains relatively concentrated around the neck.
For a retro interpretation, this is the type of project that can carry a simple outfit by itself. It does not need fringe, several appliqués, or a highly patterned yarn to provide visual interest; the silhouette already does that work.
A Defined Bow Needs Both Flexibility and Body
A very floppy fabric may allow the bow to collapse, but an excessively rigid fabric can make it project awkwardly away from the neckline. Aim for the behavior shown in the tutorial rather than assuming that any yarn producing the same rough size will create the same shape.
When substituting, fold the sample into curved layers. That simple check reveals far more about bow behavior than looking at an unstressed swatch on a table.
Keep the Front Detail in Scale With the Wearer
The bow is visually prominent, so changing its apparent size can change the entire character of the scarf. A larger hook, loftier yarn, or wider fabric can make the same basic concept feel dramatically more oversized.
Think about where you want the bow to end relative to the shoulders and coat opening. Retro-inspired does not require enormous proportions; a smaller, crisp bow can feel just as intentional.
Let the Silhouette Carry the Vintage Styling
This scarf already has a recognizable bow form, making restrained customization particularly effective. A solid cream can feel delicate, deep red can emphasize the ribbon association, and dark neutrals can make the shape more tailored.
Busy color changes may be appealing, but consider whether they compete with the bow outline. If silhouette is the main reason you selected this tutorial, allow that shape to remain the focal point.
Original Tutorial and Creator Credit
Creator: Vyva ‘s Crochet
4. Crochet Buttoned Bow Collar Scarf
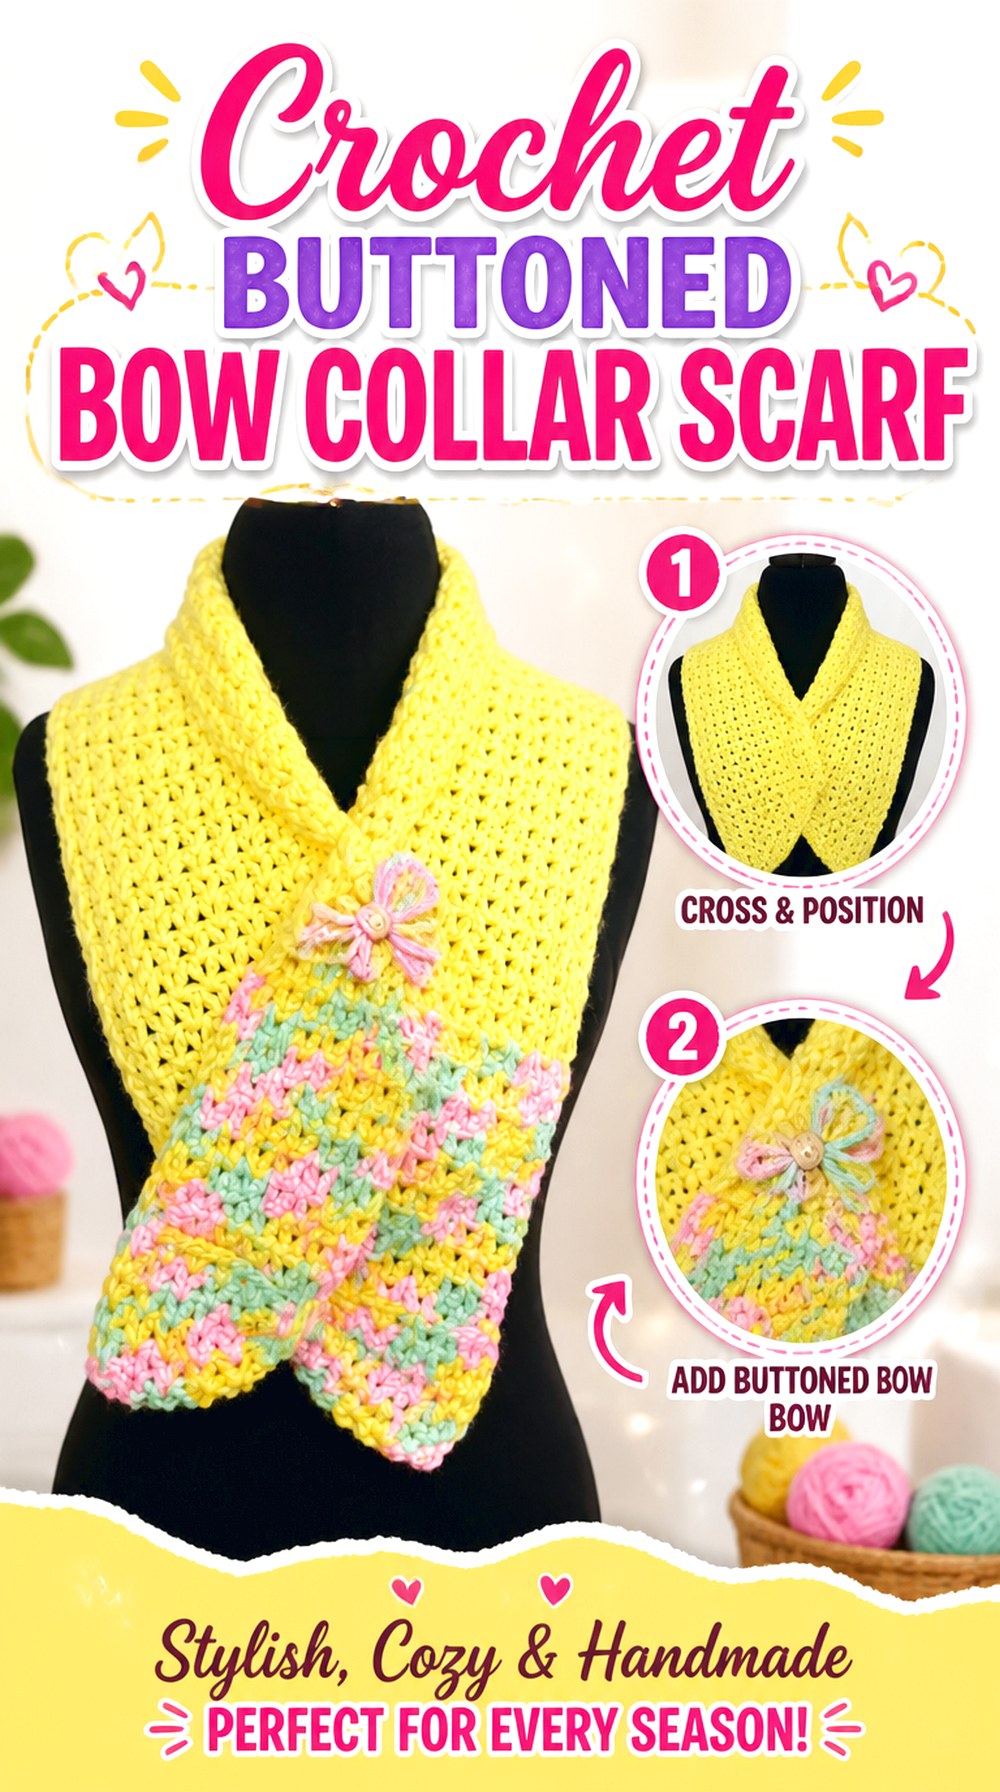
Vivirtejendo adds a button to the bow-scarf idea, creating a more fixed collar-style accessory. That immediately separates this design from loose skinny scarves and pull-through keyholes: instead of recreating the same knot each time, the closure helps establish where the scarf rests.
The result suits a polished retro look where the neck detail should remain relatively controlled. It can be an attractive option with a plain sweater or a coat worn open, particularly when you prefer a decorative front without two long scarf tails.
Button Placement Becomes a Fit Checkpoint
A fixed closure reduces the amount of adjustment available once the scarf is finished. Before permanently committing to its position, consider how the collar rests when worn rather than judging the overlap only while it lies flat.
If you alter yarn thickness or overall scale, do not assume that the original closure relationship will automatically remain comfortable. The goal is a secure presentation without forcing the scarf tightly around the neck.
Make Sure the Bow and Button Do Not Compete
This design has two strong front elements: the decorative bow treatment and the button. Their relationship can either look deliberate or unnecessarily busy.
If you customize the scarf, consider keeping one of those features visually quieter. A simple button can let a textured bow dominate, while a more decorative button may work better when the crochet itself is restrained.
Original Tutorial and Creator Credit
Creator: Vivirtejiendo
5. Crochet Compact Pull Through Bow Scarf
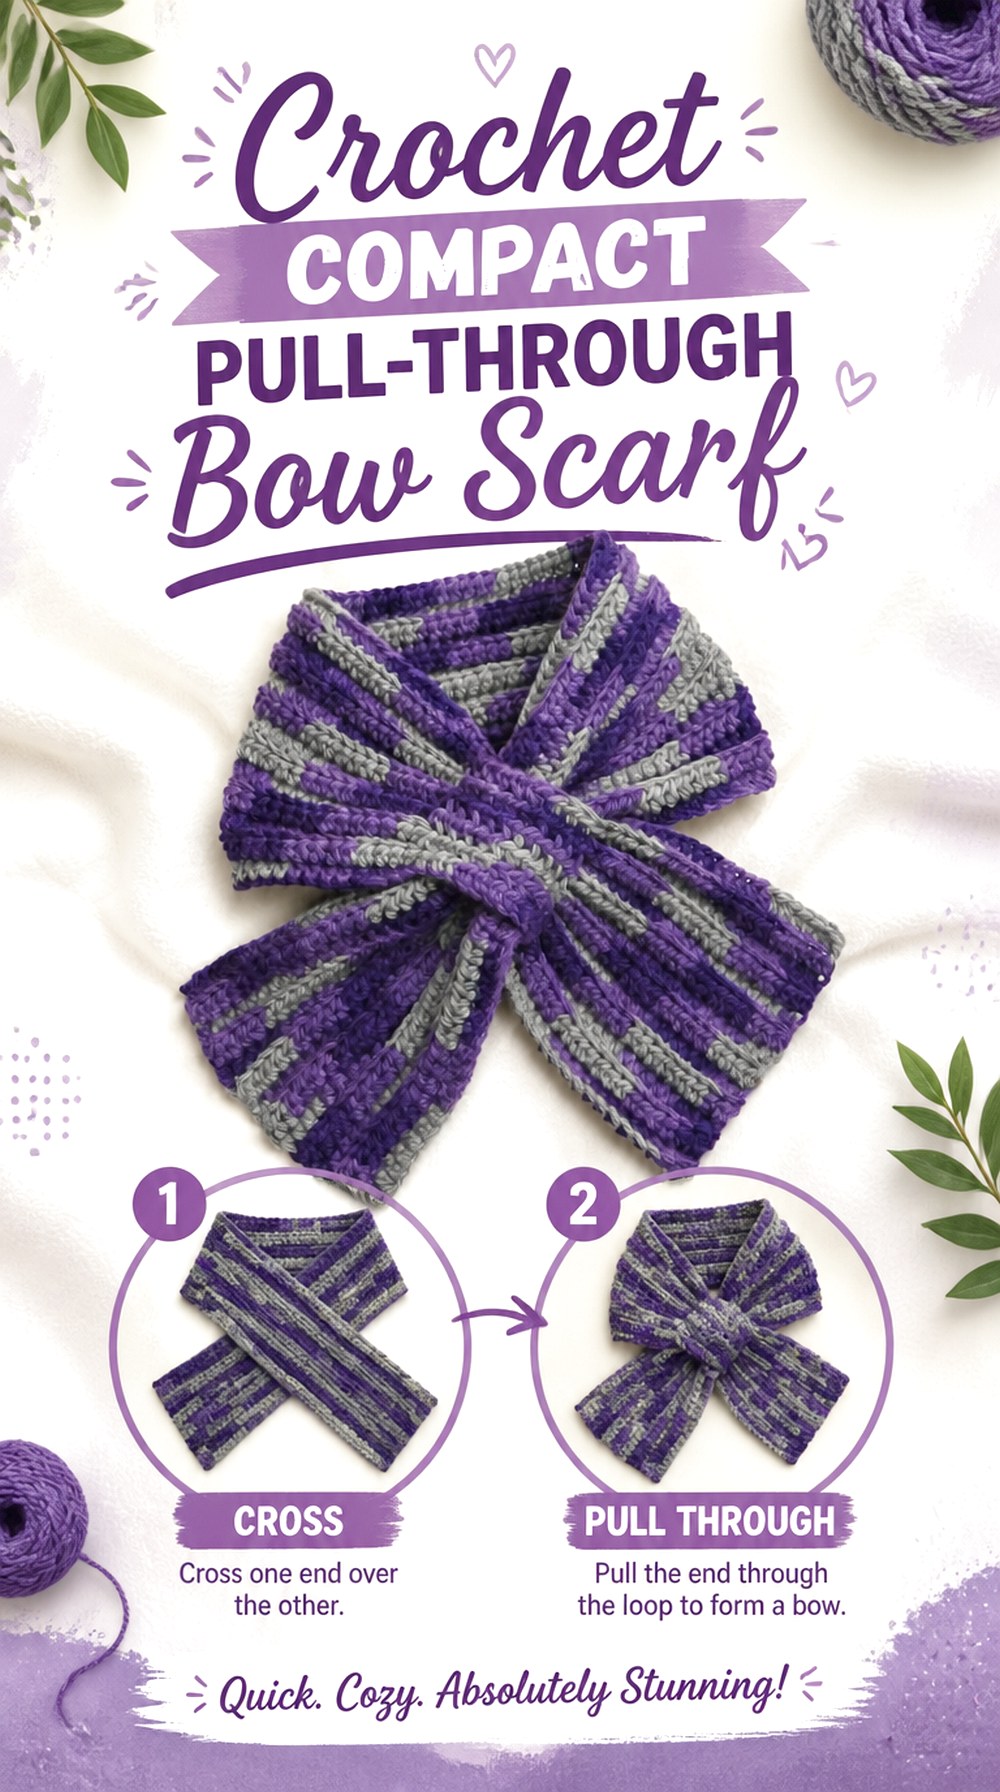
Handmade By Mei demonstrates one of the most practical bow-scarf mechanisms: a pull-through arrangement that produces a neat crossed front without requiring a conventional bow knot. The source presents the concept for both children and adults, making the relationship between neck length, opening, and scarf end especially important.
This is a good retro option when you like the appearance of a soft bow but prefer a scarf that returns to a similar arrangement each time. It also avoids the long tails of a traditional rectangle.
Test the Pull-Through Before the Scarf Is Completely Finished
Changing yarn can alter the thickness of the end that travels through the opening. An end that becomes too bulky may distort the keyhole or bunch up, while an oversized opening may create a much looser front.
Use a representative section of the finished fabric to check that relationship before adding optional decorative edging. The functional closure deserves priority over a border that makes the scarf harder to wear.
Child and Adult Versions Still Need Personal Fit Checks
A concept being adaptable to different ages does not mean there is one ideal circumference. Neck size, preferred looseness, clothing layers, and yarn thickness all contribute to comfort.
For a child, avoid simply reducing an adult scarf visually. Follow the creator’s relevant version and confirm that the finished neckwear sits comfortably and does not depend on a tight fit to produce the intended bow effect.
This Shape Works Well When You Dislike Loose Tails
A true bow consumes length and still leaves two tails that can shift as the wearer moves. A pull-through scarf concentrates the front arrangement in a smaller area.
That makes this construction worth comparing with the skinny tied designs if you expect to wear the scarf frequently under an open jacket or cardigan. You get a decorative crossed front without managing a long knot every time.
Original Tutorial and Creator Credit
Creator: Handmade By Mei
6. Crochet Ribbed Keyhole Bow Scarf
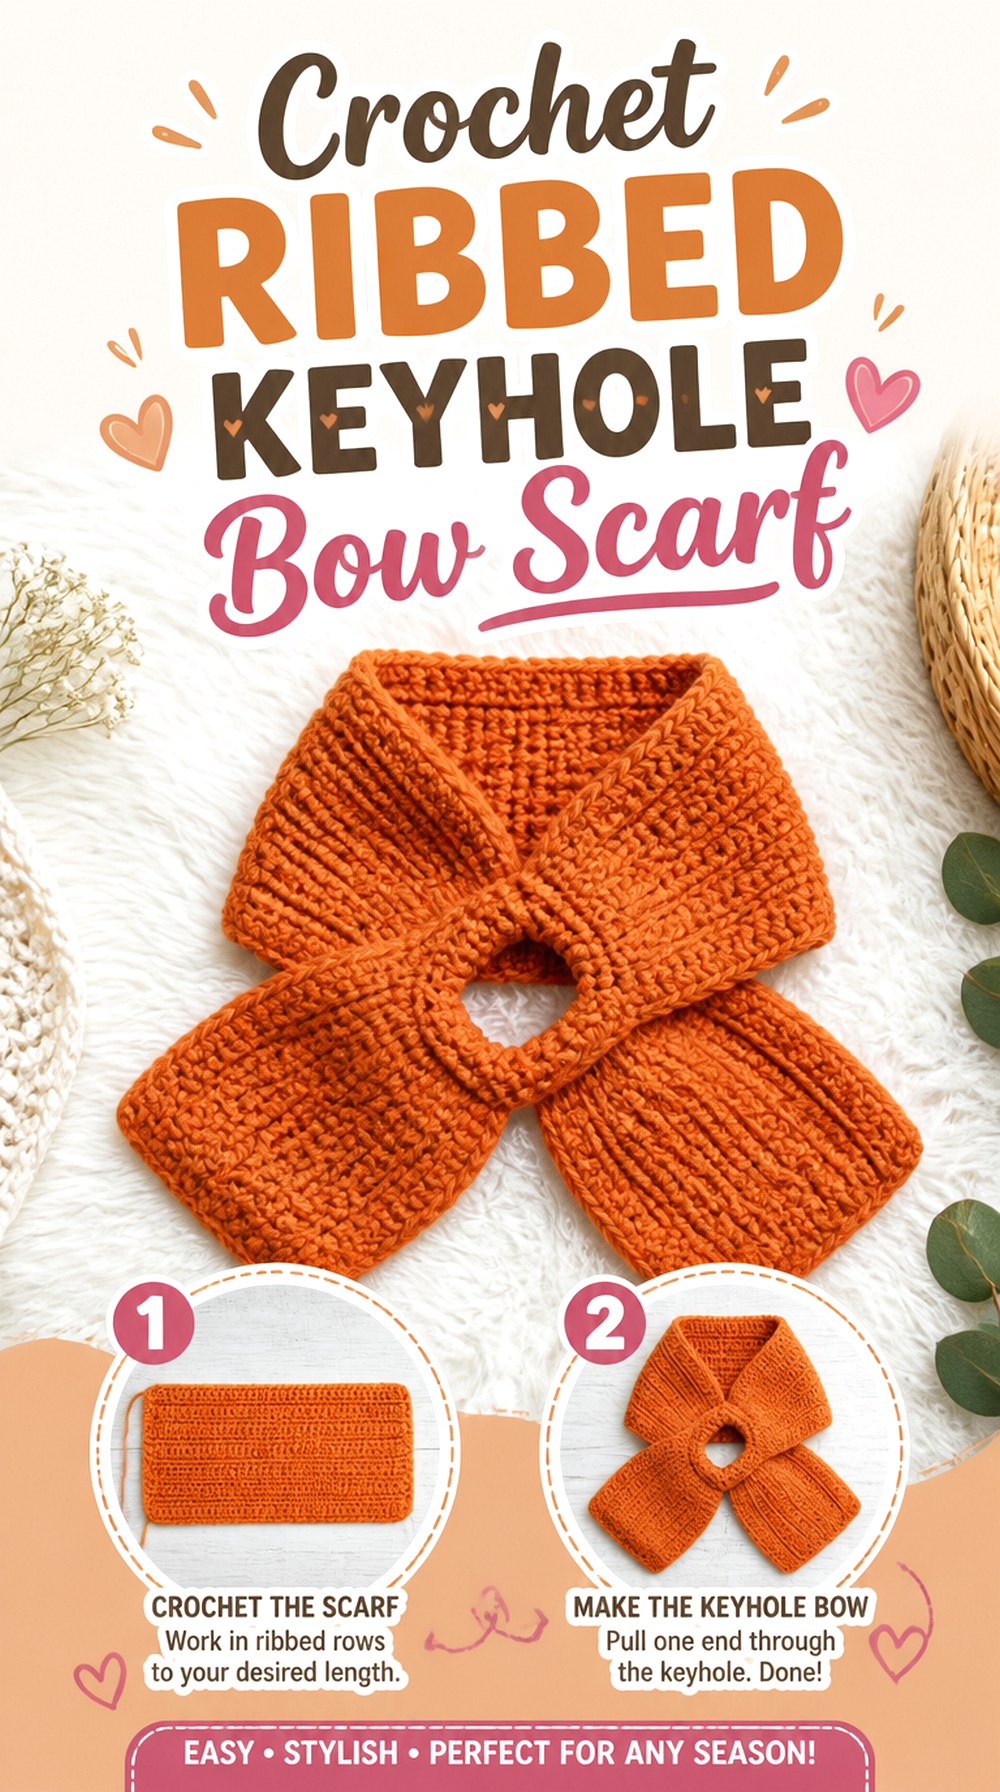
frim crochet offers another direct bow-keyhole approach, but this version is useful for a more understated retro wardrobe. The design relies on the crossing and pull-through effect rather than an oversized applied decoration, so the finished scarf can complement an outfit instead of dominating it.
Choose this route when you want the visual suggestion of an ascot or bow tie with the practicality of a defined opening. It also provides a useful contrast to the sculptural bow and large chunky versions.
A Simple Front Makes Edge Quality More Noticeable
When the construction itself is minimal, uneven width and wandering edges have fewer decorative details to hide behind. Check the scarf flat periodically and compare both sides before progressing too far.
If one section begins to narrow or flare unexpectedly, correcting the underlying tension issue is more effective than planning to disguise it inside the final crossed arrangement.
Preserve the Opening When You Change Yarn
A thicker or more textured yarn can make the scarf look pleasantly substantial, but it can also make the end harder to pull through. Conversely, a much thinner material can produce an opening that feels oversized.
Treat the finished end and opening as a matched pair. Smooth, comfortable movement through the keyhole matters more than copying the flat width of a scarf made from a different material.
Original Tutorial and Creator Credit
Creator: frim crochet
7. Crochet Chunky Bow Tie Neck Scarf
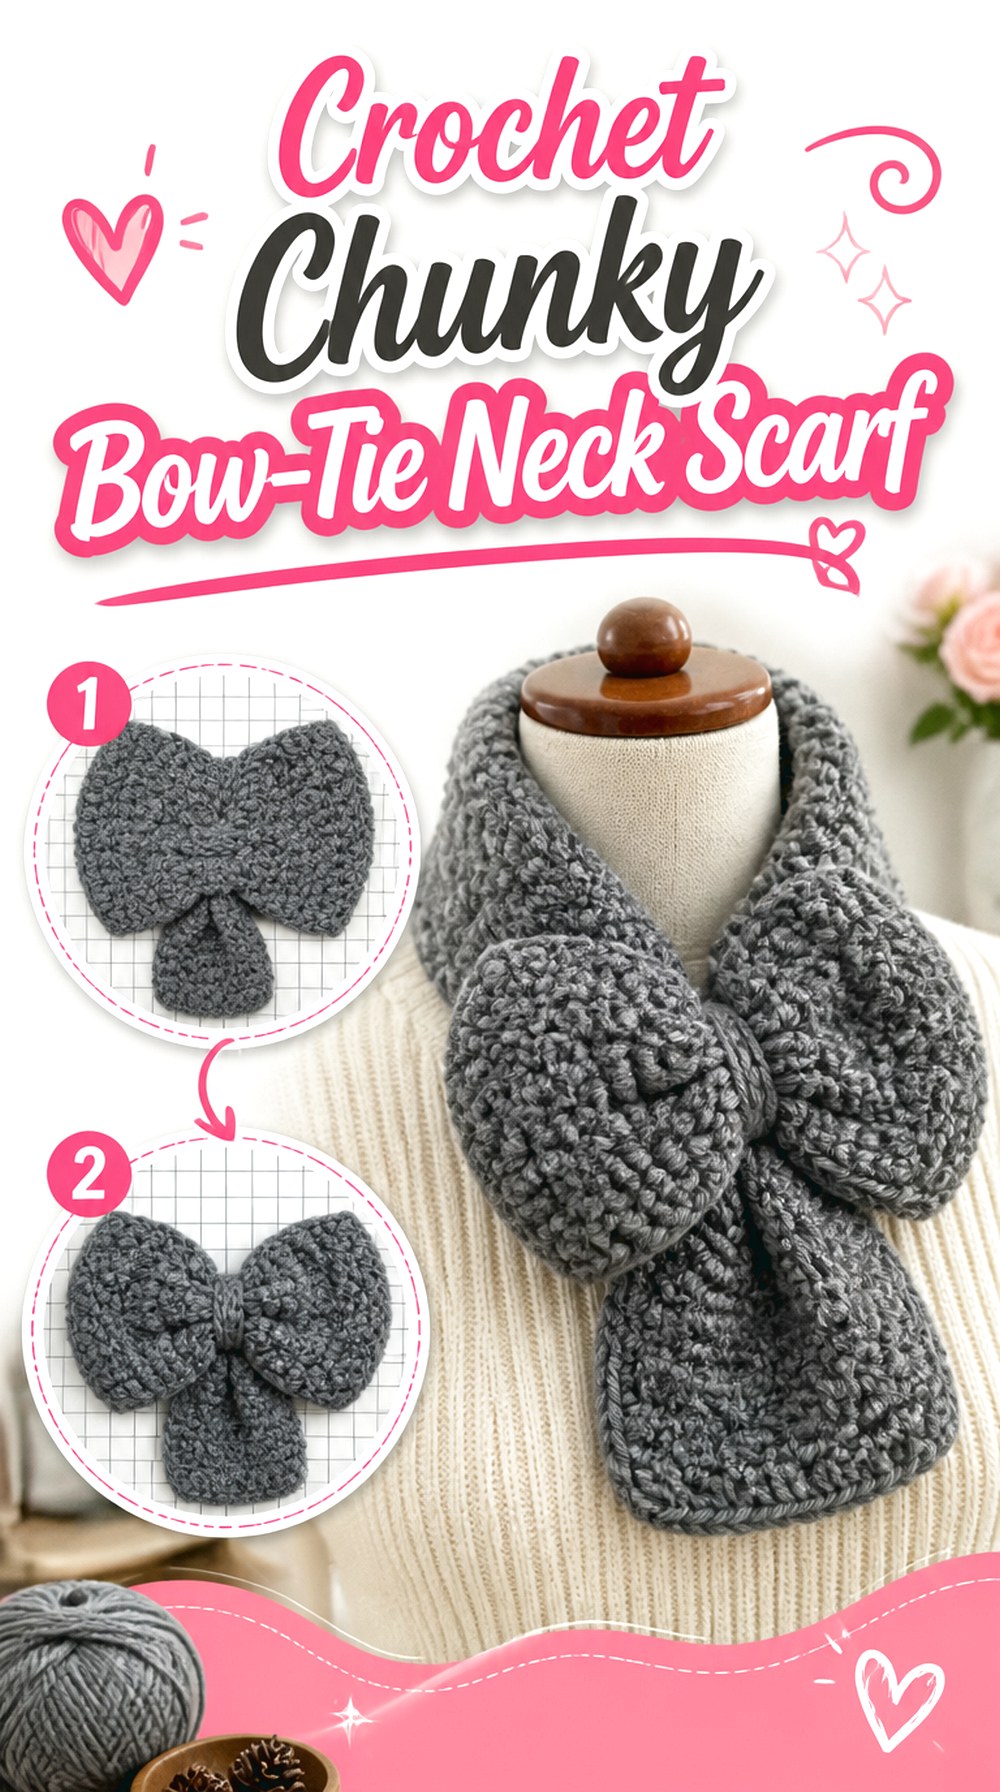
BDD Patterns takes the bow scarf into a fuller winter direction with a chunky women’s bow-tie scarf. Compared with a delicate neckerchief, more fabric is concentrated around the front of the neck, making the bow a noticeable part of the outfit rather than a small accessory detail.
This is a useful choice when you want vintage bow-tie styling but also prefer visual warmth and substance. It is less suited to disappearing beneath a narrow jacket collar than the fine scarf ideas, so outerwear compatibility deserves consideration.
Chunky Fabric Amplifies Every Overlap
Bow scarves naturally place multiple layers of crochet near one another. With thicker fabric, those overlaps become more substantial.
Before choosing this style for daily coat wear, look at the finished front and compare it with the space available inside your usual collar. A design that feels balanced over a sweater may become crowded beneath a fitted jacket, while an open or oversized coat can accommodate the volume more easily.
One Bold Bow Can Be Enough Decoration
The bow-tie silhouette already supplies a strong focal point. Extra motifs, dramatic fringe, and highly complex color changes are not necessary to make the scarf look finished.
For a retro effect, a solid or subtly heathered yarn can allow the silhouette and crochet texture to remain visible. If you want contrast, consider whether it reinforces the bow shape rather than dividing it visually into too many competing areas.
Use the Creator’s Pattern Support for Exact Construction
Similar chunky bow scarves can look alike in photographs while using quite different construction. Do not borrow dimensions or assembly details from another bow-tie design and assume they will transfer cleanly.
Follow the BDD Patterns tutorial and any linked source material for its exact construction. Use broader comparison advice here only for choosing the project and planning how it will fit into your wardrobe.
Original Tutorial and Creator Credit
Creator: BDD Patterns
8. Crochet Oversized Applied Bow Winter Scarf
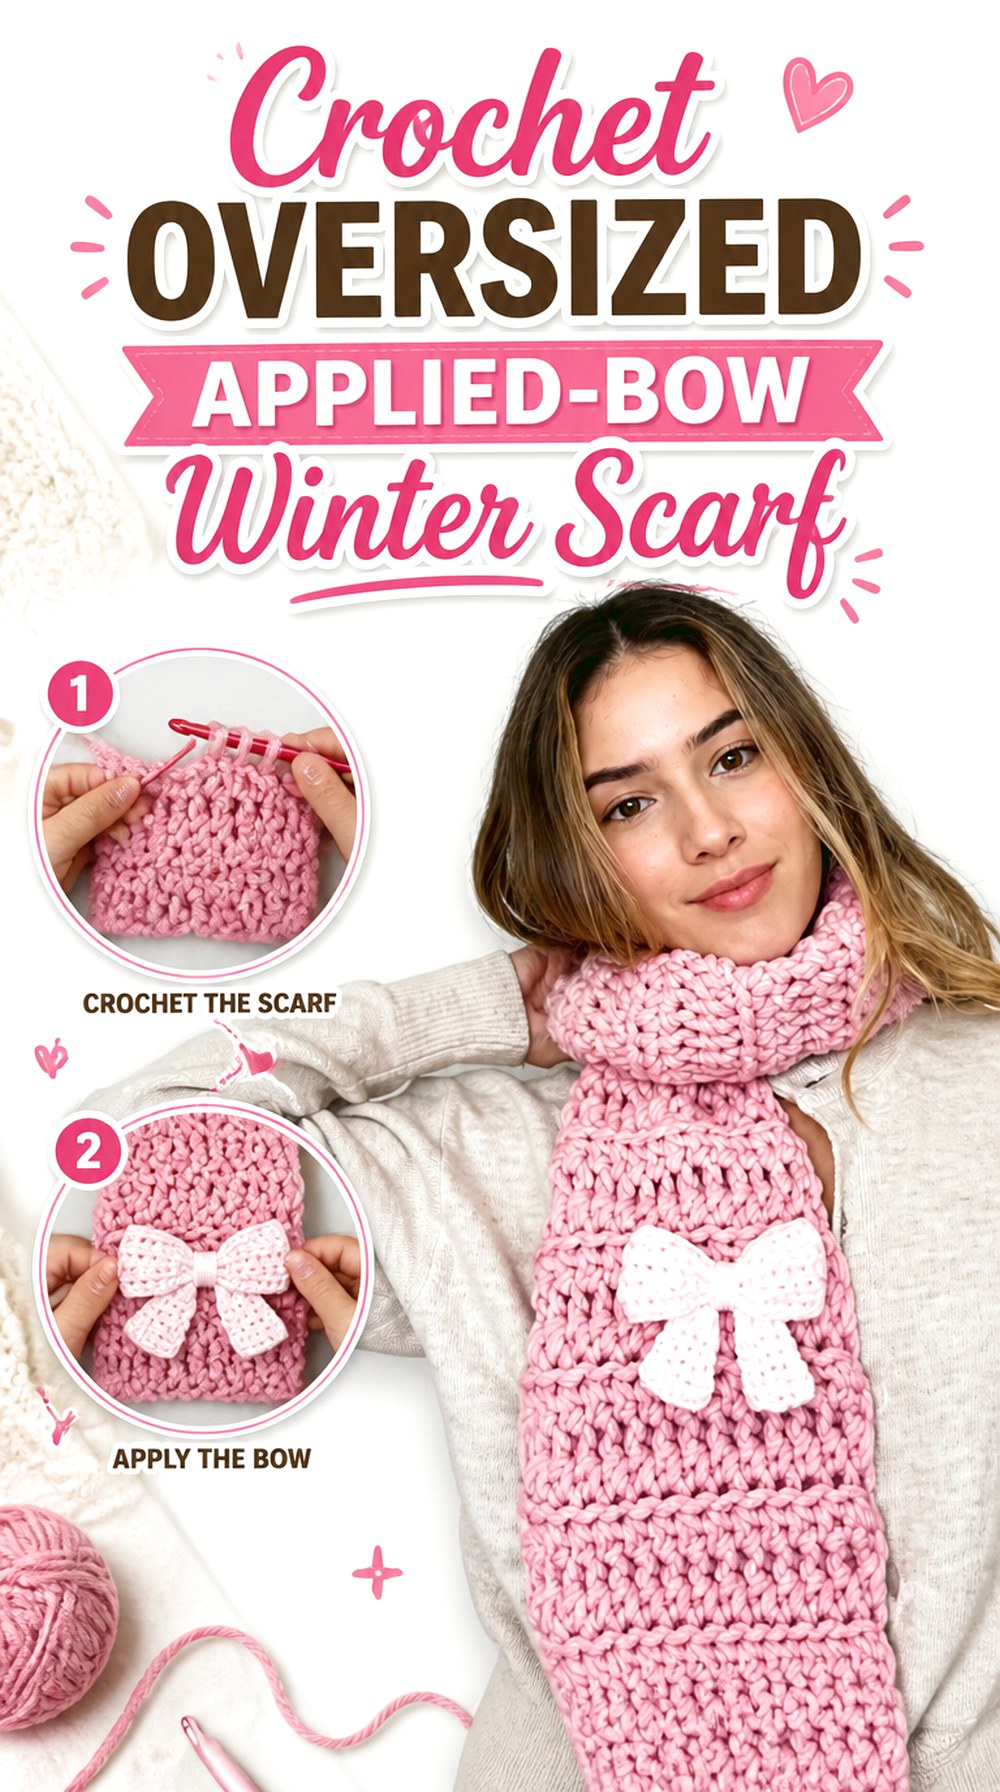
crochet daniela’s tutorial changes the role of the bow completely. Instead of using a bow-shaped closure, the source shows a chunky scarf decorated with chunky bows. That makes the bows embellishments on a larger scarf rather than the mechanism that holds the scarf around the neck.
This format gives you a stronger statement piece and more visual movement than the short collar scarves. It is particularly useful if your idea of retro leans toward playful, romantic accessories rather than a restrained ascot.
Position Dimensional Bows While the Scarf Is Being Worn
A flat table is not the best place to make the final placement decision. Once a scarf curves around the shoulders, a bow can rotate toward the body, disappear beneath a lapel, or add extra weight to one side.
Arrange the completed scarf in its usual wearing position before permanently placing dimensional decoration. Temporary markers can help you compare visibility and balance without copying any creator-specific assembly sequence.
Decide Whether the Bows Sit Inside or Outside Your Coat
Large crochet bows need room to remain recognizable. If they are repeatedly compressed under a fitted coat, the main design feature may be hidden and the additional thickness may feel awkward.
For an accessory meant to be worn over outerwear, more prominent placement can make sense. If the scarf will usually be tucked inside a jacket, consider whether a smaller-bow project would suit that use better.
Fuzzy Yarn Can Soften the Bow Outline
A plush or haloed fiber can enhance the cozy mood of a chunky scarf, but it also reduces crisp edge definition. That is a trade-off rather than an automatic problem.
If clearly shaped bows are your priority, compare a sample motif in your substitute yarn before committing to the entire project. The best fiber choice depends on whether you value a graphic bow silhouette or a softer cloud-like winter effect.
Original Tutorial and Creator Credit
Creator: crochet daniela
9. Crochet Tassel and Bow Statement Scarf
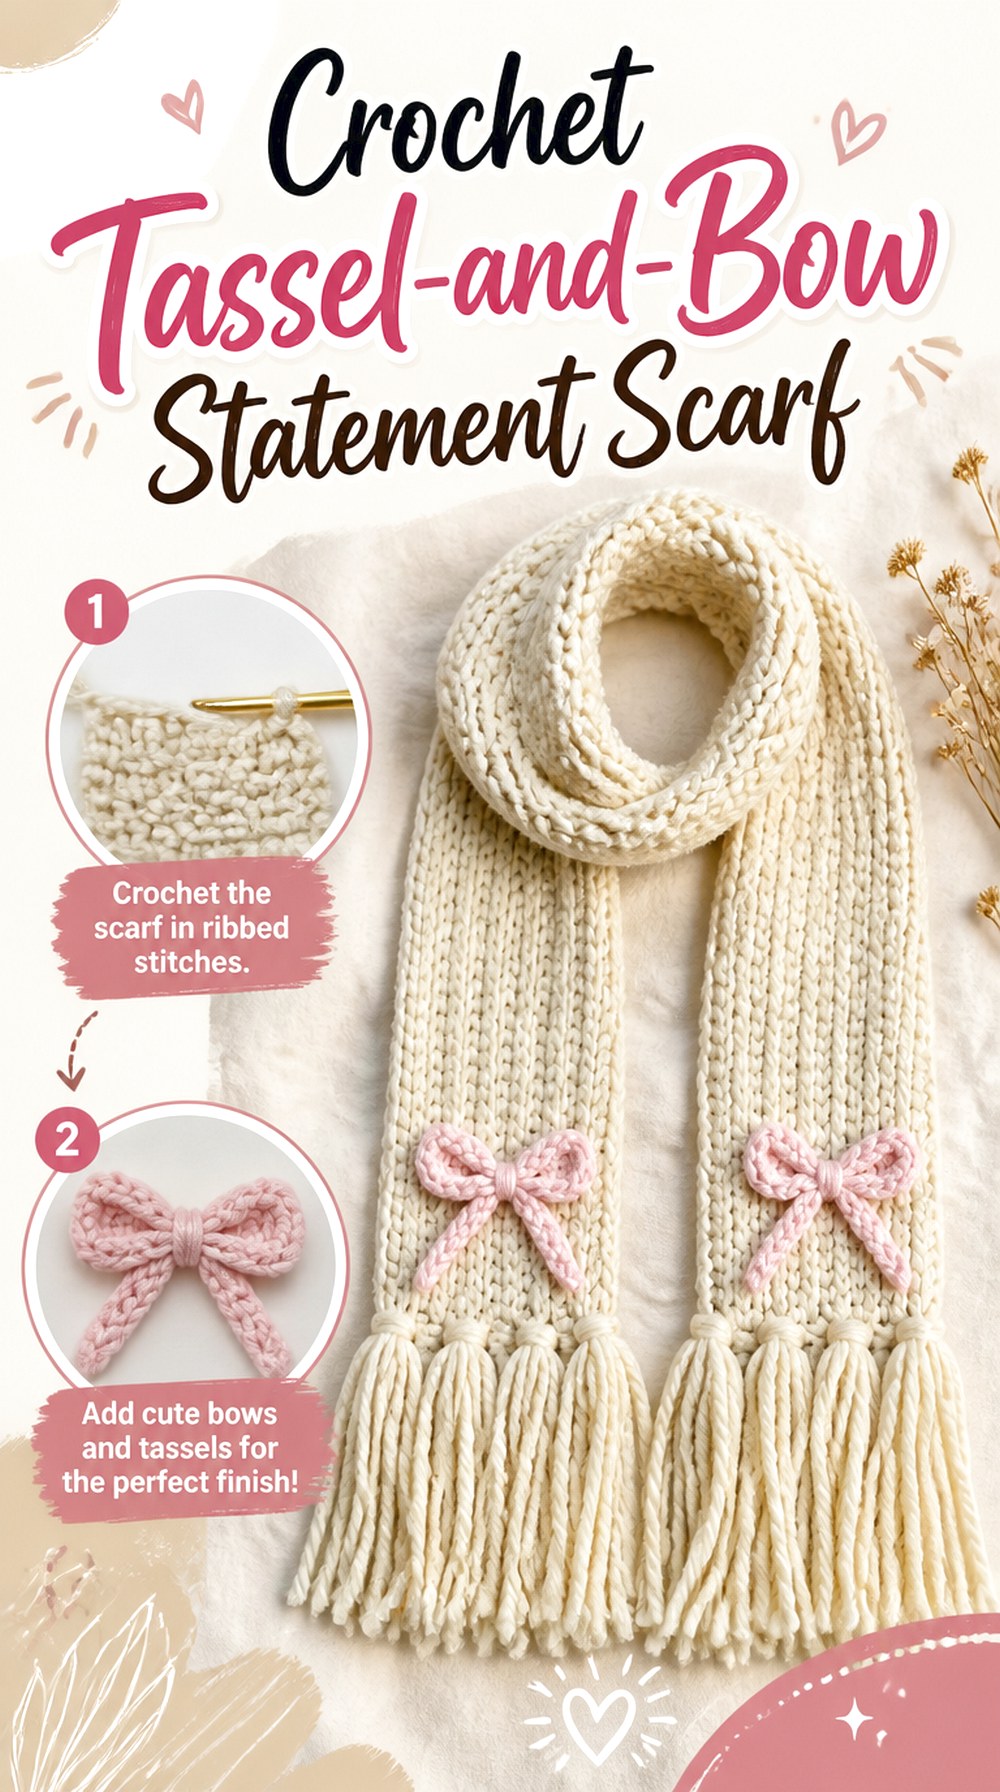
The gias.yarniverse tutorial combines a longer scarf with tassels and separate bow details, giving this project considerably more movement and decoration than a compact bow collar. The video includes the scarf, tassels, bows, and their attachment within the complete project.
This makes it a strong option for readers who want the bow motif repeated as part of a playful statement accessory. It can still be styled with a retro palette, but its personality is more decorative and youthful than the restrained neckerchief projects.
Tassels and Bows Compete for Visual Attention
This scarf already combines two moving decorative elements. Adding another strong border, several colors, or additional appliqués can make the finished accessory visually crowded.
If you want a vintage-inspired version, consider letting the bow shapes and tassels supply the complexity while keeping the scarf body relatively quiet. That gives the eye somewhere to rest and makes the individual embellishments easier to recognize.
Check Bow Placement After the Scarf Has Full Length
Decorative placement can look very different after a scarf is wrapped around the neck. Areas that appear widely separated on a flat scarf may overlap when worn.
Arrange the finished-length scarf first, then consider how the bows appear from the front and sides. This is particularly useful when you want a balanced statement rather than having every decorative feature cluster around the same shoulder.
Fringe Length Changes the Overall Proportion
Tassels extend the visual length of a scarf even though they do not behave like the crocheted body. If you are adapting the project, judge the final silhouette with the fringe included rather than making the body longer first and considering tassels afterward.
A retro interpretation can work with either shorter, tidier tassels or more dramatic movement, but the decision should support the overall proportion of the scarf.
Original Tutorial and Creator Credit
Creator: gias.yarniverse
10. Crochet Understated Keyhole Bow Scarf
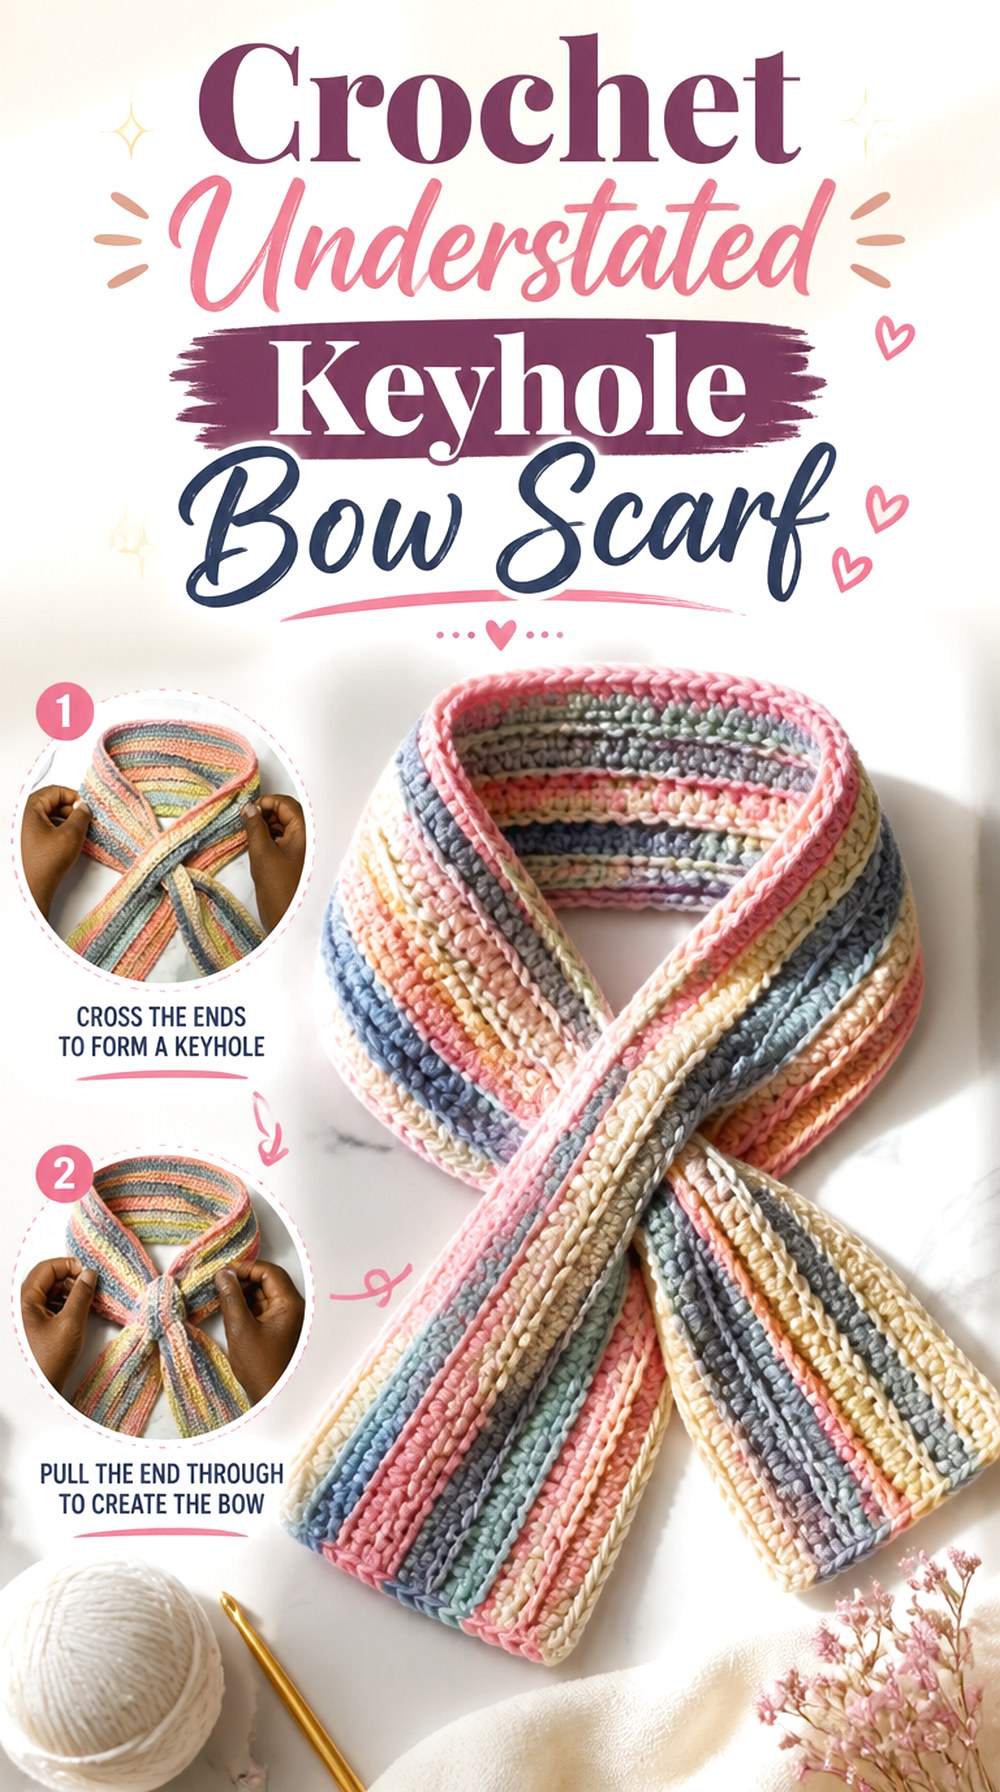
Atreyu Crochet’s source teaches a keyhole scarf rather than a separate applied bow. For this roundup, its retro bow effect comes from the compact crossed front created when one end is pulled through the opening. That makes it a quieter alternative to literal ribbon bows.
Choose this option when you like the functional behavior of a bow scarf but want something more restrained for everyday coats and sweaters. The absence of a large added bow also allows the crochet fabric itself to provide much of the visual interest.
Treat the Bow Appearance as Styling
The source construction is a keyhole scarf. The bow-like connection is an editorial styling interpretation of the crossed front, not a claim that the tutorial adds a separate bow component.
That distinction matters when choosing among these ideas. If you specifically want loops and tails that resemble a tied ribbon, select one of the direct bow tutorials. If you mainly want a tidy retro crossed neckline, this route may be more practical.
The Keyhole Should Still Function After Customization
Adding a thicker edging or choosing denser yarn can increase the effective thickness of the scarf end. That may matter more than a small change in flat width.
Before completing decorative modifications, verify that the end passes through comfortably and that the opening does not distort badly during use. The reliable closure is the main reason to choose this construction.
Original Tutorial and Creator Credit
Creator: Atreyu Crochet
11. Crochet Soft Bow Neck Warmer Scarf
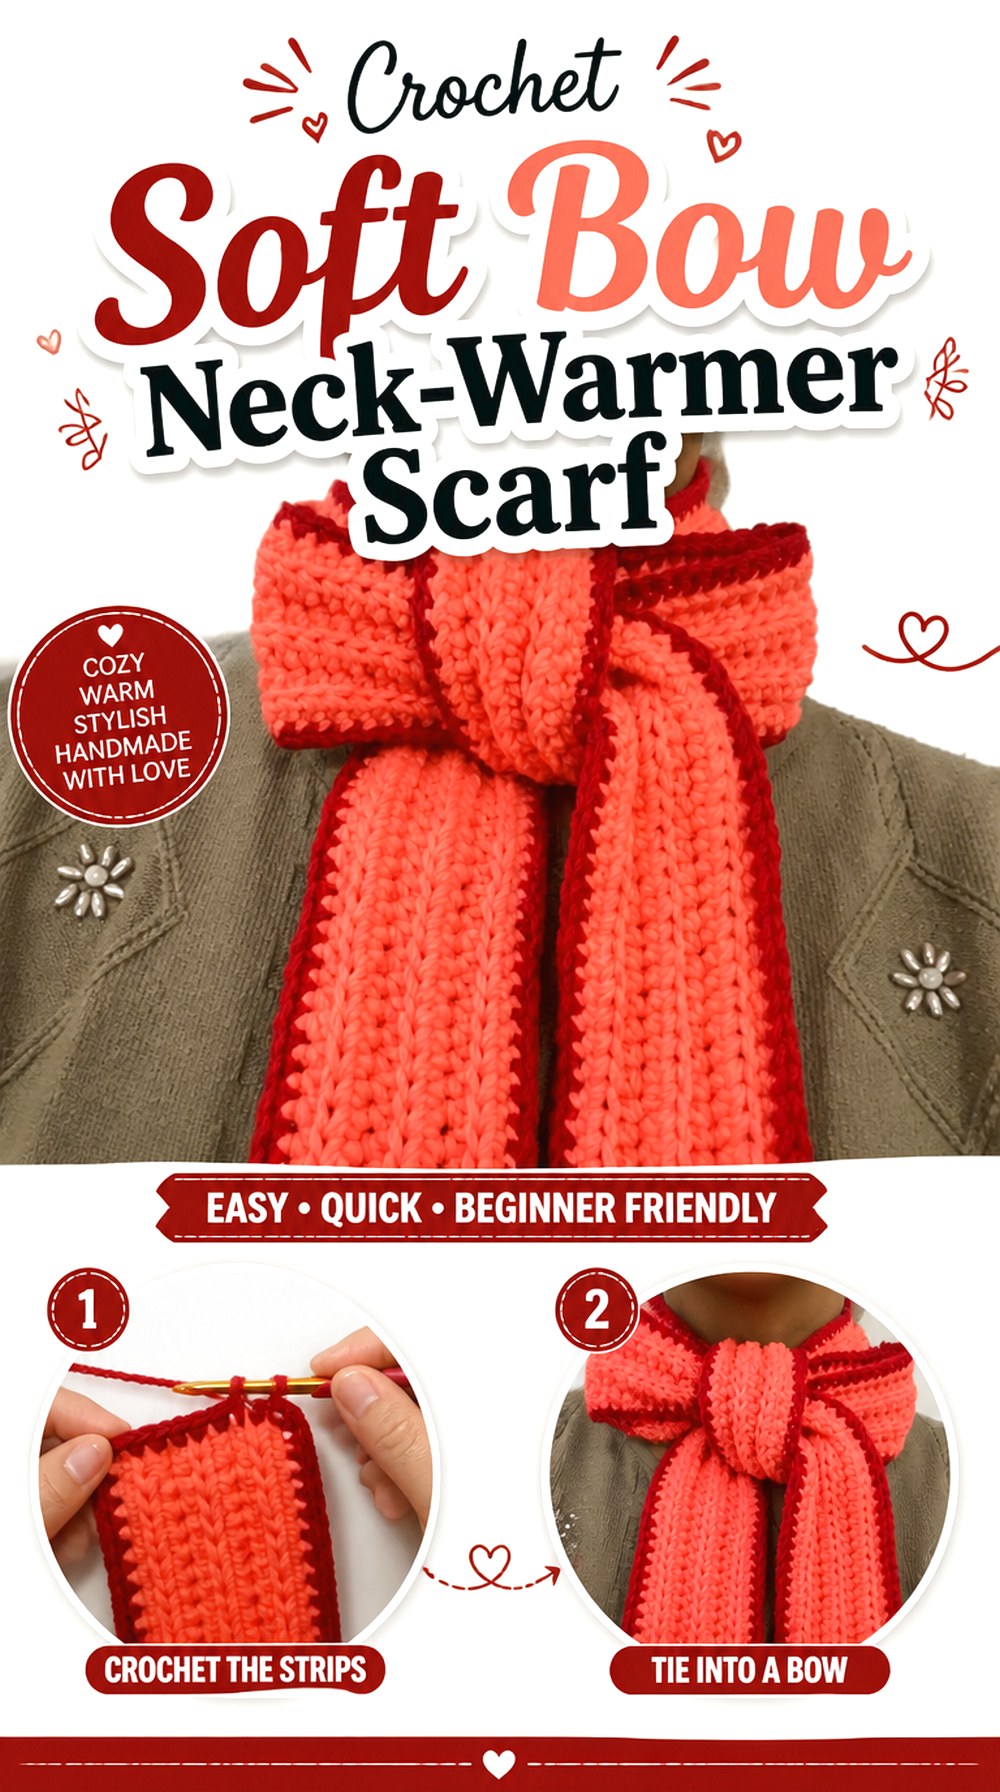
Annie Ahmed’s video page has the broad title “How To Crochet A Scarf For Beginners,” while the description identifies the project as a bow scarf or neck warmer. The finished concept concentrates warmth and decoration close to the neck instead of relying on a full-length wrap.
That compact form gives it a different role from the skinny ribbon scarves. This is a cold-weather accessory first, with the bow turning an otherwise practical neck warmer into a more styled front detail.
A Neck Warmer Needs Comfortable Breathing Room
Short scarves offer fewer ways to redistribute fabric if the finished circumference feels wrong. You cannot simply add another loose wrap or let long ends hang.
Check how the piece sits around the actual wearer before making optional finishing changes. Comfort should not depend on pulling the bow or closure unusually tight, particularly when the scarf will be worn for extended periods.
Keep the Bow Clear of a High Coat Collar
A compact neck warmer and a high outerwear collar can compete for the same space. Try the intended combination before deciding that a larger bow is automatically better.
If the front detail becomes compressed under the chin or disappears inside the coat, you may prefer to wear this scarf with an open neckline or choose one of the slimmer neckerchief constructions for that particular jacket.
Original Tutorial and Creator Credit
Creator: Annie Ahmed 🧸
12. Crochet Classic Pull Through Retro Scarf
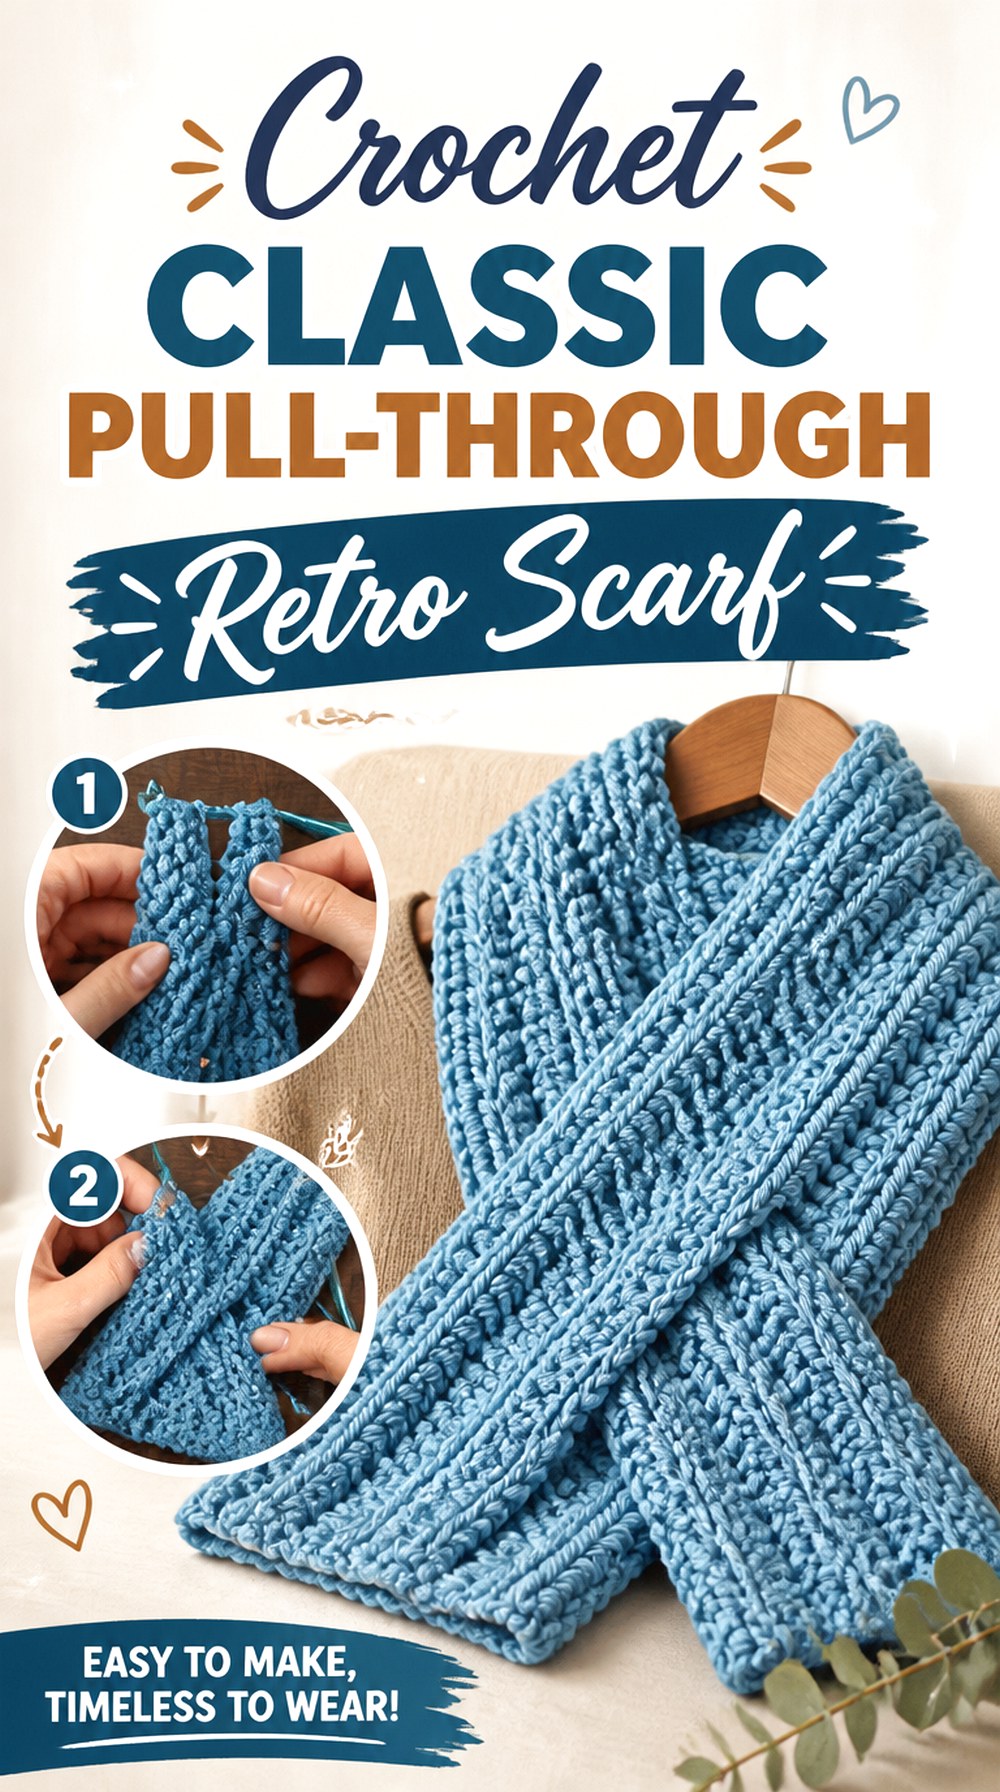
Crochet Jewel’s tutorial teaches a classic keyhole scarf: one end passes through a dedicated opening instead of requiring a standard knot. The original video is not presented as a literal retro bow tutorial, so the bow connection here comes from styling the crossed front as a tidy ascot-like feature.
This is a practical choice if you like the neatness of vintage neck accessories but do not want to arrange a bow each time. It can also sit closer to the body than a long tied scarf.
Opening Size Is Part of the Closure, Not a Minor Detail
The scarf end and keyhole must remain compatible. Significant changes in yarn thickness, border depth, or fabric density can affect whether the end travels through cleanly.
Test the completed fabric behavior rather than relying only on an opening measurement. A section can technically fit but still bunch or drag enough to make the scarf unpleasant to use regularly.
Compare the Closure With Your Usual Jacket Neckline
A keyhole positions the crossed section more predictably than a freely tied scarf. That is convenient, but it also means the front has less freedom to move around a high collar.
Try the finished arrangement with your most frequently worn cardigan or jacket. If the keyhole lands exactly where a zipper, lapel, or collar already creates bulk, a longer free-tie scarf may be more comfortable.
Original Tutorial and Creator Credit
Creator: Crochet Jewel
13. Crochet Lacy Scarflette Bow Tie
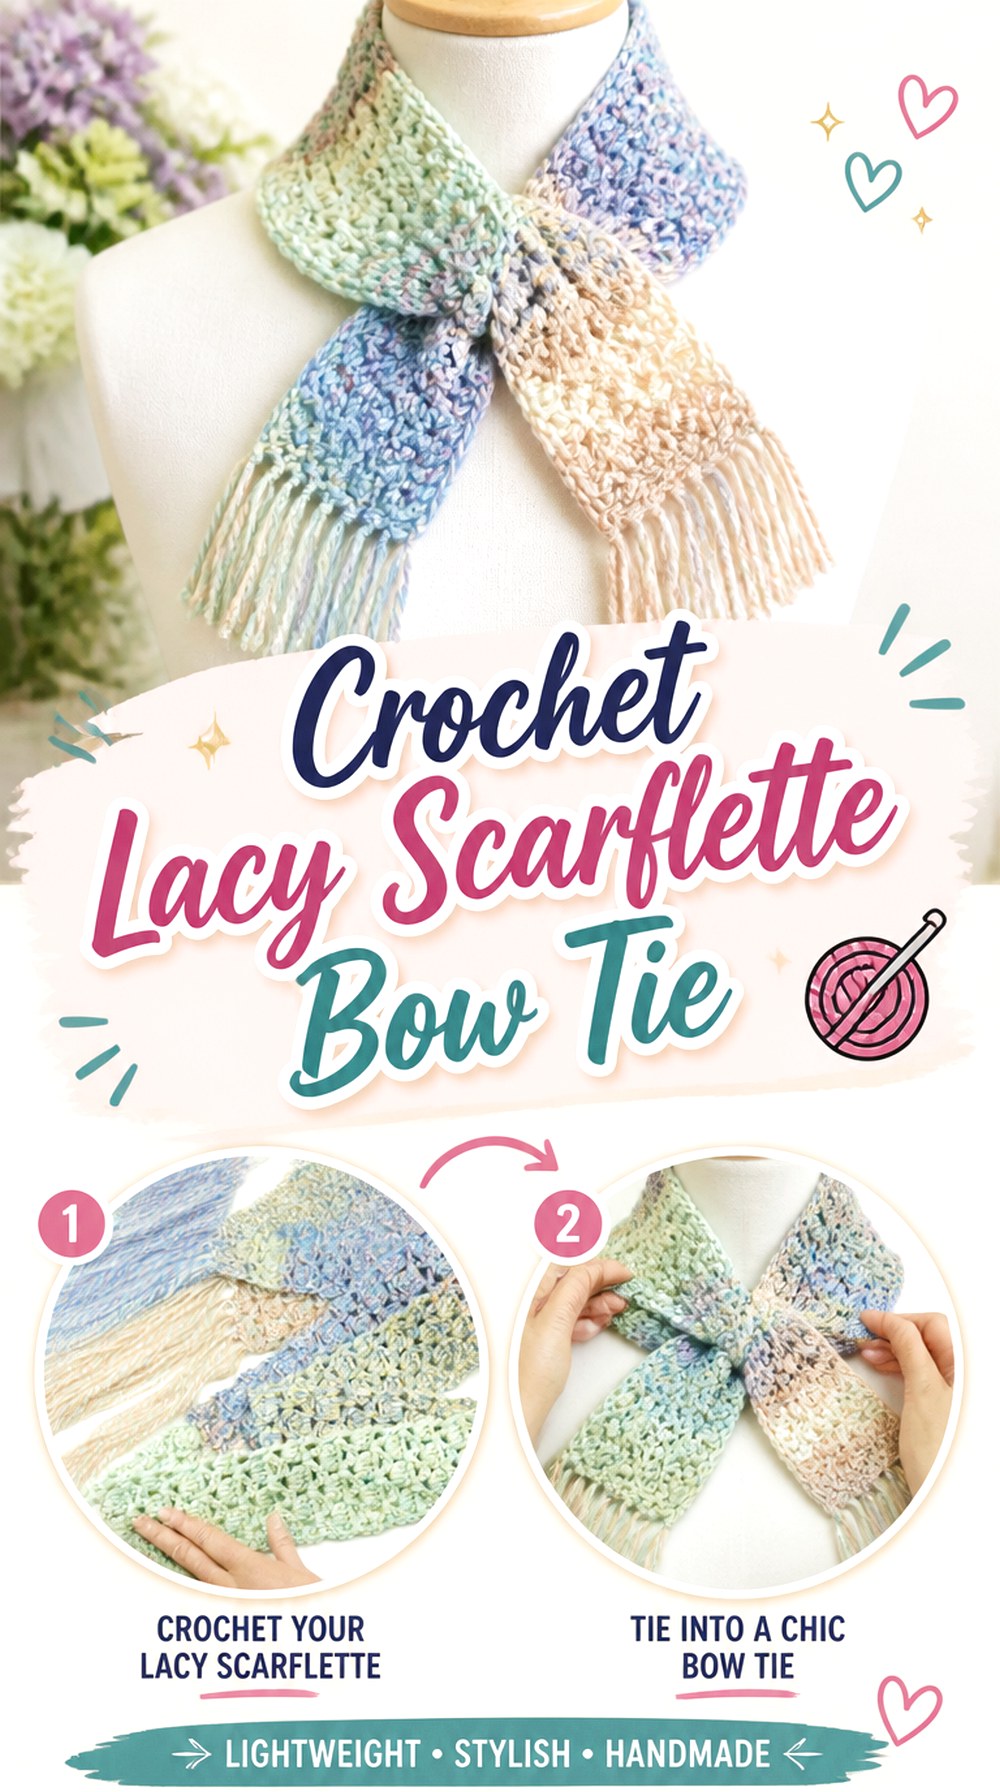
Fiber Flux’s Coastal Scarflette combines a lace stitch with long fringe, making it visually lighter and more open than the compact winter bow scarves. The tutorial is for a scarflette, not an attached-bow project; the retro bow interpretation comes from tying or arranging the narrow scarf around the neckline.
This route is useful if your preferred vintage look is airy and decorative rather than structured. The lace and fringe already provide movement, so the bow can remain loose instead of sharply sculpted.
Open Lace Produces a Softer Knot
A lacy scarf does not behave like dense ribbon. When it is tied, the fabric can compress and overlap with more movement, giving the bow a relaxed rather than architectural appearance.
That difference makes the project better suited to a soft scarf tie than to recreating the crisp silhouette of a structured bow collar. Choose it when drape is part of the appeal.
Fringe Changes the Shape of the Bow Tails
Fringe continues the visual line of the scarf after the crocheted fabric ends. When those ends become bow tails, the movement can make the finished knot appear longer and more dramatic.
Judge the tied scarf with its fringe arranged naturally before deciding that the crocheted portion needs additional length. Otherwise, the complete accessory may become more elongated than expected.
Avoid Overloading an Already Textured Accessory
Openwork and fringe provide two different kinds of surface detail. Adding several appliqué bows or a very busy color sequence may reduce the airy quality that distinguishes this project.
For a retro version, a restrained color and a deliberate loose bow can be enough. That lets the lace pattern, fringe, and knot each remain visible.
Original Tutorial and Creator Credit
Creator: Fiber Flux
14. Crochet Delicate Skinny Retro Bow Scarf
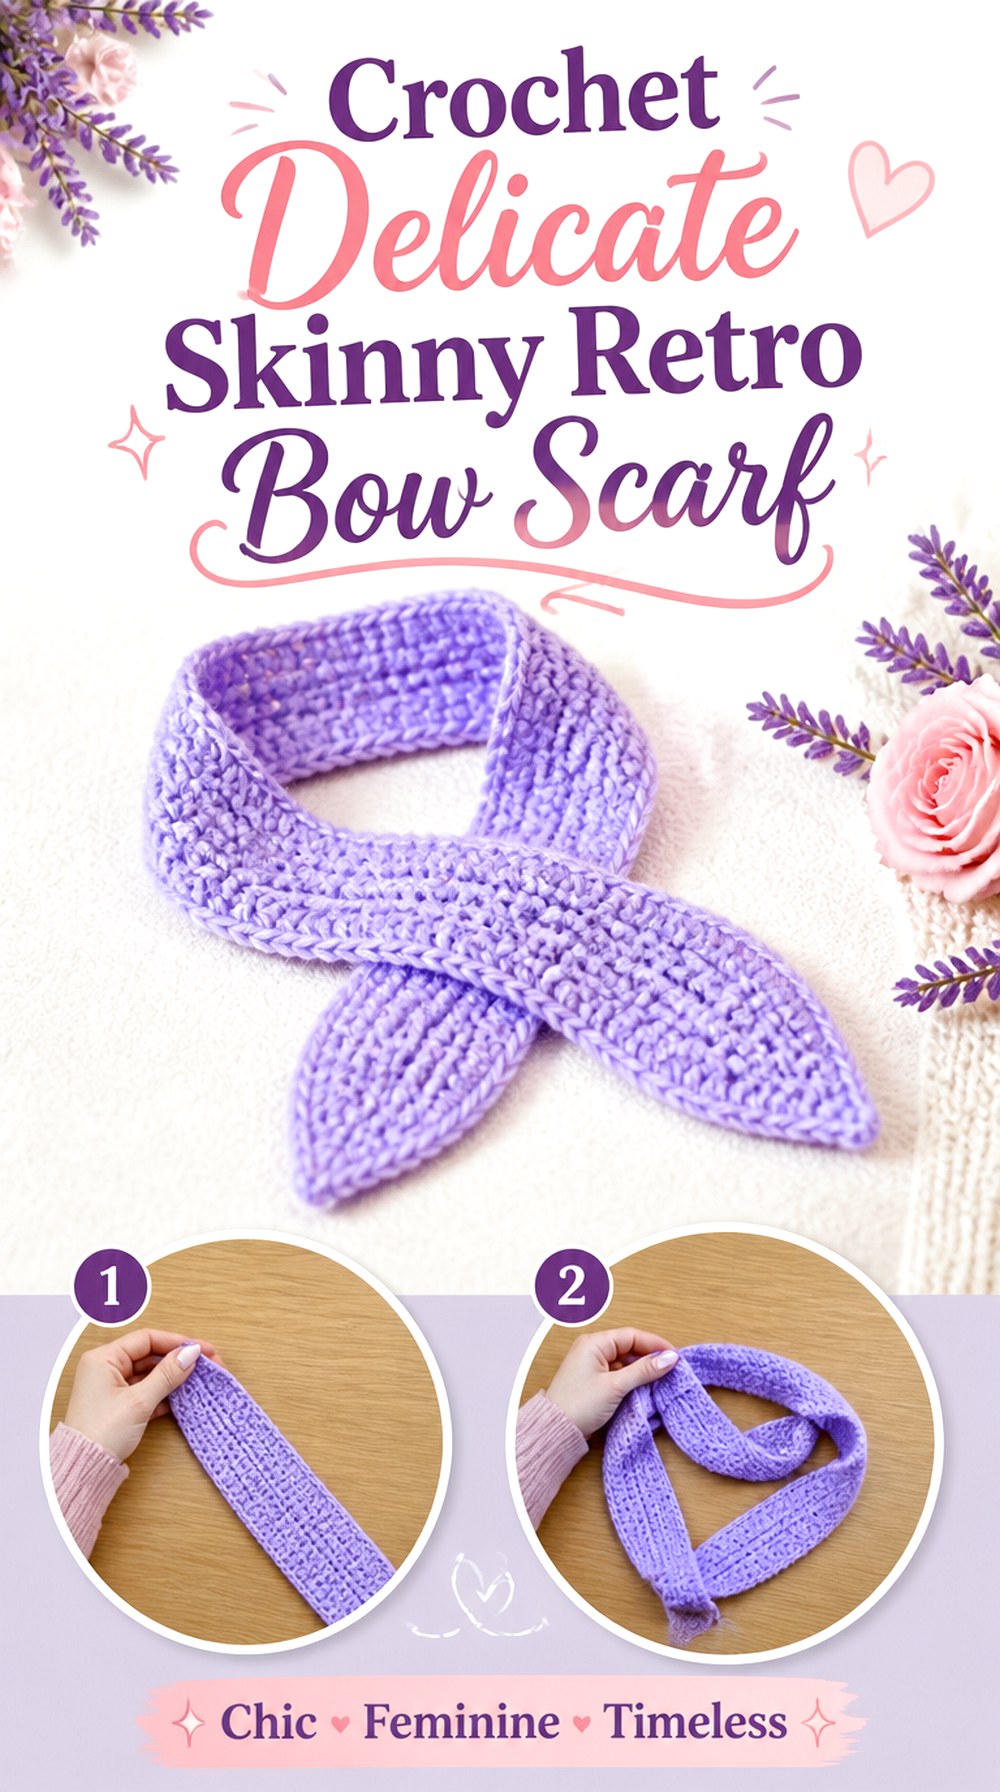
Selina Veronique Crochet’s Alice scarf is a narrow neckerchief-style project designed to be worn in several ways. The source presents the finished scarf as a slim, feminine accessory rather than a heavy winter wrap, which makes it particularly adaptable to a small tied bow.
Here the bow is a styling choice rather than a separately crocheted component. That flexibility makes this one of the better options if you want to alternate between a retro neck bow, a simple wrap, and loose skinny-scarf styling without making several accessories.
Tie the Scarf Before Deciding It Is Too Long
A bow uses considerably more usable length than a simple overhand knot. Two loops, the center knot, and hanging tails all consume part of what looks like generous length while the scarf is flat.
Try the developing piece in the actual style you want before shortening it. If your goal is a fuller bow, preserve enough length for both loops and visible tails rather than judging only where the untied ends reach.
A Skinny Scarf Needs Side-to-Side Flexibility
Because the scarf is narrow, a stiff fabric can feel more like a cord than a ribbon. That may make a compact knot bulky even if the project looks slim while flat.
When substituting yarn, bend the sample across its narrow dimension and form a loose knot. If it curves naturally, it is more likely to produce the soft bow effect associated with this retro styling route.
Original Tutorial and Creator Credit
Creator: Selina Veronique Crochet
15. Crochet Long Skinny Bow Tie Scarf
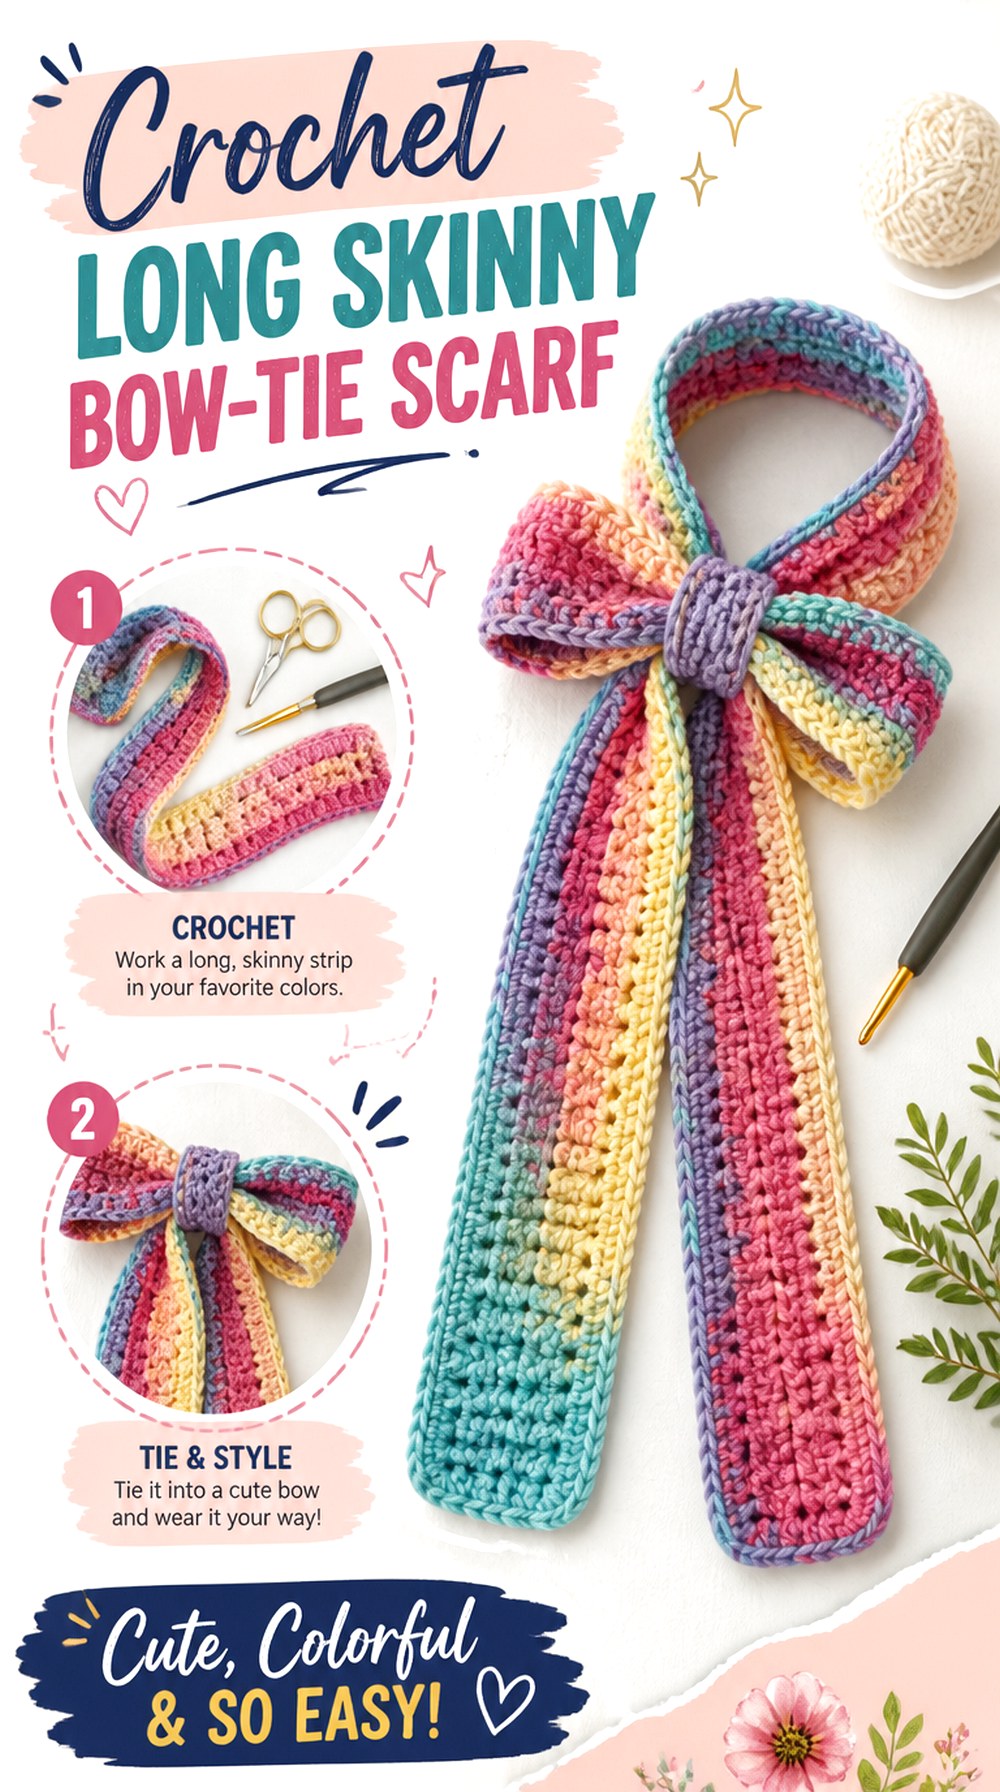
Krampolinka Crochet Designer and Free Patterns teaches a long, narrow skinny scarf that can be wrapped or loosely tied in different ways. The tutorial does not add a permanent bow, so this idea is for readers who want to create the retro effect through a true scarf knot.
Its extra length makes it fundamentally different from the petite neckerchiefs. You can form a larger bow, allow longer tails, or use a looser neck wrap before tying, giving the same scarf several possible proportions.
Extra Length Expands the Bow Options
A longer narrow scarf can support a larger bow because more fabric is available for both loops and tails. The trade-off is that the finished knot may become more noticeable, especially if the fabric itself is thick.
Before changing the source length, experiment with the intended tie. Decide whether you want a compact neck bow, long dramatic tails, or enough fabric for an additional wrap before the knot.
Do Not Let a Narrow Scarf Become Rope-Like
A skinny profile does not automatically guarantee a graceful knot. Dense fabric can produce a surprisingly firm strip when folded into several layers.
If your substitute yarn creates a stiff sample, consider whether that behavior supports your intended styling. For a soft retro bow, comfortable bending and knotting are more useful qualities than simply reproducing a narrow flat measurement.
Original Tutorial and Creator Credit
Creator: Krampolinka Crochet Designer and Free Patterns
16. Crochet Textured Vintage Mini Bow Scarf
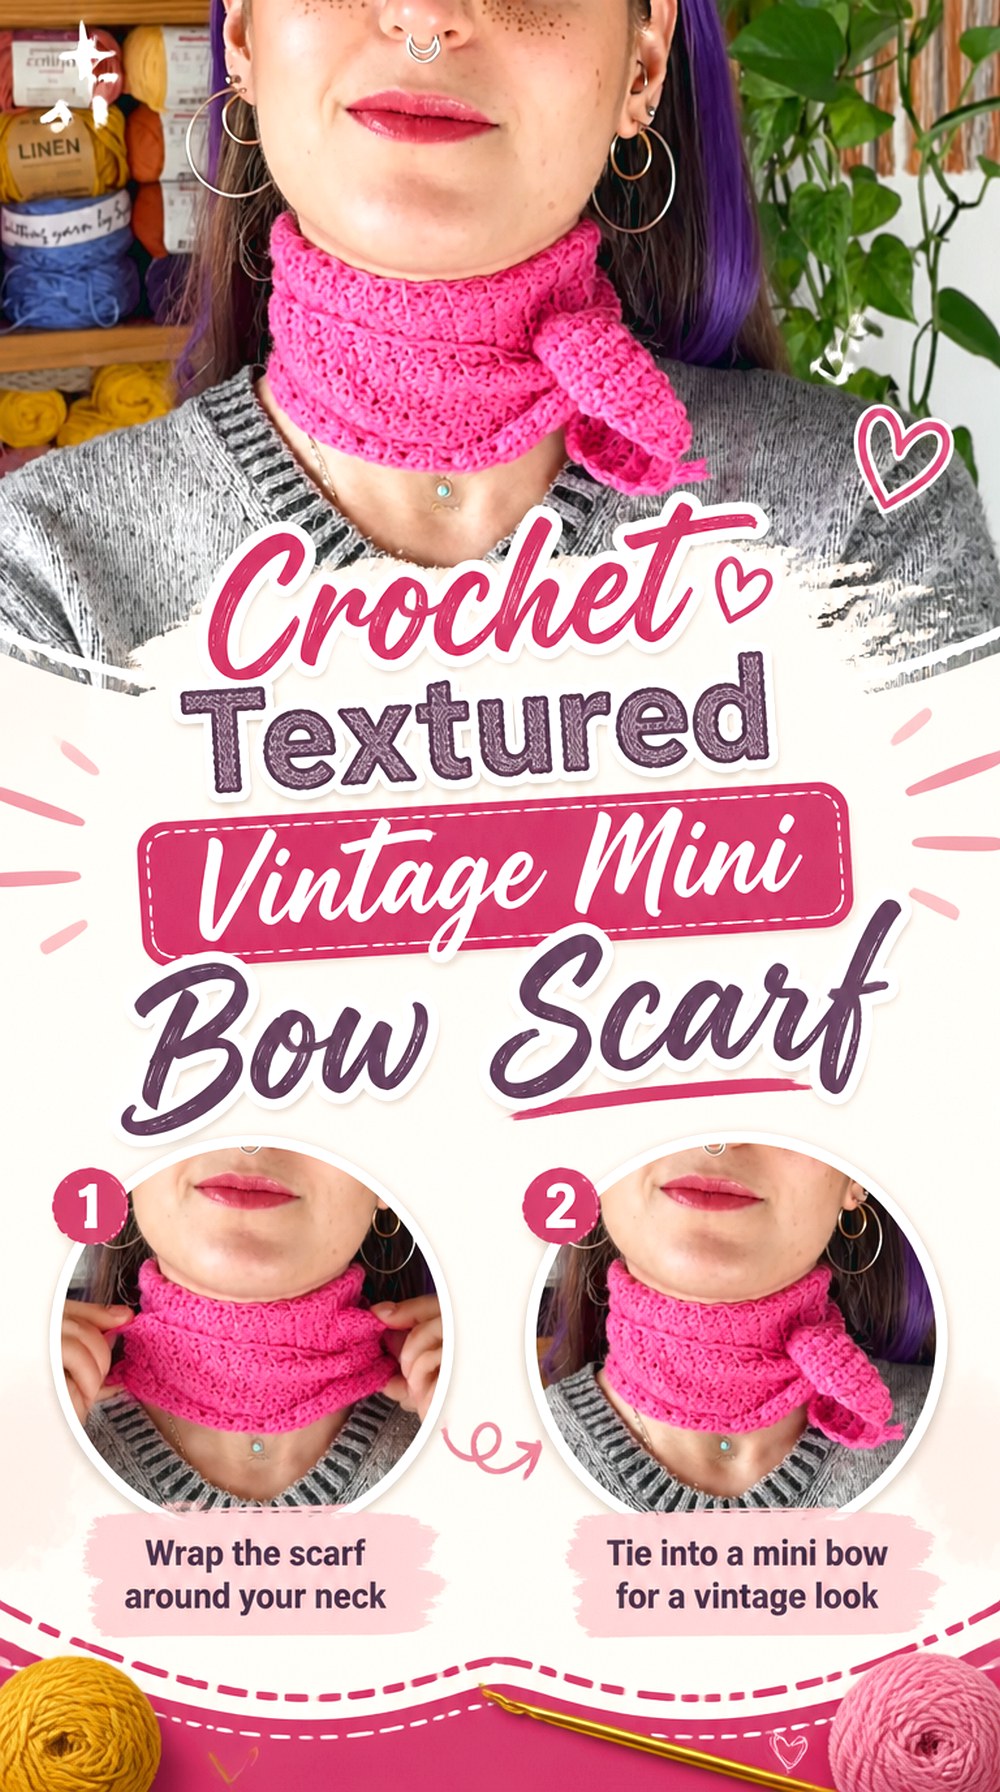
Bloodimaryart Crochet’s mini scarf or neckerchief is shaped for compact neck styling, and the creator specifically notes that it can be wrapped around the neck for a vintage look. That makes it a particularly natural base for this retro collection even though a permanent bow is not built into the project.
The shaped silhouette gives it more definition than a simple narrow rectangle. Tie the ends into a small bow or neat knot when you want a vintage accent without the volume of a conventional winter scarf.
Shaping Helps the Center Sit More Deliberately
A shaped mini scarf can concentrate more visual interest around the center while keeping the tying areas relatively manageable. That makes the accessory feel designed for the neck rather than simply being a shortened full scarf.
When adapting the project, periodically try the developing shape on. Excess length is not always an improvement if it moves the center texture away from where you want it to sit.
Let the Texture Replace Extra Ornament
This project already gains character from its shaped, textured fabric. A giant added bow or several decorative motifs can obscure the quality that makes the mini scarf different from a plain ribbon.
For a restrained retro version, consider using the scarf itself to create the bow. That keeps the visual hierarchy clear: texture in the body, knot at the neckline, and short tails completing the silhouette.
Original Tutorial and Creator Credit
Creator: Bloodimaryart Crochet
17. Crochet Petite Kerchief Bow Scarf
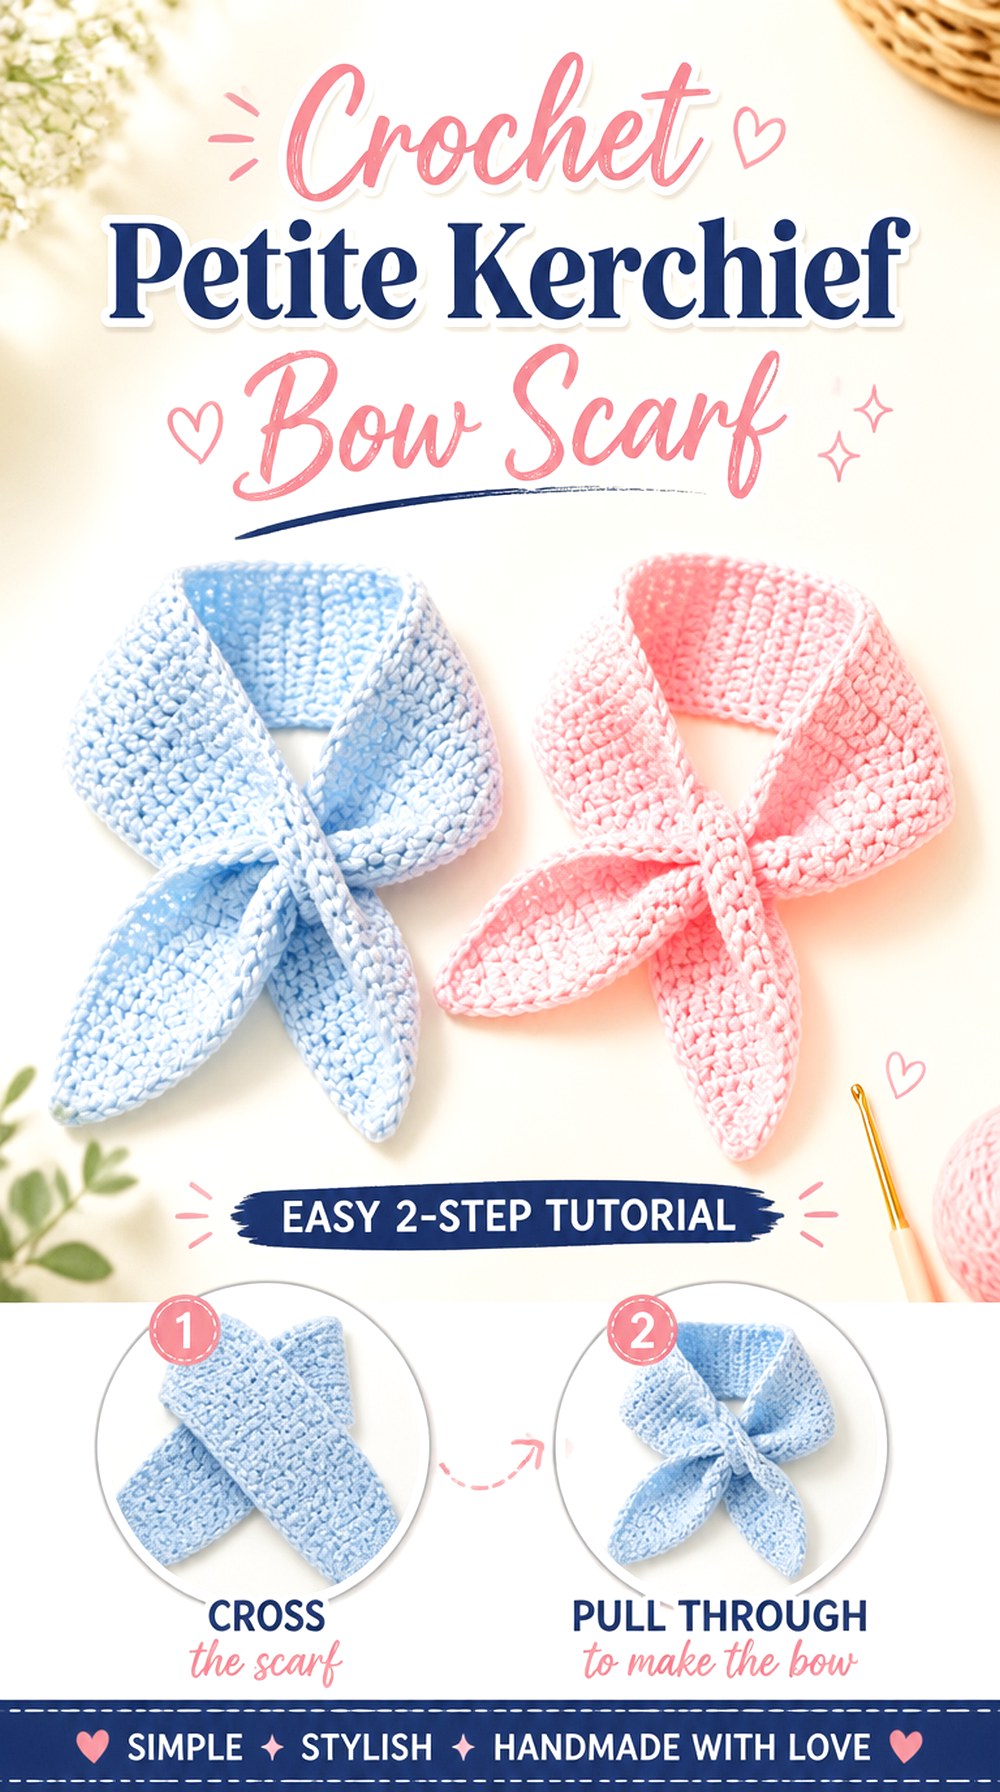
StelarCrafts offers another mini-scarf construction, but this tutorial emphasizes making a small neck scarf using measurements and adapting it to the yarn available. The source is a neckerchief tutorial rather than a literal bow pattern, so the retro bow is created by how you tie the finished scarf.
This makes the final idea useful for readers who care more about choosing their own proportions than reproducing a fixed bow shape. Keep it short for a petite side tie, or preserve enough length for a fuller central bow, while using the creator’s tutorial for the actual scarf construction.
Choose the Intended Knot Before Finalizing Length
A tiny neck knot and a symmetrical bow require different amounts of fabric. If you wait until the scarf is complete to decide between them, you may discover that the ends are shorter or longer than the intended styling needs.
Use the tutorial’s measurement-based approach, but test the developing scarf in your preferred arrangement. The styling goal should inform the final proportion rather than being treated as an afterthought.
Medium Fabric Creates a Different Look From Lace
A more substantial mini scarf can produce a stronger, clearer neckline than the delicate lace bowtie earlier in the collection. That may suit a 1960s-inspired sweater or cardigan combination where you want the scarf to remain visible.
The trade-off is knot bulk. If you substitute an especially dense yarn, check how several folded layers feel at the center before committing to a large bow.
Original Tutorial and Creator Credit
Creator: StelarCrafts
Which Crochet Retro Bow Scarf Shape Should You Choose?
For the most delicate, dressy neckline, start with the Crochet Lace Bowtie Neckerchief Scarf, Crochet Ribbon Neckline Bow Scarf, or Crochet Delicate Skinny Retro Bow Scarf. These keep the visual weight small and work well when the scarf is primarily an outfit accent.
If you want the front to stay arranged with less knotting, the Compact Pull-Through, Ribbed Keyhole, Understated Keyhole, and Classic Pull-Through versions are stronger choices. Their openings control the placement more than a free-form skinny scarf does.
For winter drama, compare the Chunky Bow-Tie, Oversized Applied-Bow, and Tassel-and-Bow Statement scarves. If maximum styling flexibility matters instead, the long skinny and mini neckerchief projects let you create the retro bow yourself and change its size or position from one outfit to the next.
Conclusion
The right crochet retro bow scarf depends first on how you want the bow to behave. Choose a fine neckerchief or skinny scarf when you want a true adjustable knot, a keyhole design when a controlled pull-through front is more practical, or a sculptural and chunky version when the bow should become the main visual feature.
Also consider what the scarf will be worn with. Delicate bowties fit differently around blouse necklines than dimensional bows do beneath winter coats, and yarn changes can alter both drape and bulk. Once you find the silhouette that suits your wardrobe, use the original creator tutorials for the exact construction details and preserve the features that make that particular scarf work.
Frequently Asked Questions
What makes a crochet bow scarf look retro rather than simply decorative?
Proportion and styling usually matter more than color alone. Small neckerchief bows, ascot-like pull-through fronts, short collar scarves, skinny ribbon ties, and neatly shaped bow fronts all reference older neckwear silhouettes. A cream, red, navy, black, dusty pink, or muted solid palette can reinforce that feeling, but the scarf does not need a stereotypical “vintage” color. Start with the neckline shape, then choose color and trim to support it.
Is a keyhole scarf the same thing as a crochet bow scarf?
Not exactly. A keyhole scarf uses an opening through which one end passes. Some keyhole designs are deliberately shaped to resemble a bow, while others simply create a crossed or ascot-like front. In this collection, projects whose source tutorials teach only a keyhole are identified as styling adaptations. Choose a direct bow tutorial if literal loops and ribbon-like shaping are essential to the finished look.
What yarn qualities are useful for a tied crochet bow scarf?
Look for fabric behavior rather than one universal fiber or yarn weight. A tied bow generally needs enough flexibility to curve through a knot without becoming hard or bulky, while still having enough body for the loops to remain visible. Make a small sample and physically fold and knot it. Very stiff fabric can create an awkward center; extremely floppy fabric may lose the bow outline.
How can I tell whether a skinny crochet scarf is long enough for a bow?
Test it in the intended wearing position before finishing. A bow uses more fabric than a simple knot because length is distributed among two loops, the center, and the tails. If you also want to wrap the scarf around the neck before tying it, that requires additional usable length. Avoid relying on a universal measurement; neckline, yarn behavior, desired bow size, and tail length all change what feels appropriate.
Can I substitute thicker yarn in a delicate bowtie neckerchief?
You can consider a substitution, but expect more than a simple scale change. Thicker fabric can enlarge the bow, increase overlap at the neck, and affect any openings used for fastening. It may also make a formerly delicate design feel more like a winter scarf. Make a sample first and compare its flexibility and thickness with the source result. If the project has a keyhole, verify that the finished end can still pass through comfortably.
How do I keep an applied crochet bow from sitting in the wrong place?
Judge placement while the scarf is arranged as it will actually be worn. Draping the scarf around the neck changes where fabric folds, hangs, and disappears beneath outerwear. A bow positioned perfectly on a flat scarf can rotate toward the shoulder or hide under a coat lapel. Temporarily mark possible positions first, then evaluate visibility and balance before making any permanent attachment.
Should I block a crochet bow scarf before deciding how it fits?
Blocking can change how some crochet fabrics settle, but the correct method depends on the yarn and its care instructions. If blocking is appropriate for your material, it can be useful to evaluate the scarf after the fabric has reached its intended finished state. Avoid assuming that heat, steam, or aggressive stretching is safe for every fiber. For keyhole scarves in particular, recheck the opening and end relationship after finishing.