Crochet hoods and balaclavas are popular right now because they’re quick to make, keep you warm, and can be made in a lot of different ways. The shapes stay simple, though. You can make a hood out of a rectangle, a seamless tube with a face opening, or an easy cowl that frames the face. You can also add bear or bunny ears, stripes, or piercings to make it look cute, playful, or bold. Three things are needed for success: soft yarn, a steady gauge, and a neat finish. Pick the right fibers for the season: acrylic or superwash for easy care, wool blends for warmth, and faux fur for texture. Then, swatch so that your fabric stands up but still moves. Use short rows, strategic increases, or ribbed panels to shape it so that it fits snugly and comfortably without moving. Finish with clean edges, ears that are well-stuffed, and optional linings or drawcords. There are nine clear ideas below, from a classic polar bear to a pierced punk, that show you exactly how to make your own cozy statement piece.
1. Red Heart Polar Bear Crochet Balaclava Hood
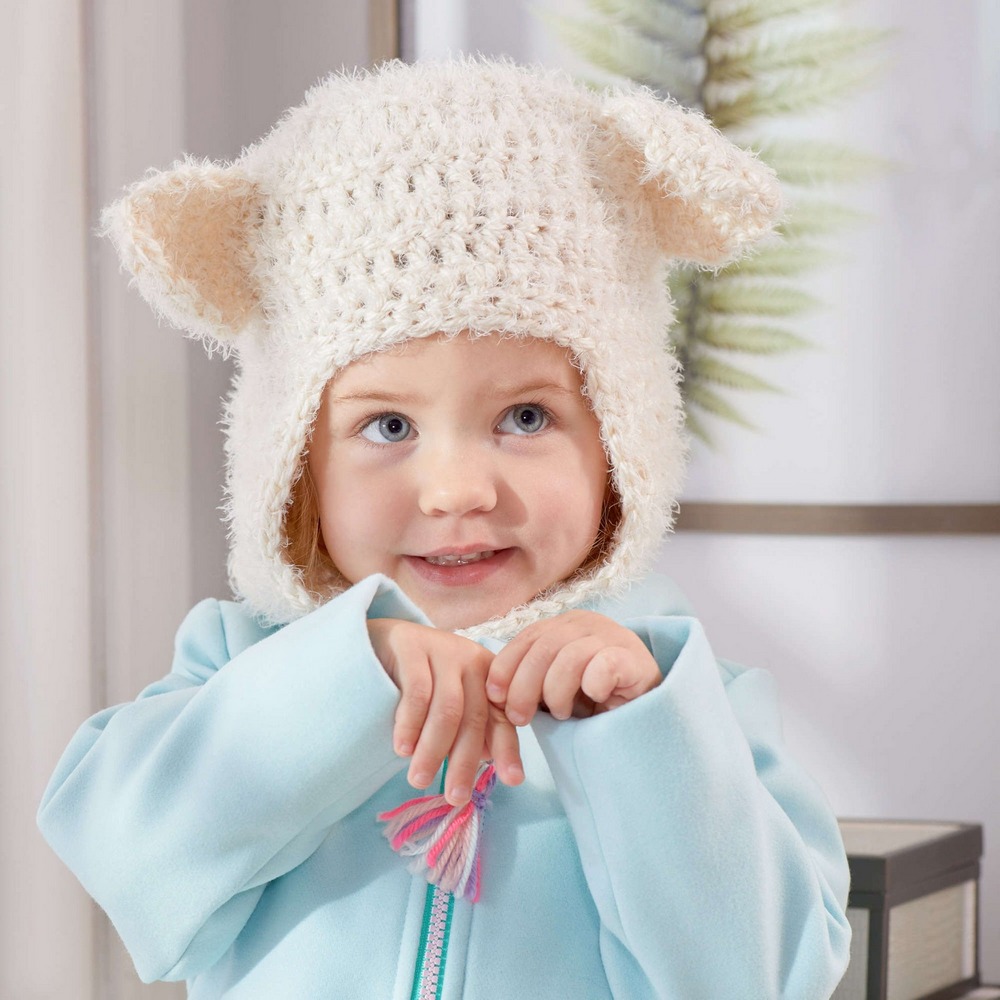
The Red Heart Polar Bear Crochet Balaclava Hood is a classic winter look. Choose a thick, soft fabric that doesn’t feel stiff and can stand on its own. Worsted or bulky acrylic works well and is easy to care for. Make a deep rectangle in single crochet or half double crochet, sew the crown together, and then add a ribbed face opening that fits snugly around the cheeks. Make small, rounded bear ears that are flat circles or ovals and stuff them lightly so they stay perky. Then, sew them securely through the layers of the hood. Keep the colors cool by using a soft white with a hint of gray for the nose details. For wind protection, put a drawcord or buttoned tab under the chin. If you need more warmth, put lightweight jersey on the inside. To finish, lightly steam-block the acrylic to relax the stitches without losing bounce, and weave the ends in so they don’t show for a clean, store-bought look. Tutorial
2. Cheshire Cat Hoodie (hood with ears)
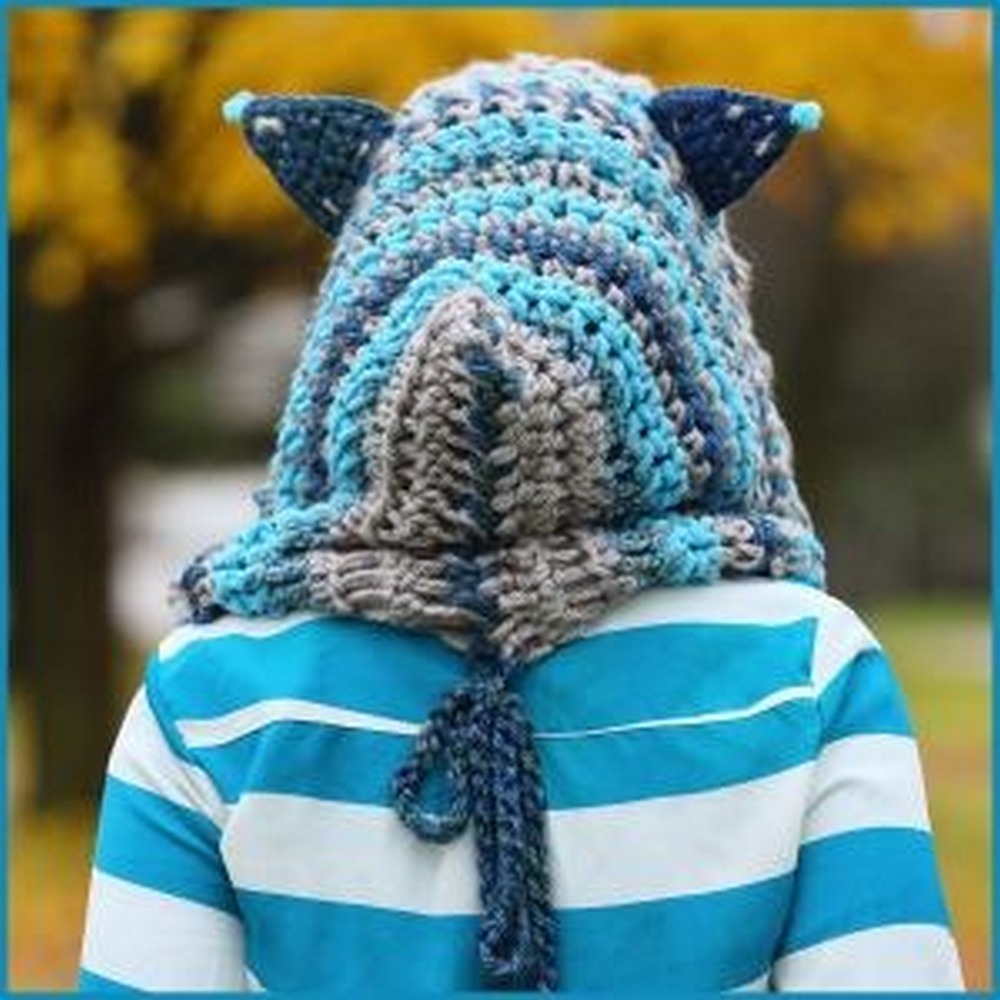
The Cheshire Cat Hoodie, which has a hood with ears, is all about fun stripes and a shape that makes you want to smile. Crochet a big rectangle for the hood with alternating bands of color, like two or three rows of each color. Then, sew the top edge together to make the crown. The ribbed edging around the face is stretchy, so it fits snugly without pinching. To make cat ears look their best, make them tall and a little angled. To do this, work two matching triangles with small increases, lightly stuff the base, and attach them in a way that is symmetrical. Pick bright pinks and purples for a cartoon-like look, or switch to a moody monochrome for a more modern look. For more coverage options, add a cowl that can be removed or a lower panel that can be buttoned on. If you carry colors, keep your floats neat. If you don’t, cut the yarn for each stripe and weave the ends as you go. A simple slip-stitch “smile” on the surface gives it character. Gently block so that the stripes stay flat and the edges of the ears stay sharp. Tutorial
3. Fluffy Hooded Bear Cowl
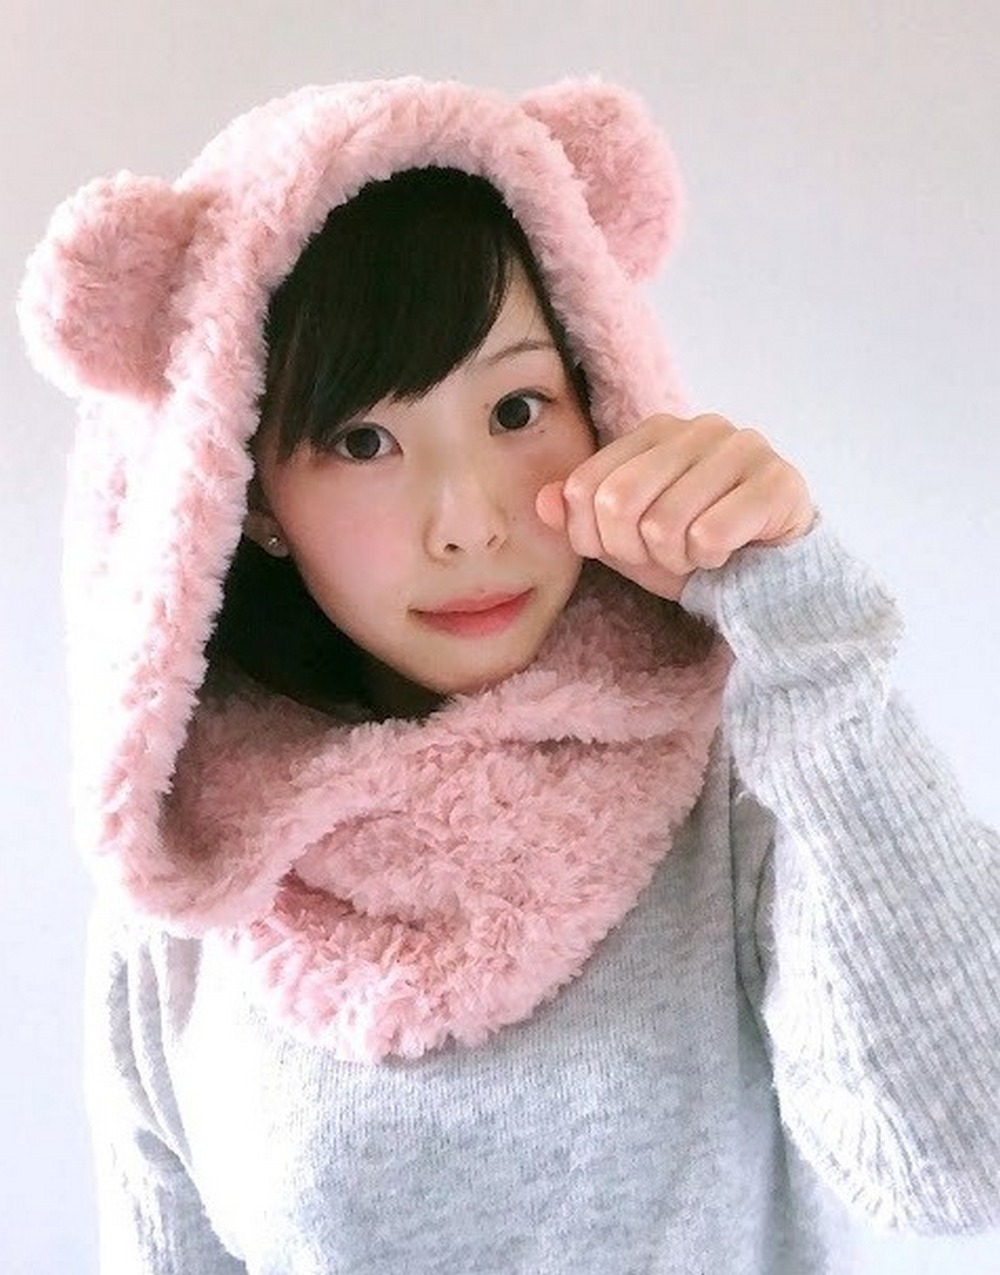
A Fluffy Hooded Bear Cowl in faux-fur or brushed yarn will make you feel like you’re in full cuddle mode. Choose a simple structure because the fluffy fibers hide the stitches. For example, a tall cowl worked in the round, then extended at the back and folded to make a hood. Use big hooks to keep the fabric soft and breathable at the same time. Use a smooth yarn for the ribbed edges so the face opening stays the same shape. Make rounded bear ears by sewing together two circles with a whip stitch. This will make them easy to see through the fluff. To make seams stronger and less itchy, think about adding a hidden cotton or jersey lining. For windy days, add a thin chin strap or inner drawcord. After blocking, lightly brush the fabric to bring back the pile. Stick to warm neutrals like cream, fawn, and cocoa, or go for a sweet look with pastel sherbet. Use invisible joins to finish so that the fluff looks like it fits together. Tutorial
4. Easy Hooded Cowl with Bear Ears
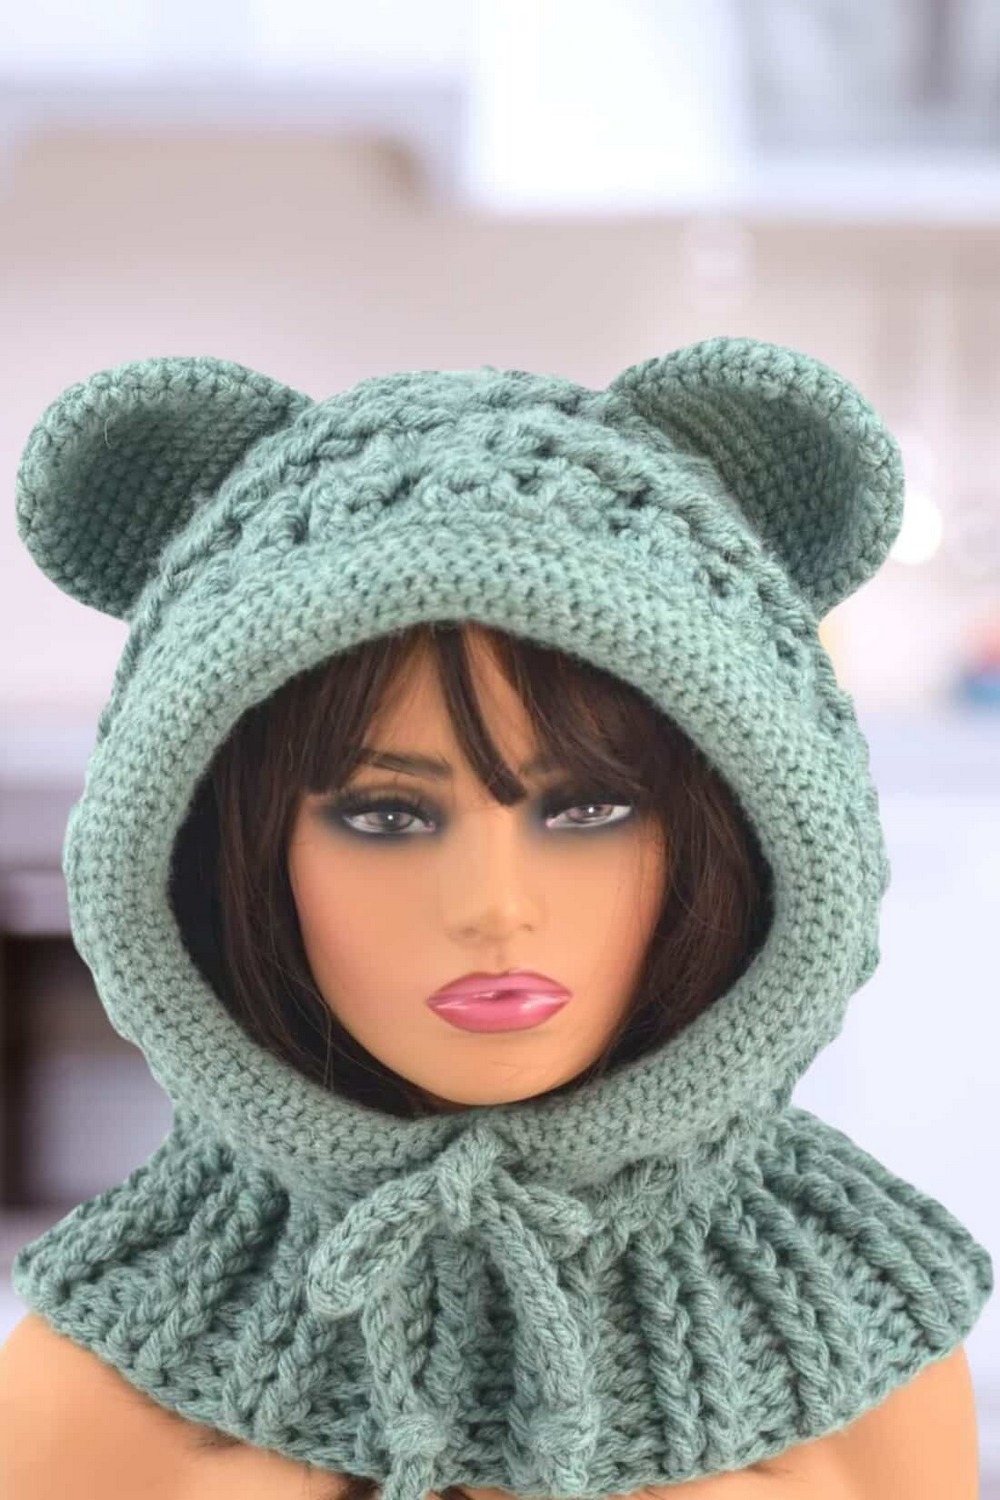
The Easy Hooded Cowl with Bear Ears is perfect if you want something quick and friendly. Start with a wide ribbed band in the back loop only half double crochet. This makes the edge look smooth and gives the fabric some give. For the cowl, knit in the round, then add height to the back with short rows to make a soft hood that hangs naturally. For a textured fabric that is easy for beginners to work with, keep the stitches simple, like half double crochet or moss stitch. Bear ears should be low-profile and not too stuffed so that the hood stays comfortable under a jacket. You can add a split hem or two buttons at the shoulder to make it easier to put on and take off. Pick a squishy worsted acrylic-wool blend to keep you warm and help you heal. To keep the flare from happening, finish with a neat slip-stitch facing around the face opening. This project looks great in solid colors and heathers, and it’s quick, useful, and easy to give as a gift. Tutorial
5. Easy Crochet Ski Mask Balaclava with Cat Ears
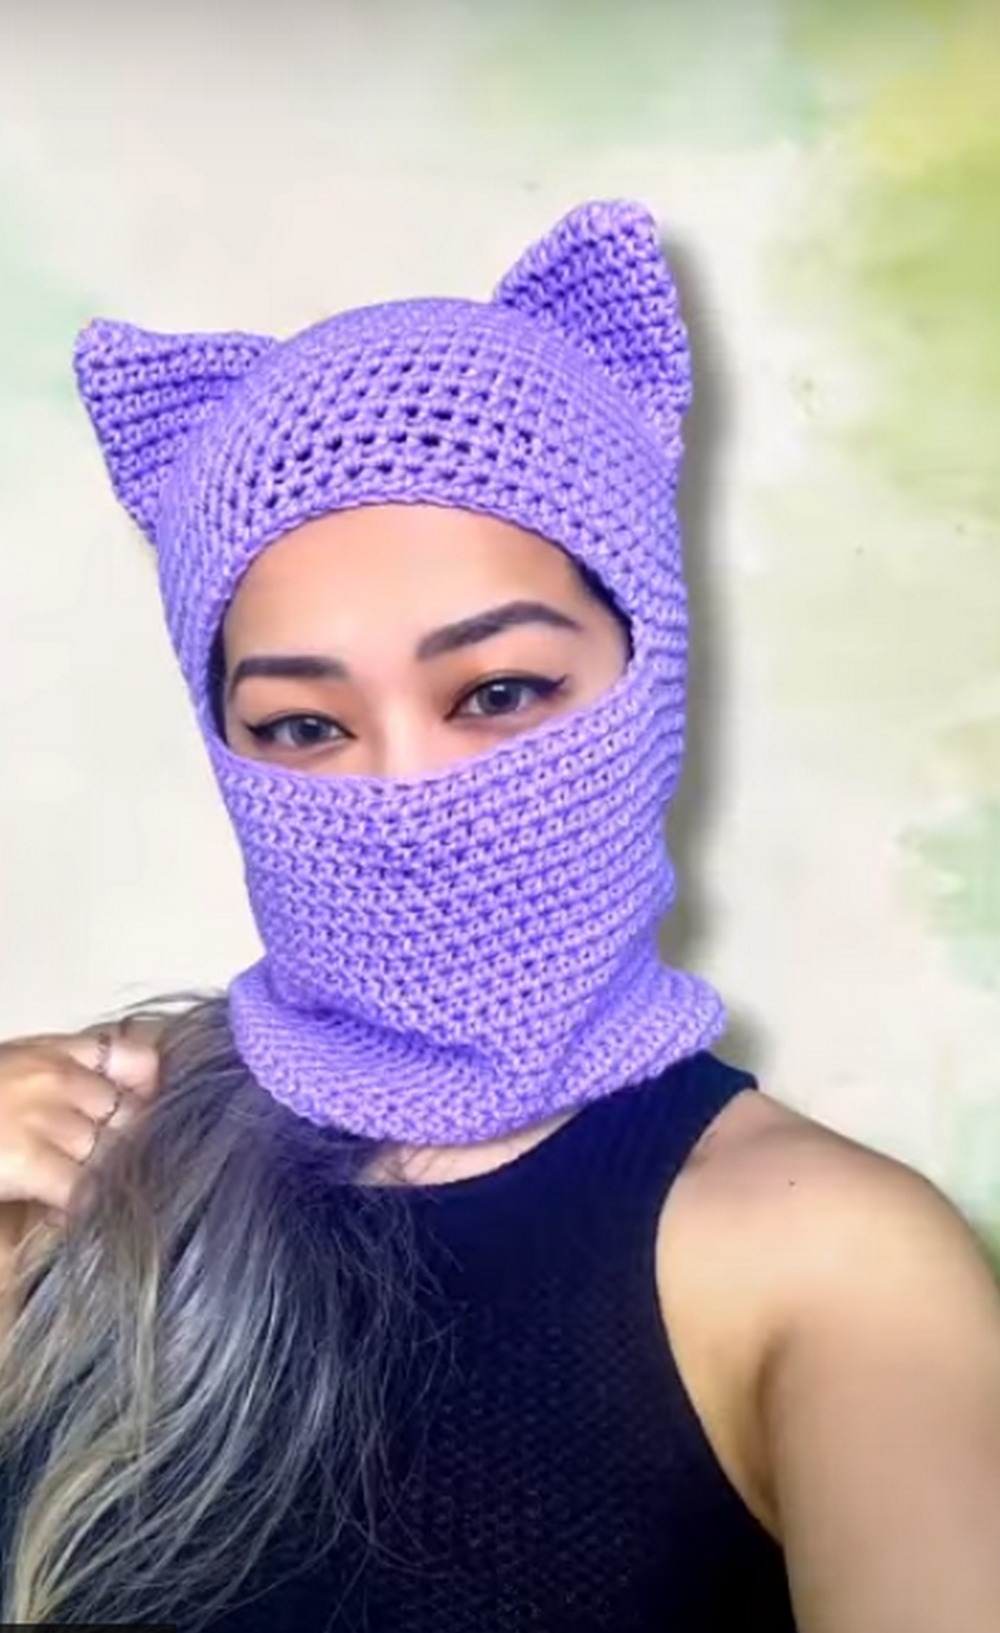
An Easy Crochet Ski Mask Balaclava with Cat Ears is a great way to combine style and function. Work a tube in the round from the neckline up, making small decreases near the crown to make the top fit snugly. Mark the placement of the face opening early. When you get there, chain across and skip stitches to make the opening. Then, come back later to add a soft ribbed border. To keep the fabric thick and block the wind, use half double crochet. Make the edges of cat ears sharp by edging them with slip stitches before sewing them on. Choose wool blends or acrylic that dries quickly for winter sports. For really cold weather, add a double-layer front panel or a fleece lining that can be taken off. Adding reflective yarn or a reflective thread carry makes things easier to see in low light without changing the look. Finish by adding extra bar tacks at the stress points.
6. Balaclava Cat Ears Tutorial (Beginner)
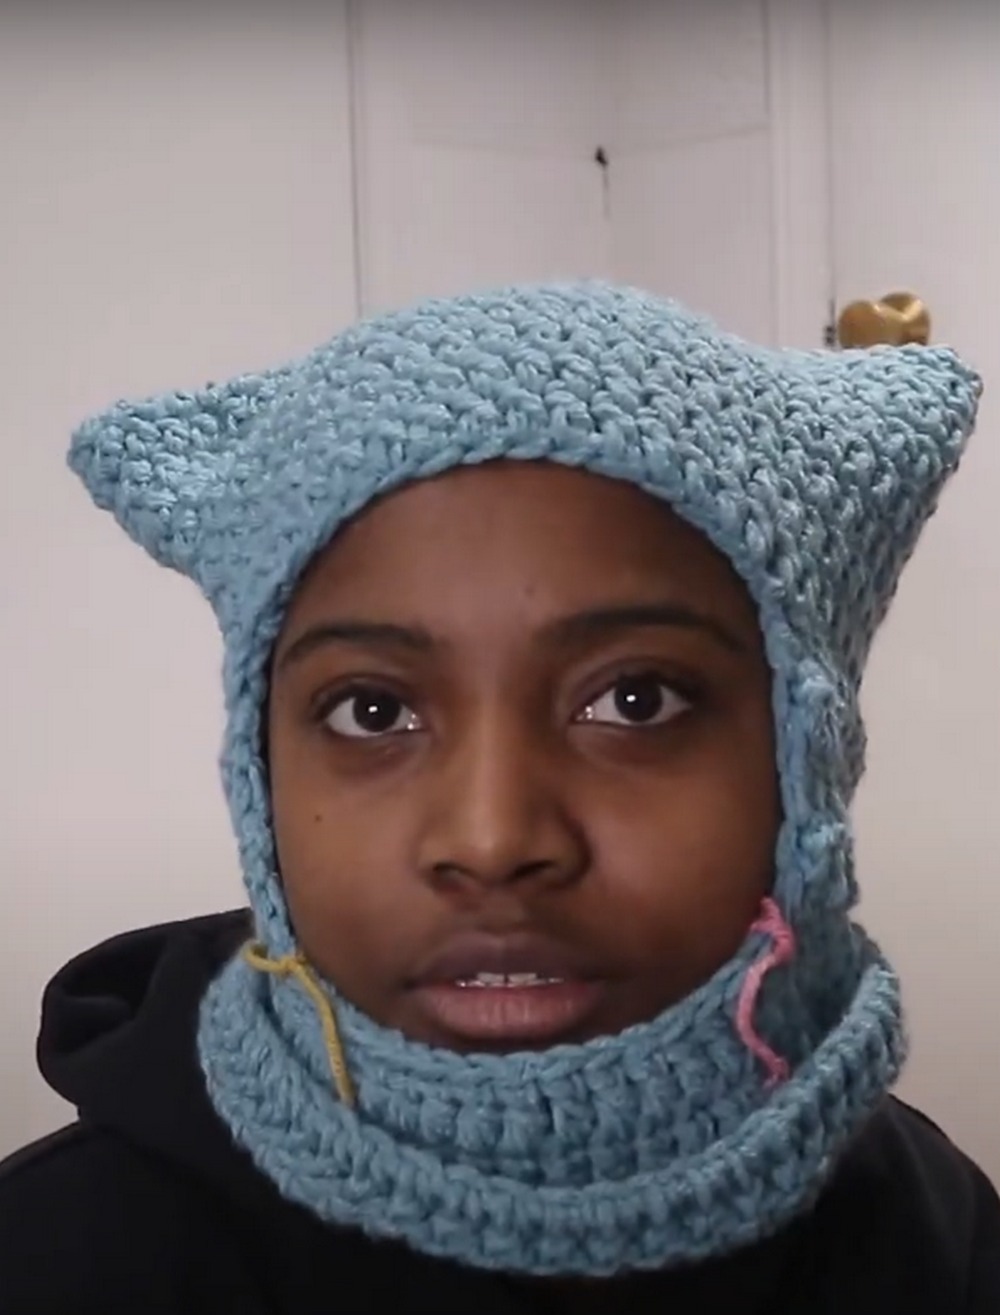
This Balaclava Cat Ears Tutorial is all about how to make the ears so that they are symmetrical, straight, and look good. Make two identical triangles with smooth sides that get bigger as they go up. Then, make a smaller triangle inside the first one in a different color to give it that cat-like look. Before putting the pieces together, lightly block them so the edges line up. Put a little bit of stuffing or felt at the bottom to help the ears stay up without falling over. When putting the pins in with the balaclava on a head form, the ears should point slightly outward and forward, not straight up. For safety, sew through several layers of the hood and tie the ends between layers to hide them. If the fabric of your balaclava is stretchy rib, put a small piece of non-stretch fabric inside to keep it from stretching. Finally, set the attachment area with steam. The result: sharp, confident ears that stay sleek even after being worn and washed every day.
7. Easy Crochet Balaclava with Cat Ears

To make an Easy Crochet Balaclava with Cat Ears that is easy for beginners, keep the shaping simple and the fit flexible. Begin with a soft rib at the neckline and then go straight up in the round for the body. Make the face opening with a chain bridge. Later, add a soft ribbed edge that can be cinched with an i-cord. To finish off the crown neatly, use a quick “four-corners” decrease method. To keep things in balance, the cat ears should be medium-sized. Sew them a little off-center toward the crown so they look more playful than like a costume. Pick a smooth worsted yarn that won’t itch and shows off your stitches well. Add a removable half-lining to the front if you need more warmth. Make sure the seams are flat and the ends are woven deeply so that the inside feels good against the skin. This is a great first balaclava that you will really wear because it is easy to use, quick, and customizable.
8. Bunny Ear Balaclava
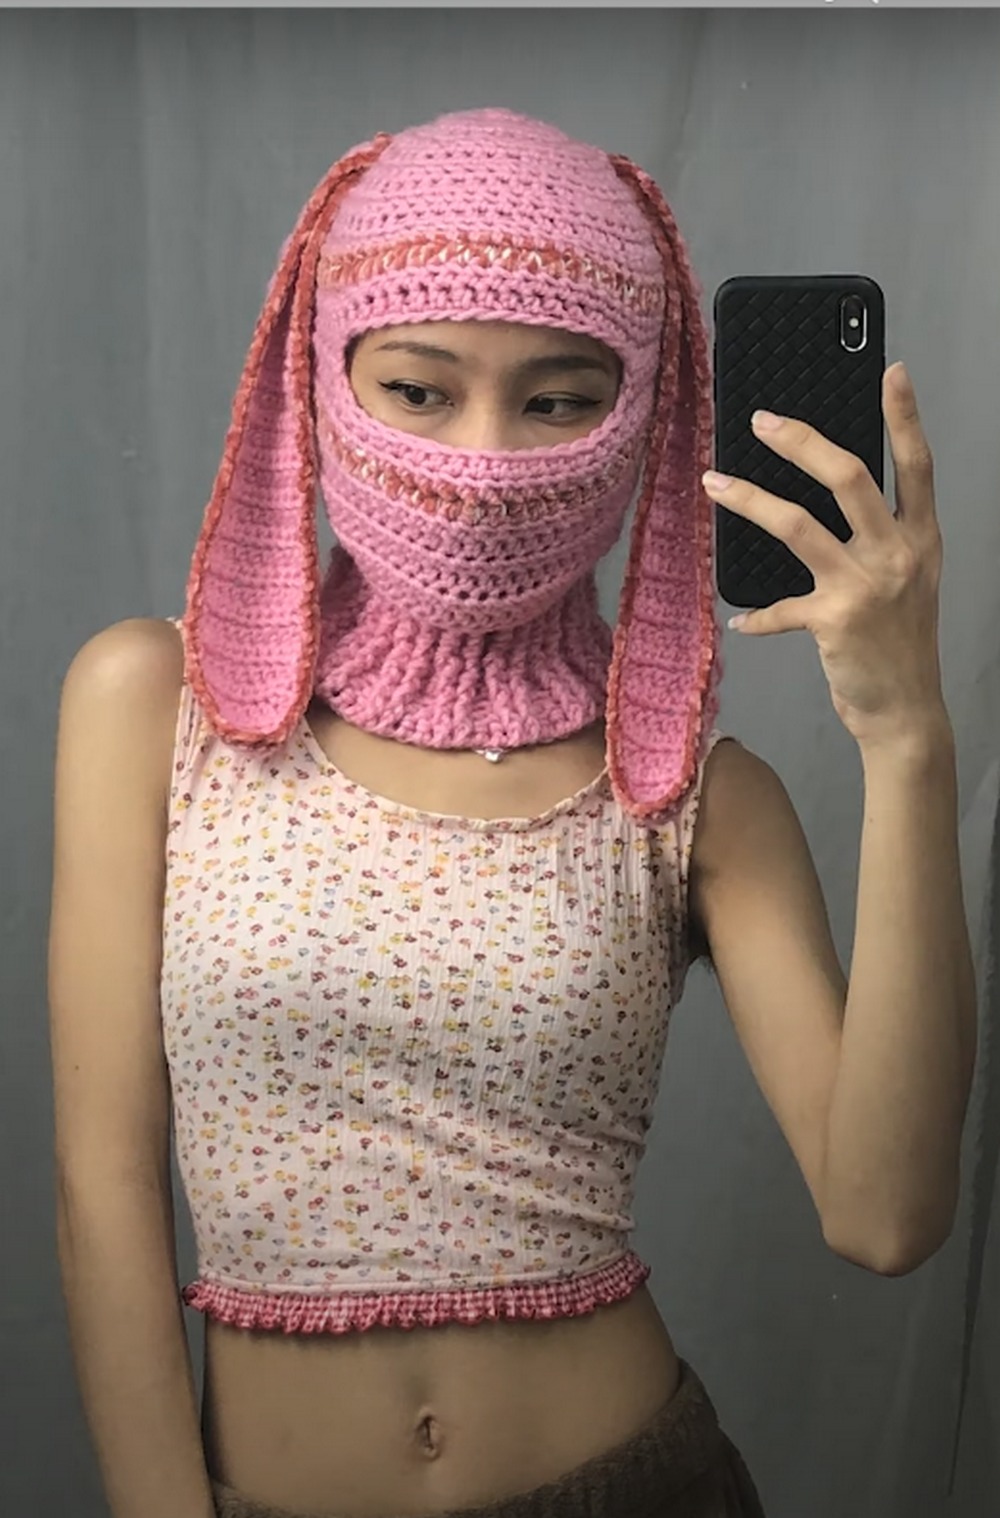
The Bunny Ear Balaclava is cute and soft, with long ears and soft lines. Make a warm base balaclava with tighter stitches for structure, then switch to looser stitches for long, bouncy ears. To keep them from drooping, make double-layer ears by sewing together front and back panels and putting a thin wire or pipe cleaner inside them if you want. Make the shapes a little curved so they “bounce” naturally. To keep the look balanced, make the ears wider apart than the cat ears. Pastels and creams scream “bunny,” but muted naturals look stylish and easy to wear. For depth, think about adding a detachable bow or a panel on the inside of the ear that is a different color. To keep drafts out, add a drawstring or buttoned placket at the neck. Finish the edges neatly. The reverse single crochet (also called crab stitch) makes a neat corded look around the face opening. Gently block the hat so that the ears hang evenly and the crown is smooth.
9. Pierced Bear Balaclava
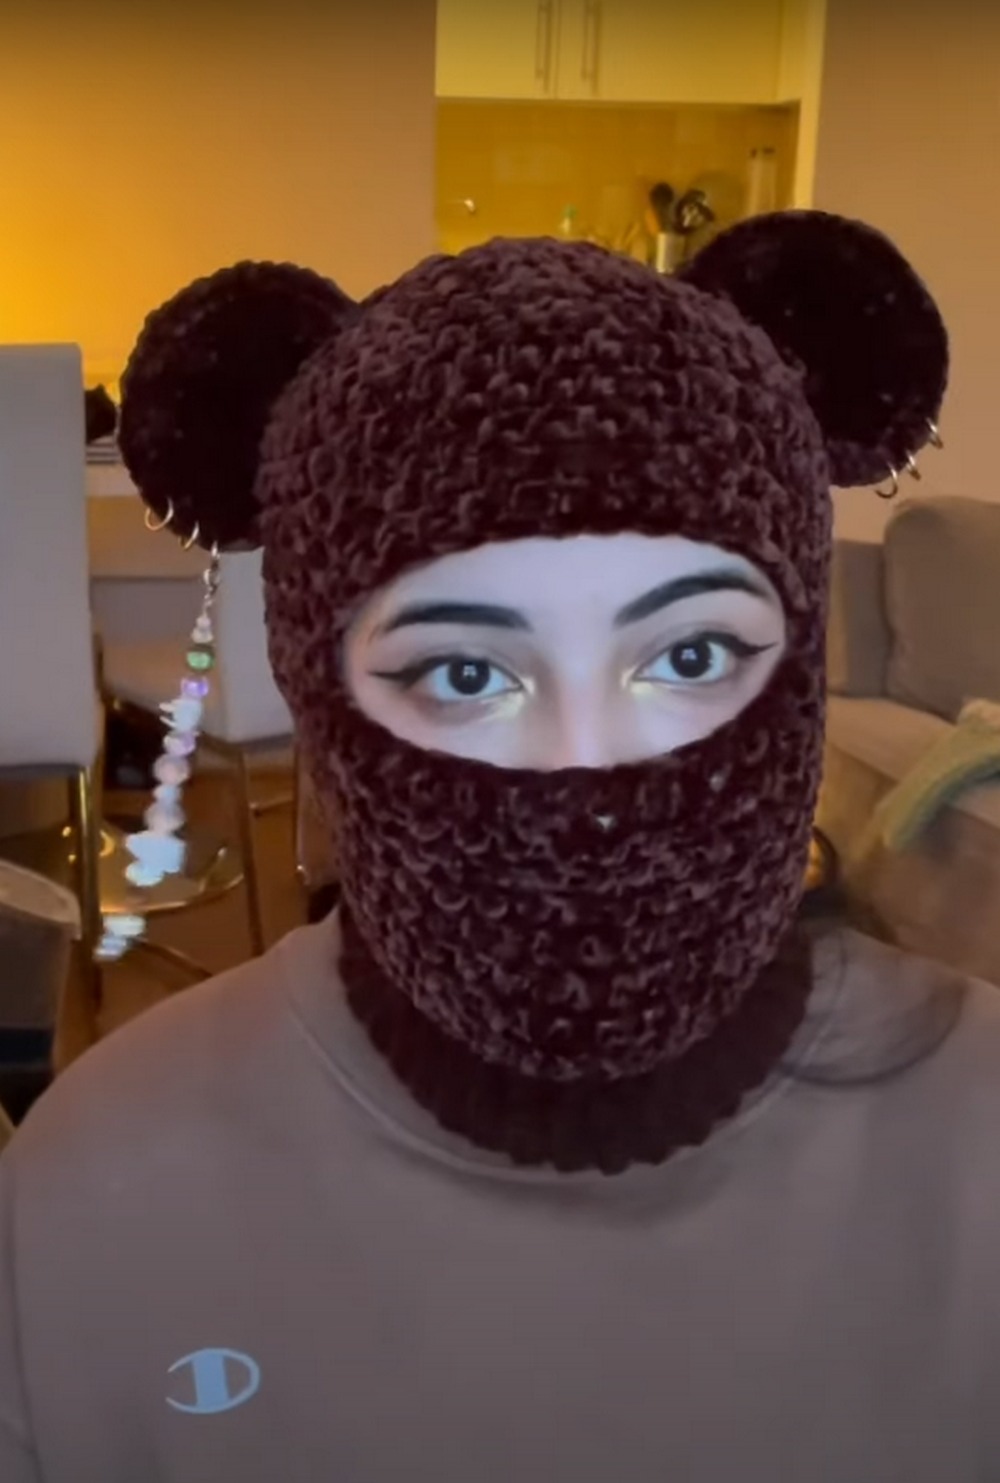
Lean and edgy, with a Pierced Bear Balaclava that combines cute and punk. Start with a strong, tightly stitched base made of wool blend or acrylic. It should be thick enough to hold hardware accents without sagging. Make it look like a classic balaclava, then add rounded bear ears with strong bases. To make “piercings,” sew on light metal-look rings or big jump rings, threading them through crochet fabric that is reinforced with small felt patches behind it so it doesn’t rip. Safety: Make sure the hardware is smooth, nickel-free, and light. For an attitude boost, add decorative lacing, chain stitches, or contrasting embroidery across the muzzle area. Silver accents stand out against a matte charcoal or jet black yarn. A deep brown yarn gives off a grunge teddy vibe. Add a soft facing around the opening for the face so that the metal doesn’t touch the skin. To keep the shape, hand-wash or spot-clean hardware areas and let them dry flat.
Conclusion
Handmade hoods and balaclavas are a mix of warmth, fun, and style. You can make each project look cute, classic, or edgy by adding ears, textures, and other details to simple shapes. Choose a yarn that works for the season, find a hook that fits, and then swatch. Add simple ways to change the depth, face opening, and coverage so that the fit feels secure without being too tight. Finish strong by cleaning up the edges, blocking the fabric, and sewing on ears that are even. If you need more warmth or stability, add linings, toggles, or ties. Take notes as you go so that your next hood is even better. Happy making this time of year.