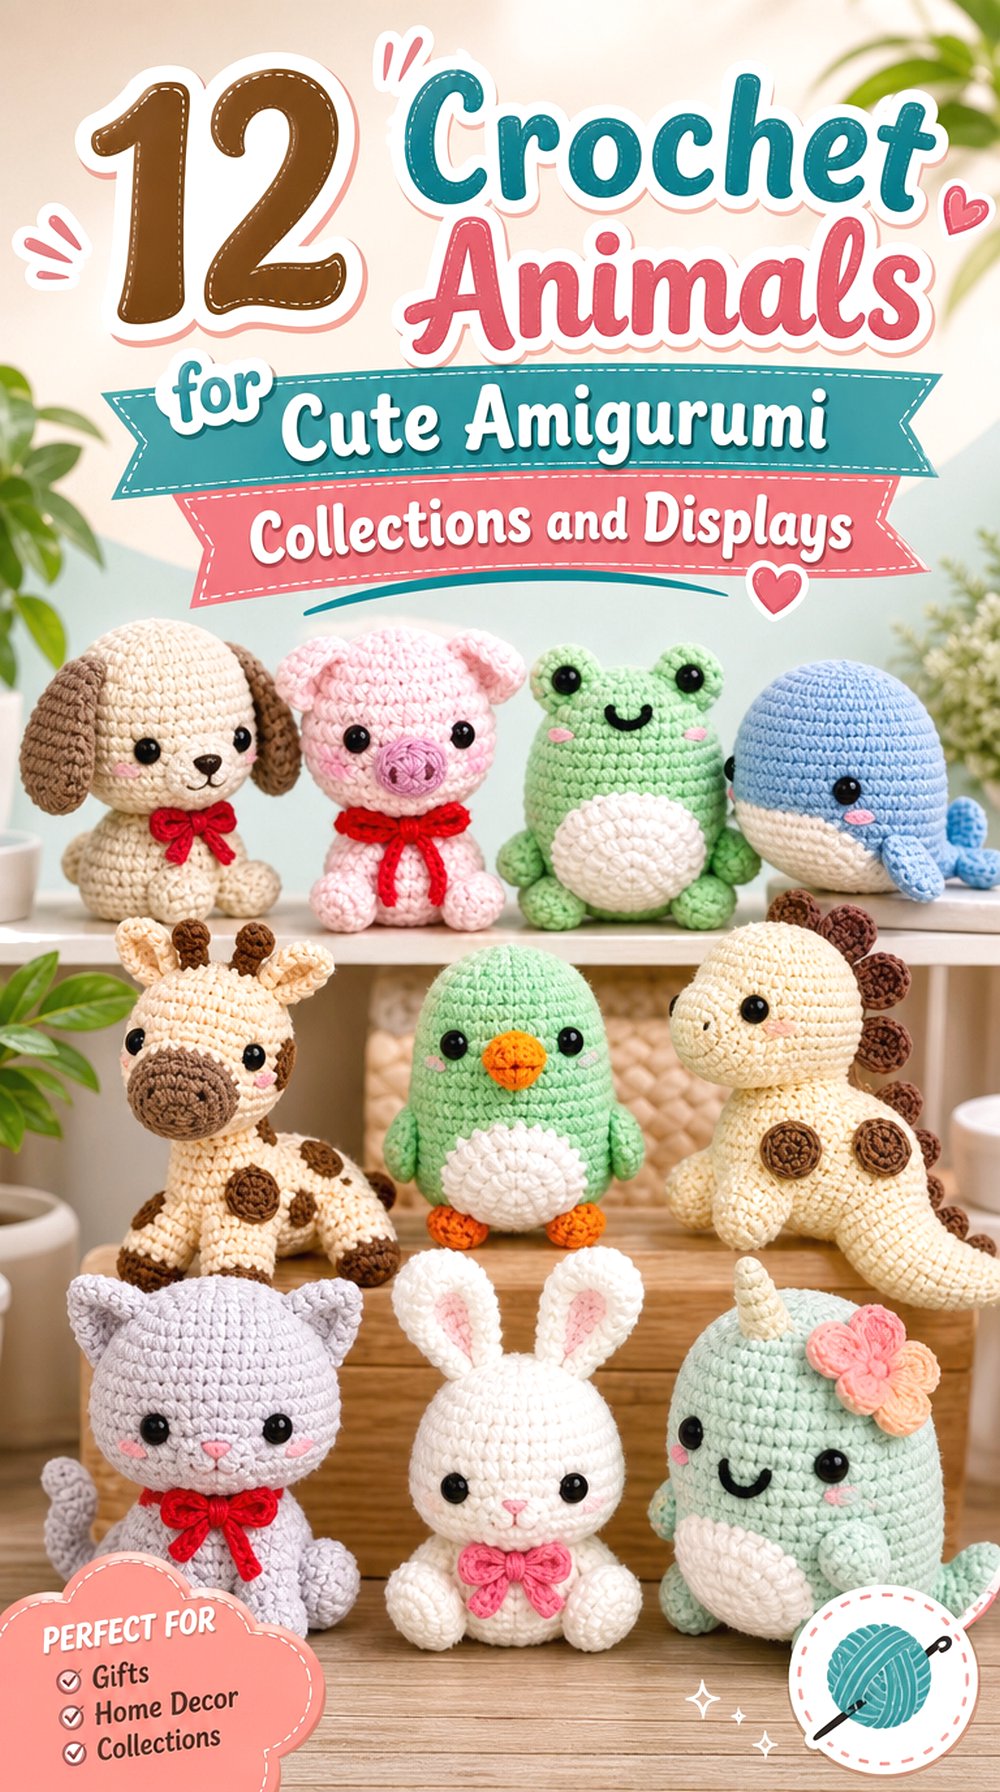
Halloween trees feel especially nostalgic when the ornaments look like characters pulled from old party invitations, paper decorations, trick-or-treat buckets, and classic monster imagery. Crochet works well for that look because simple shapes, embroidered expressions, muted colors, and dimensional details can make each branch feel collected rather than mass-produced.
The tutorials below are modern crochet resources, but their finished characters can inspire a deliberately old-fashioned Halloween tree. Some sources already teach small hanging or keychain-scale pieces, while others teach amigurumi characters that may need a separate hanging loop or a change in yarn scale before they suit your particular tree. Always check the finished size, weight, construction, and attachment details in the original tutorial before adapting a project.
Quick List
- Crochet Storybook Witch Ornament
- Crochet Arched-Back Black Cat Ornament
- Crochet Ruffled Ghost Ornament
- Crochet Jack-O’-Lantern Keychain Ornament
- Crochet Spread-Wing Bat Ornament
- Crochet Wrapped Mummy Ornament
- Crochet Cape-Wearing Vampire Ornament
- Crochet Graphic Skull Ornament
- Crochet Dangling Spider Ornament
- Crochet Frankenstein Monster Keychain Ornament
- Crochet Candy Corn Character Ornament
- Crochet Harvest Scarecrow Ornament
- Crochet Classic Werewolf Ornament
How to Give Crochet Halloween Ornaments a Vintage Look
A nostalgic Halloween tree does not need every ornament to come from an old pattern. The stronger approach is to keep a consistent visual language across modern crochet designs.
Consider cream instead of bright white, pumpkin or rust instead of neon orange, charcoal instead of absolute black, and small amounts of faded purple, olive, mustard, burgundy, or brown. Those combinations can recall vintage paper decorations without requiring artificial aging.
Faces matter too. Simple stitched mouths, crescent eyes, triangle noses, shaggy hairlines, capes, hats, and exaggerated silhouettes often read more convincingly as retro Halloween than highly detailed realistic features. If several ornaments will share one tree, repeat two or three colors throughout the collection so very different characters still feel related.
Plan Weight and Hanging Balance Before You Make a Full Set
An ornament that looks small on a table may still pull a lightweight branch downward once it is stuffed. Large heads, thick limbs, long hats, and dense plush yarn can change how a character hangs.
Make one sample before committing to multiples. Add the intended hanger, place it on the actual tree, and check whether the character faces forward or twists sideways. Moving the hanging point slightly toward the back of the head can sometimes improve presentation, but do not alter a creator’s construction blindly. Finish the character first and test its natural center of gravity.
Flat or lightly stuffed designs such as skulls can fill branch tips where heavier dolls would droop. Wider pieces such as bats work better where there is open space around them, while narrow peg-shaped figures can fit deeper between branches.
Think About Small Details Before the Tree Goes Into Storage
Halloween ornaments are handled repeatedly: they come out of storage, hang for a few weeks, and then return to a box. Long limbs, thin wings, loose embellishments, and projecting hats can become distorted if everything is packed tightly together.
Store dimensional characters with enough room that wings, hat brims, capes, and hair are not crushed. If an ornament includes safety eyes, buttons, hardware, or other small components, treat it as decorative rather than automatically assuming it is suitable as a child’s toy. For homes with small children or pets, embroidered facial details may be worth considering where the design permits them.
1. Crochet Storybook Witch Ornament
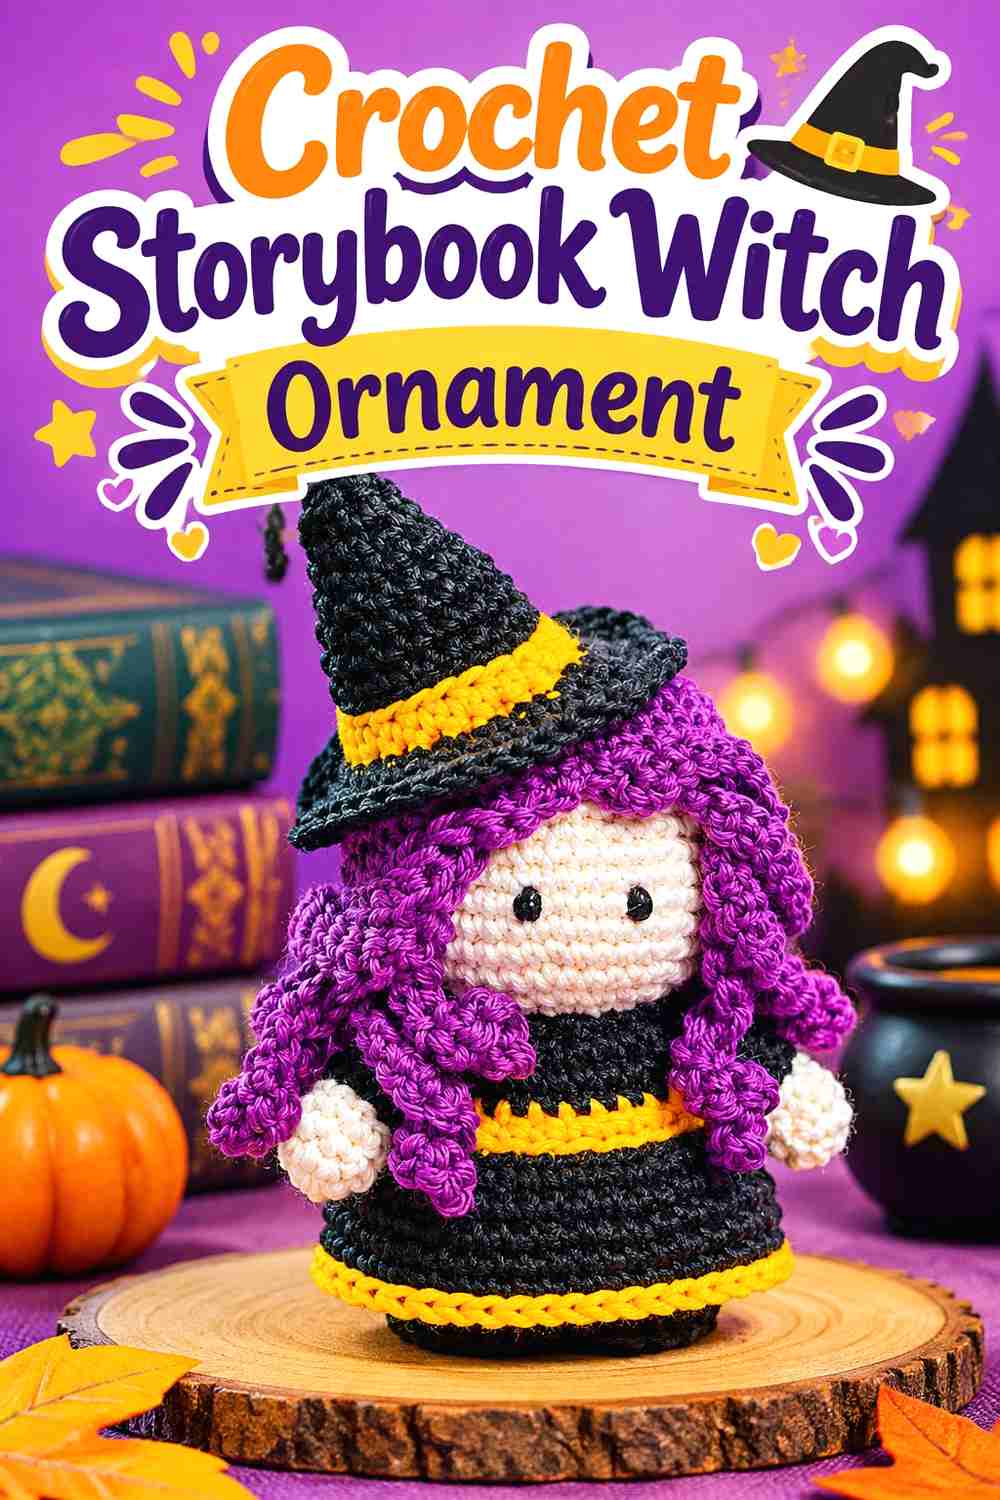
A pointed hat and recognizable doll silhouette make a witch one of the strongest anchors for a vintage-inspired Halloween tree. Little Crochet Farm’s tutorial produces a complete miniature witch character with a skirt, hair, arms, and hat rather than relying on a hat alone to communicate the theme.
For an ornament collection, this is the character that can carry several of your recurring palette colors. Black and orange are obvious choices, but muted purple, moss, ochre, or cream can make the witch feel more like an old illustrated Halloween figure.
Let the Pointed Hat Create the Main Silhouette
The hat already supplies plenty of visual height, so extra hanging hardware should not compete with it. Before adding a loop, look at the finished character from the front and decide where the suspension point can sit without folding or pulling the hat out of shape.
A taller ornament also needs breathing room on the tree. Place it where the hat will not press into the branch directly above.
Keep the Face Simpler Than the Costume
Vintage Halloween characters often work because their expressions remain graphic and readable. If you adapt colors or decorative details, resist adding so many accents that the face disappears among the hair, hat, and clothing.
When changing yarn, confirm that the smaller features remain proportional. A thicker yarn can enlarge hair, hands, and hat details enough to make a compact doll much bulkier than expected.
Creator Credit: Little Crochet Farm
2. Crochet Arched-Back Black Cat Ornament
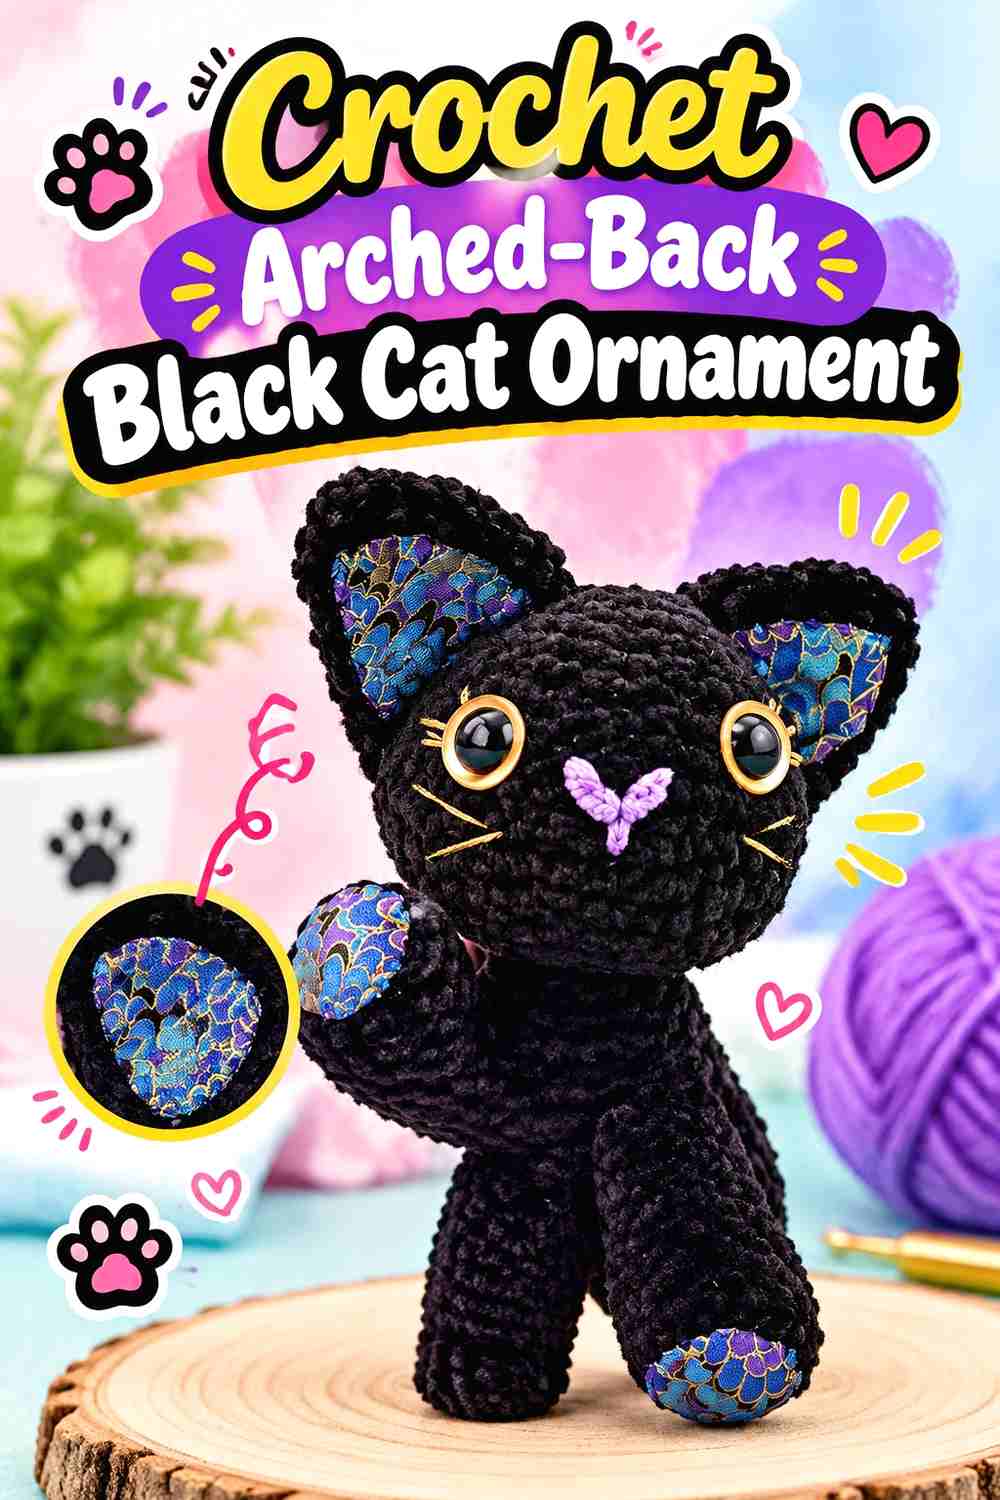
A black cat provides a completely different outline from the witch. AmareeLis demonstrates a full amigurumi cat with separate head, body, ears, arms, tail, and embroidered details, giving the finished figure a particularly character-driven look.
For a nostalgic tree, the strongest feature is not necessarily pure black yarn. Charcoal can reveal stitch definition more clearly under indoor lighting while still preserving the classic Halloween-cat effect.
The Tail Can Define the Character From Across the Room
A cat ornament needs more than two ears to stay recognizable among dark branches. The tail adds a second readable feature and can keep the silhouette from looking like a generic round animal.
Before converting a stuffed cat into hanging decor, check where the tail naturally sits. A dangling or projecting tail can catch on neighboring ornaments if the branch spacing is tight.
Dark Yarn Needs Enough Contrast Around the Face
Very dark yarn can absorb detail, especially on an artificial black tree. Cream, orange, gold, gray, or another restrained accent around the eyes, collar, paws, or inner ears can make the face readable without turning the ornament into a brightly colored modern plush.
Place the finished cat against the actual branch color before deciding that it needs more decoration. Sometimes moving it to a lighter background is more effective than adding extra features.
Creator Credit: AmareeLis
3. Crochet Ruffled Ghost Ornament
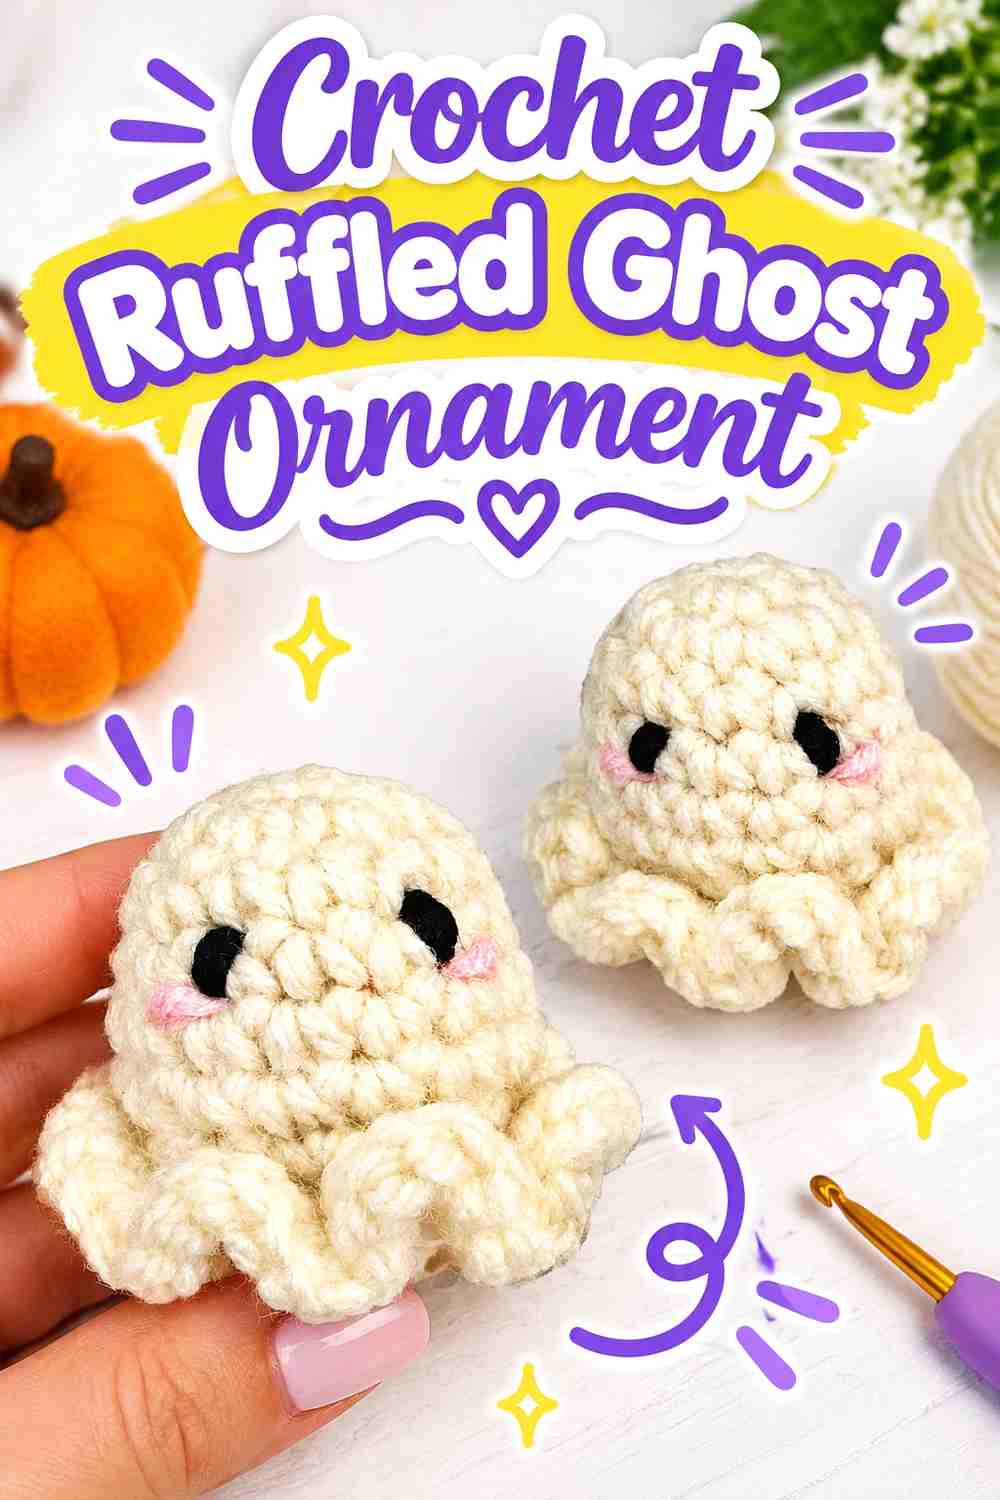
This ghost is particularly well suited to a tree because ElyseCrochets presents it as a compact no-sew amigurumi that can be used as a keychain, bag charm, or Halloween decoration. Its soft rounded head and ruffled lower edge create a shape that is noticeably different from the solid dolls elsewhere in the collection.
Cream yarn can push the design toward an aged-paper Halloween palette, while bright white produces a cleaner, higher-contrast ghost.
The Ruffled Lower Edge Gives Movement Without Dangling Limbs
A skirt-like ghost edge creates the suggestion of floating while keeping the outline compact. That makes the character useful in crowded sections of a tree where long arms or legs would become tangled.
If you change yarn, make a single sample first. A yarn with very different stiffness can change how much the lower edge flares.
A Minimal Face Supports the Vintage Mood
A simple ghost expression can be more effective than a complicated one. Large dark areas already contrast strongly with the pale body, so there is little need to crowd the face with extra embroidery.
For a tree displayed across a room, judge the face from normal viewing distance rather than only from close up. The most delicate details may disappear once the ornament is hanging among lights and branches.
Creator Credit: ElyseCrochets 💌
4. Crochet Jack-O’-Lantern Keychain Ornament
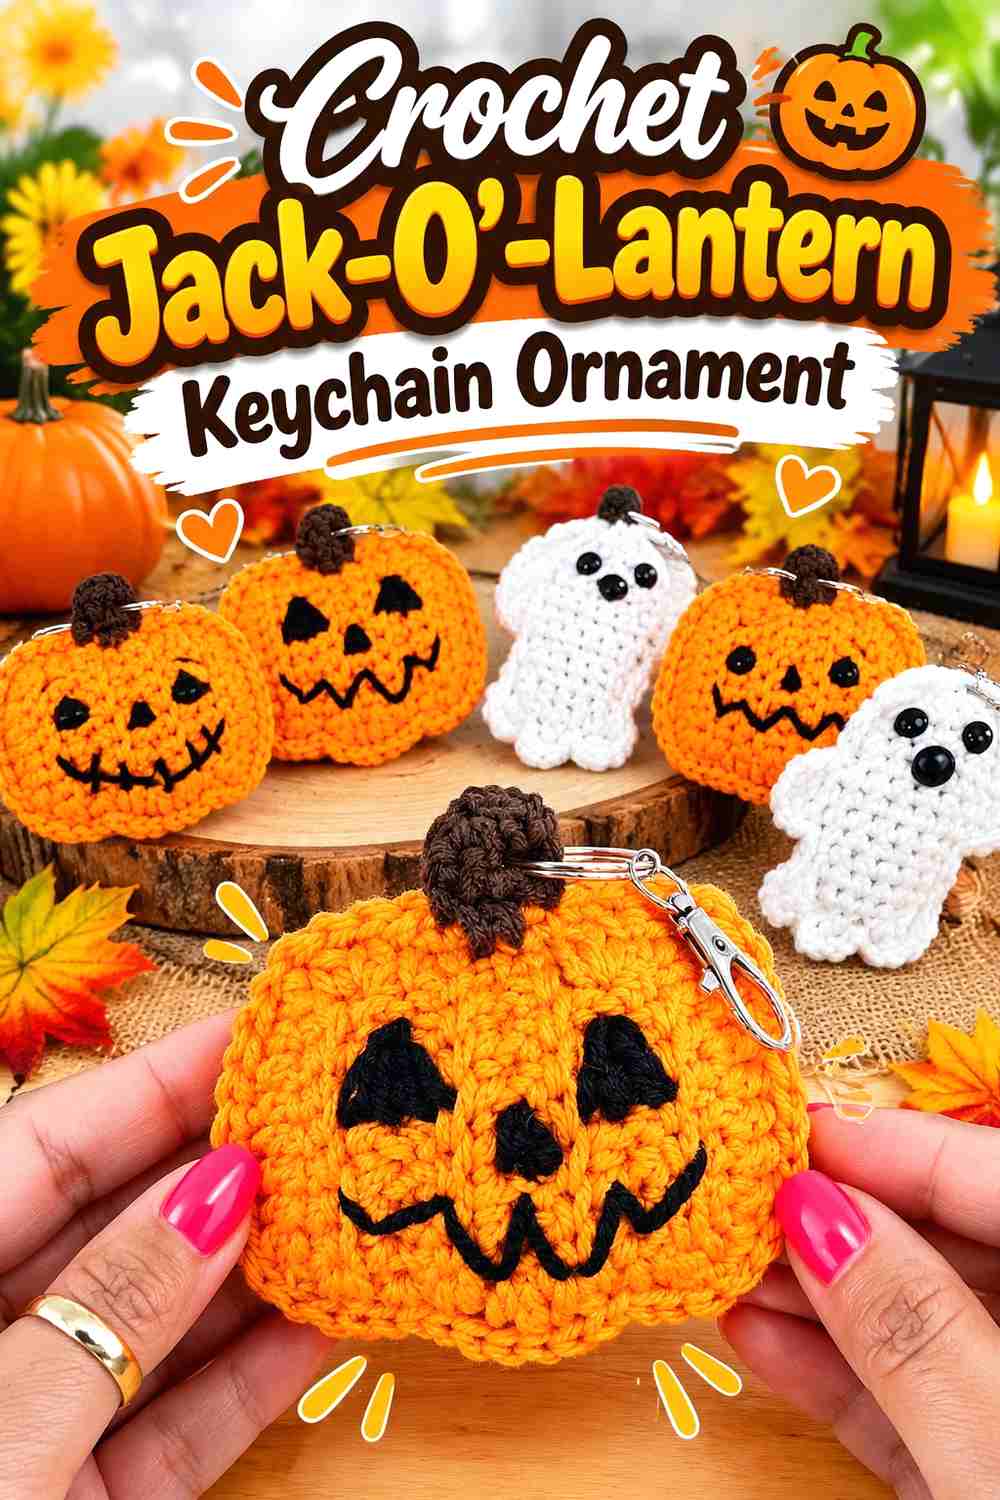
A jack-o’-lantern is one of the easiest motifs to recognize as vintage Halloween, and Jennifer Noelle’s tutorial is especially useful here because the finished crochet pumpkin is designed as a keychain and includes a hanging attachment. That gives the project a much more direct path to ornament use than adapting a large tabletop pumpkin.
The flatter, compact pumpkin shape also provides an important visual break between long-bodied dolls.
Treat the Face as the Focal Point
On a small pumpkin, the expression has to remain readable after the ornament moves farther from the viewer. A strong eye-and-mouth arrangement matters more than adding numerous surface decorations.
Before attaching the final hanger, rotate the pumpkin and identify which side presents the face most squarely. A slightly off-center attachment can cause the character to hang at an angle.
Ribbing and Stuffing Change the Profile
A pumpkin ornament can become surprisingly thick if heavily stuffed. That may be desirable on a sparse branch but cumbersome on a narrow tabletop tree.
If you want several jack-o’-lanterns, complete one first and compare its depth with the gaps between your branches. Keeping the set consistent will look more intentional than producing pumpkins with noticeably different profiles.
Creator Credit: Jennifer Noelle
5. Crochet Spread-Wing Bat Ornament
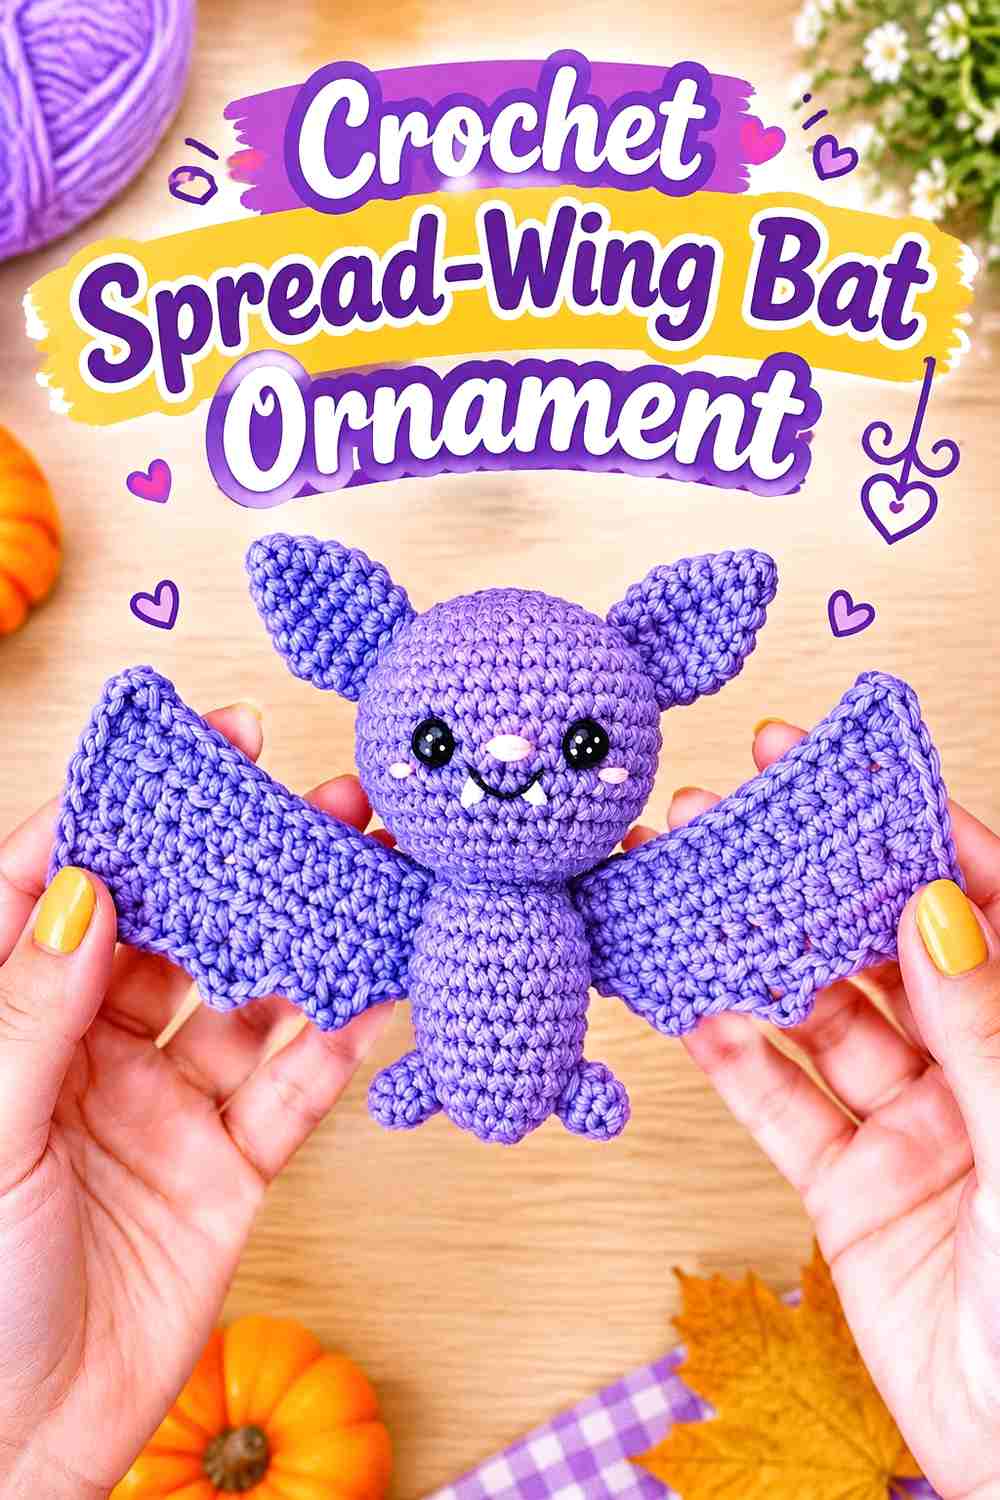
Olliehollycrochet’s bat tutorial is explicitly suited to Halloween decoration and can be strung for display. The construction includes a stuffed body, ears, feet, and prominent wings, with the tutorial also addressing wing blocking and stiffening.
That broad horizontal silhouette makes the bat one of the most useful projects for filling wider gaps on a Halloween tree.
Give the Wings Enough Empty Space
The wings are the reason to choose this project over another round Halloween character. Do not bury them between neighboring branches.
Try placing bats toward the outside of the tree where the wing tips can extend freely. A broad ornament beside a narrow witch or mummy also creates a more interesting rhythm than grouping several wide designs together.
Check Wing Shape Again After Storage
A bat depends on its wings staying legible. If they bend or curl during storage, the entire character can lose its distinctive silhouette.
Store the finished pieces flat or with light support around the wings rather than compressing them under heavier amigurumi. Recheck the creator’s guidance before attempting to reshape or stiffen them differently.
Creator Credit: olliehollycrochet
6. Crochet Wrapped Mummy Ornament
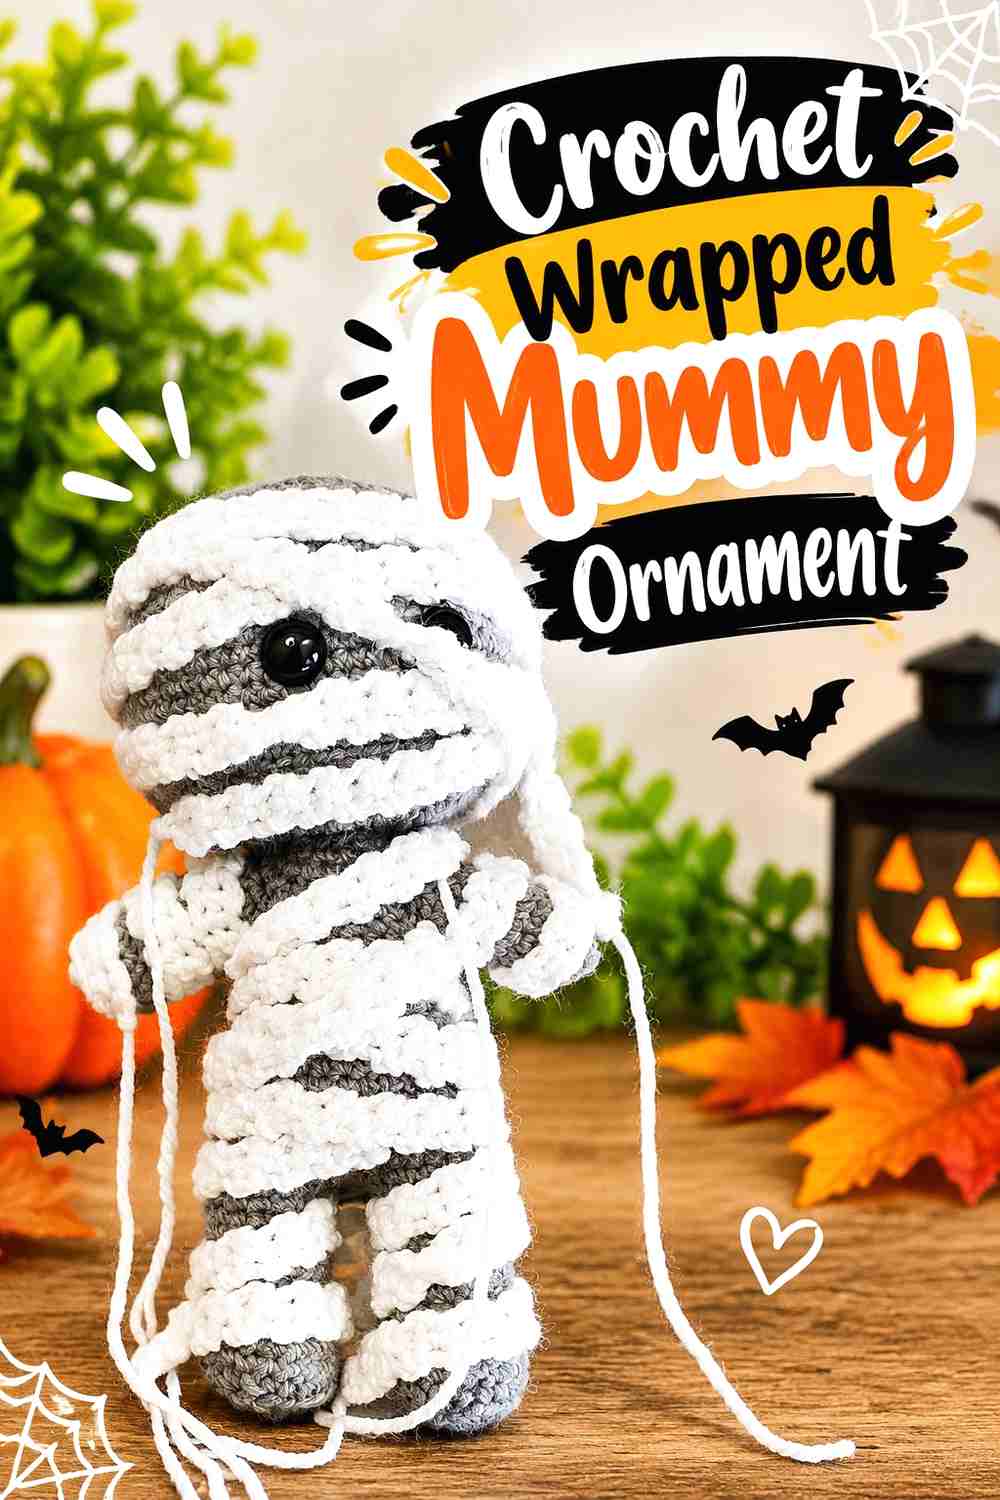
Skein Spider’s mummy tutorial builds a complete Halloween character and then adds the bandage effect that makes the figure immediately recognizable. Compared with the ghost, the mummy has a more structured human-like body and much more visible surface detail.
A cream, parchment, or pale gray body can fit a nostalgic palette without needing deliberately distressed yarn.
Bandage Texture Is More Important Than Extra Color
This character already has visual complexity because of the wrapped surface. Introducing too many additional colors can weaken the mummy effect.
If your Halloween tree already contains bright oranges and purples, the mummy is a useful neutral. It can separate two saturated ornaments and keep the overall display from becoming visually crowded.
Watch the Weight of Long Limbs
A figure with arms, legs, and wrapping may behave differently from a compact ball-shaped ornament. Before adding a hanger, finish the complete figure and determine how it balances.
If the doll is larger than your tree can comfortably carry, do not simply remove body parts from the source construction. Choose a lighter yarn system only if you understand how the material change will affect the finished fabric and stuffing.
Creator Credit: Skein Spider
7. Crochet Cape-Wearing Vampire Ornament
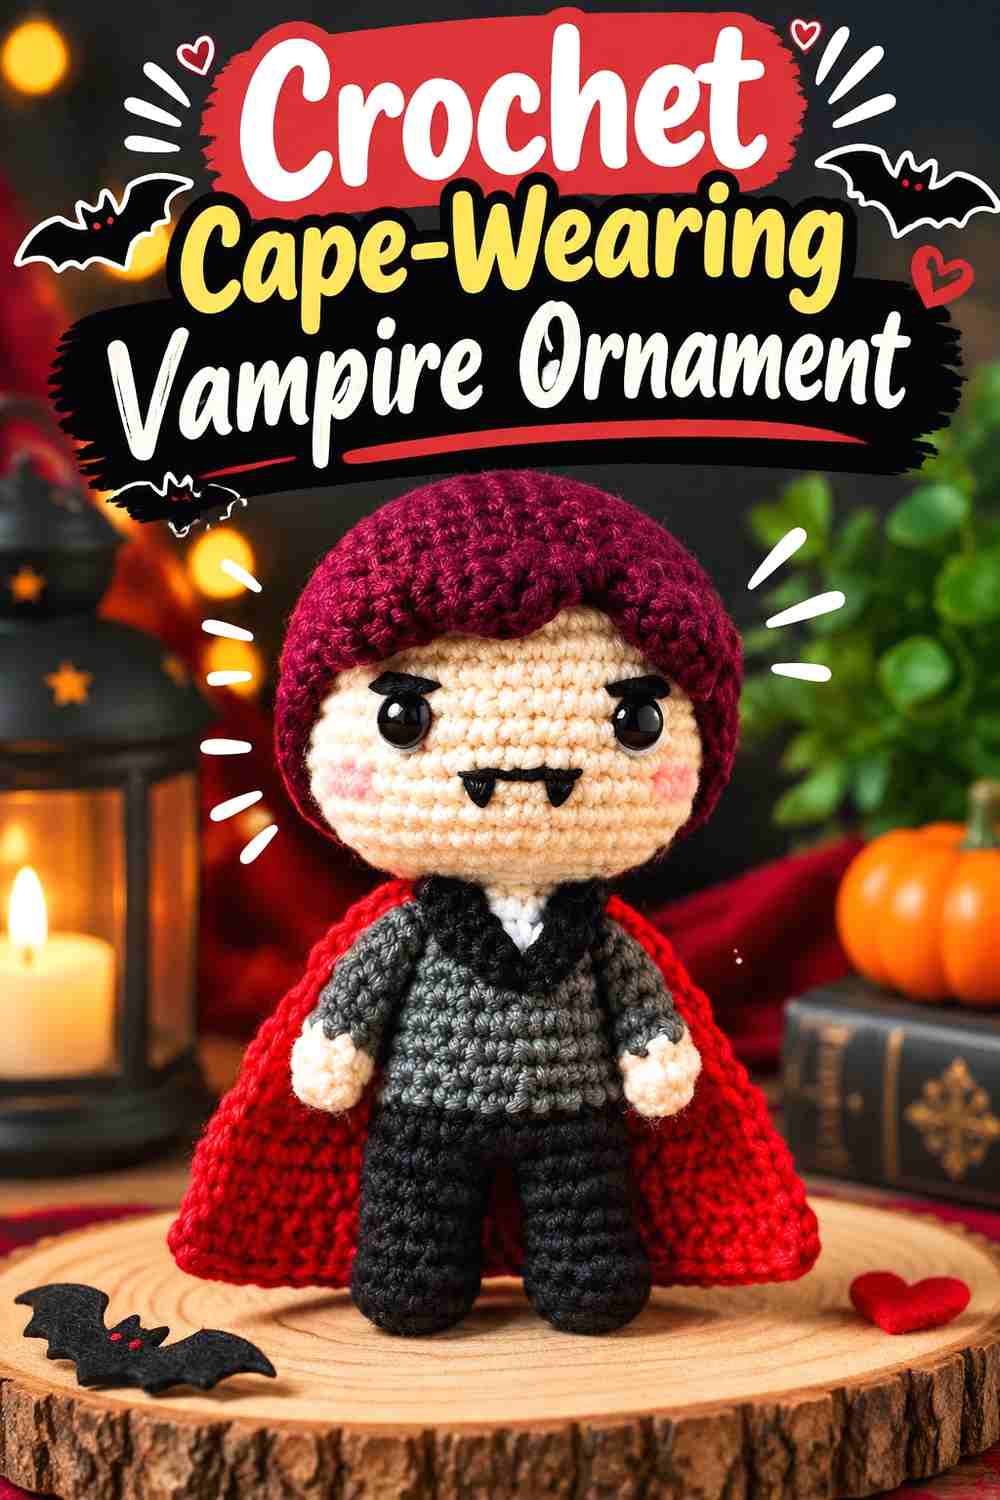
ToyGurumi’s Halloween vampire tutorial provides the classic character contrast this collection needs: a human-shaped monster with a dark formal silhouette rather than bandages, fur, or wings.
For a nostalgic tree, the cape is the most valuable visual cue. Deep red, burgundy, charcoal, and cream can evoke old monster-movie posters without relying on realistic horror details.
Preserve the Cape Outline When Adding a Hanger
A hanging loop placed through the wrong part of the costume can pull the cape upward or fold it behind the body. Complete the assembly first, then hold the figure from several possible points to see how the garment falls.
The ornament should still look like a vampire when viewed from a few feet away, even if tiny facial features are not visible.
Use Light and Dark Contrast to Frame the Face
If the hair, cape, and tree are all black, the head can disappear. A pale face or lighter collar area provides a natural visual break.
You do not need to add extra facial embroidery solely to solve a contrast problem. Changing the branch position or placing the vampire beside a light ghost or candy corn can help the character read more clearly.
Creator Credit: ToyGurumi
8. Crochet Graphic Skull Ornament
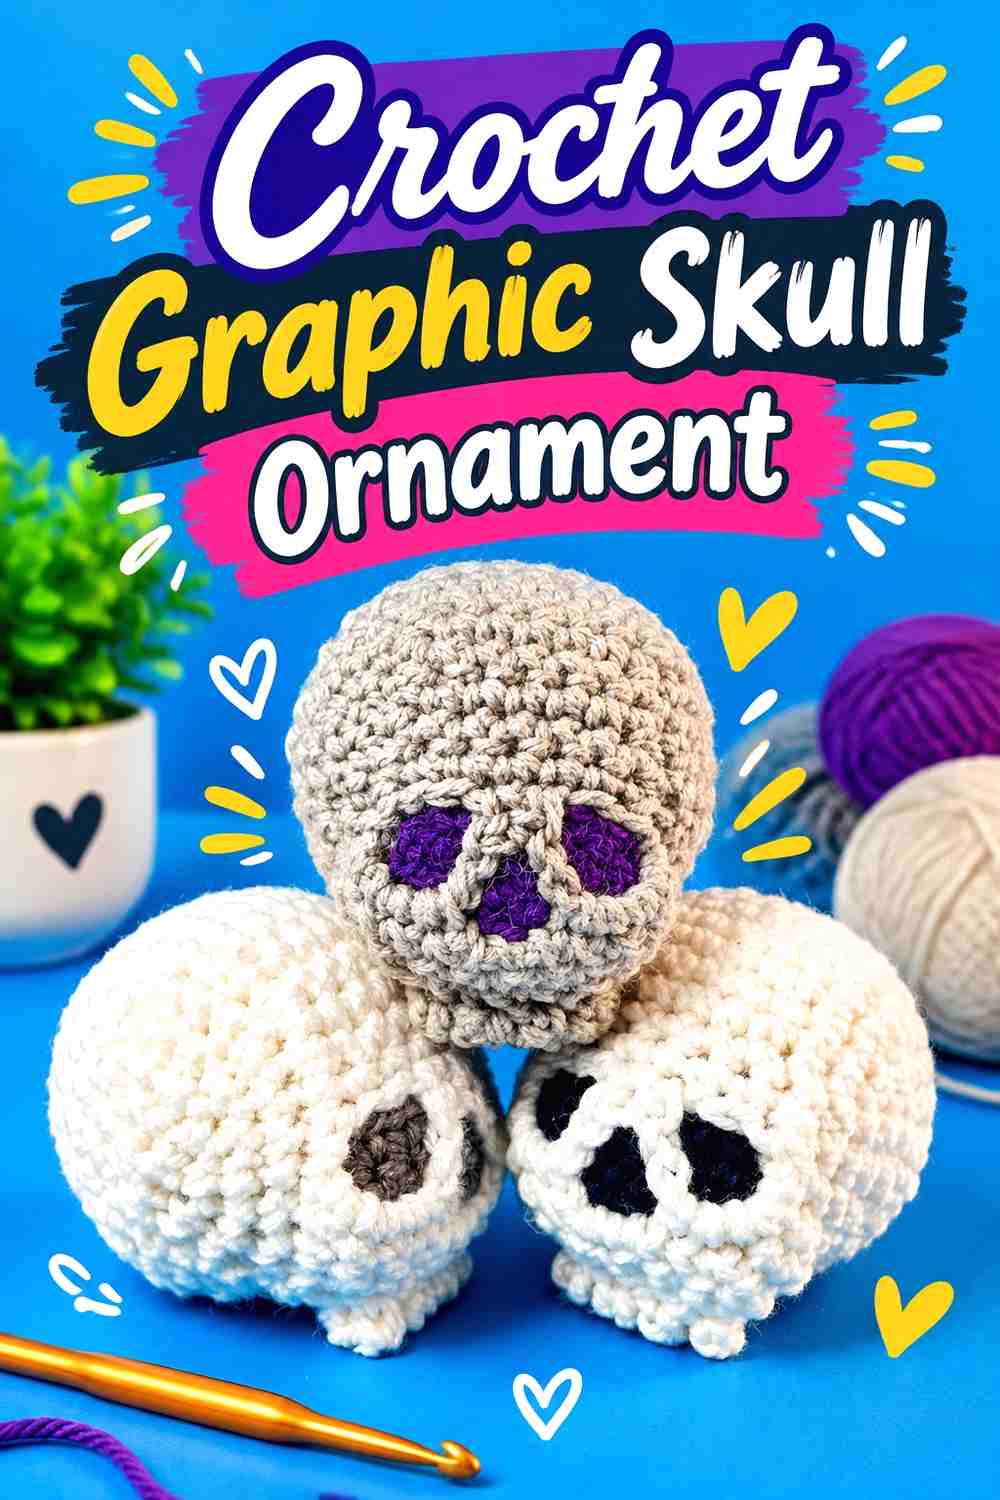
ComplicatedKnots’ crochet skull is designed as a small amigurumi that can work as decoration or a keychain. Its flatter facial emphasis makes it especially useful in a collection dominated by dimensional dolls.
A skull can also bring the tree closer to older Halloween graphics, where faces and masks often mattered more than full-body characters.
Flat-Facing Ornaments Need the Right Hanging Point
A skull looks strongest when the face hangs toward the viewer rather than turning edge-on. Test the attachment point with a temporary strand before securing the final loop.
This is also a good candidate for branch tips because it does not need the same side clearance as a bat or long-tailed cat.
High Contrast Does Most of the Work
Skull imagery depends on clear light-and-dark shapes. If you change the palette, preserve enough contrast for the eyes, nose, and overall outline to remain visible.
An antique ivory paired with charcoal can feel softer than stark white and black while still providing the necessary graphic separation.
Creator Credit: ComplicatedKnots
9. Crochet Dangling Spider Ornament
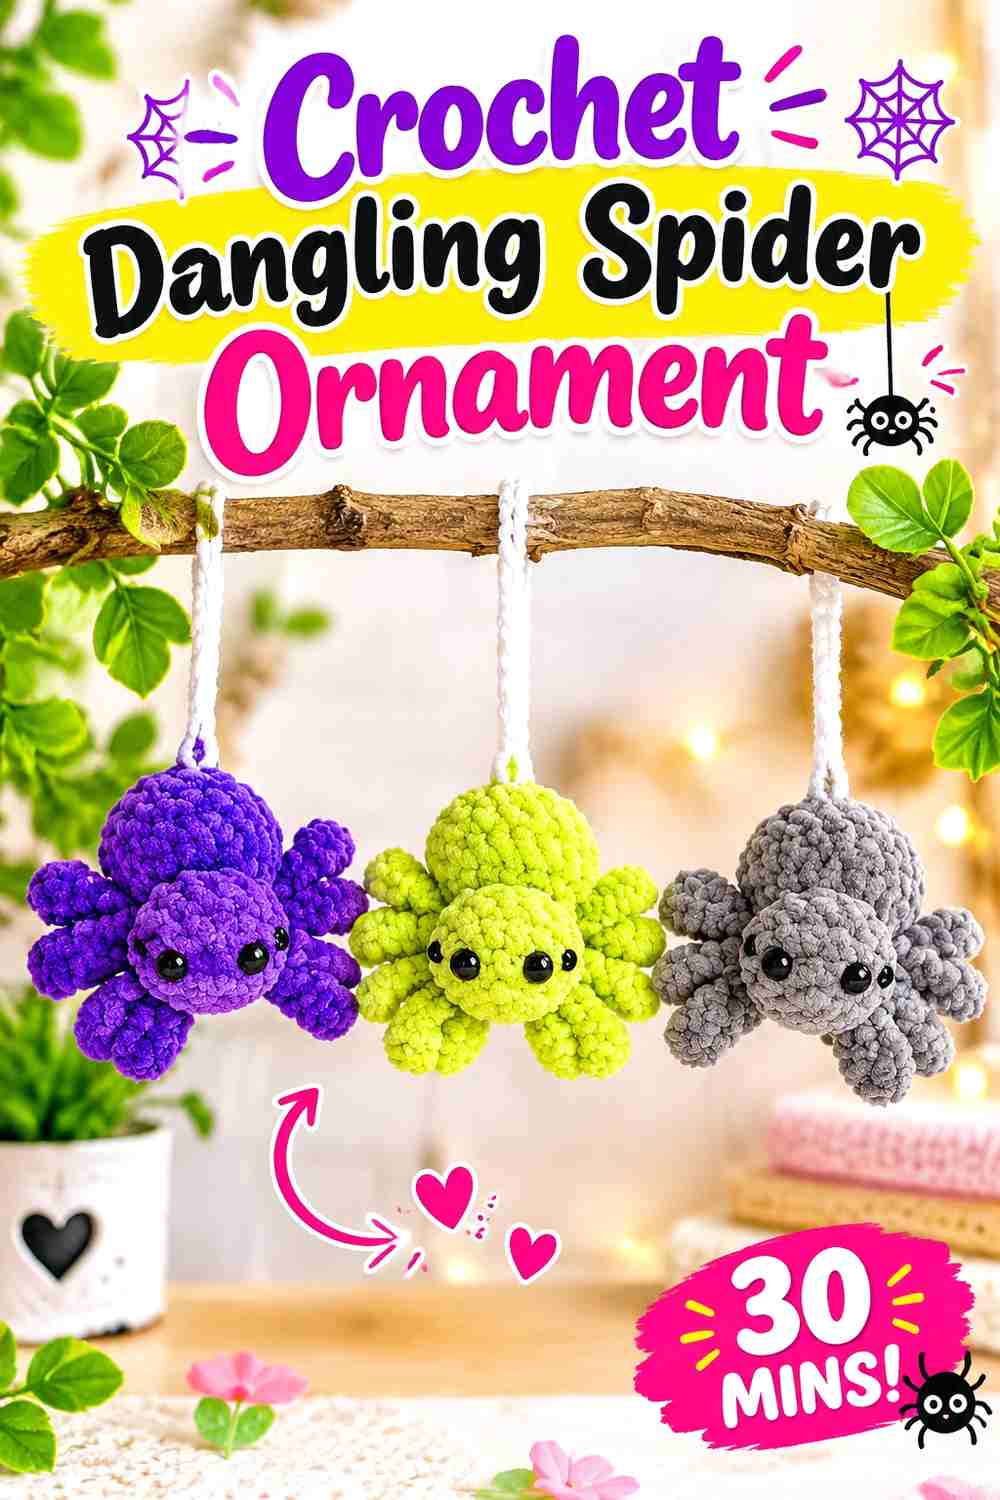
Crochetcalls’ no-sew spider is especially practical for hanging decor because the tutorial includes a hanging loop and identifies the finished character as suitable for Halloween display.
The radiating legs create one of the most irregular silhouettes in the collection, which is valuable on a tree where too many round stuffed characters can begin to look repetitive.
Let the Legs Break Up the Branch Lines
Rather than hiding the spider deep inside dense greenery, place it where several legs can remain visible. The shape works especially well near open branch intersections.
If you make several spiders, alternate their hanging height so the legs do not overlap into one indistinct mass.
Avoid Overloading the Body With Decoration
The spider’s outline already communicates the character. Extra bows, hats, or multiple embellishments can distract from that simple shape unless you are deliberately building a more whimsical theme.
For a vintage look, a restrained body color with one small facial or accent detail can be enough.
Creator Credit: crochetcalls
10. Crochet Frankenstein Monster Keychain Ornament
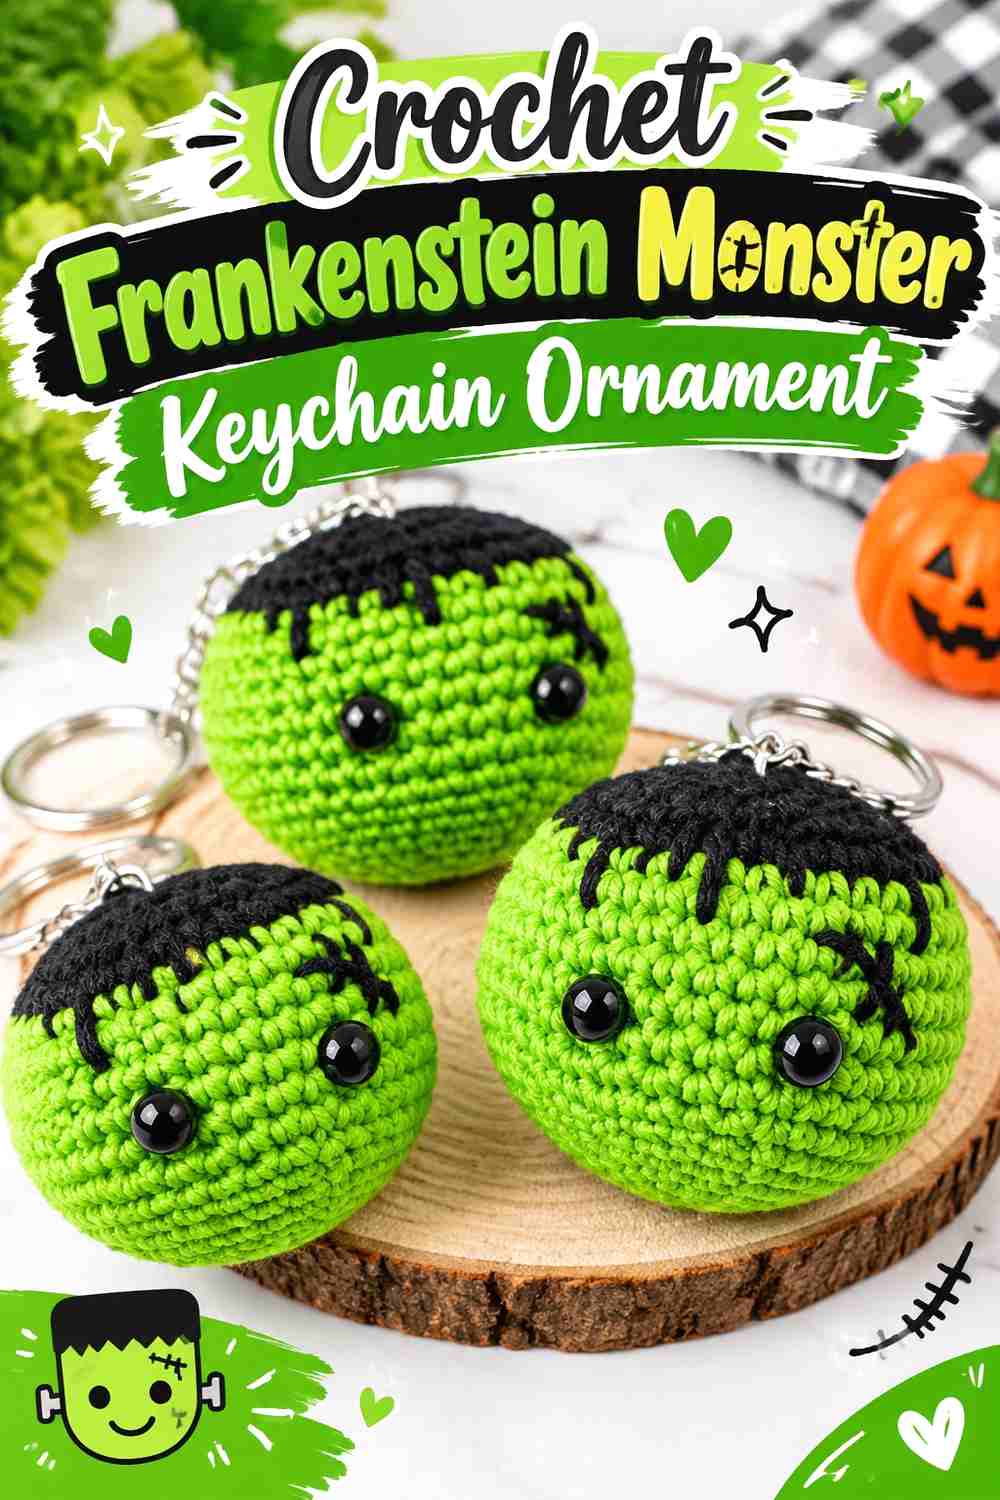
Yarn Society’s Frankenstein-inspired character is already designed as a keychain, making its compact format a natural candidate for a Halloween tree. The tutorial includes the character’s recognizable hair and facial details along with keyring attachment.
This is a useful project when you want a classic monster without the flowing shapes of a vampire or mummy.
The Hairline Carries Much of the Character
At ornament scale, small scars and facial stitches may not be visible from across the room. The dark hair against the contrasting head is a much larger cue.
When adapting colors, maintain enough value difference between the hair and face. A subdued olive or muted green can feel more vintage than a fluorescent shade while keeping the monster recognizable.
Keychain Hardware Can Be Reconsidered for a Tree
A metal keyring may be perfectly functional, but it can visually dominate a small textile ornament. Decide whether you want to retain the hardware or use a yarn or ribbon hanger appropriate to your tree.
Any replacement attachment should be secured through a structurally sound part of the finished piece rather than loosely tied around surface stitches.
Creator Credit: Yarn Society
11. Crochet Candy Corn Character Ornament
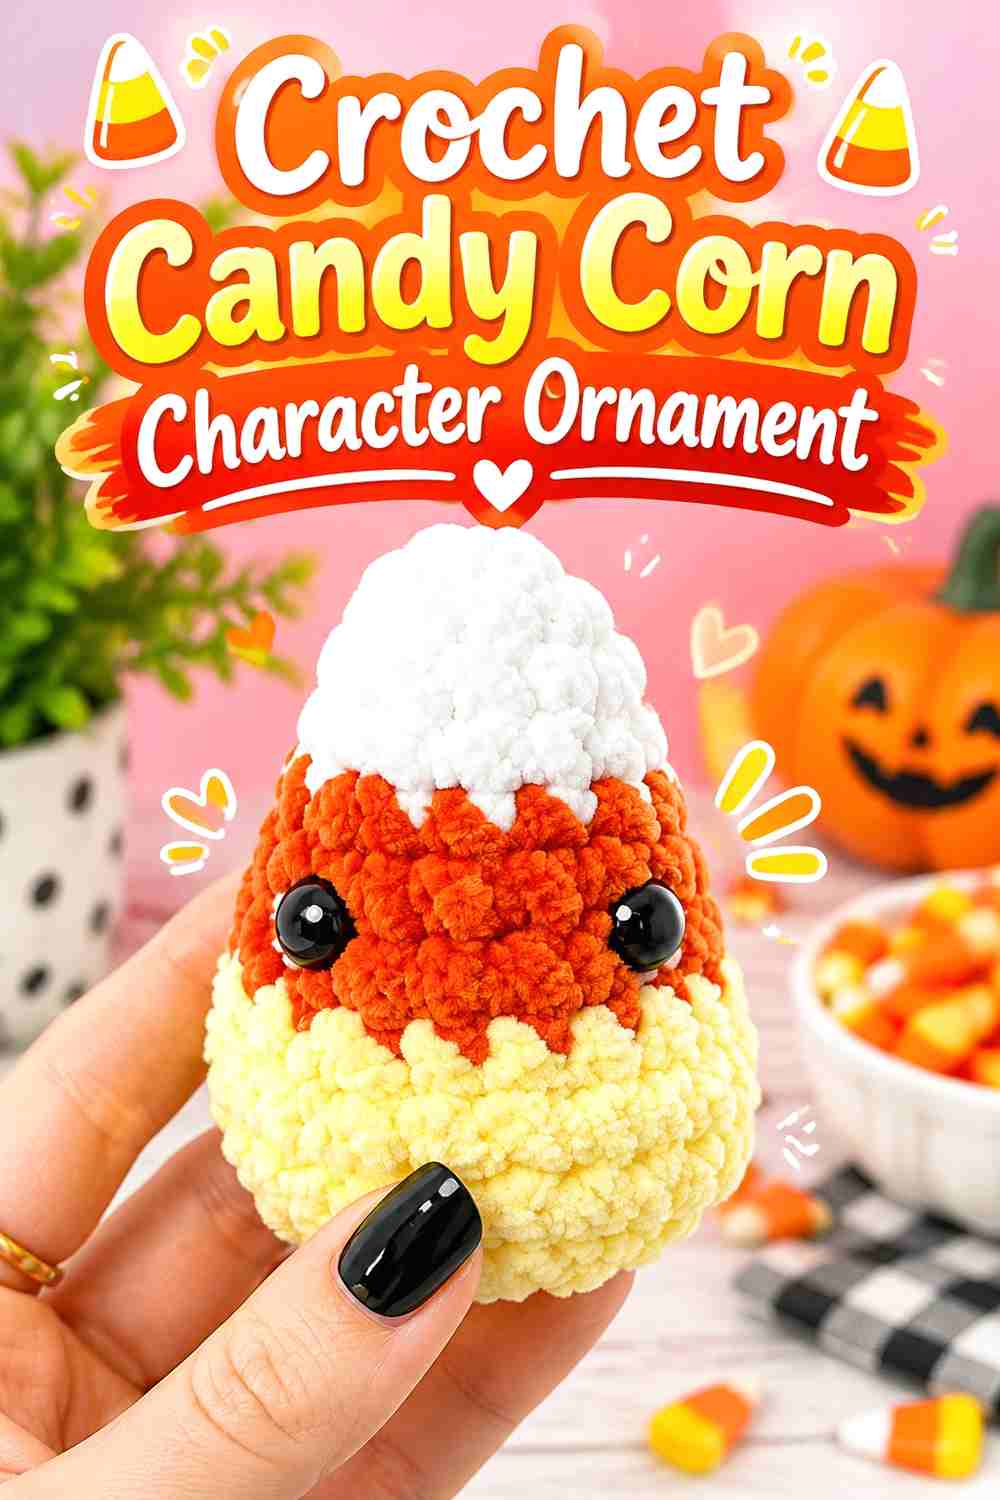
Rose and Lily Crochet’s tutorial produces a small stuffed candy corn character with the familiar striped triangular form. This gives the collection a cheerful food character that still belongs unmistakably to American Halloween imagery.
Unlike the monsters, its identity comes largely from color placement and outline rather than costume pieces.
Keep the Three-Part Color Read Clear
Cream, orange, and yellow are central to the candy corn look. Vintage styling can soften those colors, but pushing them too far toward similar tones may make the character less immediately recognizable.
This is one place where repetition works well. Several candy corn ornaments distributed around the tree can act almost like visual punctuation between larger one-of-a-kind characters.
Use the Narrow Top as a Visual Guide for Hanging
A triangular character has a natural vertical direction, so crooked hanging becomes more noticeable. Test the loop before securing it permanently and make sure the point stays roughly upright.
If the stuffed base is heavy enough to tilt the character, adjust the hanger position rather than compensating by adding more stuffing.
Creator Credit: Rose and Lily Crochet
12. Crochet Harvest Scarecrow Ornament
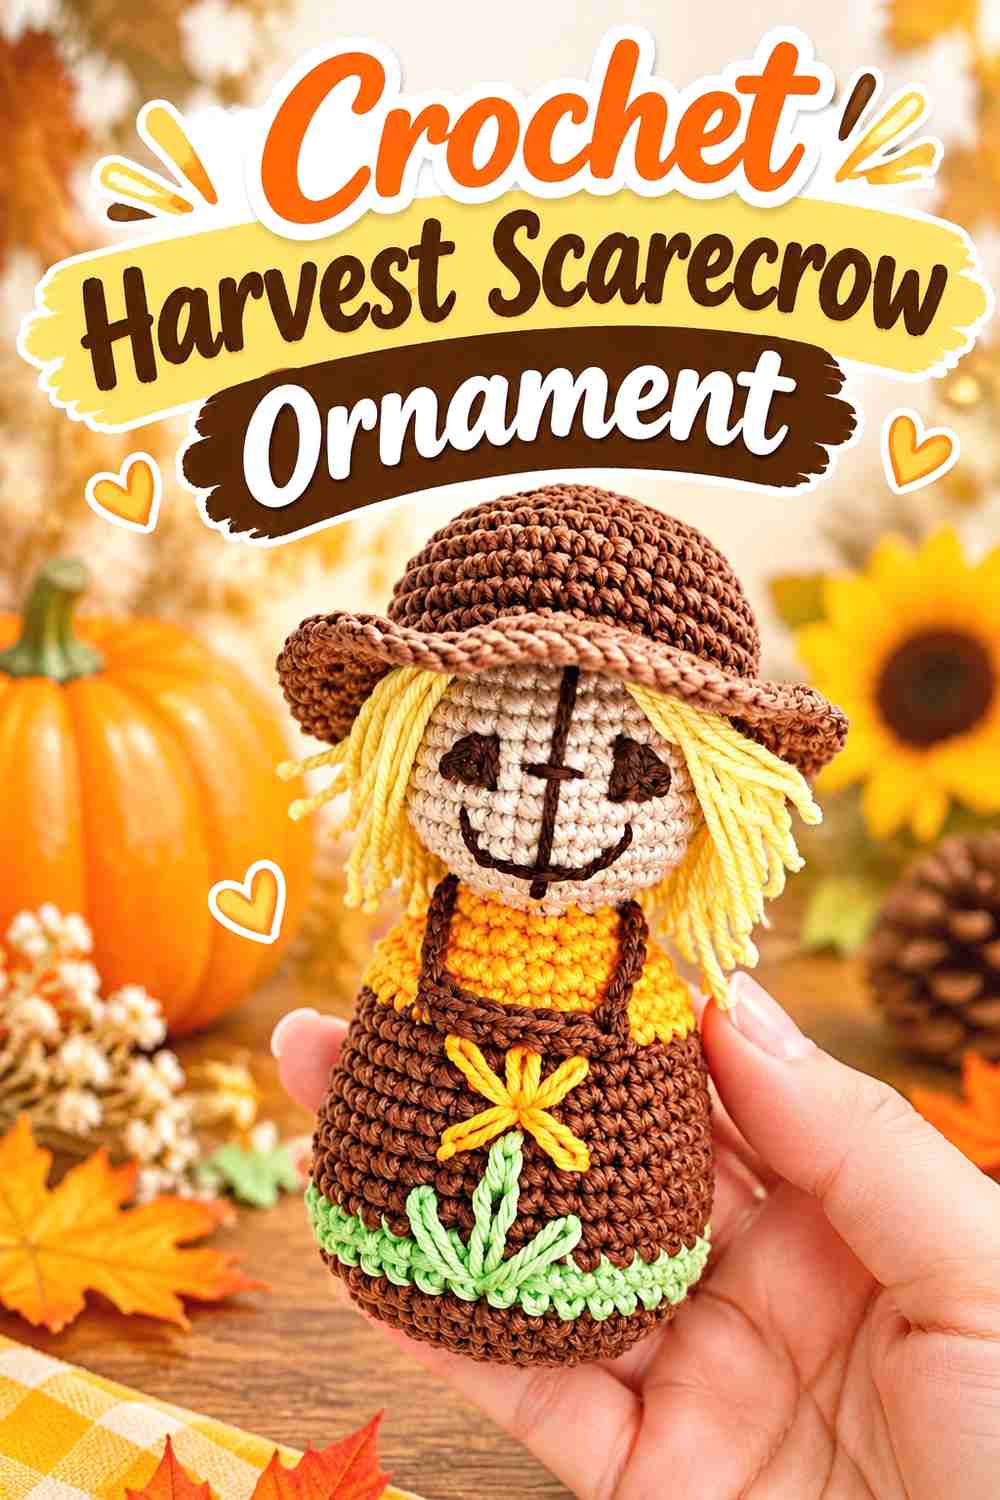
Yarnacadabra’s scarecrow uses a peg-doll format with body, head, embroidered details, hair, and a hat, giving it a tall and relatively narrow profile. That makes it a useful bridge between Halloween monsters and harvest imagery.
The scarecrow can also introduce mustard, rust, denim-inspired blue, straw, or brown tones to a tree dominated by black and orange.
A Narrow Figure Can Fill the Inner Branches
Wide ornaments often need the tree’s outer edges. A slim scarecrow can fit farther inward, where vertical gaps between branches might otherwise remain empty.
Check that the hat is still visible from the intended viewing angle. If surrounding greenery hides the top half, move the figure forward rather than adding extra decoration.
Hair and Hat Need Protection Between Seasons
Loose yarn hair and projecting hat shapes can easily flatten in a tightly packed ornament box. Give the scarecrow enough storage space that those features do not stay bent for months.
This is also a good project to keep away from hook-and-loop fasteners or rough decorations that might snag the hair.
Creator Credit: yarnacadabra
13. Crochet Classic Werewolf Ornament
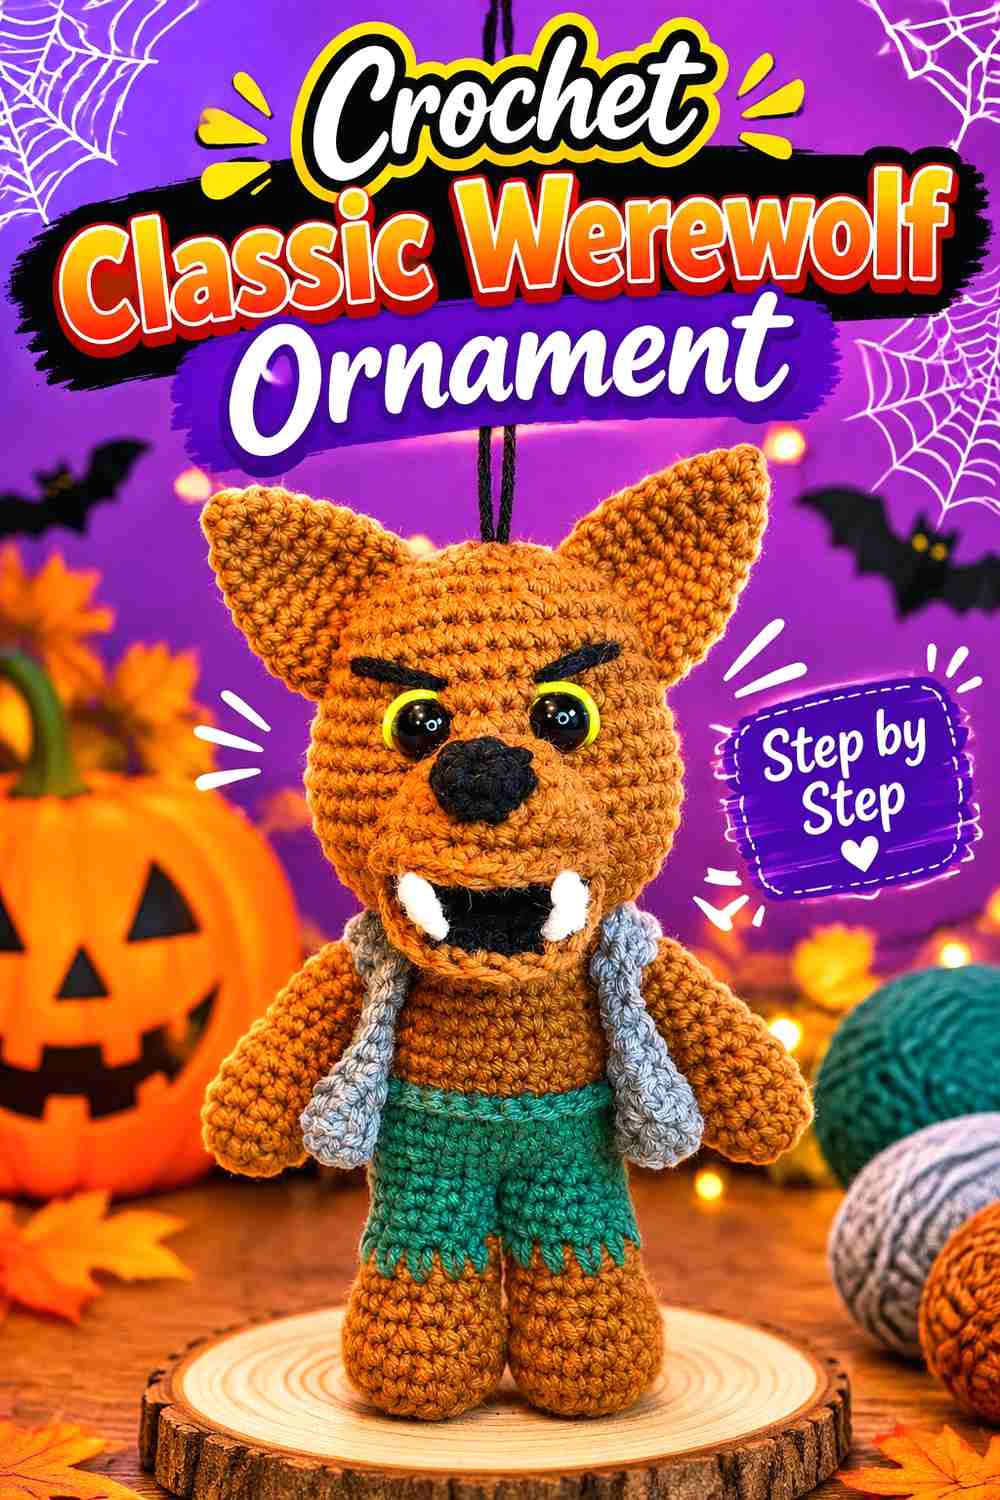
Rhonda Butler’s werewolf tutorial adds a shaggy classic-monster character to the group, with a very different outline from the smooth-faced vampire, mummy, or Frankenstein-inspired figure.
For a nostalgic monster tree, a werewolf is especially useful because browns, tans, gray, and muted green can interrupt a color scheme that otherwise leans heavily on orange, black, and white.
Pointed Features Need Space to Stay Recognizable
A werewolf depends on its animal-like ears, face, and furry outline. If those details are pressed into branches, the figure can begin to read as a generic stuffed animal.
Place it against a reasonably open section of the tree and compare the silhouette with the black cat so the two animal characters do not visually merge.
Keep the Monster Palette Controlled
Brown and gray yarns can provide a convincing old-monster feel without additional aging treatments. If the character includes clothing or accents, repeating one color already used on the witch, vampire, or Frankenstein ornament can tie the entire tree together.
Before changing yarn thickness to reduce the scale, remember that the proportions of small features can shift. Make a test character rather than assuming every material substitution will shrink uniformly.
Creator Credit: Rhonda Butler
Comparing the 13 Ornament Styles
For the most obvious vintage-Halloween effect, start with the witch, black cat, jack-o’-lantern, ghost, and bat. Those silhouettes read quickly even when mixed with lights and other decorations.
If you want more of a classic monster-tree theme, give greater emphasis to the mummy, vampire, Frankenstein-inspired monster, skull, and werewolf. The scarecrow and candy corn character bring lighter harvest imagery into that darker group.
For branch planning, the skull, candy corn, jack-o’-lantern, and compact ghost are useful where space is limited. The bat deserves a wider opening for its wings, while the cat, mummy, vampire, scarecrow, witch, and werewolf benefit from enough vertical space for their full character silhouettes.
The spider is the outlier in a useful way. Its legs interrupt the round, upright shapes of the other ornaments and can make the finished tree look more collected and less like a row of matching dolls.
Conclusion
A convincing nostalgic Halloween tree needs contrast more than perfect matching. Pair wide bats with narrow witches, pale ghosts with dark cats, simple skull faces with detailed monsters, and harvest characters with traditional spooky figures.
If you are building the collection gradually, begin with a small core of highly recognizable shapes—the witch, black cat, ghost, jack-o’-lantern, and bat—then add classic monsters and harvest characters until the branches feel balanced.
Most importantly, use the original tutorials for their exact crochet construction. When converting a doll or keychain into an ornament, check the finished weight, scale, hanger position, and branch clearance rather than assuming every small amigurumi will behave the same way once suspended.
Frequently Asked Questions
Can any small crochet amigurumi be turned into a Halloween tree ornament?
Not automatically. A small character may still be too heavy, wide, or unbalanced for a particular branch. Finish or closely evaluate the project first, then determine whether it has a secure location for a hanging loop and whether the tree can support it without drooping.
What colors make crochet Halloween ornaments look more vintage?
Muted versions of traditional Halloween colors usually work well: pumpkin orange, cream, charcoal, mustard, olive, burgundy, dusty purple, and warm brown. You do not need to use all of them. Repeating a limited palette across unrelated characters creates a more convincing collected look.
Should I use cotton or acrylic yarn for a Halloween ornament tree?
Either can work, but the choice affects appearance and structure. Cotton often gives small stitches and facial details a crisp look, while acrylic varies widely in softness and body. Follow the tutorial’s material guidance when construction depends on a particular yarn, and make a sample before substituting a very different fiber or weight.
Where should I attach the hanging loop on a crochet character?
There is no universal attachment point. The best location depends on the finished object’s center of gravity, head shape, hat, wings, tail, and other details. Test the completed character with a temporary strand before securing a permanent loop.
How do I stop crochet ornaments from turning sideways on the tree?
First check whether the hanging point is centered relative to the finished weight. The branch position also matters: an ornament pushed against needles or another decoration may rotate even when its hanger is correctly placed. Test several branch positions before modifying the character.
Are safety eyes appropriate for Halloween tree ornaments?
They can be used in decorative pieces when the source design calls for them, but they are still small components. Do not assume an ornament made with safety eyes or other small embellishments is suitable for babies, small children, or pets. Embroidered details may be preferable when the decoration will be within reach.
How should crochet Halloween ornaments be stored?
Avoid compressing pieces with projecting details such as bat wings, witch hats, scarecrow hair, spider legs, or capes. A divided container or loosely layered storage can help the characters retain their shapes. Make sure ornaments are fully dry and clean before packing them away for the season.