A crochet skull cap can be much more than a basic close-fitting beanie. The silhouette may be short and fisherman-inspired, softly ribbed, airy enough for warmer weather, or covered with raised texture that gives a simple shape much more presence. Construction matters too: some hats begin at the crown, while others use a crocheted panel that is joined and closed at the top.
These 14 crochet skull cap ideas cover noticeably different textures, proportions, and finishing choices. You will find mesh, ribbing, moss stitch, cables, shells, basketweave, herringbone, waffle texture, colorwork, and more. Along the way, the comparisons focus on fit, stretch, crown shape, edge treatment, and what to verify before committing to a tutorial.
Quick List
- Airy Mesh Crochet Skull Cap
- Short Fisherman Crochet Skull Cap
- Knit-Look Ribbed Crochet Skull Cap
- Moss Stitch Crochet Skull Cap
- Cable-Texture Crochet Skull Cap
- Shell Stitch Crochet Skull Cap
- Basketweave Crochet Child Skull Cap
- Lemon Peel Crochet Skull Cap
- Herringbone Crochet Skull Cap
- Fuzzy Checkered Crochet Skull Cap
- Crunch-Stitch Crochet Skull Cap
- Puff-Stitch Crochet Skull Cap
- Waffle-Texture Crochet Skull Cap
- Two-Tone Striped Crochet Skull Cap
Choose the Skull-Cap Silhouette Before the Stitch Pattern
“Skull cap” usually points toward a hat that stays fairly close to the head rather than creating a large amount of slouch. Within that general shape, however, crown depth changes the look dramatically. A fisherman-style cap may sit above or around the ears, while a conventional fitted beanie gives more coverage. Open mesh creates another interpretation because the hat can remain close-fitting without looking visually heavy.
Also notice what happens at the lower edge. Ribbing, a folded band, a plain edge, and openwork do not behave the same way. If your priority is the shortest possible profile, look first at the finished depth shown in the tutorial rather than choosing only by stitch texture.
Yarn and Stitch Density Change the Finished Feel
Two skull caps with similar dimensions can behave very differently when one uses open mesh and another uses cables, puffs, or waffle texture. Open stitches reduce visual density and allow more air through the fabric. Raised post stitches and dimensional textures produce a more substantial surface and can reduce how freely the fabric stretches.
Fiber matters as well. A softly elastic yarn may behave differently around the head than a firm cotton or a fuzzy lace yarn. Instead of assuming another crocheter’s hook and yarn combination will create your ideal fit, compare the tutorial materials with the yarn you intend to use. Check the yarn label for fiber and care information, then assess stretch before finishing the full circumference.
Check Fit Before Finishing the Entire Hat
There is no universal amount of negative ease that works for every crochet skull cap because stitch pattern, yarn, hook choice, and individual tension affect stretch. Use the wearer’s actual head measurement and the tutorial’s sizing guidance whenever it is provided.
For a panel-built cap, wrap the developing fabric gently around the head before closing the seam. For a crown-down cap, watch whether the top is expanding smoothly before adding the full side depth. The lower edge deserves another check before fastening off: a cap that fits at the crown can still flare or squeeze at the opening. These intermediate checks are especially useful when substituting a yarn that differs from the tutorial sample.
1. Airy Mesh Crochet Skull Cap
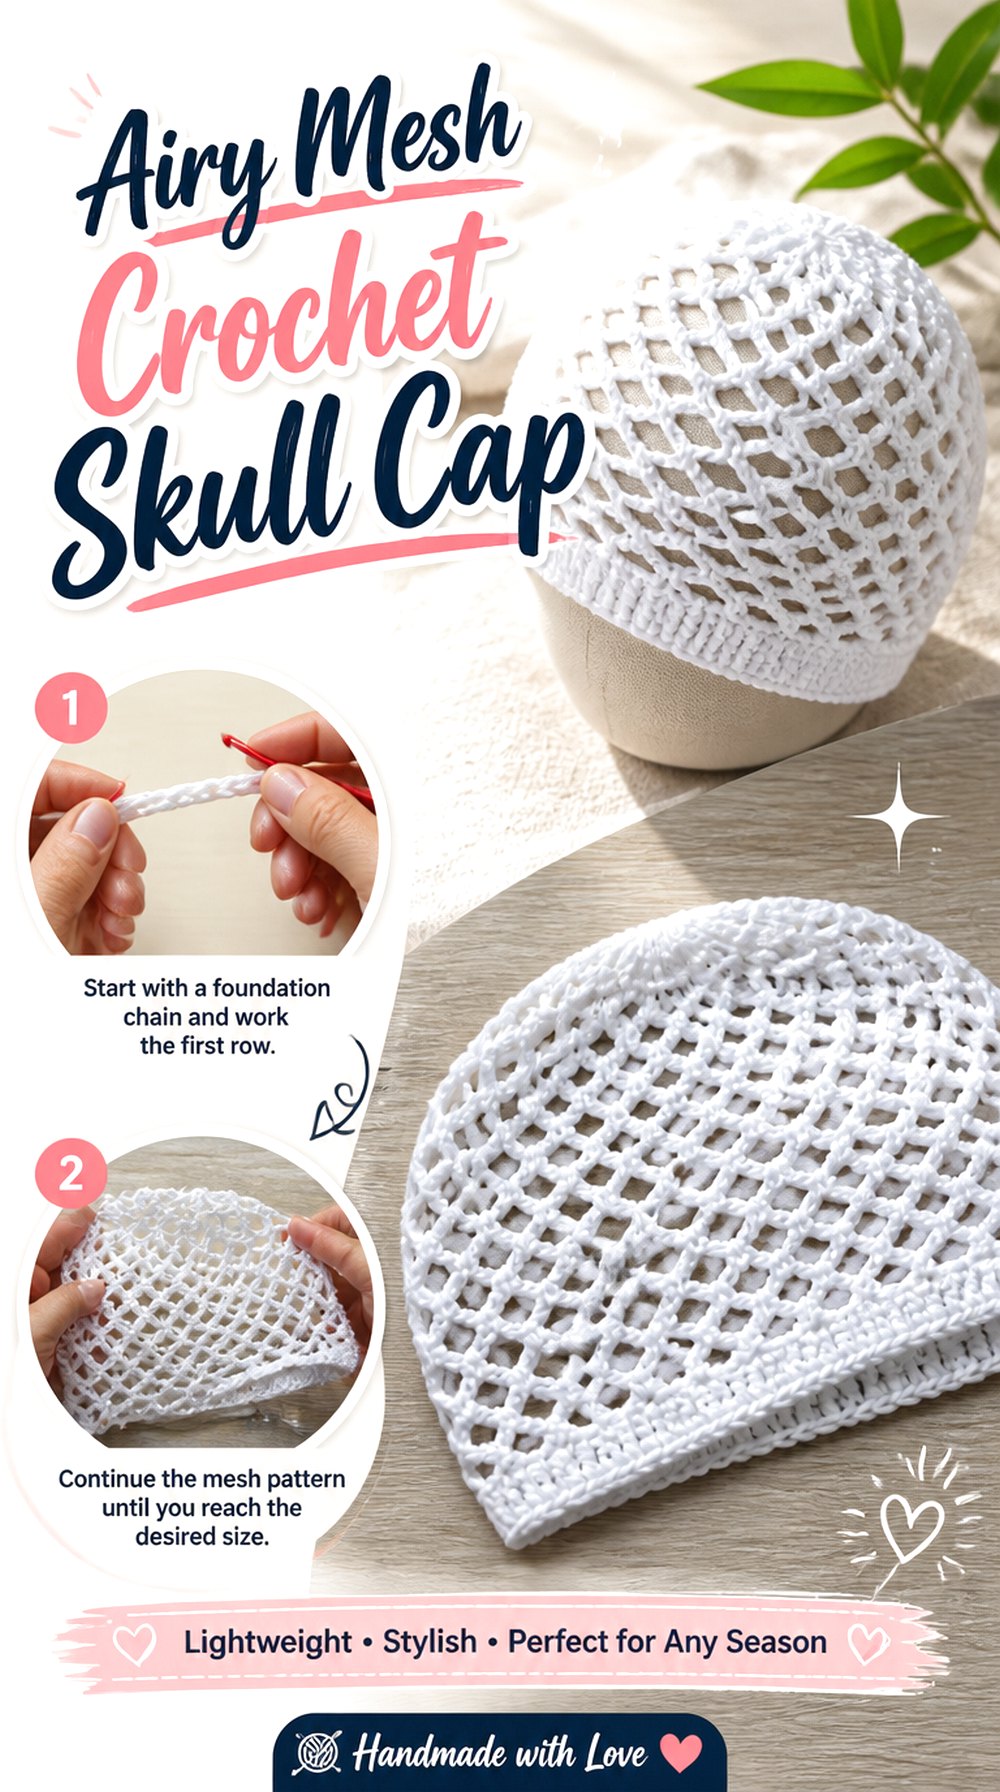
This version puts openness ahead of heavy texture. Crochet Rocio’s tutorial is specifically presented as a mesh beanie or skull cap, so the finished form matches the lightweight, close-fitting direction particularly well. The visible network of openings makes it a strong choice when you want the shape of a beanie without the solid appearance of dense winter fabric.
Because the mesh becomes such a large part of the finished design, yarn color and stitch consistency stay highly visible. It also makes a useful contrast to the ribbed and heavily textured options later in this collection.
Open Mesh Keeps the Silhouette Visually Light
With a solid cap, surface texture often dominates. Here, the spaces between stitches become part of the design. That makes the hat read as lighter even though it still follows the head closely. Before choosing this direction, decide whether you actually want ventilation and visible hair or headwear underneath; those openings are functional characteristics, not simply decoration.
Watch Crown Expansion Before Adding More Depth
A top-down mesh cap needs a crown that lies smoothly before the sides descend. If the top begins cupping earlier than expected, the hat may become too narrow; if it waves noticeably, it may have expanded too quickly. Compare your developing crown with the shape demonstrated in the tutorial rather than relying only on the number of rounds.
Match the Yarn to the Season You Have in Mind
A mesh construction does not automatically make every yarn comfortable in warm conditions. Fiber, thickness, and humidity response still matter. If you want a summer-oriented skull cap, compare the tutorial yarn with breathable alternatives you already know you like wearing. If you mainly want the mesh appearance, a different fiber may be reasonable, but recheck the fit because substitution can change stretch.
Original Tutorial and Creator Credit
Creator: Crochet Rocio
2. Short Fisherman Crochet Skull Cap
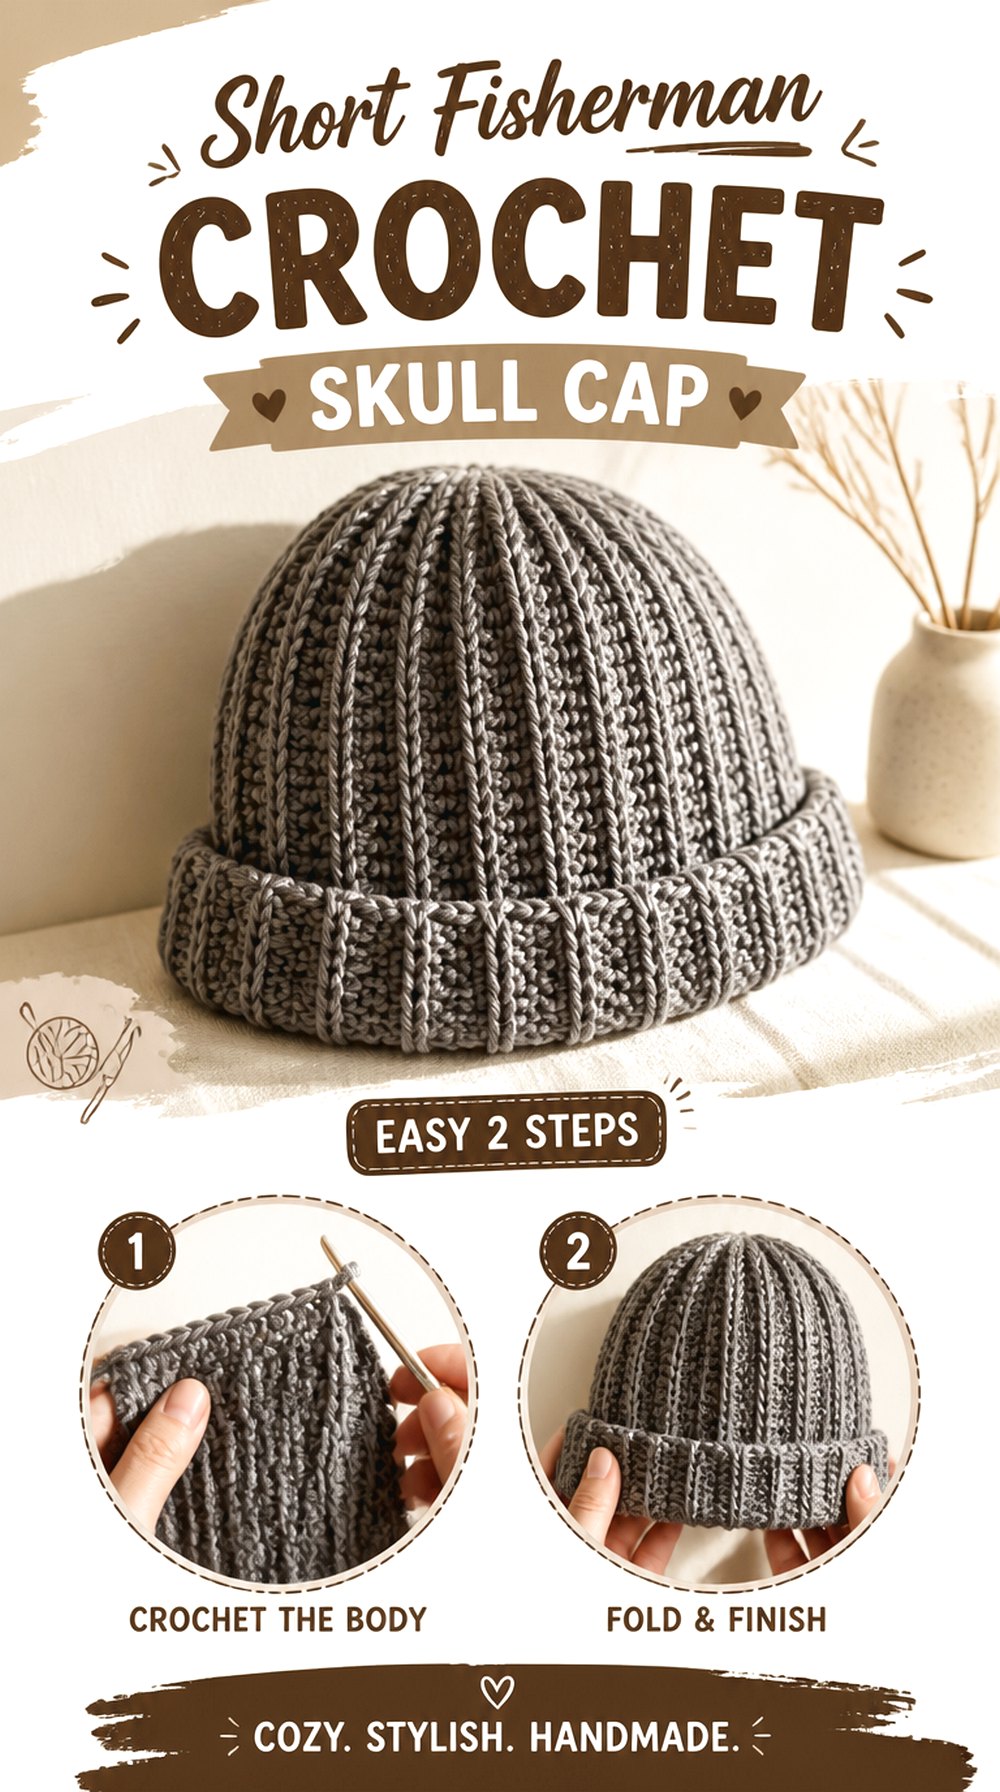
A fisherman-style beanie gives the skull-cap idea a noticeably shorter profile. Divyne crochet demonstrates a unisex beanie/fisherman hat made from a crocheted panel, including the joining and finishing process. That makes this project particularly useful for readers who prefer working flat rather than managing crown increases in continuous rounds.
The visual distinction is mostly about depth: a shorter hat creates a sharper, more compact accessory than a beanie designed to cover much of the ears. It works especially well when you want the edge itself to become part of the styling.
The Shorter Depth Changes Where the Edge Sits
Before starting, decide exactly where you want a fisherman cap to stop. A hat that looks intentionally cropped on one person can appear unintentionally small on another if the wearer expects ear coverage. Compare the finished tutorial result with the wearer’s preference, then treat height as a fit measurement rather than an automatic feature of the pattern.
A Flat Panel Gives You an Early Circumference Check
Panel construction has a useful advantage: you can assess how the fabric stretches across the head before committing to the final seam. Do not simply match the unstretched panel to the full head circumference. Instead, observe how the particular ribbing or stitch fabric stretches and compare that behavior with the fit demonstrated by the creator.
Crown Finishing Deserves Extra Attention on a Short Hat
When a hat has little extra depth, bulky gathering at the crown becomes more noticeable. Lay the finished cap on a flat surface and inspect the top from several angles after closing it. If the crown feels excessively bunched, check whether your fabric is thicker or less compressible than the tutorial sample before repeating the same construction with another yarn.
Original Tutorial and Creator Credit
Creator: divyne crochet
3. Knit Look Ribbed Crochet Skull Cap
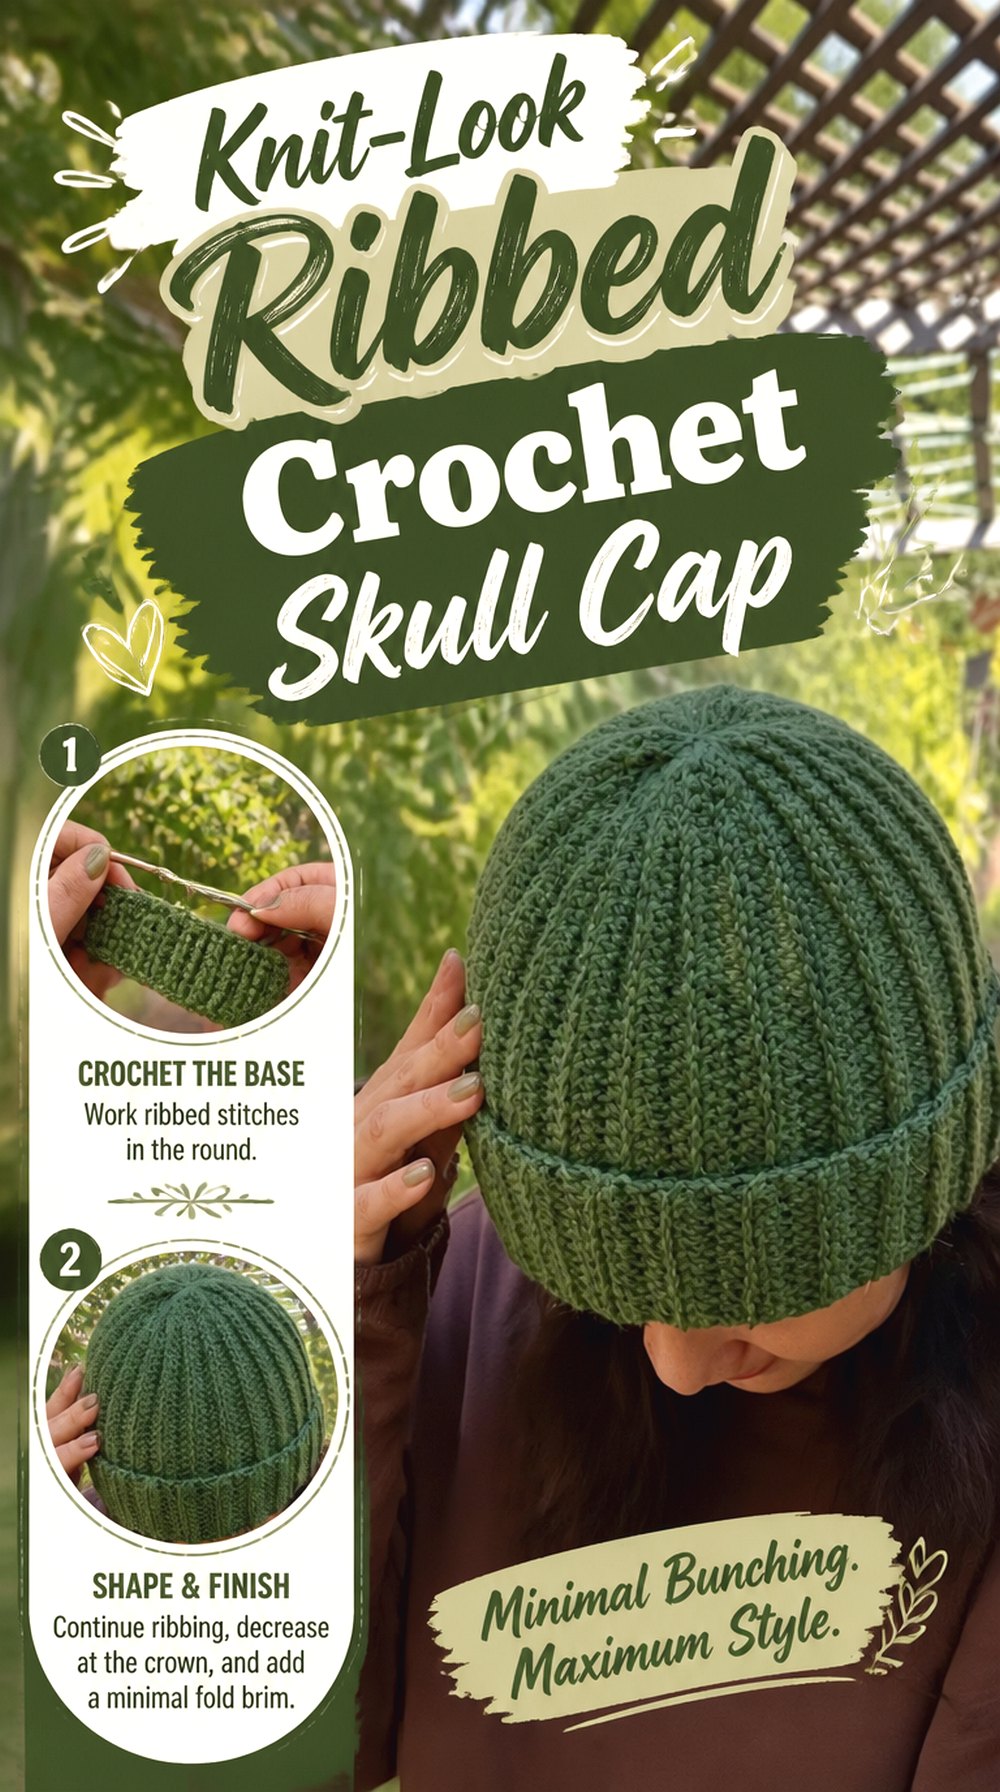
This ribbed cap is a strong choice when you want crochet that visually approaches the clean vertical lines associated with knitted headwear. VivCrochets specifically focuses on reducing the bulky top bunching that can occur in rectangle-style ribbed beanies, and the tutorial includes a dedicated sizing section before seaming.
That combination makes it useful for a close skull-cap profile: the ribbing provides stretch around the head, while the crown receives more deliberate shaping than a completely rectangular tube gathered at one end.
Ribbing Gives the Circumference Useful Flexibility
Ribbed crochet can stretch substantially in one direction, which is why measuring it only while relaxed can be misleading. Gently stretch your developing panel in the same direction it will stretch when worn. The goal is not to force it to a maximum width, but to understand how much resistance the fabric gives before deciding the circumference is finished.
Reduced Crown Bulk Matters on a Fitted Cap
Extra material at the top is easier to hide in a deliberately slouchy beanie than in a skull cap. If you prefer a smooth crown, compare the shaped end of your panel carefully with the tutorial before seaming. Substituting a much thicker yarn can change how neatly that material compresses even when the circumference still seems correct.
Measure the Wearer Instead of Copying Another Finished Hat
A favorite store-bought hat can be a useful visual reference, but its fabric may stretch differently from crochet. Use an actual head measurement alongside the tutorial’s sizing guidance. Then try the panel around the intended wearer before closing it whenever practical. That gives you a much better checkpoint than assuming two hats with the same flat width will fit identically.
Original Tutorial and Creator Credit
Creator: VivCrochets
4. Moss Stitch Crochet Skull Cap
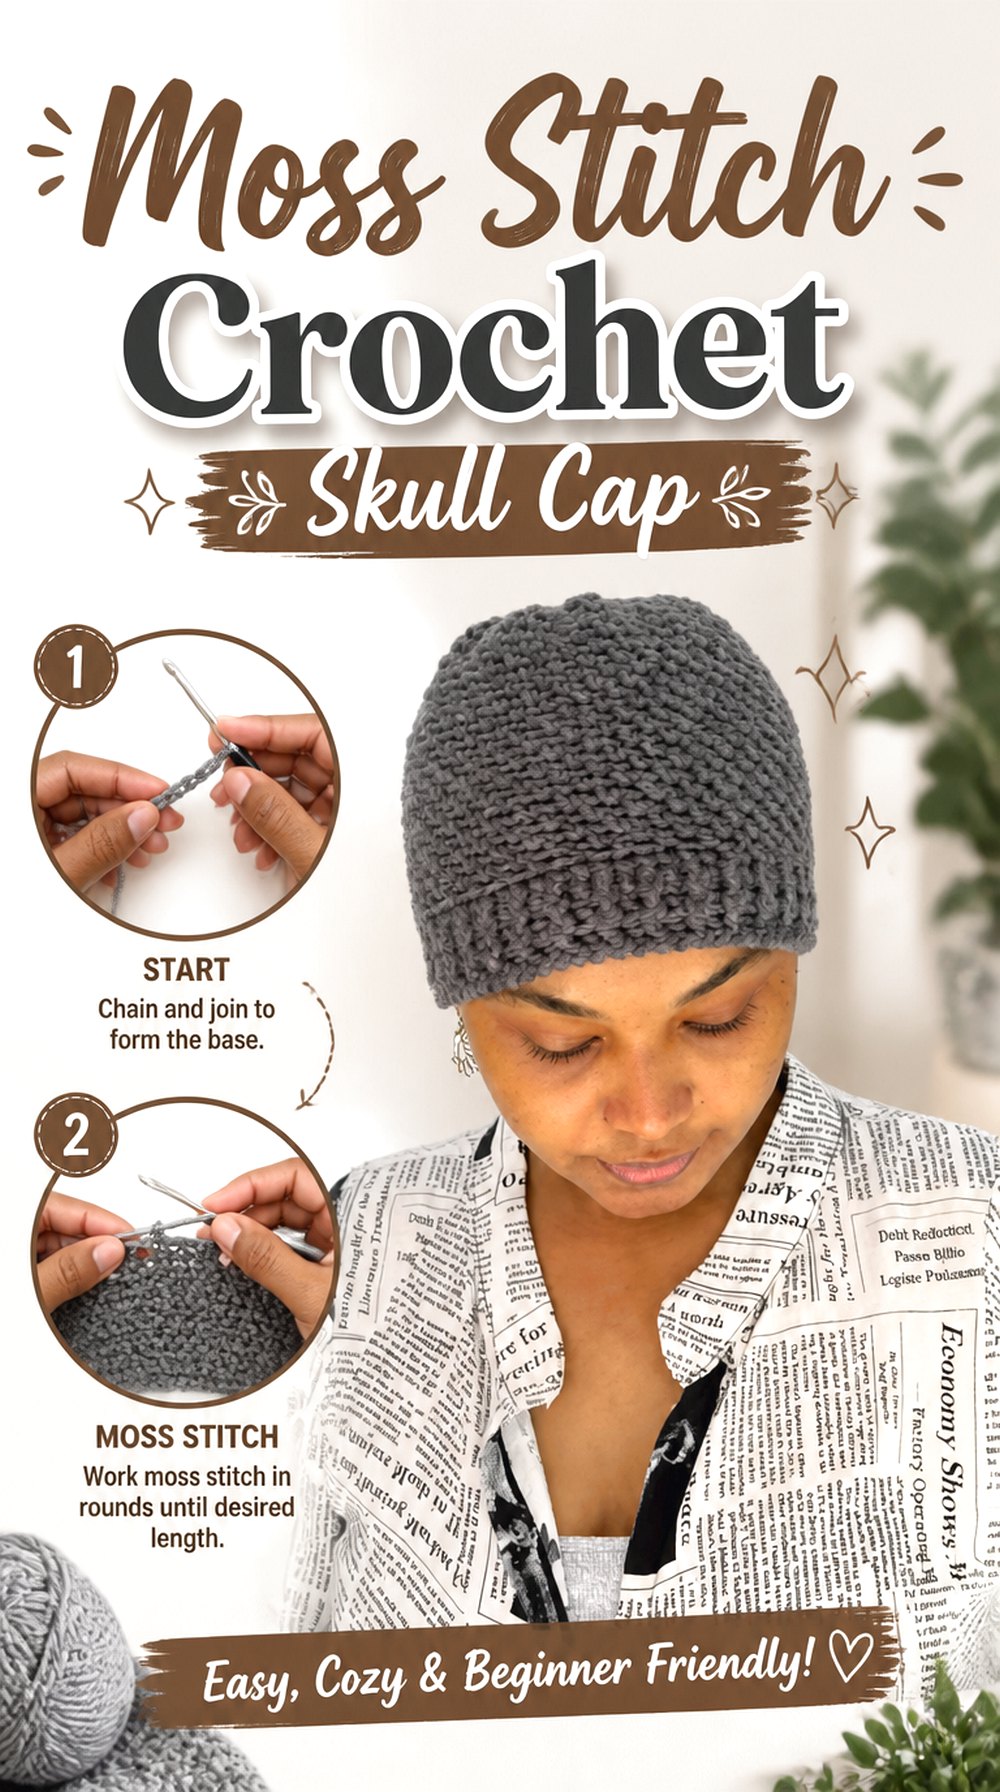
Moss stitch gives this cap a quieter surface than cables, puffs, or basketweave. The FTK Crochet tutorial demonstrates an adult moss-stitch beanie and specifically advises viewers to take their own measurements because yarn choice, hook size, and personal tension can alter the result.
That advice is especially relevant for skull caps, where a relatively small fit difference can determine whether the hat feels secure or constantly shifts. Visually, this option works when you want texture to be present up close without turning the entire hat into a bold raised pattern.
Moss Stitch Keeps the Surface Understated
The repeated small-scale texture creates interest without the depth of a cable or puff stitch. This can make it easier to use multicolored or softly variegated yarn without forcing two strong design features to compete. If stitch definition is your priority, however, compare how clearly the texture shows in your yarn before committing to the full cap.
The Tutorial’s Measurement Warning Is Worth Following
The creator explicitly notes that yarn, hook, and tension can affect measurements. That means substituting materials should trigger a new fit check rather than a simple one-for-one replacement. Wrap or try on the developing cap at a sensible point in construction and compare it with the intended finished fit instead of relying exclusively on the sample dimensions.
Watch the Lower Edge for Unwanted Flare
A close cap usually looks cleaner when the opening follows the head rather than widening away from it. If your final rounds begin flaring, compare your tension with the body of the hat and check whether your substitution has made the fabric less elastic. Correcting the edge before fastening off is easier than hoping wear will change its shape later.
Original Tutorial and Creator Credit
Creator: FTK Crochet
5. Cable Texture Crochet Skull Cap
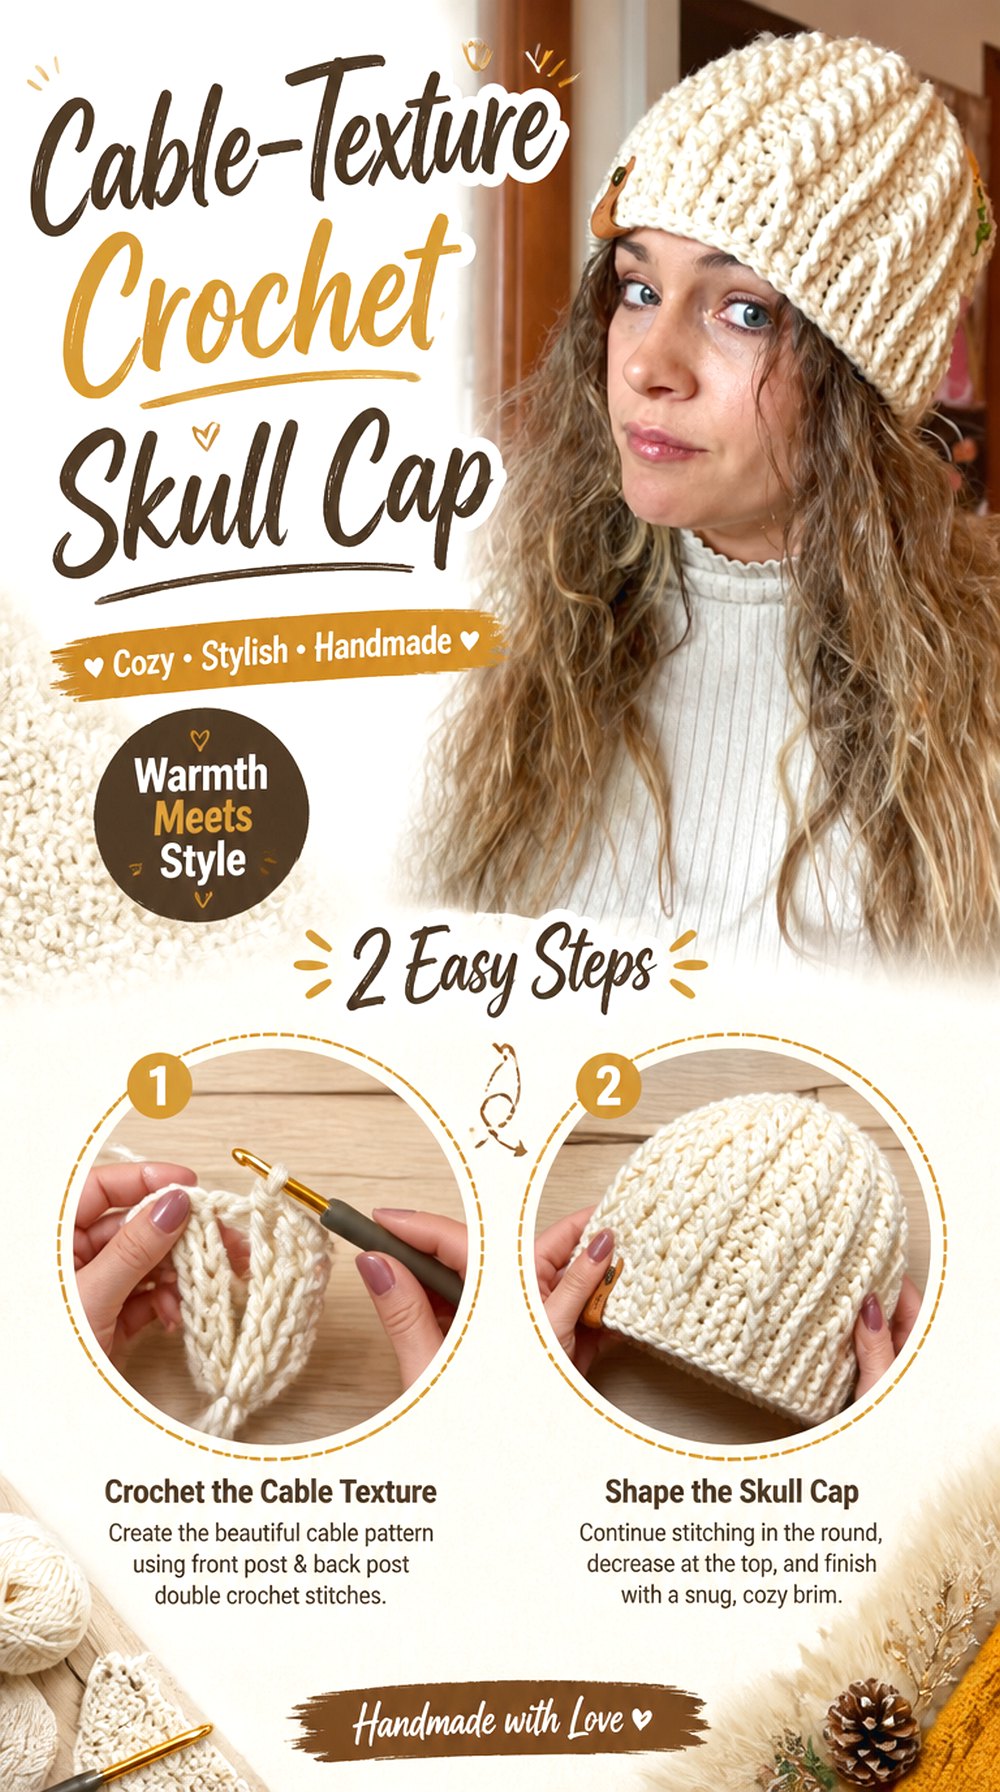
For a more sculpted surface, this cable beanie from Craft with Jess uses raised crochet cables and a snug adult fit. The tutorial moves from a top-down beginning through the textured body and then the brim, so the cable work becomes the main decorative feature rather than an added appliqué.
Compared with moss or lemon-peel texture, cables create stronger vertical and crossing lines. That makes this a good route when the hat itself needs to be the statement piece, even in one solid color.
Raised Cables Change the Fabric’s Thickness
Post-stitch cables pull yarn forward and backward across the fabric, so they do not behave exactly like a flat stitch pattern. If you substitute yarn, examine whether the cable area still bends comfortably around the head. A texture that looks impressive while flat is less successful if the finished cap feels excessively rigid for the way you intend to wear it.
Use the Lower Band as a Separate Fit Check
The brim or lower band can grip differently from the cabled body. Before considering the cap finished, check whether that section feels secure without creating an uncomfortable pressure line. If the body fits but the edge does not, identify which section differs rather than assuming the entire hat needs to be resized.
Solid Yarn Can Make the Cable Structure Easier to Read
Highly variegated yarn may visually compete with raised crossings, while a solid or gently tonal yarn tends to make shadows around the cables more obvious. Neither approach is inherently better. Decide whether your priority is the cable architecture or the yarn color changes, then choose which element should dominate the final skull cap.
Original Tutorial and Creator Credit
Creator: Craft with Jess
6. Shell Stitch Crochet Skull Cap
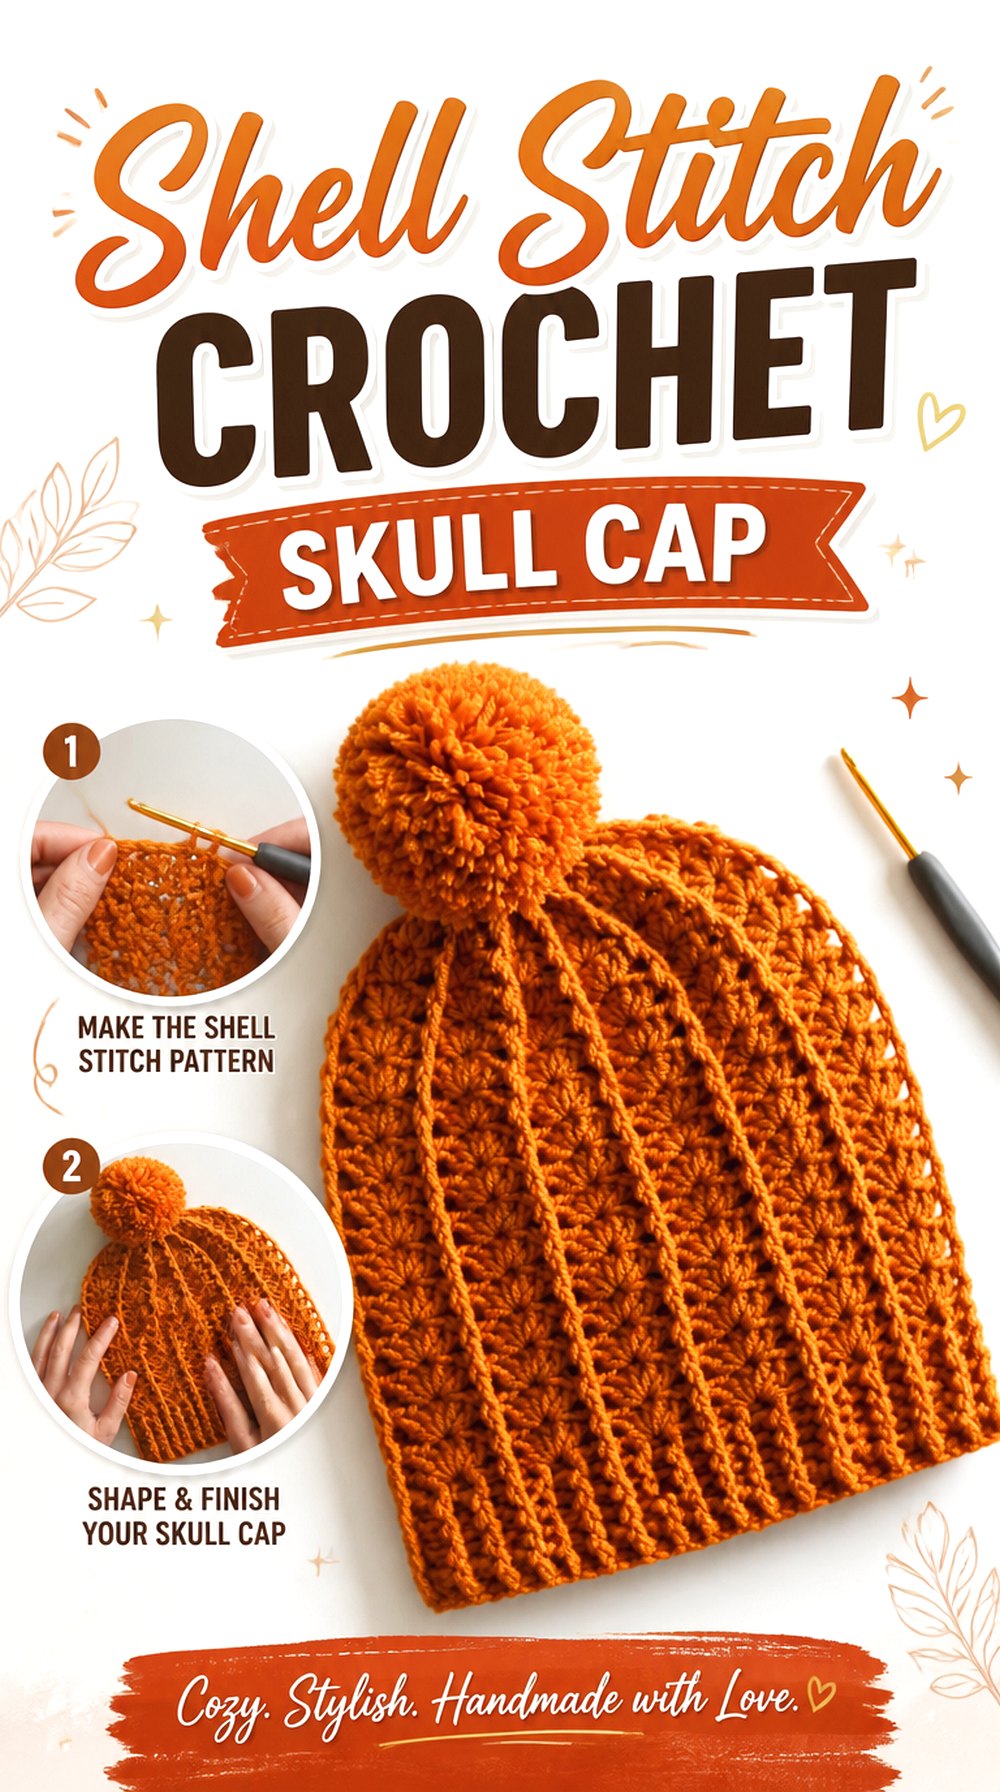
Shell stitch gives a fitted cap a softer, more decorative rhythm than the strong geometry of cables or basketweave. Sirin’s Crochet demonstrates the finished beanie clearly as a shell-stitch hat, making this option useful when you want the surface pattern to remain recognizable from a distance.
Shells can also create small changes in openness depending on the exact construction. That means the stitch choice affects more than appearance: it can influence how much background or hair shows through and how the fabric bends around the head.
Shell Scale Changes the Overall Look
Large repeated motifs can make a small hat feel visually busy, while smaller shells create a more continuous surface. Before choosing your yarn color, look at how much of the finished cap is occupied by each shell repeat. A strong multicolor yarn may obscure that repetition, whereas a simpler color can emphasize the scalloped texture.
Check Whether the Open Spaces Suit Your Use
Some shell fabrics contain more visible openings than compact stitches. If the cap is intended mainly for cold-weather coverage, examine the finished tutorial fabric rather than assuming every crochet beanie offers similar insulation. If decorative styling is the goal, those openings may instead be part of what makes this option appealing.
Give the Lower Edge Its Own Tension Check
Decorative repeats can sometimes behave differently near a border or finishing round. Try the hat on before cutting the yarn if the tutorial construction allows it. The edge should follow the intended silhouette instead of becoming the widest visual point unless that flare is deliberately part of the design.
Original Tutorial and Creator Credit
Creator: Sirin’s Crochet
7.Basketweave Crochet Child Skull Cap
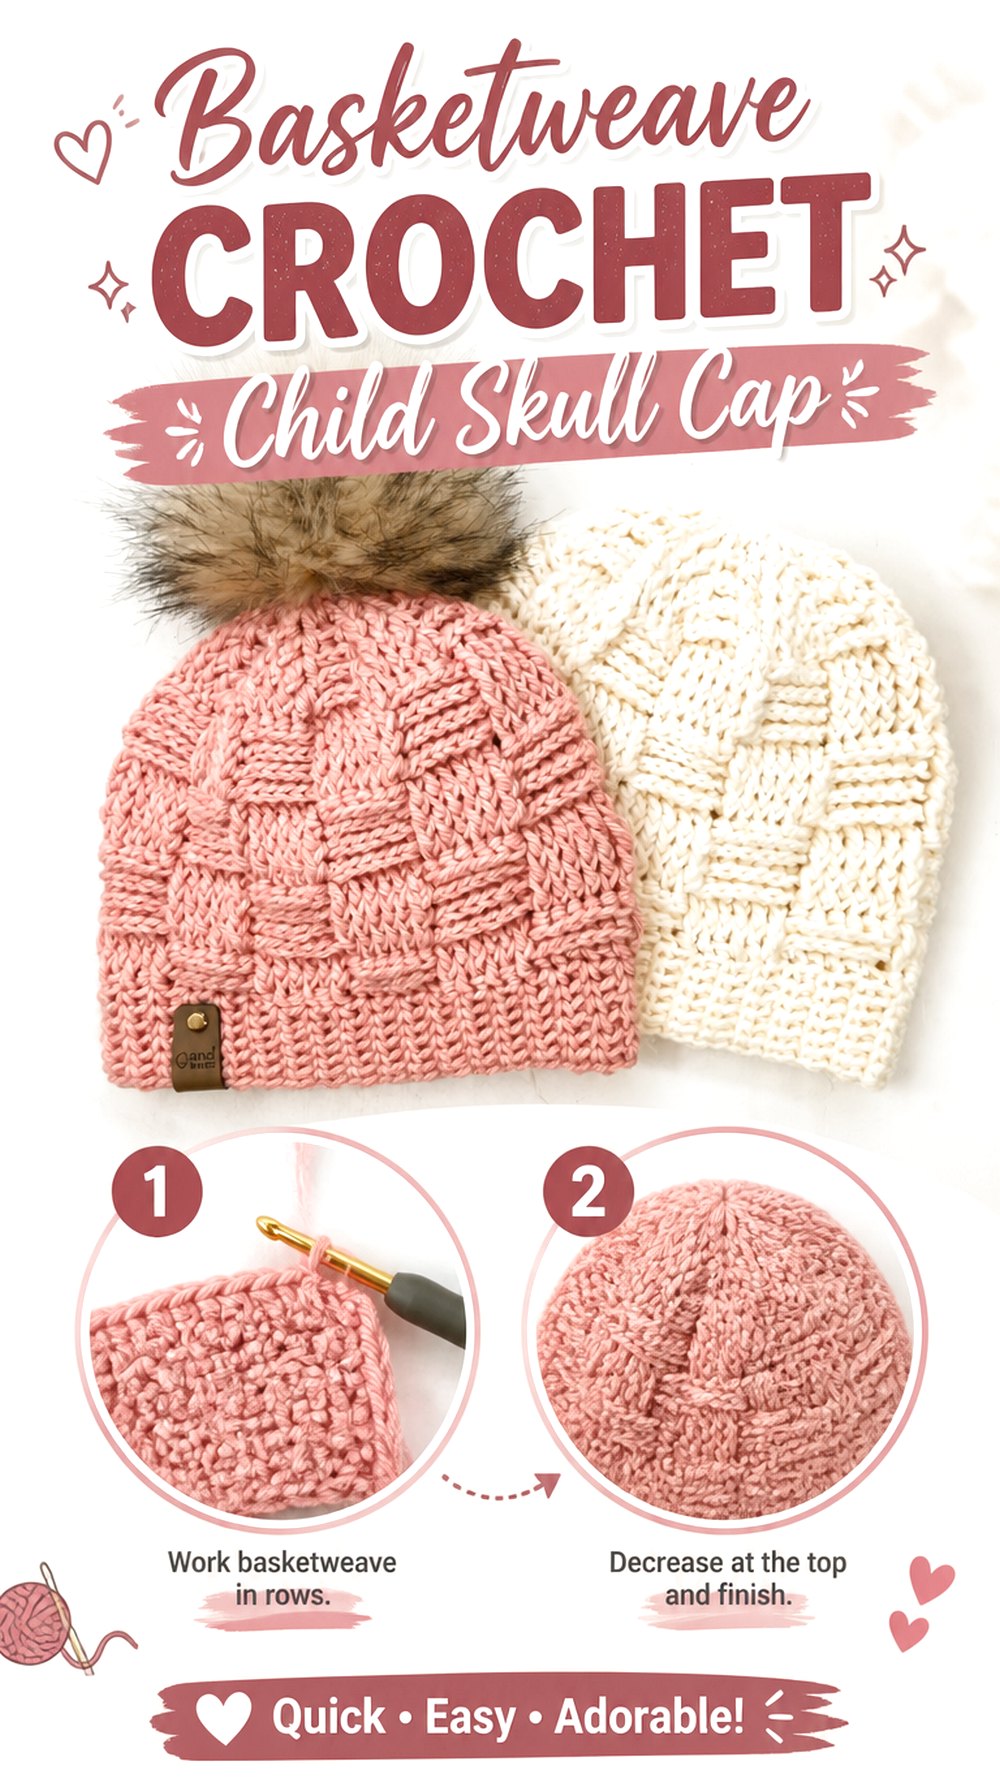
This basketweave option deliberately adds a child-size project to the collection. Ruby Webbs Crochet demonstrates the child version of the Bowie Basketweave Beanie using a top-down construction and front- and back-post stitches. The video itself is child size, while the associated written pattern includes additional sizes.
The finished surface looks much more dimensional than a plain close-fitting cap. Because the texture has a strong grid, it is also an effective choice when you want a single yarn color to carry plenty of visual interest.
The Video’s Child Sizing Should Stay Transparent
Do not treat the demonstrated child hat as an adult tutorial simply because the stitch pattern looks adaptable. If you need an adult skull cap, use sizing information specifically provided for that size or confirm how the creator handles enlargement. Head circumference, crown expansion, and depth all need to work together.
Post Stitches Build a Dense Raised Grid
Basketweave relies on alternating raised sections, which makes its structure noticeably different from mesh or moss stitch. Check how flexible your chosen yarn remains once several textured repeats are worked. A yarn that already feels stiff in a small sample may create a cap with less comfortable give around the head.
Keep an Eye on Texture During Crown Shaping
Strong geometric texture makes irregular tension easier to notice. As the crown transitions into the basketweave body, occasionally spread the hat out and inspect whether the raised blocks remain balanced. Catching a sudden tension change early is preferable to discovering after finishing that one part of the grid looks compressed.
Original Tutorial and Creator Credit
Creator: Ruby Webbs Crochet
8. Lemon Peel Crochet Skull Cap
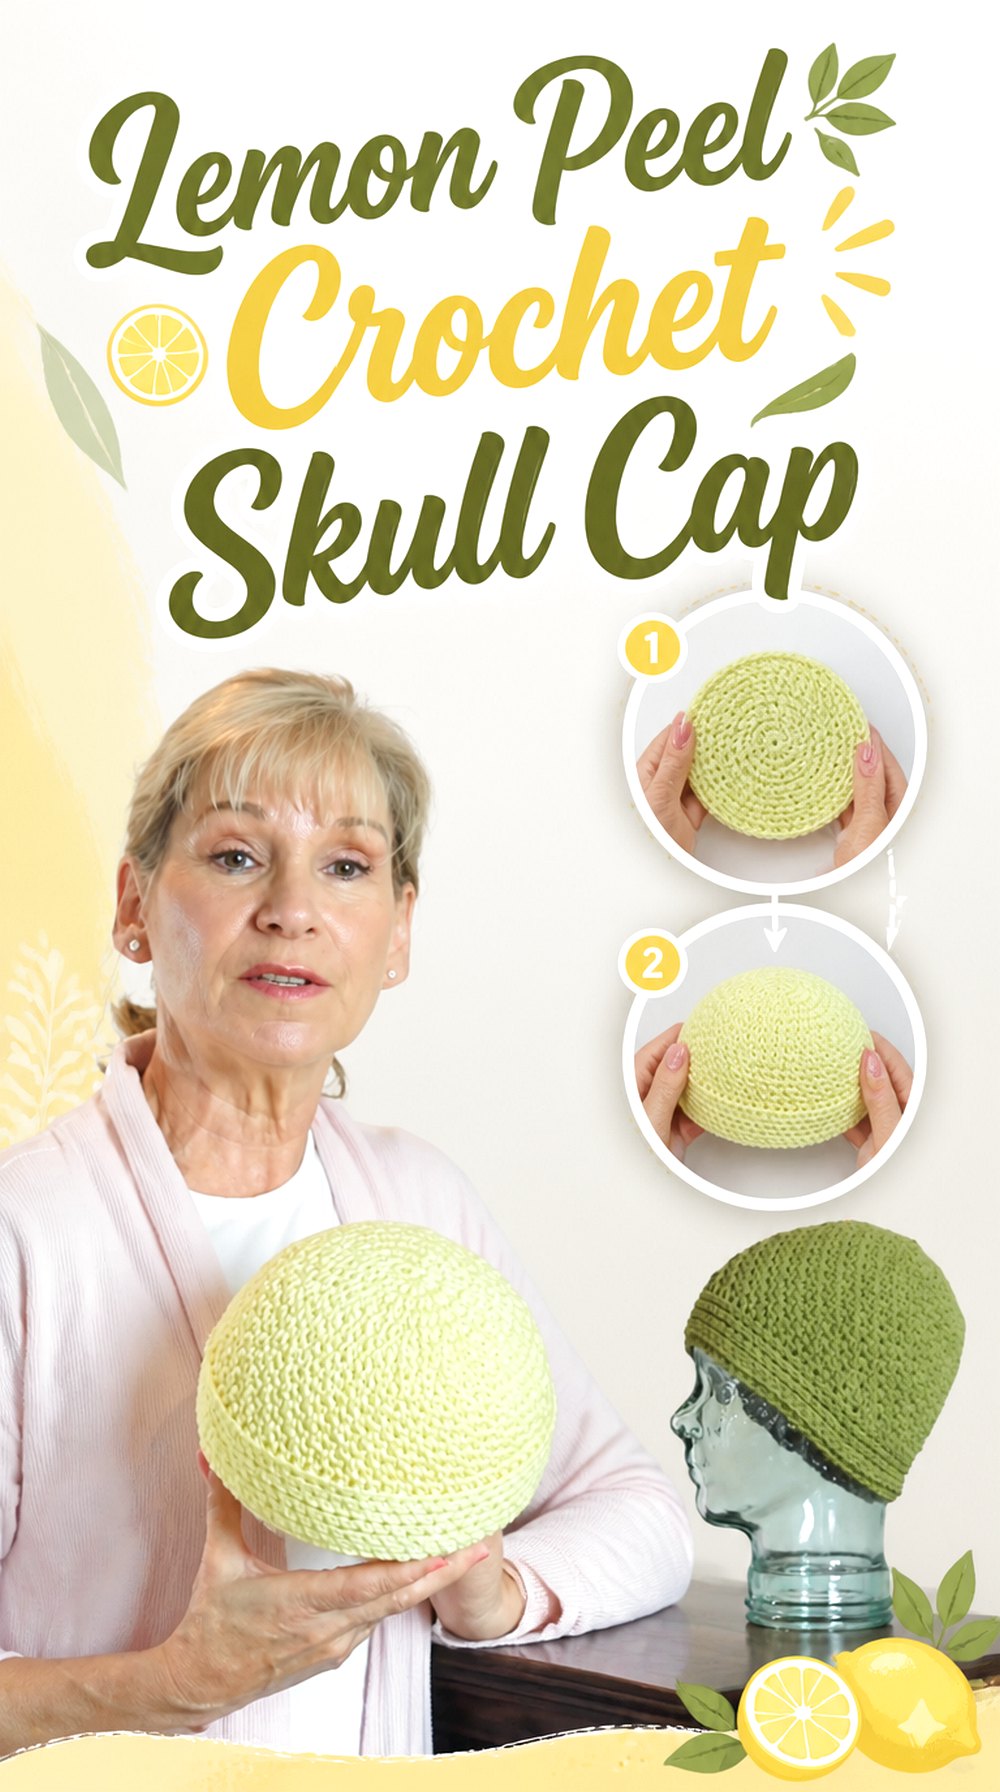
Lemon peel stitch offers a useful middle ground between plain fabric and dramatic raised texture. Margaret Olander’s tutorial builds the beanie from the crown and includes specific points for checking sizing progress, continuing crown expansion, beginning the body, and tapering the lower edge.
For a skull-cap collection, that fit-focused structure is valuable because the final silhouette depends on more than choosing a decorative stitch. The subtle alternating texture works particularly well when you want an everyday cap that still looks deliberately patterned at close range.
Small Texture Keeps the Shape Easy to Read
Because the stitch pattern is relatively fine-grained, the eye still reads the hat’s overall contour before focusing on individual texture. That makes this style useful if a neat skull-cap silhouette matters more to you than a dramatic motif. It also leaves room for a stronger yarn color without completely hiding the stitch design.
Sizing Checkpoints Are Built Into the Learning Format
The tutorial explicitly includes a sizing-progress section and guidance around crown diameter. Use those checkpoints instead of waiting until the hat is almost finished. If your yarn substitution changes how quickly the crown grows, that difference becomes much easier to correct before the full body has been crocheted.
The Tapered Edge Can Refine the Finish
A lower edge that narrows slightly can help visually contain a close-fitting cap, but the result still needs to feel comfortable. Compare the edge before and after the taper and make sure it has not become the tightest point on the wearer’s head. Fit should take priority over matching a visual detail exactly.
Original Tutorial and Creator Credit
Creator: Margaret Olander
9. Herringbone Crochet Skull Cap
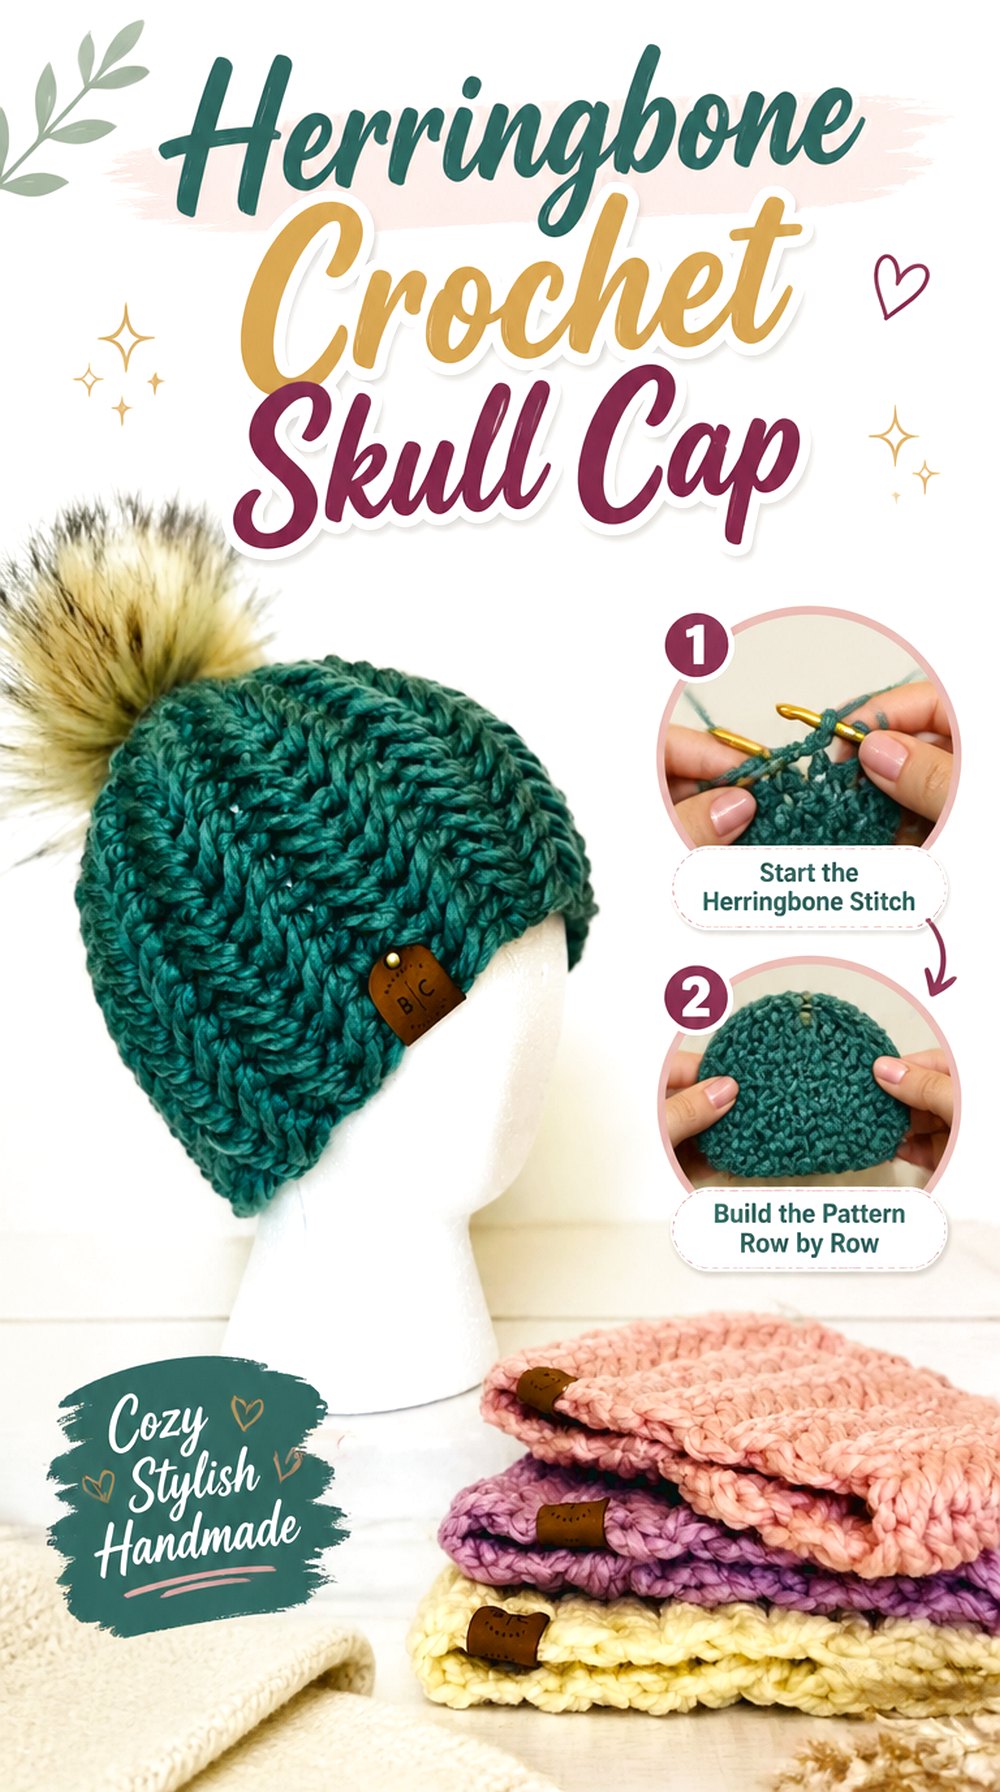
Herringbone gives a simple fitted beanie directional movement without relying on open lace or oversized raised motifs. It’s Brenny’s Crochet demonstrates an adult herringbone beanie and specifically warns that matching yarn thickness and hook choice is important for reproducing the expected result.
The slanting stitch appearance creates enough movement to make one color interesting, while the relatively streamlined profile keeps the hat suitable for readers who want texture without the bulkier look of basketweave or puffs.
Herringbone Lines Create Movement Without Large Motifs
Instead of separate shells or cable crossings, the texture appears as a continuous directional surface. This makes it a useful option when you want the cap to look patterned but not ornate. Before choosing a strongly variegated yarn, test a small section to see whether frequent color changes obscure the herringbone effect you wanted.
Yarn Thickness Is a Critical Substitution Check Here
The creator specifically emphasizes using comparable yarn thickness and hook sizing for the expected result. If you depart from those materials, treat the tutorial as construction guidance rather than a guarantee of identical dimensions. Measure your developing fabric and compare stretch rather than assuming the listed adult result will automatically transfer.
Panel Construction Makes Length Visible Early
A row-based beanie lets you see the vertical depth developing from the start. Use that advantage. Compare the panel height with the amount of crown and ear coverage you actually want before crocheting the entire circumference. A skull cap usually benefits from making that decision intentionally rather than discovering after seaming that the hat is taller than planned.
Original Tutorial and Creator Credit
Creator: It’s Brenny’s Crochet
10. Fuzzy Checkered Crochet Skull Cap
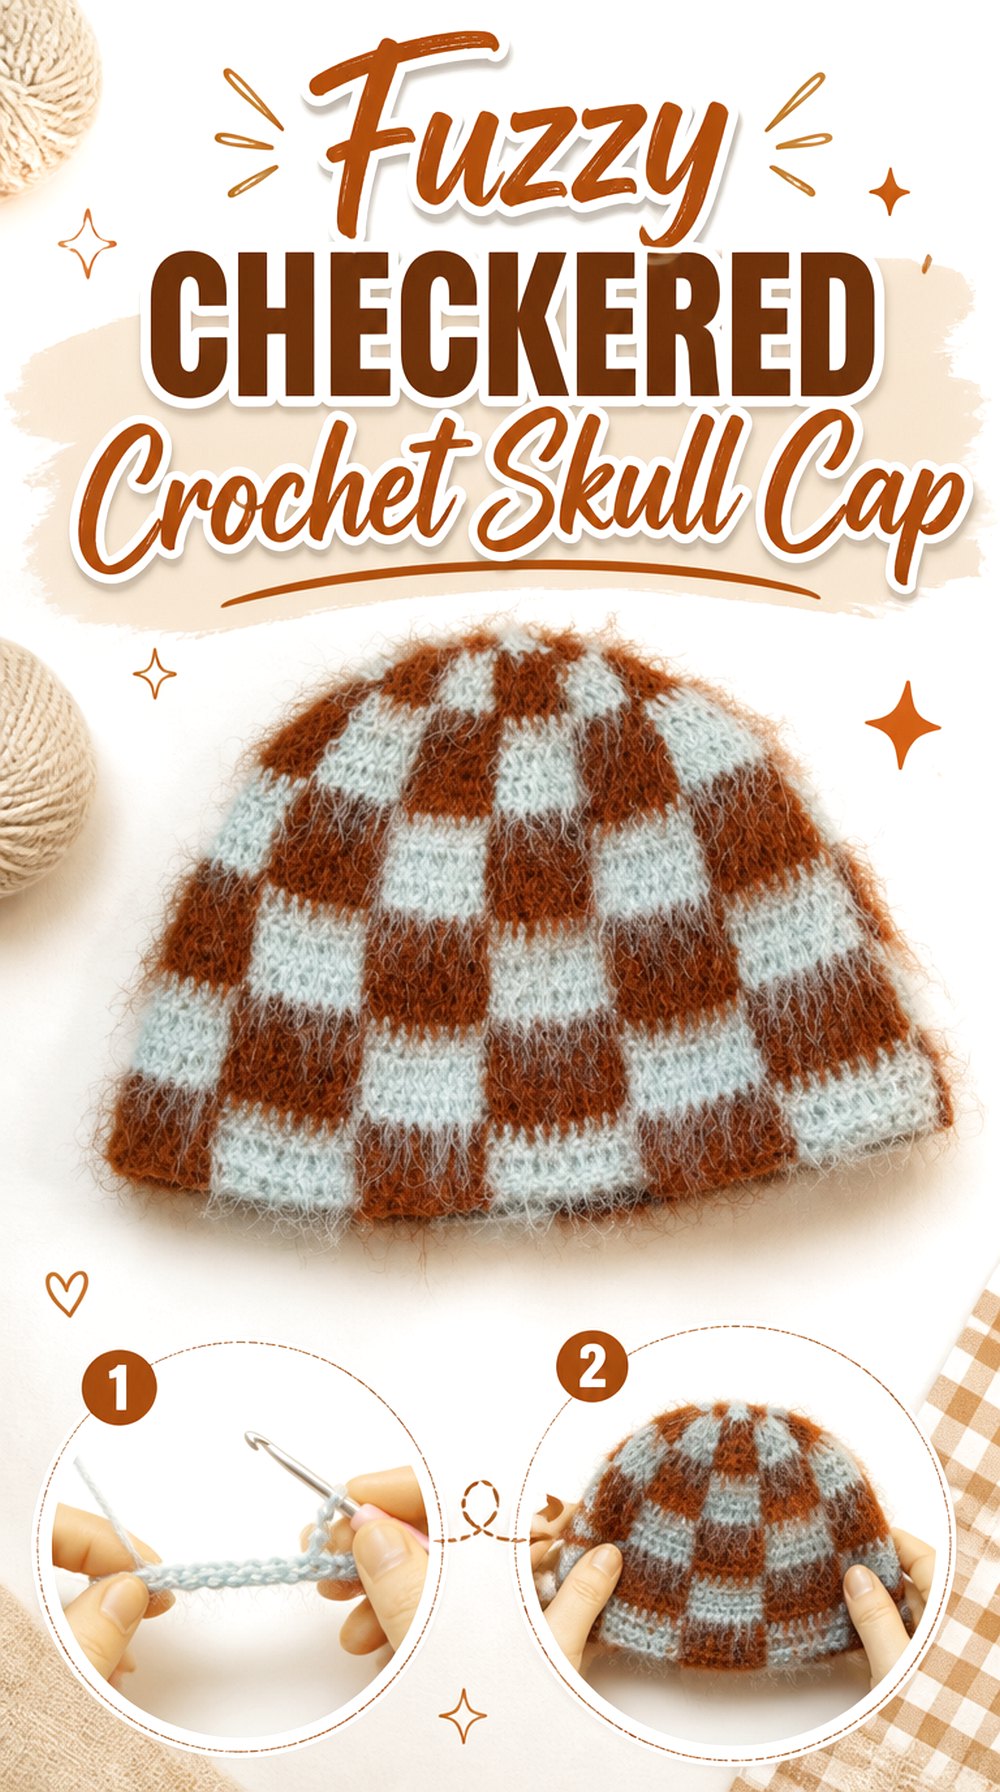
This checkered cap moves the collection into much lighter yarn and graphic colorwork. Anna Greene’s tutorial uses two colors of mohair/silk lace-weight yarn and finishes with brushing, producing a fuzzy grid rather than the crisp heavy fabric associated with many winter beanies.
That combination makes it meaningfully different from simply adding stripes to a standard cap. Here the color pattern, fine yarn, and halo all contribute to the finished identity. It suits readers who want a fashion-focused skull cap where surface color is as important as stitch texture.
The Grid Depends on Controlled Color Changes
Checkered colorwork draws attention to the boundaries between colors. If your transitions wander, the irregularity will be more noticeable than it would be in random striping. Pause after several blocks and look at the fabric from a normal viewing distance. That reveals whether the grid reads clearly before you invest in the entire cap.
Fuzzy Yarn Can Hide the Individual Stitches
A yarn halo softens edges and can make stitch anatomy less obvious. That may be exactly the effect you want for this style, but it can also make it harder to see where to insert the hook. If you have not worked with a fuzzy lace yarn before, test a small section first and make sure you can comfortably identify the working stitches.
Brushing Changes the Final Surface
The tutorial includes brushing near the end, so the final cap looks different from the fabric immediately off the hook. Consider that transformation when choosing colors: increased halo can soften the contrast between neighboring checks. If you prefer a sharper graphic grid, compare the pre-brushed and finished appearance in the video before deciding how closely you want to follow that finishing choice.
Original Tutorial and Creator Credit
Creator: Anna Greene
11. Crunch Stitch Crochet Skull Cap
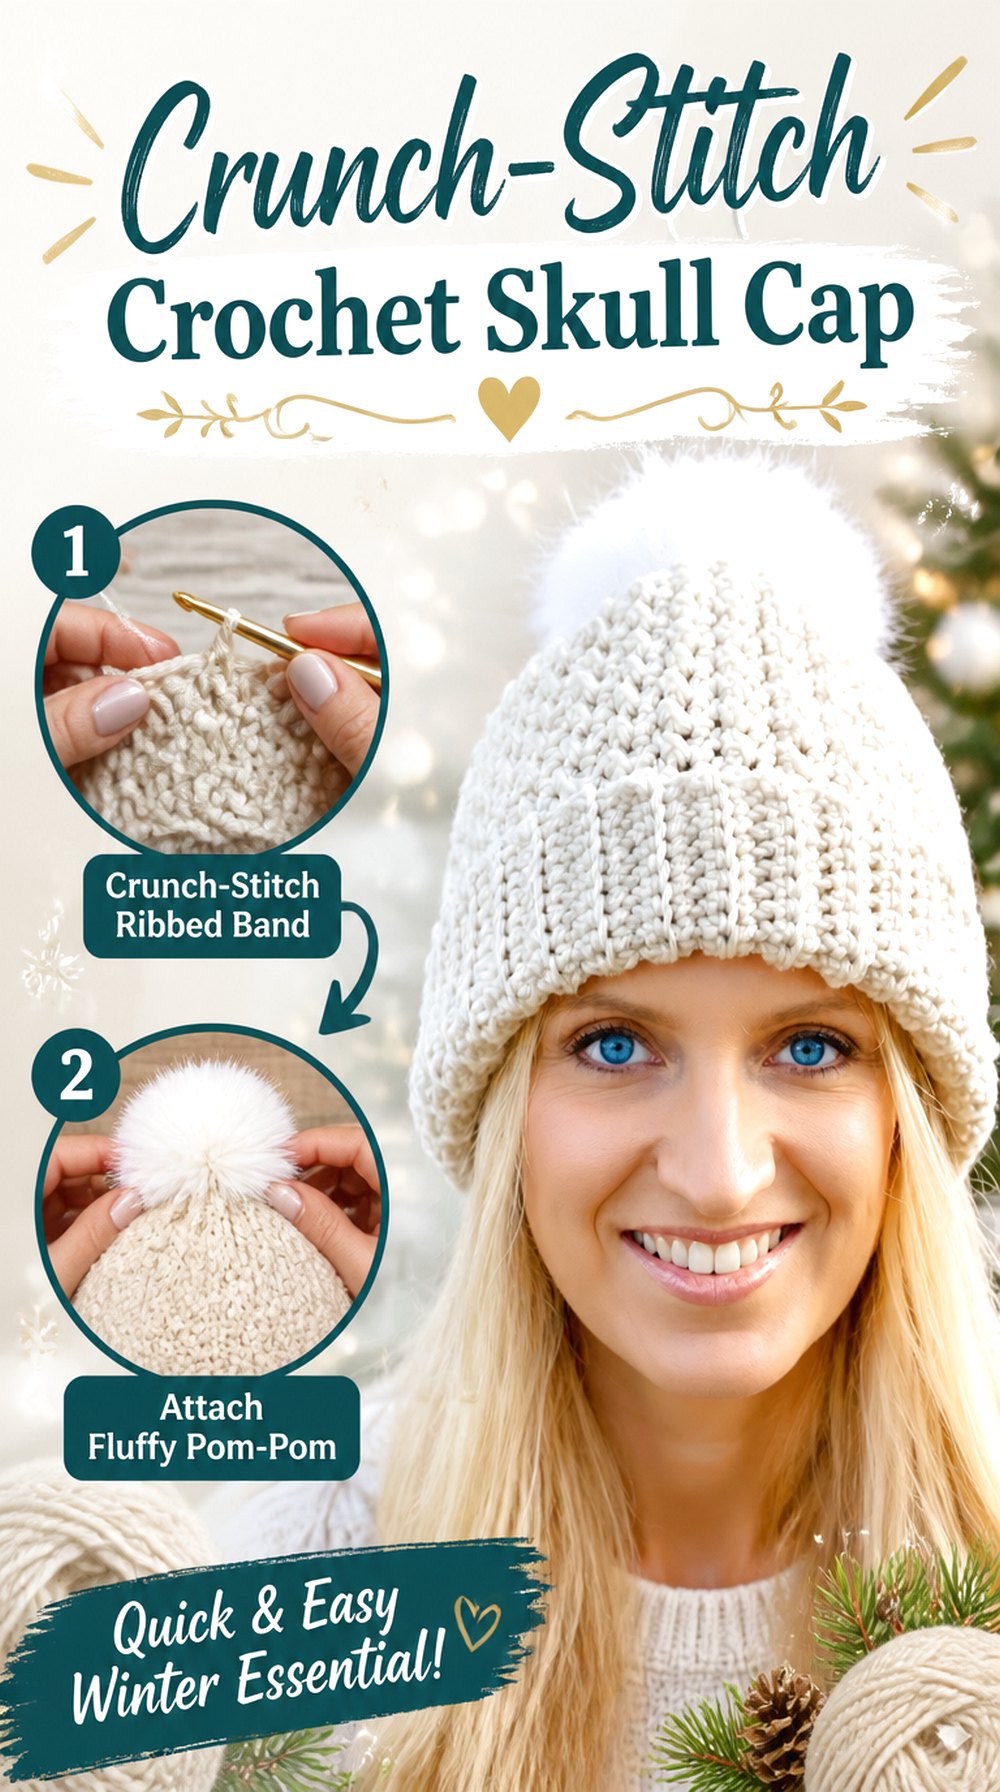
Naztazia’s textured beanie combines single-crochet ribbing with crunch stitch through the upper portion of the hat. The creator presents the pompom as optional and provides a women’s-size demonstration, with additional sizes available through the associated written pattern.
For a skull-cap interpretation, leaving off the optional pom creates a cleaner crown while retaining the contrast between the elastic-looking ribbed lower section and the small-scale texture above it. This is a useful design when you want two surfaces without introducing separate colors.
The Crunch Texture Adds Interest Without a Large Repeat
Small repeated texture can give a solid-colored cap depth while still leaving the silhouette clean. This is a practical alternative to cables if you like visible texture but do not want the eye drawn to a few large motifs. Examine the fabric from both close and normal viewing distances before choosing a highly variegated yarn.
Ribbing and the Upper Body Play Different Fit Roles
The tutorial uses single-crochet ribbing around the lower section and crunch stitch above. Treat those areas separately when checking fit. A comfortable crown does not guarantee a comfortable lower band, and vice versa. Try the edge around the head before final finishing to make sure the ribbing grips without feeling restrictive.
Leaving Off the Pom Creates a Lower-Profile Finish
Because the pompom is optional, omitting it does not require redesigning the textured body of the hat. Without that extra focal point, the crown and stitch pattern become more prominent and the result sits closer to the visual idea of a skull cap. This is one of the simplest styling decisions in the collection.
Original Tutorial and Creator Credit
Creator: naztazia
12. Puff Stitch Crochet Skull Cap
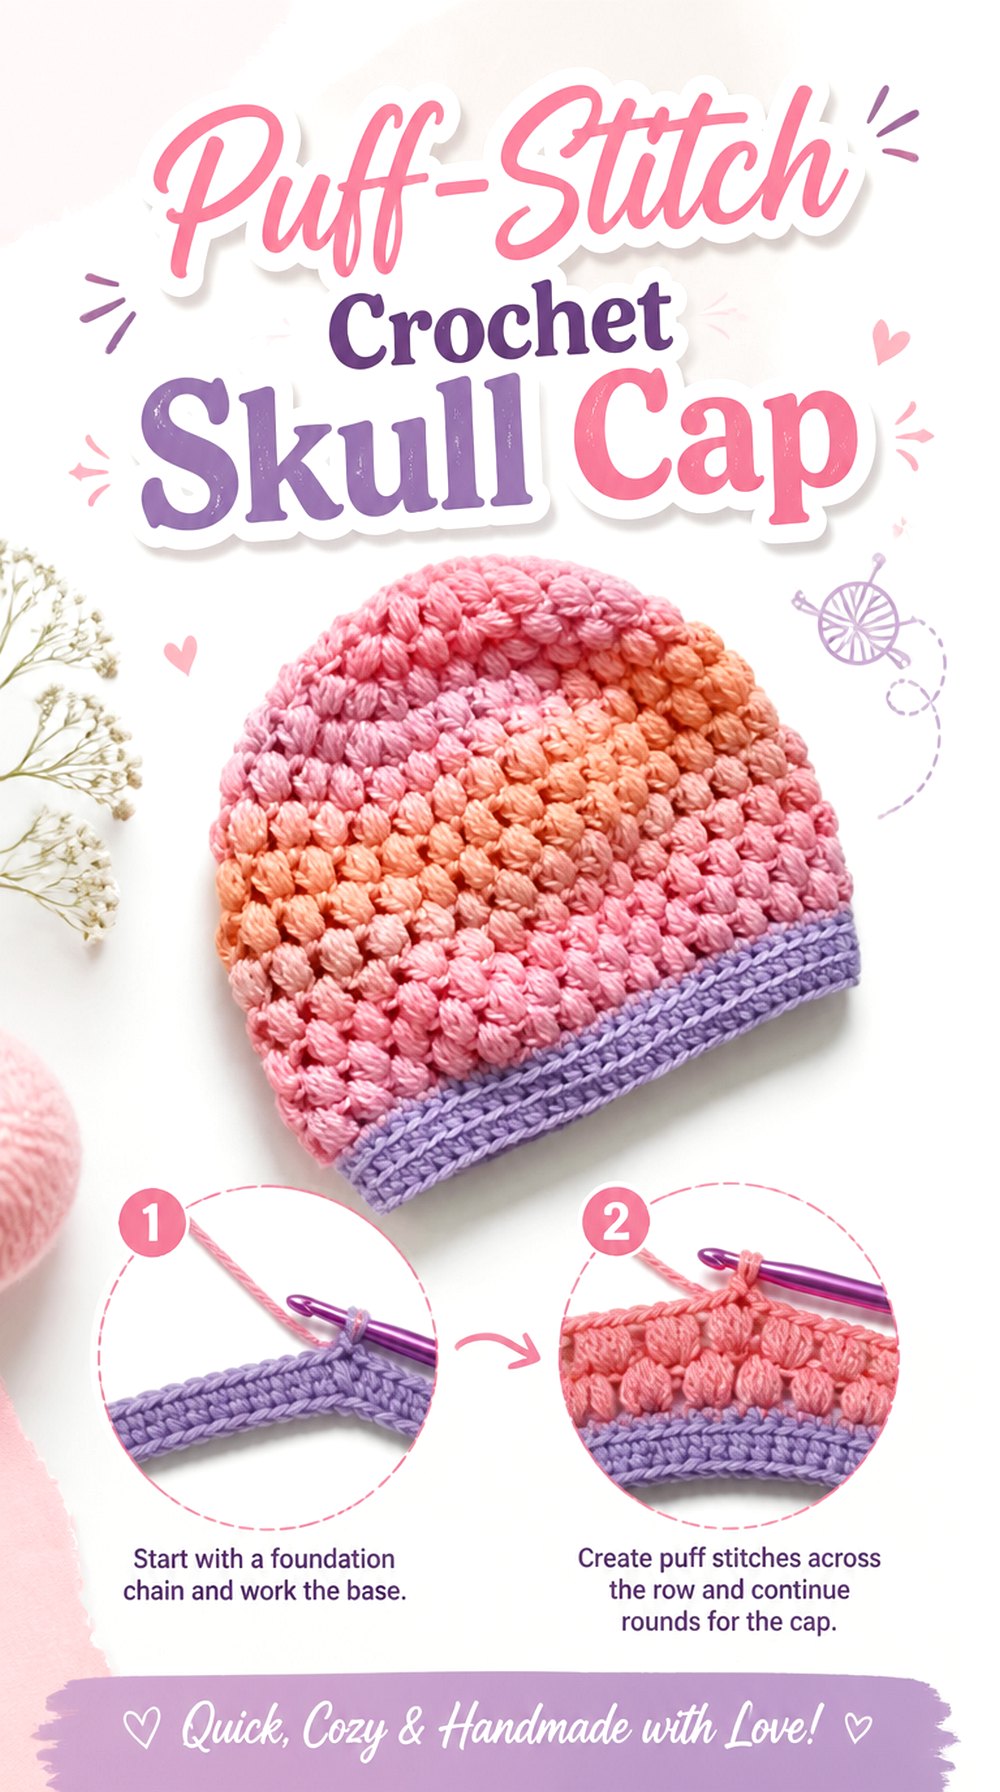
Puff stitch brings noticeably more dimensional texture to a compact hat. Hopeful Turns’ tutorial is specifically for a puff-stitch beanie and demonstrates how the clustered surface becomes the main visual element of the finished cap.
This option makes sense when you want a simple silhouette but do not want the finished object to look minimal. The puffs create repeated raised points across the fabric, so yarn choice, tension, and overall fit deserve more attention than they would on a completely flat stitch pattern.
Puffs Add Surface Volume to a Small Shape
Raised clusters make the fabric look fuller, which can give a close-fitting hat more visual weight. If you want a very sleek skull cap that disappears into an outfit, another stitch may serve you better. Choose this one when the texture itself should remain noticeable even when the cap is worked in a single color.
Consistent Puff Size Matters Across the Crown
Repeated dimensional stitches make tension differences easy to spot. Compare several neighboring puffs as you work. If one section is becoming visibly larger or tighter, address your hand tension before continuing. A small inconsistency can become much more obvious once the same motif has been repeated across the entire hat.
Let Texture Be the Main Feature
Because puff stitch already creates shadow and dimension, the cap does not require elaborate color changes to look detailed. A simple color can keep attention on the texture, while a busier yarn will shift emphasis toward color. Decide which effect you want before pairing a highly textured pattern with a highly active yarn.
Original Tutorial and Creator Credit
Creator: Hopeful Turns
13. Waffle Texture Crochet Skull Cap
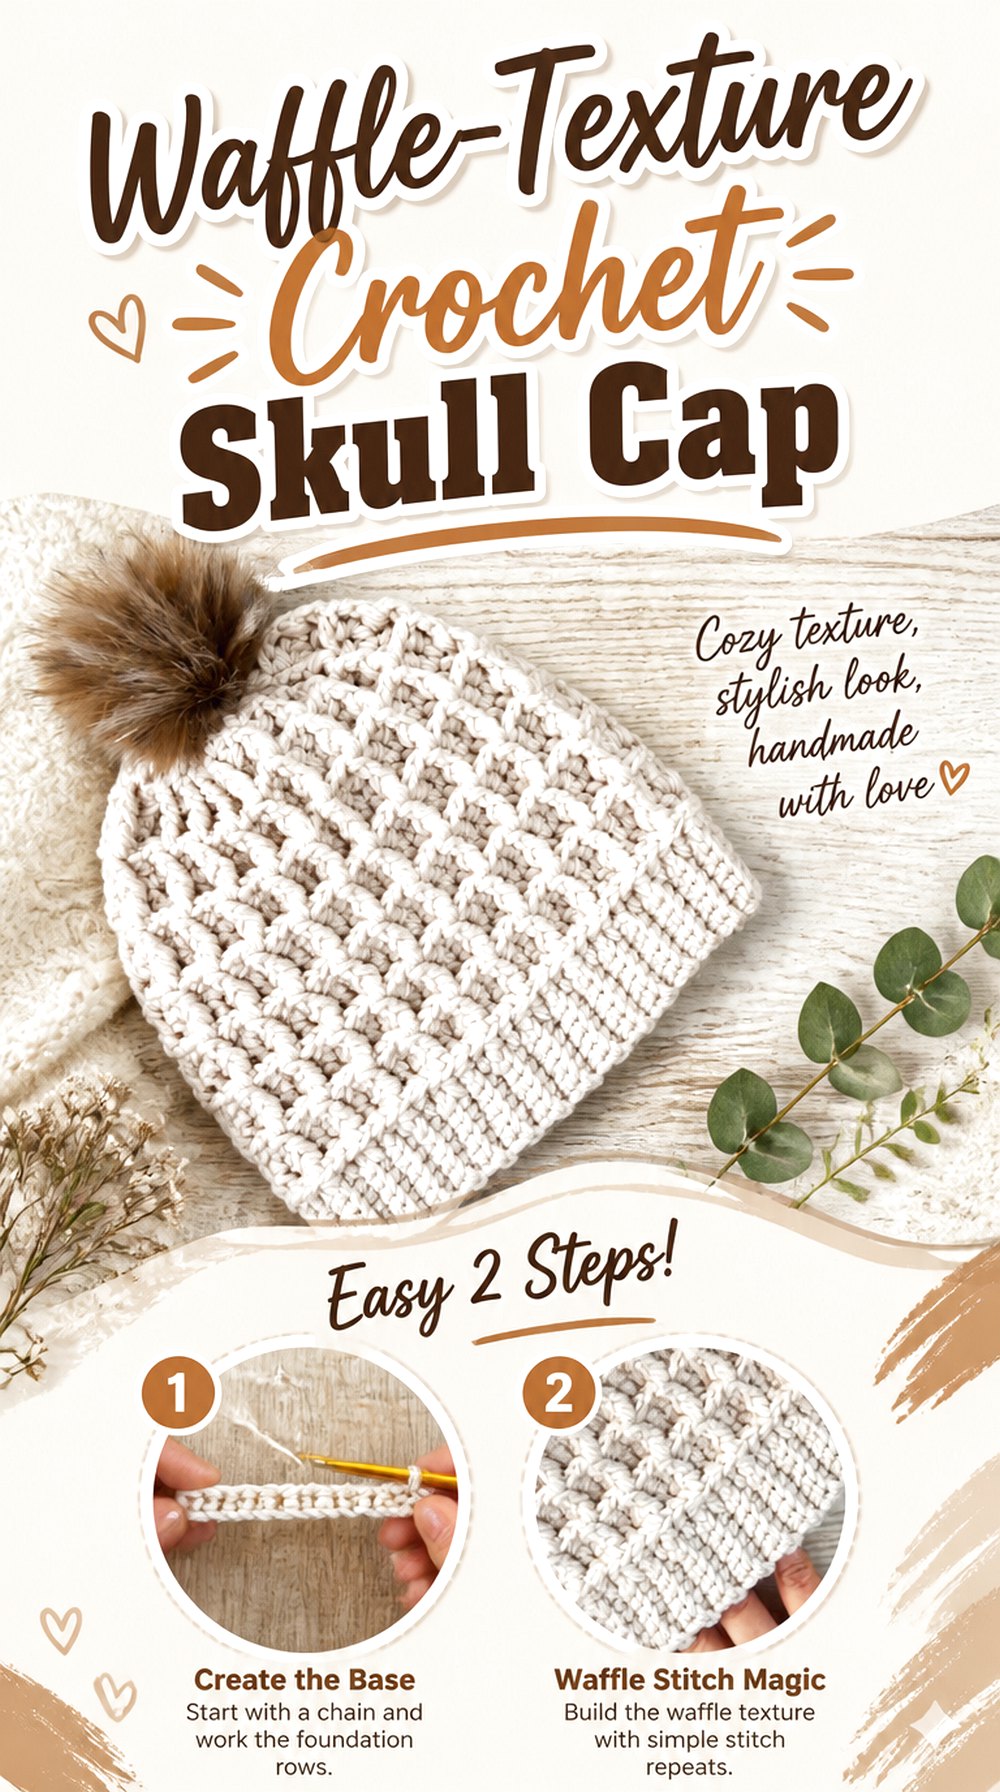
Waffle stitch gives this cap one of the deepest geometric surfaces in the collection. Diving Ducks Crochet’s tutorial combines a ribbed brim with waffle texture through the body and finishes the demonstrated hat with a pompom. The pom is added after the cap itself is complete, so readers wanting a lower-profile skull-cap look can simply focus on the finished hat before that embellishment is attached.
The rectangular waffle pattern creates pronounced light and shadow, making it particularly effective in solid yarn.
Waffle Texture Creates Strong Surface Relief
The repeating recessed and raised areas give the fabric a substantial visual presence. Before committing to this stitch, decide whether you want the skull cap to look sleek or heavily textured. This version clearly belongs in the second category. A small swatch can also tell you whether your yarn has enough stitch definition for the waffle grid to remain obvious.
The Ribbed Brim Changes the Lower Profile
Unlike a completely plain-edged skull cap, this design has a distinct band before the waffle body begins. That creates a clear visual boundary around the head. If your preferred skull-cap look is extremely minimal, compare this banded option with the mesh or herringbone projects before choosing solely because you like waffle stitch.
The Crown Works Without Making the Pom Essential
The demonstrated pompom is a finishing accessory rather than the structure holding the hat together. If you prefer a more compact silhouette, stop with the completed crown and assess the result before adding anything else. This keeps the waffle texture as the primary feature and avoids creating extra height at the top.
Original Tutorial and Creator Credit
Creator: Diving Ducks Crochet
14. Two Tone Striped Crochet Skull Cap

Cherilyn Q’s striped beanie takes a panel-based approach and uses alternating colors to turn a simple fitted shape into a graphic design. The tutorial describes the color changes as part of a repeating construction, and the pompom shown in the project is optional.
This makes a useful final option because it relies less on dimensional stitch texture than the cable, puff, and waffle caps. Instead, repetition and color contrast provide the visual interest. Leave off the optional pom when you want the result to remain closer to a compact skull-cap profile.
Color Changes Become Part of the Construction Rhythm
Two-tone striping works best when the transitions look deliberate. Before starting, decide whether the colors have enough contrast to produce the effect you want. Similar shades create a quieter surface; strongly contrasting shades make every stripe prominent. Either approach can work, but switching halfway through because the contrast feels wrong creates unnecessary extra finishing.
A Flat Panel Makes Circumference Easy to Recheck
Before closing the beanie, the panel gives you an opportunity to compare its width and stretch against the intended head. Use that checkpoint. If your yarn behaves differently from the creator’s sample, adding or removing panel width before the seam is closed is far more practical than discovering the problem after crown finishing.
The Optional Pom Lets the Styling Go Two Ways
Keeping the pom creates a conventional winter-beanie finish, while omitting it leaves the striped crown uninterrupted and produces the cleaner profile expected from a skull cap. That small choice makes this tutorial adaptable to two noticeably different styling preferences without requiring the colorwork itself to change.
Original Tutorial and Creator Credit
Creator: Cherilyn Q
Which Crochet Skull Cap Style Should You Choose?
For the lightest-looking options, start with the Airy Mesh Crochet Skull Cap or the finer Fuzzy Checkered Crochet Skull Cap. Both move away from the dense appearance of a conventional winter beanie, although their yarn and construction are very different.
If stretch and a simple everyday shape matter more, the Knit-Look Ribbed, Moss Stitch, Lemon Peel, or Herringbone caps keep the surface comparatively controlled. For stronger texture, move toward Cable, Basketweave, Puff, or Waffle. The Short Fisherman Crochet Skull Cap is the clearest choice when reduced depth is the main styling goal, while the striped and checkered options put color placement ahead of heavy stitch relief.
Conclusion
The most useful way to choose among these 14 crochet skull cap ideas is to start with silhouette and fit, then decide how much texture or openness you want. Mesh gives the lightest visual effect, fisherman styling shortens the profile, ribbing emphasizes stretch, and cable, basketweave, puff, and waffle stitches make the surface more prominent. Colorwork offers another direction without relying on heavy texture.
Before committing to a project, compare the tutorial’s yarn, construction, crown depth, and lower edge with the way you actually want the hat to sit. Use the original tutorials for exact construction details, and recheck measurements whenever your materials differ from the creator’s sample.
Frequently Asked Questions
What makes a crochet beanie look more like a skull cap?
The clearest difference is usually the profile. A skull-cap look stays relatively close to the head with little deliberate slouch, and many versions avoid a large pompom or oversized folded brim. Crown depth matters as much as stitch pattern. A short fisherman cap and a snug ribbed beanie can both fit the general style even though their construction is very different.
Which stitches make sense for a lighter crochet skull cap?
Mesh and other openwork fabrics create the most obvious ventilation, while lightweight yarn can also reduce the visual and physical heaviness of a cap. Do not judge suitability from stitch openness alone, though. Fiber and yarn thickness still influence comfort. Check the creator’s materials and the yarn label, especially when adapting a winter-oriented tutorial for warmer conditions.
How can I keep a crochet skull cap from becoming too loose?
Start with the intended wearer’s head measurement and evaluate the actual stretch of your crocheted fabric. Different ribbing, fibers, hook sizes, and stitch patterns can behave very differently, so a universal amount of negative ease is unreliable. Check fit during construction whenever possible, particularly before seaming a panel or completing a lower band that cannot easily be changed later.
Can I use a beanie tutorial if I want a brimless skull-cap style?
Sometimes, but look at how the brim is constructed first. An optional pompom can usually be omitted without affecting the hat body, while removing an integrated brim may alter the intended depth, stretch, or finishing structure. Tutorials that explicitly offer a no-brim version are the clearest candidates. Otherwise, verify the construction before assuming the brim can simply disappear.
Should I block a finished crochet skull cap?
That depends on the fiber, stitch pattern, and the shape you need to correct or settle. Always follow the care guidance appropriate to the yarn rather than applying one blocking method to every cap. Because skull caps depend on stretch for fit, avoid aggressively enlarging the fabric during blocking. Measure before and after so you can see whether the process has changed the circumference or depth.
Is panel construction or top-down construction better for a crochet skull cap?
Neither is universally better. A flat panel makes it easy to judge depth early and test circumference before seaming. Top-down construction lets you shape the crown progressively and then decide how far the sides should extend. Choose the method whose fit checkpoints make more sense to you, especially if you plan to substitute yarn or alter the finished depth.