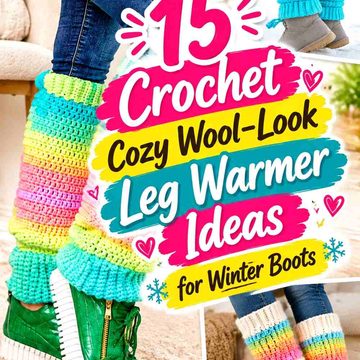
Crochet boot gaiters can add another visible layer between leggings, tights, or pants and a pair of winter boots. For knee-high styling, the most useful designs are usually tall leg warmers or adaptable boot cuffs that can be fitted around the calf and positioned above, inside, or partly over the boot shaft.
The tutorials in this collection do not all use the term “gaiter.” Most creators describe their projects as leg warmers or boot cuffs, and some source versions are shorter than knee height. They are included because their construction, sizing, texture, or adjustable height can inform a knee-high boot-gaiter look. Always follow the creator’s tutorial when changing dimensions rather than assuming a short cuff can simply be lengthened without reconsidering fit.
There is also an important winter distinction: crochet gaiters are outfit layers, not waterproof technical snow gaiters. Crochet fabric should not be relied on to stop snow, slush, or water from entering footwear. For prolonged wet-snow conditions, use weather-rated boots and purpose-built protective gaiters, then treat the crochet layer as styling or added dry-weather warmth.
Quick List
- Crochet Tapered Knee-High Boot Gaiters
- Crochet Classic Straight Boot Gaiters
- Crochet Faux-Knit Ribbed Boot Gaiters
- Crochet Bow-Accent Knee-High Boot Gaiters
- Crochet Cherry-Trim Boot Gaiters
- Crochet Almond-Texture Bow Boot Gaiters
- Crochet Sculpted Cable Knee-High Boot Gaiters
- Crochet Any-Size Everyday Boot Gaiters
- Crochet Curly-Texture Winter Boot Gaiters
- Crochet Clean Ribbed Knee-High Boot Gaiters
- Crochet Color-Block Reversible Boot Gaiters
- Crochet Feather-Texture Boot-Top Gaiters
- Crochet Chunky Buttoned Boot Gaiters
- Crochet Minimal Bulky Boot Gaiters
- Crochet Cable-Panel Boot Gaiters
- Crochet Flat-Panel Winter Boot Gaiters
- Crochet Beginner Ribbed Boot Gaiters
- Crochet Shell-Stitch Slouchy Boot Gaiters
Measure the Leg and the Boot Before Choosing a Gaiter
Knee-high styling involves more than one circumference. Measure where you expect the lower edge to sit, the widest part of the calf, and the area immediately below the knee. If the crochet will overlap the outside of a boot, measure around the boot too.
A straight tube may fit the calf but bunch excessively at the ankle. Conversely, a closely fitted lower section can become uncomfortable higher on the leg. Tutorials that explain customization or made-to-measure construction are especially useful if you want substantially more height than the source sample.
Knee movement matters as well. A tall gaiter that finishes directly in the knee crease can fold sharply every time you sit or walk. Positioning the upper edge just below the bend often produces a cleaner boot-gaiter silhouette.
Decide Whether the Gaiter Goes Inside or Outside the Boot
A narrow lower edge can disappear inside the shaft of a knee-high boot so only the upper crochet section shows. This gives an effect similar to tall boot socks without putting an entire thick crocheted sock inside the footwear.
A wider or flared design behaves differently. It may be intended to overlap the top of the boot or remain visible above lower footwear. Before adding bows, scallops, cables, or other details, check whether the boot will hide them.
Also consider boot fit. If your boots are already close around the calf, adding dense crochet underneath the shaft may make them uncomfortable or impossible to fasten. In that case, a gaiter that sits primarily above the boot opening may be the more practical choice.
Yarn Stretch Matters More as the Gaiter Gets Taller
A short boot cuff carries relatively little fabric below its upper edge. A knee-high piece has much more weight pulling downward, so stretch and recovery become more important.
Ribbing can help, but not every ribbed crochet fabric behaves identically. Make a useful-sized swatch, stretch it, release it, and notice whether it returns close to its original shape. A fabric that remains elongated may gradually slide or lose its intended silhouette.
Dense cables, plush yarn, large bows, and other embellishments also add weight. A dramatic design can work well for an outfit, but the upper fit has to support the finished project without being uncomfortably tight.
1. Crochet Tapered Knee-High Boot Gaiters
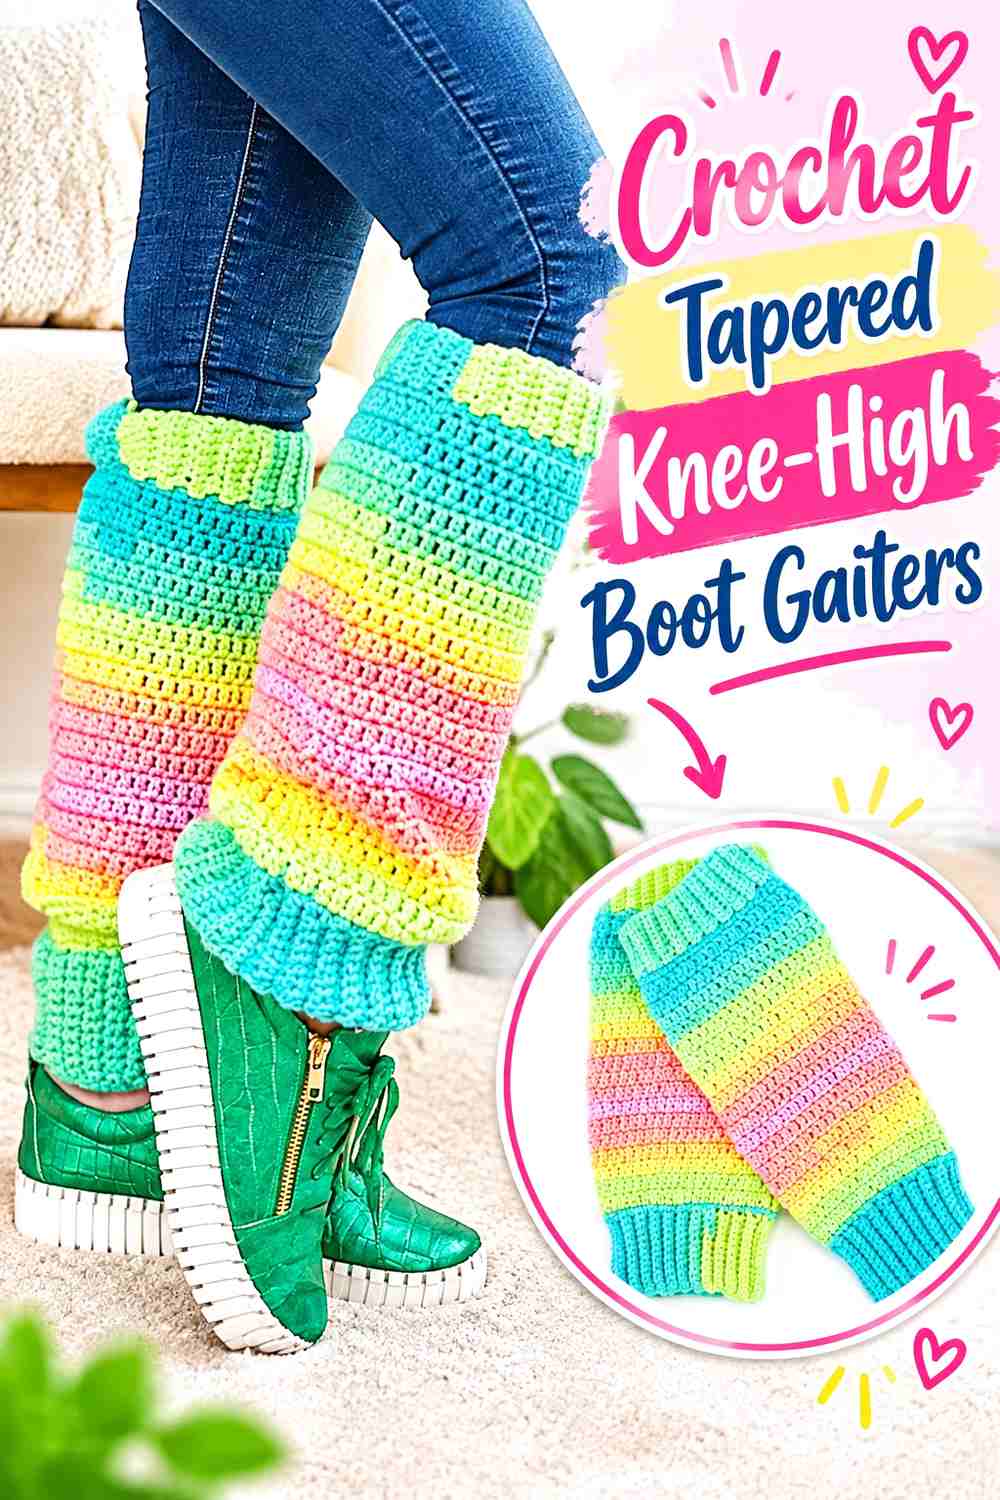
This customizable leg-warmer construction is particularly relevant to knee-high boot styling because the tutorial discusses adjusting calf size, ankle width, and height separately. That gives you more control than a simple straight tube when the goal is a tall gaiter that follows the changing shape of the lower leg.
Separate the Ankle Fit From the Calf Fit
A tall gaiter does not have to be the same width from top to bottom. If the ankle is too loose, excess fabric can collect immediately above the boot. If the calf is too tight, the upper section can stretch the stitches more than intended.
Use the source adjustment method as the framework and compare both areas before committing to the second gaiter.
Set the Height With the Actual Boots On
Knee-high boots already cover much of the lower leg, so the amount of crochet that needs to remain visible may be smaller than expected.
Try measuring from the top of the boot shaft to the point below the knee where you want the gaiter to finish. This keeps you from adding unnecessary length that will simply disappear inside the boot.
Creator Credit: Treasurie
2. Crochet Classic Straight Boot Gaiters
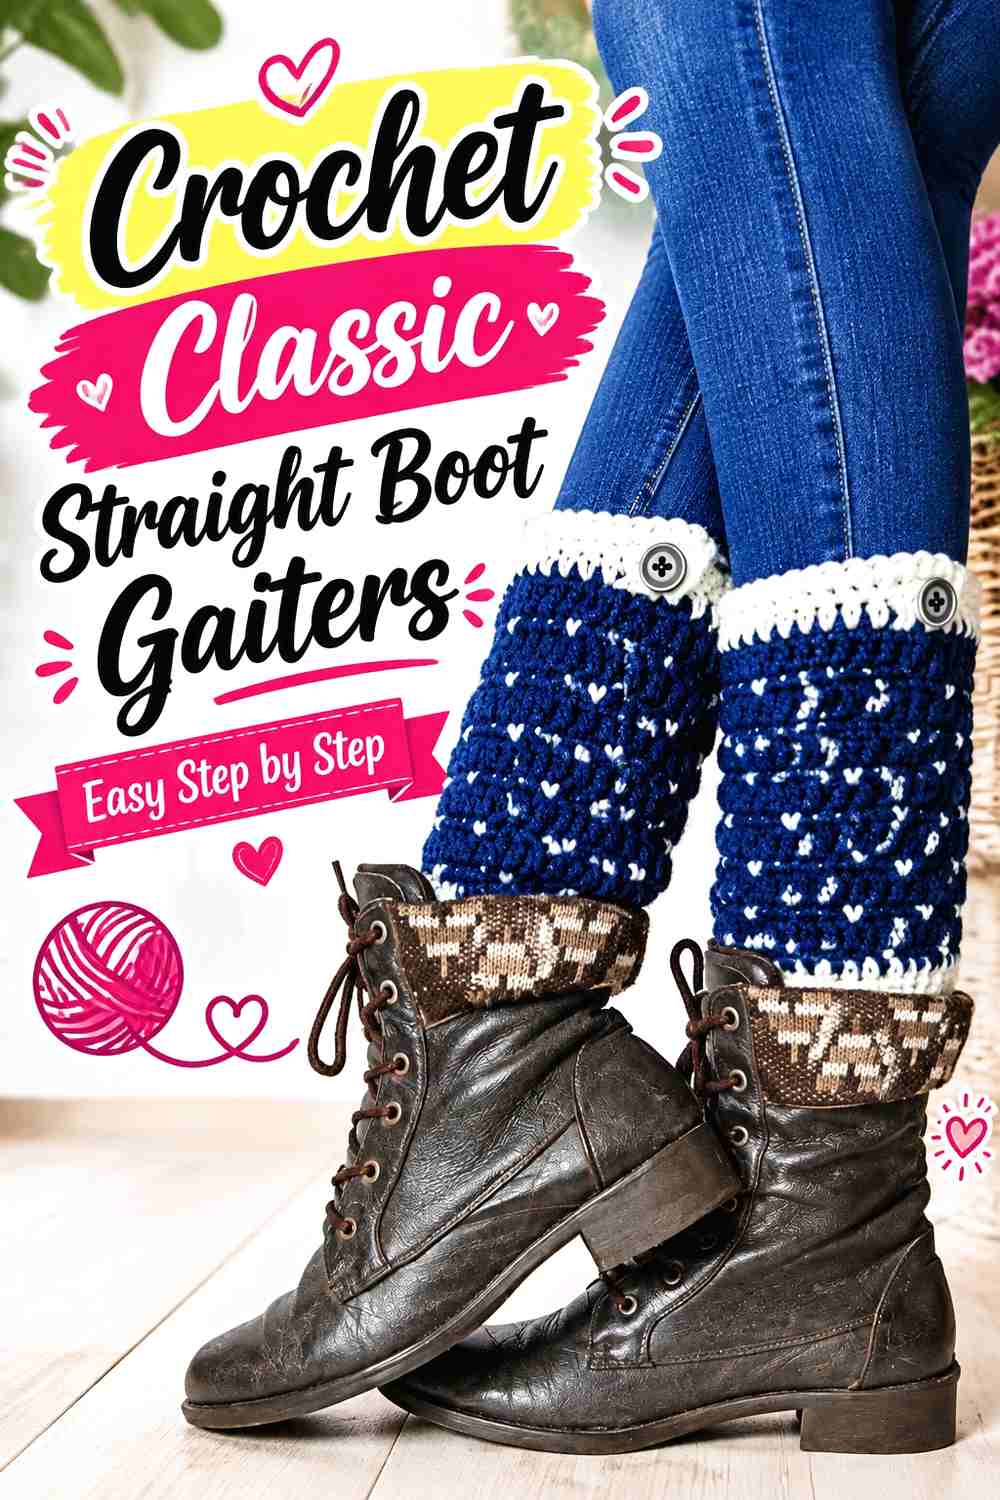
This straightforward leg-warmer tutorial keeps embellishment to a minimum and emphasizes the basic wearable tube. That simplicity makes it useful for a knee-high gaiter where the relationship between the boot, calf, and upper edge should remain the main visual feature.
A Straight Shape Works Best When Circumferences Are Compatible
A tube is easiest to adapt when the ankle, boot opening, and calf do not require dramatically different widths.
If your calf widens substantially toward the knee, check the developing fabric frequently instead of assuming one starting circumference will remain comfortable for the entire height.
Plain Fabric Leaves More Room for a Statement Boot
Detailed boots and elaborate crochet can compete visually. A quieter gaiter gives buckles, lacing, contrasting leather, or patterned leggings more space to stand out.
This is a useful direction when you want crochet texture without making the gaiter the dominant feature of the outfit.
Creator Credit: Crochet MC
3. Crochet Faux-Knit Ribbed Boot Gaiters
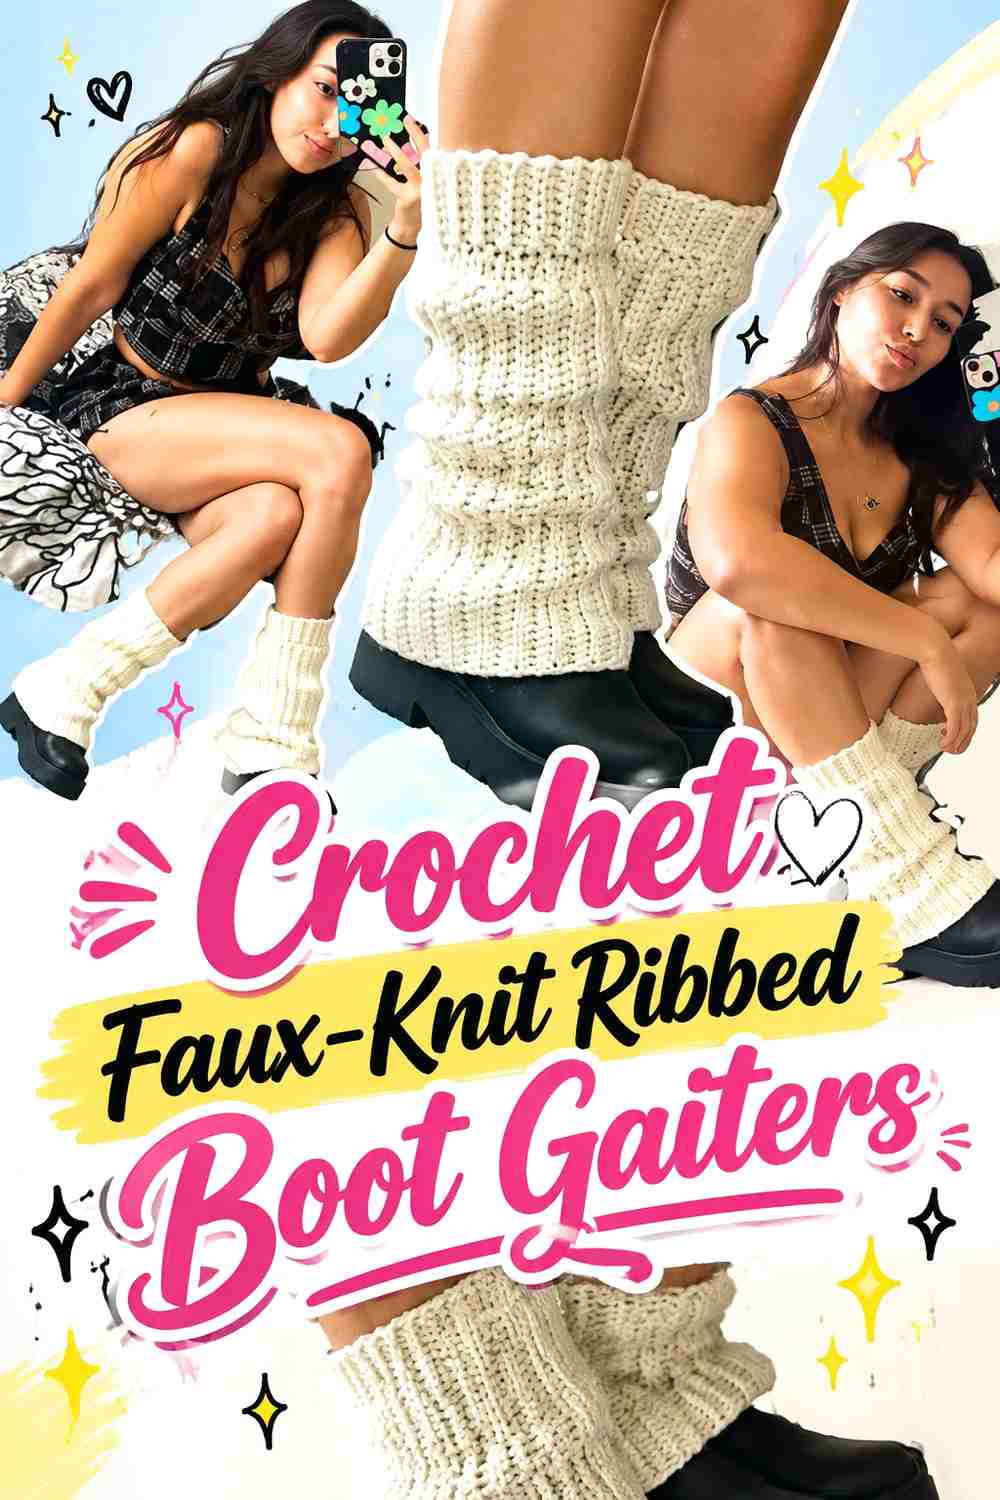
Strong vertical ribs give this project a neater, faux-knit appearance. The tutorial also addresses the upper cuff and final shaping, making it a strong candidate when you prefer a more fitted-looking gaiter rather than a deliberately loose or flared silhouette.
Vertical Ribbing Emphasizes Height
Long vertical lines naturally suit a knee-high accessory because they visually connect the boot shaft with the upper edge of the gaiter.
If you extend the source proportions, keep comparing width as the work grows. Small tension changes become easier to notice over a long ribbed surface.
Finish the Fabric According to Its Fiber
The tutorial discusses steaming, but heat treatment is not interchangeable across all yarns.
Check the label of the yarn you actually use before steaming or blocking. The goal is to refine the fit without flattening the ribbing or damaging a substitute fiber.
Creator Credit: Kae Neebs
4. Crochet Bow-Accent Knee-High Boot Gaiters
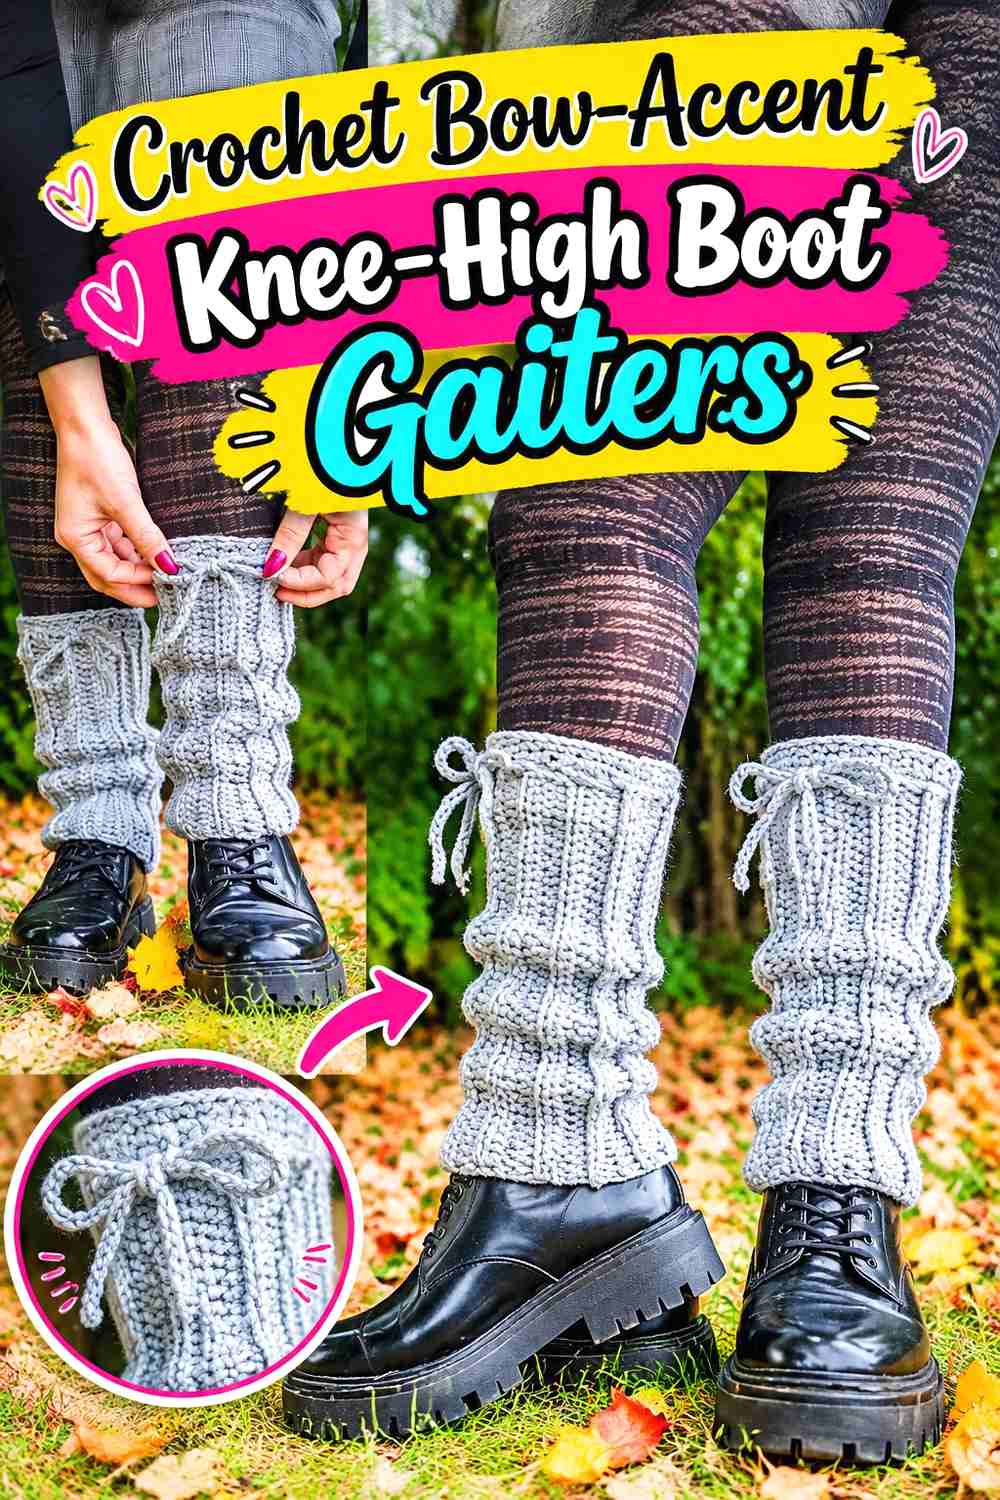
This measurement-based leg-warmer project adds bows after the main wearable shape is established. That makes the decoration optional enough to adapt around boots while still providing a clear focal point for winter outfits where the upper gaiter remains visible.
Place the Bow Where the Boot Will Not Hide It
A bow near the ankle may disappear behind a knee-high boot shaft. For this styling direction, first determine how much of the gaiter will show above the boot.
Then use the creator’s finishing approach as your reference when considering where a decorative feature belongs.
Establish the Fit Before Adding the Accent
The main tube needs to stay comfortably in place without depending on the bow.
Complete the fit check first, preferably over the leggings or tights you expect to wear in winter, and treat the bow as a finishing decision rather than a structural fix.
Creator Credit: StelarCrafts
5. Crochet Cherry-Trim Boot Gaiters
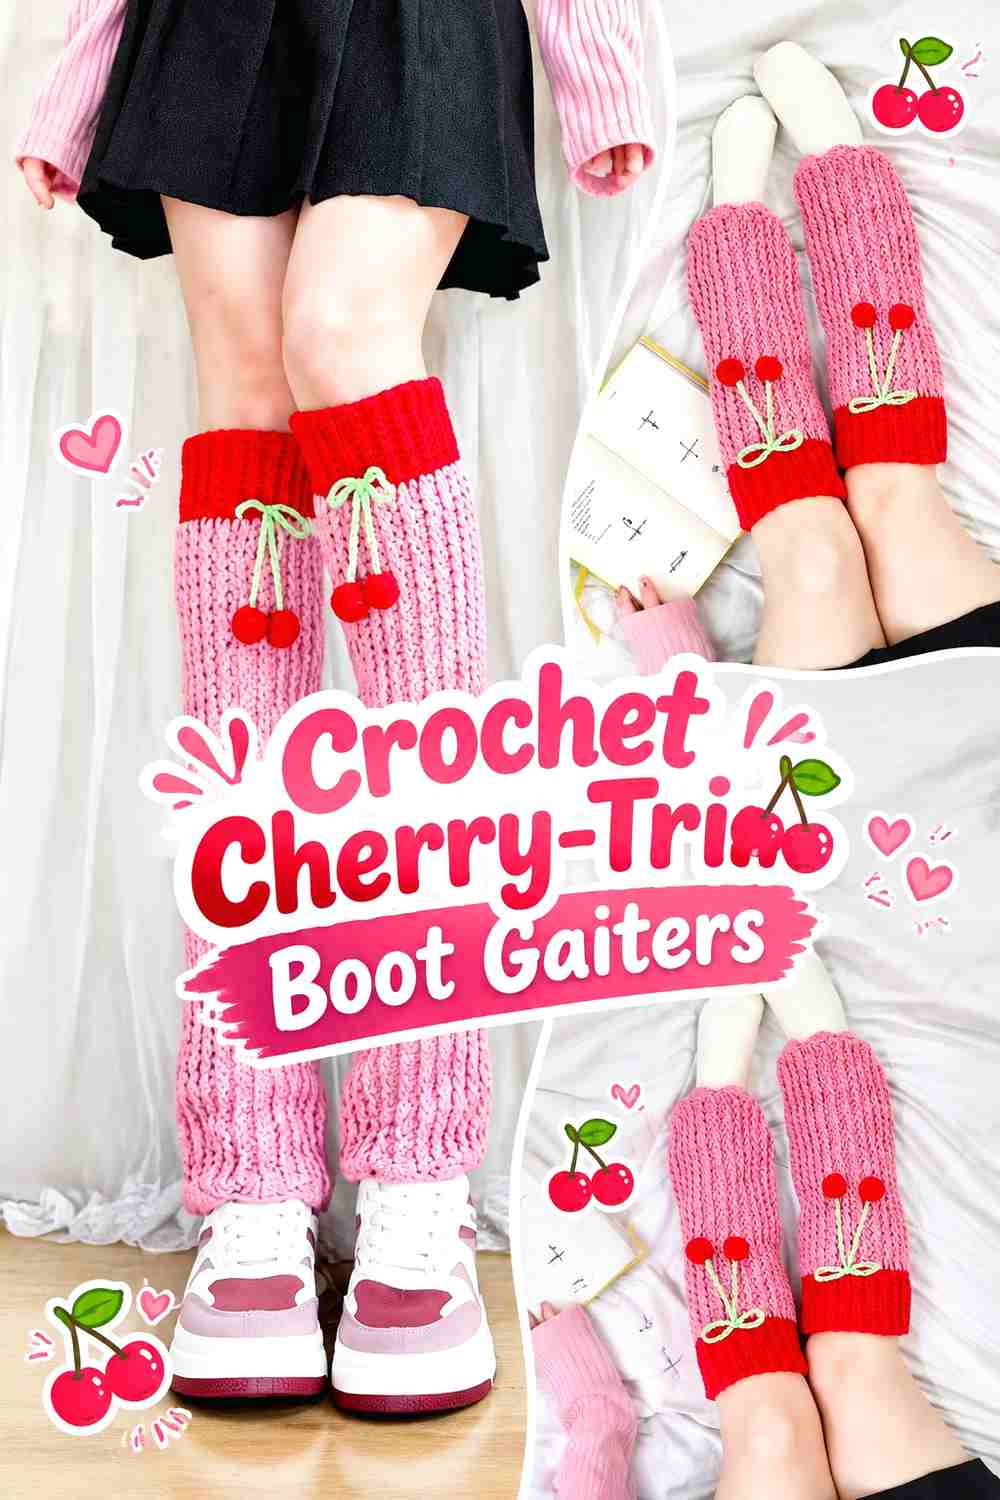
This playful leg-warmer design combines a textured body with a shaped lower edge and cherry embellishment. It is considerably more decorative than a plain knee-high gaiter, making it a good reference for outfits where the crochet itself should become a visible feature.
Move the Visual Focus Above the Boot Shaft
With knee-high boots, low-positioned decoration can disappear completely. Before adapting this design, identify the visible section of the finished gaiter.
A motif placed in the exposed zone will contribute more to the outfit than one hidden inside the boot.
Decorative Weight Can Affect a Tall Gaiter
Added motifs are small individually, but a taller project already has more fabric pulling from its upper edge.
Check how securely the gaiter stays in place before increasing the number or size of embellishments. Decoration should not compensate for a loose top fit.
Creator Credit: Vivi Crochet 🌷
6. Crochet Almond-Texture Bow Boot Gaiters
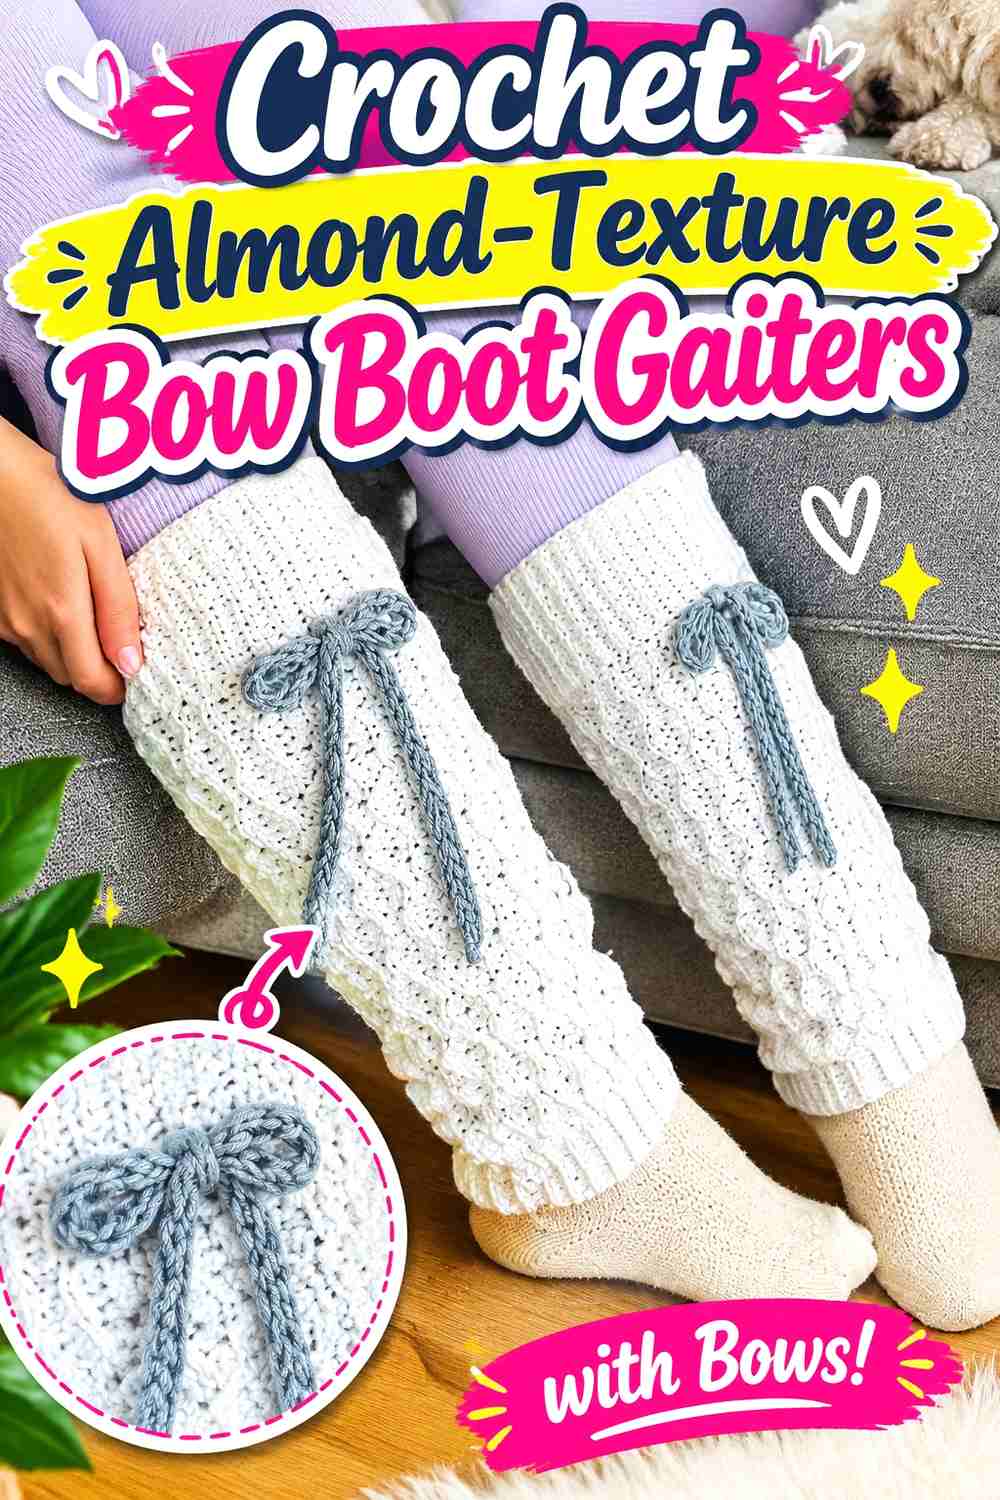
The almond-textured body, defined cuffs, and bow give this project several layers of visible detail. Because the tutorial is measurement based, it offers a more adaptable starting point for creating a tall version than a project tied only to one fixed circumference.
Smooth Yarn Helps the Almond Texture Read
This design already contains substantial stitch texture. A highly fuzzy yarn may blur the raised surface and make the bow the only detail that remains visually clear.
Swatch the textured area before buying enough yarn for a knee-high pair, especially if stitch definition is one of the main reasons you selected the project.
Avoid Crowding the Top Edge
A bow, ribbed cuff, and knee-high boot can create several strong horizontal lines close together.
Check the finished proportions in a mirror with the boots on. Leaving some visual space between the boot opening and embellishment can make each feature easier to see.
Creator Credit: petpetcrochets
7. Crochet Sculpted Cable Knee-High Boot Gaiters
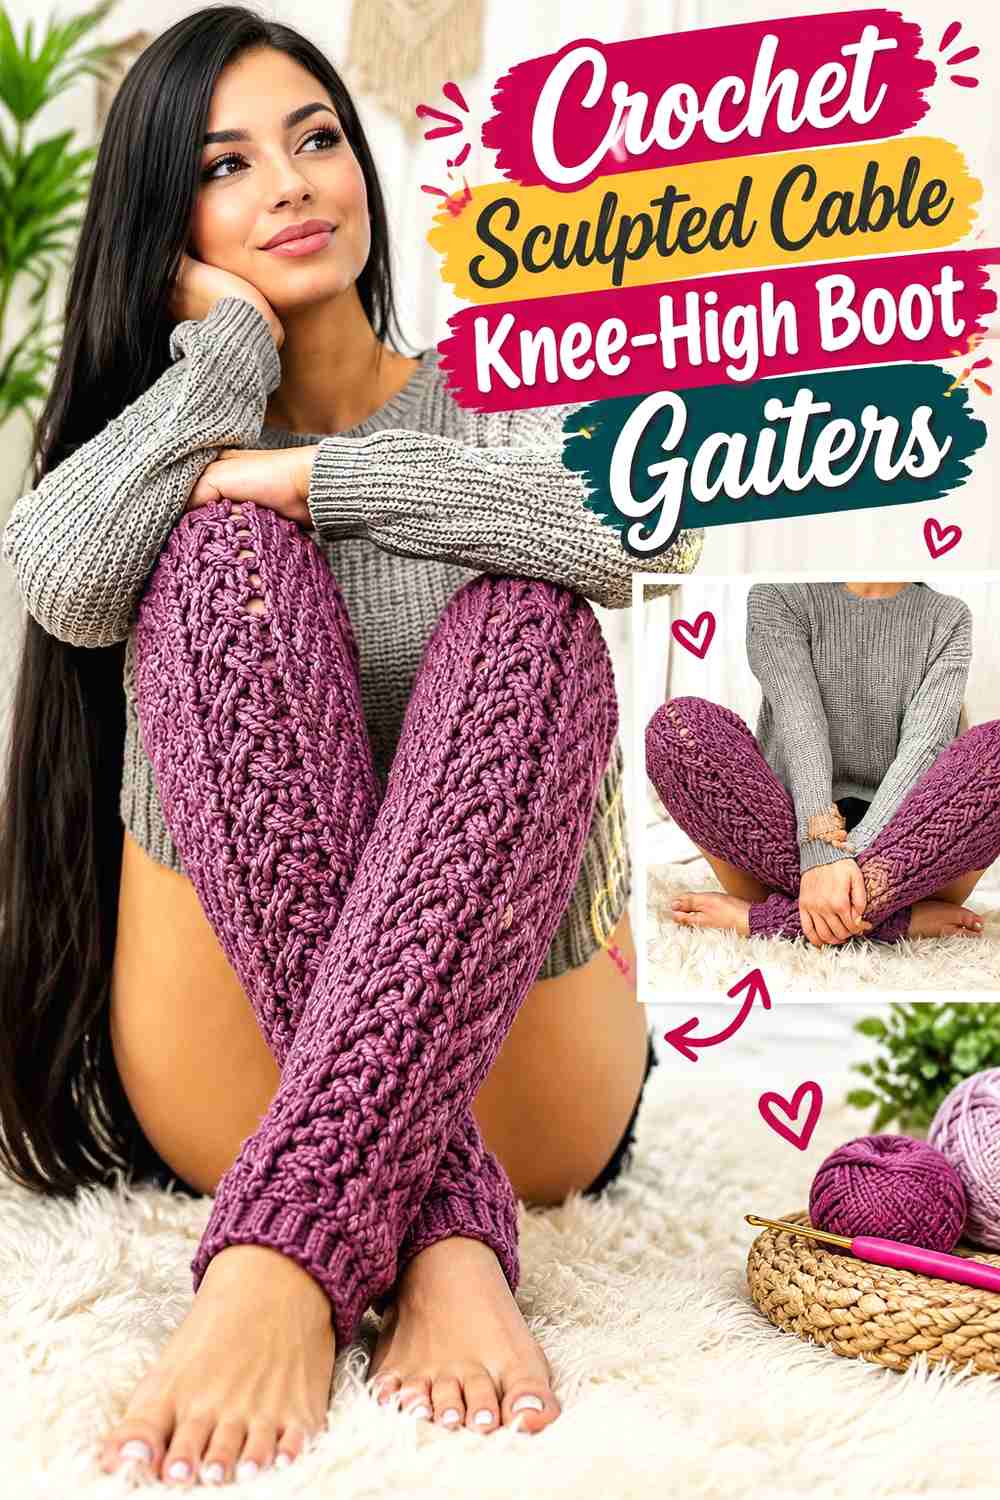
Cable texture makes this one of the strongest choices for a statement gaiter. The tutorial divides the leg warmer into distinct textured and shaping areas rather than relying on an uninterrupted basic tube, so the crochet technique itself becomes a large part of the finished look.
Put the Cable Where It Can Actually Be Seen
A detailed central cable loses much of its impact if the boot covers most of it.
Plan the exposed section before deciding on final length. For knee-high boots, you may want the most sculptural portion concentrated above the shaft rather than hidden beneath it.
Raised Texture Increases Bulk
Cables create a physically thicker surface than flat crochet. That can look substantial and winter-ready, but it may not fit comfortably underneath a close boot.
If the boot shaft has little spare room, plan to wear the textured section primarily above the opening.
Creator Credit: TCDDIY
8. Crochet Any-Size Everyday Boot Gaiters
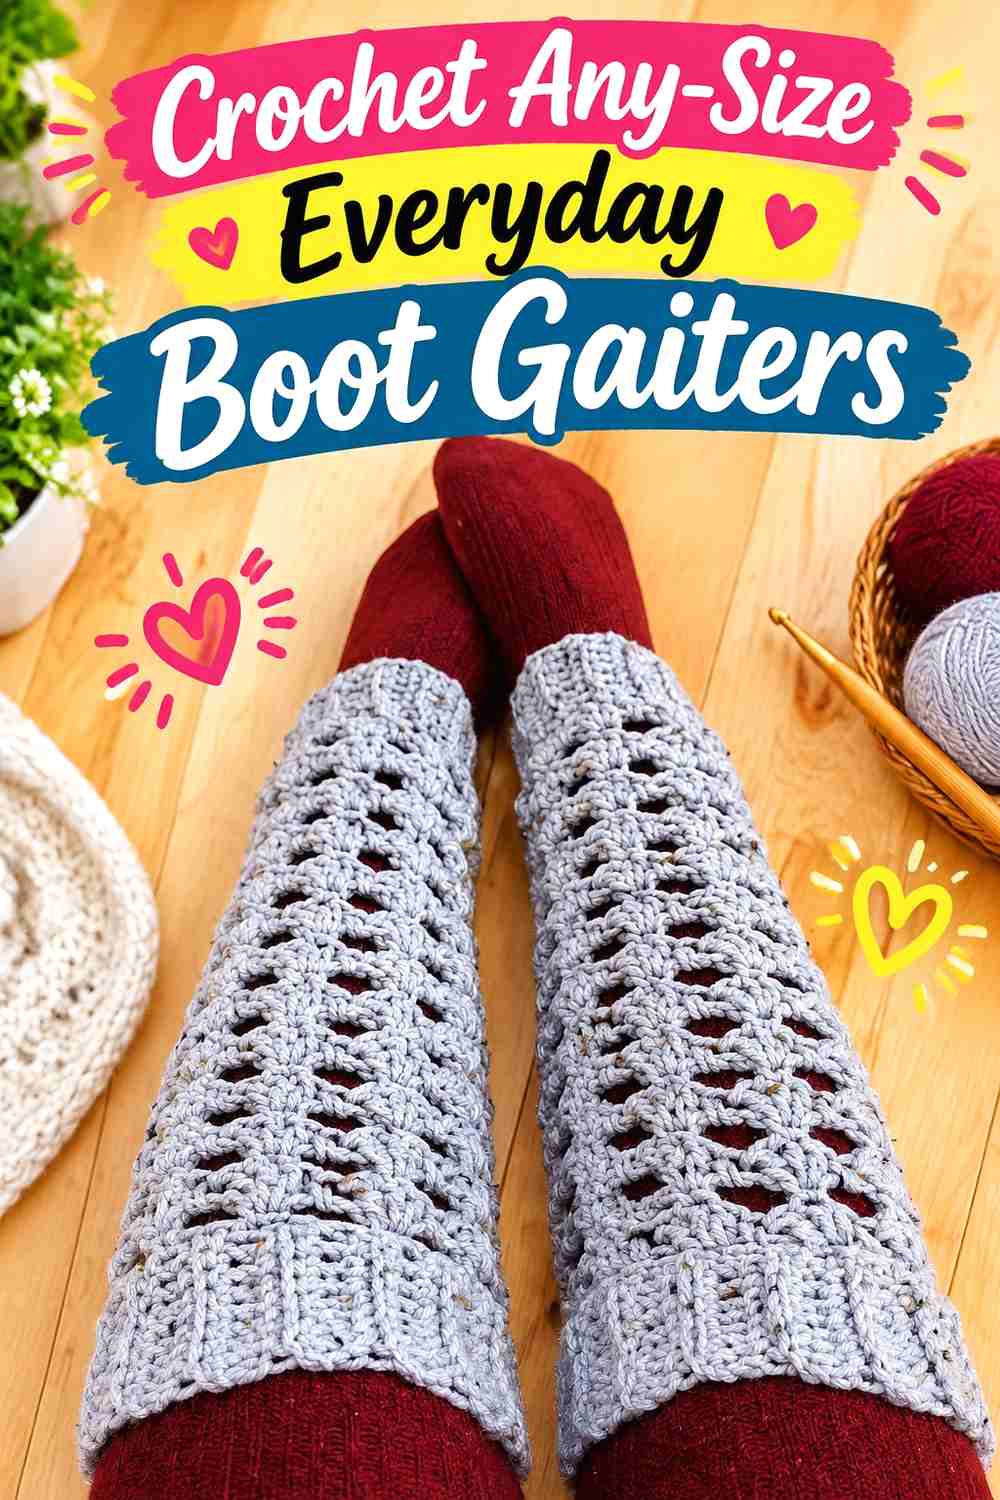
This tutorial focuses on making leg warmers for different sizes instead of centering the design around one decorative feature. The adaptable approach is useful for knee-high boot outfits because fit around the individual leg can take priority over reproducing one sample exactly.
Longer Coverage Requires More Than an Ankle Measurement
As the gaiter rises, it encounters the wider calf and eventually the area below the knee.
Follow the creator’s sizing approach instead of extending a lower-leg circumference unchanged. The taller the piece, the more important those intermediate fit checks become.
A Quiet Surface Works With More Winter Outfits
Simple crochet can pair with patterned coats, textured boots, plaid skirts, or strong accessories without creating another major focal point.
Choose this direction when versatility is more valuable than a distinctive motif or edge treatment.
Creator Credit: Bag-O-Day Crochet
9. Crochet Curly-Texture Winter Boot Gaiters
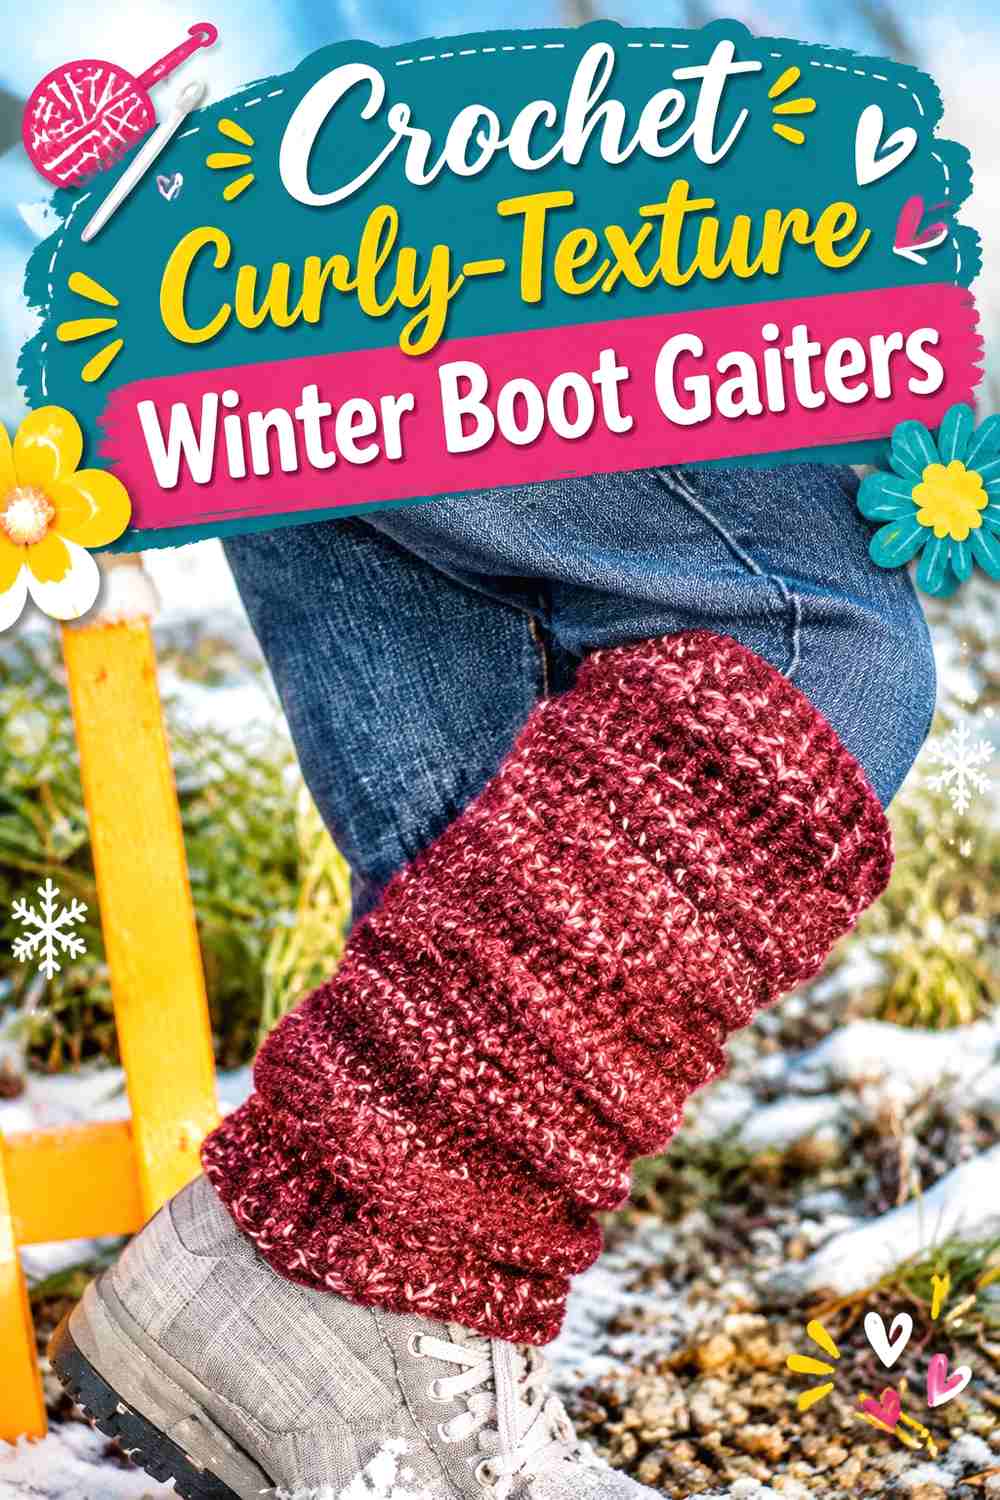
This adult leg-warmer tutorial uses curly-textured yarn and specifically allows the calf section to be made longer or shorter. The yarn surface gives the design a soft, fuzzy look without requiring complicated decorative stitch work.
Let the Yarn Create the Texture
Novelty yarn can obscure small stitch details, so elaborate cables or lace would have less visual impact.
If you like the fuzzy appearance, allow the fiber to remain the focal point and keep other embellishment restrained.
Extra Height Means More Plush Fabric
A knee-high version increases both visual and physical volume.
Before committing to maximum height, check whether the textured fabric fits around your intended boots and whether you actually want that much softness concentrated around the lower leg.
Creator Credit: The Crochet Crowd
10. Crochet Clean Ribbed Knee-High Boot Gaiters
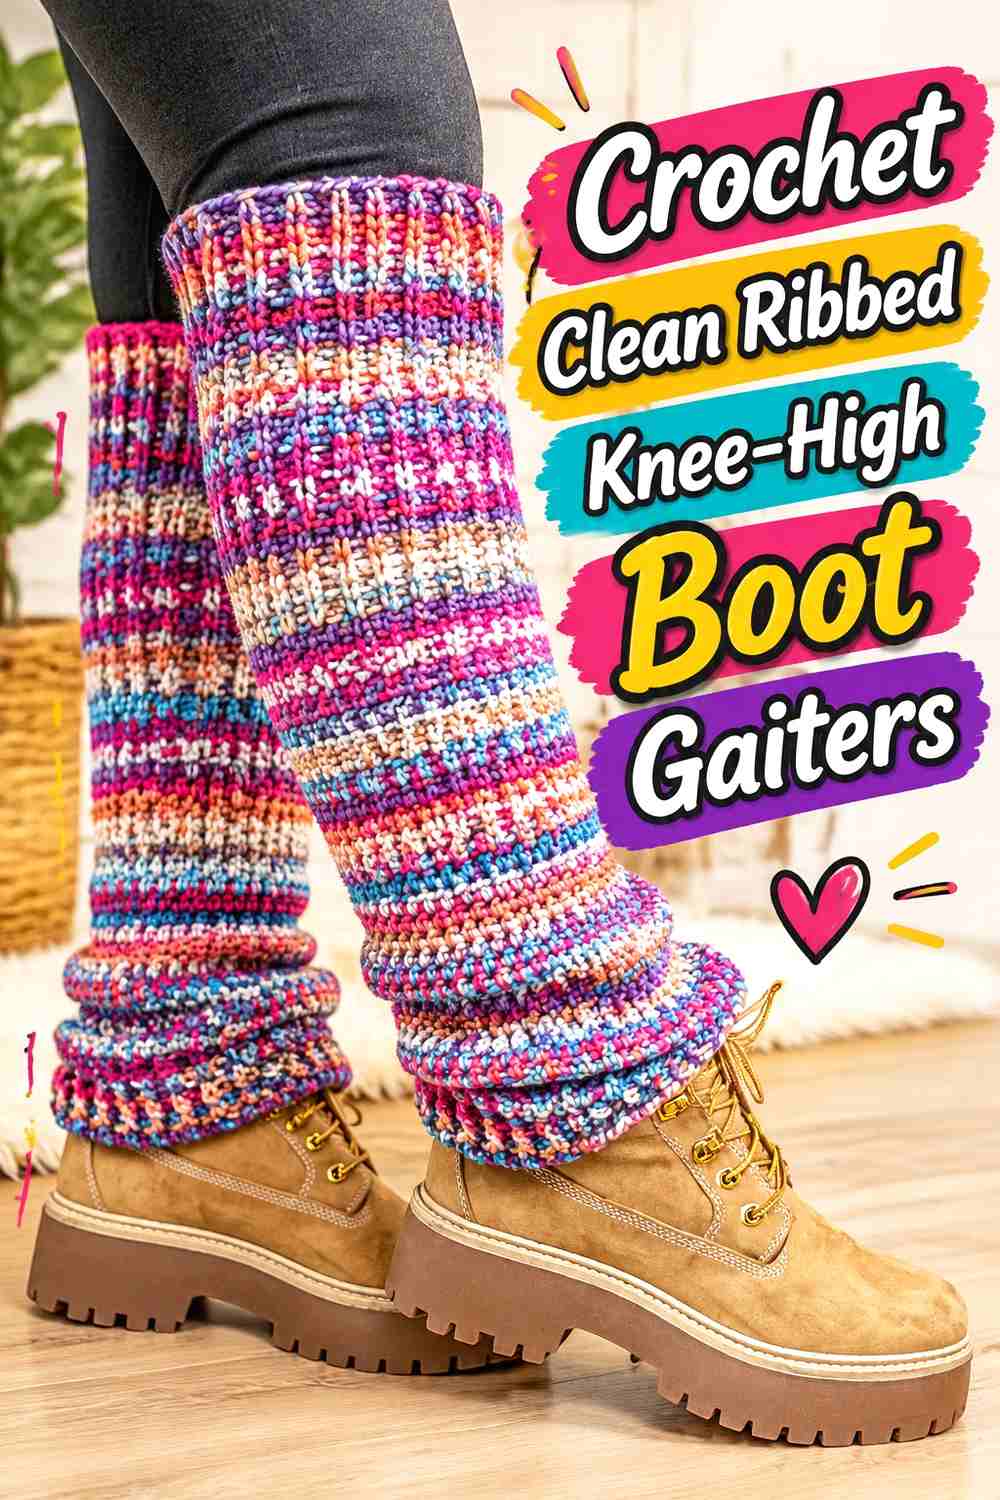
This tutorial focuses on straightforward ribbed leg warmers and includes guidance on sizing and stretch. The clean structure is useful when you want a tall gaiter to resemble an intentional wardrobe basic rather than an embellished costume accessory.
Ribbing Should Stretch and Recover
For a tall piece, stretching is only half of the equation. The fabric also needs to recover reasonably well after being pulled over the foot, boot, or calf.
Test the first section several times before continuing to knee height. Permanent stretching near the top can lead to slipping later.
Keep the Upper Edge Below the Knee Crease
A clean ribbed gaiter benefits from a smooth top line.
Ending slightly below the bending point of the knee can reduce bunching when walking or sitting and keeps the silhouette visually separate from the thigh.
Creator Credit: Dress it up Debra
11. Crochet Color-Block Reversible Boot Gaiters
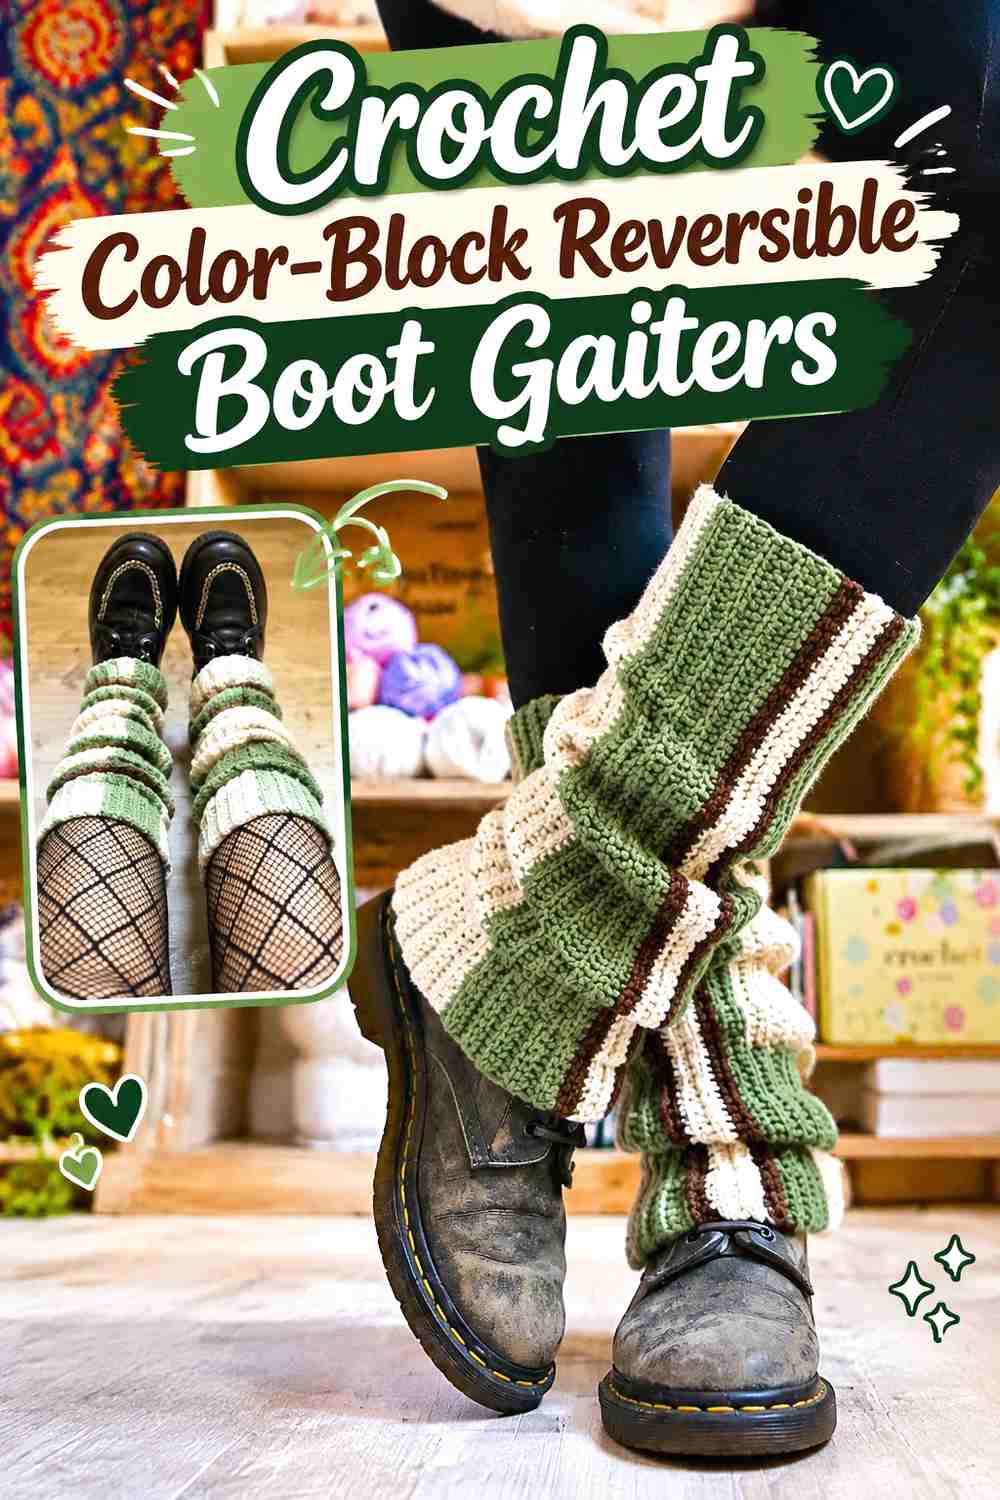
This tutorial uses several colors in a relatively simple leg-warmer construction, allowing different portions of the fabric to become visible depending on how the warmer is positioned. The color treatment is the main source of variety rather than a large applied decoration.
Plan Color Around the Visible Boot Line
With knee-high boots, part of a tall warmer may be concealed.
Before distributing colors evenly from ankle to knee, identify which section will remain visible. A carefully planned color block is more useful than an elaborate sequence that spends most of its time inside the boot.
Matching Two Multicolor Pieces Requires Attention
Even when the construction is simple, two gaiters can look noticeably different if color transitions land at inconsistent heights.
Compare the pair frequently so the dominant color bands line up similarly once worn.
Creator Credit: Bloodimaryart Crochet
12. Crochet Feather-Texture Boot-Top Gaiters
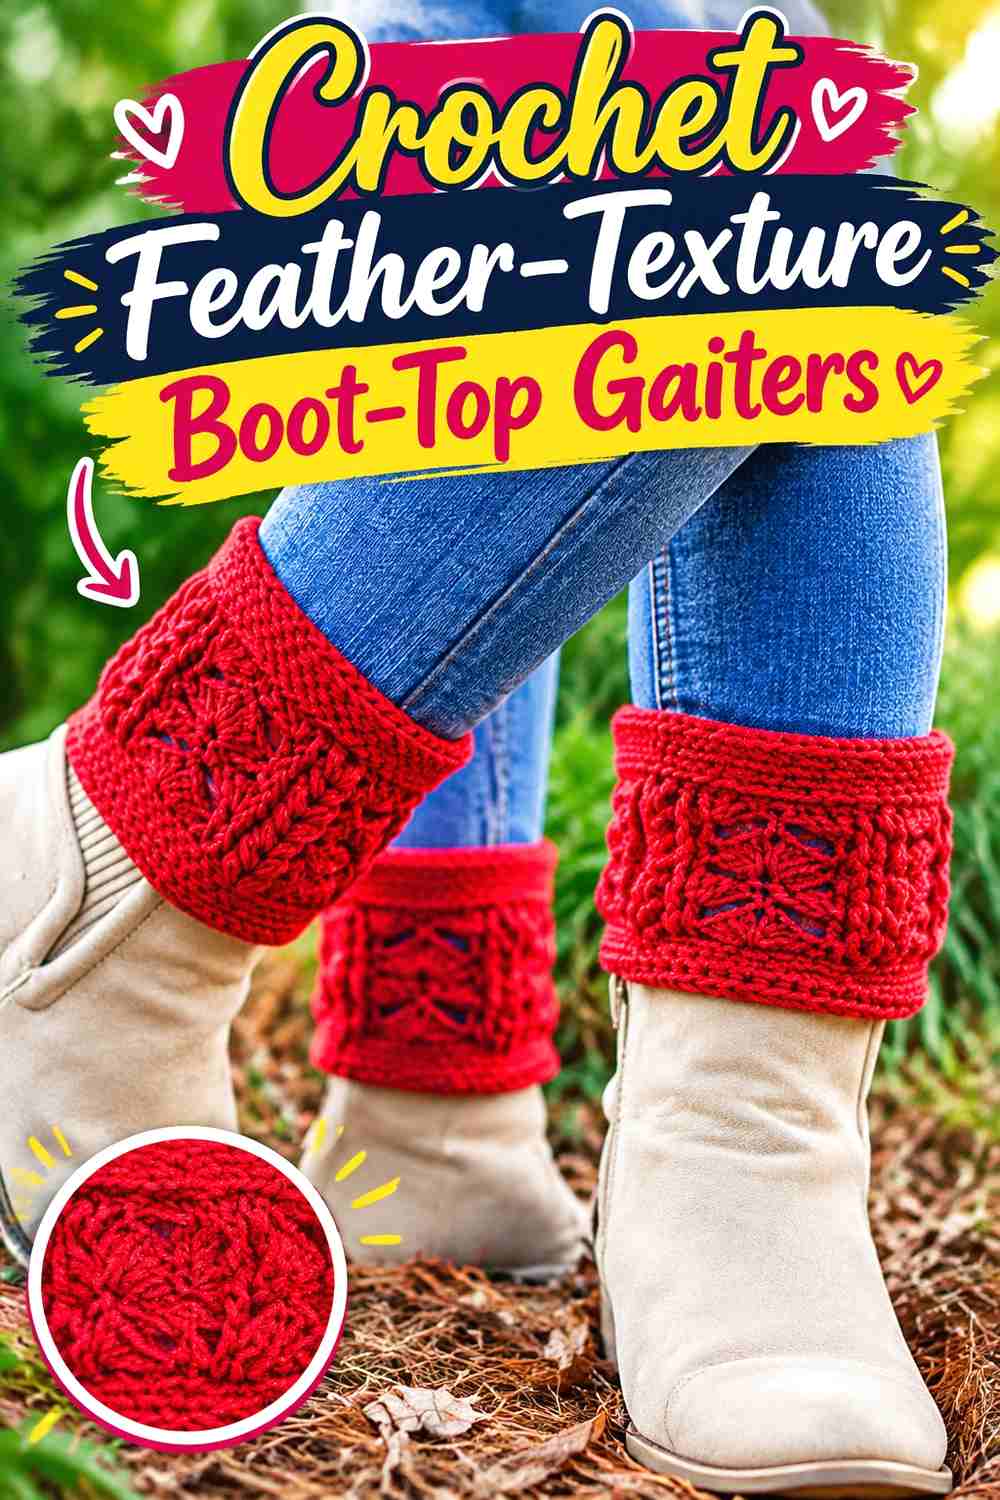
This boot-cuff tutorial combines a ribbed section with feather-stitch texture and explains that the cuff can be made longer. The source project itself is compact, so it is better treated as a boot-top construction reference than as an already knee-high design.
Extending Height Changes the Fit Problem
A short cuff only has to fit one relatively narrow zone of the leg. A taller gaiter moves through changing calf circumferences.
If you want to carry this concept toward knee height, do not simply repeat texture indefinitely without checking the fit against your leg.
Feather Texture Works Well as a Visible Upper Panel
Instead of extending the entire source construction, another styling approach is to keep the textured portion concentrated immediately above the boot.
This preserves the visual feature where it can be seen while avoiding unnecessary thickness under the boot shaft.
Creator Credit: Journey C. Designs
13. Crochet Chunky Buttoned Boot Gaiters
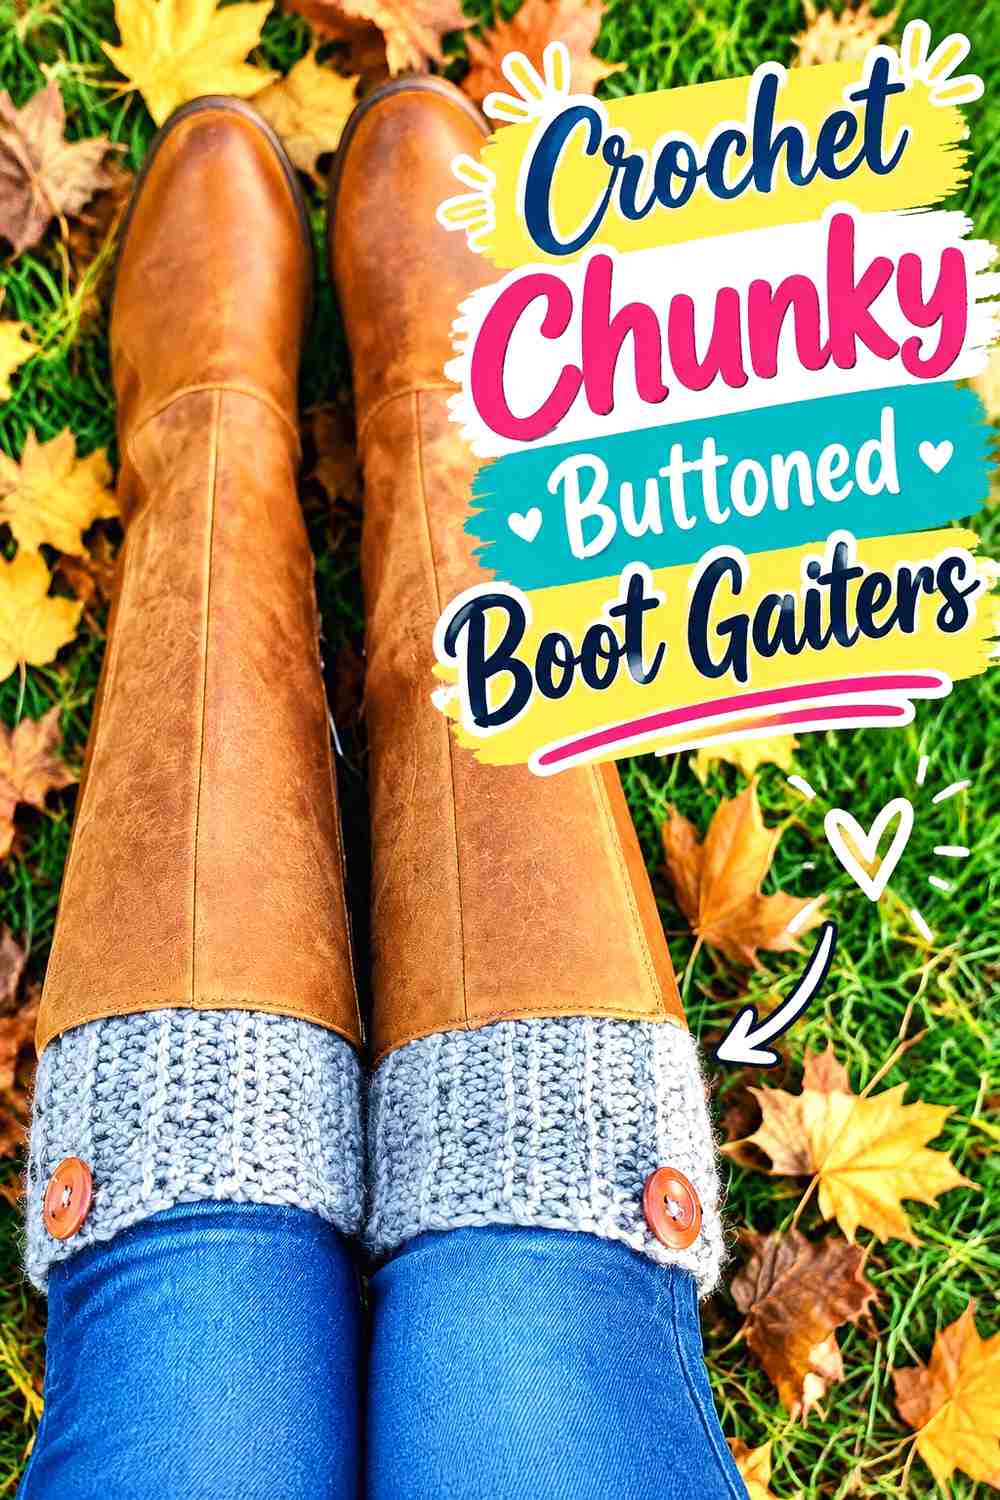
This chunky ribbed boot-cuff design includes decorative buttons, giving it a wrapped or outerwear-inspired appearance. The original project is shorter than a knee-high gaiter, but its substantial ribbing and button detail provide a distinct boot-top styling direction.
Keep Buttons Away From Pressure Points
A decorative button sitting underneath a tight boot shaft can press into the leg and create unnecessary bulk.
For knee-high styling, position any prominent button detail where it remains outside the boot rather than trapped beneath rigid footwear.
Chunky Yarn Needs Less Added Volume
Thick crochet becomes visually substantial quickly.
If adapting the style upward, a relatively streamlined body can balance the chunky yarn better than combining maximum height, large buttons, and heavy texture everywhere at once.
Creator Credit: MJ’s Off The Hook Designs
14. Crochet Minimal Bulky Boot Gaiters
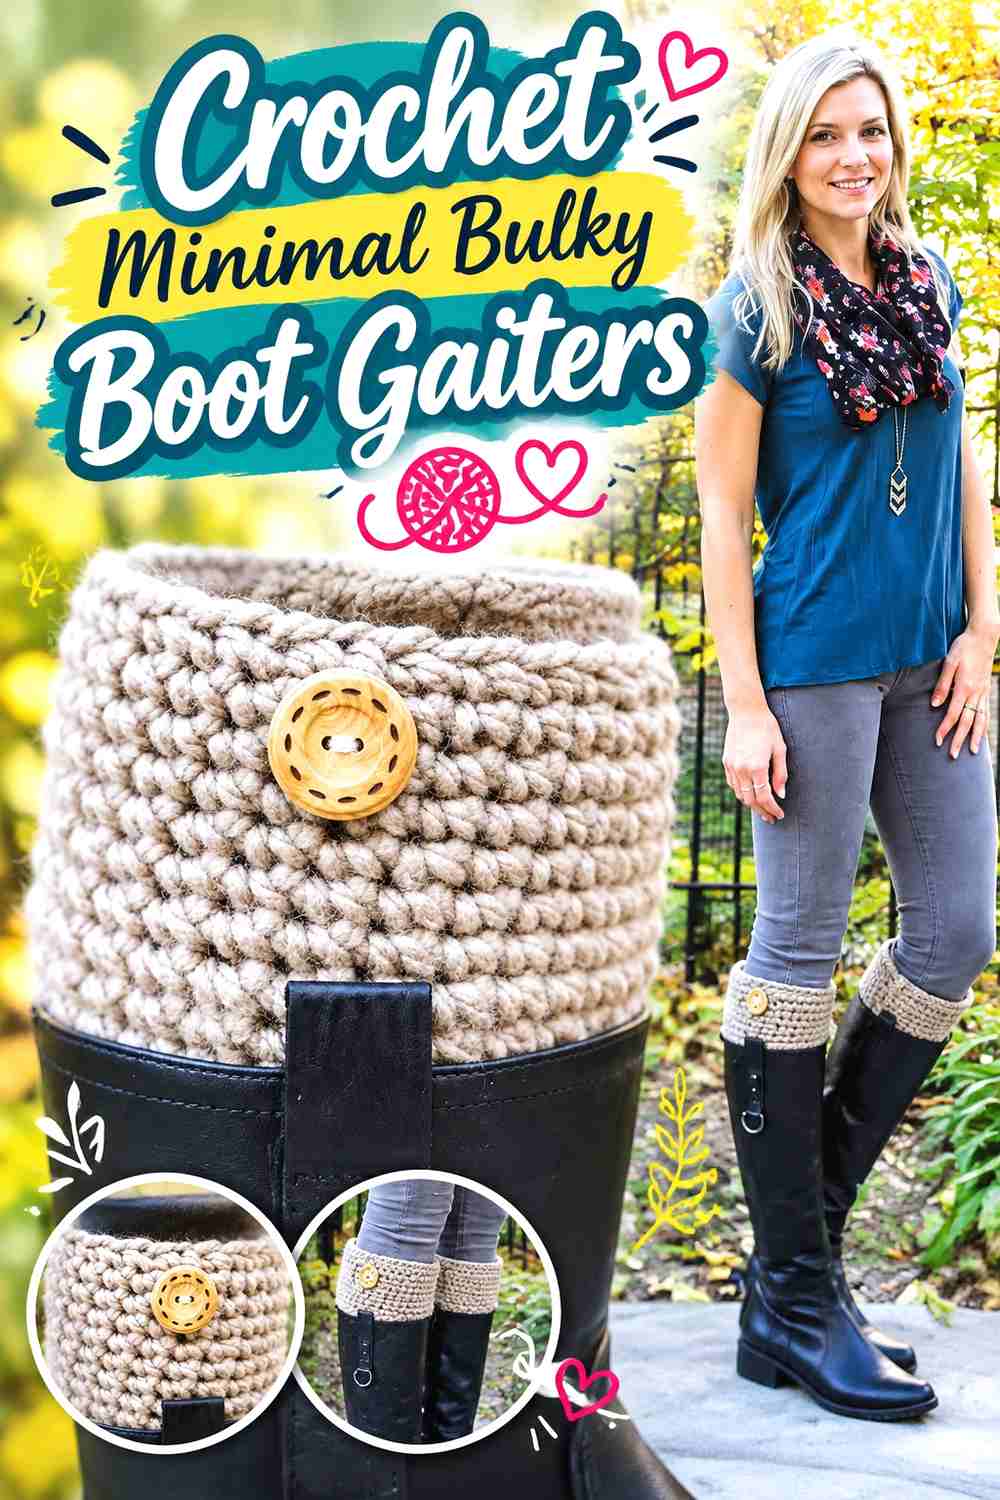
This simple boot-cuff tutorial uses bulky yarn and a straightforward surface. The compact source shape is useful as a reference for a minimalist gaiter where yarn thickness and proportion do more of the visual work than complicated stitching.
Bulky Fabric Can Fill the Boot Opening Quickly
If a knee-high boot is already fitted closely around the calf, dense bulky crochet may not fit comfortably underneath it.
Test a swatch between your leg and the boot before committing to an entire tall pair.
Simplicity Makes Proportion More Important
Without cables, motifs, or lace, differences in height and circumference become easy to see.
Lay both gaiters side by side during construction and compare their dimensions before seaming or completing the finishing work.
Creator Credit: Melanie Ham
15. Crochet Cable-Panel Boot Gaiters
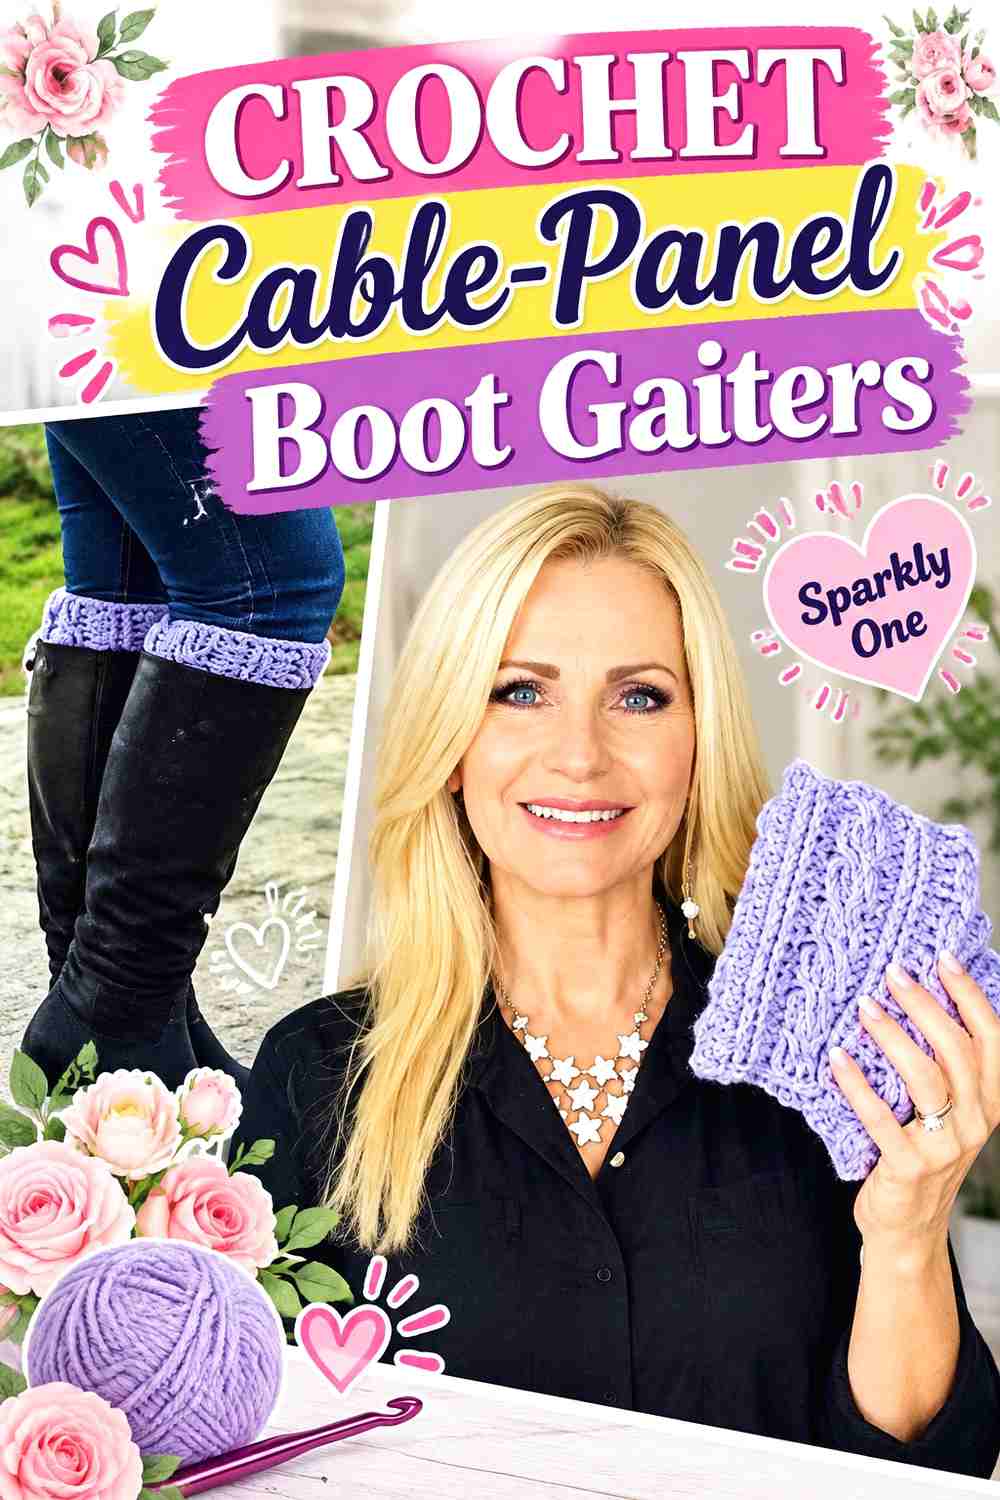
This boot-cuff tutorial introduces cable crochet as the main decorative element. The source piece is shorter, but the textured panel offers a useful idea for a knee-high gaiter where one concentrated cable section appears above the boot rather than covering the entire leg.
A Single Cable Panel Can Be Enough
You do not need cable texture around the entire circumference to create a strong winter look.
A front-facing or side-facing panel can supply the detail while flatter surrounding fabric reduces bulk and keeps the gaiter easier to layer.
Mark the Visual Front Before Finishing
Once the gaiter is worn around a boot, the orientation of the cable matters.
Use the seam or another reference point to keep both cable panels facing the same direction on the finished pair.
Creator Credit: Sparkly One
16. Crochet Flat-Panel Winter Boot Gaiters
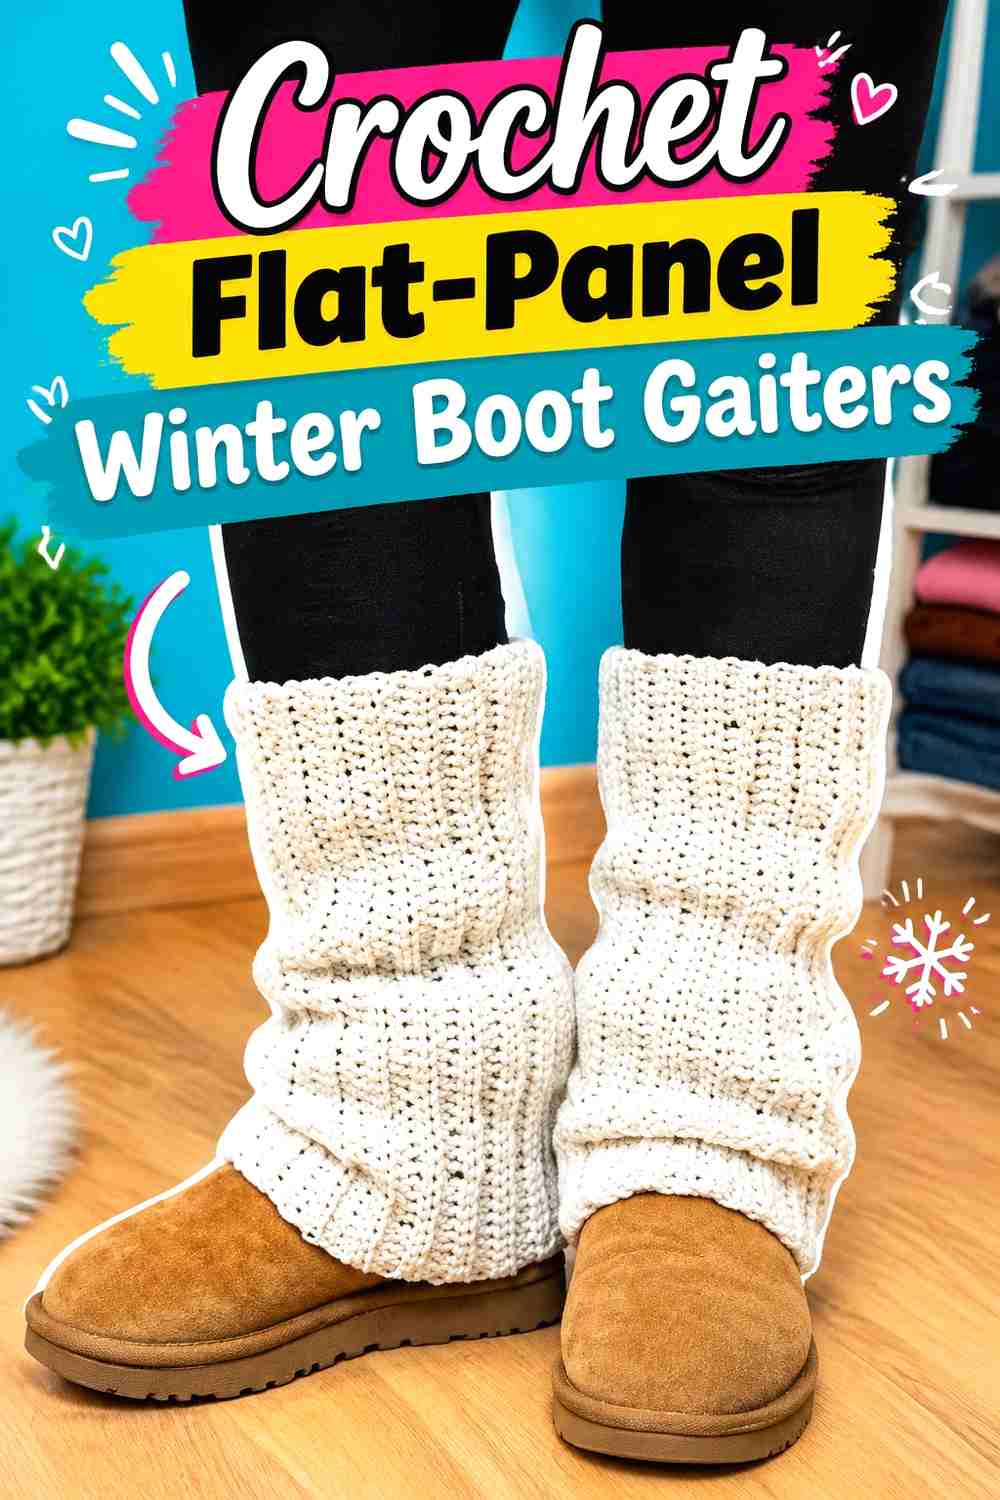
This leg-warmer tutorial begins with a flat panel that is joined to form the final tube. That construction makes it easier to compare two pieces side by side before seaming, which can be useful when you are aiming for the longer proportions of a knee-high gaiter.
Flat Construction Makes Length Easy to Compare
Before closing either panel, place both pieces together and check the top and bottom edges.
Small differences become much more noticeable when long gaiters are worn side by side, especially with matching boots.
Make Sure the Seam Can Handle Boot Layering
A seam can add a small amount of thickness compared with uninterrupted fabric.
Decide whether you want that join positioned toward the back, inner leg, or another less visible area, and check that it does not sit uncomfortably against a rigid boot edge.
Creator Credit: vivi e cuci
17. Crochet Beginner Ribbed Boot Gaiters
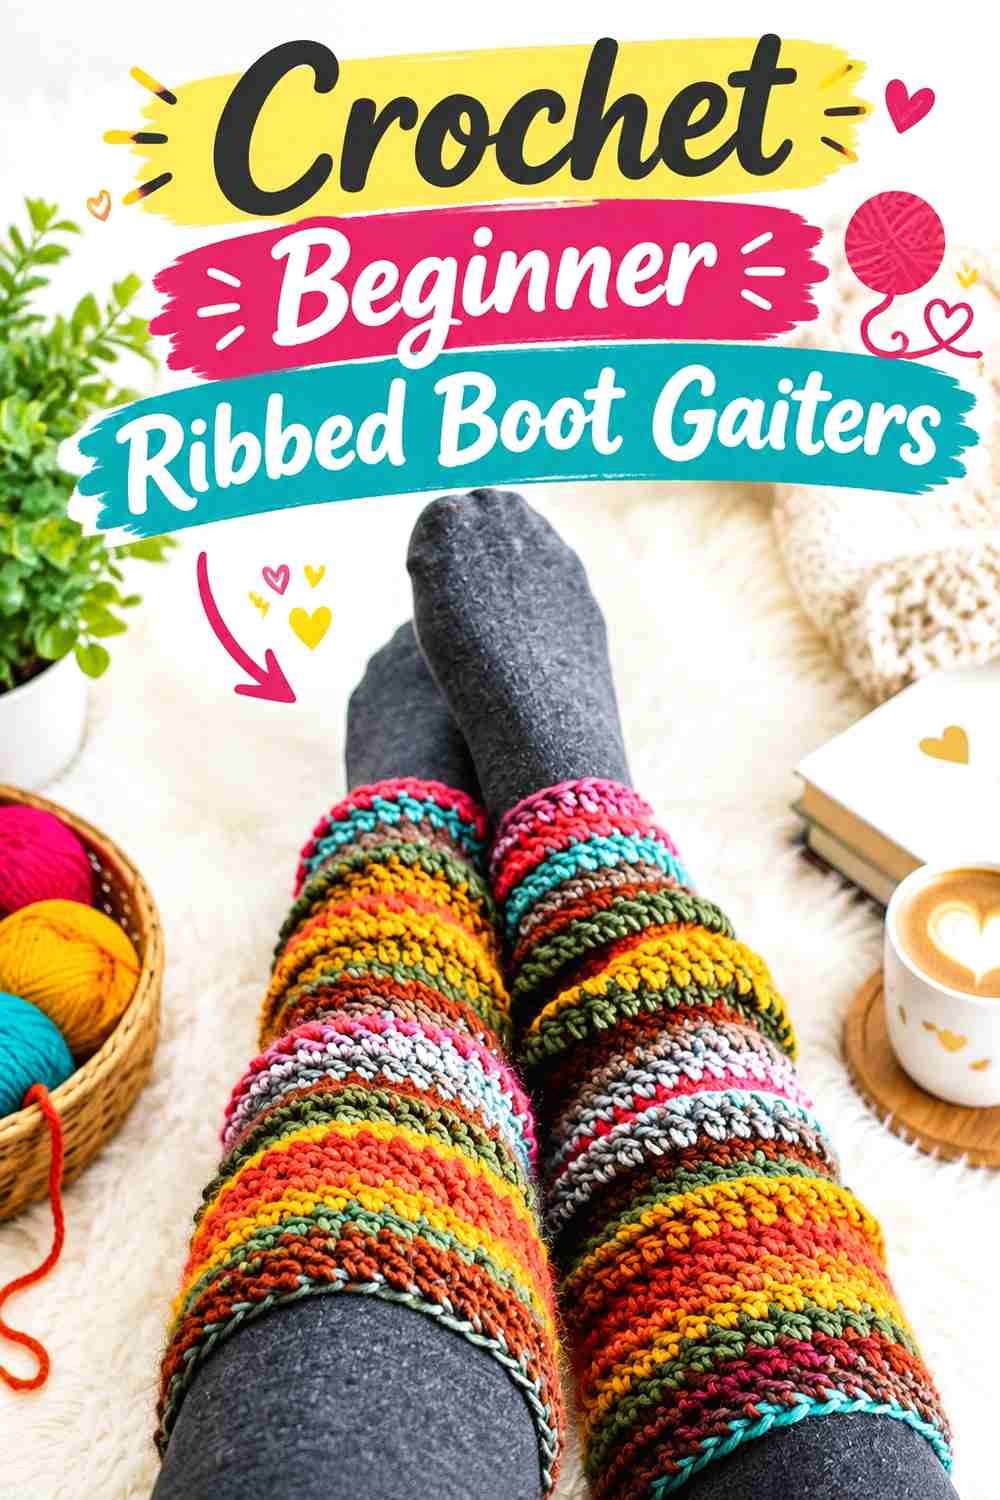
This beginner-focused leg-warmer tutorial uses a simple construction that can serve as a base for boot styling without additional appliqués or complex surface treatment. Its clear silhouette makes it useful when your main goal is learning how the basic leg-warmer form interacts with tall footwear.
Use the First Gaiter as the Real Fit Sample
Do not automatically begin the second piece as soon as the first is off the hook.
Try the completed or nearly completed gaiter with your knee-high boot, leggings, and normal winter layer. That real combination will reveal whether the length and circumference need adjustment.
Keep Basic Crochet Deliberately Basic
A simple design does not need extra decoration to justify its place in an outfit.
A strong yarn color, marl, tweed, or subtle self-striping effect can create enough interest while preserving an easy-to-style silhouette.
Creator Credit: B.Hooked Crochet
18. Crochet Shell-Stitch Slouchy Boot Gaiters
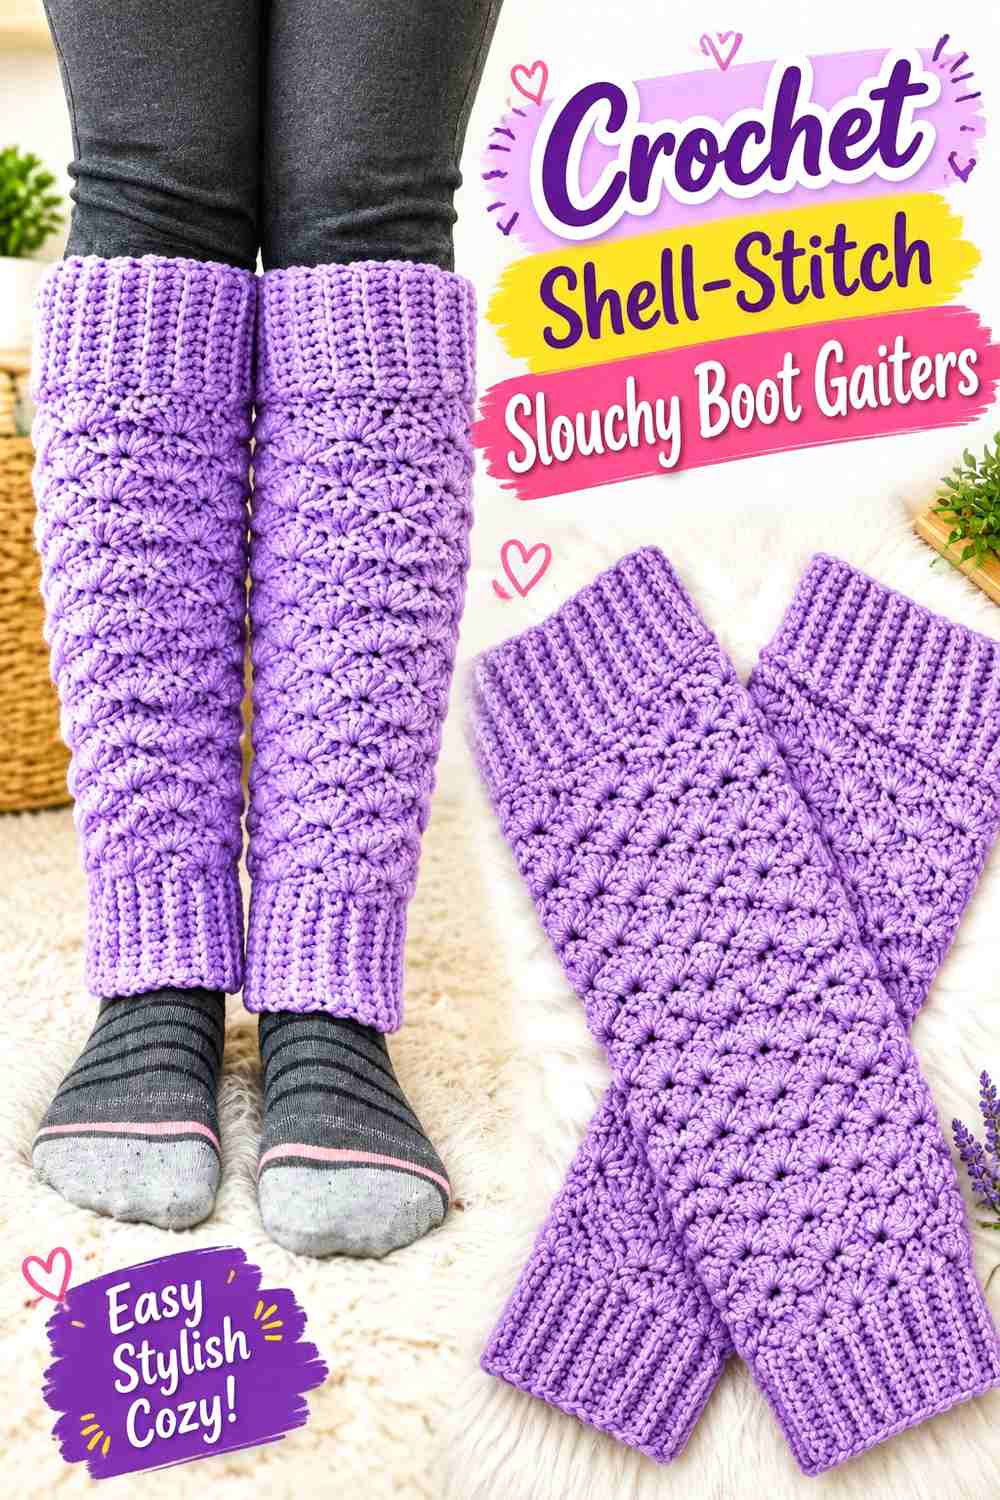
Shell stitch creates a visibly different surface from ribs and cables, while the source design can be modified in size and worn with a slouchier effect. That combination makes it a useful final option for readers who want a softer, less tailored knee-high gaiter silhouette.
Shell Texture Changes When the Fabric Slouches
Shells are easiest to read when the fabric is spread out. Once extra length collapses into folds, the pattern becomes denser and more layered visually.
Decide whether your priority is showing the stitch pattern or creating a relaxed pile of fabric above the boot.
Keep the Upper Edge More Controlled Than the Body
A slouchy gaiter still needs somewhere to anchor.
If the entire piece is equally loose, the folds may simply migrate downward. Follow the source’s fitting guidance and make sure the top area supports the amount of extra fabric you plan to add.
Creator Credit: Crochet With Akita
Choosing the Right Crochet Gaiter for Knee-High Boots
For the cleanest everyday look, compare the Treasurie tapered style, Dress it up Debra ribbing, Bag-O-Day adaptable version, Crochet MC classic tube, or B.Hooked beginner construction. Their simpler surfaces let fit and boot styling remain the focus.
If texture matters most, the TCDDIY cable design creates the strongest sculptural effect. Kae Neebs offers orderly vertical ribs, Crochet With Akita introduces shell texture, and The Crochet Crowd shifts attention toward the yarn itself with a curly surface.
For outfit-focused details, StelarCrafts and petpetcrochets use bows in different ways, while Vivi Crochet adds a recognizable cherry accent. MJ’s Off The Hook Designs and Sparkly One bring button and cable-cuff ideas into the boot-top area.
The shorter cuff tutorials are most useful as construction or styling references rather than ready-made knee-high patterns. If you extend one substantially, recheck circumference as the piece moves up the calf instead of relying on the source cuff measurement throughout.
Conclusion
The most successful crochet knee-high boot gaiter starts with the relationship between your leg and your boots, not with the decorative stitch.
For fitted outfits, choose ribbing or an adjustable tapered construction. For a softer silhouette, slouchy shells or textured leg warmers give extra movement. Cables create a stronger statement, while bows, buttons, cherries, and color blocks work best when you know exactly which portion will remain visible above the boot.
Most importantly, decide whether the crochet belongs inside, above, or outside the boot shaft before finalizing height and decoration. Use each original tutorial for its exact construction and sizing method, particularly when adapting a shorter boot cuff into a taller piece.
For actual wet or deep snow, keep the role of crochet realistic. These projects can contribute warmth and winter style, but waterproof boots and technical gaiters are the appropriate equipment when moisture protection is necessary.
Frequently Asked Questions
Are crochet boot gaiters waterproof enough for snow?
No waterproof performance should be assumed from crochet fabric. Yarn type, stitch density, and finishing do not turn a fashion leg warmer into technical snow equipment. Use weather-rated boots and purpose-built gaiters when you need to keep snow or water out.
How tall should a crochet gaiter be for knee-high boots?
That depends on the boot shaft and how much crochet you want visible. Put the boots on and measure from their upper edge to the point below the knee where you want the gaiter to finish. Do not rely only on a generic knee-high measurement because boot heights and leg proportions differ.
Should crochet gaiters go inside or outside knee-high boots?
Either can work if the construction suits it. Narrow ribbed fabric may fit inside the boot, while chunky cables, buttons, ruffles, and other bulky details generally make more sense above or outside the shaft. Check available room inside the boot before adding thick crochet.
How can I stop tall crochet leg warmers from sliding down?
Start with the tutorial’s intended sizing method and pay particular attention to upper-edge stretch and recovery. A taller piece carries more weight than a short cuff. Ribbing, appropriate negative ease where specified by the designer, drawstrings, or other source-supported fit features may help, but the top should not be made uncomfortably tight simply to prevent slipping.
Can I turn a short crochet boot-cuff tutorial into a knee-high gaiter?
Sometimes, but extending height changes more than yarn quantity. The leg becomes wider through the calf, the finished piece becomes heavier, and decorative sections may land in different places relative to the boot. Use the creator’s adjustment guidance where available and perform fit checks as the height increases.
Which crochet texture works well with simple winter boots?
Vertical ribs give a clean, garment-like look, while cables create stronger relief. Shell stitches produce a softer decorative surface, and novelty yarn makes fiber texture more prominent than stitch definition. Choose according to how much contrast you want against the boot.
Should I measure over leggings or directly against my leg?
Measure over the type of clothing you normally expect to wear underneath the gaiters. A pair sized over bare skin may fit differently over thermal leggings or thicker winter pants. If the crochet will also sit over part of the boot, check that circumference separately.