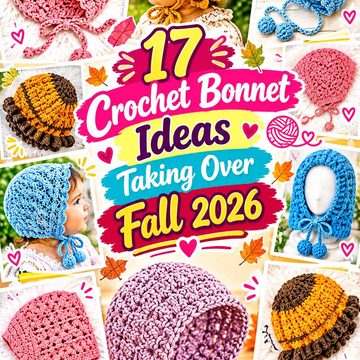
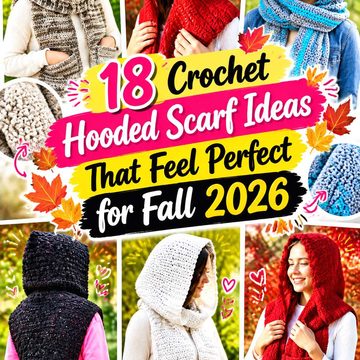
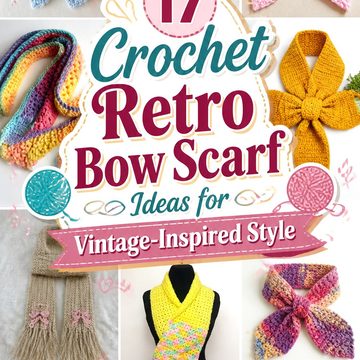
A crochet bow bonnet hood scarf can range from a true tie-front bonnet to a roomy scoodie with scarf ends that are adapted into a decorative bow. That difference matters. Some shapes frame the face closely, while others prioritize neck coverage, pockets, patchwork, soft drape, or a rounded hood that behaves more like a separate scarf-and-hat combination.
This collection covers all of those routes for fall 2026. The first bonnet tutorials already feature long ties as part of the finished design. Several later tutorials teach hooded scarves, scoodies, and cowls rather than bows specifically; for those, the bow is an optional styling or finishing idea rather than something attributed to the creator. Use the comparisons below to choose the underlying construction first, then decide how prominent you want the bow to be.
Quick List
- Crochet Oversized Long-Tie Bow Bonnet
- Crochet Soft Mohair Long-Tie Bonnet Hood
- Crochet Granny-Square Bow-End Scoodie
- Crochet Color-Block Shaped Hood Scarf with Bow Ties
- Crochet Airy Mohair Hood Scarf with Side Bow
- Crochet Slimline Scoodie with Ribbon-Style Ends
- Crochet Two-Style Granny-Square Bow Hood Scarf
- Crochet Pocket Hood Scarf with Statement Bow
- Crochet Rounded Striped Scoodie with Bow Ends
- Crochet Short-Row Hood Scarf with Neck Bow
- Crochet One-Piece Ribbed Hood Scarf with Detachable Bow
- Crochet Mixed-Scale Granny-Square Bow Hood Scarf
- Crochet Chunky Rounded Scoodie with Oversized Bow
- Crochet Rounded Classic Scoodie with Bonnet Ties
- Crochet Super-Bulky Pocket Hood Scarf with Bow Accent
- Crochet Luxe Draped Hood Scarf with Soft Bow
- Crochet Super-Bulky Hood Scarf with Tie-Front Bow
Choose the Hood Shape Before You Choose the Bow
A bow does not fix the wrong underlying silhouette. A bonnet-style hood usually sits closer to the sides of the face and naturally places ties near the jaw. A scoodie gives you longer scarf sections and more freedom to knot, wrap, or leave the ends loose. Granny-square versions add visible seams and more structure, while a rounded hood avoids the pointed back that can appear when a simple rectangle is folded and joined.
Start by deciding how you expect to wear the piece most often. If you want a recognizable bonnet outline, prioritize the first two ideas or the rounded-hood options. If neck coverage matters more, choose a longer hooded scarf. For decorative fall layering, a patchwork or draped version can make the textile itself the focal point, with the bow kept smaller.
Yarn Drape Changes the Look of the Ties
Two ties with the same general shape can behave very differently depending on the fabric. A lofty or haloed yarn can produce a soft, blurred bow with less visible stitch definition. Smooth yarn makes the edges and loops clearer. Thick yarn increases the physical and visual size of every knot, while lighter fabric can create longer ties without adding as much bulk around the neck.
Before extending any scarf end specifically for bow styling, make a small swatch and handle it the way you would the finished tie. Fold it, knot it loosely, and see whether it springs open, collapses, or becomes too thick. Also remember that changing yarn can alter the fit of the original hood. Preserve the tutorial’s construction logic and confirm your own gauge or measurements before making major proportion changes.
Plan Bow Placement Without Distorting the Hood
A decorative bow should not have to pull the hood closed just to stay visible. On a true bonnet, the ties may naturally control the opening, so comfortable placement around the jaw and neck becomes important. On a scoodie or hooded scarf, it is often better to treat the bow as an accent created from scarf ends or a separate removable tie rather than tightening the hood itself.
Try the finished hood on before deciding where a decorative bow should sit. Look at the face opening, shoulder line, and coat collar together. A side bow can leave the center front uncluttered; a low neck bow can make the piece feel more bonnet-like; bow-ended scarf tails create a decorative effect without changing hood fit. For children, avoid adding long cords or loose embellishments without considering entanglement and age-appropriate garment safety.
1. Crochet Oversized Long Tie Bow Bonnet
1. Crochet Oversized Long Tie Bow Bonnet
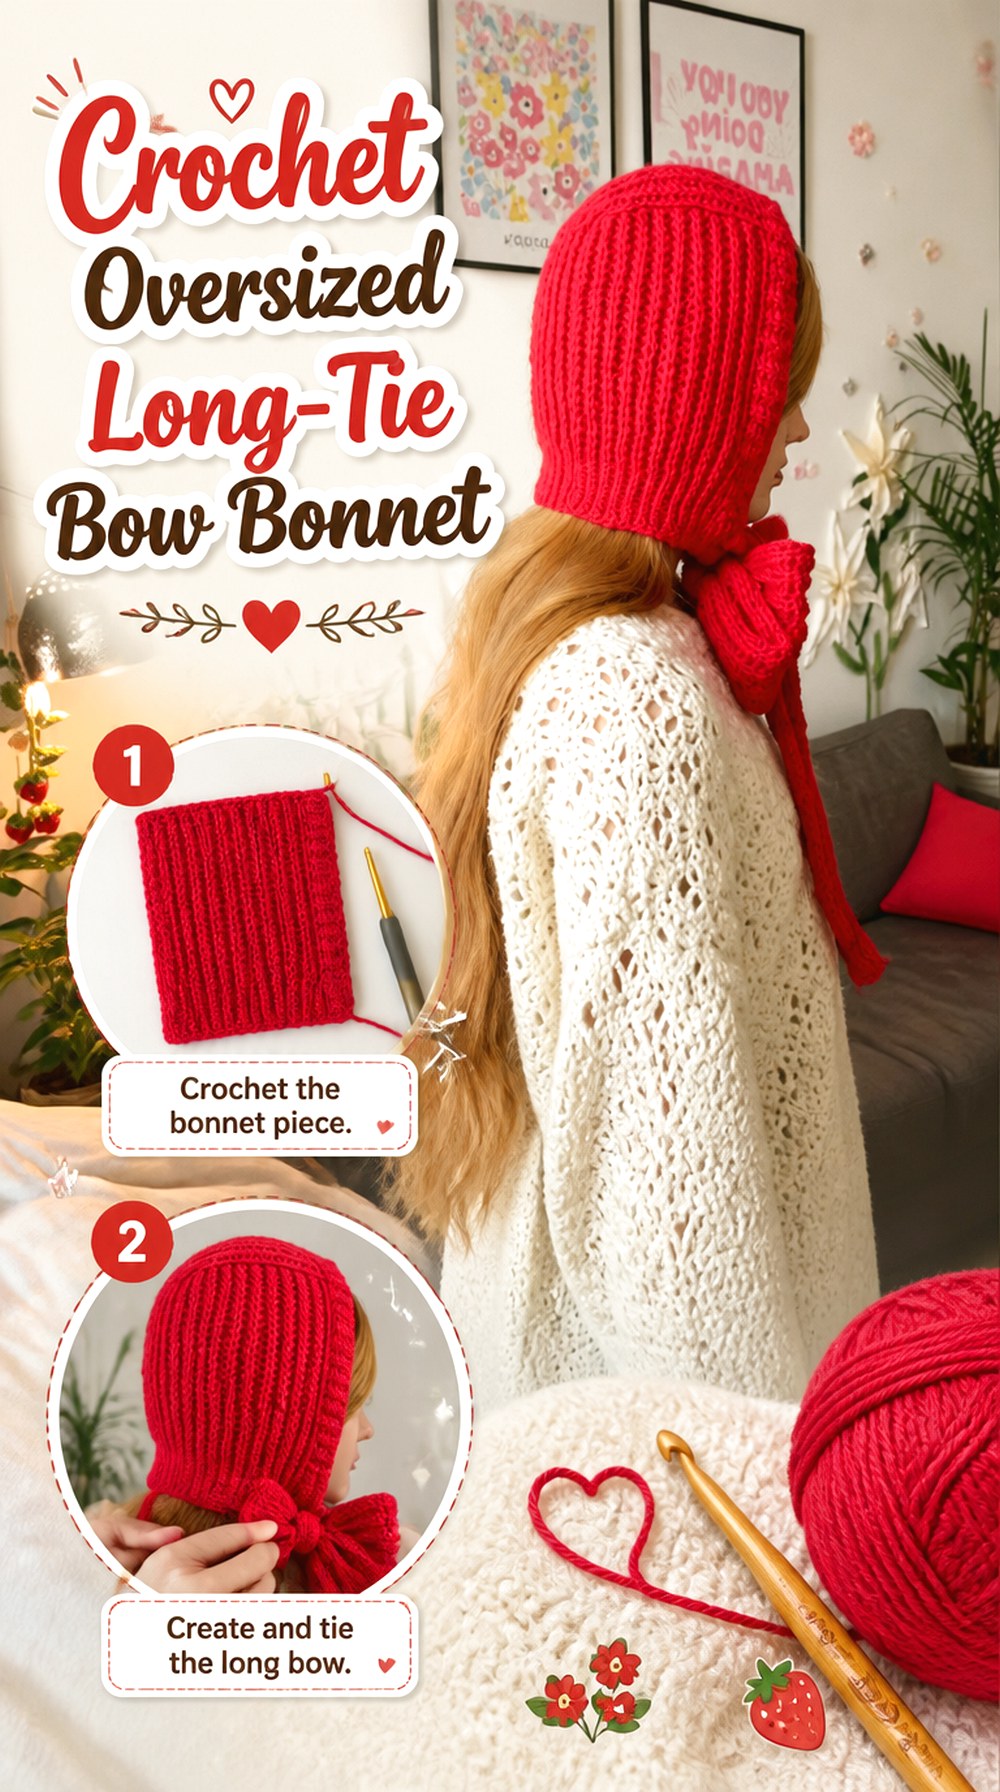
This is the closest match to the full bow-bonnet idea: a crochet bonnet with visibly long ties that can become a prominent bow below the chin or toward one side. Instead of relying on a full scarf for neck coverage, the ties themselves provide much of the visual drama. That makes the project a strong choice when the bonnet outline is more important than having long scarf panels.
For fall styling, this form works especially well as a standalone head-and-neck accent over a simple coat or sweater. Because the tie treatment is already central to the source design, you do not need to invent a separate bow attachment.
Long Ties Are the Design, Not an Afterthought
On this bonnet, shortening the ties substantially would change the character of the finished piece. Before adjusting them, decide whether you want a full looped bow, a loose knot with hanging tails, or ties that mostly remain open. Each choice needs different usable length, so compare the tutorial’s finished appearance with how you actually intend to wear yours rather than choosing tie length from appearance alone.
Keep the Bonnet Opening Comfortable When the Bow Is Tightened
A dramatic bow can tempt you to pull the ties harder than necessary. Check the hood around the jaw, ears, and lower face before cinching it. The bow should secure or decorate the bonnet without forcing the front edge into an uncomfortable position. If the opening looks right only when the ties are very tight, revisit the hood fit rather than using the bow to compensate.
Original Tutorial and Creator Credit
2. Crochet Soft Mohair Long Tie Bonnet Hood
2. Crochet Soft Mohair Long Tie Bonnet Hood
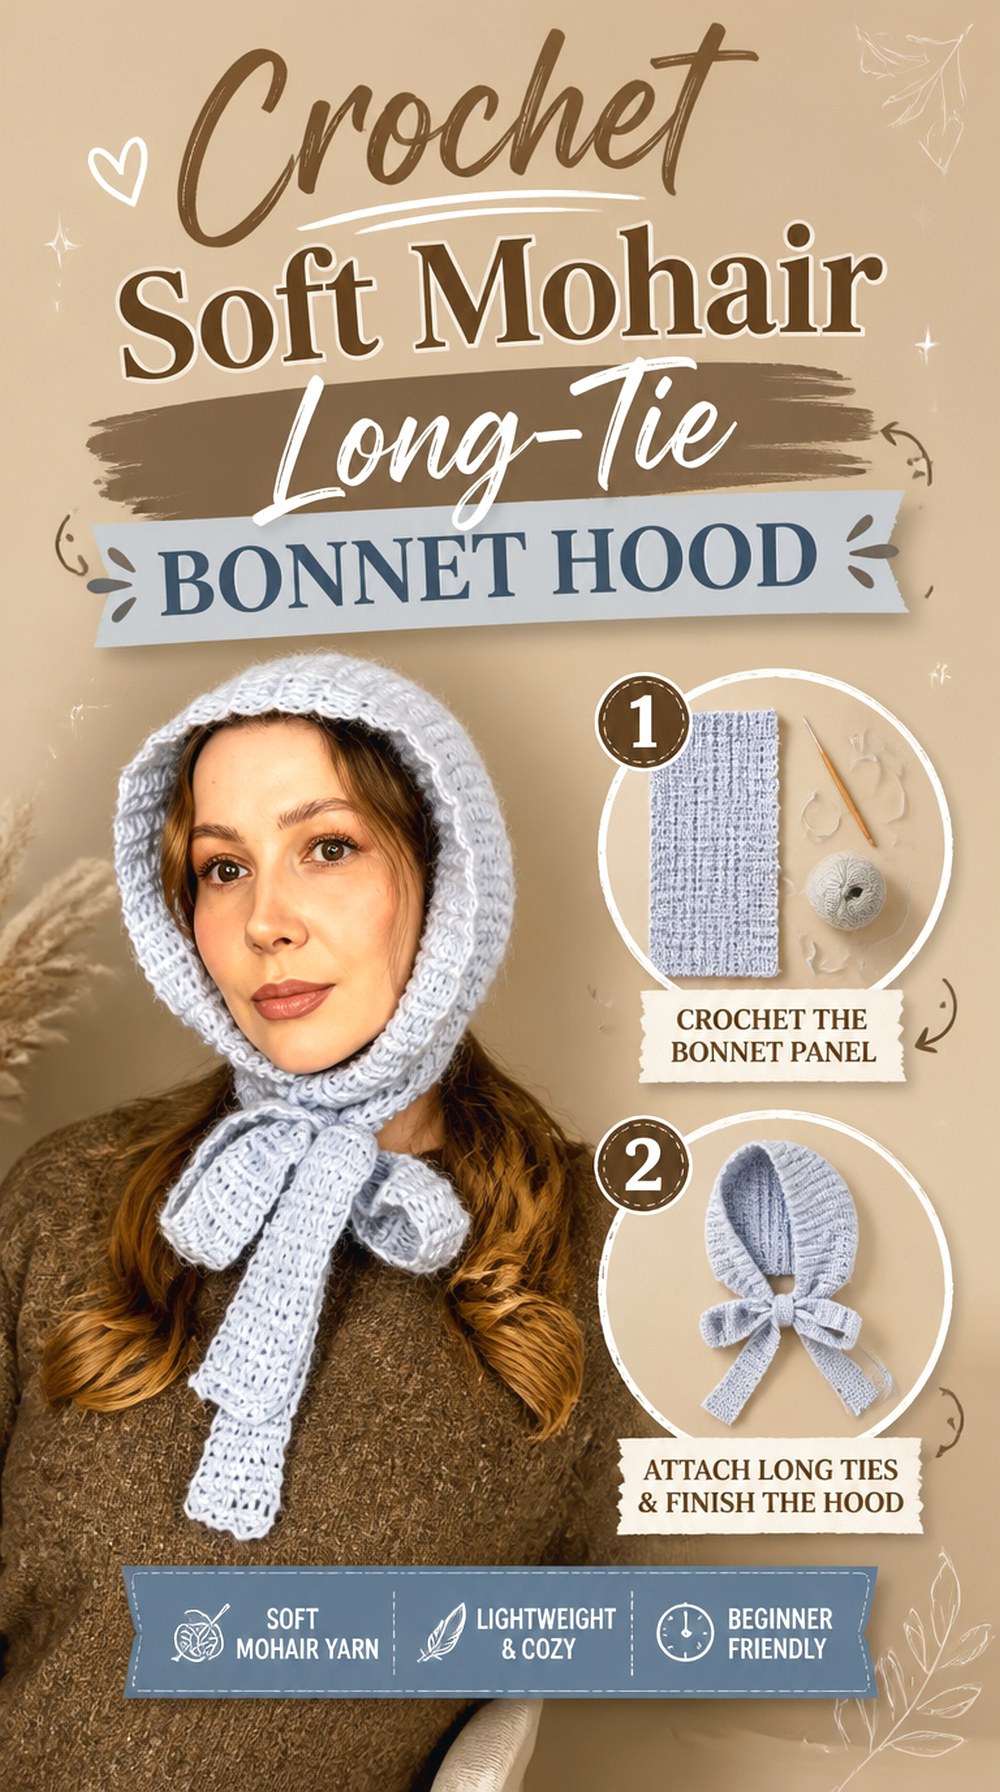
A softer long-tie bonnet gives the same basic bow opportunity with a noticeably different surface. DIYGuru’s updated bonnet tutorial uses a fluffy mohair-based fabric, so the finished edges read less sharply than a smooth-yarn bonnet. That can suit a romantic fall look where the bow is meant to appear soft and relaxed rather than crisp and graphic.
This shape is also useful if you want the hood itself to remain visually simple. There are no pockets or patchwork panels competing with the ties. The main decisions are therefore proportion, yarn behavior, and how much of the long-tie silhouette you want visible over outerwear.
Soft Halo Makes the Bow Read More Diffusely
Fuzzy fibers soften the boundaries between stitches. That can make a large bow look gentle and cloudlike, but intricate little loops may disappear into the halo. If you substitute yarn, compare not only weight but also surface texture. A smoother yarn can turn the exact same general tie shape into a much more defined, ribbon-like feature.
Long Ties Need Enough Body to Hang Cleanly
A tie can be long without looking elegant if the fabric twists, curls, or stretches too freely. Once you have enough of the tie completed to judge it, let it hang vertically and loosely knot it. This gives you more useful information than evaluating it flat on a table. Check whether the two sides behave similarly before finishing both ends.
Check the Hood Profile Before Changing Yarn
The source uses a specific soft, lofty material approach, so substituting a denser yarn can affect more than the bow. A firmer fabric may hold the bonnet away from the head or make the front edge feel heavier. Swatching and checking the developing hood against your intended fit is more reliable than assuming two yarns with similar label categories will drape alike.
Original Tutorial and Creator Credit
Creator: DIYGuru
3. Crochet Granny Square Bow End Scoodie
3. Crochet Granny Square Bow End Scoodie
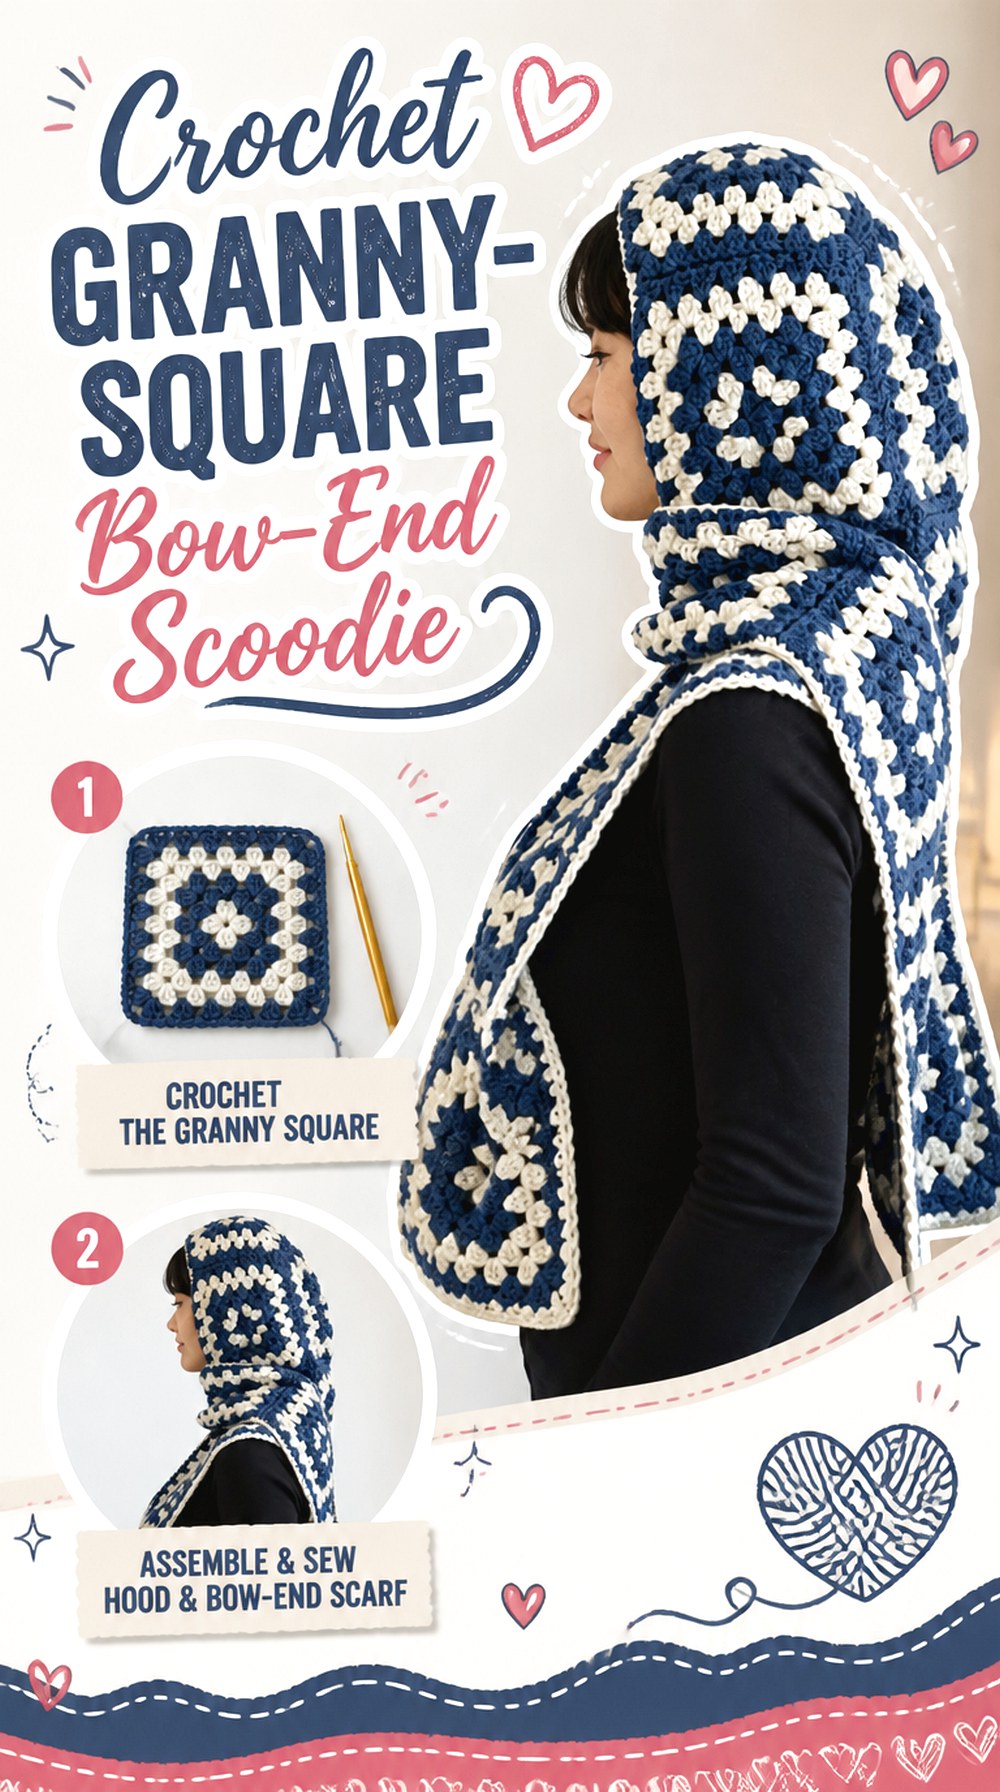
Käthe’s scoodie takes a completely different route by building the hooded scarf from granny squares. That gives the finished piece visible geometry and color-placement opportunities before any bow treatment is added. For a fall version, the scarf ends can become the bow feature: keep the hood construction from the tutorial, then consider whether the end proportions suit a loose decorative knot or an independently added tie.
The strength of this idea is modular planning. Instead of one uninterrupted fabric surface, you can decide where the eye lands through square arrangement. A bow should support that patchwork rather than covering the strongest motifs.
Square Placement Controls Where the Bow Sits
Before joining the final layout, mark the squares that will fall nearest the neck and scarf ends. A striking motif may disappear if it lands directly inside a knot. More restrained squares near the tying area can let a colorful hood remain dominant while still giving the bow enough contrast to read clearly.
Keep the Granny Join Flexible Around the Jaw
Joined motifs naturally introduce additional structure. Around a hood opening, an overly rigid join can make the edge behave differently from a continuous scarf. Flex the joined area gently before committing to extra decorative ties. If the front already feels firm, a softer bow treatment will usually integrate better than another thick layer of crochet.
A Narrow End Can Make a Cleaner Knot
A full-width granny-square scarf end may produce a substantial knot. If you want a visible bow without excessive bulk, consider a separate narrower tie or a visually tapered finishing concept rather than forcing an entire patchwork panel into a bow. Preserve the creator’s original construction and treat the bow as an optional finishing layer.
Original Tutorial and Creator Credit
Creator: Käthe
4. Crochet Color Block Shaped Hood Scarf with Bow Ties
4. Crochet Color Block Shaped Hood Scarf With Bow Ties
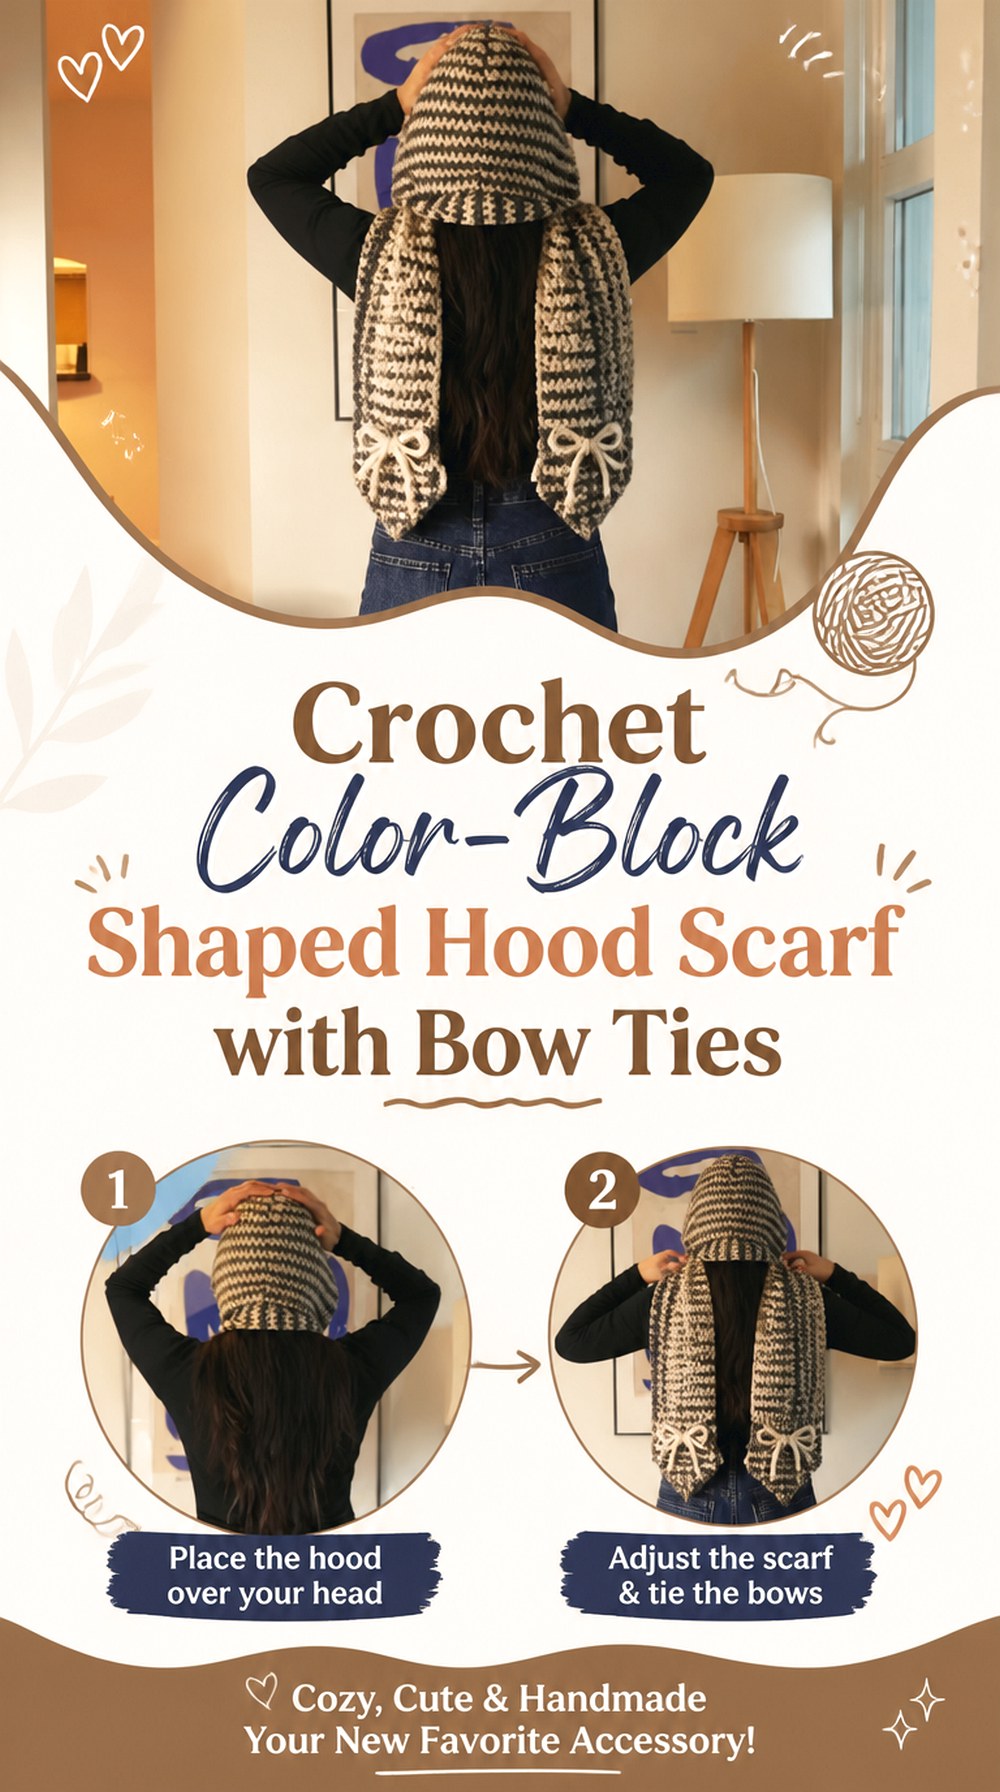
Andrea Quinteros’s scoodie offers a shaped, seamed construction rather than a simple folded rectangle or motif assembly. Its color changes can be used to make the hood and scarf read as separate visual zones, which is useful when adapting the ends into bow-style ties. A two-color fall palette can keep the project graphic without needing extra embellishment.
This option suits readers who want a recognizable scarf first and a bonnet-inspired bow second. The bow is not part of the original tutorial, so follow the creator’s shaping and assembly for the scoodie itself, then evaluate whether the scarf ends can be styled or supplemented without altering the hood fit.
Color Blocks Can Guide the Eye Toward the Face
Color placement changes where the hood appears to begin and end. If one shade frames the face and another dominates the scarf, a bow made from the scarf color becomes a deliberate continuation rather than a random add-on. Lay your planned colors beside each other before starting; similar values will look subtle, while stronger contrast will emphasize the construction lines.
Shaping Matters Before You Add Decorative Ties
This tutorial includes deliberate hood shaping, so preserve that structure before experimenting with extra length or ornament. A good checkpoint is the completed hood-and-scarf connection. If it already sits correctly on the shoulders and around the head, any bow addition can remain decorative instead of becoming responsible for correcting fit.
Let the Bow Sit Below the Hood Seam
Placing a thick knot directly over a structural join can make the area bulky and obscure how the hood falls. A slightly lower bow position usually keeps the scarf-and-hood transition readable. Test the location while wearing the piece with the type of neckline you expect to pair with it.
Original Tutorial and Creator Credit
Creator: Andrea Quinteros
5. Crochet Airy Mohair Hood Scarf with Side Bow
5. Crochet Airy Mohair Hood Scarf With Side Bow
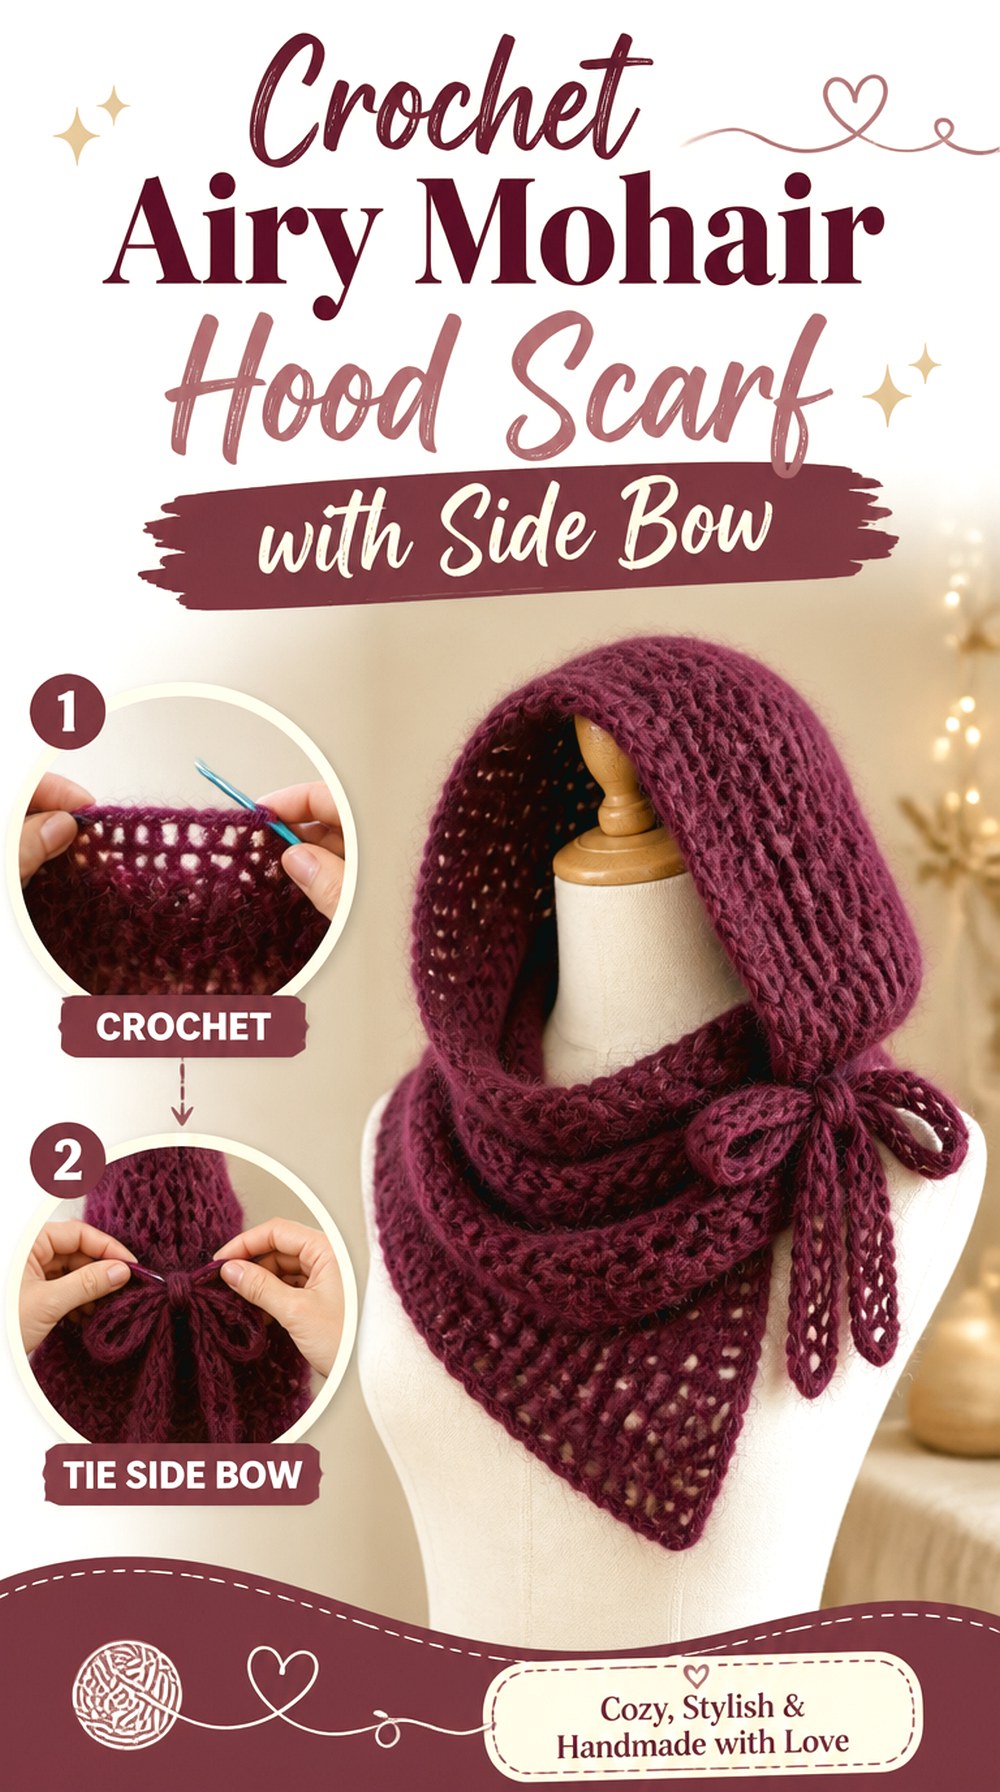
Cromatico Crochet’s scoodie uses a soft mohair approach, giving this version a lighter-looking, more atmospheric surface than the chunky scarf hoods later in the list. The long scarf silhouette makes it a useful base for a loose side bow, especially when you want the knot to look relaxed rather than tightly structured.
The original video teaches the hood-and-scarf project, not a bow conversion. For this variation, the key is restraint: preserve the flowing fabric and add only as much bow treatment as the yarn can support without bunching around the neck.
Mohair-Like Halo Can Blur Small Bow Details
A fuzzy yarn rewards larger, simpler shapes. Tiny crochet ties, narrow edging, or complicated layered loops may disappear visually. If the bow matters, test it at the scale you expect to wear it. A broad loose knot can remain readable even when individual stitch lines are softened by the fiber.
Side Placement Keeps the Front Opening Clear
Moving the bow toward one side can prevent a soft, fluffy fabric from stacking directly beneath the chin. It also lets the hood opening remain the main face-framing element. Try both sides before deciding; coat closures, bags, or your usual hair placement may make one position more comfortable.
A Lightweight Scarf Tail Helps Balance the Hood
When the hood has visible volume but the scarf remains fluid, the two elements can balance each other without feeling heavy. Avoid assuming that longer is automatically better for a bow. Extend only after checking how much fabric gathers into the knot and whether the loose tails still fall naturally.
Original Tutorial and Creator Credit
Creator: Cromatico Crochet
6. Crochet Slimline Scoodie with Ribbon Style Ends
6. Crochet Slimline Scoodie With Ribbon Style Ends
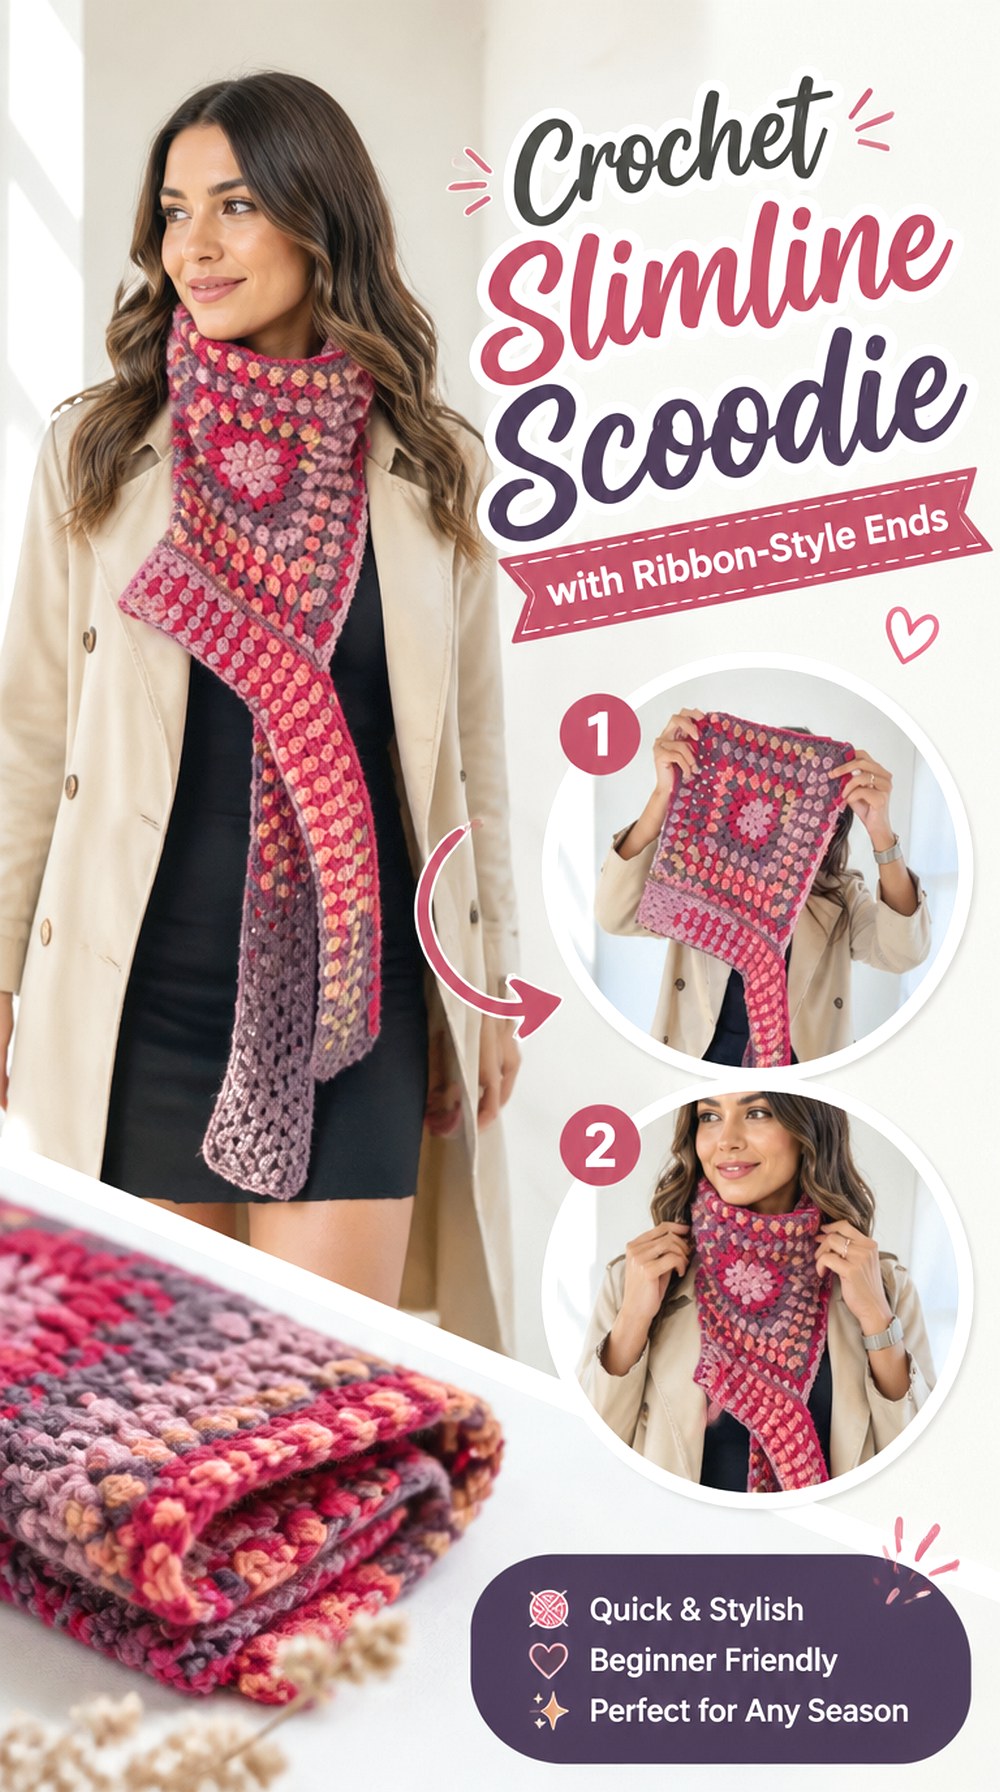
The boobair.crochet scoodie provides a cleaner, narrower-looking route for readers who do not want an oversized patchwork or pocket scarf. That makes it a practical base for ribbon-like ends: instead of creating the largest possible bow, the goal is a smaller tie detail that keeps the accessory easy to layer.
This version can work well with fall jackets because the visual weight stays concentrated around the hood rather than spreading into broad scarf panels. Since the source tutorial focuses on the scoodie itself, treat any additional bow length as a fit-and-styling decision you make after the core proportions are established.
Slim Scarf Ends Work Well for a Smaller Bow
Narrower fabric gathers more easily into a compact knot than a wide, chunky scarf. That can create a bonnet reference without turning the bow into the largest element. Before adding length, practice tying the existing end loosely. You may already have enough fabric for the look you want.
Watch Stretch Before You Lengthen the Ties
Long narrow crochet strips can grow more noticeably in wear than short ones, especially in a stretchy stitch or fiber. Let the scarf ends hang for a while before judging their final proportion. If they lengthen under their own weight, adding extra rows purely for a larger bow may produce more drop than expected.
Original Tutorial and Creator Credit
Creator: boobair.crochet
7. Crochet Two Style Granny Square Bow Hood Scarf
7. Crochet Two Style Granny Square Bow Hood Scarf
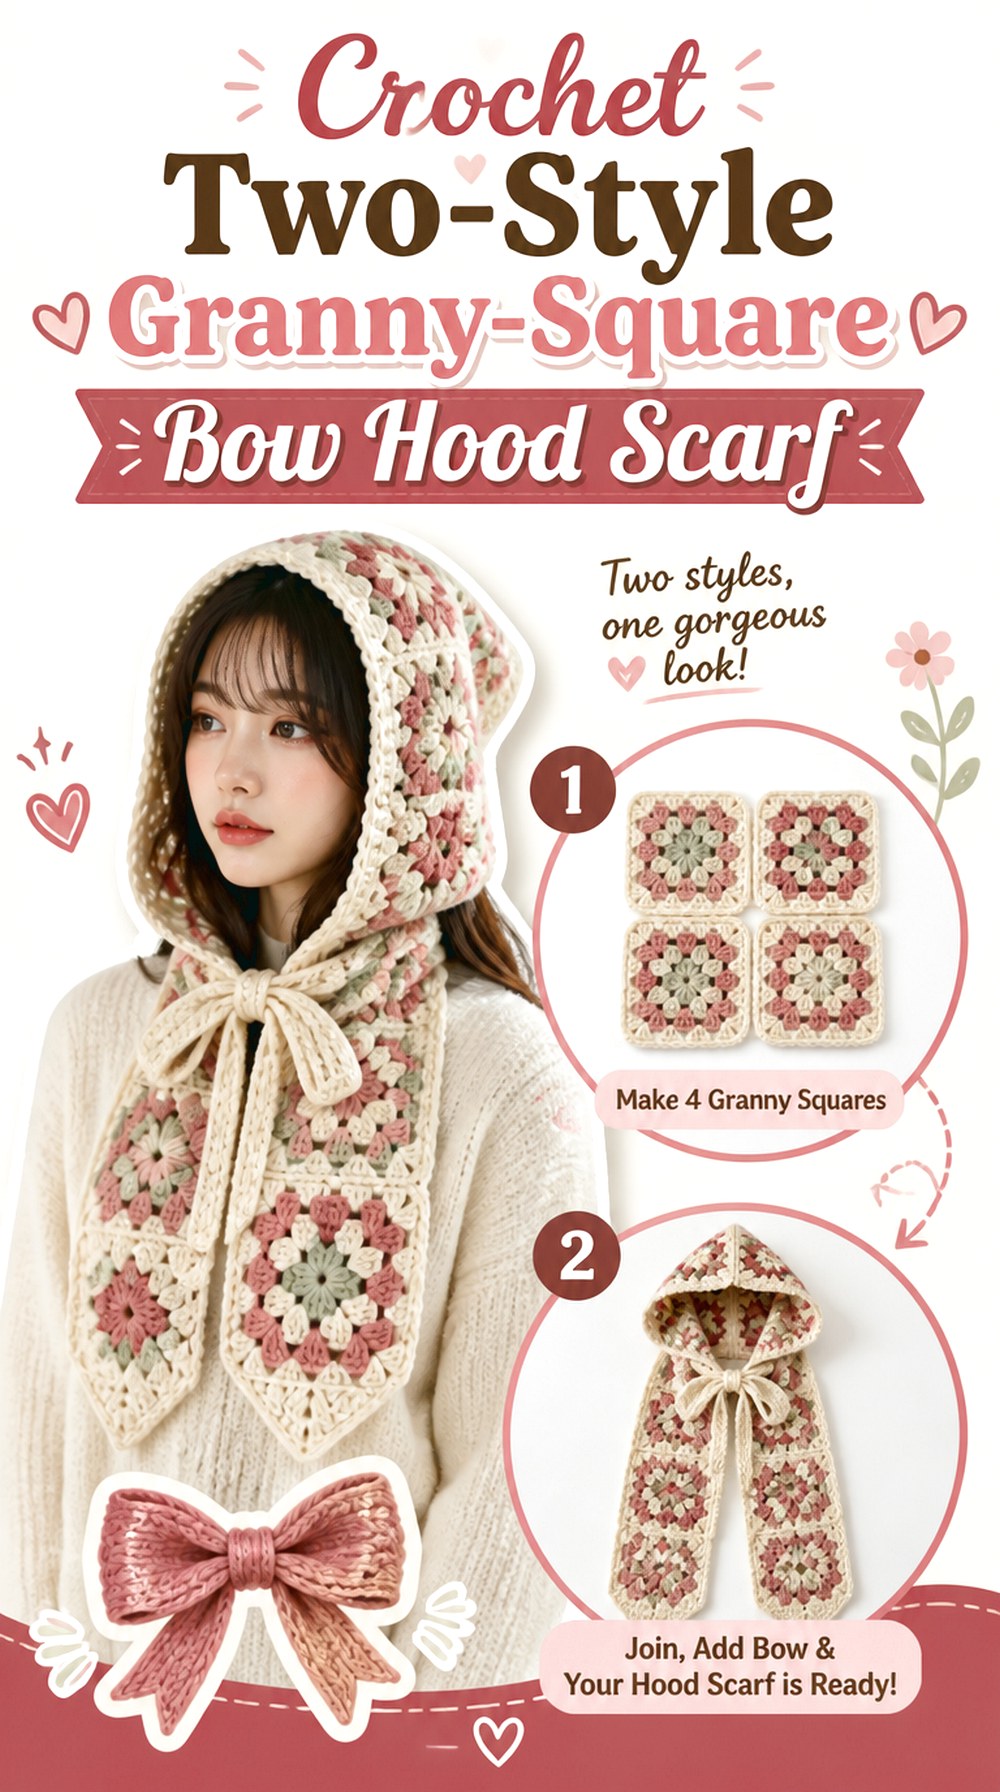
Mrs.H demonstrates a granny-square hooded scarf in two different styles, making this a useful choice when you like patchwork but are not sure how much visual volume you want around the hood. The bow adaptation can then be matched to the selected version rather than forcing the same finishing idea onto both.
For fall, the squares give you room to mix muted colors, but construction still matters more than palette. Confirm the size and behavior of the joined fabric first. A hood made from motifs can feel substantially different from an uninterrupted crocheted panel, especially once additional ties are introduced.
Use the Two Tutorial Styles to Choose Hood Volume
Compare the source’s finished alternatives before buying yarn or planning embellishment. A roomier hood can support a larger visual detail at the neck, while a more compact version may look better with a narrow tie. Choosing the base silhouette first prevents the bow from overwhelming the proportions later.
A Bow Can Separate Patchwork from Neck Coverage
A solid-color bow or tie can act as a visual break between a multicolor hood and the rest of the scarf. This is useful when the motif layout already contains several colors. Instead of adding one more pattern, repeat one existing shade and let the change in shape provide the contrast.
Match Blocked Squares Before Adding Tie Extensions
Motifs that appear equal while freshly crocheted can settle differently after blocking. Compare their finished dimensions before the permanent joining stage. If the patchwork is already uneven, long ties may exaggerate the asymmetry by pulling differently on each side.
Original Tutorial and Creator Credit
Creator: Mrs.H
8. Crochet Pocket Hood Scarf with Statement Bow
8. Crochet Pocket Hood Scarf With Statement Bow
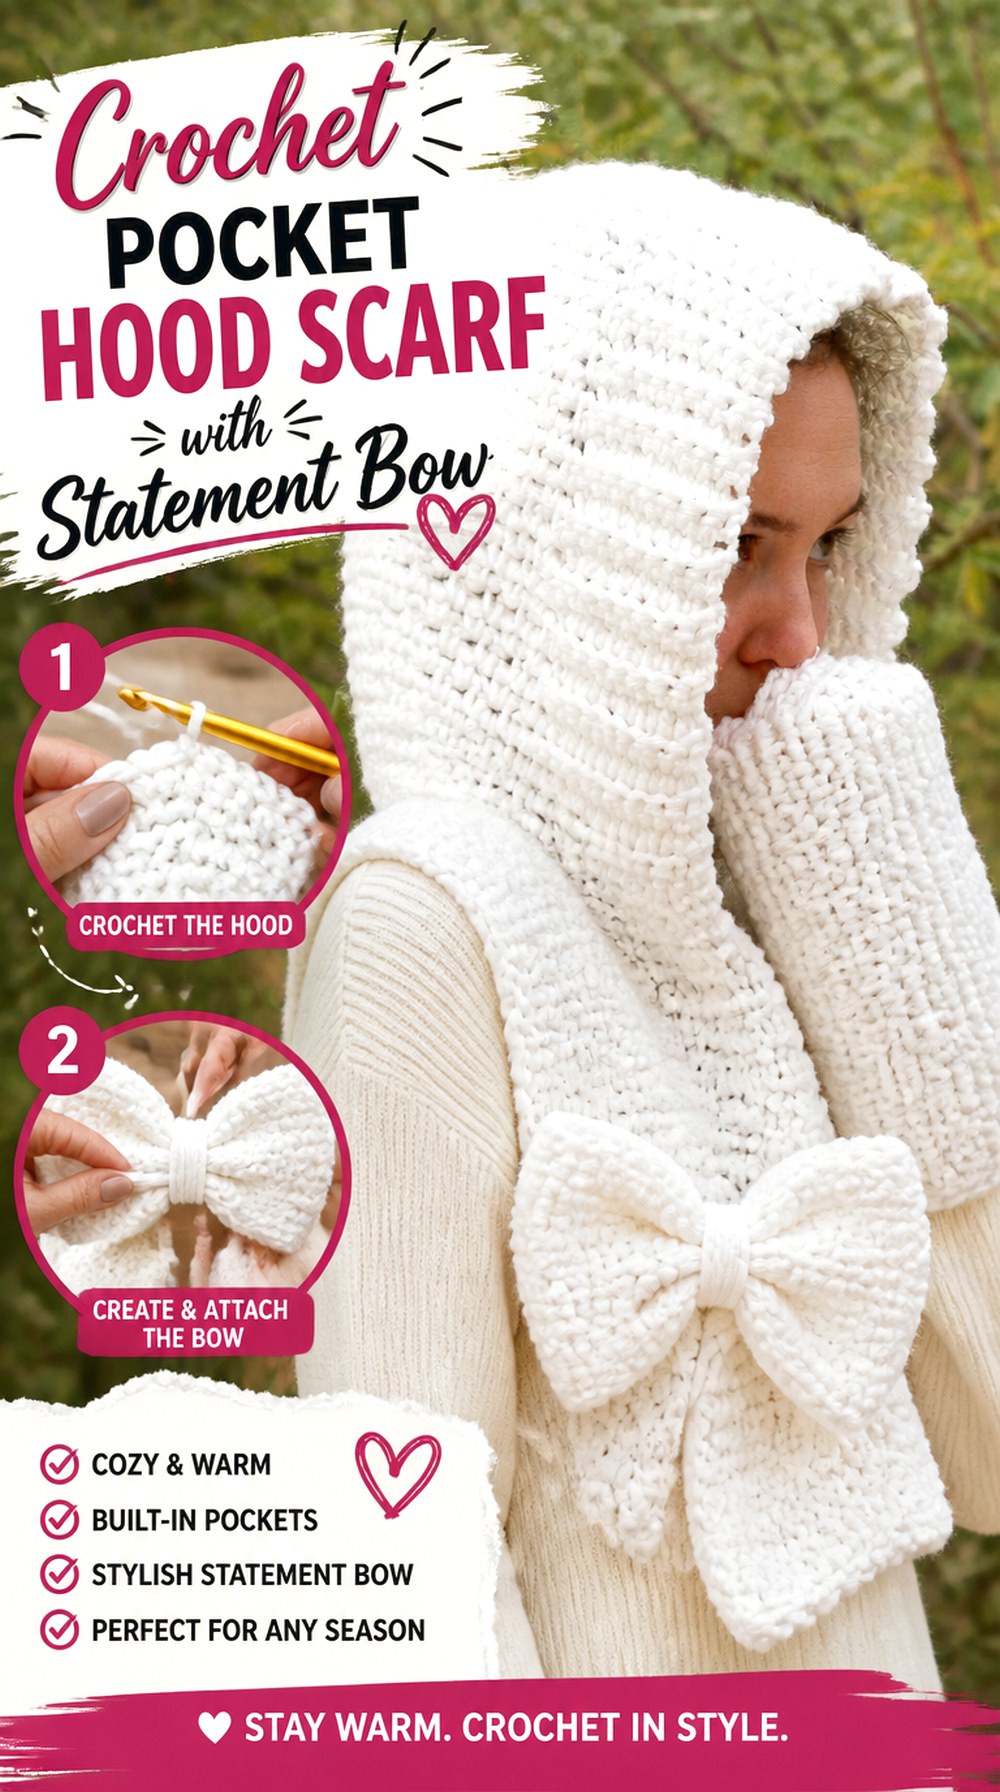
A hooded scarf with pockets already performs several jobs at once: head covering, neck wrap, long scarf, and hand-warming storage. Winding Road Crochet’s tutorial therefore makes a strong base for a more substantial fall accessory. A bow can still fit the look, but it should be planned around the pockets instead of added automatically to the ends.
One approach is a decorative side bow near the upper scarf rather than a knot formed from the pocketed ends. This keeps the functional lower sections usable and avoids compressing the pockets whenever the scarf is tied.
Pockets Already Add Weight to the Lower Scarf
Pocket layers make the ends behave differently from a plain scarf. Folding those same sections into a tight bow can create a thick knot and may make the pockets awkward to access. Try the finished scarf normally first, then choose a bow location that does not interfere with how your hands naturally reach the pockets.
Put the Bow Where It Won’t Compete with the Pocket Line
A bow near the shoulder or upper chest gives the eye a focal point without turning the lower scarf into a cluster of overlapping fabric. Pin or temporarily tie a sample ribbon in several locations before crocheting a permanent accent. This simple visual test can prevent an otherwise balanced pocket scarf from becoming crowded.
Reinforce Only What Needs Support
If you add a separate bow, its attachment should not distort the scarf beneath it. A large embellishment may need a firmer attachment area, but reinforcing the entire scarf edge can change drape unnecessarily. Keep structural changes localized and continue to rely on the creator’s tutorial for the original pocket-scarf construction.
Original Tutorial and Creator Credit
Creator: Winding Road Crochet
9. Crochet Rounded Striped Scoodie with Bow Ends
9. Crochet Rounded Striped Scoodie With Bow Ends
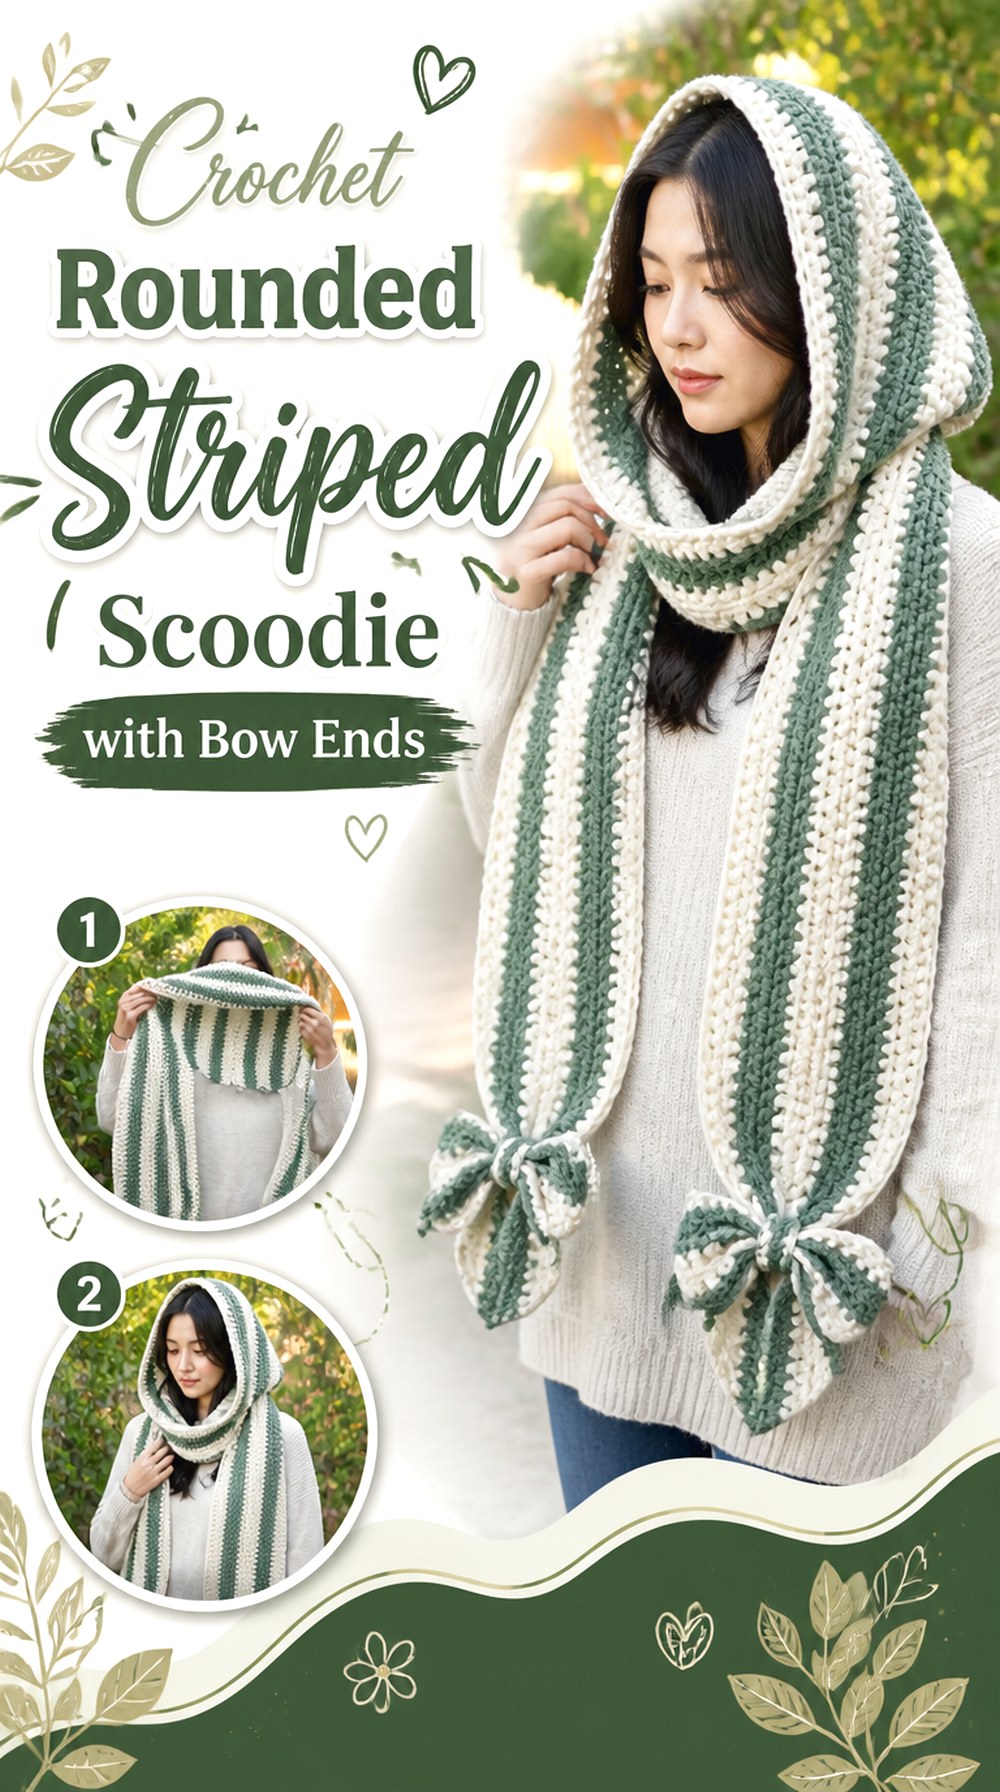
VivCrochets’ hooded scarf stands out because its construction avoids the pointed back common to many folded hood shapes. The rounded profile already moves the accessory closer to a modern bonnet silhouette, while continuous stripes make the scarf ends visually connected to the hood.
For a bow adaptation, the ends can remain part of that stripe story. A loose knot or bow will bend the stripes into new directions, creating movement without needing another embellishment. The source also uses a no-sew construction, so extra decorative decisions should not undermine the clean continuous character that makes this project distinctive.
Rounded Shaping Gives the Hood a Softer Back Profile
If a bonnet-like outline is important, look at the hood from the side as well as the front. A rounded crown sits differently over hair and under a coat hood than a pointed one. Preserve that shaping when adjusting scarf length; changing the lower sections should not require changing the crown.
Stripes Change the Bow’s Visual Scale
A wide stripe crossing one bow loop reads very differently from several narrow color changes. Before settling on a stripe sequence, imagine which colors may land in the tying zone. If you want the bow clearly visible, avoid letting its two halves become visually unrelated unless that asymmetry is intentional.
No-Sew Construction Rewards Careful Color Planning
Because the hood and scarf read as one continuous object, color transitions become especially noticeable. A separate contrasting bow may interrupt that flow. If you prefer a cohesive result, keep the bow within the existing palette and let the change in direction provide enough emphasis.
Original Tutorial and Creator Credit
Creator: VivCrochets
10. Crochet Short Row Hood Scarf with Neck Bow
10. Crochet Short Row Hood Scarf With Neck Bow
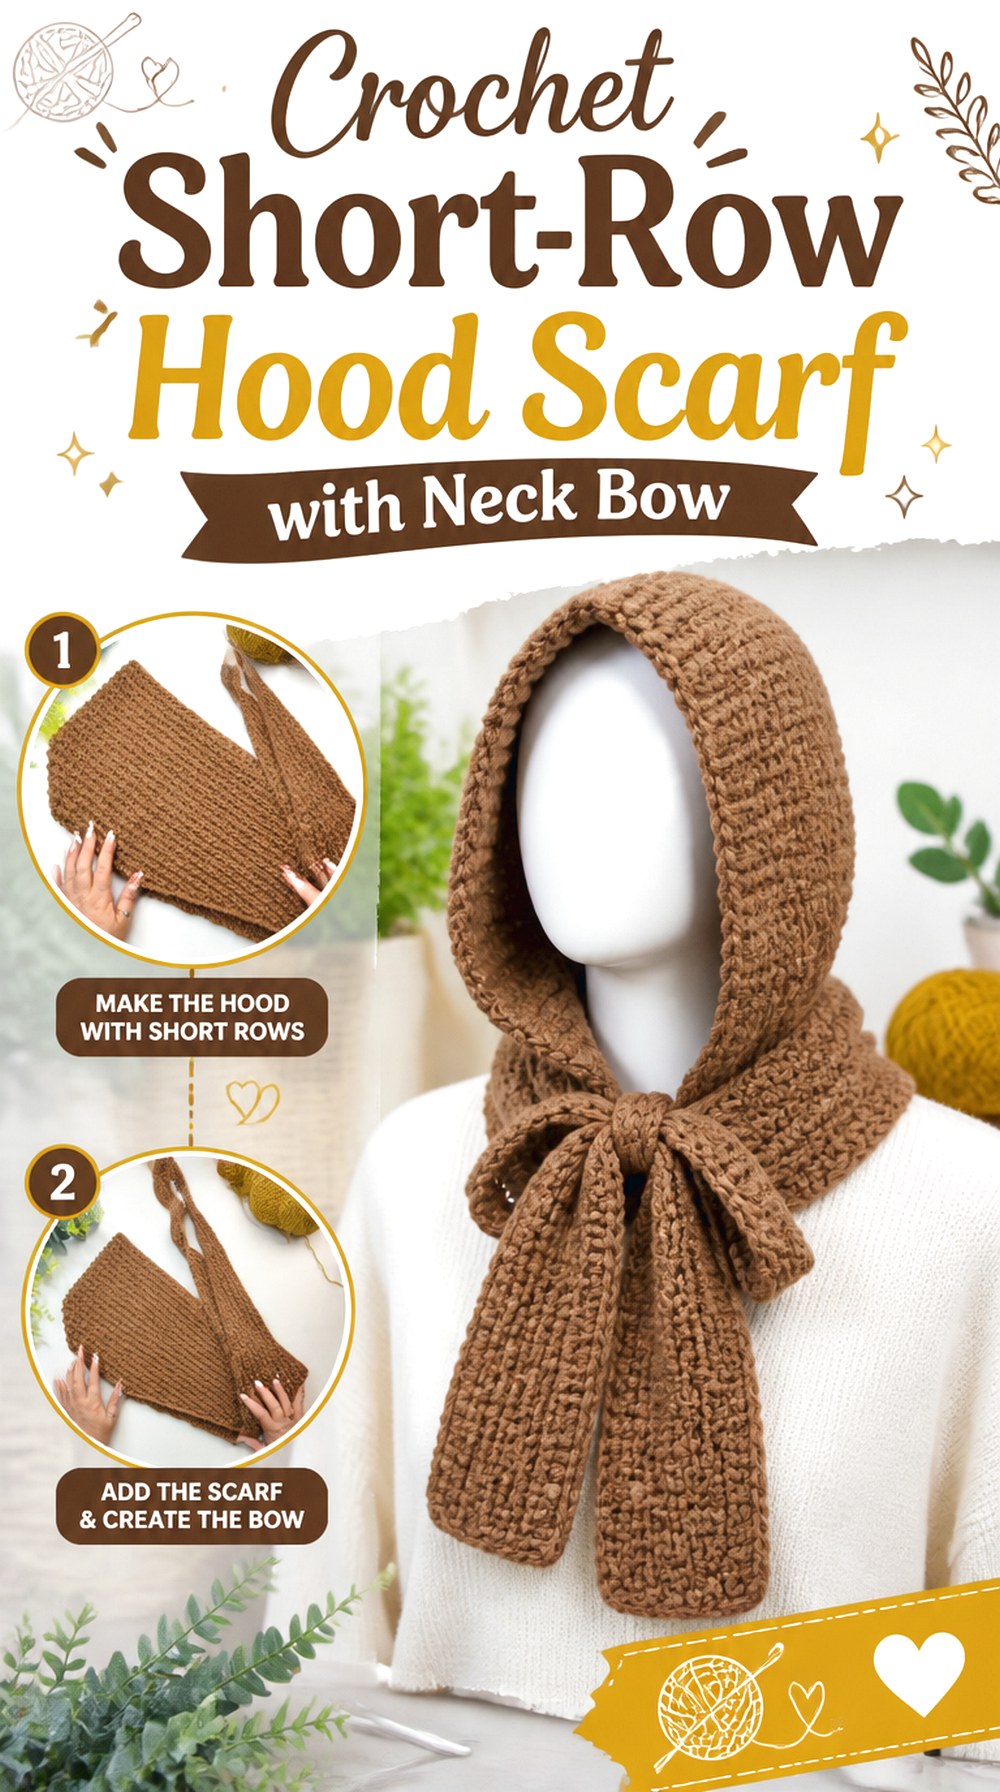
Passionate Crafter’s Pixel Hooded Scarf uses shaping rather than a simple rectangular hood, giving this idea a clean crown and a more intentionally sculpted outline. That makes it a good fall choice when you want the hood to remain the strongest construction feature and the bow to function as a smaller neck accent.
The source teaches the hooded scarf rather than a bow version. A loose front tie, narrow additional bow, or removable neck detail can introduce the bonnet reference without altering the short-row shaping that gives the original project its identity.
Short-Row Shaping Creates a Cleaner Crown
The crown deserves to be assessed before any extra finishing is planned. Try the hood up and down and look at how it settles at the back of the neck. If the shaped portion already creates a strong silhouette, keep later additions away from the crown so they do not pull it out of alignment.
A Neck Bow Should Not Collapse the Face Opening
The front edge needs enough freedom to frame the face naturally. If tying a bow causes the hood to narrow or twist, the tie is doing structural work it was never intended to do. Position a decorative bow lower, loosen the knot, or make it independent from the hood edge.
Keep the Bow Secondary to the Pixel-Like Texture
The tutorial’s texture gives the fabric its own visual character. A highly textured or multicolored bow can compete with that surface. One quieter option is to repeat the main yarn in a simpler tie, letting shape—not additional stitch complexity—differentiate the accent.
Original Tutorial and Creator Credit
Creator: Passionate Crafter
11. Crochet One Piece Ribbed Hood Scarf with Detachable Bow
11. Crochet One Piece Ribbed Hood Scarf With Detachable Bow
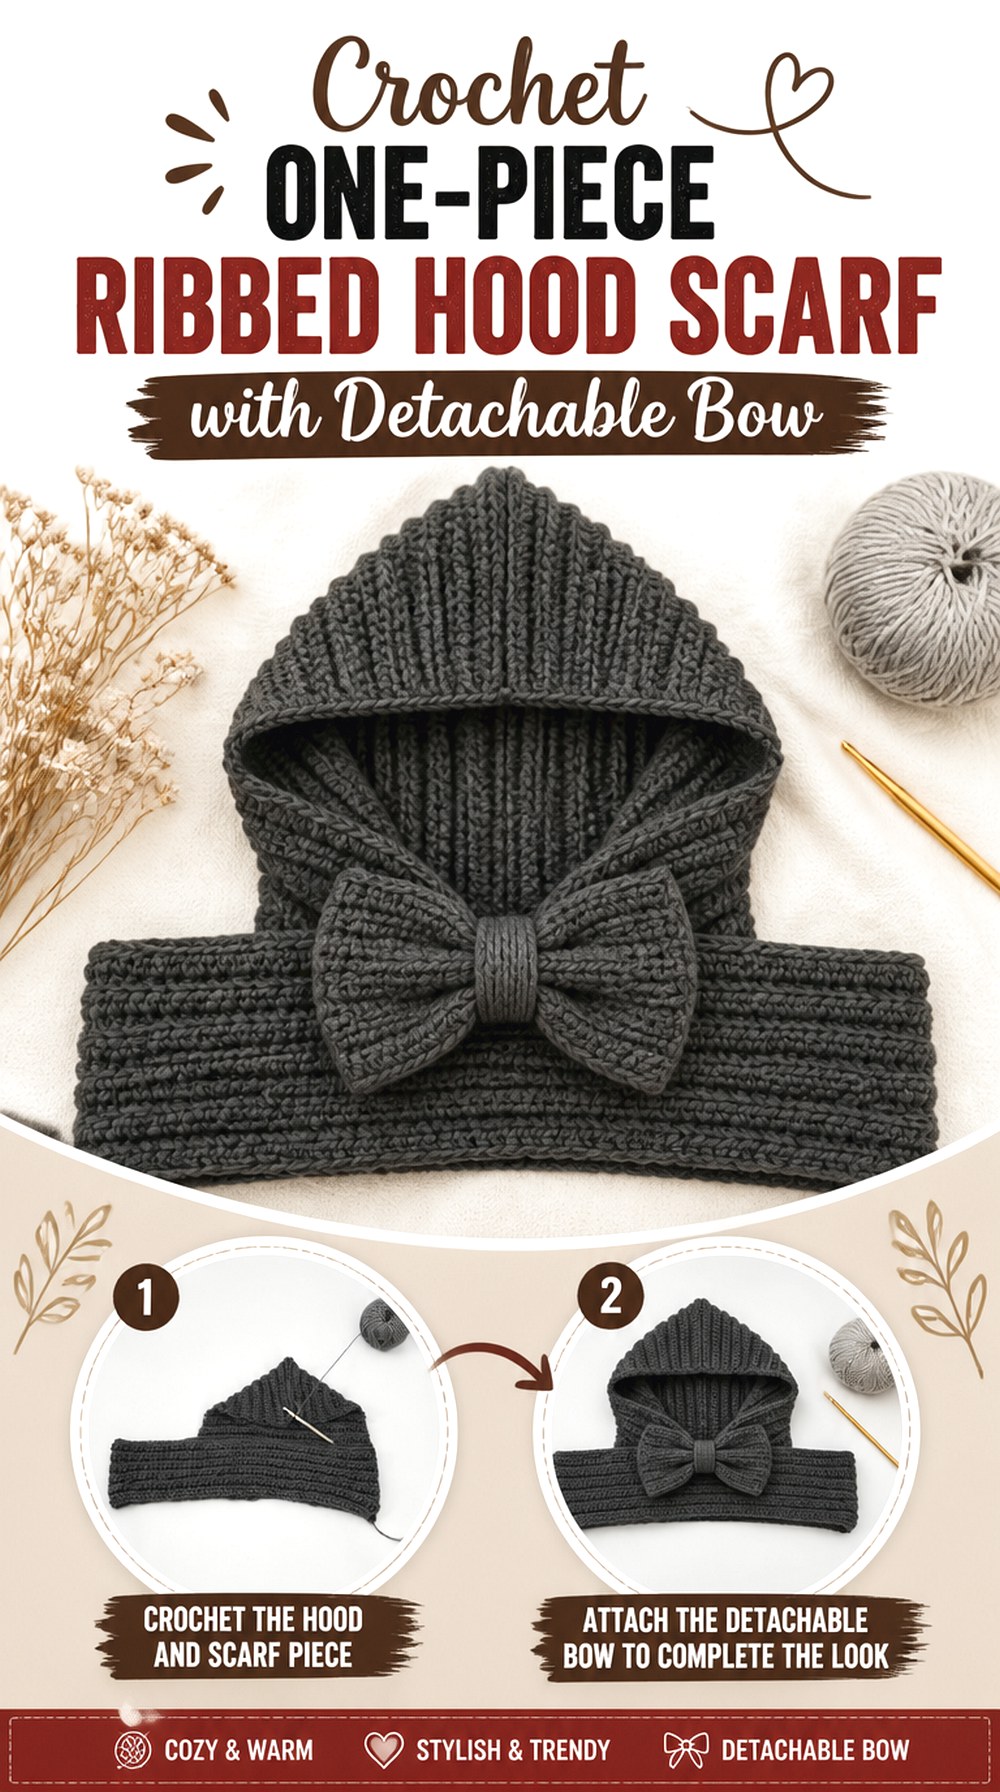
Wilma Westenberg’s hooded scarf is worked as a continuous project rather than assembled from granny squares or separate pocket sections. That continuous line makes it useful for a cleaner bow-hood interpretation: the scarf can remain unchanged while a detachable bow introduces the bonnet look only when wanted.
A removable accent is especially practical if you want one accessory to move between simple outerwear and more decorative fall outfits. It also avoids permanently changing the scarf length or interfering with how the hood hangs when it is down.
One-Piece Construction Makes Proportion Easy to Judge
Continuous fabric lets you evaluate the hood and scarf as one silhouette. Before deciding on a bow, wear the completed base with the ends loose, crossed, and wrapped. The position that already feels most natural will tell you where a decorative tie can sit without fighting the construction.
Detachable Bow Gives You Two Wearing Modes
Instead of altering both scarf ends, a separate bow can be attached only when the outfit calls for it. Keep attachment methods gentle enough that they do not stretch or snag the crochet. This is also useful when a bow would create excess bulk under a particular coat but works well with an open cardigan or jacket.
Ribbed-Looking Texture Needs Yarn Definition
Texture becomes part of this project’s visual rhythm. A very fuzzy substitute can soften the lines, while a smoother yarn will make them more obvious. If you introduce a bow in the same yarn, consider whether you want it to blend into the texture or stand apart through a simpler surface.
Original Tutorial and Creator Credit
Creator: Wilma Westenberg
12. Crochet Mixed Scale Granny Square Bow Hood Scarf
12. Crochet Mixed Scale Granny Square Bow Hood Scarf
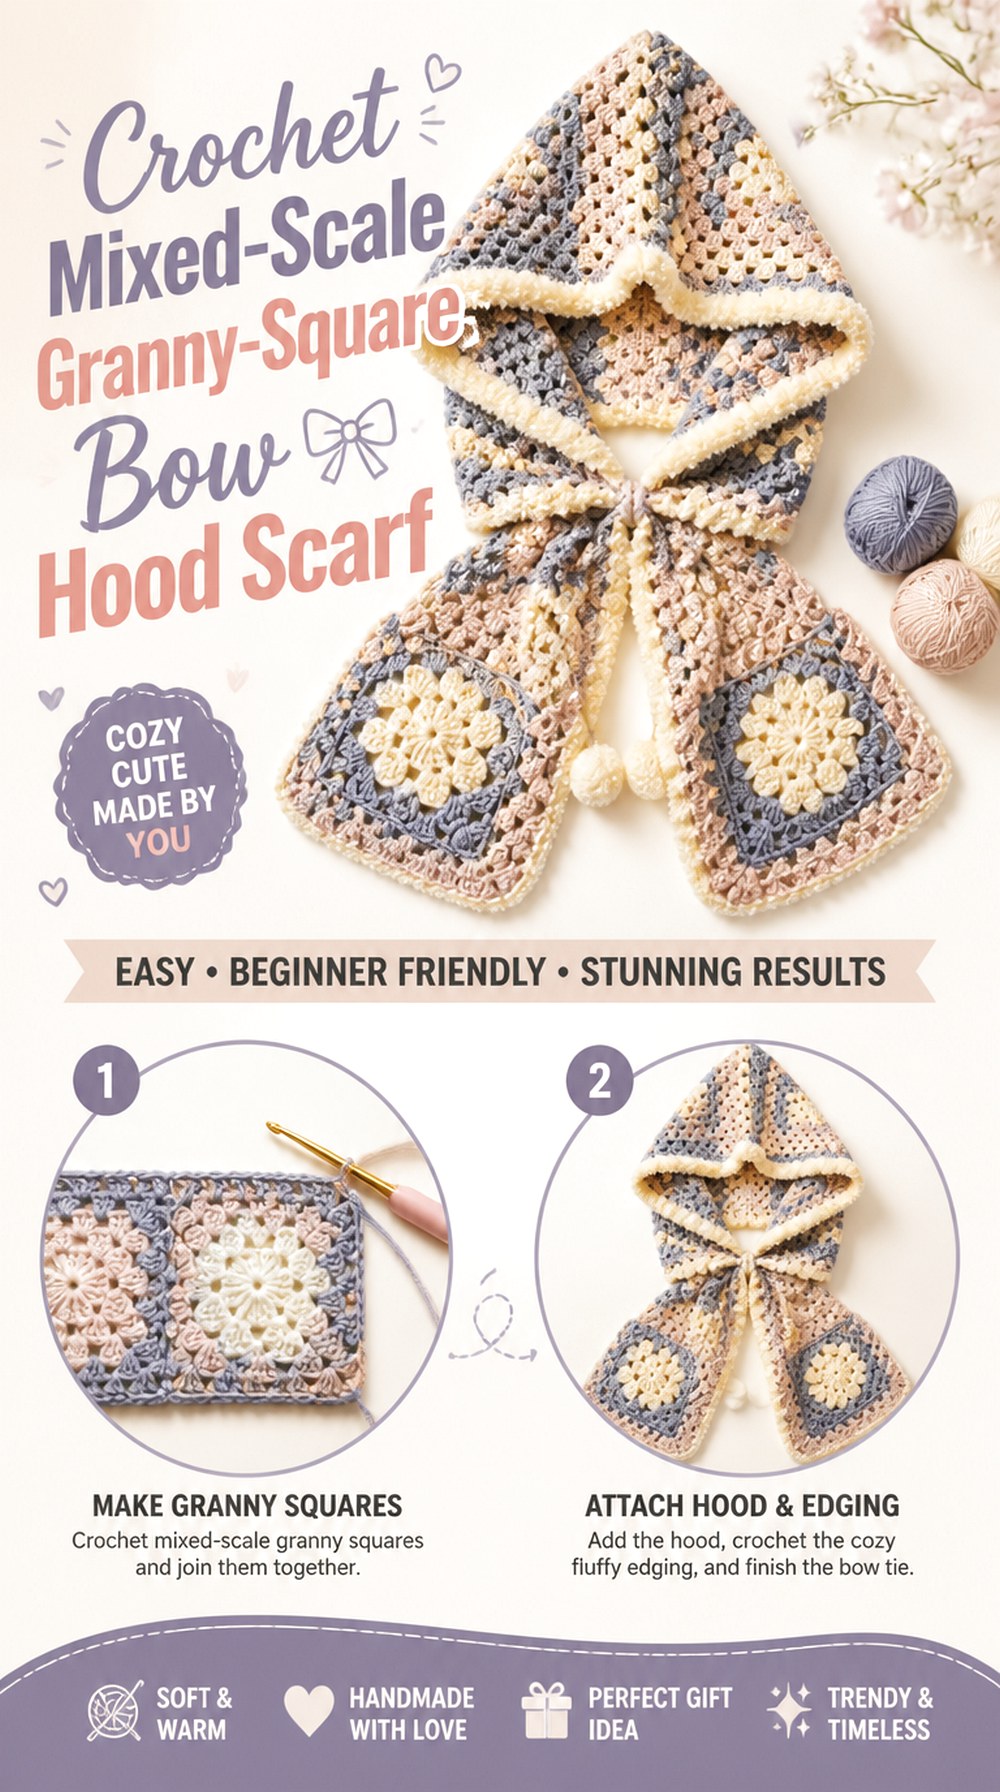
Crochet Musings builds its hooded scarf from large and smaller granny squares, creating a different patchwork rhythm from a design where every motif has the same scale. This gives you natural focal areas to work around when planning an optional bow. The bow does not need another motif of its own; it can serve as a calm finishing shape against the busier square layout.
This is a strong option for readers who enjoy modular crochet and want color to play a bigger role in the finished fall accessory. The crucial planning point is dimensional compatibility between the different square sizes.
Large and Small Squares Create Natural Focal Points
Identify which motifs will dominate the hood before deciding where to place a bow. If the largest squares already frame the face, a huge tie can split attention. A smaller accent closer to the neck may create a better hierarchy: hood first, bow second, scarf ends third.
Put the Bow Near a Quiet Section of the Layout
A solid border, joining line, or low-contrast motif area can provide enough visual breathing room for a bow. This is particularly useful with multicolor granny squares. Rather than adding a new shade, pull one existing color from the patchwork and repeat it in the accent.
Mixed-Scale Motifs Must Meet Cleanly
When different motif sizes share a project, their blocked measurements and combined spans matter. Lay out the squares before final joining and check that the intended groups align. Correcting a dimensional mismatch at this stage is much easier than trying to disguise a crooked join beneath a bow later.
Original Tutorial and Creator Credit
Creator: Crochet Musings
13. Crochet Chunky Rounded Scoodie with Oversized Bow
13. Crochet Chunky Rounded Scoodie With Oversized Bow
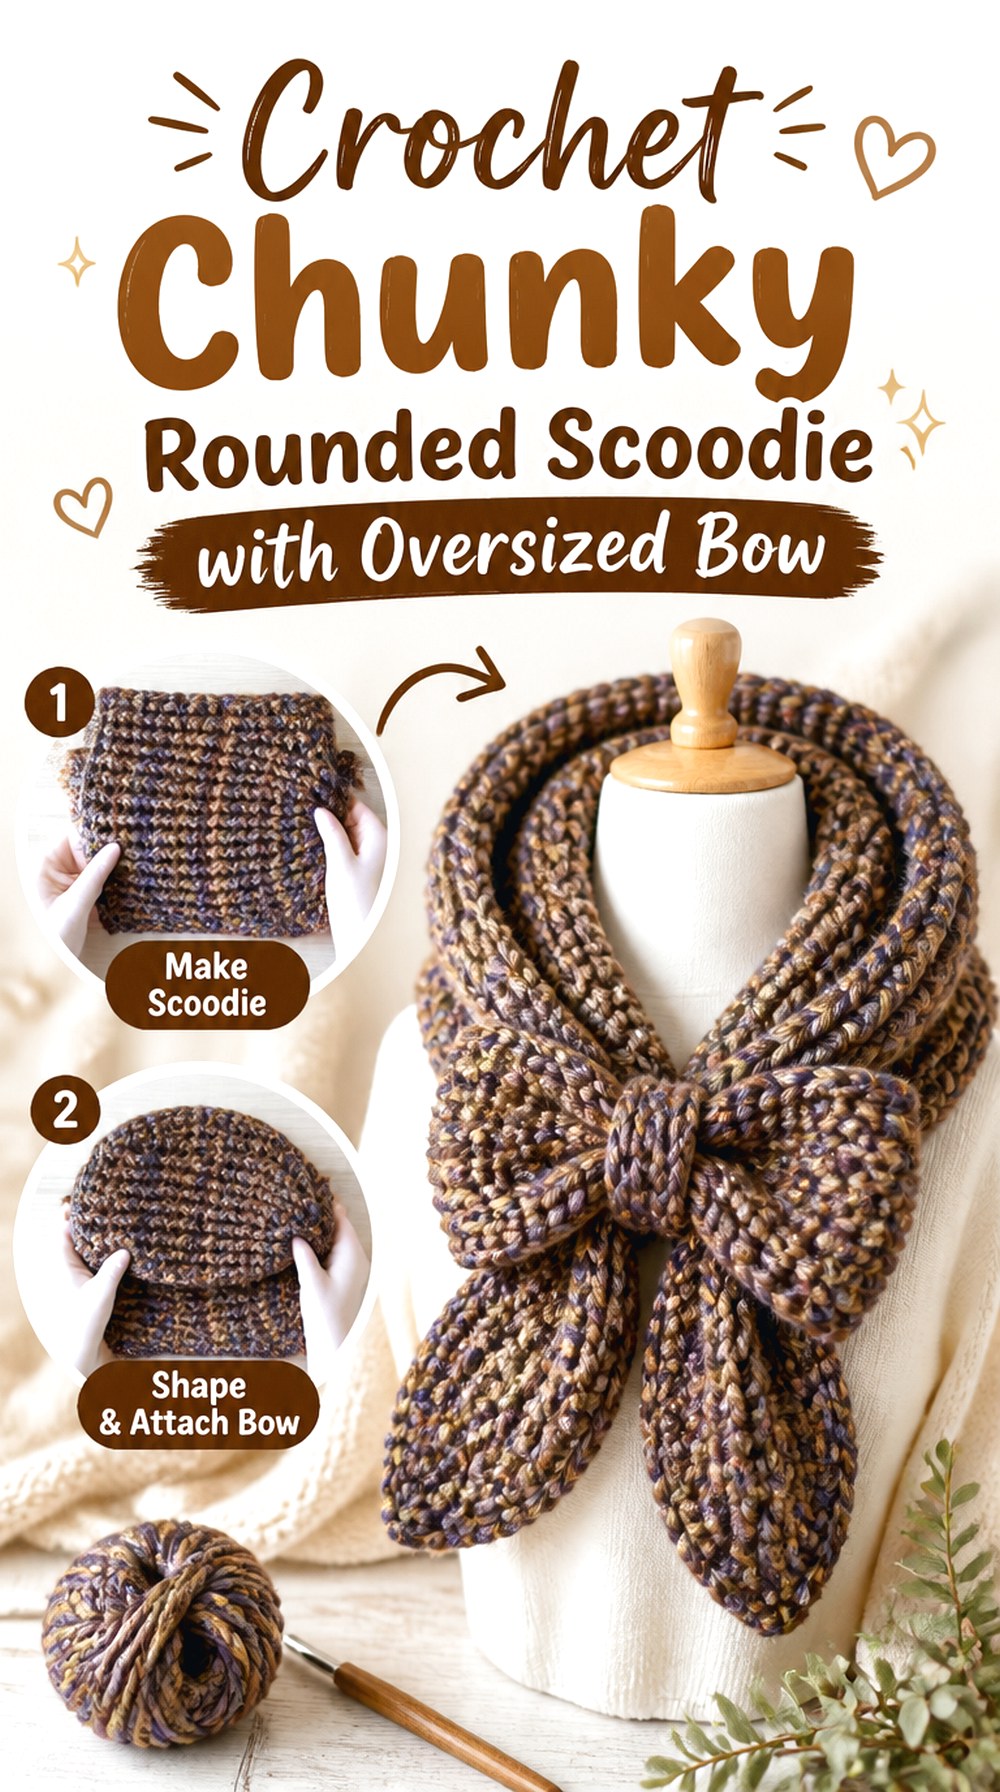
The 24 Carat Crochet chunky scoodie combines substantial yarn with a rounded hood, making it one of the strongest bases for an exaggerated fall bow. Chunky fabric already has high visual weight, so even a simple knot can look dramatic. That means the adaptation does not need complicated embellishment.
The tutorial’s original scoodie is made in separate sections and then joined, which also gives you a clear moment to assess the scarf and hood independently. Complete the source construction as intended before deciding whether the bow should be formed from scarf ends or added separately.
Chunky Yarn Makes Even a Simple Bow Look Large
A bow that looks modest in thin yarn can become oversized quickly in chunky fabric. Start by tying the existing scarf loosely instead of automatically adding length. Look at the knot from the front and side; depth matters as much as width once the accessory is worn near the face.
Rounded Hoods Pair Better with Soft, Broad Knots
The curved hood profile has fewer sharp lines than a pointed or square crown. A broad relaxed bow can echo that softness, whereas a tiny rigid knot may look disconnected. Keep enough space between the hood edge and bow so both shapes remain recognizable.
Test Weight Before Extending Scarf Ends
Chunky scarf sections gain weight quickly as they get longer. Hang the finished or nearly finished scarf before deciding on extensions. If the hood begins to pull backward or the ends already feel substantial, use a separate decorative bow instead of adding more crocheted length.
Original Tutorial and Creator Credit
Creator: 24 Carat Crochet
14. Crochet Rounded Classic Scoodie with Bonnet Ties
14. Crochet Rounded Classic Scoodie With Bonnet Ties
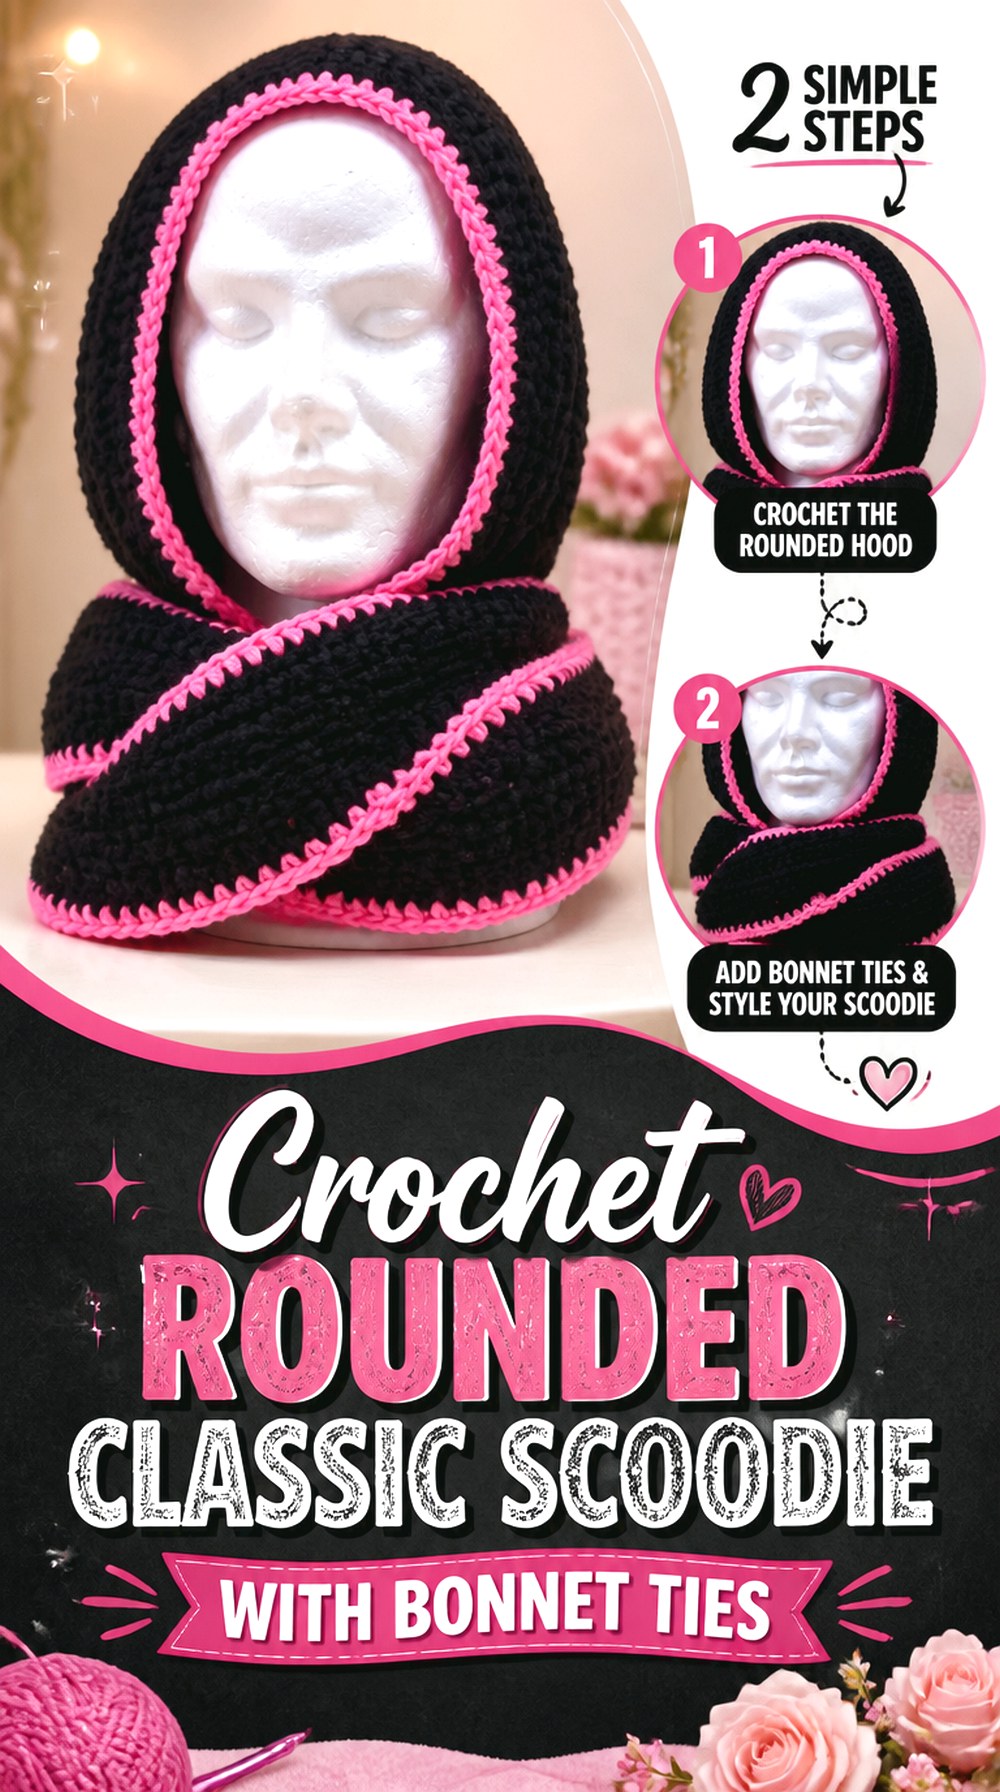
Crochet with Clare’s rounded scoodie is another good bridge between a hooded scarf and a bonnet because the back of the hood avoids a pronounced point. Unlike the chunky project above, this version can be treated as a more classic foundation for adding narrow bonnet-inspired ties while leaving the scarf itself wearable in the usual way.
That distinction is useful if you like the look of a bow beneath the chin but do not want to sacrifice full scarf ends. Instead of converting the scarf into the ties, the optional bonnet tie can remain a separate detail attached near the lower face opening.
Classic Rounded Hood Suits a Bonnet-Like Tie Conversion
The hood profile already provides the soft outline associated with bonnet styling. Before adding anything, mark where the front edge naturally reaches the jaw. A tie placed too high can pull across the cheeks; one placed too low may behave more like a neck closure than a bonnet tie.
Keep Added Ties Independent of the Crown Seam
The back seam shapes the hood and should not carry unnecessary tension from the bow. If you add separate ties, concentrate them near a stable front or lower edge rather than routing tension through the crown construction. The goal is a decorative front feature without changing how the rounded back sits.
Border Tension Changes the Face Frame
A neat edging can stabilize the opening, but an overly tight border may shorten it and pull the hood inward. Check the face frame after any edging and before attaching ties. If the hood already feels snug, a decorative nonfunctional bow may be a better adaptation than a tie that cinches the opening further.
Original Tutorial and Creator Credit
Creator: Crochet with Clare
15. Crochet Super Bulky Pocket Hood Scarf with Bow Accent
15. Crochet Super Bulky Pocket Hood Scarf With Bow Accent
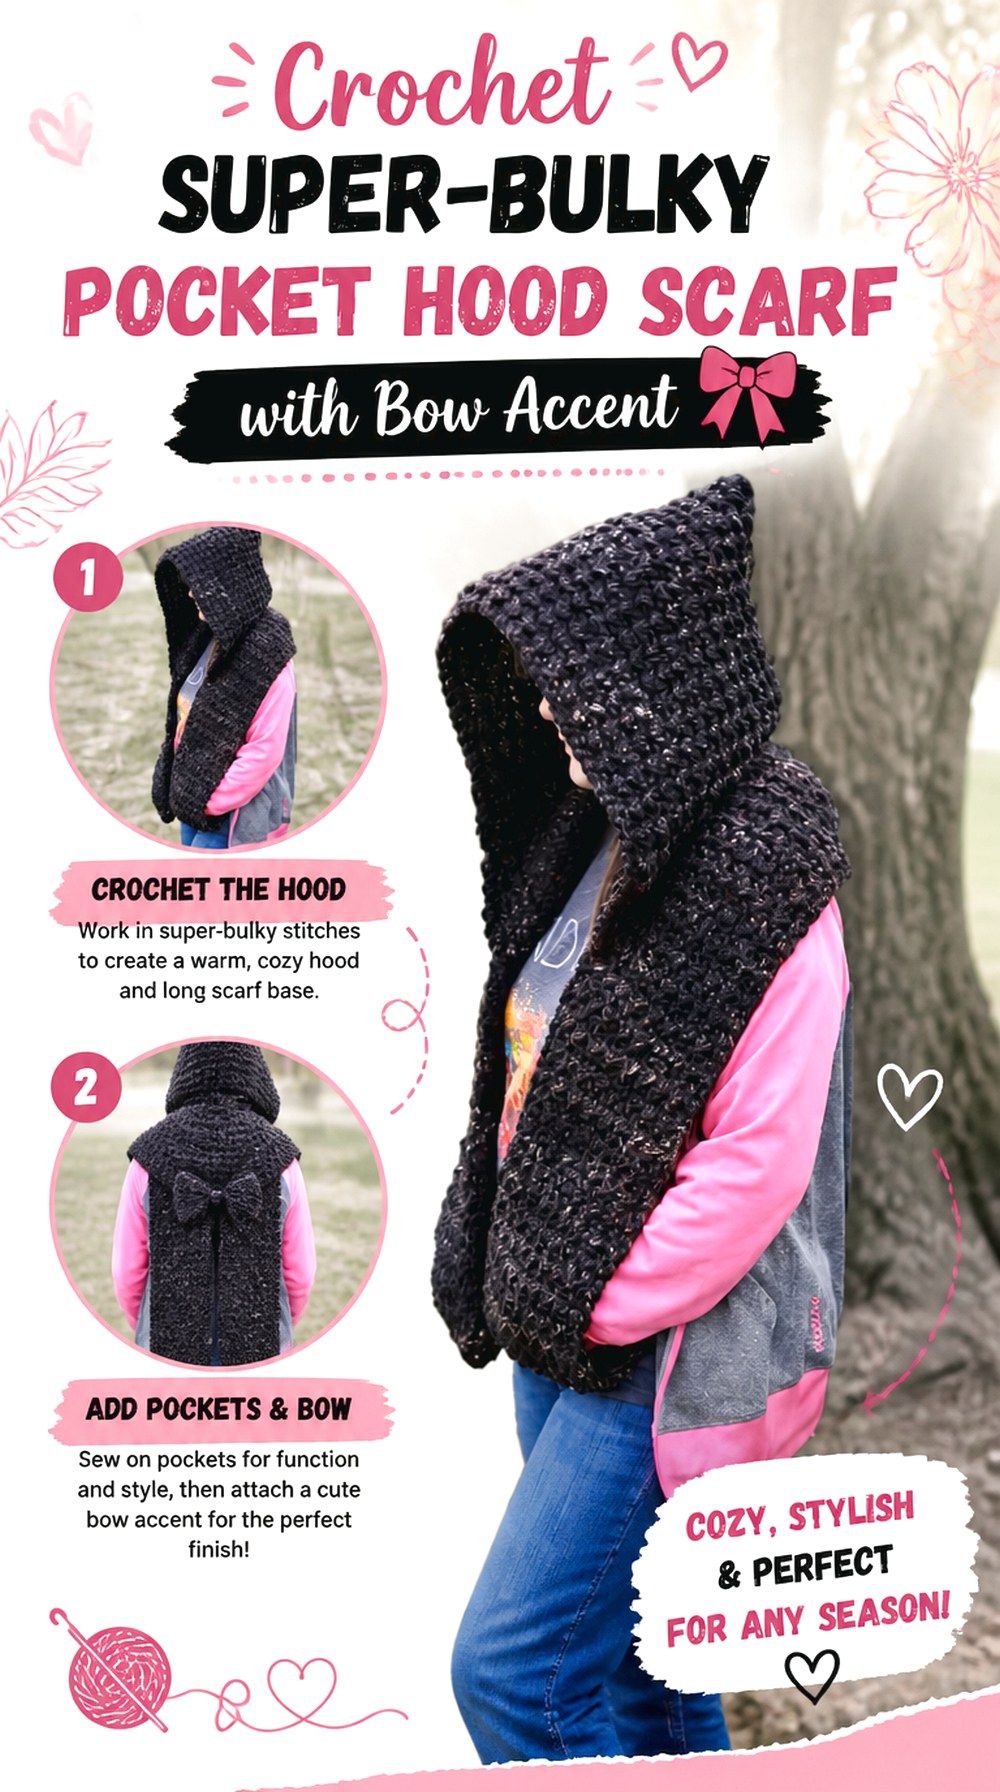
Bag-O-Day Crochet’s hooded scarf combines a large-scale fabric with pockets, so this is the most substantial bow-scarf concept in the collection. The original project already has strong volume and function. A fall adaptation therefore benefits from a flat decorative bow near the upper scarf instead of trying to knot the pocketed ends together.
This project makes sense for someone who wants the scarf to read as a serious cold-weather layer first. The bow becomes a controlled accent rather than the structural center, which separates it from the long-tie bonnets at the beginning of the list.
Super-Bulky Fabric and Pockets Can Become Heavy
The source uses super-bulky yarn, so extra crochet accumulates quickly. Once the scarf and pockets are complete, wear the piece for a short period before planning an embellishment. If the ends already pull noticeably downward, avoid adding a dense three-dimensional bow that increases weight in the same area.
Use a Flat Bow Instead of More Bulk
A flatter bow silhouette can give you the fall bonnet reference without creating a large knot. Think in terms of visible loops and tails rather than maximum thickness. Pin a fabric ribbon or paper mock-up in place first to judge scale before committing yarn to the accent.
A Wide Scarf Base Needs a Strong Visual Center
With broad scarf panels and pockets, a tiny bow may disappear. Scale the accent to the whole front view, not just the hood edge. At the same time, keep it far enough from pocket openings and the central neck area that it does not reduce function.
Original Tutorial and Creator Credit
Creator: Bag-O-Day Crochet
16. Crochet Luxe Draped Hood Scarf with Soft Bow
16. Crochet Luxe Draped Hood Scarf With Soft Bow
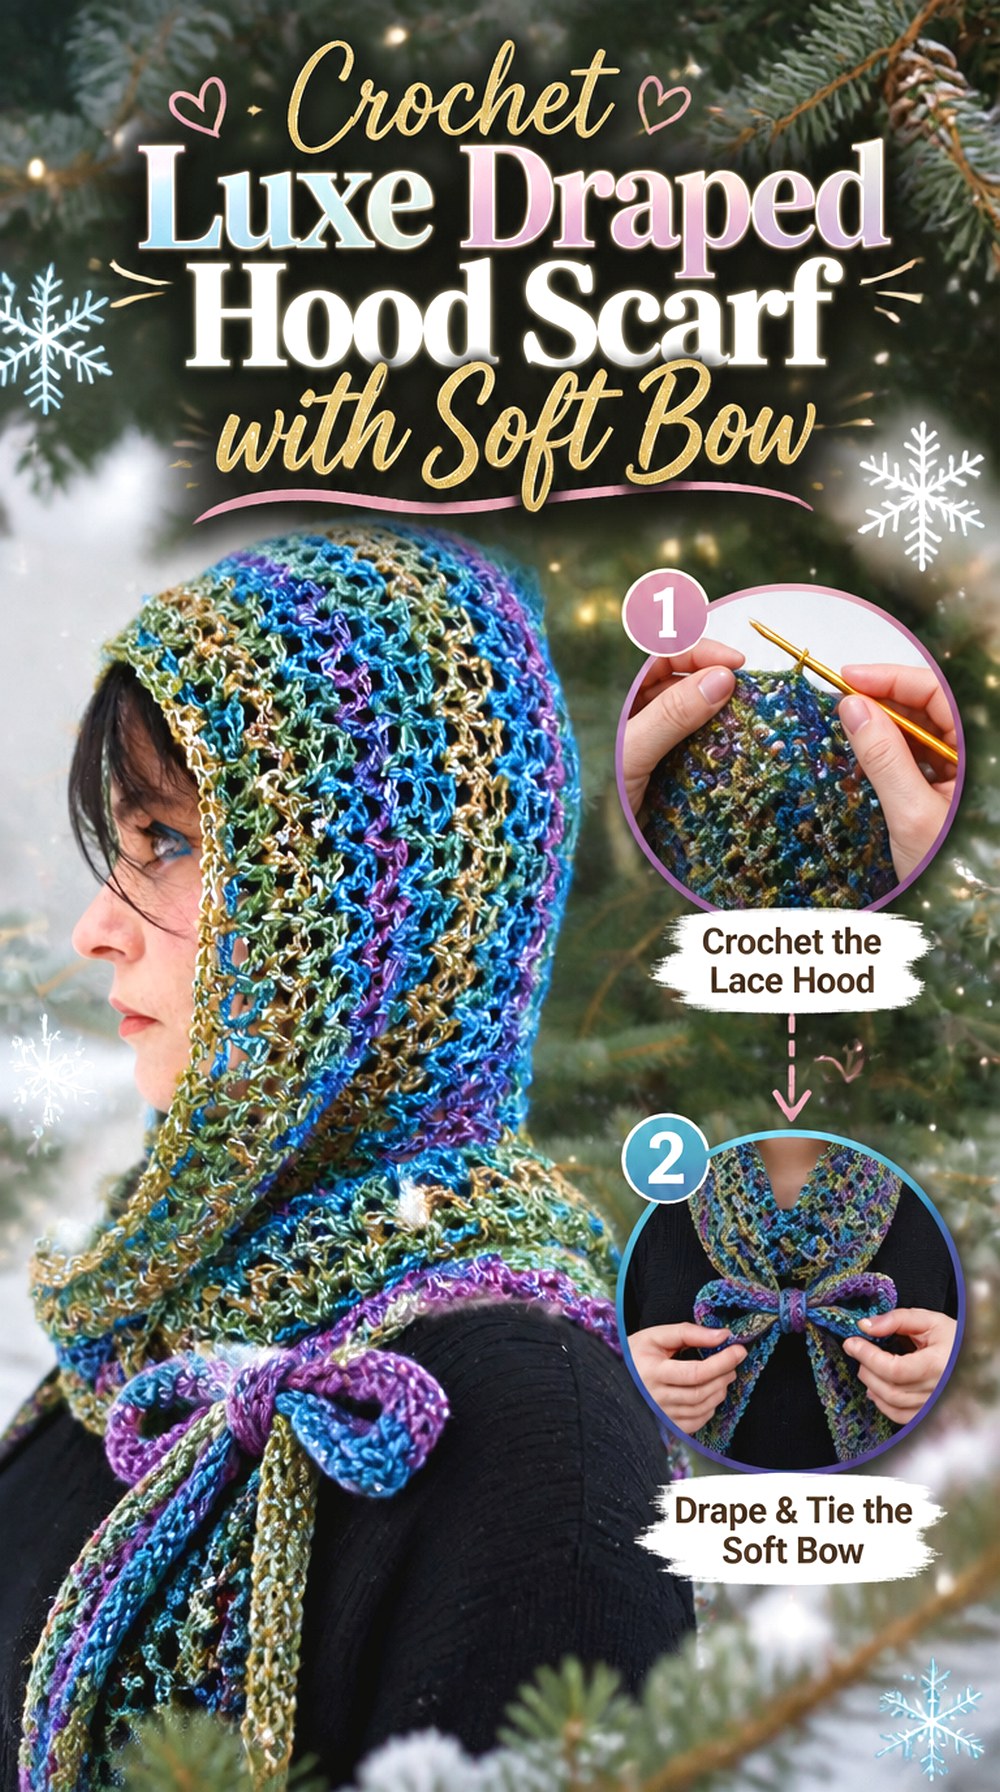
Jayda InStitches’ Luxe Hooded Scarf offers a more flowing alternative to chunky pocket scarves and dense granny-square hoods. Its long, elegant line makes it a good base when the bow should look draped rather than tightly tied. A soft side knot or loose bow can reference bonnet styling while preserving the scarf’s vertical movement.
This approach works particularly well when you want one handmade accessory to sit over dresses, lighter jackets, or layered fall outfits without reading as a bulky winter hood. The original tutorial remains the guide for the scarf itself; bow styling is an optional adaptation after the fabric behavior is clear.
Drapey Yarn Lets the Hood Fall Rather Than Stand
Some hoods are meant to maintain a strong outline; others gain their character from folding softly around the head and shoulders. If you substitute yarn here, check the fabric’s willingness to fold. A stiff replacement can dramatically change both the hood and any bow made from the same material.
A Soft Bow Works Better Than a Stiff Loop
With fluid scarf fabric, a rigid separate bow can look attached rather than integrated. A loose knot with longer tails usually echoes the drape more naturally. If you want a defined bow, choose a narrower section so it can hold a recognizable loop without becoming a thick block at the neck.
Keep the Luxe Scarf’s Length as the Main Line
The long falling scarf panels are part of what distinguishes this project. Avoid consuming so much length in a bow that the vertical silhouette disappears. Try a half-bow or side knot first and compare it with the scarf worn completely loose before deciding whether a larger bow improves the overall balance.
Original Tutorial and Creator Credit
Creator: Jayda InStitches
17. Crochet Super Bulky Hood Scarf with Tie Front Bow
17. Crochet Super Bulky Hood Scarf With Tie Front Bow
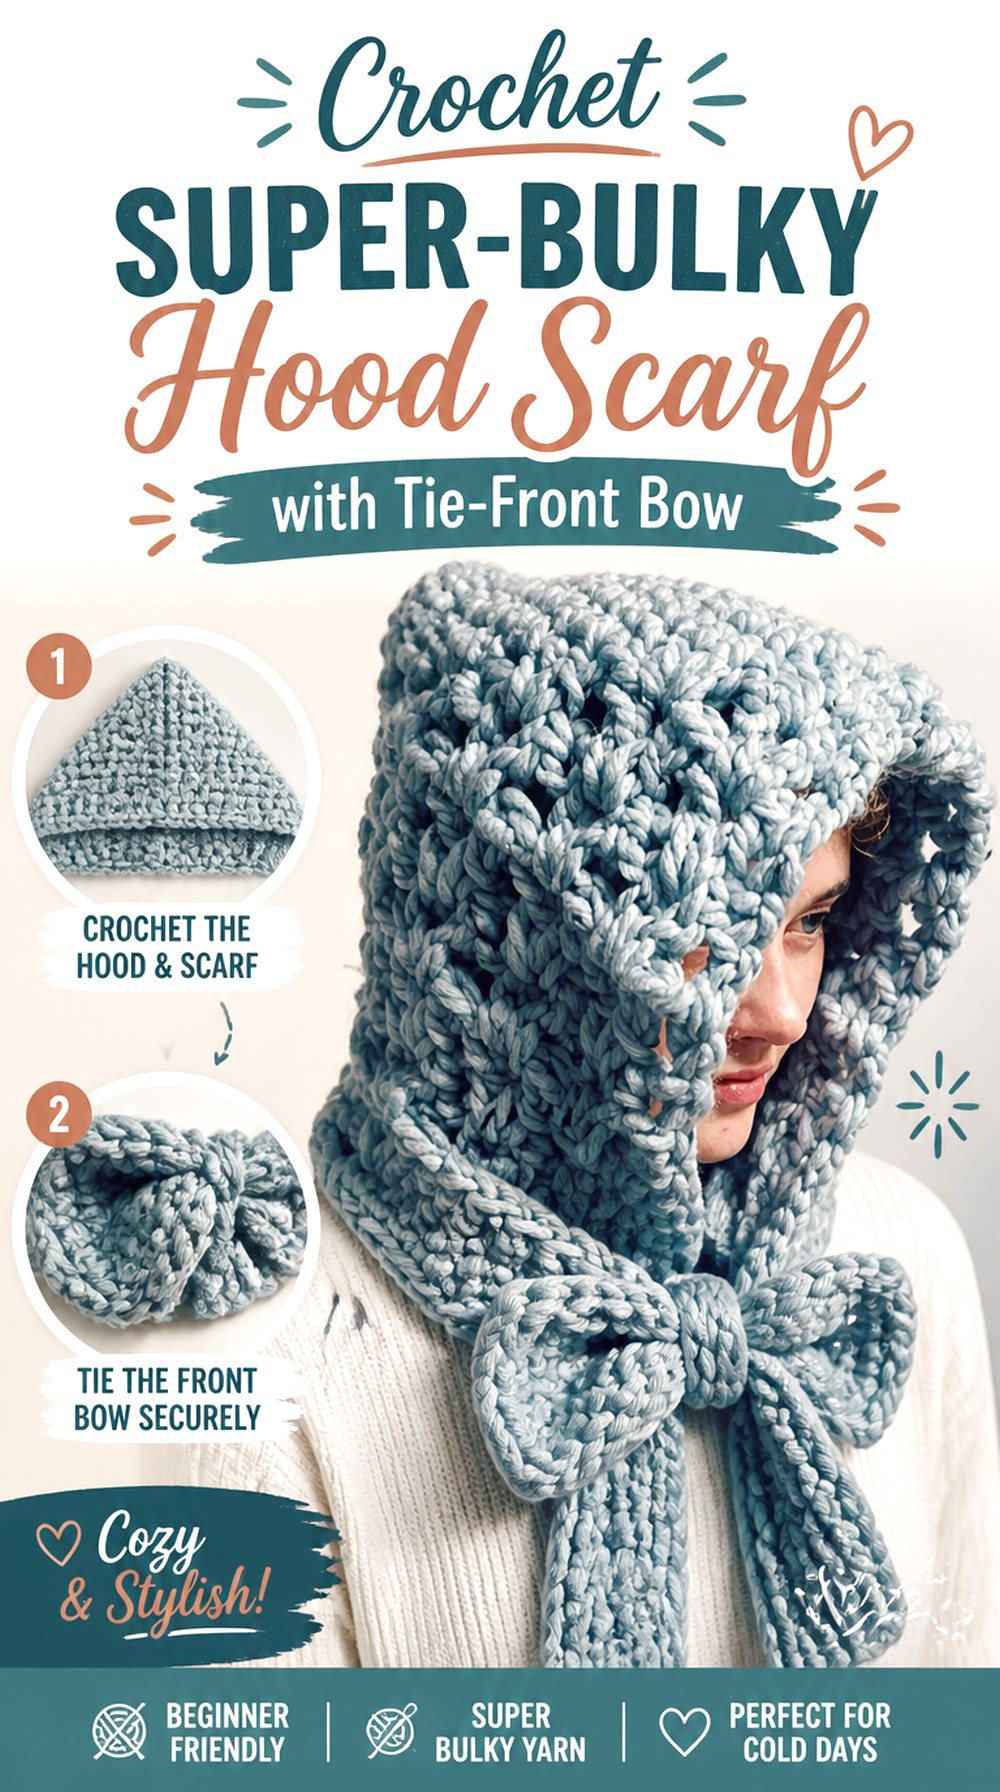
AllFreeCrochet’s hooded scarf tutorial uses super-bulky yarn, giving the finished accessory large stitches and an intentionally substantial scale. For a bow-bonnet interpretation, that scale is the main consideration. You do not need a complicated bow because the yarn will make even a simple tie treatment highly visible.
Compared with the pocketed super-bulky option, this version keeps the overall form simpler. That leaves more visual room at the center front. Follow the source for the hooded scarf itself, then decide whether a loose front bow, separate tie, or ordinary scarf knot gives you the right amount of bonnet influence.
Large Stitches Need a Simple Tie Treatment
Big crochet stitches already create texture, shadow, and visual movement. Multiple layered bow pieces can make the front look crowded. Begin with the simplest possible knot or loop and assess it at normal viewing distance. The bow should still read as an intentional shape without hiding the crochet surface underneath.
Front Bow Placement Can Replace Extra Trim
A central or slightly off-center bow already gives the neckline a focal point. Additional fringe, heavy edging, or multiple embellishments may not be necessary. This is especially useful with a solid yarn, where the stitch scale and bow silhouette can provide enough detail on their own.
Check Bulk Under a Coat Collar
A super-bulky hood plus a large bow can create several layers at the same point on the neck. Try the scarf with your intended outerwear before finalizing the bow. If the collar pushes the knot upward or makes the hood uncomfortable, move the bow lower or use a flatter removable accent.
Original Tutorial and Creator Credit
Creator: AllFreeCrochet
Which Crochet Bow Hood Scarf Shape Should You Choose?
| Shape | Strongest reason to choose it | Main thing to check | Bow approach |
|---|---|---|---|
| Long-tie bonnet | A clear bonnet silhouette and visible face-framing ties | Comfort around the jaw and neck | Tie the existing long ends |
| Rounded scoodie | Softer hood profile with full scarf coverage | Hood depth and scarf weight | Small neck bow or added bonnet ties |
| Granny-square hood scarf | Patchwork color and modular layout | Blocked motif dimensions and join flexibility | Solid-color bow or narrower tie |
| Pocket hood scarf | Maximum scarf function and hand coverage | Added weight and pocket access | Separate upper-scarf bow |
| Draped hood scarf | Softer layering and less rigid structure | Yarn drape and stretch | Loose side bow or half-knot |
| Super-bulky hood scarf | Strong texture and cold-weather scale | Neck bulk under outerwear | Flat or simple oversized bow |
The most direct bow-bonnet result comes from a tutorial that already includes long ties. Scoodies provide more versatility because the scarf remains functional even when you skip the bow. Patchwork versions make the strongest color statement, while rounded hoods are useful when you want a bonnet-like outline without committing to a true bonnet construction. Pocket and super-bulky versions need the most restraint because their base fabric already contributes considerable volume.
Conclusion
For the clearest crochet bow bonnet look, start with the two long-tie bonnet ideas because the ties already belong to the original silhouette. Choose a rounded scoodie if you want a softer hood plus real scarf coverage, or move toward granny squares when patchwork and color placement matter more than a minimal face frame. Pocketed and super-bulky options work best when the bow stays secondary, while the draped hood scarf suits a looser, less structured fall finish.
Whichever direction you choose, settle the hood fit and fabric behavior before extending ties or adding embellishments. Use the original tutorials for exact construction details, then treat the bow as a proportion and styling decision that should complement—not distort—the finished wearable.
Frequently Asked Questions
Can I add a bow to a crochet hooded scarf tutorial that does not include one?
Yes, as a separate adaptation, provided you do not assume the source construction was designed to be cinched with ties. Complete enough of the hood to judge its fit first. A removable bow, scarf-end knot, or decorative side tie can add the look without changing the hood itself. If pulling the bow changes the face opening or crown shape, use a nonstructural accent instead.
How do I decide how long crochet bonnet ties should be?
There is no reliable universal tie length because yarn stretch, bow size, wearer proportions, and preferred knot all change the amount needed. Use the source tutorial’s dimensions when the creator provides them. For an adaptation, make enough fabric to test a loose bow before committing to substantially more length, and remember that crochet ties may lengthen somewhat when hanging or worn.
Should the bow use the same yarn as the hood?
It can, but matching yarn is not always the best functional choice. A very thick hood yarn may produce an unnecessarily bulky bow, while a highly fuzzy yarn can soften the loops until their shape is hard to see. Using the same color in a slightly less bulky compatible fabric can preserve visual continuity. Whatever you choose, check how the two fabrics stretch together at the attachment point.
How can I stop a bow from pulling a crochet hood forward?
First determine whether the bow is carrying too much tension. A decorative bow should not need to cinch a normally loose hood into position. Move it lower, tie it more loosely, or make it detachable from the structural hood edge. Also check whether very long scarf ends or heavy embellishments are pulling downward; reducing weight can sometimes solve the problem more effectively than tightening the tie.
Are granny-square hood scarves suitable for adding bonnet ties?
They can be, but motif joins and edge tension deserve extra attention. Block the squares and check the finished hood opening before attaching ties. A stiff join near the jaw may become uncomfortable if a tie pulls directly on it. In that case, a decorative bow located on a separate border or scarf section can create the bonnet look without placing additional stress on the motif connection.
Are long bow ties appropriate for children’s crochet hoods?
Long cords and ties can create entanglement hazards, so adult-style bow-bonnet proportions should not automatically be transferred to children’s garments. For a child project, use an age-appropriate design and follow applicable garment-safety guidance rather than simply shortening an adult version by eye. Decorative details should also be securely attached and appropriate for the intended wearer.