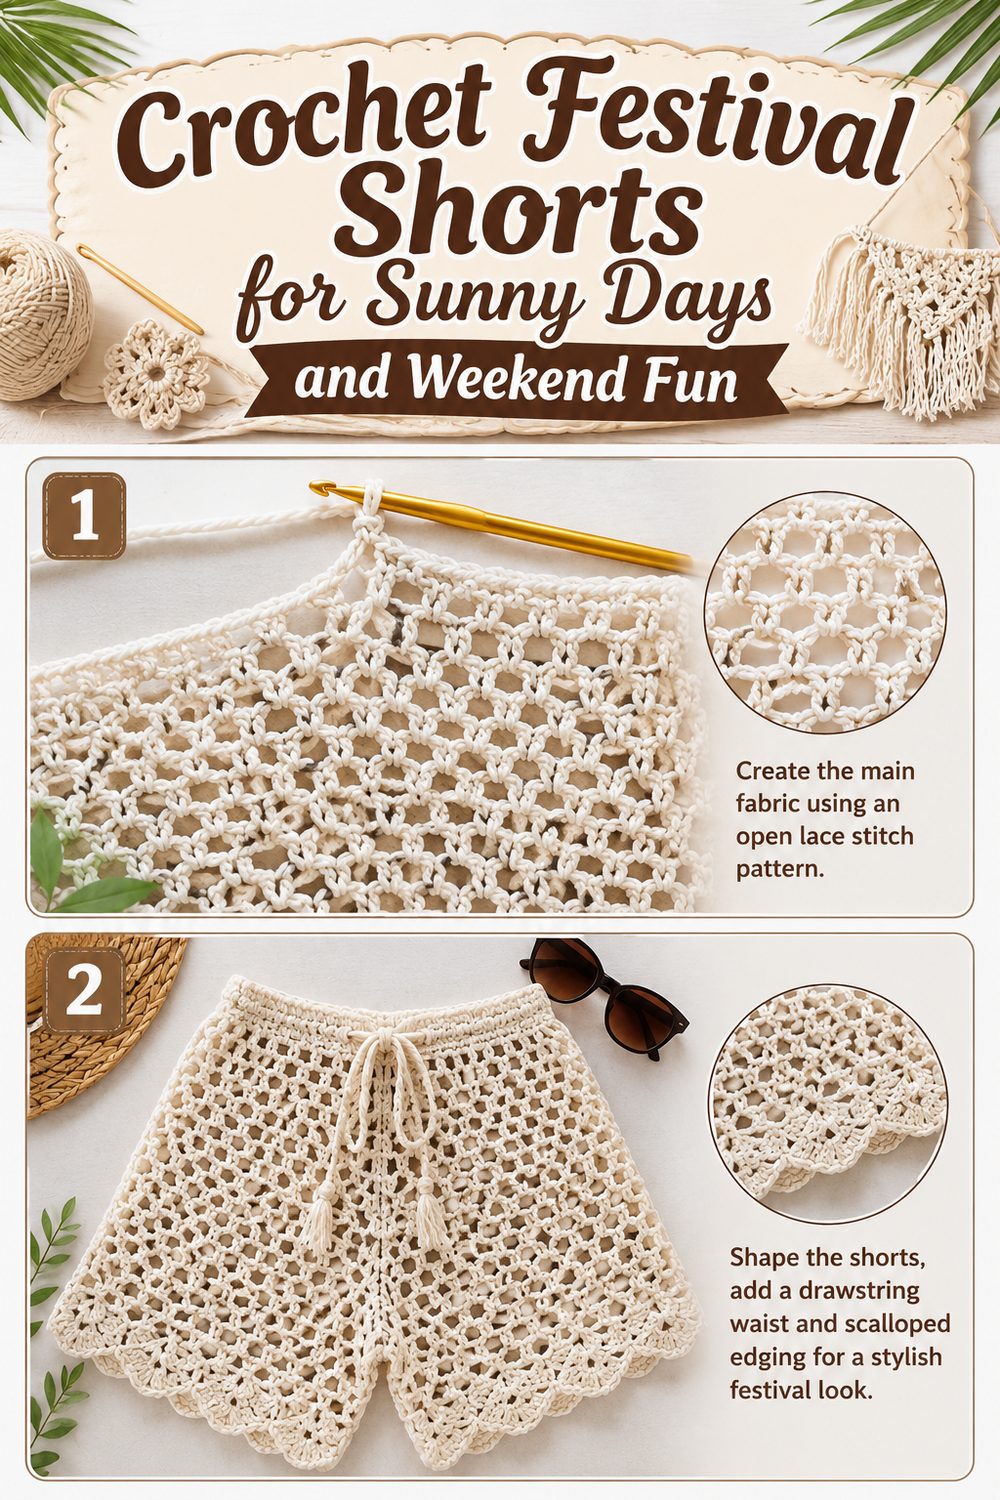
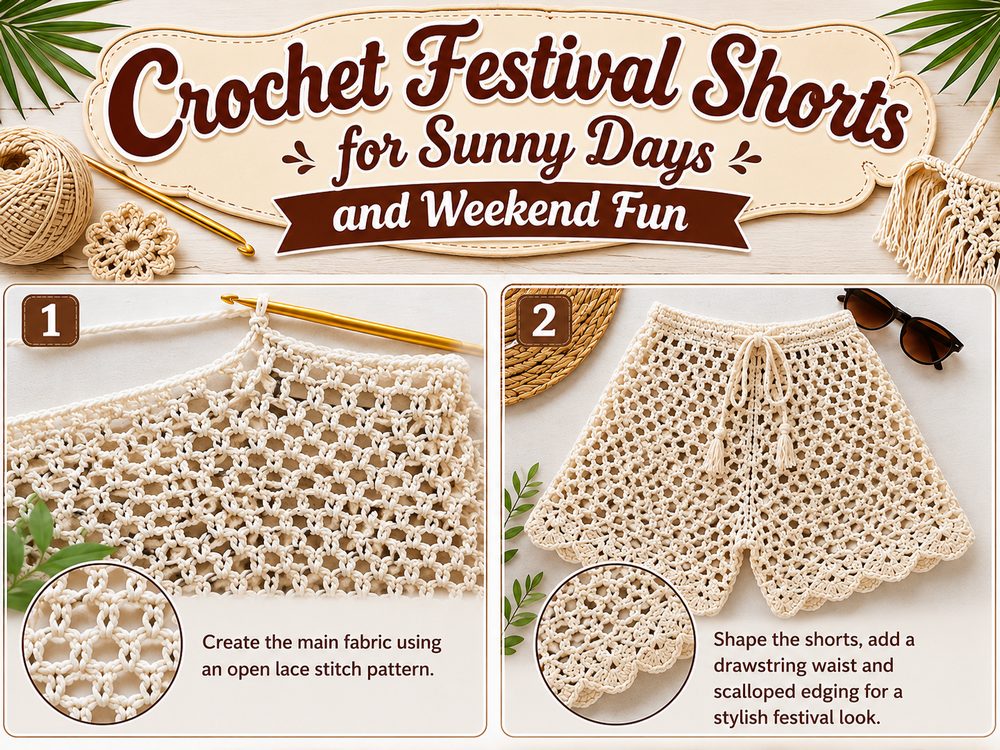
Crochet festival shorts are one of those pieces that feel playful, relaxed, and full of personality. They are great for warm weather, music festivals, beach trips, or just layering over swimwear when you want something handmade and eye-catching.
The tutorial I selected focuses on a Coachella-inspired pair of crochet shorts designed to work as both a festival piece and a beach cover-up, which makes them especially fun to make and easy to style in different ways.
What makes this kind of project so appealing is the freedom it gives you. You can keep them bright and bold, go with earthy boho shades, or make them in a soft neutral for a more laid-back look. If you enjoy summer crochet and want something stylish but still practical, this is a lovely project to try.
Why You’ll Love This Project
These shorts are fun because they feel light, wearable, and easy to personalize. The selected tutorial presents them as festival-ready shorts that can also double as a beach cover-up, so they are not just pretty, they are genuinely useful for warm-weather outfits too.
Materials Needed
- Yarn suitable for lightweight summer wear
- Crochet hook that suits your yarn choice
- Scissors
- Yarn needle
- Measuring tape
- Stitch markers
- Optional drawstring, ties, or waistband finishing detail
Use a yarn and hook size that matches your desired fit and texture.
Best Yarn for This Project
For festival shorts, lightweight yarn is usually the best choice. Cotton, bamboo blends, or other breathable summer-friendly fibers are especially nice because they help the fabric feel cooler and more comfortable in warm weather. Since this style is meant for festivals and beachwear, it works best when the fabric stays soft, airy, and flexible instead of heavy or overly stiff. The tutorial listing itself frames the shorts as a warm-weather piece with beach cover-up potential, which makes breathable yarn an especially smart match.
Skill Level
Easy to intermediate.
This project is a nice choice for a crocheter who is comfortable with basic garment construction and ready to make something fitted and wearable. Since the tutorial is presented as a DIY shorts project rather than a tiny technique demo, it is best approached with a little patience, regular measuring, and a willingness to adjust the fit as you go.
Size and Fit Guide
Festival shorts usually look best when you treat them as a made-to-measure project. Start by measuring your waist, hips, rise, and preferred inseam or side length. As you crochet, keep holding the piece against your body or comparing it to a pair of shorts you already like.
If you want a more fitted look, keep the shaping closer through the hips and upper thigh. If you want more comfort or more beach-cover-up ease, allow a little extra room. This kind of project is much easier to enjoy when you check the fit early instead of waiting until the end.
Stitches Used
The exact stitch list is not clearly stated in the available YouTube search snippet, so it is best to follow the tutorial directly for the precise stitch sequence.
For a project like this, the construction is usually built in a simple, repeatable way so the shorts can stay light, wearable, and easy to customize. Keep your tension even and focus on fit as much as stitch pattern.
How to Make It
Step 1: Start the Foundation
Begin by deciding how you want the shorts to sit on your body. Festival shorts can look great as a mid-rise or high-rise piece, so the first thing to think about is comfort. Measure around the part of your waist or hips where you want the waistband to rest. That starting point shapes the entire feel of the finished shorts.
Because these are meant to be wearable in warm weather, it helps to avoid making the opening too snug. Leave enough ease so the shorts feel easy to move in, especially if you plan to wear them over swimwear or as a beach layer.
Step 2: Build the Waist Section
The waistband area should feel secure without feeling tight. Work this part carefully and check that it sits comfortably before you move into the body of the shorts. Some crocheters like a simple waistband, while others prefer adding a tie or drawstring detail for a more adjustable fit.
If the tutorial includes a tie-style or decorative festival look, that detail can really add to the finished style. Even if you keep the waistband plain, it should still feel neat and supportive. This is one of those sections where a few extra minutes of checking the fit really pays off later.
Step 3: Shape the Main Body
Once the top edge feels right, start building the main body downward. This is where the shorts begin to take shape and where the fun really starts. Festival shorts usually look best when the fabric has a nice balance between structure and openness. You want them to hold their shape, but still feel light enough for sunny weather.
As you work, keep checking the width across the hips and seat. This is especially important for crochet shorts because too little ease can make them uncomfortable, while too much can make the shape feel sloppy. Try to keep the tension consistent so the fabric looks smooth and balanced.
Step 4: Create the Rise and Leg Openings
As the piece develops, you will need to form the lower part of the shorts and separate the leg sections. This is where stitch markers become very helpful. They make it easier to keep both sides even and help you see whether the front and back are developing in a balanced way.
Be patient here. This part often decides whether the shorts feel flattering and wearable. Check the rise before moving too far ahead. Sit down, bend slightly, and think about how you want them to feel during actual wear. A festival piece should still be comfortable enough to move around in all day.
Step 5: Work Each Leg
After the leg sections are separated, crochet each side to your preferred length. Some festival shorts look best very short and playful, while others are nicer with a little more coverage. If you want them more practical for beachwear, you may prefer adding a bit more length.
Keep both legs even by measuring often. You can count rows, compare the pieces side by side, or use a measuring tape after every few rounds or rows. A handmade pair always looks more polished when both sides match nicely.
Step 6: Adjust the Fit as You Go
One of the best things about a crochet shorts project is that it can be adjusted while you work. If the shorts feel too narrow, add a little ease before finishing. If they feel too loose, shape gently so they sit better on the body. This is especially useful for festival wear, where you may want a confident fit without sacrificing comfort.
If the shorts are intended to double as a beach cover-up, you can also keep the fabric a little more relaxed and breathable. That gives them a softer, more effortless feel, which suits this style beautifully. The selected tutorial specifically presents the design as wearable for both festivals and the beach, which supports this more flexible, light summer approach.
Step 7: Join and Finish Neatly
Once the shaping is complete, join any sections carefully and make sure the seams feel smooth. Avoid pulling too tightly when seaming, because that can distort the fit. After joining, try the shorts on again before weaving in all the ends. A final check can help you catch anything that needs a tiny adjustment.
Finish the top and leg edges neatly. You can leave them simple or add a little decorative touch if you want a more boho look. The final result should feel playful, summery, and easy to style.
Helpful Tips
- Use breathable yarn for a cooler, more comfortable finish.
- Check the hip and rise fit early.
- Use stitch markers when dividing the leg sections.
- Keep both legs the same length by measuring often.
- Try them on as you go whenever possible.
- Do not make the waistband too tight.
- Light blocking can help the finished shorts look neater.
Common Mistakes to Avoid
- Starting with a waistband that is too small
- Forgetting to leave enough room through the hips
- Making one leg opening larger than the other
- Using yarn that feels too heavy for summer wear
- Pulling seams too tightly during joining
- Waiting until the very end to check the fit
Customization Ideas
These shorts are easy to make your own. You can choose bold rainbow shades for a festival look, soft neutrals for a beachy boho style, or bright sunset colors for something more playful. You can also make them slightly longer for extra comfort or shorter for a more classic festival outfit. Add a drawstring, side ties, shell edging, fringe, or a contrast waistband if you want more personality in the final piece.
Style Ideas
Festival shorts look lovely with a crochet halter top, bikini top, oversized shirt, or loose kimono. For the beach, they work well as a light cover-up over swimwear. For festivals, pair them with boots, sandals, layered jewelry, or a fringed bag for a relaxed boho finish. They can also be worn at home on hot days when you want something soft and handmade.
Care Instructions
Hand wash gently in cool or lukewarm water with a mild detergent. Lay flat to dry so the shape stays even. Avoid high heat, especially if you use soft summer fibers or blends. If needed, reshape lightly while drying.
Time Needed
This may take a few hours depending on your speed, yarn, size, and stitch pattern.
Conclusion
Crochet festival shorts are such a fun project when you want something creative, wearable, and full of summer energy. They are stylish enough for festivals, practical enough for beachwear, and flexible enough to adjust to your own comfort and taste. Once you make one pair, it is easy to imagine trying another in a different color, texture, or length. They are playful, personal, and a great way to bring handmade style into warm-weather outfits.
FAQs
Is this beginner-friendly?
It suits a confident beginner best, especially someone who is comfortable checking fit as they work.
What yarn is best for crochet festival shorts?
Lightweight cotton or a breathable summer blend usually works best.
Can I adjust the size?
Yes. Measure your waist, hips, rise, and leg length, then adjust as you go.
Can I wear these as a beach cover-up?
Yes. The selected tutorial specifically presents them as suitable for both festivals and beach cover-up wear.
How do I make them more comfortable?
Use soft breathable yarn, do regular fit checks, and avoid making the waistband or rise too tight.