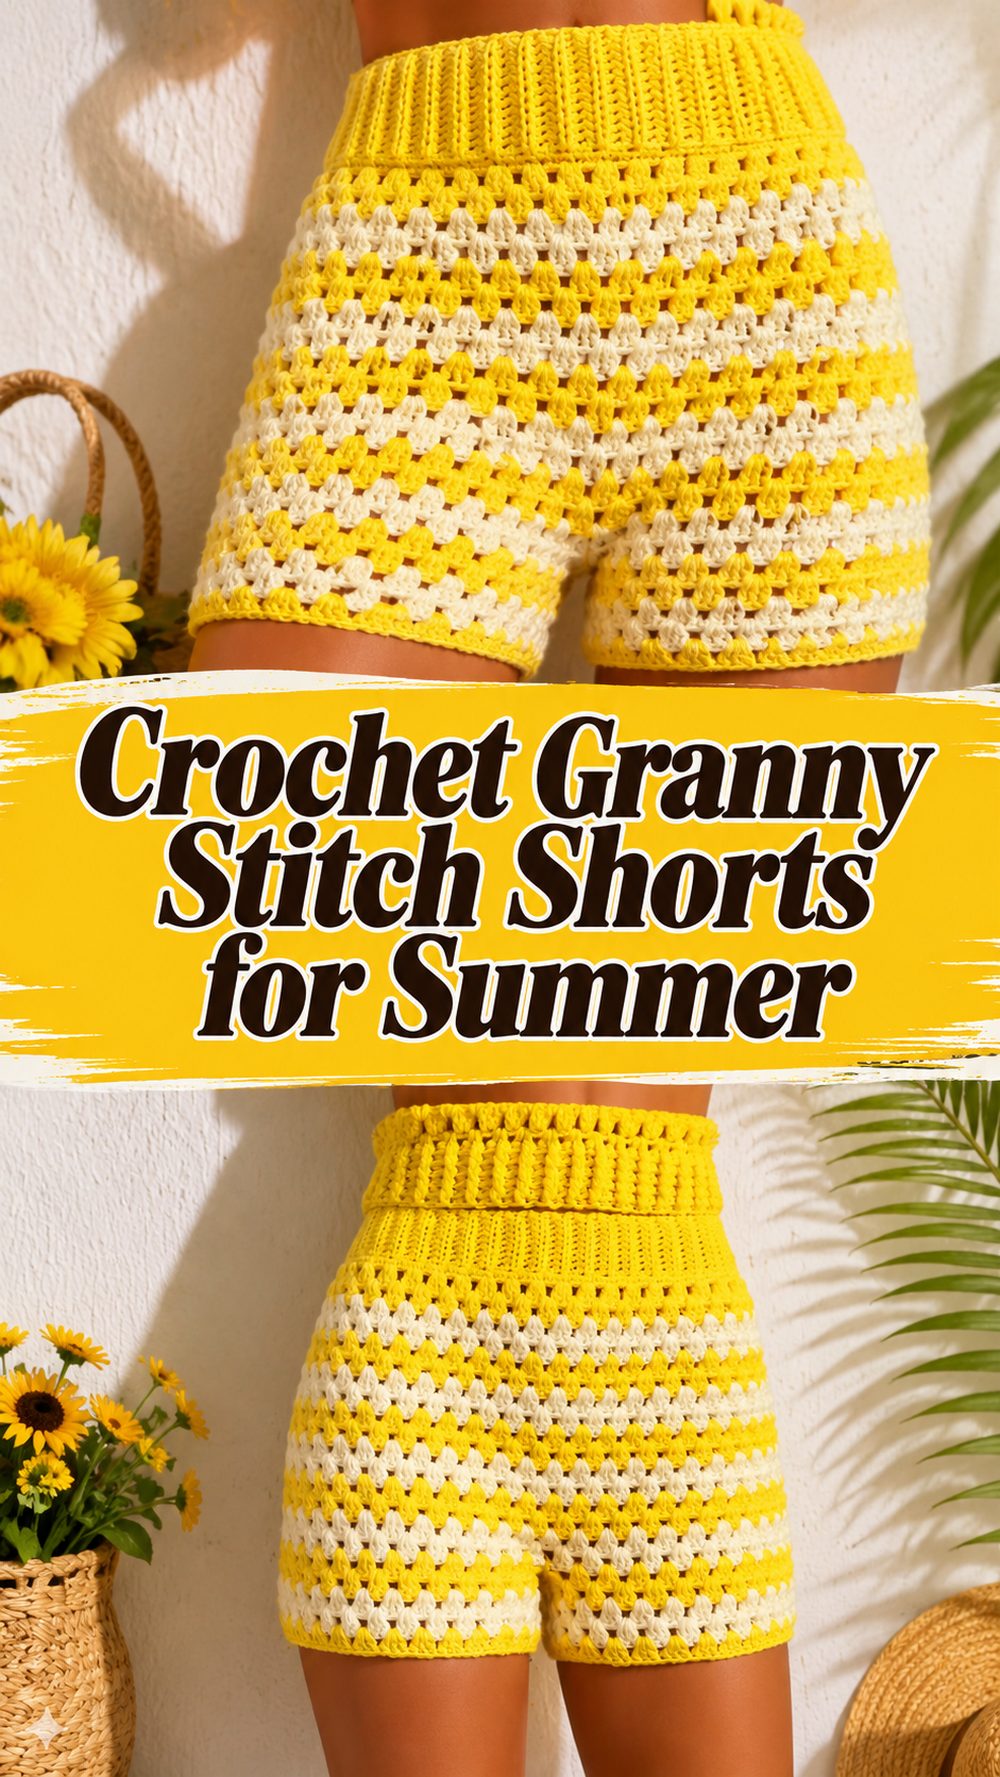
Crochet granny shorts are one of those projects that feel playful, useful, and really satisfying once they start taking shape. They have that relaxed handmade look that works beautifully for warm weather, beach days, lounging at home, or layering over swimwear.
What makes this style especially fun is the classic granny texture. It gives the shorts a breezy feel while still looking colorful and eye-catching. If you enjoy wearable crochet pieces that are cute but still practical, this is a lovely project to try. It is also a nice choice for anyone who wants to move beyond scarves and simple squares and make something they can actually wear. With a soft fit, a flexible waistband, and room to adjust the size as you go, these shorts can be made to suit your own style and comfort.
Why You’ll Love This Project
These crochet granny shorts are fun to make because the stitch pattern builds up quickly and gives the fabric a light, open texture. They are stylish without feeling too complicated, and they are easy to personalize with your own colors, length, and fit.
Materials Needed
- Yarn
- Crochet hook
- Scissors
- Yarn needle
- Stitch markers
- Measuring tape
- Optional drawstring or waistband finishing detail
Use a yarn and hook size that matches your desired fit and texture.
Best Yarn for This Project
For granny shorts, a yarn that feels comfortable against the skin is the best choice. If you want a summer-ready pair, breathable fibers are usually the nicest option. Cotton, bamboo blends, or other lightweight yarns help keep the shorts cooler and more comfortable. If you prefer a softer drape, a light acrylic or acrylic blend can also work, especially if you like a bit more stretch. The goal is to choose something that shows off the granny stitch nicely without making the fabric feel too heavy.
Skill Level
This project is best described as easy to beginner-friendly. The overall shape is simple, and the granny stitch pattern is repetitive once you settle into it. A confident beginner who knows how to chain, make basic stitches, and join pieces should be able to follow along comfortably.
Size and Fit Guide
The easiest way to size crochet shorts is to measure as you work. Check your waist, hips, rise, and preferred leg length before you start. As the shorts grow, hold them up or try them on carefully to see whether you want a snugger or looser fit. You can make the shorts wider by adding more stitch repeats and longer by continuing more rows or rounds before finishing. If you want extra comfort, leave a little ease through the hips and upper thigh.
Stitches Used
- Chain
- Slip stitch
- Double crochet
- Granny stitch clusters
- Spaces between clusters
- Basic joining
How to Make It
Step 1: Start the Foundation
The shorts begin with a foundation that sets up the granny stitch pattern. This first part is important because it decides how the shorts will sit around the waist or upper hip area, depending on the style you want. Keep your starting chain even and not too tight. Since wearables need flexibility, it helps to pause early and compare the width against your body or a pair of shorts you already like.
Step 2: Build the Granny Stitch Fabric
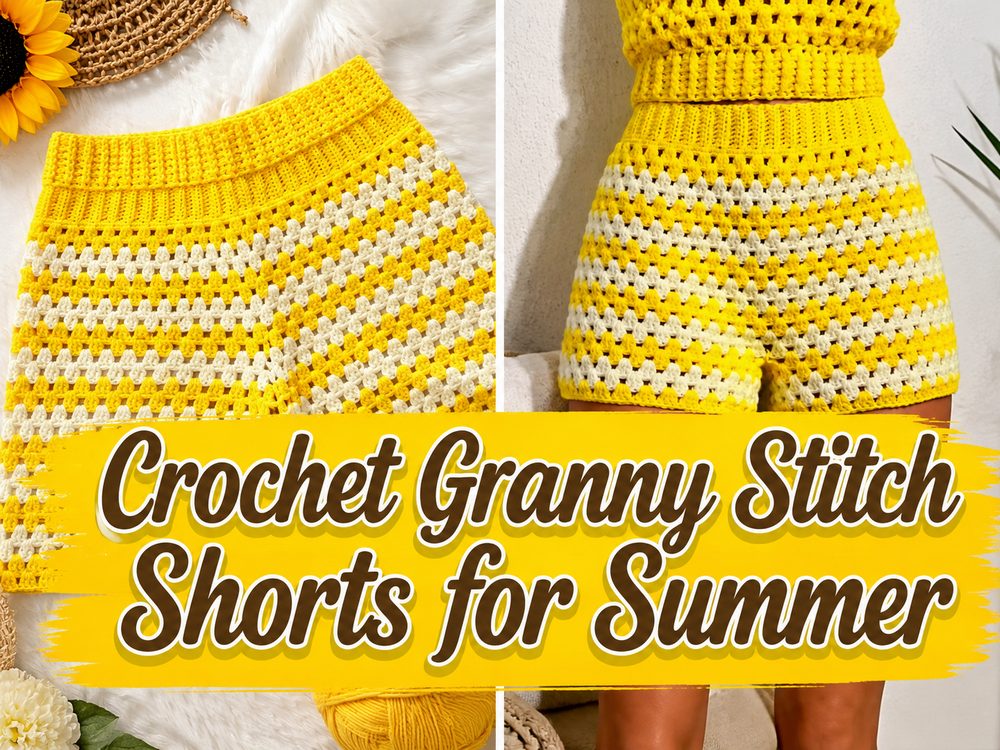
Once the base is ready, the main fabric is worked in granny stitch. This gives the shorts that recognizable open, textured look made from clusters separated by spaces. The pattern grows fairly quickly, which makes the project feel encouraging even if you are still getting used to crochet clothing. Try to keep your tension steady so the stitches look balanced from one side to the other. If one section starts pulling tighter than the rest, it is worth fixing early before the shaping begins.
Step 3: Shape the Front and Back
After the main section is started, the piece is worked and shaped so it can become wearable shorts rather than a flat panel. This is where the project begins to look more structured. The shaping creates room for the body and helps form the rise. Work carefully here and keep checking that both sides stay even. If the tutorial’s exact counts are not something you want to follow strictly, focus instead on symmetry and fit. The fabric should sit comfortably without twisting.
Step 4: Form the Leg Sections
As the shorts take shape, the work is separated so each leg opening can be created. This part is exciting because the project suddenly starts to look like real clothing. Keep an eye on the spacing and check that the leg openings feel comfortable. If you like a more relaxed summer fit, you can leave a little extra room. If you prefer a closer fit, stop earlier and keep the edges neat. The granny stitch keeps the shorts breathable, which makes this style especially nice for warmer days.
Step 5: Adjust the Length
One of the best things about crochet shorts is how easy they are to customize. You can keep them short and playful, or continue a little longer for more coverage. When adjusting length, try to keep the overall proportions balanced with the waistband and rise. If the shorts are too short in the rise, they may feel uncomfortable no matter how pretty the stitch pattern looks. It is always better to test the fit before finishing the edges.
Step 6: Join the Piece
When the shaping is complete, the shorts are joined to create the full body and the inner leg seams. Take your time here so everything lines up properly. Using stitch markers before joining can really help. A neat join makes a big difference in the finished look, especially with a textured stitch like granny clusters. Make sure both leg openings are even and that the center section does not pull awkwardly when worn.
Step 7: Finish the Waistband
The waistband helps pull the whole project together. Depending on the method used, this section may be kept simple or made a little firmer for a better hold. Some crocheters like to add a drawstring or a slightly tighter finishing round for comfort and adjustability. For wearable crochet, the waistband matters just as much as the decorative stitch pattern. You want it to feel secure without digging in.
Step 8: Tidy the Edges and Weave In the Ends
Once the shorts are fully shaped, finish the edges cleanly and weave in all loose yarn ends. This final bit always makes the piece look more polished. If the edges feel wavy, blocking can help settle the stitches and give the shorts a neater outline. The final pair should look light, textured, and easy to wear, with a soft handmade shape and breathable granny stitch detail.
Helpful Tips
- Use breathable yarn if you want these for summer wear.
- Check the fit before joining the inner seams.
- Keep your stitch tension even so both sides match.
- Use stitch markers to mark the center and leg sections.
- Try the shorts on as you go whenever possible.
- Block the finished shorts lightly for a cleaner shape.
Common Mistakes to Avoid
- Making the starting chain too tight
- Forgetting to check the fit before shaping the legs
- Letting one side grow longer than the other
- Joining the seams without matching the stitches first
- Choosing yarn that feels too heavy or too warm
- Skipping the waistband adjustment and ending up with a loose fit
Customization Ideas
You can make these shorts in bright summer colors, soft neutrals, or a striped look for a playful finish. Add a drawstring for extra comfort, make the legs longer for more coverage, or keep them shorter for a beachy style. You could also add a simple edging around the leg openings for a more finished decorative touch.
Style Ideas
These crochet granny shorts look lovely with a simple tank top, bikini top, oversized shirt, or matching crochet crop top. They are cute for holidays, festivals, poolside outfits, or relaxed summer weekends. They also make a fun handmade gift for someone who loves boho-style clothing.
Care Instructions
Hand wash gently in cool water if possible. Lay the shorts flat to dry so they keep their shape. Avoid high heat, especially if your yarn has any synthetic fiber in it. Store them folded rather than hanging if the fabric feels stretchy.
Time Needed
This may take a few hours depending on your speed, yarn, size, and stitch pattern.
Conclusion
Crochet granny shorts are such a fun warm-weather project because they are both practical and stylish. The granny stitch gives them a relaxed handmade charm, and the fit can be adjusted as you go, which makes them feel much more approachable than they might seem at first. Once you finish your first pair, it is easy to imagine making another in a different color or length.
FAQs
1. Is this project beginner-friendly?
Yes, it is a good project for a beginner who already knows a few basic stitches and wants to try a simple wearable.
2. What yarn is best for crochet granny shorts?
Lightweight cotton or a soft breathable blend is great for summer, while a lighter acrylic can work for a softer drape.
3. Can I adjust the size easily?
Yes. You can adjust width, rise, and length by measuring as you go and adding or reducing stitch repeats.
4. Will granny stitch shorts feel too open?
That depends on your yarn, hook, and tension. A slightly tighter gauge can make them feel more comfortable while still keeping the airy look.
5. How do I make them more comfortable to wear?
Check the rise and hip fit carefully, use a comfortable yarn, and make sure the waistband is secure but not too tight.