Dress your calves with drama! This handpicked set focuses on airy, openwork (lattice, mesh, shells) you can thread with satin ribbon for corset-style flair—plus a few true lace-up tutorials when you want the full criss-cross moment. Most are beginner-friendly and worked top-down or in flat panels that seam into tubes, so you can customize circumference and height as you go. Use cotton or wool blends for structure, then lace 6–10 mm satin through eyelets or ch-1 spaces. For a softer look, tie bows at the ankle; for bold coquette vibes, run a long ribbon the full length and finish with a neat bow at the cuff. Pick a pair, match your ribbon, and get that polished, balletcore finish—fast.
Lace Up Flared Leg Warmers
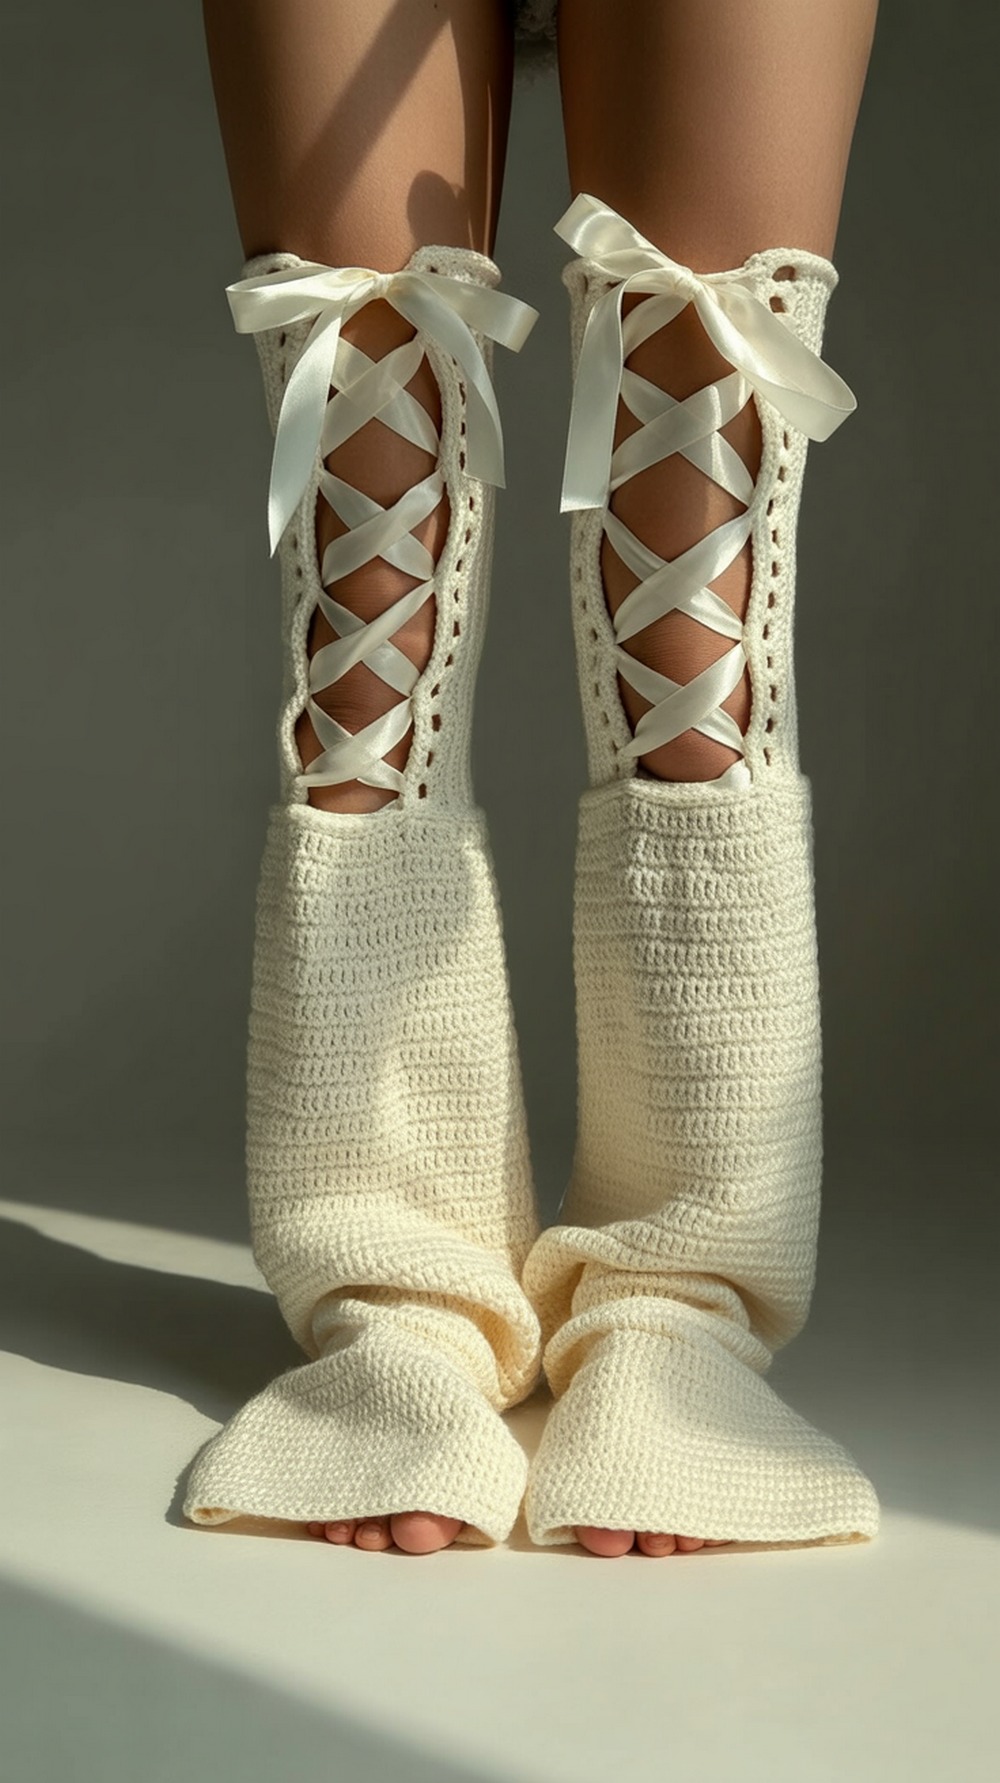
This tutorial gives you the classic lace-up silhouette with flared hems and ribbon threaded through front eyelets. It’s built made-to-measure, so you’ll size as you crochet for a snug calf and dramatic flare. Keep your stitches even to ensure clean lacing channels; block lightly so the edges don’t curl. For durability, melt-seal (synthetic) or whip-stitch (fabric) ribbon ends before threading. Want crisp criss-crosses? Lace from ankle upward and snug at the top. Finish with a bow or short tails for a sleek line. Thread 6–8 mm satin ribbon, and tie gently to avoid puckering.
Supplies: Worsted/aran (#4) acrylic or cotton; 5.0–5.5 mm hook; satin ribbon (6–8 mm); yarn needle; scissors
Why it’s great: Built-in eyelets make lacing clean and secure.
Lace Up Flared Leg Warmer
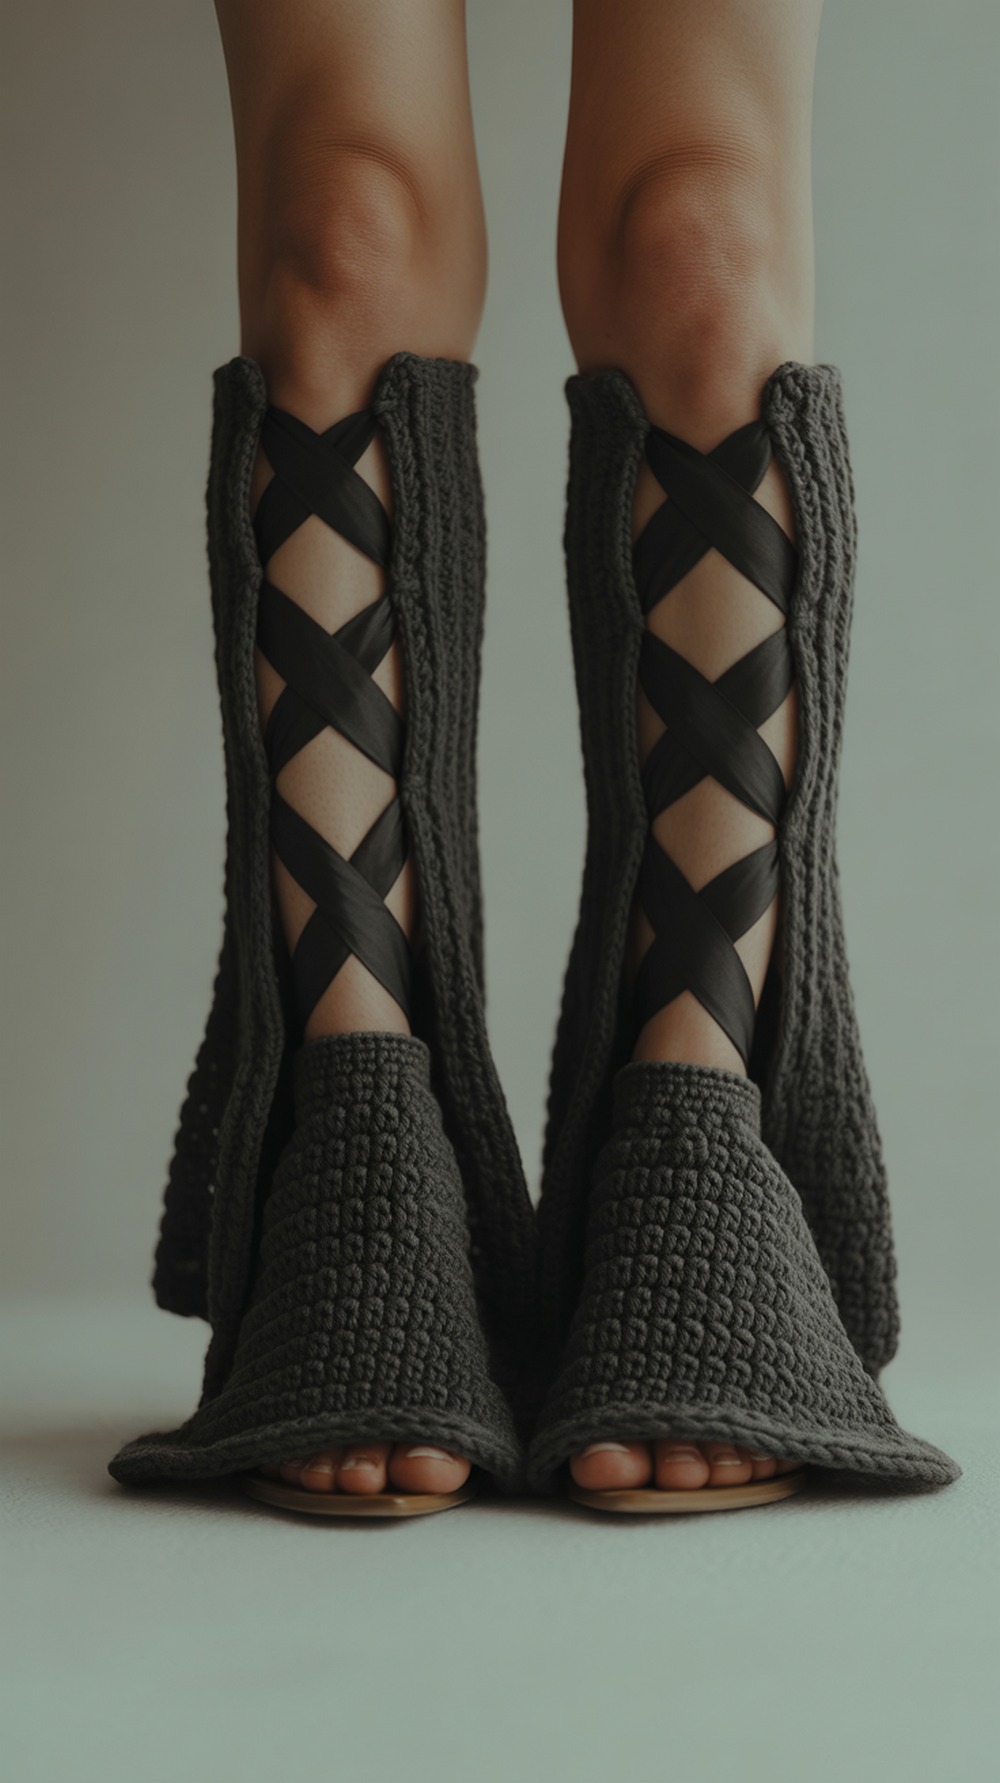
A succinct, recent video guide to the same lace-up concept—great if you prefer a quick pacing. You’ll crochet a slim tube, add a flare, then create consistent eyelets for ribbon threading. Measure ankle, widest calf, and desired height first; note those in your phone to keep both legs identical. Weave ribbon on the leg to check spacing before trimming. If you want taller, add repeats above the flare and mirror them on the second warmer. Choose satin or grosgrain ribbon; both hold a bow nicely. Seal ribbon ends so they don’t fray.
Supplies: Worsted (#4) yarn; 5.0 mm hook; satin/grosgrain ribbon (6–8 mm); stitch markers; yarn needle
Why it’s great: Short, clear demo you can finish in an evening.
DIY Lacey Leg Warmers with Corset Lace Tie

This project leans into openwork and specifically shows a corset-style lace tie that’s easily adjusted for fit and aesthetics. The mesh panels make perfect ribbon channels; the pattern is forgiving and size-inclusive. Tip: steam-block mesh lightly (no squashing) to keep openings uniform for smooth lacing. If your ribbon slips, add tiny bar-tack knots inside to anchor at top and bottom. For dancing or long wear, weave elastic cord behind the ribbon for hidden stability. Tie your bow at the front or outer calf to show it off.
Supplies: DK–worsted (#3–4); 4.5–5.0 mm hook; 8–10 mm satin ribbon; measuring tape; yarn needle
Why it’s great: Purpose-built for corset lacing over airy mesh.
Bow Front Leg Warmers

Prefer bows to full lacing? This tutorial builds simple tubes with a tidy front bow detail, giving you that coquette pop without threading the whole length. Make them knee-high or ankle-skimming; just add or subtract rounds. Tip: interface your bow tails or use double-faced satin so the loops stay crisp. If your ribbing loosens over time, run thin elastic through the inside of the top round. Pair a neutral yarn with pastel ribbon for contrast.
Supplies: Worsted (#4) yarn; 5.0 mm hook; 12–16 mm ribbon for bow; yarn needle; elastic (optional)
Why it’s great: Fast glow-up with minimal finishing.
No Sew Bow Detail Leg Warmers
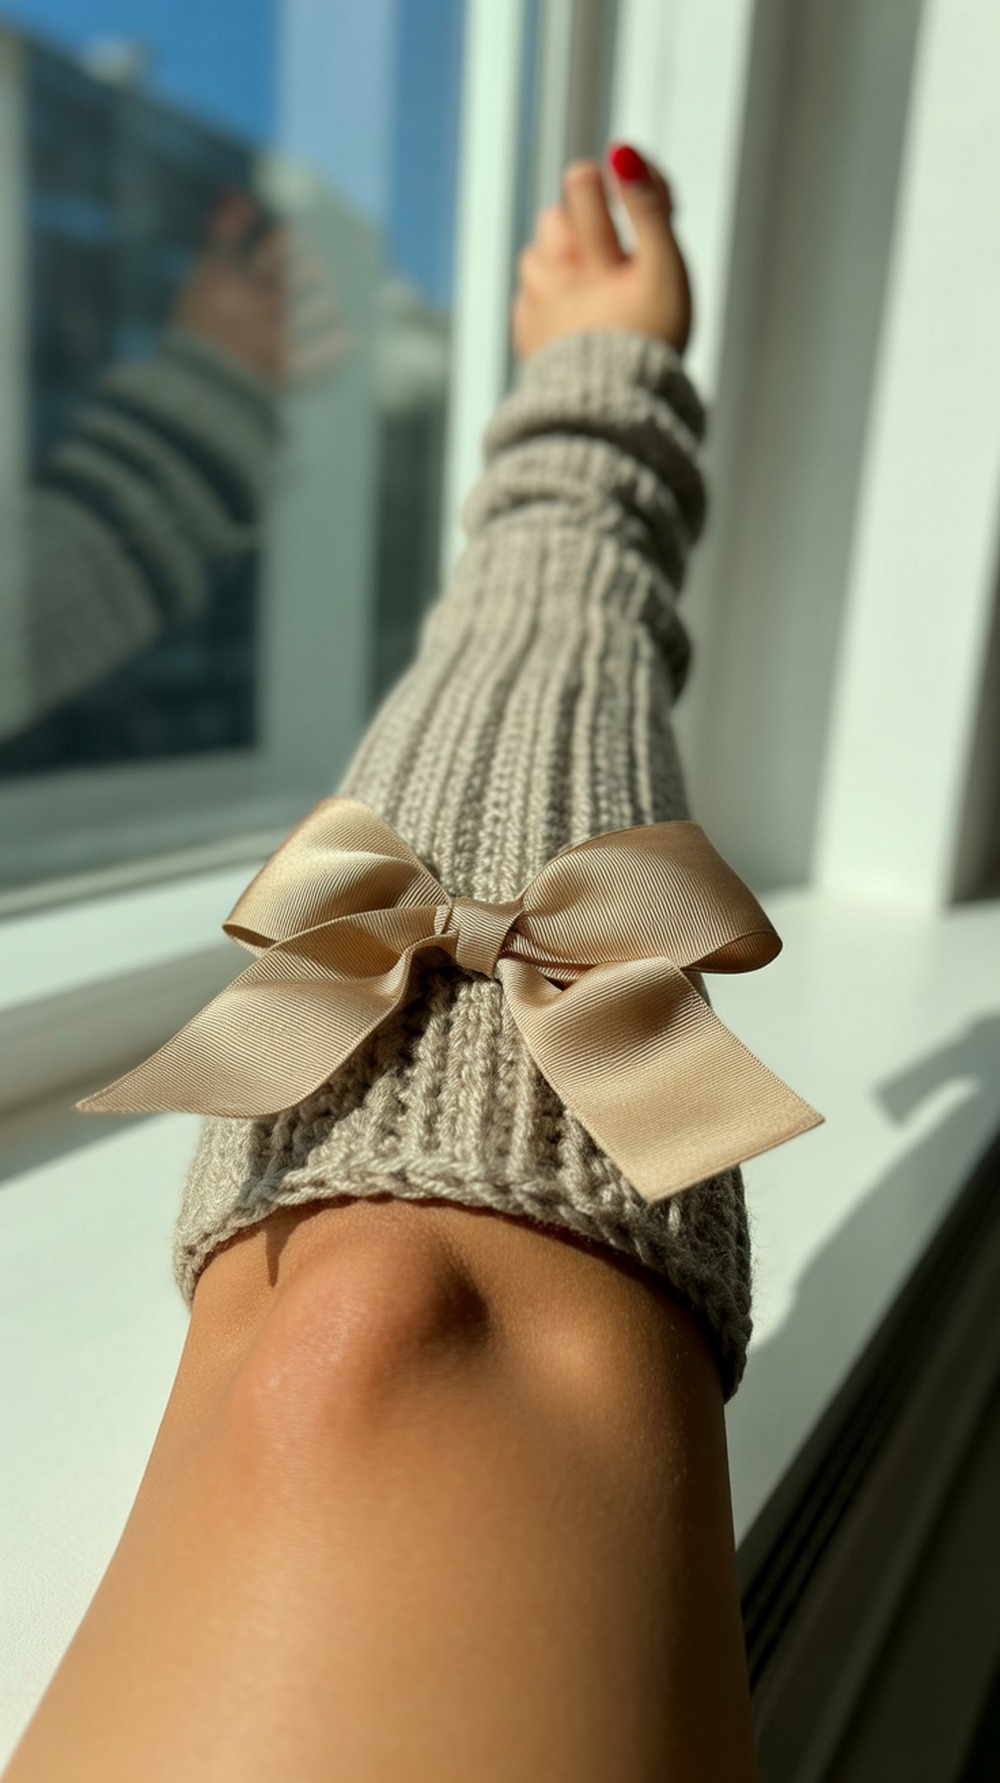
Here, the bow detail is built in—no sewing bows later. The pattern shows a straightforward cuff-plus-body approach, then demonstrates placing the ribbon neatly. Keep your tension even through the cuff for grip; if making thigh-highs, add light elastic in the top round. Satin ribbon works, but grosgrain resists slipping—great over tights. Finish with short tails for everyday wear.
Supplies: Worsted (#4) yarn; 5.0–5.5 mm hook; ribbon (10–12 mm); tape measure; yarn needle
Why it’s great: Clean bow look with zero extra assembly.
Pinterest Inspired Pom Pom & Bow Warmers

For playful coquette style, this tutorial adds small pom-poms and a bow accent. Use a mesh or eyelet row near the ankle to thread a thin ribbon; leave long tails for movement. Keep pom-poms compact so they don’t snag. If you’re active, tack the bow at two points to prevent spinning. Choose monochrome yarn and matching ribbon for a chic set, or contrast for pop.
Supplies: Worsted (#4) yarn; 5.0 mm hook; 6–8 mm ribbon; pom-pom maker; yarn needle
Why it’s great: Maximal cute factor with lightweight details.
Wisteria Open Lace Leg Warmers

This free pattern (sizes Baby–3XL) features repeating lace panels and ch-1 spaces that double as ribbon channels—perfect for threading a slim satin through one or two vertical columns. Use a 6–8 mm ribbon for delicate lacing, or a micro 3–4 mm for subtle detail. The post-stitch cuffs hug the leg; block gently to open the lace. Tip: mirror your ribbon path on both legs so the bows tie on the same side. Tutorial
Supplies: DK (#3) yarn; 5.0 mm hook; narrow satin ribbon; markers; yarn needle
Why it’s great: Size-inclusive lace with ready-made eyelets.
Spicy Lace Leg Warmers

Want fast stitches and dramatic texture? This super-bulky lace pattern works up quickly and produces big, graphic openings—great for a wide ribbon accent threaded just at the cuff or across one front panel. Keep ribbon proportionate (10–15 mm) so it doesn’t overwhelm the lace. Because the fabric is chunky, block flat and let it dry completely before lacing so the eyelets stay consistent. Tutorial
Supplies: Super bulky (#6) yarn; 9–10 mm hook; wide satin ribbon; tapestry needle; scissors
Why it’s great: Big-lace look that laces beautifully and fast.
Shell Mesh Leg Warmers

This tutorial uses shell stitch for an airy mesh—ideal for weaving a slim ribbon up one side seam for an asymmetric lace-up look. Work to your preferred height, then edge with simple sc for structure. Tip: thread ribbon on the wearer and snug gradually to avoid puckering shells; tie the bow at mid-calf for balance. Block lightly so shells open evenly and lacing looks neat.
Supplies: Worsted (#4) yarn; 5.0 mm hook; 6 mm ribbon; stitch markers; yarn needle
Why it’s great: Classic shells create instant lattice for ribbon.
Beginner Tubes with Bow Accent
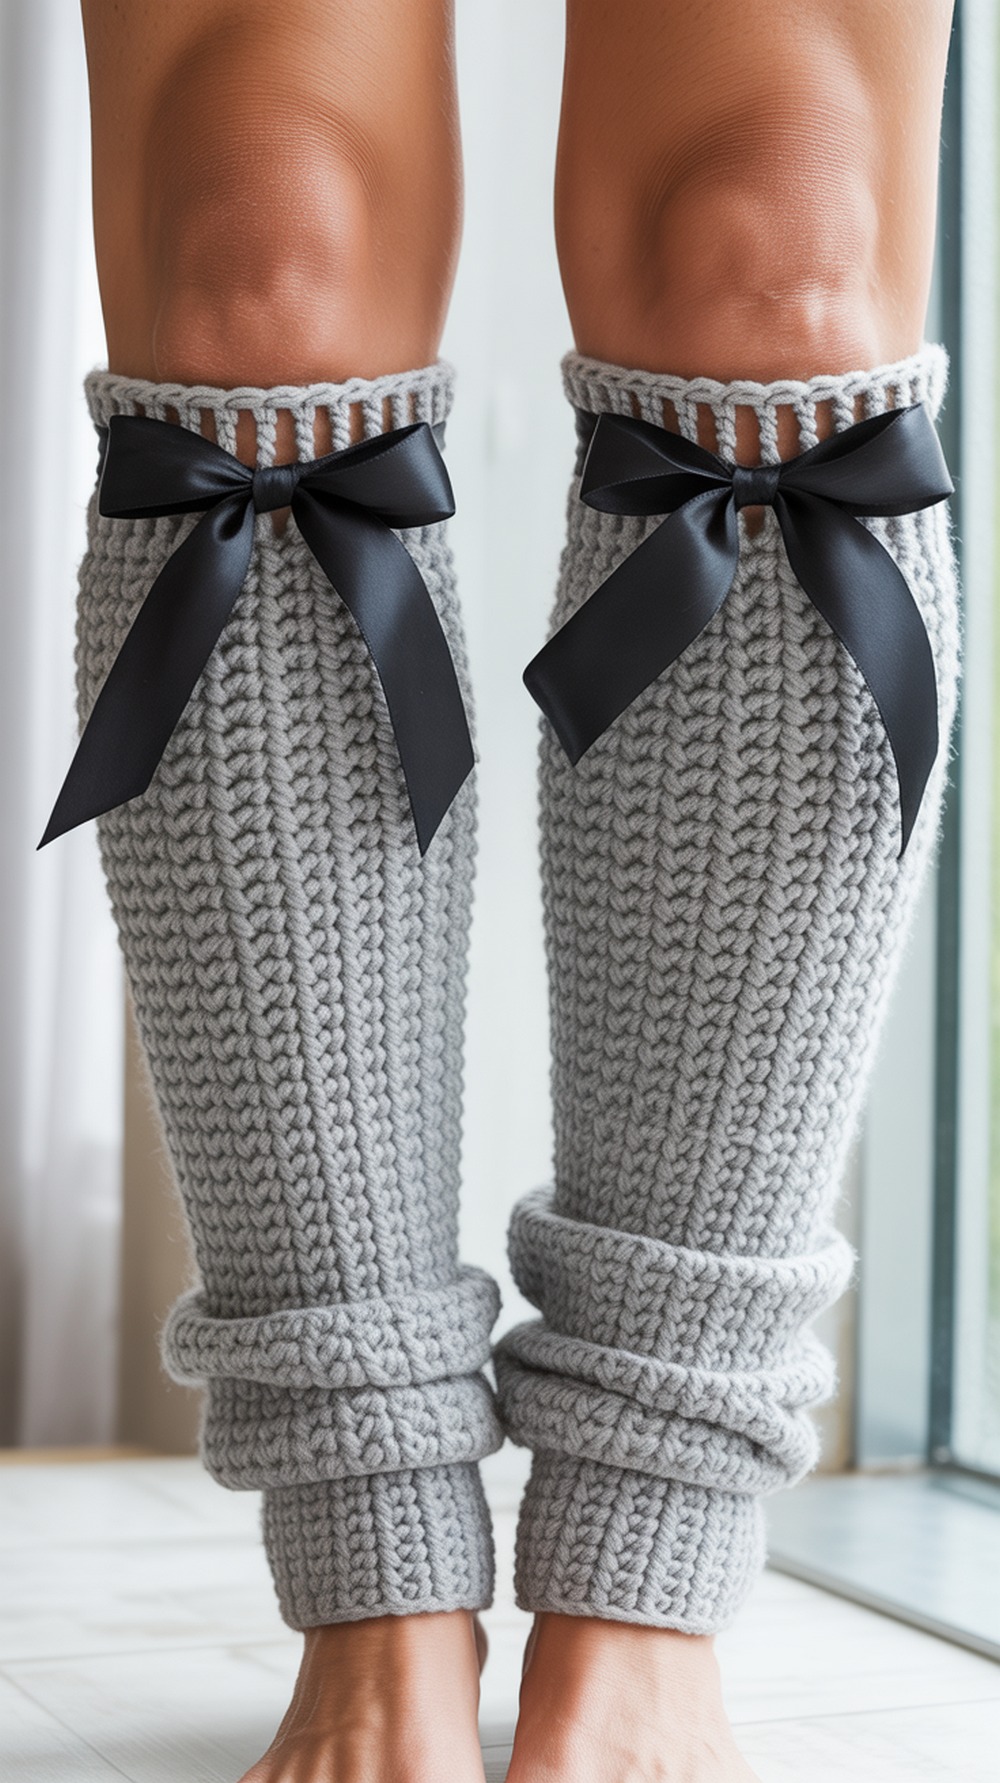
Start here if you’re brand-new. This pattern is a straightforward tube worked in rounds; add an eyelet round (ch-1, sk-1) near the top, then thread a narrow ribbon for a sweet bow finish. Measure calf circumference; adjust starting chain to fit without strain. If the tube grows with wear, run clear elastic through the eyelet round under the ribbon. Choose a soft worsted for comfort and easy care. Tutorial
Supplies: Worsted (#4) yarn; 5.5 mm hook; 6 mm ribbon; measuring tape; yarn needle
Why it’s great: Beginner build with simple ribbon add-on.
Conclusion
Pick one “easy win” first—like #10 or #5—then graduate to full corset lacing in #1–#3. Keep ribbon widths proportional to your lattice, block gently for crisp eyelets, and finish ribbon ends so they last. With a couple evenings of stitching, you’ll have custom, cozy leg warmers that elevate everything from leggings to skirts. Bookmark this list, and share your favorite combo of yarn + ribbon—you’ll inspire someone else to lace up, too.
FAQs
What yarns work best for ribbon-laced, home-wear leg warmers?
Worsted cotton or cotton-acrylic blends hold shape and show lattice clearly; wool blends add warmth and bounce. Avoid very slick fibers if you want the ribbon to stay tied.
Machine wash or hand wash—and drying tips?
Check the yarn label. Acrylic/cotton blends are usually machine-wash cold, lay flat to dry. Remove ribbons before washing; re-lace after blocking flat.
How do I scale patterns for calf size or height?
Use “made-to-measure” notes or adjust starting chains/row counts. For tubes, add/decrease stitches in multiples required by the stitch pattern; for height, add repeats evenly to both legs.
Which fibers are safe for kitchen/bath or light heat exposure?
Cotton handles humidity and mild warmth better than acrylic. Keep all crochet and ribbon away from open flames or high heat—these are fashion items, not hot pads.
Best joins/edgings for durability?
Back-loop rib cuffs for stretch; slip-stitch seams; single-crochet or reverse-sc (crab stitch) edging to lock shape. Reinforce eyelet rounds with one firm sc round above and below.
Typical time and yardage?
Ankle-to-mid-calf pairs: 200–350 yds (DK–worsted) in 3–6 hours. Tall lace or flares: 350–500 yds in 6–10 hours. Super-bulky lace (#8) is fastest at 2–4 hours.
Photo tips?
Shoot near a window, angle legs three-quarters, and keep backgrounds clean. A slight bend in the knee shows shaping and lacing best.
How to fix curling, stretching, or wavy edges?
Light steam or wet-block flat; add a stabilizing sc or crab-stitch edge; weave elastic through the top round; if wavy, reduce stitches slightly or go down a hook size for the border.