A crochet bat bag can make the bat itself the entire purse shape, place a flat bat across a conventional bag, build the design from granny squares, or use a dimensional bat as a removable accent. Those choices affect much more than appearance: the bag can differ in usable interior space, opening style, strap support, fabric stretch, finishing, and how prominently the bat motif reads.
This collection deliberately includes several construction routes. The first source teaches a complete bat purse, while the remaining tutorials focus on bat granny squares, appliqués, or soft bats that can be combined with a separately chosen bag construction. That distinction matters when planning what you actually need to crochet. The comparisons below focus on structure, motif placement, closure clearance, reinforcement, and other practical decisions rather than treating every bat design as interchangeable.
Quick List
- Wing-Shaped Crochet Bat Crossbody Purse
- Crochet Bat Granny Square Crossbody Bag
- Crochet Patchwork Bat Square Shoulder Tote
- Crochet Oversized Bat Appliqué Messenger Bag
- Crochet Bat Appliqué Zipper Pouch
- Crochet Single-Bat Mini Crossbody Bag
- Crochet Mini-Bat Drawstring Treat Bag
- Crochet Graphic Bat Emblem Flap Bag
- Crochet Scattered-Bat Everyday Tote
- Crochet Hanging Bat Charm Shoulder Bag
- Crochet Plush Bat Charm Bucket Bag
- Crochet Soft Bat Accent Wristlet
Decide Whether the Bat Is the Bag or the Decoration
A shaped bat purse creates the strongest silhouette because the wings, body, and outline determine the finished bag itself. The trade-off is that unusual outer edges do not necessarily translate into equally generous storage space. Before choosing that route, look at the opening and central body area rather than judging capacity from the full wingspan.
A granny square or appliqué gives you more control over the underlying bag. You can select the tote, pouch, crossbody, or flap construction for function first and then add the bat. Dimensional soft bats offer another route: they work as charms or accents without requiring the main bag to have an unusual shape. That makes them useful when you want the Halloween theme to be removable.
Structure, Stretch, and Strap Support Matter
Crochet bag fabric can stretch under use, and a decorative bat does not solve that structural issue. A dense bag body generally behaves differently from an open granny-square panel, so consider what will actually be carried and whether a lining would improve containment, shape, or privacy. Do not assume a tutorial includes lining unless the creator specifically shows or states it.
Strap connections deserve separate attention. Keep the main load at structurally sound parts of the bag rather than expecting a wing tip, appliqué edge, or decorative square to carry it. If you change the yarn from a source project, remember that fiber, yarn thickness, and fabric density can also change drape and stretch. Make a decision based on the fabric you actually produce, not color alone.
Plan Bat Scale and Placement Before Final Assembly
A bat that looks balanced on a large tote can overwhelm a wristlet, while a tiny appliqué may disappear on a wide messenger flap. Crochet the motif first when practical, finish or block it as appropriate for the fiber, and compare its actual dimensions with the intended bag panel.
Leave visual and functional clearance around zippers, drawstring channels, handles, flap folds, and seams. For repeated bats, temporarily arrange all motifs before attaching them. That lets you adjust spacing without having one edge look crowded. Granny-square bags need an additional checkpoint: compare the finished square dimensions with the other squares or panels being joined. A visually compatible motif still needs compatible physical dimensions.
1. Wing-Shaped Crochet Bat Crossbody Purse
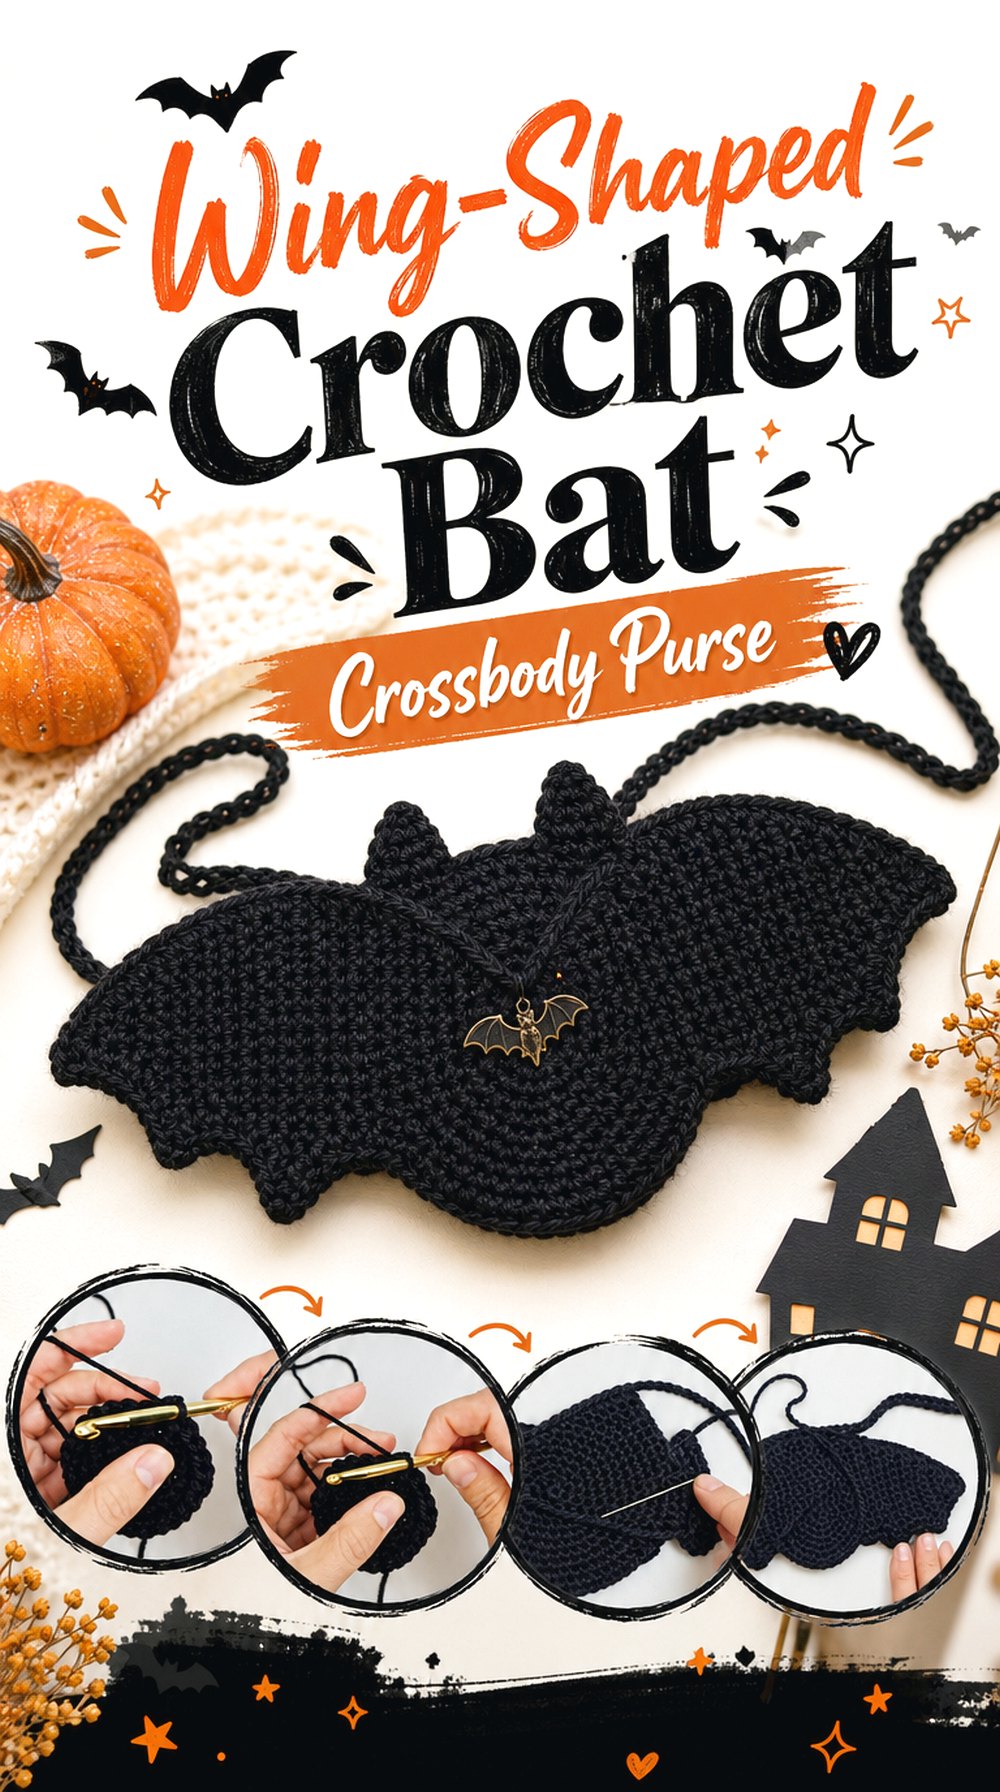
This option makes the bat silhouette the main event rather than placing a bat on an ordinary purse. Stitch and Hound Crochet’s source tutorial produces a functional purse from bat-shaped motifs, with the wings creating the recognizable outer profile. It is a strong choice when you want the accessory to read unmistakably as a bat even from a distance.
The unusual outline also means the apparent width of the wings should not be confused with usable storage space. Think about what needs to fit through the central opening, how the purse will sit against the body, and whether your intended contents need additional containment. The source is the most direct whole-bag tutorial in this collection.
The Wings Define Shape More Than Capacity
A wide wing silhouette creates visual impact, but the practical interior is concentrated closer to the center of the purse. Before choosing it for a particular use, compare the things you intend to carry with the actual opening and central storage area shown by the creator. If capacity is the priority, a conventional tote with a bat decoration may offer a more efficient use of its outside dimensions.
Keep the Strap Anchors Structurally Supported
A shaped purse has several visually dramatic points that should remain decorative rather than becoming accidental load-bearing areas. Watch where the original construction places the strap and preserve a sound connection if you customize its length or styling. An attachment that pulls heavily on a narrow wing tip could distort the silhouette even when the crochet itself looks neat.
Decide on Interior Finishing Early
If you want a lining, pocket, or other interior finish, consider it while you can still examine the purse’s internal shape easily. Bat wings and curved edges make a lining less straightforward than a plain rectangular tote. You do not need to add one automatically, but planning before final finishing is easier than discovering afterward that the fabric stretches more than your intended use allows.
Original Tutorial and Creator Credit
Creator: Stitch and Hound Crochet
2. Crochet Bat Granny Square Crossbody Bag
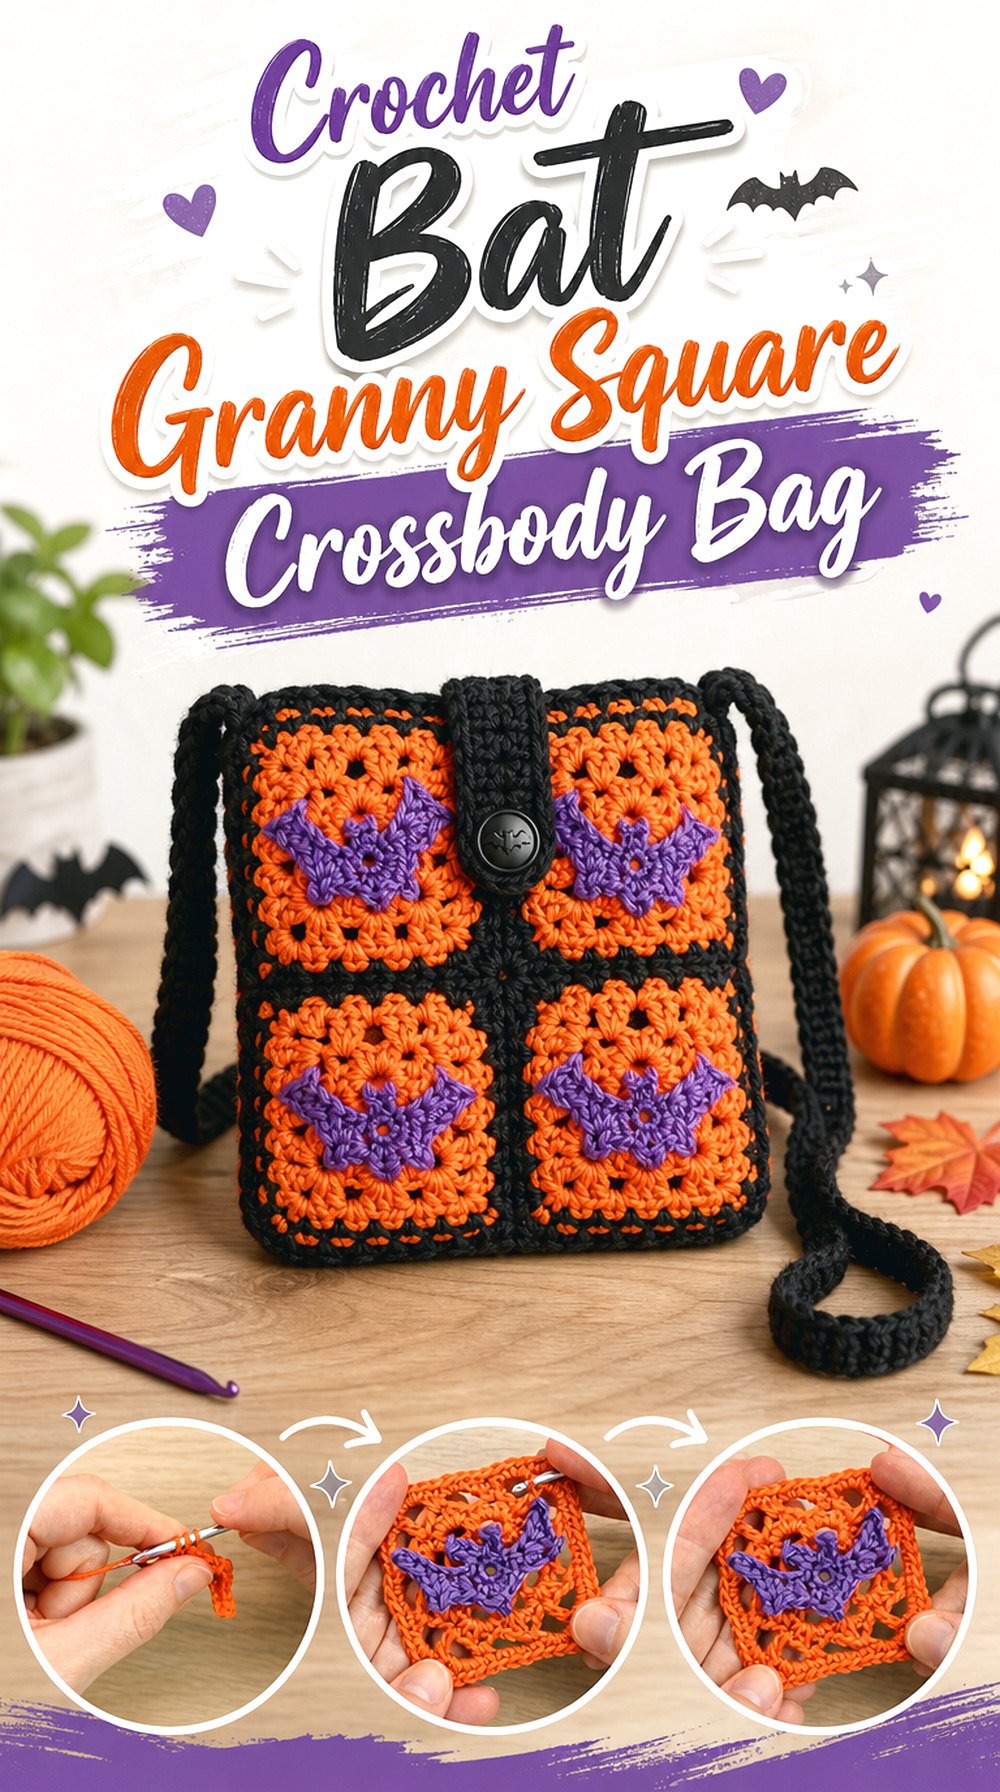
A bat granny square offers a modular way to make a themed crossbody without forcing the entire bag into a winged outline. HappyBerry Crochet’s tutorial focuses on the square itself, so the bag body is an adaptation: use the finished motif as a front panel, pair it with compatible crochet panels, and choose an independent strap and opening construction.
This route suits readers who want a recognizable bat centered within a tidy geometric frame. It also gives you more freedom to control bag depth and interior shape than a sculpted bat purse. The important planning step is to let the finished square—not an assumed measurement—guide the dimensions of the rest of the bag.
Let the Finished Square Determine the Front Panel
Crochet and finish the bat square before committing to the surrounding panel dimensions. Yarn substitutions and individual tension can change its final scale. Once you know the actual square size, you can decide whether it should form the whole front, sit inside a border, or become one part of a larger panel without forcing the motif to fit a predetermined bag.
Move Strap Stress Away From the Decorative Center
The bat motif is the visual focus, but it does not need to carry the bag’s structural load. Position strap attachments where the surrounding bag construction can distribute tension effectively. This is especially important if the square has more open areas than the side or back panels. A decorative front can remain visually light while stronger sections handle everyday pulling.
Consider What Can Show Through the Square
If the motif contains visible openings, the color of a lining—or even the contents of an unlined bag—can become part of the finished look. Decide whether you want that contrast. A lining can provide a quiet backdrop behind the bat and improve containment, while an intentionally open construction can create a lighter effect when the intended contents make that practical.
Original Tutorial and Creator Credit
Creator: HappyBerry Crochet
3. Crochet Patchwork Bat Square Shoulder Tote
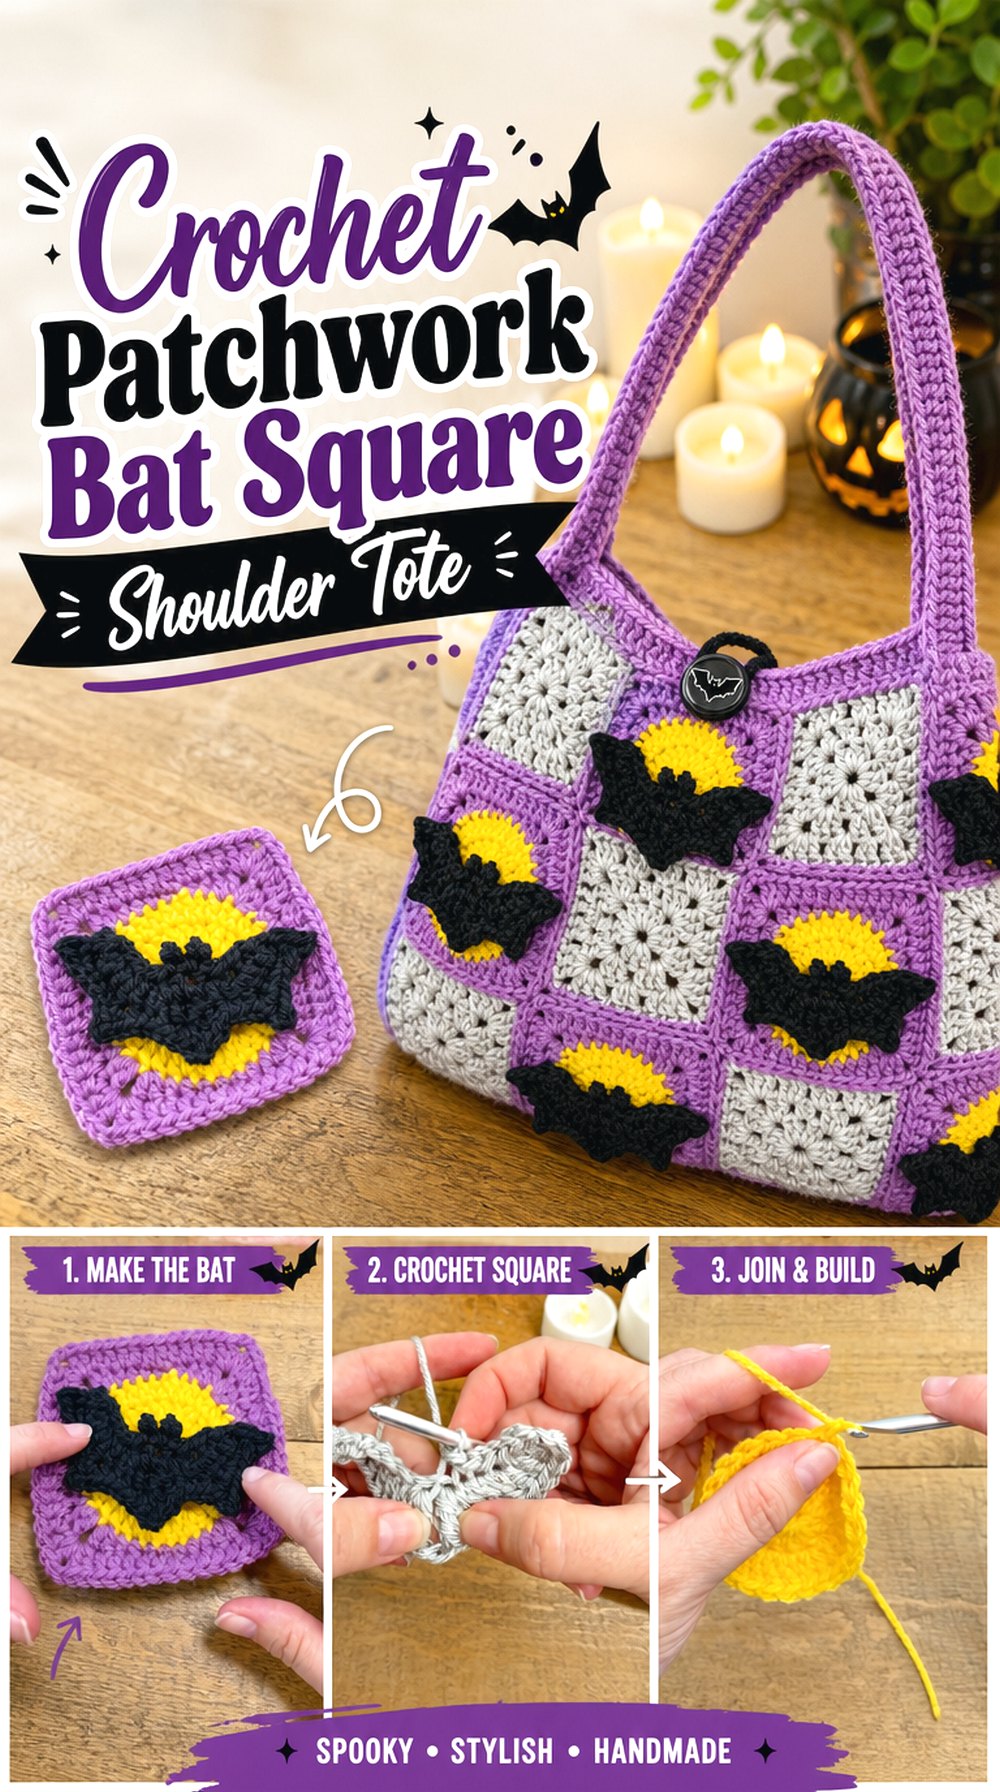
Instead of featuring one central square, this idea turns bat motifs into part of a larger patchwork tote. The Knotting Perch tutorial teaches a bat granny square; the shoulder tote itself should come from a compatible bag layout or your own general panel planning rather than being attributed to that video.
Repeating the motif changes its effect. A single square works like an emblem, while several squares create an all-over Halloween surface. You can also mix bat squares with simpler coordinating squares to reduce visual density. This option is well suited to readers who enjoy modular projects because individual components can be finished and compared before final joining.
Repetition Needs Breathing Room
Covering every available panel with the same detailed bat can make individual silhouettes harder to notice. Before joining, lay the finished squares in different arrangements. Alternating bat motifs with quieter squares can make the bats easier to read while still creating an unmistakably themed tote. The layout decision is visual, so evaluate the full arrangement rather than one square at a time.
Match the Squares Before You Commit to Joining
Small differences become much more obvious when several motifs meet along straight seams. Compare the finished dimensions and edge behavior of all squares first. If you combine this bat design with another square pattern, do not assume that an identical number of rounds produces an identical size. Compatibility should be judged from the actual finished pieces.
Plan Handles Around the Patchwork Grid
A shoulder tote repeatedly pulls upward where the handles meet the body. Look at your square arrangement before choosing those attachment zones. If a handle would land in a particularly open or decorative portion of a bat, changing the grid placement or adding a structurally appropriate upper section may preserve the motif and give the handle connection a more suitable foundation.
Original Tutorial and Creator Credit
Creator: The Knotting Perch
4. Crochet Oversized Bat Appliqué Messenger Bag
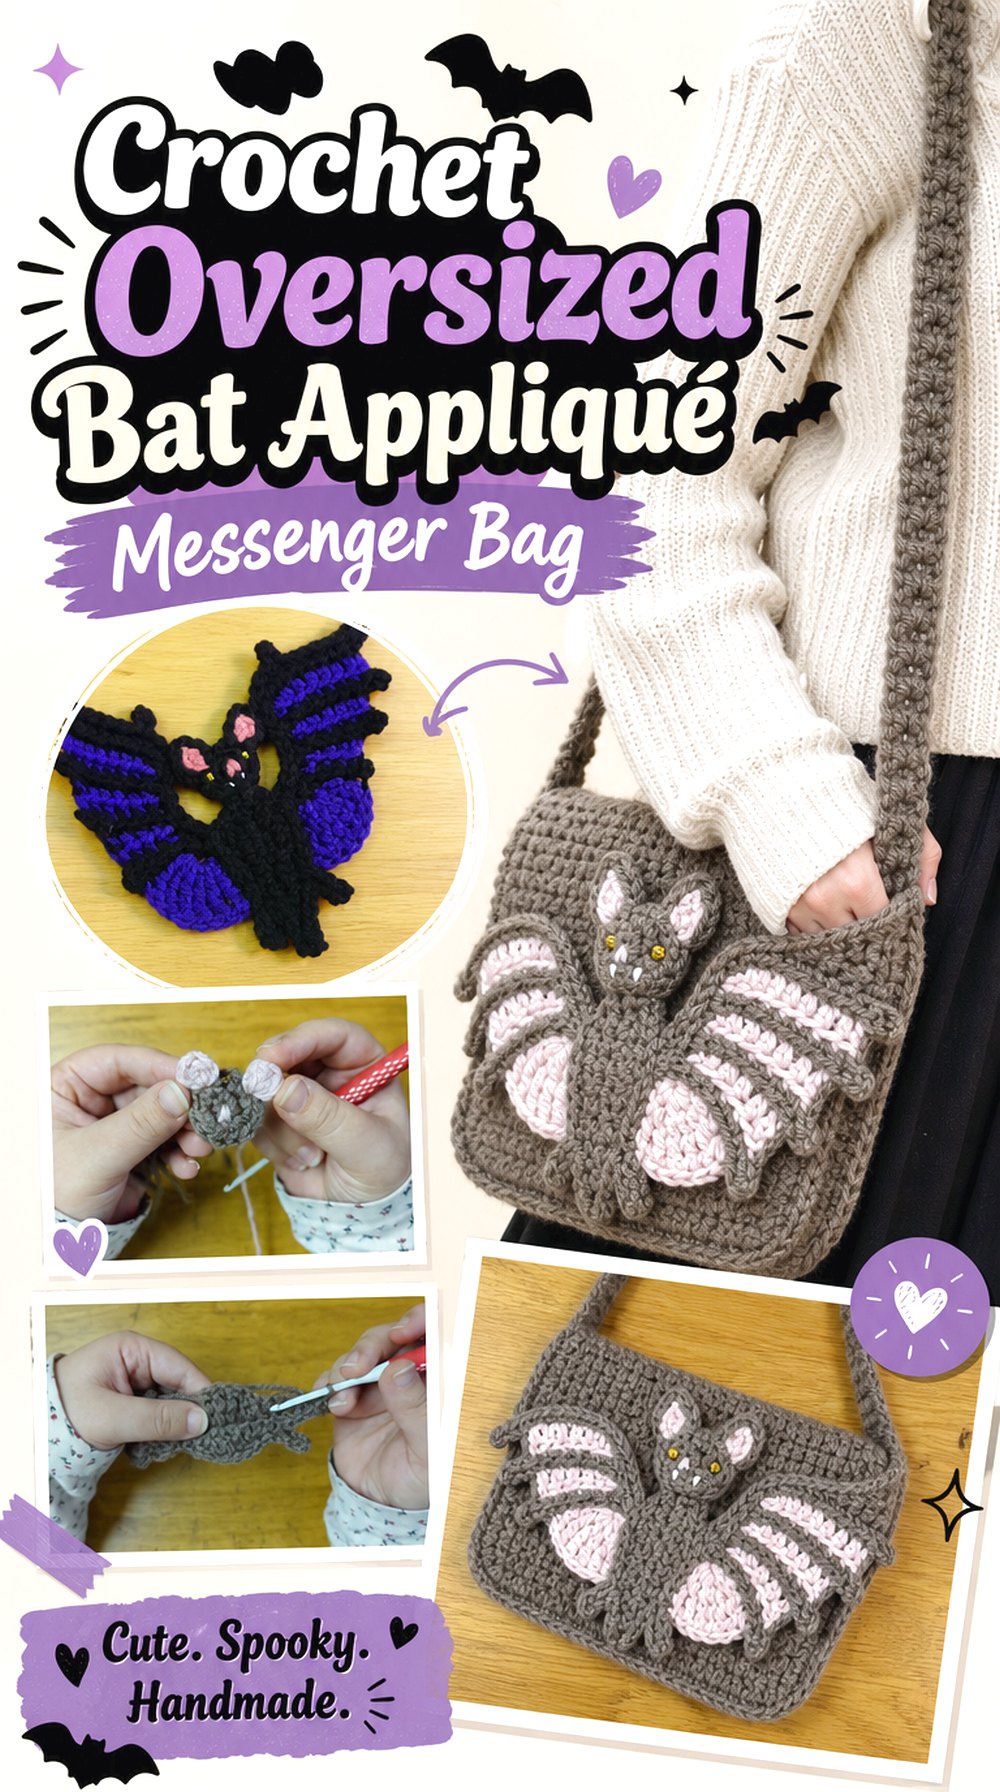
A messenger bag gives a broad flap a clear job: it becomes a display surface for one dramatic bat. Lizfaerie Crafts’ tutorial teaches a wide crochet bat appliqué rather than a messenger bag, so pair it with an independently selected flap-bag construction whose proportions suit your finished motif.
Compared with a granny-square design, the background remains continuous and the bat sits above it as a separate layer. That gives you more freedom to reposition the motif before sewing it down. It also works well when you want contrasting colors without changing the structure of the underlying bag. Check the appliqué against the completed flap before deciding its final placement.
Treat the Flap as a Framed Display Area
Temporarily position the bat while the flap is lying flat and then check it again with the flap closed over the filled bag. The apparent center can change when the fabric bends. Keep important wing and head details away from fold lines, closure hardware, or edges where the silhouette may disappear around the side.
Wide Wings Need Edge Control
A broad appliqué has more outer edge to manage than a compact motif. If the wings curl or lift in a way you do not want, evaluate the finished motif before attachment. Appropriate blocking for the chosen fiber and thoughtful sewing placement may help it sit more cleanly. Avoid stretching the appliqué merely to force it across an undersized flap.
Use Contrast to Preserve the Bat Silhouette
The detailed outer shape is one of the main reasons to choose an appliqué. A bat and background that are too similar in value may merge visually even when the stitches are excellent. Before permanently attaching it, view the combination from several feet away. Strong readability at that distance is a better test of the overall graphic effect than inspecting individual stitches up close.
Original Tutorial and Creator Credit
Creator: Lizfaerie Crafts
5. Crochet Bat Appliqué Zipper Pouch
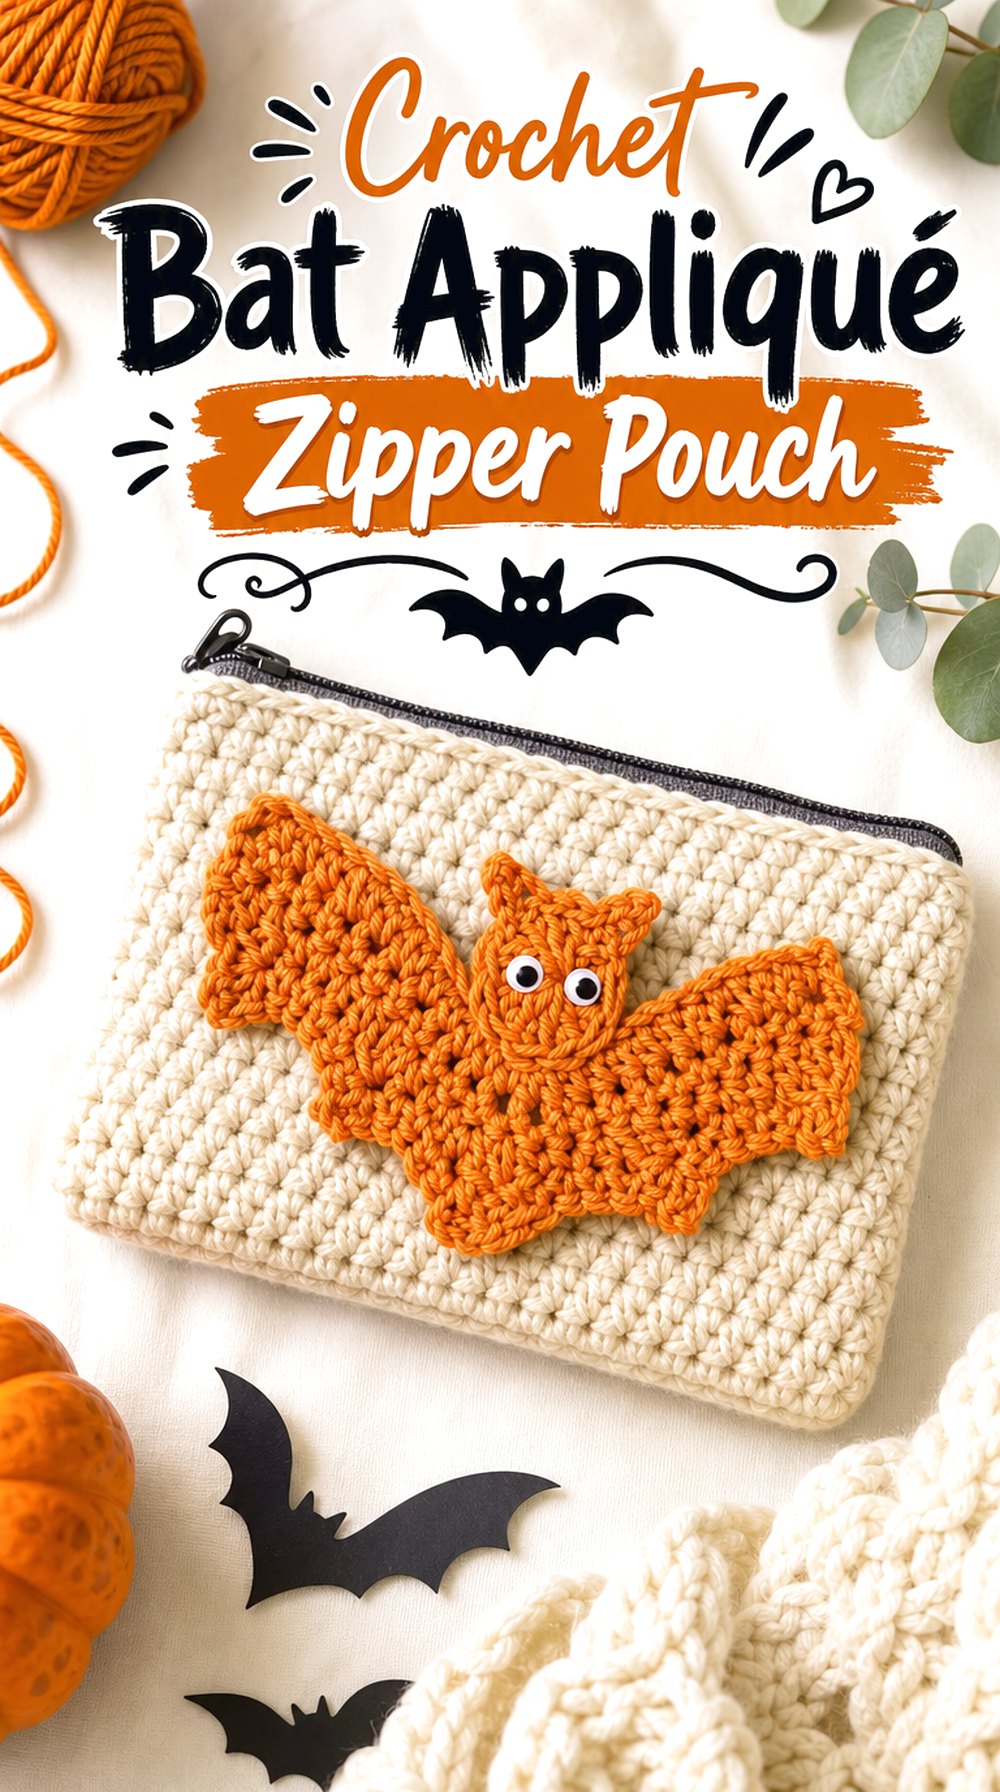
A small zippered pouch benefits from a bat motif that adds the Halloween theme without changing the basic rectangular structure. GoldenLucyCrafts’ tutorial supplies the appliqué; the zipper pouch needs its own suitable construction. This combination works for notions, small accessories, or other uses appropriate to the pouch size you choose.
Because the surface is compact, the bat placement has to coexist with the zipper, seam allowances, and any corner shaping. It is usually easier to judge the decoration while the main panel is still flat. The finished appliqué should look intentional rather than squeezed between structural elements simply because it was added at the end.
Give the Zipper Visual Clearance
Keep the bat’s ears and wing tips far enough from the opening that the decoration does not visually compete with or physically interfere with zipper movement. Temporarily place both elements before attachment. If the motif seems crowded, shifting it lower or choosing a larger pouch can produce a cleaner result than trying to compress the bat.
Let the Pouch Fabric Handle Small Contents
An appliqué changes the surface, not the containment of the bag. If you intend to carry small objects, inspect the density of the pouch fabric and consider whether lining is useful. A secure base construction matters more to function than adding extra stitches around the bat itself, so keep decorative and structural decisions separate.
Original Tutorial and Creator Credit
Creator: GoldenLucyCrafts
6. Crochet Single-Bat Mini Crossbody Bag
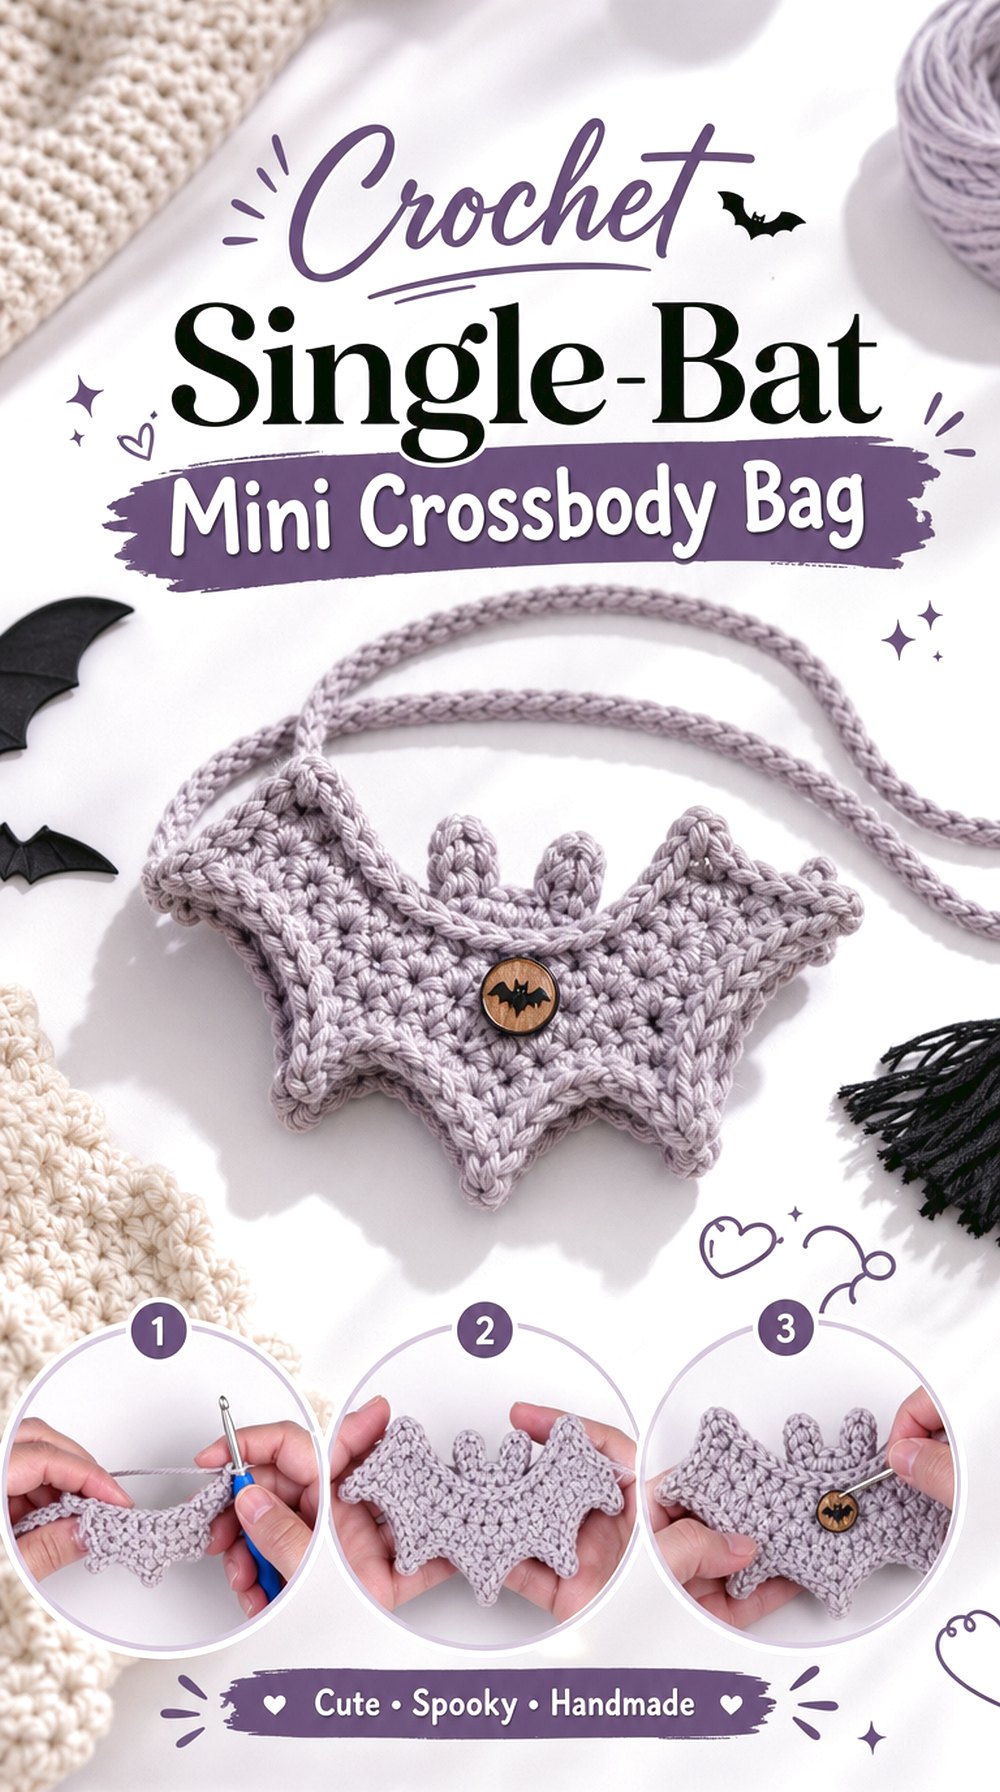
A compact crossbody does not need repeated Halloween motifs to make its theme clear. Using one bat from Tiffany Bliss as the centered accent keeps the front readable and lets the underlying bag shape remain simple. The video teaches the appliqué rather than the complete purse, so choose a mini crossbody construction separately.
This idea differs from the granny-square crossbody because the bat is attached over an intact bag panel. You can therefore move the motif higher, lower, or off-center after seeing the actual finished purse. That flexibility is particularly useful when a closure or strap hardware occupies part of the front surface.
One Focal Bat Suits a Smaller Surface
A mini bag has limited visual space. Instead of automatically adding borders, moons, stars, or additional bats, place the single motif first and assess whether anything else is needed. Leaving negative space around the wings can make the bat easier to recognize and helps prevent the front panel from feeling like several unrelated decorative ideas competing for attention.
Reinforce the Bag, Not the Appliqué
A flat bat is decoration, so strap attachment and bag support should come from the purse construction itself. Avoid treating the appliqué as an anchor point for hardware or straps. If the mini bag will be used regularly, prioritize secure side or upper-edge connections and then position the bat where those functional elements do not distort it.
Original Tutorial and Creator Credit
Creator: Tiffany Bliss
7. Crochet Mini-Bat Drawstring Treat Bag
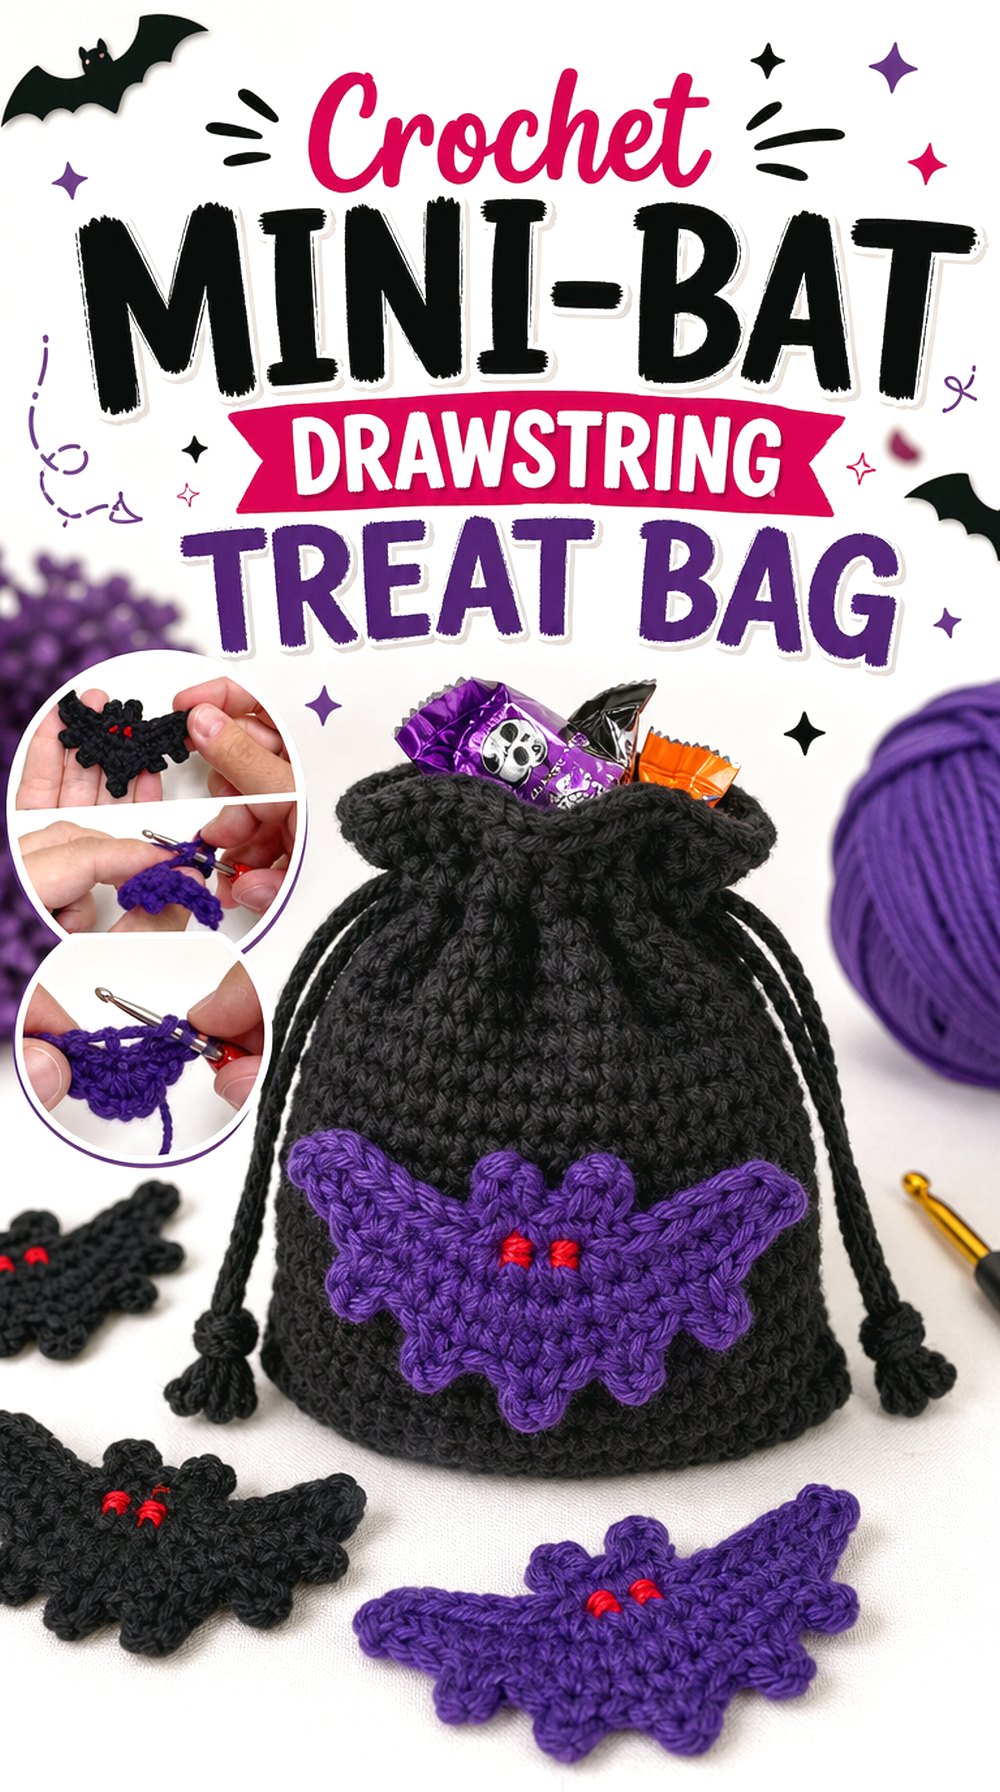
A drawstring bag offers a tall, relatively simple body that can carry several small bats without requiring a complicated shaped purse. Jolly Lizard’s tutorial focuses on a compact bat appliqué, making it suitable as the decorative element for a separately chosen drawstring or handled treat-bag construction.
Spacing matters more here than perfect symmetry. A few bats can appear to fly around the bag when their angles vary slightly, creating movement without changing the actual bag fabric. Keep decoration away from the drawstring channel so the opening can gather normally. For bags intended for children, also consider cord length, loose embellishments, and supervision rather than treating every decorative drawstring configuration as universally suitable.
Small Bats Make Repetition Easier to Control
Lay out all finished motifs before sewing down the first one. You can create an upward flight path, a scattered arrangement, or a more orderly repeat, but leave enough open background that individual bats stay recognizable. Temporary placement also reveals whether the final bat ends up awkwardly close to a side seam.
Keep Decoration Below the Gathering Area
A drawstring opening repeatedly changes shape. An appliqué caught inside that active zone may fold unpredictably or interfere with gathering. Treat the upper channel as functional space and place the bats lower on the body. If the bag is for a child, assess the drawstring configuration itself for the intended age and use rather than relying on decorative appeal alone.
Original Tutorial and Creator Credit
Creator: Jolly Lizard
8. Crochet Graphic Bat Emblem Flap Bag
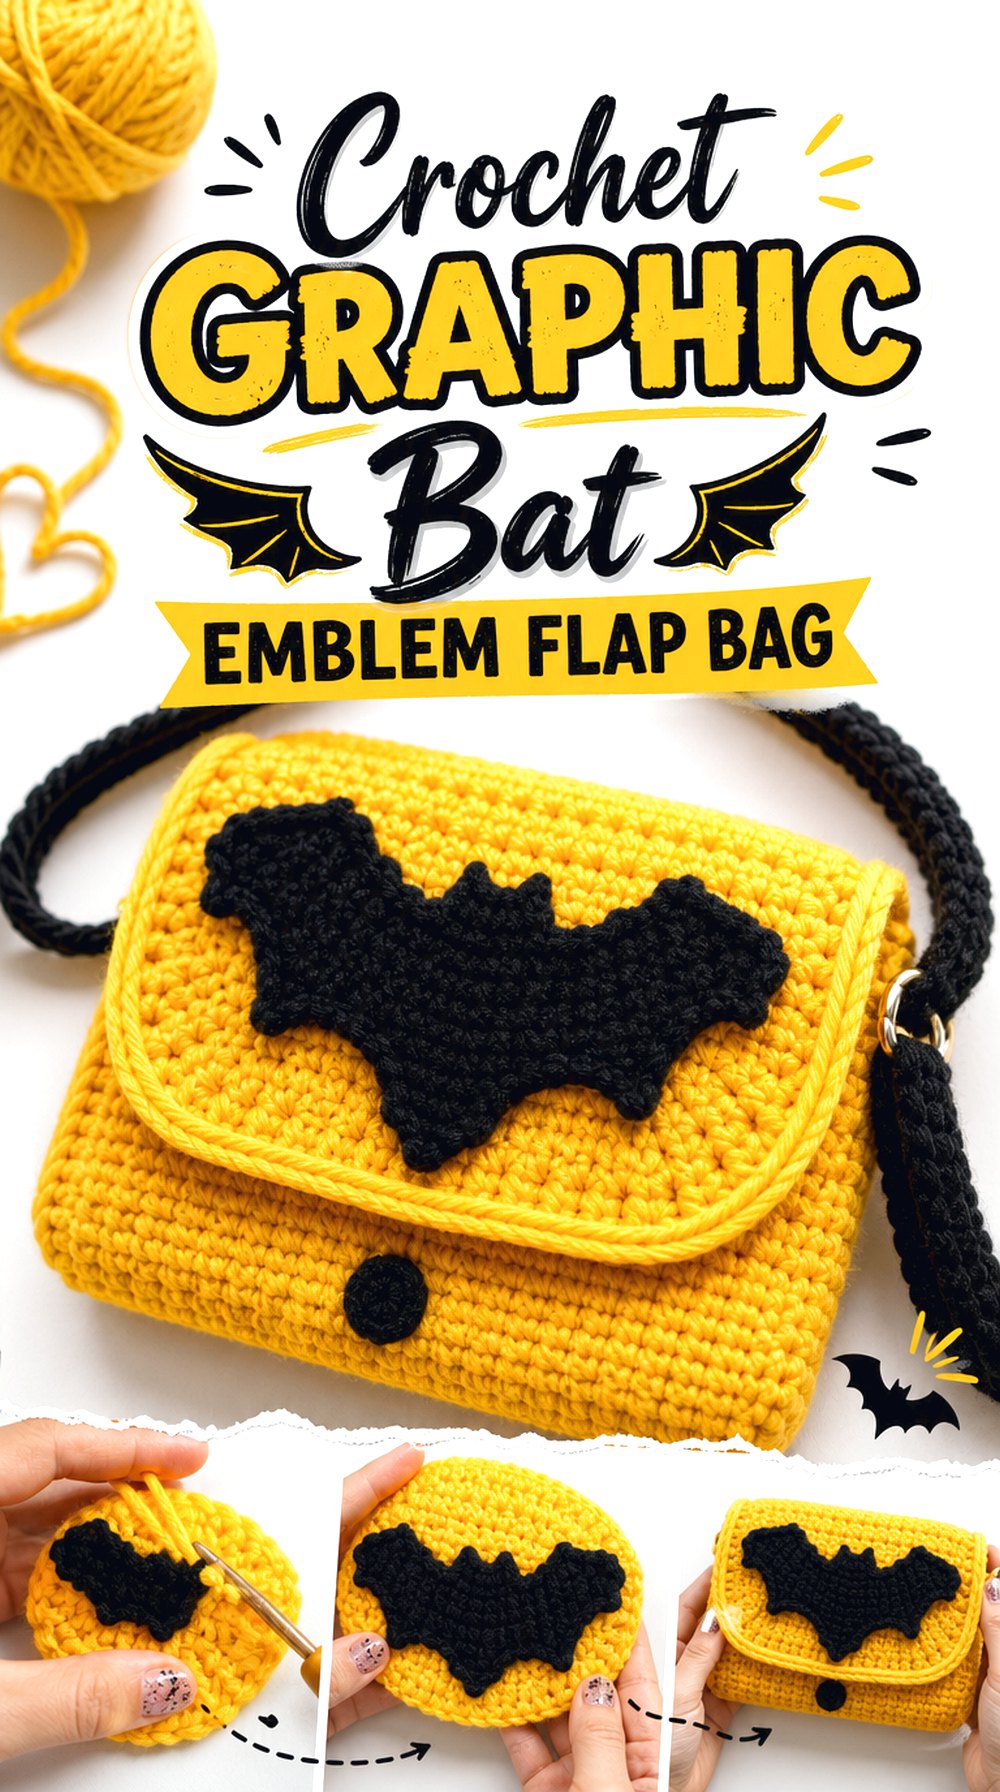
This version uses a sharply recognizable bat emblem as a single graphic element on a flap bag. Ahuyama Crochet’s tutorial title references the Batman logo, so the source should be understood as a tutorial for that recognizable bat-style appliqué, not as a complete bag construction or permission to commercially use third-party branding.
For a personal project, a solid flap provides a clean backdrop that keeps the emblem legible. Compared with the softer Halloween bats elsewhere in this collection, the effect is more graphic and logo-like. That makes placement and contrast especially important: the emblem should appear deliberately centered or deliberately offset rather than accidentally displaced by a closure.
A Flat Flap Preserves the Graphic Shape
Logo-like motifs are easiest to read when the background does not distort them excessively. Check the appliqué while the flap is both open and closed, especially if the bag has depth. A motif that appears centered on a completely flat piece may shift visually after the flap bends over the top edge of the bag.
High Contrast Changes the Mood Immediately
This design relies heavily on silhouette. Test the bat against the actual flap color before attaching it. A strong contrast creates a bolder emblem effect; a low-contrast pairing makes the bat more subdued. Neither approach is automatically better, but the choice should be deliberate because the motif contains less internal detail to separate it from the background.
Verify Commercial Rights Separately
If you plan to sell finished bags, do not assume that access to a crochet tutorial also grants rights to market a recognizable third-party logo or character identity. Creator pattern terms and intellectual-property rights are separate issues. Check the applicable permissions for your intended use and consider an original generic bat motif when you want to avoid branded imagery.
Original Tutorial and Creator Credit
Creator: Ahuyama Crochet
9. Crochet Scattered-Bat Everyday Tote
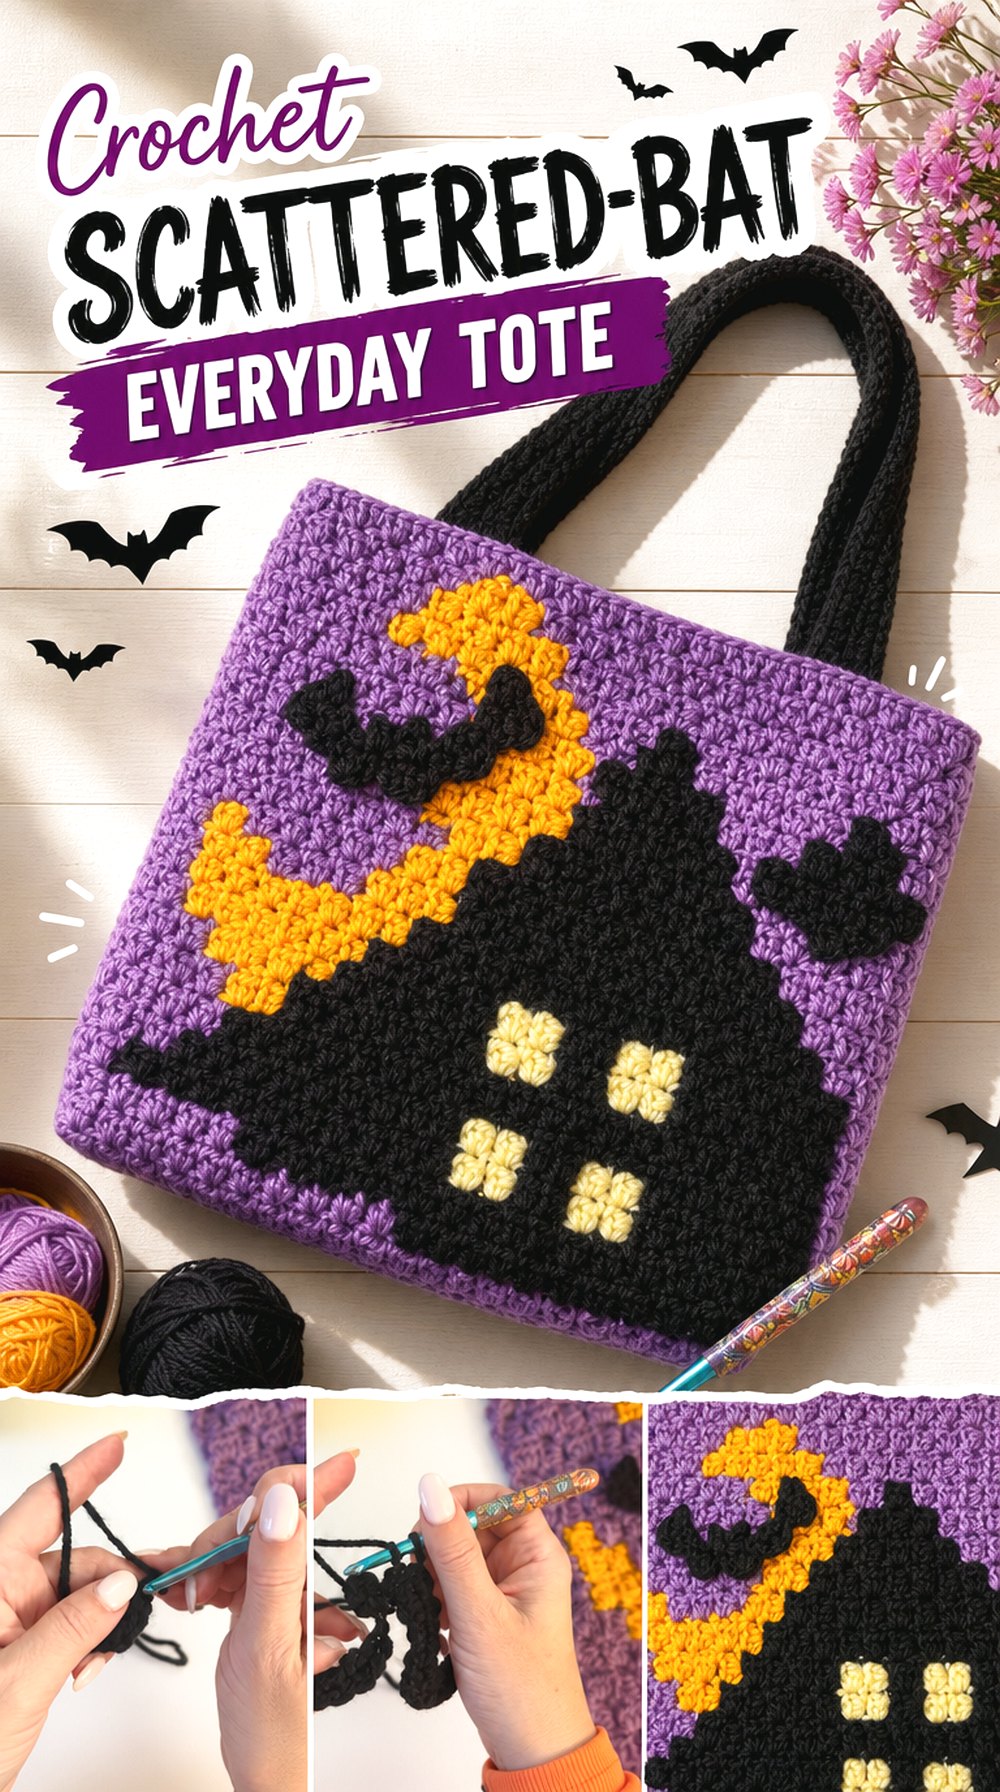
For a tote that feels Halloween-themed without changing its familiar shape, small scattered bats are a practical route. RepeatCrafterMe’s tutorial specifically presents a bat appliqué that can be added to projects including totes, making the decorative connection especially direct. The tote itself still needs an independent construction.
Instead of centering one bat, arrange several across a plain panel and vary the orientation slightly. The look can stay playful while the rectangular bag remains useful beyond a costume setting. Because the motifs are separate from the load-bearing fabric, you can concentrate structural decisions—handle support, fabric density, and lining—on the tote and treat the bats as surface design.
Arrange Every Bat Before Attaching the First
Scattered layouts look spontaneous, but good spacing still benefits from planning. Place all motifs on the finished panel and photograph the arrangement before sewing. Check the outer edges as carefully as the center; a wing that nearly disappears into a side seam can make the distribution look accidental once the tote is assembled.
Let the Main Tote Carry the Weight
Adding more appliqués does not make the underlying fabric stronger. Choose the tote construction and handle reinforcement according to its intended use, then attach the bats without relying on them for structural support. If the body stretches noticeably when filled, address that through the bag design or lining rather than adding decorative stitching around the motifs.
Original Tutorial and Creator Credit
Creator: RepeatCrafterMe
10. Crochet Hanging Bat Charm Shoulder Bag
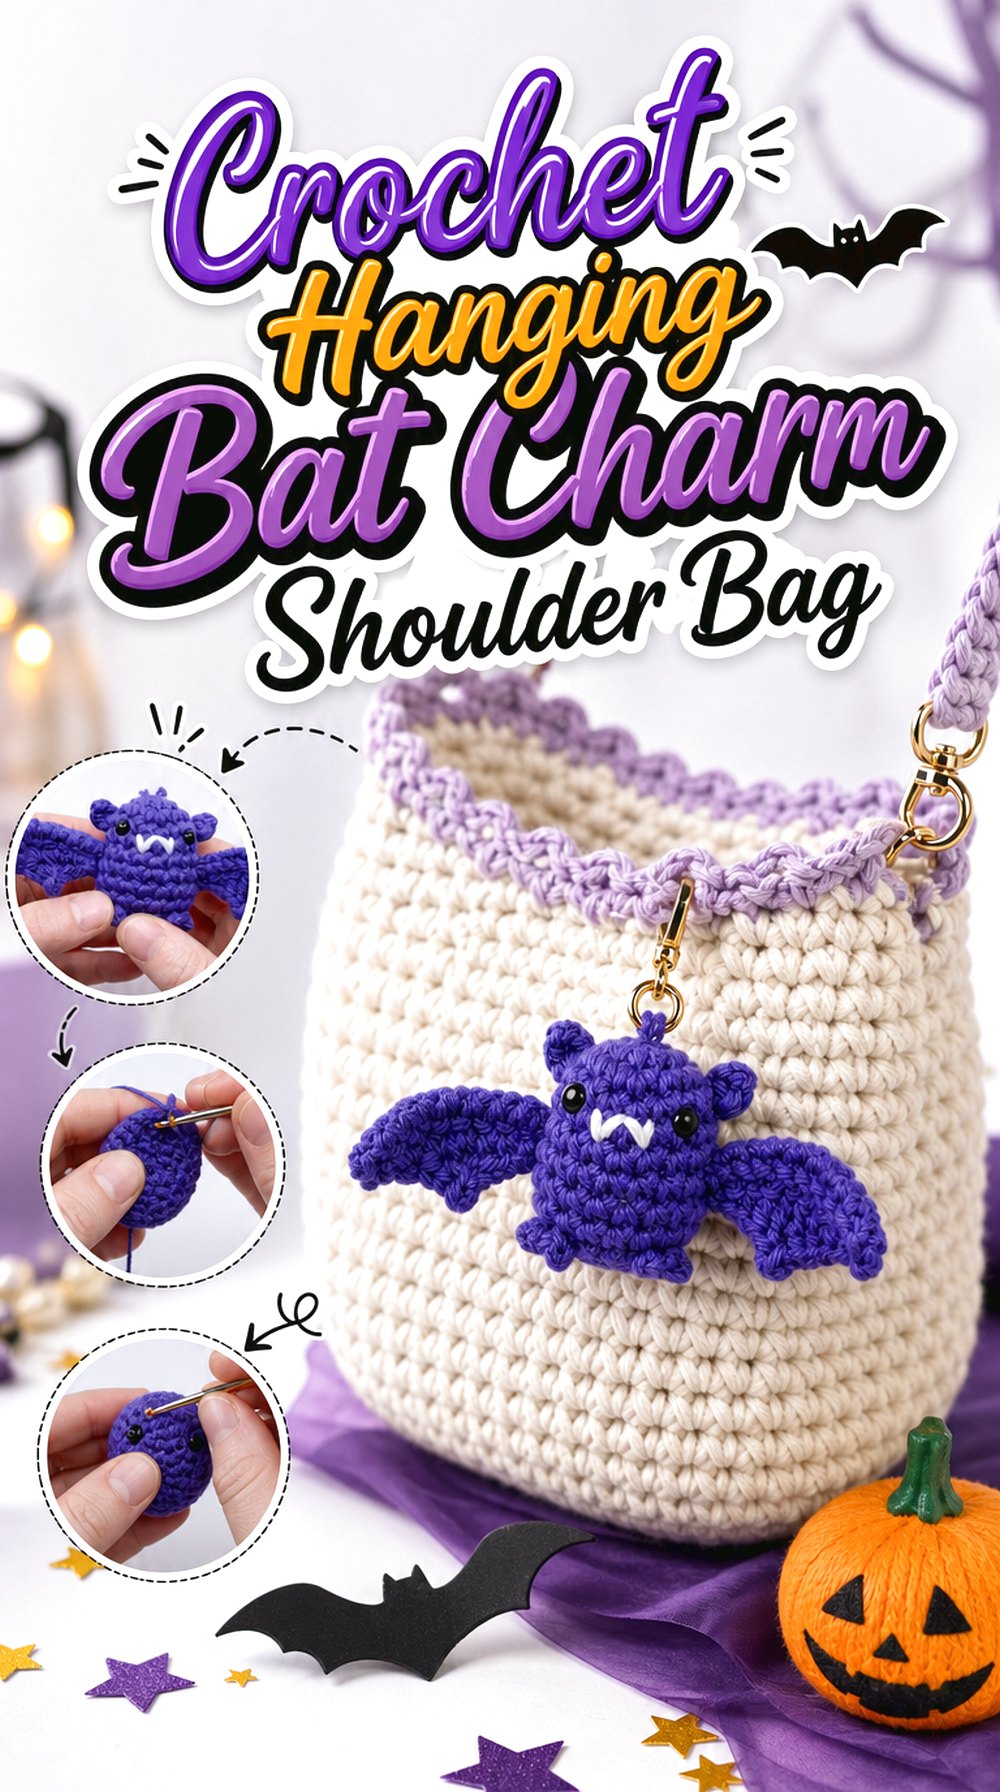
A hanging bat creates movement that a sewn appliqué cannot. Club Crochet’s tutorial teaches a dimensional hanging bat, which can be treated as a removable bag charm when paired with a separately constructed shoulder bag. A crescent or other simple bag body works particularly well conceptually because the charm can hang where it remains visible instead of lying flat against a busy surface.
This approach is useful if you want the seasonal detail to be detachable. Removing the bat can simplify storage or care and lets the underlying bag remain less theme-specific. Before adding any attachment hardware, consider the finished bat’s actual weight and construction so a delicate strap loop is not overloaded.
Movement Becomes Part of the Design
A dangling soft bat will shift as the bag is carried, so judge placement while the bag is hanging rather than only on a table. Keep it away from areas where the wings can repeatedly catch in a zipper or closure. If the charm is large relative to the bag, a shorter attachment point can prevent it from competing with the entire silhouette.
A Detachable Connection Can Simplify Care
A removable charm lets you clean or store the bag separately from a dimensional softie. Choose attachment hardware appropriate to the finished weight and ensure it is secured to a structurally suitable point on the bag. Do not hang the bat from an appliqué, loose surface stitch, or another decorative section that was not intended to carry repeated pulling.
Review Small Components for Child Use
Dimensional bat projects may involve components that need additional consideration when attached to children’s accessories. Do not assume magnets, small detachable parts, or decorative hardware are suitable for every age. If the finished bag is intended for a young child, use age-appropriate features and secure attachments, and assess the source materials before making the charm part of the bag.
Original Tutorial and Creator Credit
Creator: Club Crochet
11. Crochet Plush Bat Charm Bucket Bag
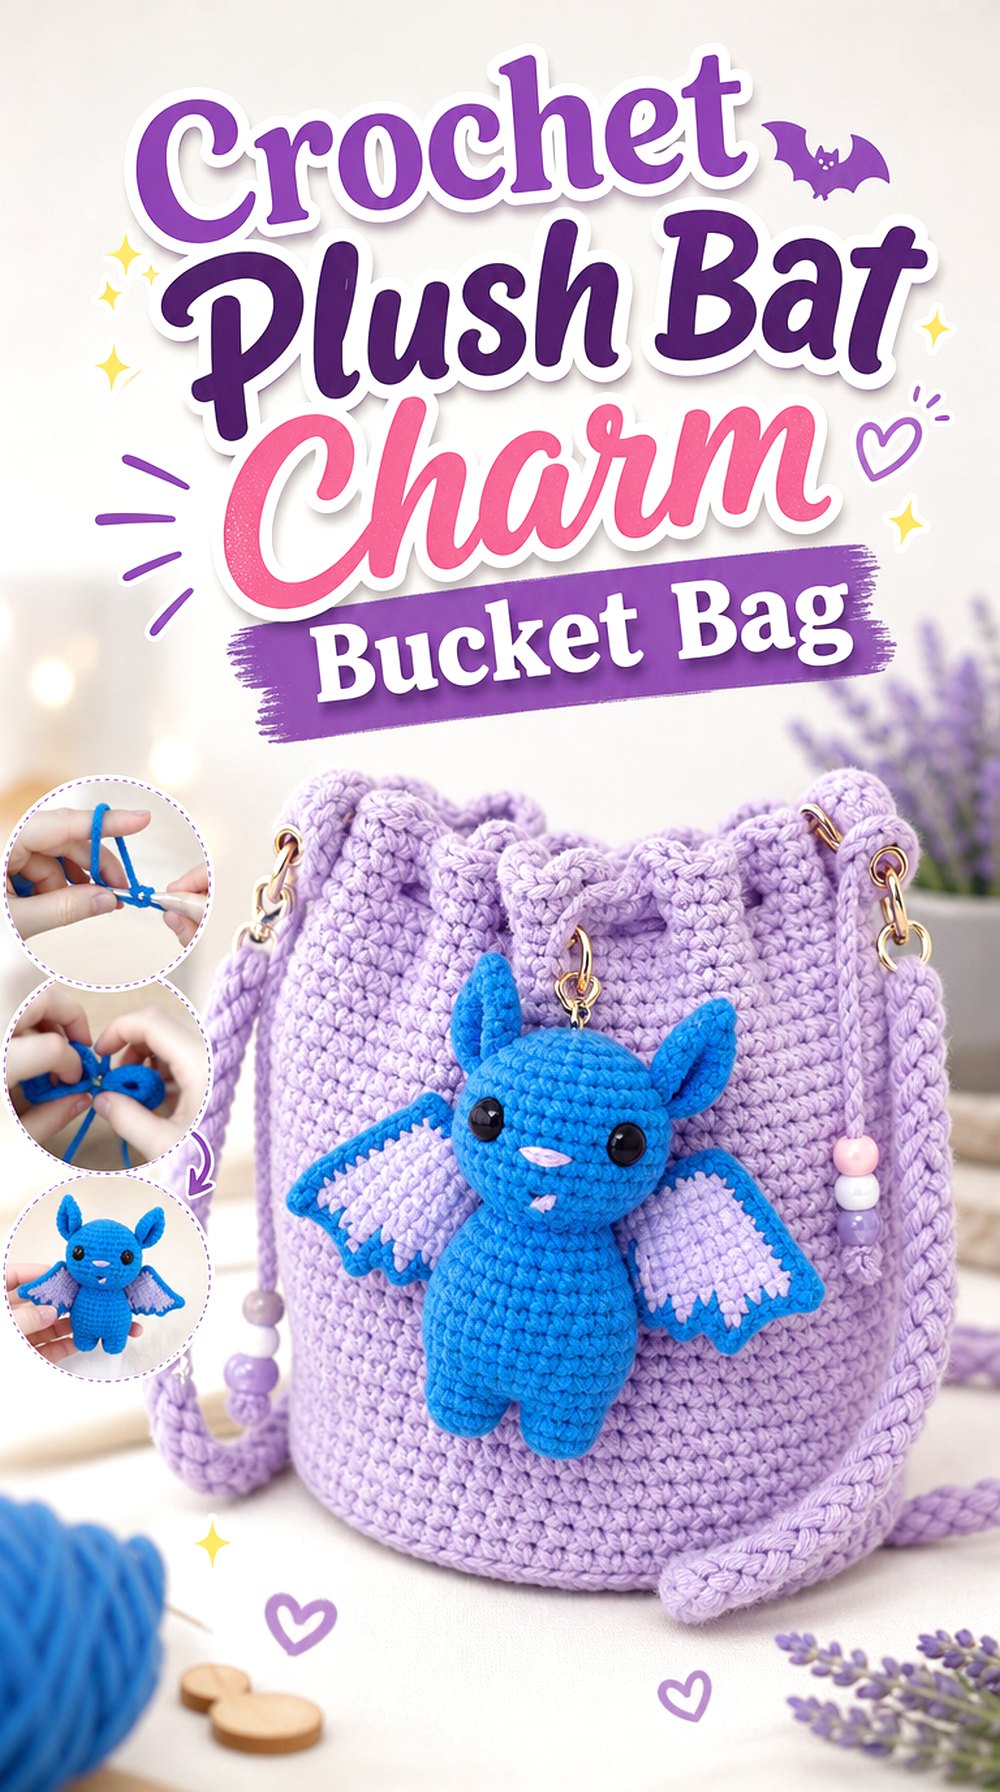
A bucket bag and plush bat make a softer alternative to the angular appliqué projects. The crochetmezaddy tutorial teaches a stuffed bat plushie; it does not teach the bucket bag. Pairing the softie with a separately chosen bucket construction creates a three-dimensional accent near the drawstring, strap, or side attachment point.
The rounder bag form also gives you a different visual balance from the flat messenger and tote options. Rather than filling a front panel, the bat can sit slightly forward from the bag and become the main feature. Verify the finished softie’s scale against your actual bag before choosing the attachment location, because a dimensional object occupies space differently from an appliqué.
Match the Charm to the Opening Area
A plush bat positioned too close to a drawstring or closure may look appealing while the bag is open but become cumbersome when the top gathers. Test the charm with the bucket bag both open and closed. Moving it to a side loop or strap connection can preserve access while still keeping the bat prominent.
Stuffing Concentrates Weight at One Point
A dimensional charm places more weight on its attachment than a flat appliqué does. The difference may be modest, but it is still worth checking the bag fabric for distortion while the charm hangs freely. If the attachment point stretches, choose a more structurally supported location instead of tightening the charm against the same weak area.
Choose Facial Details for the Actual User
The source tutorial includes a plush construction with added facial features. If you adapt the bat for a young child’s bag, do not automatically assume small plastic or detachable components are appropriate. Embroidered features are one alternative when the intended use calls for fewer small parts, but the entire finished attachment should still be assessed for age and supervision.
Original Tutorial and Creator Credit
Creator: crochetmezaddy
12. Crochet Soft Bat Accent Wristlet
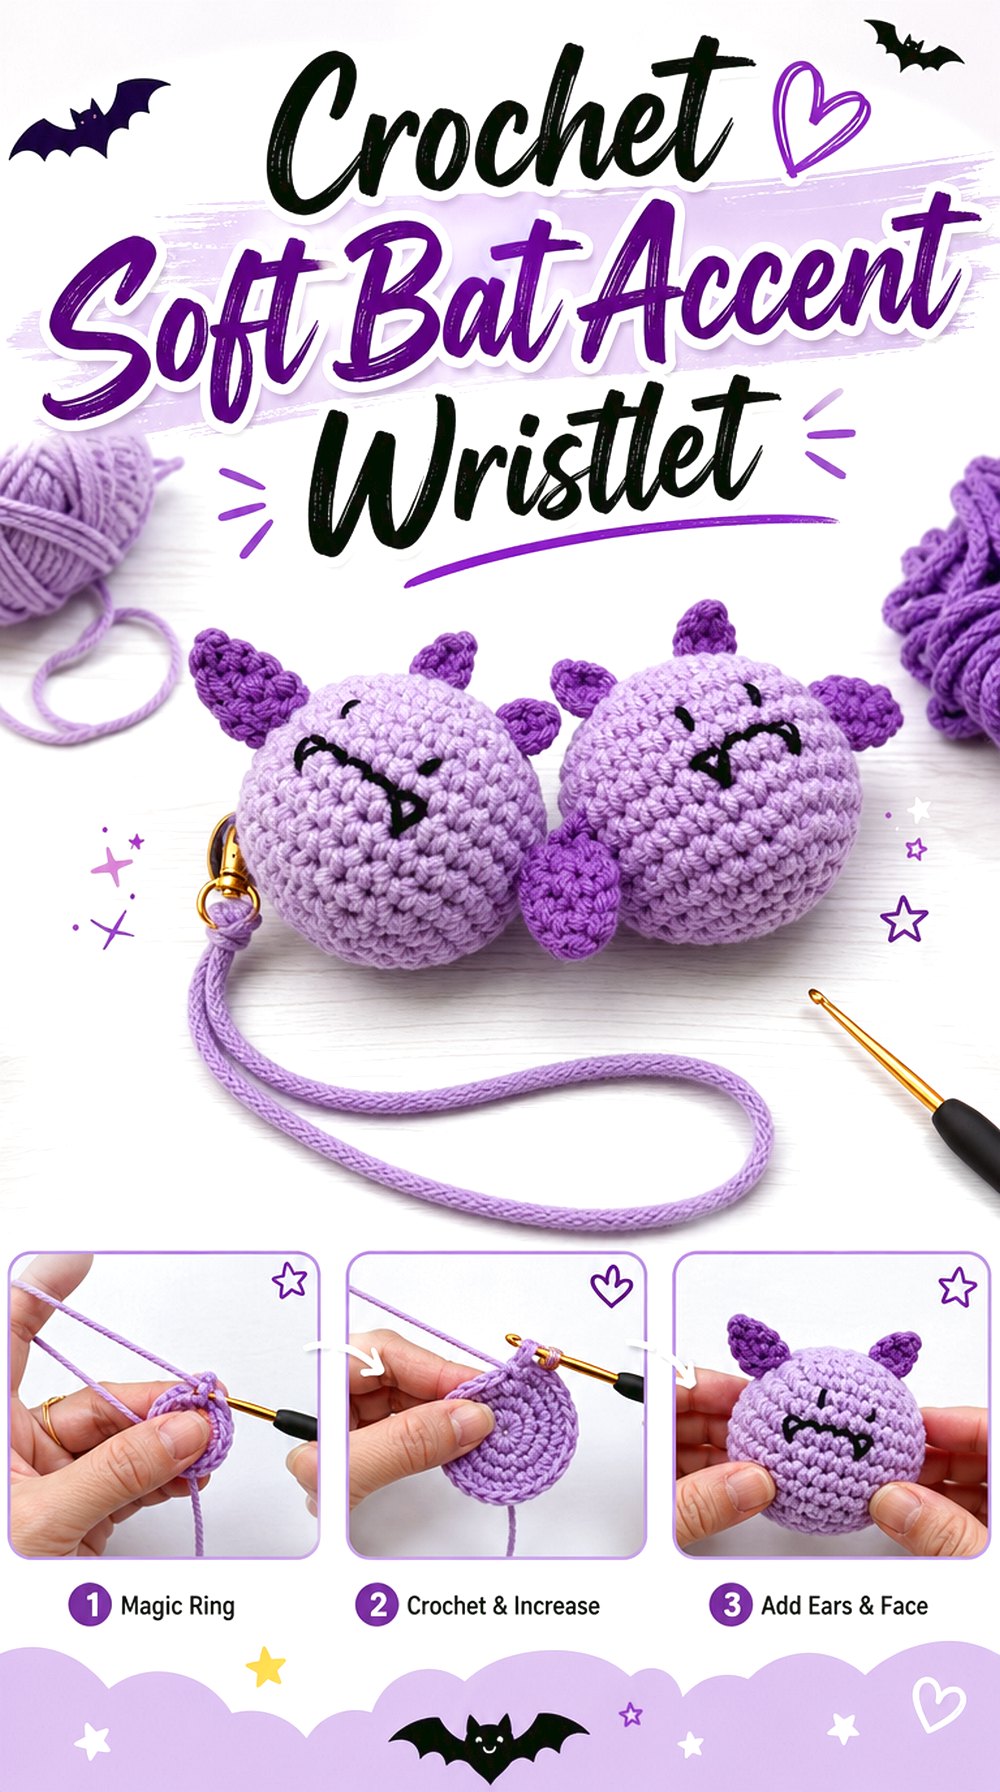
A wristlet offers the smallest bag format in this roundup, so a soft bat accent can provide the theme without covering an entire panel. Crochet Musings’ tutorial teaches the bat itself rather than the wristlet. Use it with a separately selected small-bag construction, attaching the finished bat at a side loop or another appropriate point instead of assuming it should become the zipper pull.
This design works when you want a noticeable bat but prefer a compact accessory over a tote or crossbody. The key decision is proportion: crochet the bat first or confirm its finished scale from the tutorial, then compare it with the wristlet. If the bat dominates the pouch completely, a larger bag may produce a better balance.
Keep the Bat Clear of the Main Opening
A dimensional accent should not make the wristlet difficult to open. Test where the bat falls while the pouch is held naturally, particularly if it sits near a zipper. A side attachment can keep the character visible while leaving the closure unobstructed. Avoid using the softie itself as a pull unless its construction and attachment are genuinely suitable for repeated tugging.
Removability Gives the Wristlet Two Uses
A detachable bat can turn a plain wristlet into a seasonal accessory without making the theme permanent. That also lets the two pieces be stored or cared for separately. Use a secure attachment appropriate to the user and finished charm, and remember that detachable hardware may need additional consideration on accessories intended for children.
Original Tutorial and Creator Credit
Creator: Crochet Musings
YouTube Video: HALLOWEEN BAT! 🦇 Crochet This Bat In Under 1 Hour! Easy Step-By-Step Tutorial For Beginners
YouTube Video Link: Watch on YouTube
The video is especially useful for making the soft bat component that can be adapted into a removable wristlet accent.
How These Crochet Bat Bag Ideas Compare
| Idea | Bat’s Role | Bag Format | Main Planning Priority |
|---|---|---|---|
| Wing-Shaped Bat Crossbody | Forms the actual bag | Crossbody purse | Opening and central storage space |
| Bat Granny Square Crossbody | Main front panel | Crossbody | Square dimensions and strap support |
| Patchwork Bat Square Tote | Repeated structural motifs | Shoulder tote | Matching square sizes and layout |
| Oversized Bat Appliqué | Large surface decoration | Messenger bag | Flap placement and wing edges |
| Bat Appliqué Zipper Pouch | Compact front decoration | Zipper pouch | Closure clearance |
| Single-Bat Mini Crossbody | One centered accent | Mini crossbody | Visual scale and strap anchoring |
| Mini-Bat Treat Bag | Repeated small decoration | Drawstring bag | Drawstring clearance and cord safety |
| Graphic Bat Emblem Bag | Logo-like focal motif | Flap bag | Contrast, placement, and usage rights |
| Scattered-Bat Tote | Repeated surface accents | Everyday tote | Spacing and underlying bag strength |
| Hanging Bat Charm Bag | Moving 3D accent | Shoulder bag | Secure detachable attachment |
| Plush Bat Bucket Bag | Stuffed focal charm | Bucket bag | Charm weight and opening access |
| Soft Bat Wristlet | Small removable softie | Wristlet | Proportion and zipper clearance |
Conclusion
Choose the bat construction before choosing colors. For the strongest bat silhouette, the wing-shaped crossbody makes the animal itself the purse. Granny-square versions are better when you want modular panels, while appliqués let an ordinary tote, pouch, or flap bag keep its familiar structure. Drawstring and repeated-bat options suit a more playful Halloween look, and the softie-based ideas make the seasonal detail removable.
Whatever route you choose, compare the actual motif with the bag before final assembly and keep closures, straps, and load-bearing areas functional. Use the original tutorials linked above for the creators’ exact bat or purse construction details rather than trying to infer those details from the adaptation ideas here.
Frequently Asked Questions
Are all 12 YouTube videos complete crochet bat bag tutorials?
No. The Stitch and Hound Crochet selection teaches an actual bat purse. The other selected videos teach bat granny squares, flat appliqués, or dimensional bats that can be incorporated into a separately chosen bag construction. That distinction gives you more design variety without suggesting that a bat appliqué tutorial also contains instructions for making a tote, zipper pouch, or crossbody.
Should I line a crochet bat bag?
It depends on the bag fabric and intended use. Lining can help contain small items, reduce how much contents show through open crochet, and sometimes support the shape, but it is not automatically necessary for every design. Examine the finished fabric before deciding. Also confirm whether the bag tutorial you select actually includes lining instructions rather than assuming that it does.
How can I tell whether a bat granny square will fit my bag?
Use the finished square as your reference. Crochet and finish or block the motif as appropriate, measure its actual dimensions, and compare those measurements with the planned panel. Allow for whatever seams, joins, borders, or edging your separate bag construction requires. When mixing square patterns, compare physical dimensions directly; matching yarn or round counts alone does not guarantee compatible squares.
What can I do if the wings of a crochet bat appliqué curl?
First determine whether the curling comes from the motif itself, the yarn behavior, or uneven attachment to the bag. Appropriate blocking for the chosen fiber may improve the shape, and careful attachment can keep wing edges from lifting more than intended. Do not stretch a bat aggressively to fit a panel that is too large. It is usually better to adjust placement or choose a better-matched motif scale.
Are safety eyes, magnets, and detachable bat charms suitable for children’s bags?
Do not assume they are suitable simply because they appear in a crochet project. The intended child’s age, supervision, attachment method, and specific components all matter. For young children, avoid loose or easily detached small pieces and consider embroidered facial features instead of small plastic elements. Magnets and detachable hardware need particular care, so review the materials before adapting a soft-bat tutorial into a child’s accessory.
Can I sell crochet bat bags made using these tutorials?
Check each creator’s current pattern or tutorial terms rather than assuming one universal rule. Permission to view a public tutorial does not automatically grant permission to reproduce the creator’s written pattern, photos, branding, or other protected material. Recognizable third-party logos or characters can introduce separate rights issues as well. If selling finished work is your goal, verify the applicable creator terms and any relevant trademark or character restrictions first.