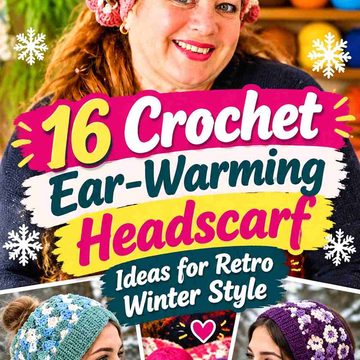
This chunky ear-warmer is fast, warm, and beginner-friendly. The deep rib texture comes from working half double crochet in the back loop only, which gives you big, stretchy columns that hug the head without feeling tight. You’ll crochet one long ribbed strip across the short edge (that’s the height), stop when it fits your head with a little negative ease, then join the ends with a tidy twist seam. A light steam or block sets the ribs, and a simple single-crochet edging cleans everything up. Use one skein of bulky (category #5) or soft super-bulky (#6) yarn; think cozy acrylic/wool blends that bounce back. The project takes around an evening, and it’s easy to resize—just add or subtract rows for length or change the starting chain for width.
The twist looks fancy but is just two folded ends nested together and sewn through four layers. If you prefer a flat band, simply seam the ends straight. Add a faux-leather tag if you like. Make a stack in different colors for gifts, markets, or last-minute winter outfits. The finished band is about 4–5″ (10–13 cm) tall and stretches comfortably to 21–23″ (53–58 cm). Let’s stitch it.

Full Pattern (Step-by-Step Tutorial)
Skill level: Easy
Yarn: Bulky #5 (≈ 60–80 g). Color used in prompts: dusty rose
Hook: 8 mm (L-11) (or size to meet gauge)
Notions: Yarn needle, scissors, 4 stitch markers, measuring tape, steamer (optional)
Gauge (relaxed, slightly stretched): ~10 hdc (BLO) × 8 rows = 4″/10 cm
Sizing & fit: Adult S/M/L. Work length 2–3″ (5–7.5 cm) shorter than head size for a snug fit after stretch.
- S: stop strip at 18″ (fits 20–21″)
- M: stop at 19″ (fits 21–22″)
- L: stop at 20″ (fits 22–23″)
Abbreviations: ch = chain, sl st = slip stitch, sc = single crochet, hdc = half double crochet, BLO = back loop only, RS/WS = right/wrong side.
Notes: Height is set by the starting chain. Length is built by rows. Keep edges straight; count often.
Steps
- Width setup
For ~4.5″ height: ch 16. (Adjust: ch 14 for ~4″, ch 18 for ~5″.)
Row 1 (WS): Hdc in 2nd ch from hook and each ch across. 15 sts. Ch 1, turn. - Make the ribbed strip
Row 2 (RS): Hdc in BLO across, ch 1, turn. (15)
Repeat Row 2 until the strip measures target length (see sizing), slightly stretched to check. - Edge tidy (optional)
Do not fasten off. Rotate, sc evenly once along one long edge for a clean line. Sl st to last st, fasten off. Repeat on the other long edge with a new strand if you want both sides even. - Twist seam
Lay the strip flat RS up. Fold the left end in half like a “C.” Fold the right end in half like a reverse “C.” Nest the two folded ends together to create four stacked layers. With yarn needle, whipstitch through all four layers along the short edge. Weave in ends. - Finish
Steam lightly to open ribs (optional). Add a small tag if you like. Wear with the twist centered.
1. Supplies

Everything you need is here and simple on purpose. One skein of dusty rose bulky yarn gives you that plush, ribbed texture and squishy warmth. An 8 mm hook keeps the fabric soft and stretchy. A few markers help you count rows without guessing. The measuring tape is how you tailor the fit—remember to stop two to three inches short of your head size for comfy negative ease. A yarn needle closes the seam cleanly, and scissors finish the job. A steamer is optional but great for relaxing the ribs. Keep the setup neat so you can see every tool at a glance.
2. Starting Chain & First Row

Begin with a foundation chain that sets the headband’s height. For a classic 4.5 inches, chain 16 in dusty rose. Work your first row of half double crochets into the back bumps of the chain. This small trick gives both long edges a clean, matching look. Keep your tension relaxed; you want a springy rib, not a board-stiff strap. Count your stitches at the end—consistency here keeps both edges straight later. Chain one and turn, and you’re ready for the texture magic. From the next row on, you’ll go into the back loop only to build those deep, cozy ribs.
3. Building The Ribs (BLO)

Now the texture shows up fast. Work hdc in the back loop only across every row, chain one, turn, and repeat. The front loop you leave behind forms a ridge that stacks into stretchy, vertical columns. Place a marker every 10 rows to track length without recounting constantly. Keep edges tidy by working the very first and last stitches cleanly; a tiny tilt of the hook helps you catch the full back loop. If your rib seems narrow or wide, adjust the starting chain next time. For this band, focus on keeping a relaxed, even rhythm—chunky yarn rewards smooth motion.
4. Measure for Length

Fit is everything. Measure the ribbed strip slightly stretched, because this fabric expands on the head. For most adults, stop at 18″ for a snug small, 19″ for medium, 20″ for large. Aim for 2–3 inches shorter than your actual head circumference. This negative ease keeps the band secure without slipping. If you’re between sizes, favor the shorter length; the ribs are very forgiving. Double-check your stitch counts at the edges to ensure both sides stayed straight. If you added an optional single-crochet tidy edge on one side, repeat it on the other for symmetry before you seam.
5. Set up The Twist

The twist looks fancy but is truly simple. Lay the strip right-side up. Fold the left end in half to make a “C.” Fold the right end in half the opposite way to make a reverse “C.” Slide one folded end inside the other so you have four layers stacked. Check that the ribs line up and that the folds are even; use two markers to hold everything in place. This setup creates that stylish front knot once seamed. If you prefer a flat headband, skip the folds and just align the ends directly with right sides facing for a straight seam.
6. Seam Through Four Layers

Thread a long tail onto your yarn needle and whipstitch through all four layers from one side to the other. Keep stitches close and even, catching full loops so the seam stays strong and invisible from the outside. Pause midway to confirm the layers haven’t shifted. When you reach the end, run the needle back through the seam in the opposite direction for extra security, then weave in the tail between the rib columns. Flip the band right side out. The twist should sit centered and tidy, with ribs flowing into the knot smoothly and no gaps at the join.
7. Optional Edging & Finishing

If you love a polished border, add a quick single-crochet edging along one or both long edges. Work one sc per row end, adding a second sc in any row that looks tall to keep the edge from drawing in. Don’t over-tighten—edgings should lie flat. Finish with a near-invisible slip stitch, cut the yarn, and weave in the tail. A light steam pass relaxes any uneven ribs and evens out the stitches. Avoid soaking; a gentle steam is enough for bulky fibers. If you have a faux-leather tag, stitch it near the seam for a crisp, boutique look.
8. Final Beauty Image
Here’s your finished ear-warmer: plush ribs, soft stretch, and a clean twist sitting right at center. The dusty rose shade pairs effortlessly with winter neutrals and helps the texture glow in natural light. The band feels thick but breathes well, making it perfect for errands, walks, and market days. Because the construction is simple, you can make several in a weekend—great for gifts or a quick shop restock. If you want extra warmth, work the height a couple chains taller next time. If you want slimmer, subtract two chains. Wear it twist-front or rotated for a smooth, classic look.
Final Thoughts
Chunky yarn, simple stitches, and one neat seam—that’s the magic here. The back-loop ribs give big texture and comfy stretch, while the twist adds instant style without extra shaping. Size is flexible, the steps are repeatable, and mistakes are easy to fix. Once you make one, you’ll know the rhythm and speed through the next. Keep your color palette tight (that dusty rose is a winner), add a tag, and enjoy warm ears and a handmade finish all winter.