This crochet Strawberry Granny Heart Shoulder Bag blends cute style with practical make-and-wear fun. You’ll crochet two sturdy red heart panels, add tiny cream seeds for a sweet strawberry look, and finish the top edge with a leafy green calyx band that reads instantly “strawberry.” The structure stays simple: two hearts seamed together along the curves and point, leaving the top open like a pouch. A strong strap—either a Romanian cord or a flat crochet band—keeps it wearable for errands, festivals, or everyday outfits.
The granny-inspired shaping is forgiving, so your heart size can be scaled up or down by adding or removing a round. Cotton yarn gives the bag clean stitch definition and a light, summery hand; acrylic works, too, if that’s what you have. Embroidered seeds in soft cream add depth without bulk, and you can customize spacing or density to match your style. For a polished interior, add a simple fabric lining cut in heart shapes, or leave it unlined for a lighter carry. The pattern stays beginner-friendly but offers satisfying details—shaping the heart, placing the leafy top, and assembling a strap that won’t stretch out. The result: a cheerful, handmade statement bag you’ll actually use.
Materials (use the same colors throughout)
- Worsted-weight cotton: strawberry red (MC), leaf green (CC1), soft cream (CC2 for seeds)
- 4.0 mm (G-6) hook
- Tapestry needle, scissors, 6–8 locking stitch markers
- Optional: light cotton fabric + sewing needle/thread for lining
Abbreviations
ch = chain, sl st = slip stitch, sc = single crochet, hdc = half dc, dc = double crochet, tr = treble, st(s) = stitch(es), sp = space, rep = repeat, RS/WS = right/wrong side
Size & gauge
- Finished bag body (without strap): ~22–24 cm wide x 20–22 cm tall in worsted + 4 mm.
- Gauge is not critical; keep both heart panels the same size.
Pattern Overview
You’ll make two red heart panels, add cream seeds, crochet a green leafy calyx band across the top opening, seam the hearts into a bag, add a sturdy strap, and (optionally) line it.
A) Large Solid Heart Panel (make 2 in strawberry red)
- Rnd 1 (into magic ring): Work 4 tr, 5 dc, ch 1, 1 tr, ch 1, 5 dc, 4 tr, ch 3, sl st into ring. Pull tail to form a heart.
- Rnd 2: Ch 1, sc in next 3, hdc in next 3, dc in next 4, (2 dc, ch 2, 2 dc) in the top cleft ch-1 sp, dc in next 4, hdc in next 3, sc in next 3, (sc, ch 2, sc) in the bottom point ch-3 sp, sl st to first sc.
- Rnd 3: Ch 1, sc in next 4, hdc in next 4, (dc in next 2, 2 dc in next st) twice, dc in next 2, (2 dc, ch 2, 2 dc) in top cleft, dc in next 2, (2 dc in next st, dc in next 2) twice, hdc in next 4, sc in next 4, (sc, ch 2, sc) in point, sl st to first sc.
- Rnd 4 (optional to enlarge): Work evenly around: add gentle increases along each curve (about 6 increases spread per side). Maintain (… ch 2 …) corners at the top cleft and point. Fasten off, weave tail.
- Make two identical panels. Block lightly if you like (steam or mist).
B) Strawberry Seeds (on front panel only)
With soft cream yarn, embroider tiny “V” stitches or French knots randomly across the front panel, avoiding 1–1.5 cm from edges. Keep spacing even.
C) Leafy Calyx Band (in leaf green)
With RS facing a single heart panel, join leaf green at the top cleft, work across the top edge only:
Row 1: [sc, hdc, dc, tr, dc, hdc, sc] evenly over ~1/6 of the top edge, ch 2, turn (Leaf 1).
Row 2: Sk first st, work down: sc in each st to base, sl st to next unworked top stitch group.
Rep to make 5 leaves spaced across the top edge (adjust spacing to fill the opening). Fasten off.
- Make this leafy band on one panel only (this will be the front/top opening detail).
D) Strap (choose one)
Romanian cord (recommended, in leaf green or red): Ch 1, pull up a loop, insert hook between first 2 loops, yo, pull up a loop, yo, pull through 1, yo, pull through 2; repeat to ~100–110 cm.
OR simple flat strap (in red): Ch 5, work 1 sc in 2nd ch from hook and across (4 sc). Turn. Ch 1, 4 sc. Repeat to length; edge with sl sts for stability.
E) Assembly
Place hearts WS together with the leafy calyx panel at the top of the front. Starting at the top right, whipstitch or sc-seam around the curves and point to the top left, leaving the top open.
Attach strap ends to the two top corners; reinforce with extra stitches. Weave all ends.
F) Optional Lining
Cut two fabric hearts slightly smaller than your crochet panels. Whipstitch to the inside just below the green leaves and around the curve, keeping the top edge neat.
1. Supplies
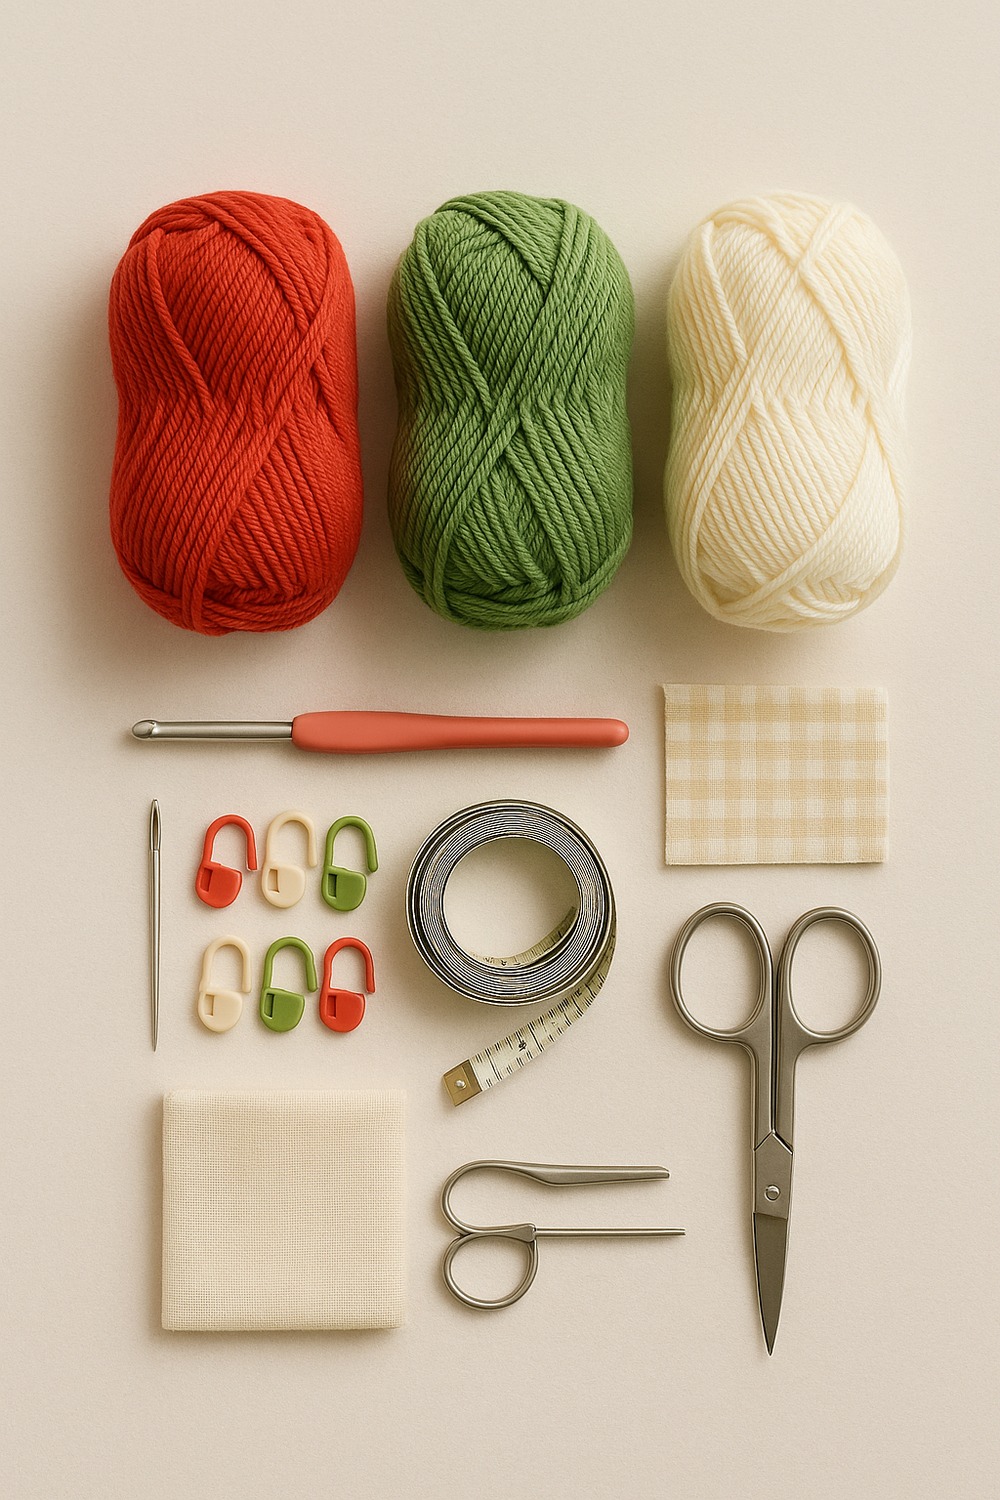
Gather everything before you start so the making feels smooth and stress-free. Keep strawberry red as the star for the body, leaf green for the calyx and strap, and soft cream for tiny seeds. A 4.0 mm hook gives tidy stitches and a comfortable fabric. Markers help you mirror both heart panels. A tapestry needle and sharp scissors make finishing clean. The measuring tape keeps your two hearts the same size. If you want a lining, pick a light cotton that behaves. Lay tools neatly so you can see them all at once and stay in the same color mood from first stitch to final seam.
2. Starting the heart
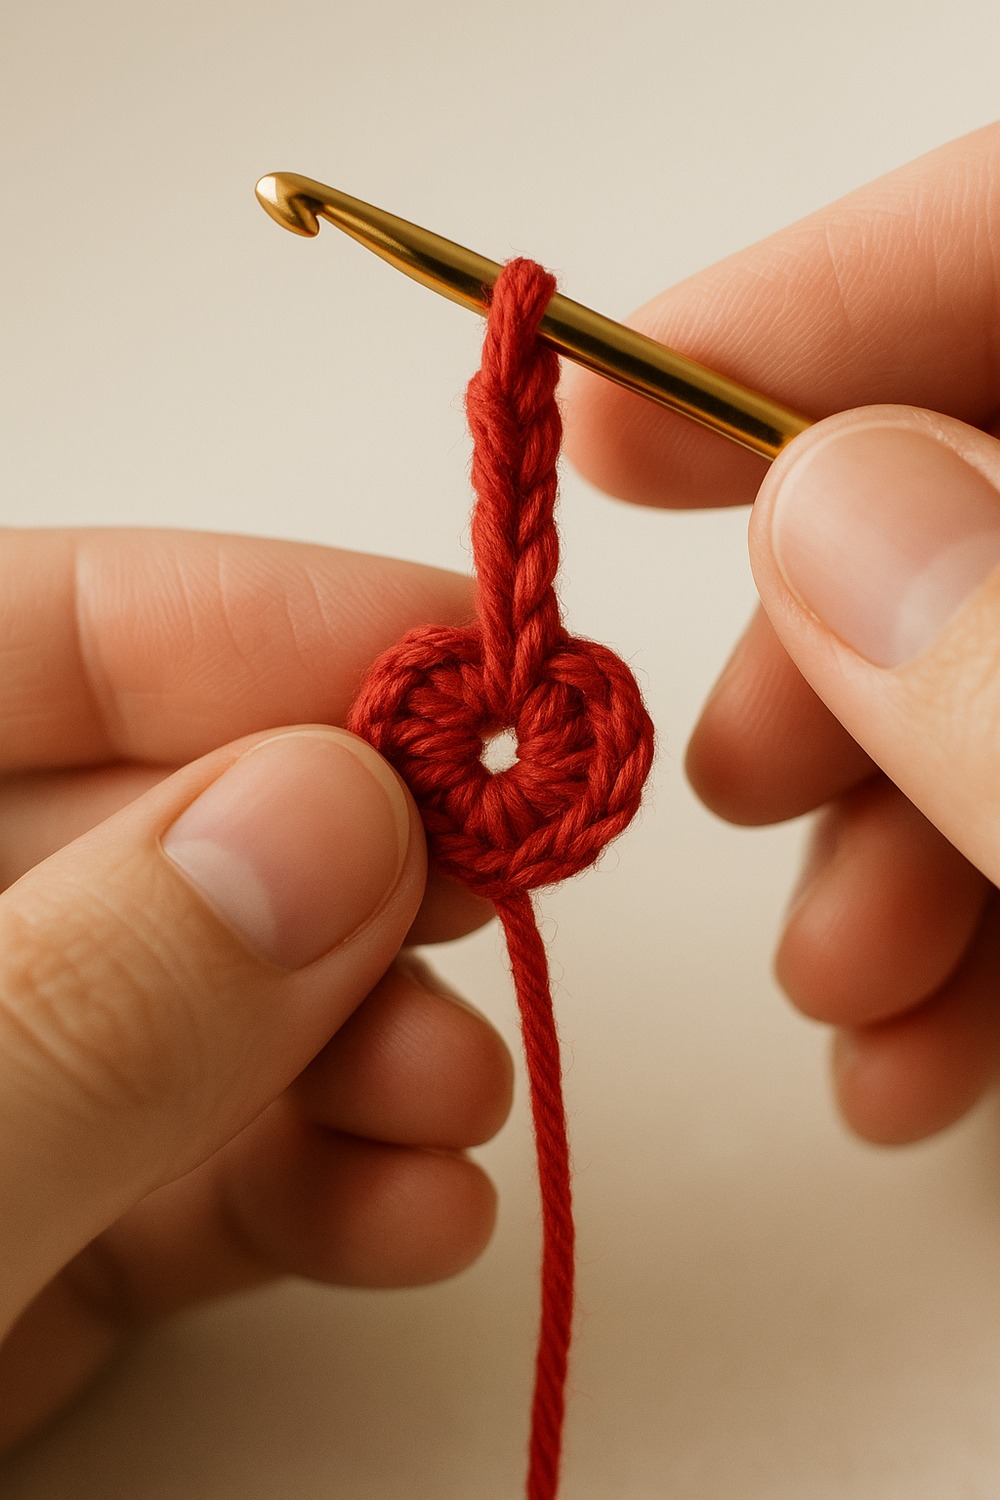
Begin with a magic ring so the point of your heart closes snugly. Work tall stitches into the loop to sketch the heart outline right away. Keep your tension even and the yarn flowing smoothly across your finger. After the last stitch, cinch the ring firmly but not aggressively, preserving a tidy center. Place a marker at the joining point so both panels match. If magic rings make you nervous, chain four and slip stitch to form a loop—then continue the same round. Either way, you’re shaping a clean foundation in strawberry red, setting the tone and size for the rest of the project.
3. Shaping the curves
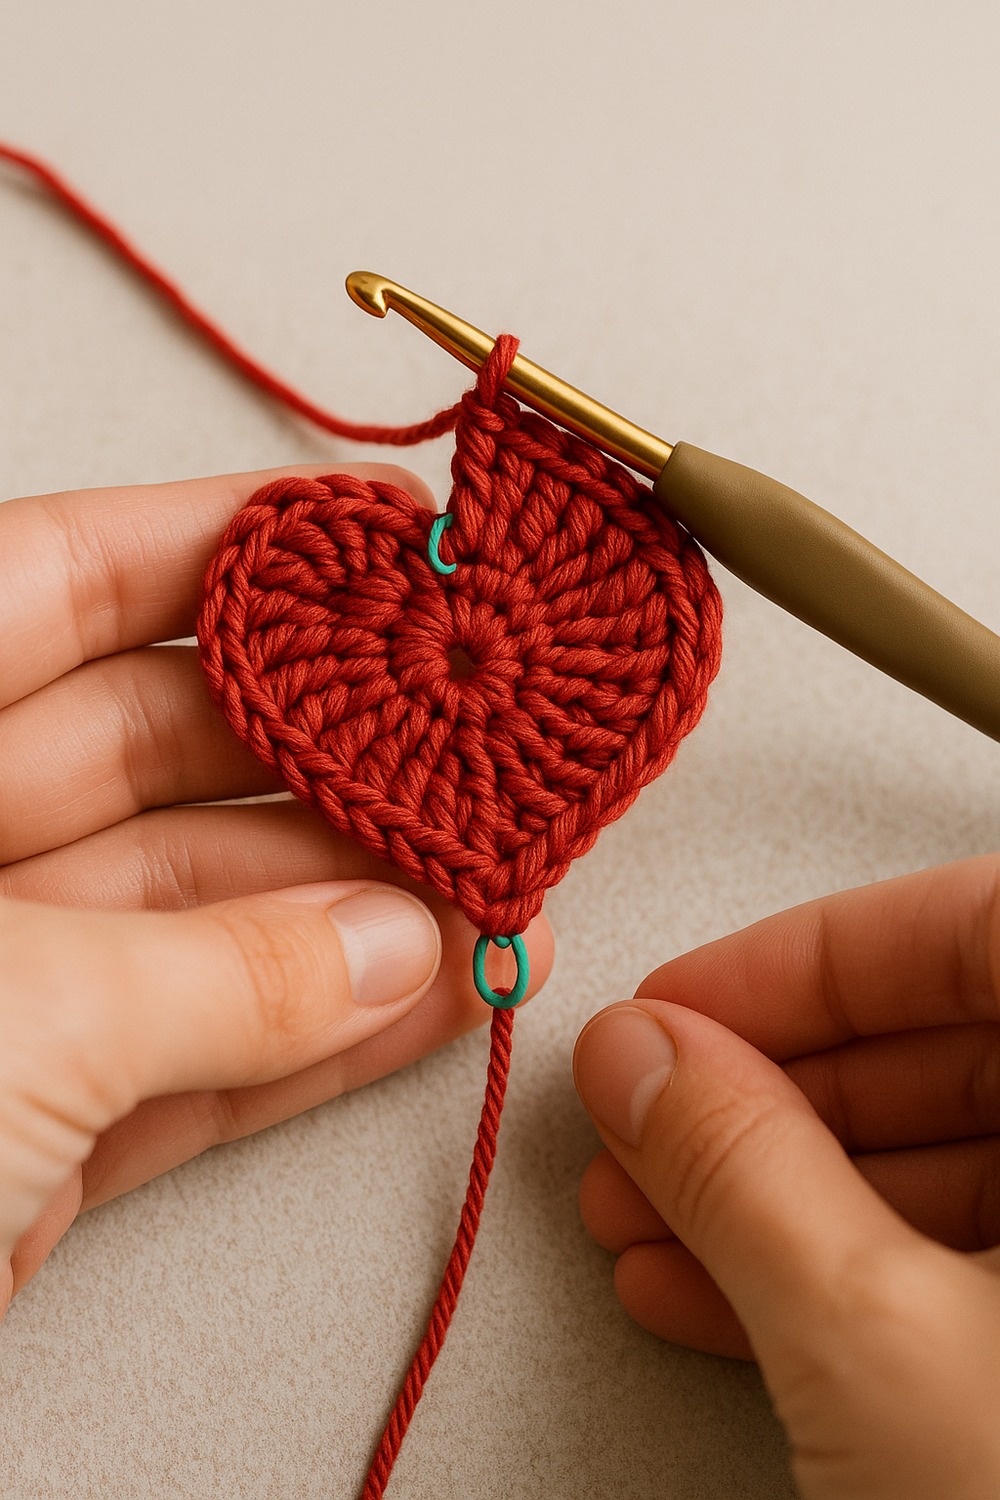
Use a thoughtful mix of sc, hdc, and dc to smooth the heart’s curves. Shorter stitches keep the edges tidy near the point; taller stitches stretch the arcs across the tops. Work slowly around the cleft, adding the ch-2 corner there so the dip reads clearly. Mirror your placements on the opposite side so the panel stays symmetrical. Pause to lay the piece flat and check for wobble; small blocking taps with your fingers help it settle. Keep everything strawberry red. Add a marker at the point and at the cleft so you hit the same places cleanly on the second panel.
4. Final heart size
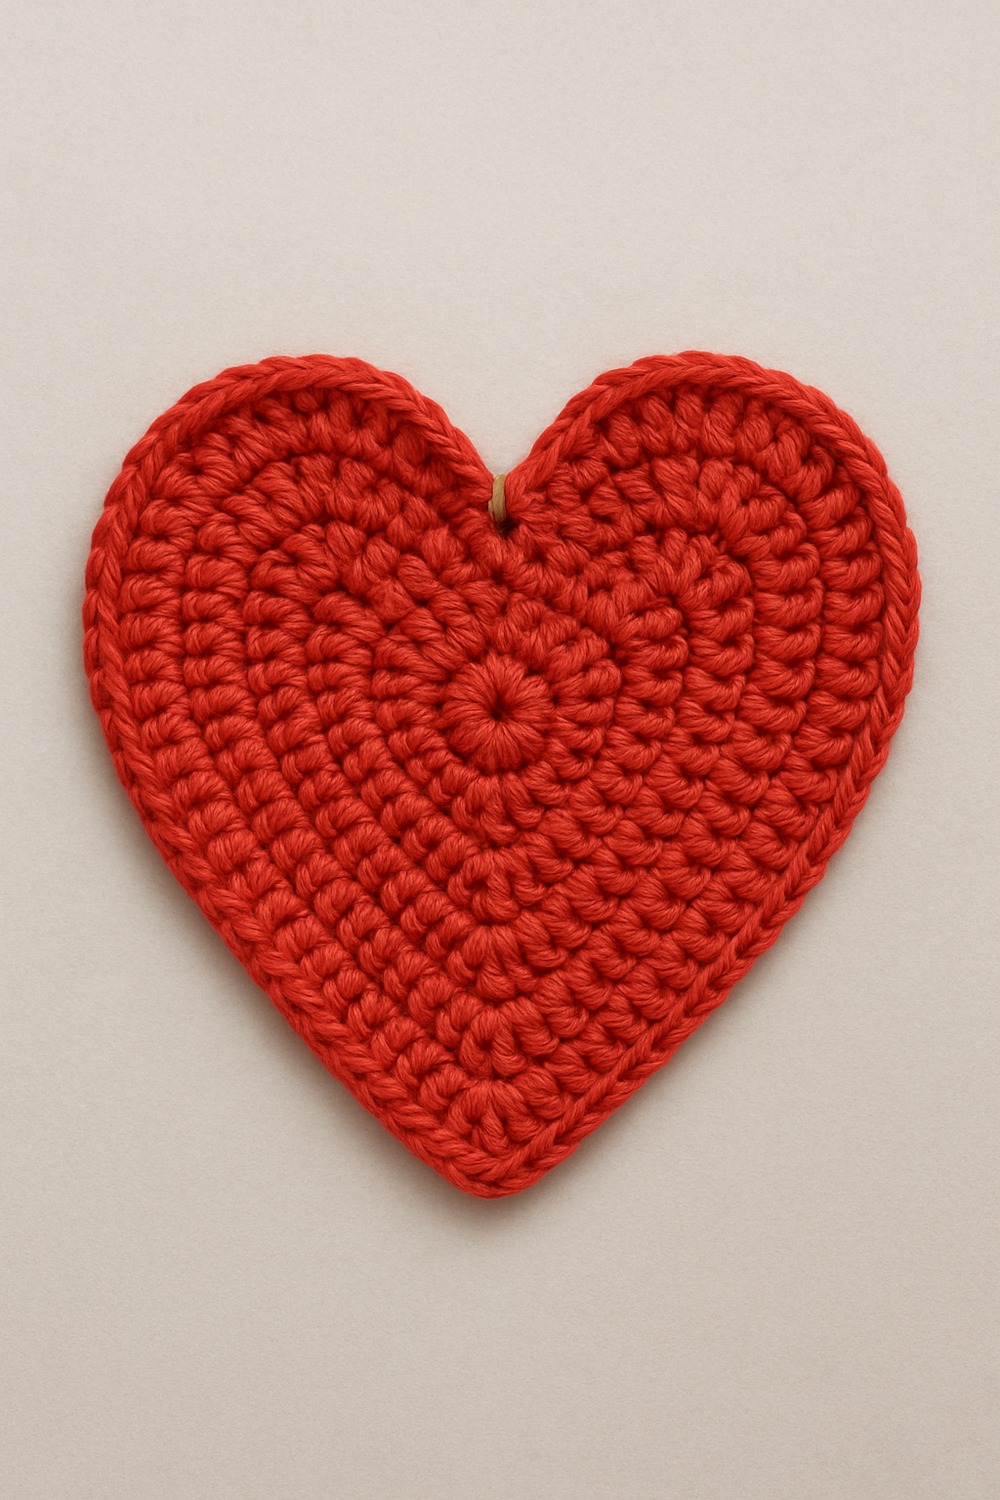
Finish enlarging the heart by sprinkling increases evenly along each curved side. This prevents ruffling and keeps the outline balanced. Aim for a width around 22–24 cm; stop sooner for a petite bag or add another increase round for extra capacity. Keep corners at the point and the cleft defined with small ch-2 turns. Compare against your tape and jot quick notes; you’ll copy this exact round count for the back panel. Stay in strawberry red for every stitch. When you like the size and shape, fasten off neatly and weave the center tail so the fabric feels secure and smooth.
5. Seeds on the front
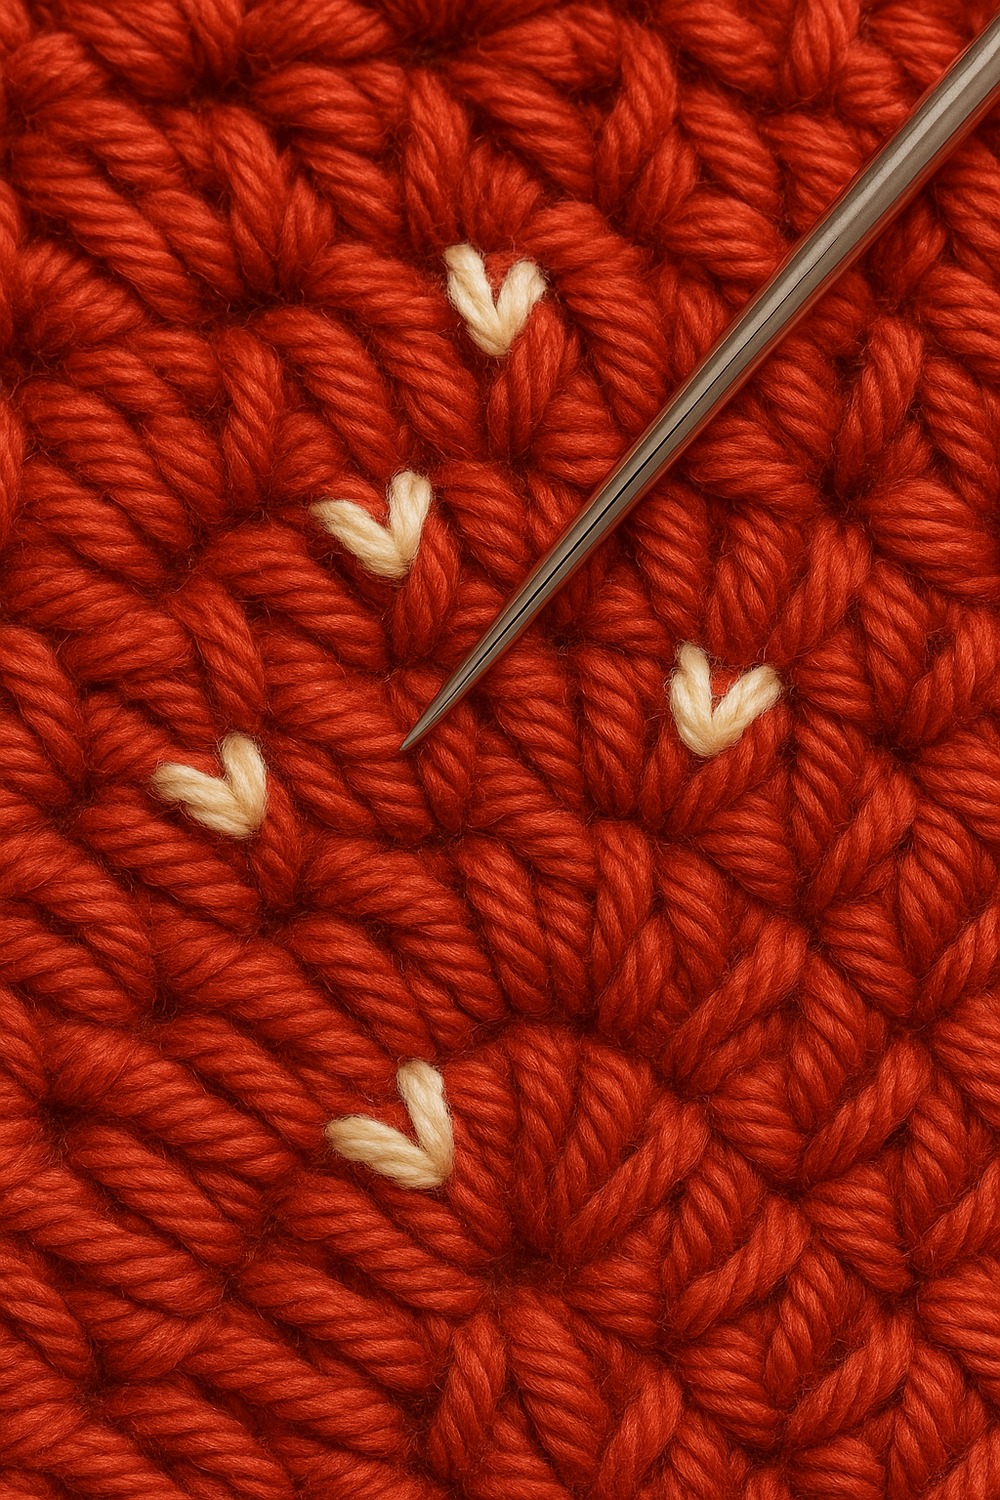
Add character with small cream seeds. Thread a tapestry needle with soft cream and make tiny “V” stitches scattered across the front panel, leaving a clean border near the edges. Keep spacing consistent—casual but intentional—so the surface looks playful, not busy. Work from the back to the front and re-enter close to where you exited to avoid long floats. Pull gently so the fabric doesn’t pucker. Tie off on the wrong side and weave tails securely. These creamy flecks pop against strawberry red, giving the bag that unmistakable strawberry vibe while staying lightweight and flexible for everyday wear.
6. Leafy calyx band
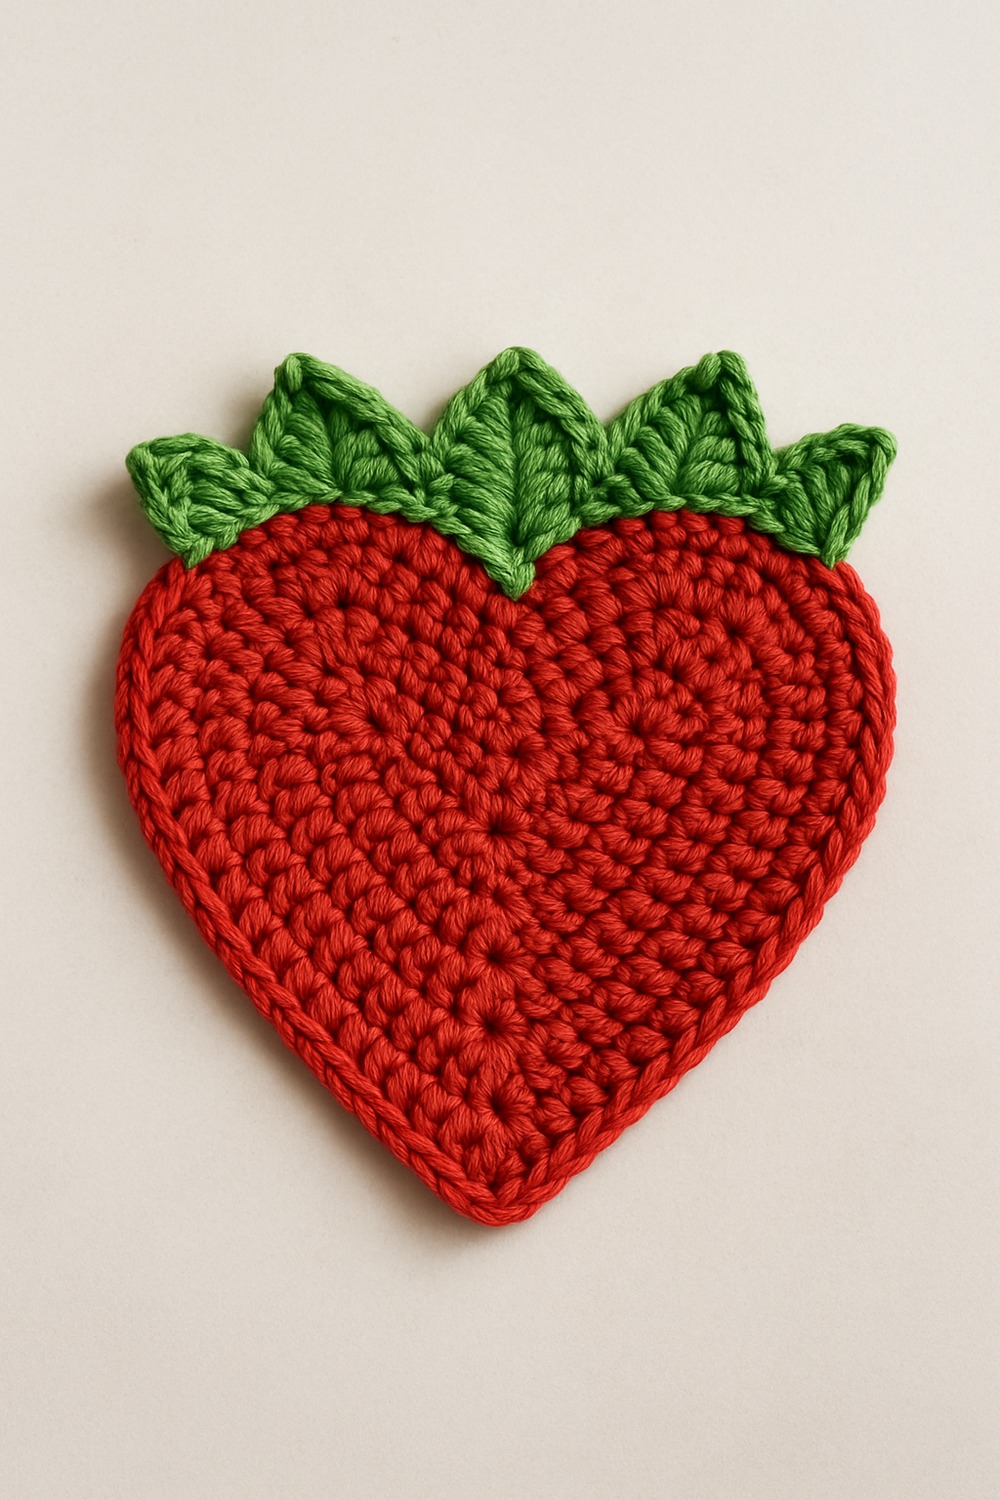
Switch to leaf green to crochet a simple row of leaves right across the top opening. Join at the cleft, then build a leaf with a ladder of stitches—sc, hdc, dc, tr, dc, hdc, sc—so each shape gently peaks. Slip stitch forward and repeat to place five leaves evenly. Keep your tension even to avoid scallops lifting too high. These leaves frame the opening and say “strawberry” instantly while staying functional and flat. Double-check the spacing aligns with your planned strap points so everything looks intentional once assembled. Keep colors consistent: only strawberry red, leaf green, and soft cream.
7. Seaming + strap
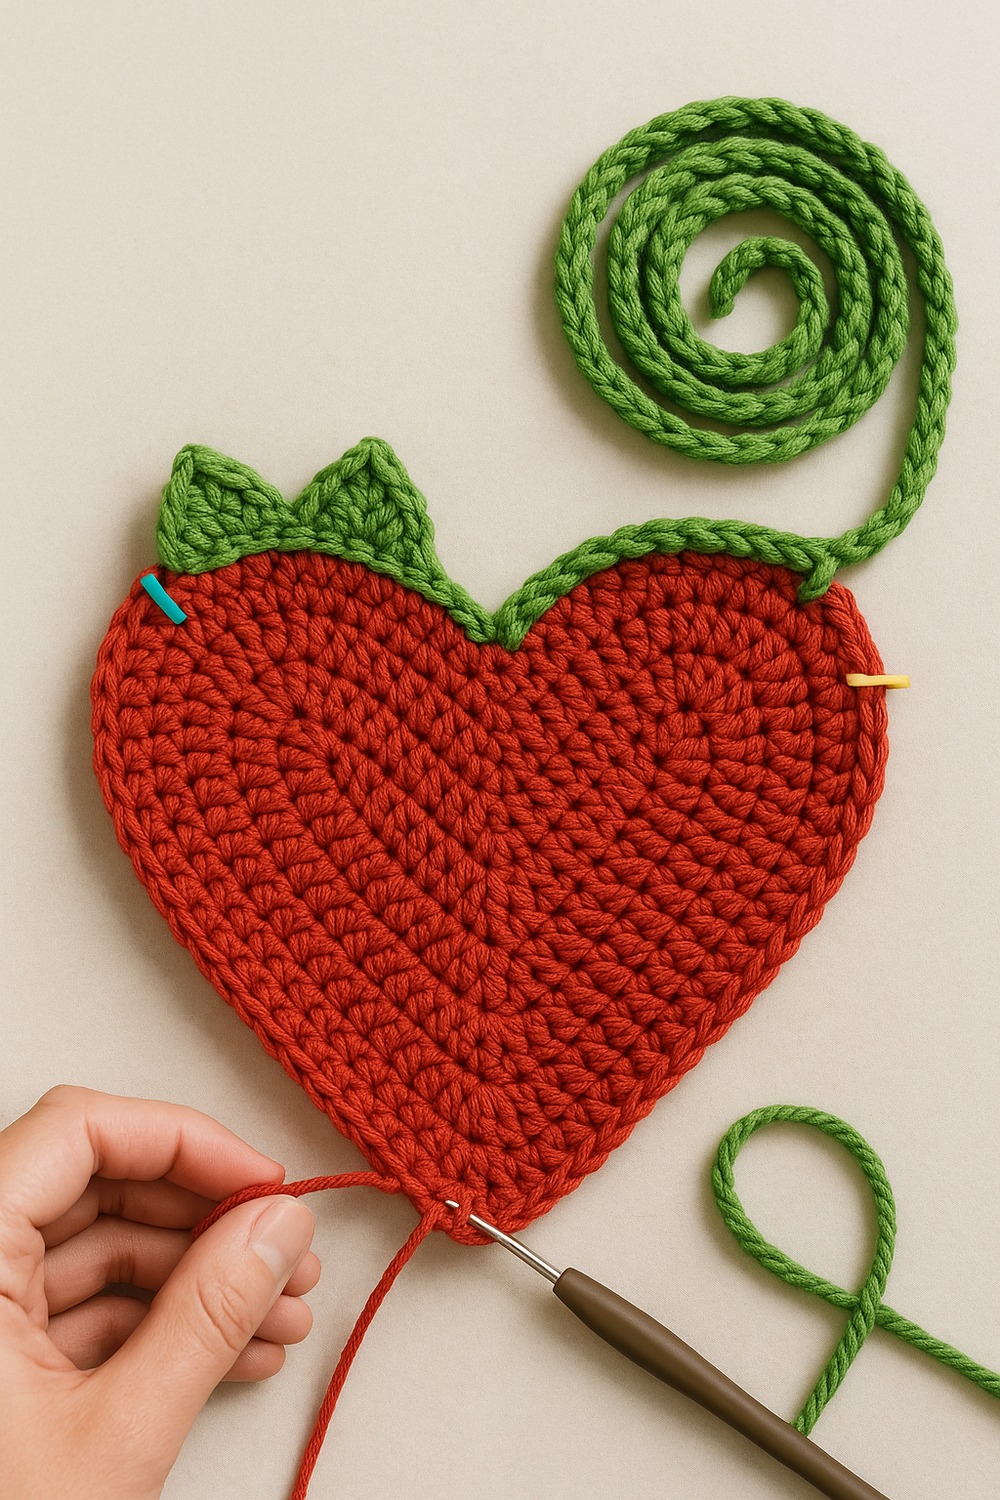
Stack both hearts wrong sides together with the leafy panel on top. Seam from the right top edge down around the curve, through the point, and up to the left top edge, leaving the top open. Use strawberry red to keep the join invisible; tiny whipstitches or a firm sc seam both work. Attach your strap at the two top corners with reinforced stitches so it bears weight comfortably. A Romanian cord in leaf green looks crisp and resists stretch; a flat red strap is also great. Remove markers as you go. Check symmetry and length before securing the final tails.
8. Final beauty shot
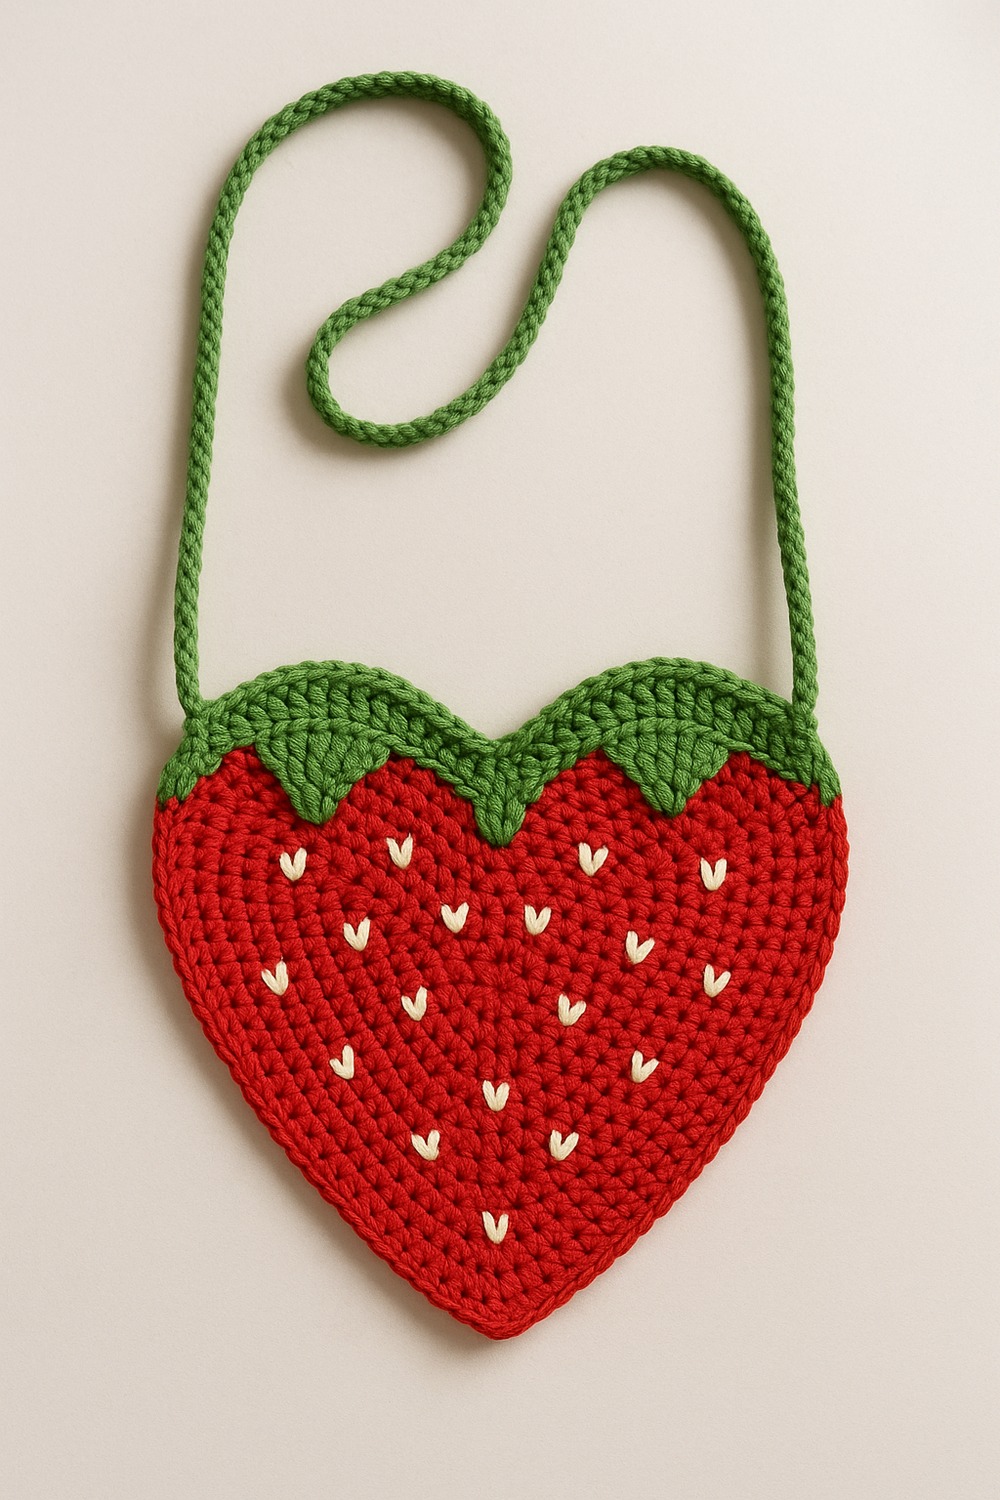
Here’s your finished Strawberry Granny Heart Shoulder Bag, ready to wear. The strawberry red body reads bold and cheerful, softened by tiny cream seeds that add depth without weight. The leaf green calyx along the top frames the opening and ties the theme together. The matching strap sits securely at the corners and holds the shape when carried. Keep styling simple so the handmade texture shines. If you lined the inside, admire how it supports the silhouette. This playful piece pairs with sundresses, denim, and weekend errands alike. You made a functional, charming accessory from a handful of thoughtful stitches.
Final Thoughts
This project balances cute design with practical construction. The red heart panels work up fast, the cream seed embroidery adds personality, and the green leaves turn the top edge into a clear strawberry moment. Keep your increases smooth, seam with patience, and choose a strap you trust for everyday use. If you want a roomier bag, add one more increase round to both hearts; for mini, remove a round. A simple lining upgrades durability and keeps small items tidy. Enjoy carrying a handmade piece that always sparks conversation—and make a second one as a gift while the pattern’s fresh.