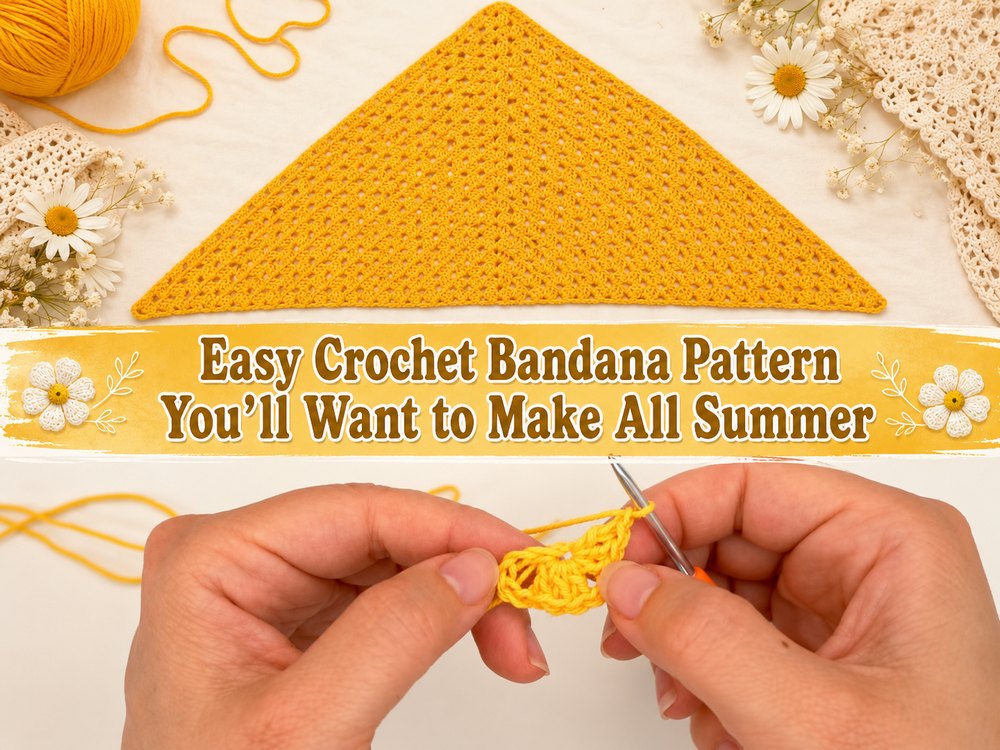
A light crochet bandana is such a fun little project to make when you want to make something quick, cute and wearable.
This style is a soft triangle shape with ties at the ends and can be easily worn as a simple headscarf. It’s a great warm-weather project and a fun way to use up some of your stash yarn. This tutorial is based on a full youtube bandana tutorial with tie ends and a start to finish walk through for beginners.

Why You’ll Love This Project
This bandana has an easy triangle shape that works up and finishes with ties making it feel practical as well as pretty. This is the kind of project that you can make for yourself, give as a gift to a friend, or sew in several different colors to match different outfits.
Supplies Needed
- Yarn
- Crochet hook Scissors Yarn needle
Select a yarn and hook size to give you the fit and texture you want.
The Best Yarn for This Project
Soft cotton or cotton blend is a good choice for a bandana because it’s light, breathable and comfortable to wear. If you want more drape, use a softer yarn. For a crisper shape, go for a firmer cotton.
Level of difficulty
Easy good for beginners.
Size & Fit Guide
You can make the triangle bigger by continuing the main rows until it covers the head as much as you want. Stop early for a smaller fit. The ties provide a simple way to adjust the final fit after wear.
Used Stitch
- Double crochet chain
- slip stitch:
The Making Of It
Begin the Foundation
Start in the middle of the bandana and work the first little triangle section. This makes the point at the back.
Main Section Work
Continue crocheting in rows, working outward to make the triangle. The fabric remains light and airy, giving the bandana that effortless relaxed look.
Change the Size
Repeat the main row pattern until the width looks right for your head. As you go, try it on your head so you can stop when it looks like it’s covered well.
Join or Shape
When the triangle is the size you want, work the ends so they’re neat and ready for the ties.
Edges Complete
Add some long tie straps to each end so you can comfortably knot the bandana at the back. Fasten off and weave in ends. The tutorial selected is a bandana with straps to be tied behind the head.
Helpful Hints
- Keep an even tension, so triangle grows evenly on both sides.
- Periodically double fold the bandana to check that both edges look even.
- If your yarn is slippery, place a stitch marker at the center point to keep you on track.
- Weave the tie ends carefully as these are the ones that tend to get the most pull during wear.
What to Avoid Common Mistakes
- Too much shortening of the ties
- Skipping center shaping
- Over-tightening the starting rows.
- Not checking the fit as you go along
- Leaving ends unwoven close to the ties
Ideas for Customization
Try striped rows for a playful touch.
Add a simple border for some extra detail.
Make the triangle more deep for more coverage.
Summer outfits: Bright colors or neutral colors for daily wear.
Stylistic Ideas
Style with loose hair, a low bun or a ponytail. It also looks lovely with casual summer clothes, beach outfits or simple handmade wardrobe pieces.
Care Instructions:
Wash by hand in cold water. Shape while damp and lay flat to dry. After washing, you can smooth the edges with your hands if you like.
Time Required
This can take a couple of hours depending on your speed, yarn, size and stitch pattern.
Summary
This crochet bandana is a sweet, easy project that provides you with something handmade and wearable without feeling too complicated. Great little make if you want a relaxing project with a pretty finish.
Frequently Asked Questions
Can beginners make this bandana?
Yes, this style is beginner-friendly and works well if you are comfortable with basic stitches.
Can I make it bigger?
Yes. Just keep repeating the main rows until you reach your desired size.
What yarn works best?
Cotton or a cotton blend is usually the nicest choice for a light headscarf.
Do I need exact measurements?
No. You can check the fit as you crochet and stop when it looks right.
Can I wear it in different ways?
Yes. You can tie it at the back of the head or style it with the point sitting lower for more coverage.