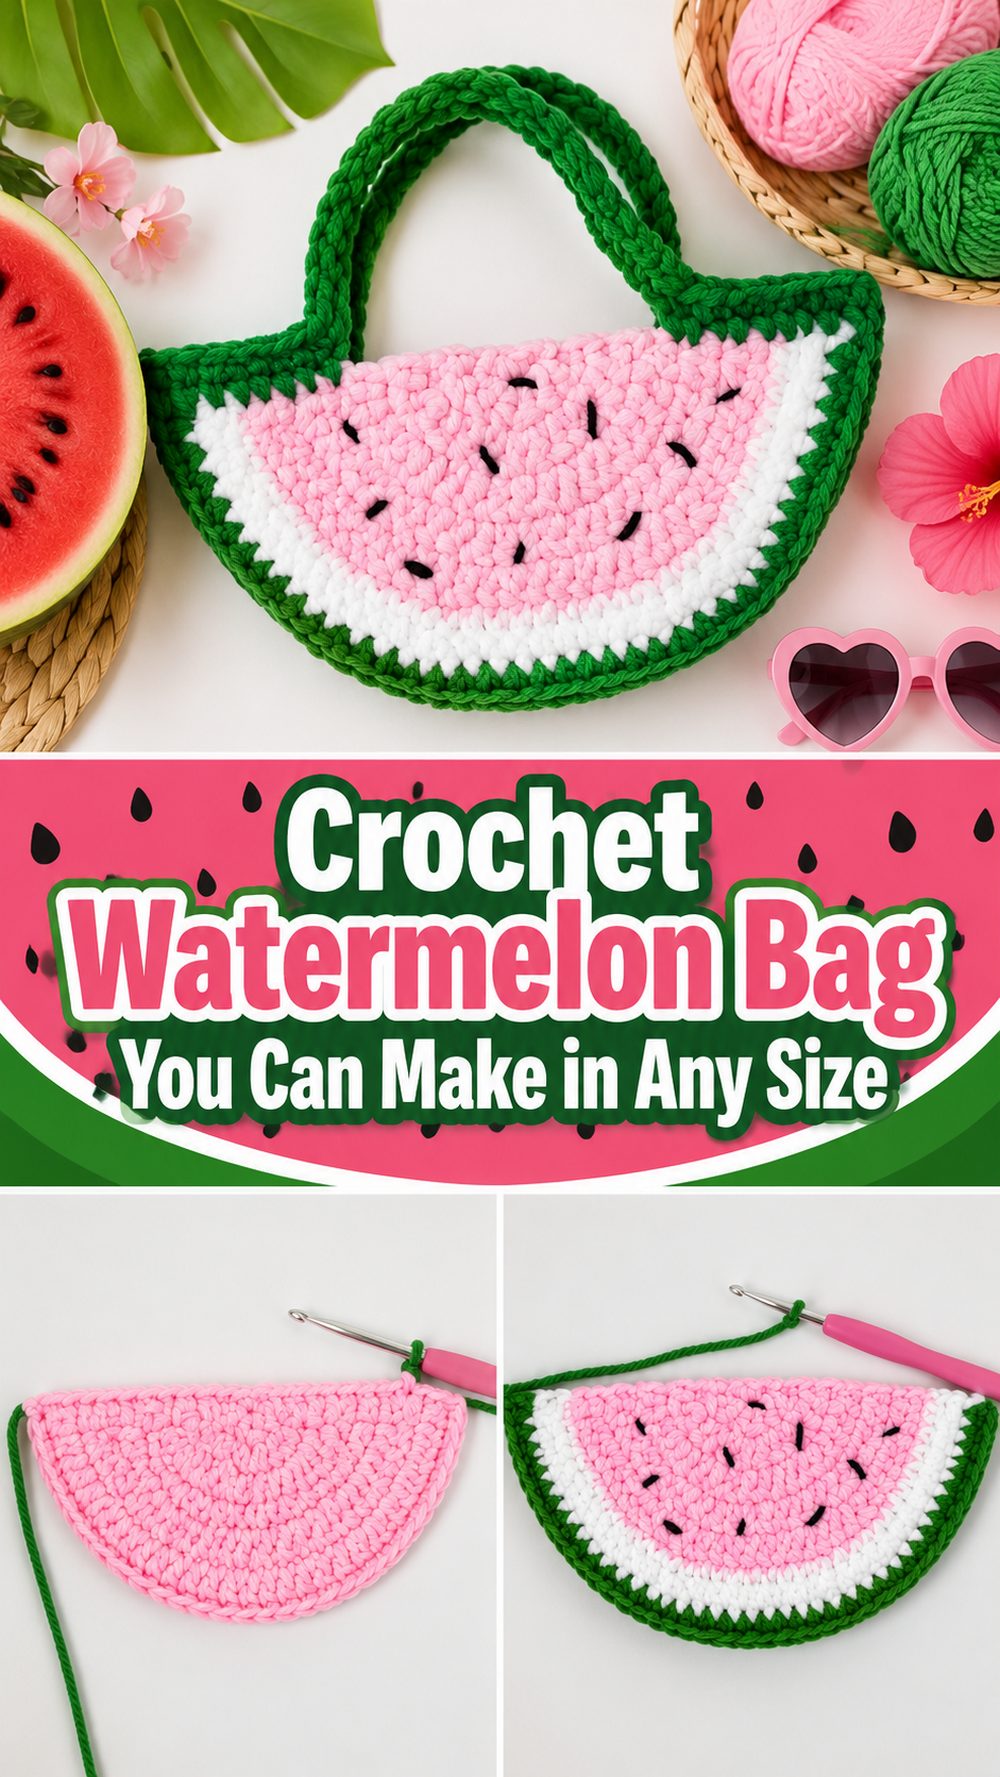
A crochet watermelon bag is one of those projects that instantly feels cheerful. It has that bright, fruity look that makes even a simple outfit feel more fun, and it is a lovely way to turn basic yarn into something playful and useful. The tutorial I selected shows a full no-sew watermelon bag project, which makes it especially appealing if you want a bag with a clean shape and less finishing work at the end. It is also presented as a design you can make in any size, so you are not locked into just one version. That makes it a great choice whether you want a small cute purse, a medium everyday bag, or something a little roomier. If you enjoy colorful crochet and accessories that stand out, this is a really satisfying project to try.
Why You’ll Love This Project
This project is fun because it mixes a simple bag idea with a playful fruit design. The watermelon color changes do most of the visual work, so the finished piece looks creative and eye-catching without needing a lot of complicated decoration. The chosen tutorial also presents it as a full no-sew bag that can be made in any size, which gives you more freedom to adjust it to your own style and needs.
Materials Needed
- Red or pink yarn for the main watermelon center
- White yarn for the inner rind line
- Green yarn for the outer rind
- Crochet hook
- Scissors
- Yarn needle for weaving in ends
- Stitch markers if you like marking sections or strap placement
Use a yarn and hook size that matches your desired fit and texture.
Best Yarn for This Project:
A smooth cotton yarn or cotton blend works especially well for a bag like this. It helps the shape hold better, keeps the stitches more defined, and gives the color sections that fresh, crisp fruit look. If you want a softer feel, you can use acrylic, but cotton usually gives a cleaner finish for novelty bags and summer accessories.
Skill Level:
Easy to confident beginner. The selected video is a full tutorial, and the no-sew style makes the construction feel more approachable. It still helps to be comfortable with basic stitches, color changes, and shaping your work neatly as you go.
Size and Fit Guide:
This project is especially flexible because the tutorial is described as a bag you can make in any size. That means you can stop when the body looks right for your needs, whether you want a tiny purse, a medium shoulder bag, or a larger statement piece. Check the width and depth as you work, and think about what you actually want to carry inside.
Stitches Used:
The search listing does not show a full stitch list, so it is best not to guess exact stitch counts or row numbers. From the style of project, you can expect basic bag-building stitches, color sections, and simple shaping. Follow the visual flow of the tutorial and keep the size adjustable rather than forcing exact numbers where they are not clearly shown.
How to Make It
Step 1: Start the Watermelon Center
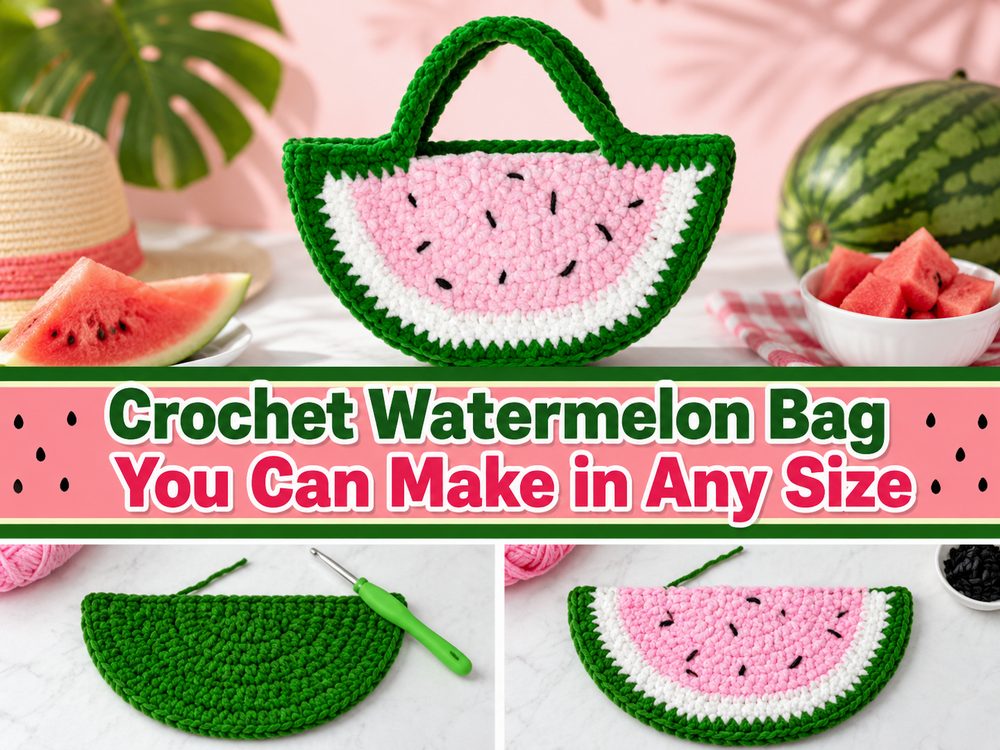
Begin with the red or pink section that forms the main body of the watermelon. This is the part that gives the bag its bold fruity look, so it helps to keep your stitches even right from the beginning. Because the project is designed to be flexible in size, focus more on the overall shape and proportion than on chasing exact numbers. Work until the center looks balanced and wide enough for the bag you want.
Step 2: Build the Rounded Shape
As the bag grows, keep shaping it into a smooth rounded or curved form so it feels like a watermelon slice rather than a plain flat pouch. This is where your tension matters a lot. If the edges start to ripple too much, your stitch count may be growing too quickly. If the shape begins to curl inward, it may need more room. Pause now and then to spread the piece flat and check the overall look.
Step 3: Add the Watermelon Rind Colors
Once the fruity center is established, bring in the contrast colors that make the design instantly recognizable. The white section creates that fresh inner rind line, and the green outer band finishes the watermelon look. Try to keep your color changes neat and consistent so the sections look clean. This part is what really transforms the project from a simple crochet bag into a fun themed accessory.
Step 4: Decide the Final Size
The selected tutorial specifically notes that the bag can be made in any size, which is one of the nicest parts of this pattern idea.
Before moving on, hold your piece up and think about how you want to use it. For a cute lightweight bag, stop earlier. For something more practical, keep going until the width feels roomy enough. A watermelon bag usually looks best when it stays playful and not overly bulky, so try to keep the proportions balanced.
Step 5: Shape the Bag Without Extra Sewing
One of the standout points of the chosen tutorial is that it is a no-sew design.
That usually means the bag is constructed directly through crochet rather than being made as separate pieces that need a lot of assembly later. This gives the project a smoother feel and can make the finishing stage much more enjoyable. As you work this part, pay attention to where the opening sits and how the bag begins to take on depth.
Step 6: Form the Opening
As the structure develops, leave a practical opening at the top so the bag is easy to use. The opening should feel wide enough to reach inside comfortably but not so wide that the bag loses its shape. If your stitches are naturally loose, you may want to keep the top edge a little firmer so it stays tidy.
Step 7: Crochet the Strap
A watermelon bag feels most wearable when the strap length matches how you want to carry it. You can make a shorter strap for a shoulder bag or go longer for a casual crossbody feel if the construction allows it. Keep your strap firm and even so it does not stretch too much later. If you are unsure, test the length before finishing the final attachment points.
Step 8: Refine the Shape
Once the bag body and strap are complete, spend a little time adjusting the shape with your hands. Smooth the curves, check the balance of the color bands, and make sure the bag hangs evenly. Novelty bags look best when the overall outline is neat, so a few extra minutes here can really improve the final result.
Step 9: Finish the Details
Weave in all loose ends carefully, especially around the strap and color changes. If you want, you can embroider a few tiny black seed details onto the red section for an even more recognizable watermelon look, but keeping it simple can also be very cute. The final bag should feel bright, playful, and summery, with clear fruit-inspired color sections and a comfortable shape for carrying light essentials.
Helpful Tips
- Use cotton yarn if you want the bag to hold its shape better.
- Keep your tension even so the rounded shape stays smooth.
- Check the bag size before finishing, especially since this design is adjustable.
- Make the strap firm enough that it will not stretch too much over time.
- Weave in ends securely around all color changes.
- If you want a cleaner finish, lightly shape or block the bag after it is done.
Common Mistakes to Avoid
- Making the center too small before adding the rind colors
- Letting the shape ripple too much as it grows
- Pulling color changes too tightly
- Making the strap too thin for the size of the bag
- Forgetting to check the final proportion before finishing
- Leaving loose ends where they can peek through the lighter yarn sections
Customization Ideas
You can make this bag look softer, brighter, or more playful depending on your yarn shades. Try a deep watermelon red for a bold summer look, or go with pastel pink and minty green for something sweeter and more whimsical. You could add embroidered seed details, a button closure, a lining, or even a small leaf accent near the strap. Since the design is flexible in size, you can also turn it into a mini purse or a bigger everyday fruit bag.
Style Ideas
This bag is perfect for summer outfits, beachy looks, denim, white tops, picnic dresses, and playful casual wear. It also makes a really cute handmade gift for someone who loves colorful accessories or fruit-themed crochet. Because the design is already eye-catching, it pairs well with simple clothes and lets the bag be the fun statement piece.
Care Instructions
Gently hand wash in cool water when needed. Press out excess water without twisting the bag too much. Lay it flat to dry and reshape the curves while it is still damp. Avoid high heat, especially if you use synthetic yarn, and store it flat if you want the shape to stay neat.
Time Needed
This may take a few hours depending on your speed, yarn choice, bag size, and how much time you spend on neat finishing and optional details.
Conclusion
This crochet watermelon bag is such a cheerful project to make. It gives you a cute finished accessory, plenty of room to play with size, and a bright design that feels perfect for warm weather. The no-sew approach also makes it especially appealing if you want a project that feels tidy and satisfying from start to finish. Make it small and sweet or a bit roomier for everyday use, choose the shades you love most, and enjoy turning a simple bag into something fresh and fun.
FAQs
Is this beginner-friendly?
Yes, it looks suitable for beginners who already know basic crochet stitches and feel comfortable with color changes.
Can I adjust the size?
Yes. The selected tutorial is specifically presented as a watermelon bag you can make in any size.
Do I need to sew separate pieces together?
The chosen tutorial is described as a no-sew design.
What yarn works best for a watermelon bag?
Cotton or a cotton blend is usually a great choice because it gives clearer stitch definition and better shape.
Can I add watermelon seeds?
Yes. You can keep the bag plain or add small embroidered seed details for extra character.